bulb Hyundai Equus 2016 Owner's Manual
[x] Cancel search | Manufacturer: HYUNDAI, Model Year: 2016, Model line: Equus, Model: Hyundai Equus 2016Pages: 477, PDF Size: 16.25 MB
Page 20 of 477
F20
Climate control air filter ...7-35
Filter inspection ......................7-35
Filter replacement ..................7-35
Wiper blades .......................7-36
Blade inspection .....................7-36
Blade replacement .................7-36
Battery.................................7-39
For best battery service.......7-39
Battery recharging by
battery charger ......................7-41
Battery recharging by
vehicle .......................................7-41
Reset items ..............................7-42
Tires and wheels ................7-42
Tire care ...................................7-42
Recommended cold tire
inflation pressures .................7-42
Checking tire inflation
pressure ....................................7-44
Tire rotation ...........................7-45
Wheel alignment and tire
balance......................................7-45
Tire replacement ....................7-46
Wheel replacement ................7-47
Tire traction .............................7-47
Tire maintenance....................7-48
Tire sidewall labeling .............7-48
Low aspect ratio tire .............7-51
Tire terminology and
definitions ................................7-52
All season tires .......................7-54
Summer tires ...........................7-54
Snow tires ................................7-54
Tire chains ...............................7-55
Radial-ply tires .......................7-55
Fuses....................................7-56
Inner panel fuse
replacement ..............................7-57
Engine compartment fuse
replacement ..............................7-59
Fuse/relay panel
description ................................7-60
Light bulbs ..........................7-69
Headlight, position light, turn
signal light, side marker light
and front fog light bulb
replacement .............................7-70
Side repeater light bulb
replacement .............................7-74
Rear combination light bulb
replacement .............................7-75
High mounted stop light .......7-75
License plate lamp
replacement .............................7-79
Interior light bulb
replacement .............................7-82
Appearance care ................7-83
Exterior care ...........................7-83
Interior care.............................7-88
Emission control system ...7-89
Crankcase emission control
system .......................................7-89
Evaporative emission control
system .......................................7-89
Exhaust emission control
system .......................................7-90
California perchlorate
notice ...................................7-92
Page 21 of 477
Dimensions ............................8-2
Bulb wattage .........................8-2
Tires and wheels ..................8-3
Recommended lubricants
and capacities.......................8-4
Recommended SAE viscosity
number ........................................8-5
Vehicle identification number
(VIN).......................................8-6
Vehicle certification label ...8-6
Tire specification and
pressure label .......................8-6
Engine number .....................8-7
Refrigerant label ..................8-7
Consumer information.........8-8
Reporting safety defects ....8-9
8Specifications, Consumer
information and Reporting
safety defects
F21
Page 207 of 477
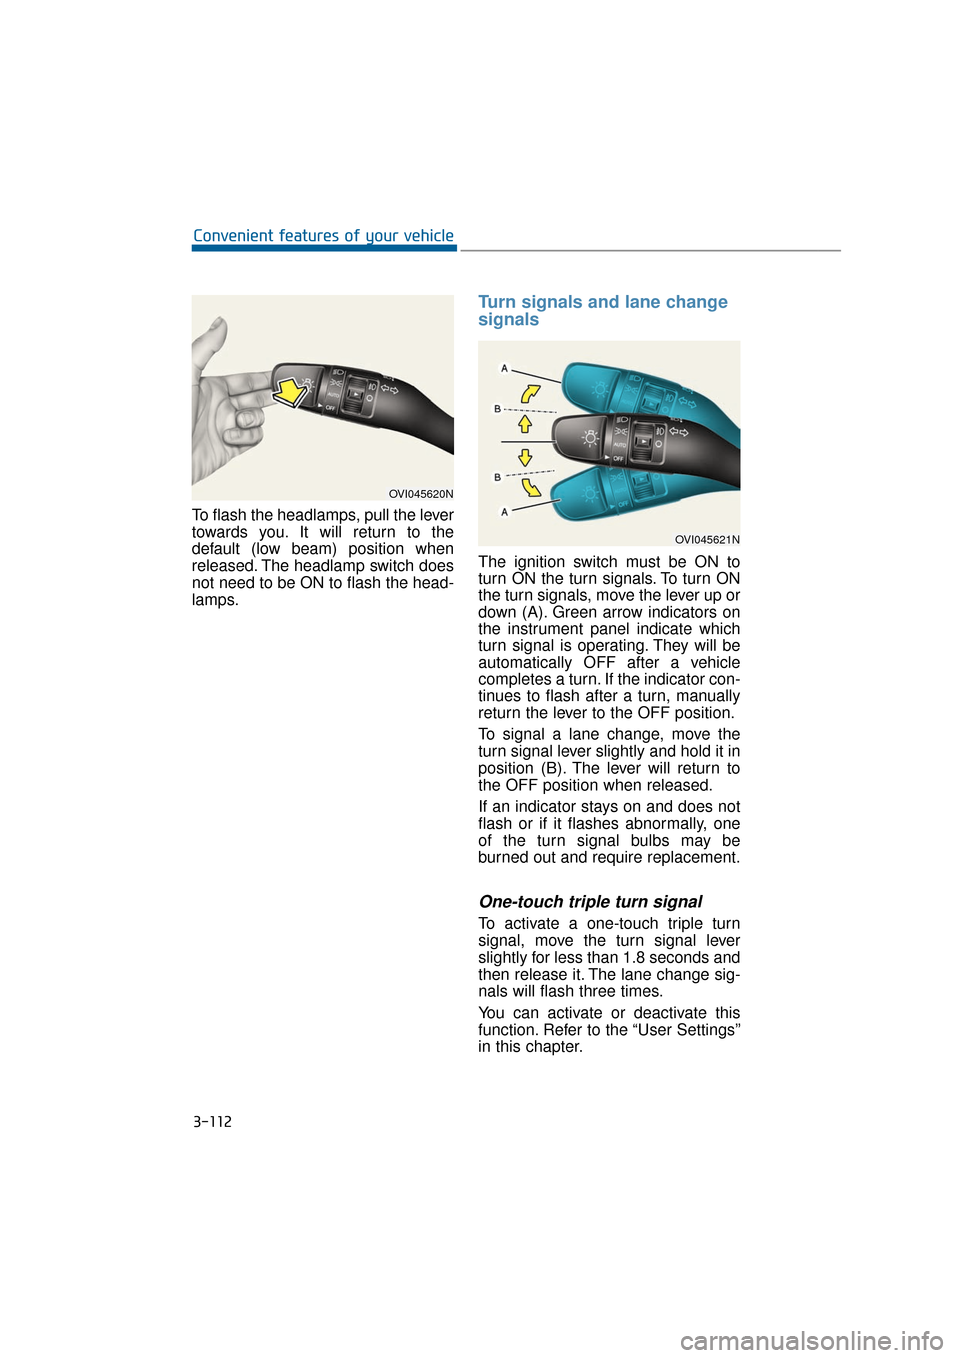
To flash the headlamps, pull the lever
towards you. It will return to the
default (low beam) position when
released. The headlamp switch does
not need to be ON to flash the head-
lamps.
Turn signals and lane change
signals
The ignition switch must be ON to
turn ON the turn signals. To turn ON
the turn signals, move the lever up or
down (A). Green arrow indicators on
the instrument panel indicate which
turn signal is operating. They will be
automatically OFF after a vehicle
completes a turn. If the indicator con-
tinues to flash after a turn, manually
return the lever to the OFF position.
To signal a lane change, move the
turn signal lever slightly and hold it in
position (B). The lever will return to
the OFF position when released.
If an indicator stays on and does not
flash or if it flashes abnormally, one
of the turn signal bulbs may be
burned out and require replacement.
One-touch triple turn signal
To activate a one-touch triple turn
signal, move the turn signal lever
slightly for less than 1.8 seconds and
then release it. The lane change sig-
nals will flash three times.
You can activate or deactivate this
function. Refer to the “User Settings”
in this chapter.
3-112
Convenient features of your vehicle
OVI045620N
OVI045621N
Page 208 of 477
Information
If an indicator flash is abnormally
quick or slow, a bulb may be burned
out or have a poor electrical connec-
tion in the circuit.
Front fog light
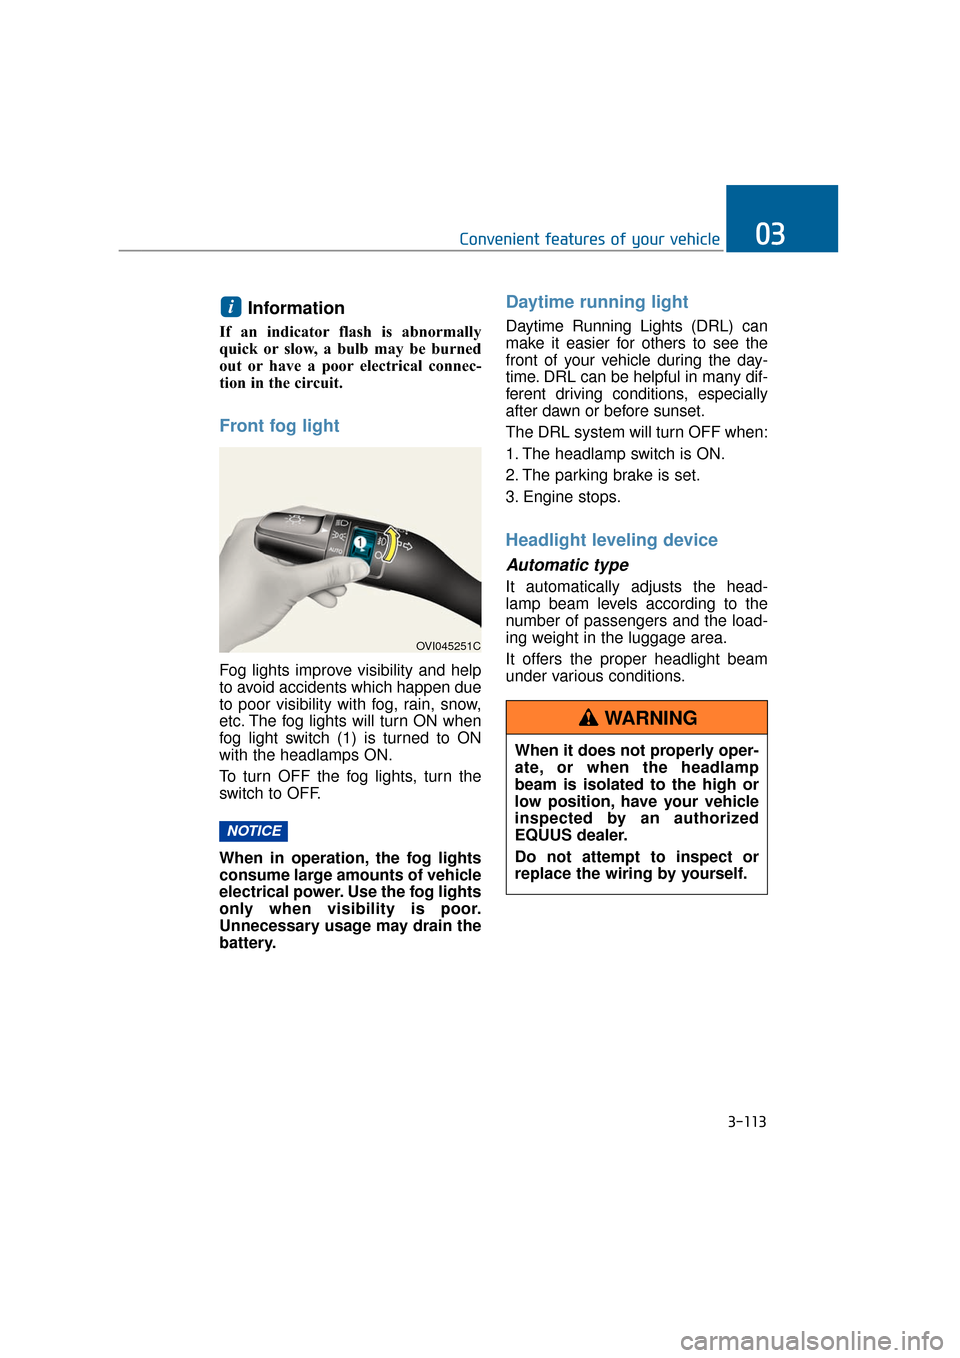
Fog lights improve visibility and help
to avoid accidents which happen due
to poor visibility with fog, rain, snow,
etc. The fog lights will turn ON when
fog light switch (1) is turned to ON
with the headlamps ON.
To turn OFF the fog lights, turn the
switch to OFF.
When in operation, the fog lights
consume large amounts of vehicle
electrical power. Use the fog lights
only when visibility is poor.
Unnecessary usage may drain the
battery.
Daytime running light
Daytime Running Lights (DRL) can
make it easier for others to see the
front of your vehicle during the day-
time. DRL can be helpful in many dif-
ferent driving conditions, especially
after dawn or before sunset.
The DRL system will turn OFF when:
1. The headlamp switch is ON.
2. The parking brake is set.
3. Engine stops.
Headlight leveling device
Automatic type
It automatically adjusts the head-
lamp beam levels according to the
number of passengers and the load-
ing weight in the luggage area.
It offers the proper headlight beam
under various conditions.
NOTICE
i
3-113
Convenient features of your vehicle03
OVI045251C
When it does not properly oper-
ate, or when the headlamp
beam is isolated to the high or
low position, have your vehicle
inspected by an authorized
EQUUS dealer.
Do not attempt to inspect or
replace the wiring by yourself.
WARNING
Page 360 of 477
Fuses ......................................................................7-\
56
Inner panel fuse replacement ......................................7-57
Engine compartment fuse replacement ....................7-59
Fuse/relay panel description .......................................7-60
Light bulbs.............................................................7-69
Headlight, position light, turn signal light,
side marker light and front fog light bulb
replacement ......................................................................7-\
70
Side repeater light bulb replacement.........................7-74
Rear combination light bulb replacement .................7-75
High mounted stop light ................................................7-75
License plate lamp replacement ..................................7-79
Interior light bulb replacement ....................................7-82
Appearance care ..................................................7-83
Exterior care ....................................................................7-83\
Interior care......................................................................7-\
88
Emission control system .....................................7-89
Crankcase emission control system ...........................7-89
Evaporative emission control system.........................7-89
Exhaust emission control system ...............................7-90
California perchlorate notice .............................7-92
Page 426 of 477
7-69
Maintenance07
L
LI
IG
G H
H T
T
B
B U
U L
LB
B S
S
Use only the bulbs of the specified
wattage.
Make sure to replace the burned-
out bulb with a new one of the
same wattage rating. Otherwise, it
may cause damage to a fuse or an
electric wiring system.
When you are not equipped with
necessary tools, the appropriate
bulbs and the expertise, consult an
authorized EQUUS dealer. In many
cases, it is difficult to replace vehi-
cle light bulbs, because some parts
of the vehicle must be disassem-
bled before getting to the bulb. This
is especially true when disassem-
bling to replace the headlamp
bulb(s). Removing/installing the
headlamp assembly may damage
your vehicle.
Information
After heavy rain or vehicle washing,
headlamp and taillight lenses may
appear to be frosty. This is caused by
the temperature difference between
the lamp inside and outside. This is
similar to the dew condensation on
your windows inside while raining.
This does not indicate a problem with
your vehicle. When water penetrates
into the lamp circuitry, have the vehi-
cle checked by an authorized EQUUS
dealer.
i
NOTICE
NOTICE
- Working on the lights
Before working on the light,
firmly set the parking brake,
turn the ignition switch to the
LOCK position, and turn OFF
the lights. These are to prevent
a sudden vehicle movement,
burning your fingers or an elec-
tric shock.
WARNING
Page 427 of 477
7-70
Maintenance
Headlight, position light, turn
signal light, side marker light
and front fog light bulb
replacement
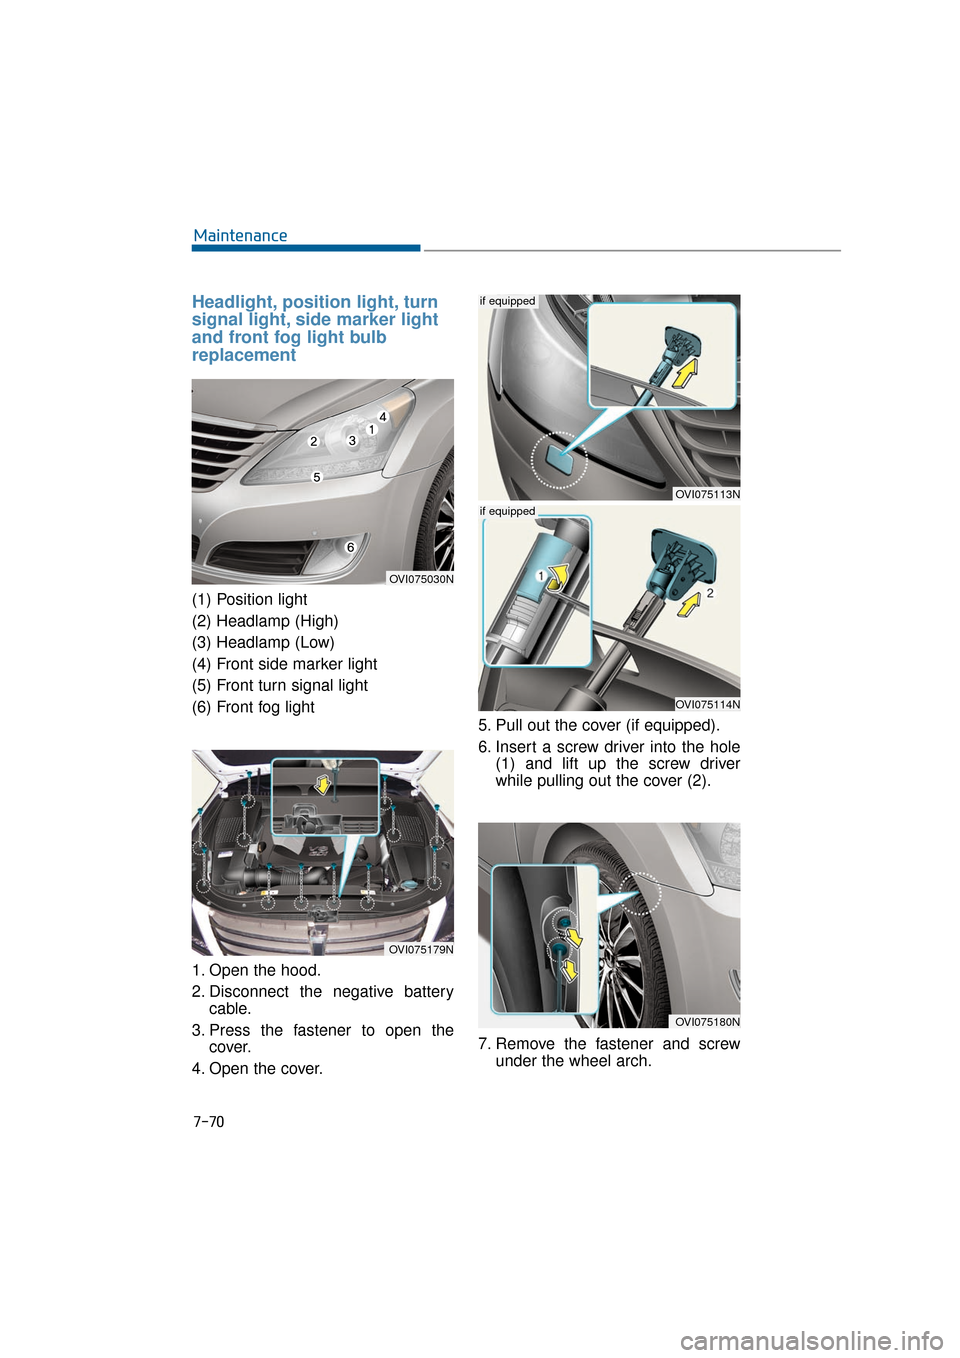
(1) Position light
(2) Headlamp (High)
(3) Headlamp (Low)
(4) Front side marker light
(5) Front turn signal light
(6) Front fog light
1. Open the hood.
2. Disconnect the negative batterycable.
3. Press the fastener to open the cover.
4. Open the cover. 5. Pull out the cover (if equipped).
6. Insert a screw driver into the hole
(1) and lift up the screw driver
while pulling out the cover (2).
7. Remove the fastener and screw under the wheel arch.
OVI075030N
OVI075179N
OVI075113N
if equipped
OVI075114N
if equipped
OVI075180N
Page 429 of 477
7-72
Maintenance
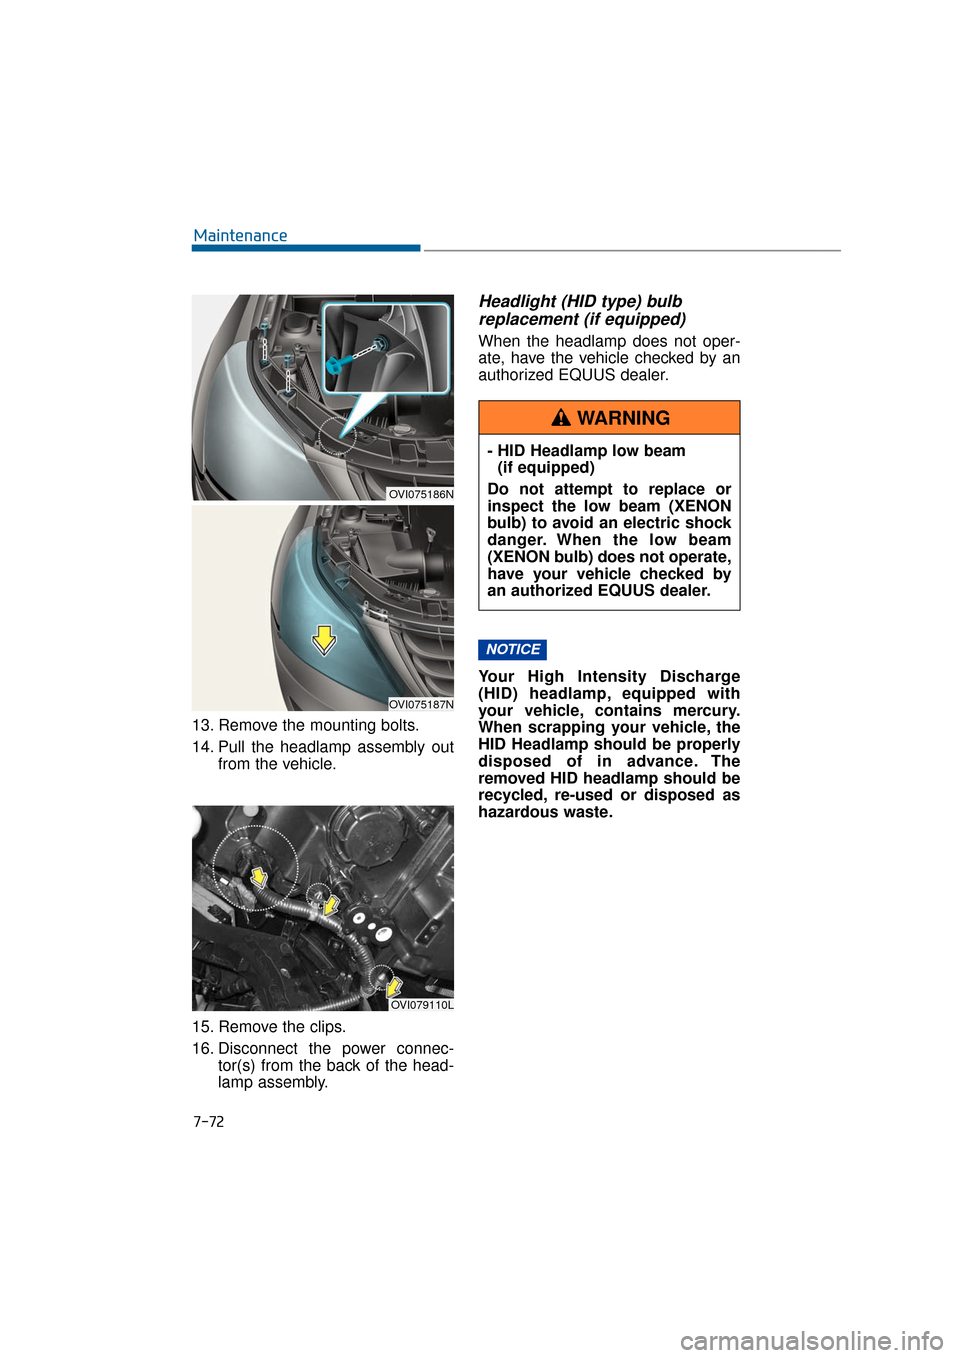
13. Remove the mounting bolts.
14. Pull the headlamp assembly out from the vehicle.
15. Remove the clips.
16. Disconnect the power connec- tor(s) from the back of the head-
lamp assembly.
Headlight (HID type) bulbreplacement (if equipped)
When the headlamp does not oper-
ate, have the vehicle checked by an
authorized EQUUS dealer.
Your High Intensity Discharge
(HID) headlamp, equipped with
your vehicle, contains mercury.
When scrapping your vehicle, the
HID Headlamp should be properly
disposed of in advance. The
removed HID headlamp should be
recycled, re-used or disposed as
hazardous waste.
NOTICE
OVI075186N
OVI075187N
OVI079110L
- HID Headlamp low beam
(if equipped)
Do not attempt to replace or
inspect the low beam (XENON
bulb) to avoid an electric shock
danger. When the low beam
(XENON bulb) does not operate,
have your vehicle checked by
an authorized EQUUS dealer.
WARNING
Page 430 of 477
7-73
Maintenance07
Information
HID lamps have superior perform-
ance in comparison to halogen bulbs.
HID lamps are estimated to last twice
as long as halogen bulbs, or longer, by
the manufacturer, depending on the
usage hours. HID lamps needs to be
replaced at some point within the
vehicle life. Frequent turning the
headlamps ON and OFF shortens the
HID lamps life. HID lamps do not
blow out in the same manner as halo-
gen incandescent lamps. When a
headlamp blows out after a period of
operation, the lamp light gradually
fades away after being turned ON.
Even when the lamp is turned ON by
turning ON the switch, it needs to be
replaced. The HID lamp components
are more complex than the ones of
conventional halogen bulbs. Thus, the
repairing costs are more expensive.
Headlight (bulb type), front turnsignal, position, side markerand fog light bulbs
When a bulb is out, have the vehicle
checked by an authorized EQUUS
dealer.
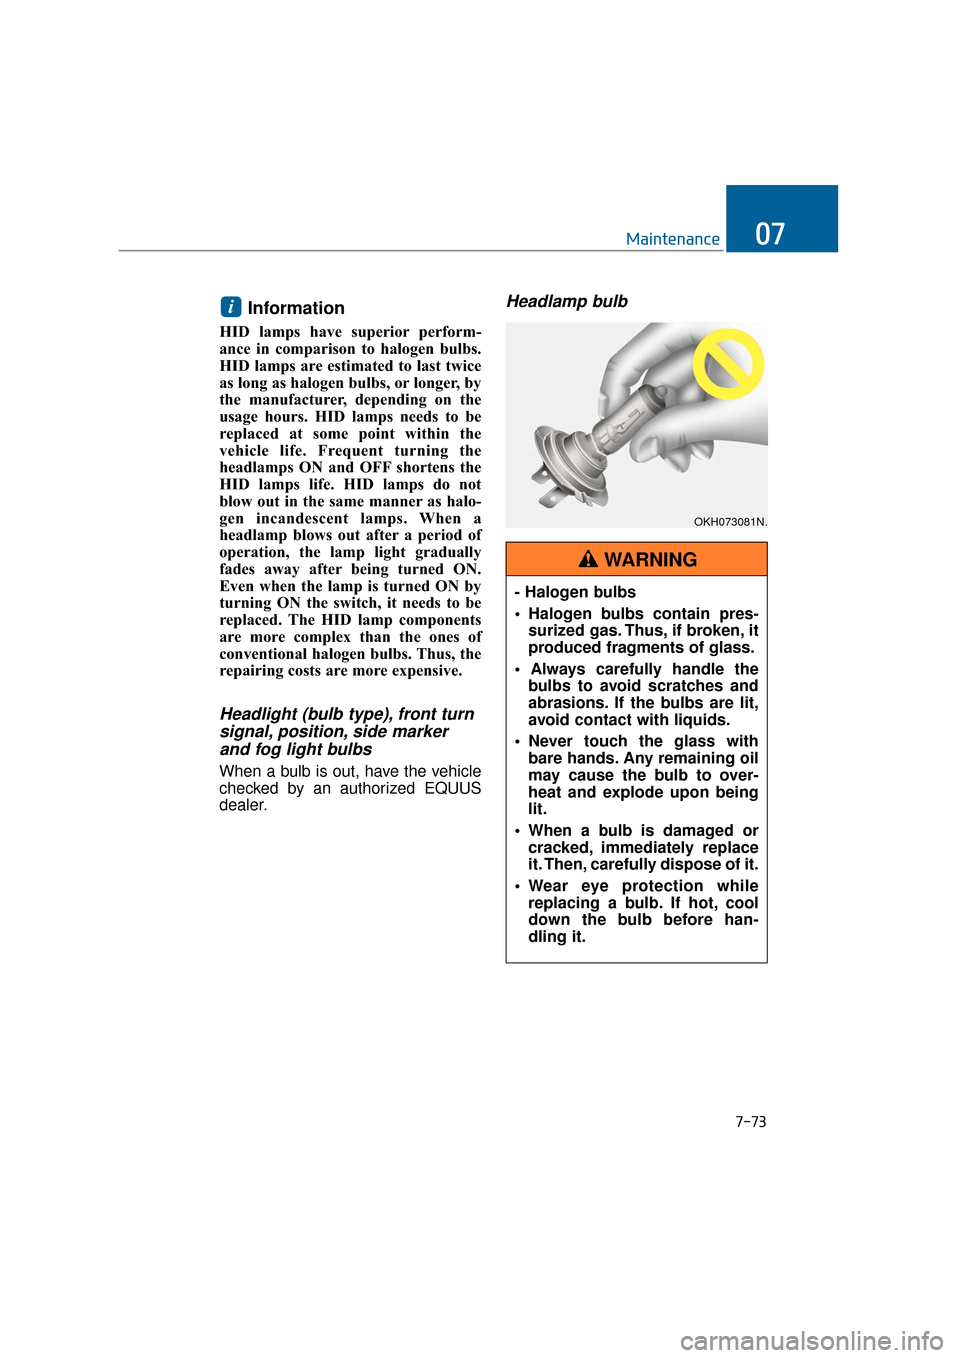
Headlamp bulb i
OKH073081N.
- Halogen bulbs
Halogen bulbs contain pres-
surized gas. Thus, if broken, it
produced fragments of glass.
bulbs to avoid scratches and
abrasions. If the bulbs are lit,
avoid contact with liquids.
Never touch the glass with bare hands. Any remaining oil
may cause the bulb to over-
heat and explode upon being
lit.
When a bulb is damaged or cracked, immediately replace
it. Then, carefully dispose of it.
Wear eye protection while replacing a bulb. If hot, cool
down the bulb before han-
dling it.
WARNING
Page 431 of 477
7-74
Maintenance
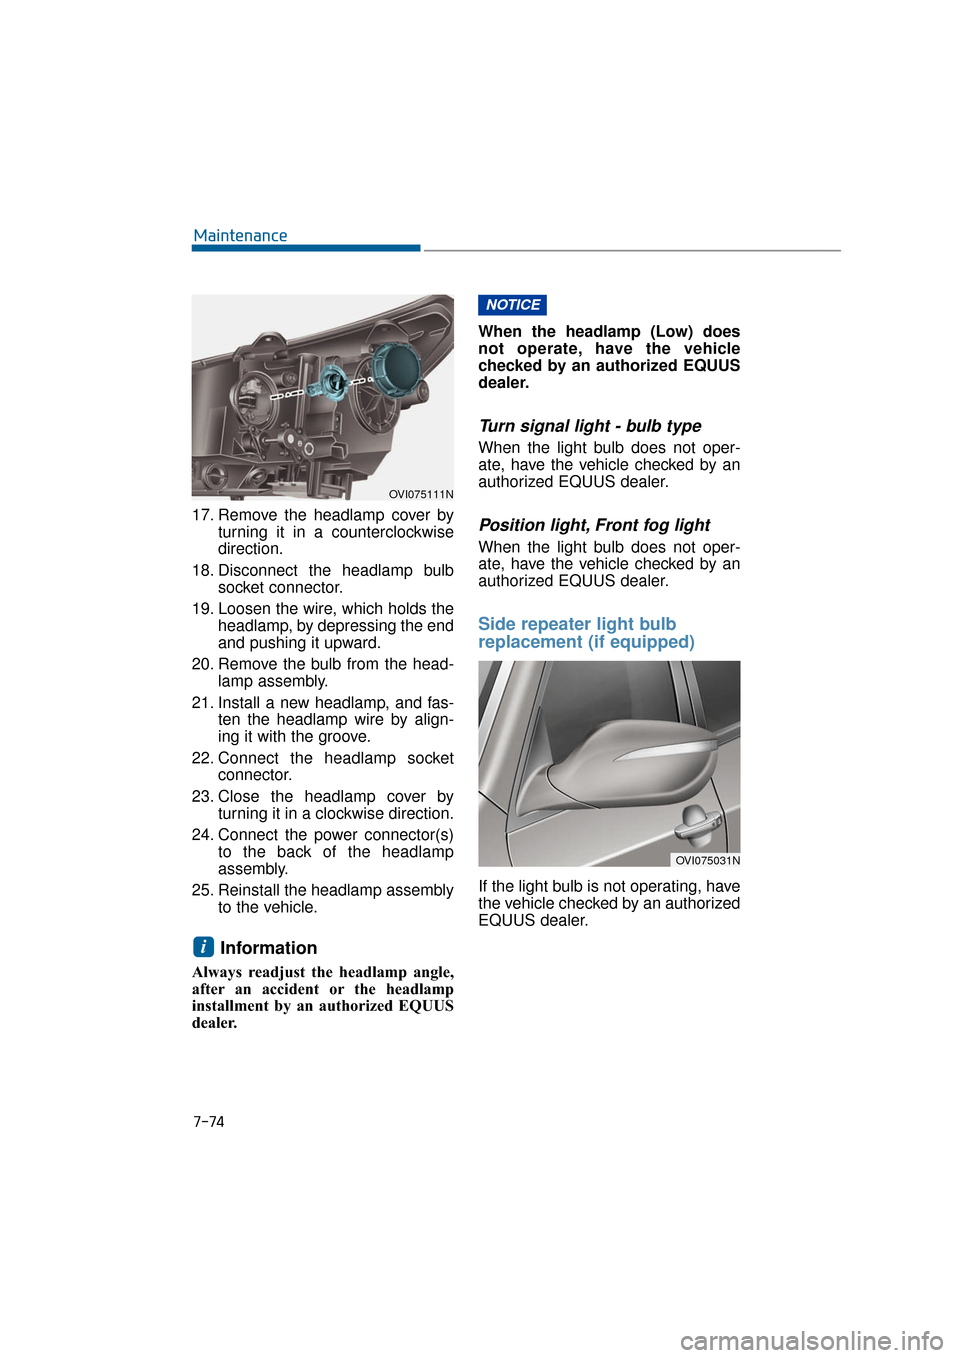
17. Remove the headlamp cover by turning it in a counterclockwise
direction.
18. Disconnect the headlamp bulb socket connector.
19. Loosen the wire, which holds the headlamp, by depressing the end
and pushing it upward.
20. Remove the bulb from the head- lamp assembly.
21. Install a new headlamp, and fas- ten the headlamp wire by align-
ing it with the groove.
22. Connect the headlamp socket connector.
23. Close the headlamp cover by turning it in a clockwise direction.
24. Connect the power connector(s) to the back of the headlamp
assembly.
25. Reinstall the headlamp assembly to the vehicle.
Information
Always readjust the headlamp angle,
after an accident or the headlamp
installment by an authorized EQUUS
dealer. When the headlamp (Low) does
not operate, have the vehicle
checked by an authorized EQUUS
dealer.
Turn signal light - bulb type
When the light bulb does not oper-
ate, have the vehicle checked by an
authorized EQUUS dealer.
Position light, Front fog light
When the light bulb does not oper-
ate, have the vehicle checked by an
authorized EQUUS dealer.
Side repeater light bulb
replacement (if equipped)
If the light bulb is not operating, have
the vehicle checked by an authorized
EQUUS dealer.
NOTICE
i
OVI075111N
OVI075031N