stop start Hyundai Genesis 2010 Owner's Guide
[x] Cancel search | Manufacturer: HYUNDAI, Model Year: 2010, Model line: Genesis, Model: Hyundai Genesis 2010Pages: 399, PDF Size: 10 MB
Page 241 of 399

WARNING
Always fully depress the brake
pedal before and while shifting out
of the P (Park) position into anoth-
er position to avoid inadvertent
motion of the vehicle which could
injure persons in or around the car.
Driving your vehicle
14 5
Sports mode
Whether the vehicle is stationary or in
motion, sports mode is selected by push-
ing the shift lever from the D (Drive) posi-
tion into the manual gate. To return to D
(Drive) range operation, push the shift
lever back into the main gate.
In sports mode, moving the shift lever
backwards and forwards will allow you to
make gearshifts rapidly.
Up (+) : Push the lever forward once to
shift up one gear.
Down (-) : Pull the lever backwards once
to shift down one gear.
✽ ✽
NOTICE
• In sports mode, the driver must exe-
cute upshifts in accordance with road
conditions, taking care to keep the
engine speed below the red zone.
• In sports mode, only the 6 forward
gears can be selected. To reverse or
park the vehicle, move the shift lever
to the R (Reverse) or P (Park) position
as required.
• In sports mode, downshifts are made
automatically when the vehicle slows
down. When the vehicle stops, 1st gear
is automatically selected.
• In sports mode, when the engine rpm
approaches the red zone shift points
are varied to upshift automatically.
• To maintain the required levels of
vehicle performance and safety, the
system may not execute certain
gearshifts when the shift lever is oper-
ated.
• When driving on a slippery road,
push the shift lever forward into the
+(up) position. This causes the trans-
mission to shift into the 2nd (or 3rd)
gear which is better for smooth driv-
ing on a slippery road. Push the shift
lever to the -(down) side to shift back
to the 1st gear.
E060102BBH
Shift lock system
For your safety, the automatic transmis-
sion has a shift lock system which pre-
vents shifting the transmission from P
(Park) or N (Neutral) into R (Reverse)
unless the brake pedal is depressed.
To shift the transmission from P (Park) or
N (Neutral) into R (Reverse):
1. Depress and hold the brake pedal.
2. Start the engine or turn the ignition
switch to the ON position.
3. Move the shift lever.
If the brake pedal is repeatedly
depressed and released with the shift
lever in the P (Park) position, a chattering
noise near the shift lever may be heard.
This is a normal condition.
OBH059006 + (UP)
- (DOWN)
Sports mode
Page 247 of 399
Driving your vehicle
20 5
E070202ABH
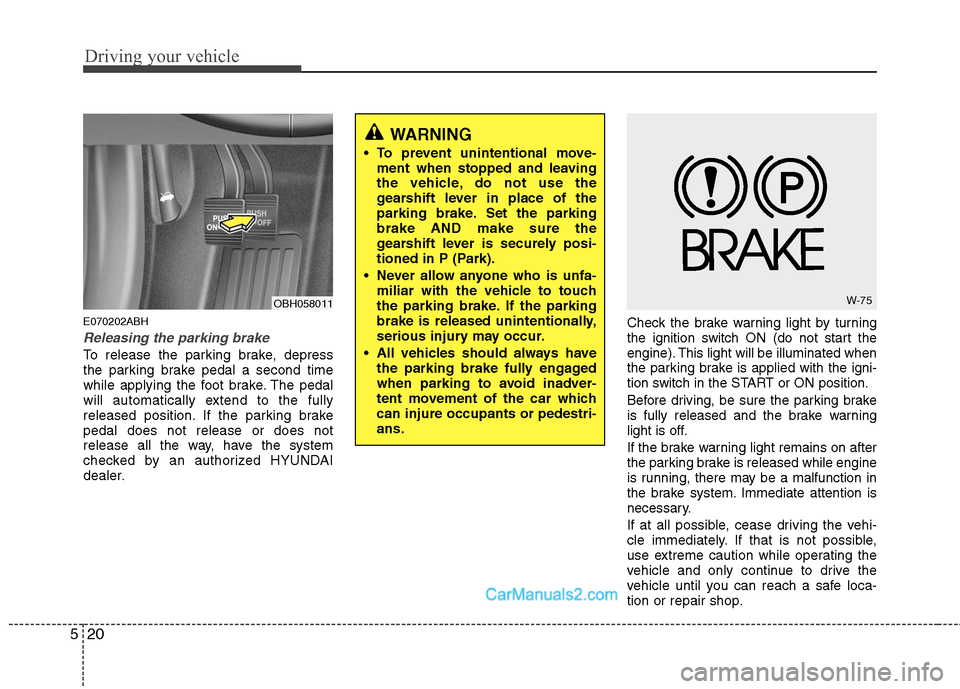
Releasing the parking brake
To release the parking brake, depress
the parking brake pedal a second time
while applying the foot brake. The pedal
will automatically extend to the fully
released position. If the parking brake
pedal does not release or does not
release all the way, have the system
checked by an authorized HYUNDAI
dealer.Check the brake warning light by turning
the ignition switch ON (do not start the
engine). This light will be illuminated when
the parking brake is applied with the igni-
tion switch in the START or ON position.
Before driving, be sure the parking brake
is fully released and the brake warning
light is off.
If the brake warning light remains on after
the parking brake is released while engine
is running, there may be a malfunction in
the brake system. Immediate attention is
necessary.
If at all possible, cease driving the vehi-
cle immediately. If that is not possible,
use extreme caution while operating the
vehicle and only continue to drive the
vehicle until you can reach a safe loca-
tion or repair shop.
WARNING
To prevent unintentional move-
ment when stopped and leaving
the vehicle, do not use the
gearshift lever in place of the
parking brake. Set the parking
brake AND make sure the
gearshift lever is securely posi-
tioned in P (Park).
Never allow anyone who is unfa-
miliar with the vehicle to touch
the parking brake. If the parking
brake is released unintentionally,
serious injury may occur.
All vehicles should always have
the parking brake fully engaged
when parking to avoid inadver-
tent movement of the car which
can injure occupants or pedestri-
ans.
OBH058011W-75
Page 249 of 399
Driving your vehicle
22 5
Check the brake warning light by turning
the ignition switch ON (do not start the
engine). This light will be illuminated
when the parking brake is applied with
the ignition switch in the START or ON
position.
Before driving, be sure the parking brake
is fully released and the brake warning
light is off.
If the brake warning light remains on
after the parking brake is released while
engine is running, there may be a mal-
function in the brake system. Immediate
attention is necessary.
If at all possible, cease driving the vehi-
cle immediately. If that is not possible,
use extreme caution while operating the
vehicle and only continue to drive the
vehicle until you can reach a safe loca-
tion.
OBH059057N
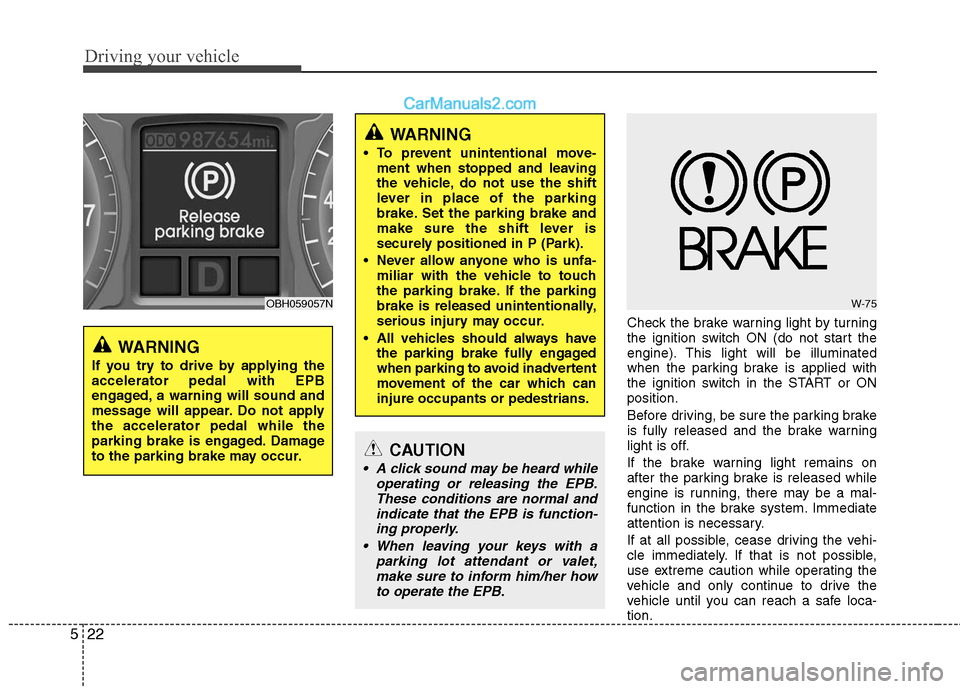
WARNING
If you try to drive by applying the
accelerator pedal with EPB
engaged, a warning will sound and
message will appear. Do not apply
the accelerator pedal while the
parking brake is engaged. Damage
to the parking brake may occur.
WARNING
To prevent unintentional move-
ment when stopped and leaving
the vehicle, do not use the shift
lever in place of the parking
brake. Set the parking brake and
make sure the shift lever is
securely positioned in P (Park).
Never allow anyone who is unfa-
miliar with the vehicle to touch
the parking brake. If the parking
brake is released unintentionally,
serious injury may occur.
All vehicles should always have
the parking brake fully engaged
when parking to avoid inadvertent
movement of the car which can
injure occupants or pedestrians.
W-75
CAUTION
A click sound may be heard while
operating or releasing the EPB.
These conditions are normal and
indicate that the EPB is function-
ing properly.
When leaving your keys with a
parking lot attendant or valet,
make sure to inform him/her how
to operate the EPB.
Page 253 of 399

Driving your vehicle
26 5
In these cases, the brake warning light
comes on, the AUTO HOLD indicator
changes from green to white, and
warning sounds and a message will
appear to inform you that EPB has
been automatically engaged.
Before driving again, press the foot
brake pedal, check the surrounding
area near your vehicle and release the
parking brake manually with the EPB
switch.
• When AUTO HOLD is ON and the
vehicle comes to a stop on a steep
slope (about 25% gradient or more),
the EPB will be automatically
engaged. In this case, when you
release EPB manually by pulling the
EPB switch with the foot brake pedal
pressed, AUTO HOLD will hold the
vehicle for 3 seconds in order to pre-
vent the vehicle from rolling back
during the launch.
• If the AUTO HOLD malfunction indi-
cator lights up yellow on the LCD
screen, the AUTO HOLD is not work-
ing properly. Take your vehicle to an
authorized HYUNDAI dealer and
have the system checked.E070300AEN-EE
Anti-lock brake system (ABS)
WARNING
ABS (or ESC) will not prevent acci-
dents due to improper or danger-
ous driving maneuvers. Even
though vehicle control is improved
during emergency braking, always
maintain a safe distance between
you and objects ahead. Vehicle
speeds should always be reduced
during extreme road conditions.
The braking distance for cars
equipped with an anti-lock braking
system (or Electronic Stability
Control system) may be longer than
for those without it in the following
road conditions.
During these conditions the vehicle
should be driven at reduced
speeds:
Rough, gravel or snow-covered
roads.
With tire chains installed.
(Continued)
WARNING
Press the accelerator pedal slow-
ly when you start the vehicle.
For your safety, cancel the AUTO
HOLD when you drive downhill or
back up the vehicle or park the
vehicle.
CAUTION
If there is a malfunction with the dri-
ver’s door, hood or trunk open
detection system, the AUTO HOLD
may not work properly.
Take your vehicle to an authorized
HYUNDAI dealer and have the sys-
tem checked.
Page 254 of 399
527
Driving your vehicle
The ABS continuously senses the speed
of the wheels. If the wheels are going to
lock, the ABS system repeatedly modu-
lates the hydraulic brake pressure to the
wheels.
When you apply your brakes under con-
ditions which may lock the wheels, you
may hear a “tik-tik’’ sound from the
brakes, or feel a corresponding sensation
in the brake pedal. This is normal and it
means your ABS is active.
In order to obtain the maximum benefit
from your ABS in an emergency situa-
tion, do not attempt to modulate your
brake pressure and do not try to pump
your brakes. Press your brake pedal as
hard as possible or as hard as the situa-
tion warrants and allow the ABS to con-
trol the force being delivered to the
brakes.
✽ ✽
NOTICE
A click sound may be heard in the
engine compartment when the vehicle
begins to move after the engine is start-
ed. These conditions are normal and
indicate that the anti-lock brake system
is functioning properly.
Even with the anti-lock brake system,
your vehicle still requires sufficient
stopping distance. Always maintain a
safe distance from the vehicle in front
of you.
Always slow down when cornering.
The anti-lock brake system cannot pre-
vent accidents resulting from exces-
sive speeds.
On loose or uneven road surfaces,
operation of the anti-lock brake system
may result in a longer stopping dis-
tance than for vehicles equipped with a
conventional brake system.
W-78
CAUTION
If the ABS warning light is on and
stays on, you may have a problem
with the ABS. In this case, howev-
er, your regular brakes will work
normally.
The ABS warning light will stay on
for approximately 3 seconds after
the ignition switch is ON. During
that time, the ABS will go through
self-diagnosis and the light will go
off if everything is normal. If the
light stays on, you may have a
problem with your ABS. Contact
an authorized HYUNDAI dealer as
soon as possible.
(Continued)
On roads where the road surface
is pitted or has different surface
height.
The safety features of an ABS (or
ESC) equipped vehicle should not
be tested by high speed driving or
cornering. This could endanger the
safety of yourself or others.
Page 255 of 399
Driving your vehicle
28 5
✽
✽
NOTICE
When you jump start your vehicle
because of a drained battery, the engine
may not run as smoothly and the ABS
warning light may turn on at the same
time. This happens because of the low
battery voltage. It does not mean your
ABS is malfunctioning.
• Do not pump your brakes!
• Have the battery recharged before
driving the vehicle.
E070500AUN-EU
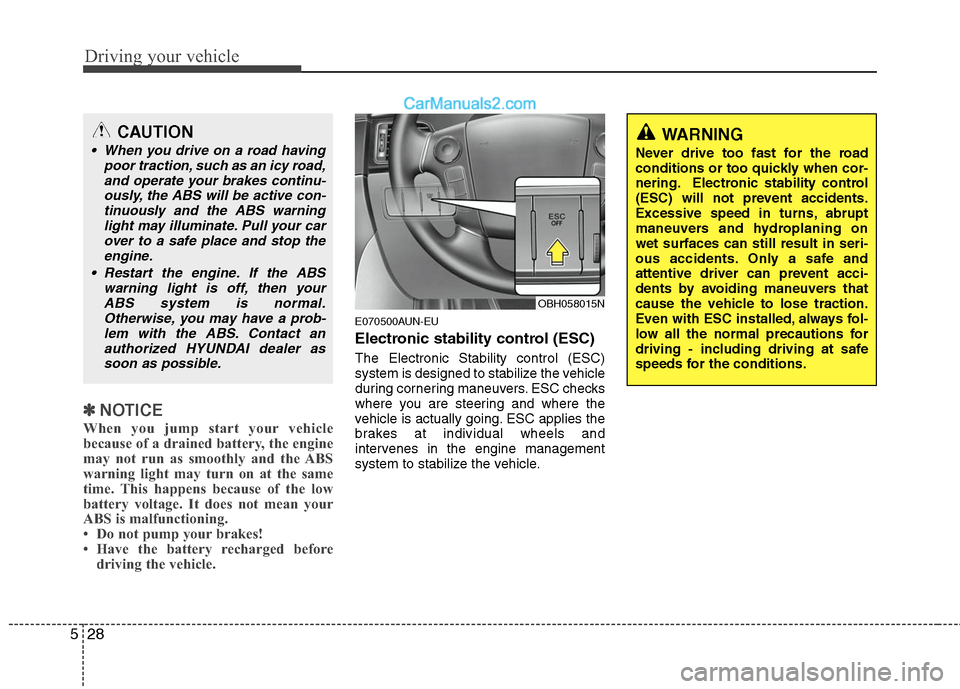
Electronic stability control (ESC)
The Electronic Stability control (ESC)
system is designed to stabilize the vehicle
during cornering maneuvers. ESC checks
where you are steering and where the
vehicle is actually going. ESC applies the
brakes at individual wheels and
intervenes in the engine management
system to stabilize the vehicle.
OBH058015N
WARNING
Never drive too fast for the road
conditions or too quickly when cor-
nering. Electronic stability control
(ESC) will not prevent accidents.
Excessive speed in turns, abrupt
maneuvers and hydroplaning on
wet surfaces can still result in seri-
ous accidents. Only a safe and
attentive driver can prevent acci-
dents by avoiding maneuvers that
cause the vehicle to lose traction.
Even with ESC installed, always fol-
low all the normal precautions for
driving - including driving at safe
speeds for the conditions.
CAUTION
When you drive on a road having
poor traction, such as an icy road,
and operate your brakes continu-
ously, the ABS will be active con-
tinuously and the ABS warning
light may illuminate. Pull your car
over to a safe place and stop the
engine.
Restart the engine. If the ABS
warning light is off, then your
ABS system is normal.
Otherwise, you may have a prob-
lem with the ABS. Contact an
authorized HYUNDAI dealer as
soon as possible.
Page 275 of 399
Driving your vehicle
48 5
E100000AEN
Your vehicle's fuel economy depends
mainly on your style of driving, where you
drive and when you drive.
Each of these factors affects how many
miles (kilometers) you can get from a gal-
lon (liter) of fuel. To operate your vehicle
as economically as possible, use the fol-
lowing driving suggestions to help save
money in both fuel and repairs:
Drive smoothly. Accelerate at a moder-
ate rate. Don't make "jack-rabbit" starts
or full-throttle shifts and maintain a
steady cruising speed. Don't race
between stoplights. Try to adjust your
speed to that of the other traffic so you
don't have to change speeds unneces-
sarily. Avoid heavy traffic whenever
possible. Always maintain a safe dis-
tance from other vehicles so you can
avoid unnecessary braking. This also
reduces brake wear.
Drive at a moderate speed. The faster
you drive, the more fuel your car uses.
Driving at a moderate speed, especial-
ly on the highway, is one of the most
effective ways to reduce fuel consump-
tion. Don't "ride" the brake pedal. This can
increase fuel consumption and also
increase wear on these components.
In addition, driving with your foot rest-
ing on the brake pedal may cause the
brakes to overheat, which reduces
their effectiveness and may lead to
more serious consequences.
Take care of your tires. Keep them
inflated to the recommended pressure.
Incorrect inflation, either too much or
too little, results in unnecessary tire
wear. Check the tire pressures at least
once a month.
Be sure that the wheels are aligned
correctly. Improper alignment can
result from hitting curbs or driving too
fast over irregular surfaces. Poor align-
ment causes faster tire wear and may
also result in other problems as well as
greater fuel consumption. Keep your car in good condition. For
better fuel economy and reduced
maintenance costs, maintain your car
in accordance with the maintenance
schedule in section 7. If you drive your
car in severe conditions, more frequent
maintenance is required (see section 7
for details).
Keep your car clean. For maximum
service, your vehicle should be kept
clean and free of corrosive materials. It
is especially important that mud, dirt,
ice, etc. not be allowed to accumulate
on the underside of the car. This extra
weight can result in increased fuel con-
sumption and also contribute to corro-
sion.
Travel lightly. Don't carry unnecessary
weight in your car. Weight reduces fuel
economy.
Don't let the engine idle longer than
necessary. If you are waiting (and not
in traffic), turn off your engine and
restart only when you're ready to go.
ECONOMICAL OPERATION
Page 294 of 399
63
What to do in an emergency
2. When the car is stopped, turn on your
emergency hazard flashers, set the
parking brake and put the shift lever in
P.
3. Have all passengers get out of the car.
Be sure they all get out on the side of
the car that is away from traffic.
4. When changing a flat tire, follow the
instruction provided later in this sec-
tion.
F020300AEN
If engine stalls while driving
1. Reduce your speed gradually, keeping
a straight line. Move cautiously off the
road to a safe place.
2. Turn on your emergency flashers.
3. Try to start the engine again. If your
vehicle will not start, contact an
authorized HYUNDAI dealer or seek
other qualified assistance.
F030100BBH
If engine doesn't turn over or
turns over slowly
1. Be sure the shift lever is in N (Neutral)
or P (Park) and the emergency brake
is set.
2. Check the battery connections to be
sure they are clean and tight.
3. Turn on the interior light. If the light
dims or goes out when you operate the
starter, the battery is discharged.
4. Check the starter connections to be
sure they are securely tightened.
5. Do not push or pull the vehicle to start
it. See instructions for "Jump starting".
F030200ABH
If engine turns over normally but
does not start
1. Check fuel level.
2. With the ignition switch in the LOCK
position, check all connectors at igni-
tion coils and spark plugs. Reconnect
any that may be disconnected or
loose.
3. If the engine still does not start, call an
authorized HYUNDAI dealer or seek
other qualified assistance.
IF THE ENGINE WILL NOT START
WARNING
If the engine will not start, do not
push or pull the car to start it. This
could result in a collision or cause
other damage.
Page 329 of 399
Maintenance
14 7
G051700AUN
Parking brake
Inspect the parking brake system includ-
ing the parking brake pedal and cables.
G051900AUN
Brake discs, pads, calipers and
rotors
Check the pads for excessive wear, discs
for run out and wear, and calipers for fluid
leakage.
G052000AUN
Exhaust pipe and muffler
Visually inspect the exhaust pipes, muf-
fler and hangers for cracks, deterioration,
or damage. Start the engine and listen
carefully for any exhaust gas leakage.
Tighten connections or replace parts as
necessary.
G052100AUN
Suspension mounting bolts
Check the suspension connections for
looseness or damage. Retighten to the
specified torque.
G052200AUN
Steering gear box, linkage &
boots/lower arm ball joint
With the vehicle stopped and engine off,
check for excessive free-play in the
steering wheel.
Check the linkage for bends or damage.
Check the dust boots and ball joints for
deterioration, cracks, or damage.
Replace any damaged parts.
G052300AEN
Power steering pump, belt and
hoses
Check the power steering pump and
hoses for leakage and damage. Replace
any damaged or leaking parts immedi-
ately. Inspect the power steering belt (or
drive belt) for evidence of cuts, cracks,
excessive wear, oiliness and proper ten-
sion. Replace or adjust it if necessary.
G052400AUN
Drive shafts and boots
Check the drive shafts, boots and clamps
for cracks, deterioration, or damage.
Replace any damaged parts and, if nec-
essary, repack the grease.
G052500AUN
Air conditioning refrigerant
Check the air conditioning lines and con-
nections for leakage and damage.
Page 364 of 399
749
Maintenance
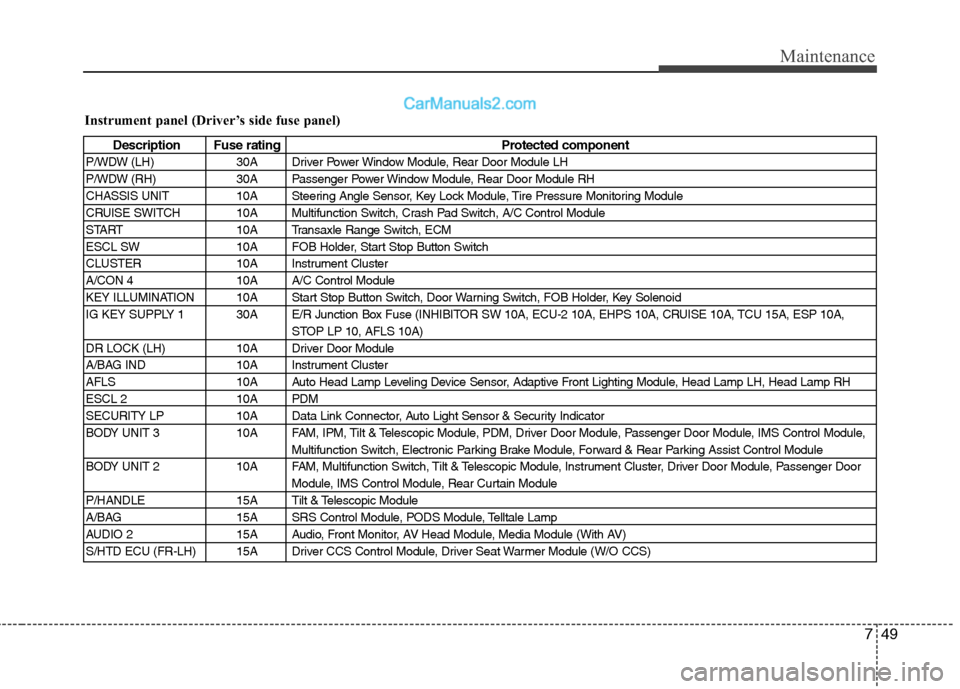
Instrument panel (Driver’s side fuse panel)
Description Fuse rating Protected component
P/WDW (LH) 30A Driver Power Window Module, Rear Door Module LH
P/WDW (RH) 30A Passenger Power Window Module, Rear Door Module RH
CHASSIS UNIT 10A Steering Angle Sensor, Key Lock Module, Tire Pressure Monitoring Module
CRUISE SWITCH 10A Multifunction Switch, Crash Pad Switch, A/C Control Module
START 10A Transaxle Range Switch, ECM
ESCL SW 10A FOB Holder, Start Stop Button Switch
CLUSTER 10A Instrument Cluster
A/CON 4 10A A/C Control Module
KEY ILLUMINATION 10A Start Stop Button Switch, Door Warning Switch, FOB Holder, Key Solenoid
IG KEY SUPPLY 1 30A E/R Junction Box Fuse (INHIBITOR SW 10A, ECU-2 10A, EHPS 10A, CRUISE 10A, TCU 15A, ESP 10A,
STOP LP 10, AFLS 10A)
DR LOCK (LH) 10A Driver Door Module
A/BAG IND 10A Instrument Cluster
AFLS 10A Auto Head Lamp Leveling Device Sensor, Adaptive Front Lighting Module, Head Lamp LH, Head Lamp RH
ESCL 2 10A PDM
SECURITY LP 10A Data Link Connector, Auto Light Sensor & Security Indicator
BODY UNIT 3 10A FAM, IPM, Tilt & Telescopic Module, PDM, Driver Door Module, Passenger Door Module, IMS Control Module,
Multifunction Switch, Electronic Parking Brake Module, Forward & Rear Parking Assist Control Module
BODY UNIT 2 10A FAM, Multifunction Switch, Tilt & Telescopic Module, Instrument Cluster, Driver Door Module, Passenger Door
Module, IMS Control Module, Rear Curtain Module
P/HANDLE 15A Tilt & Telescopic Module
A/BAG 15A SRS Control Module, PODS Module, Telltale Lamp
AUDIO 2 15A Audio, Front Monitor, AV Head Module, Media Module (With AV)
S/HTD ECU (FR-LH) 15A Driver CCS Control Module, Driver Seat Warmer Module (W/O CCS)