reset Hyundai Genesis 2011 Owner's Manual
[x] Cancel search | Manufacturer: HYUNDAI, Model Year: 2011, Model line: Genesis, Model: Hyundai Genesis 2011Pages: 409, PDF Size: 38.54 MB
Page 102 of 409
425
Features of your vehicle
If the power window is not operated cor-
rectly, the automatic power window sys-
tem must be reset as follows:
1. Turn the ignition switch to the ON posi-
tion.
2. Close driver’s and front passenger’s
windows and continue pulling up on
the power window switch for at least 1
second after the window is completely
closed.
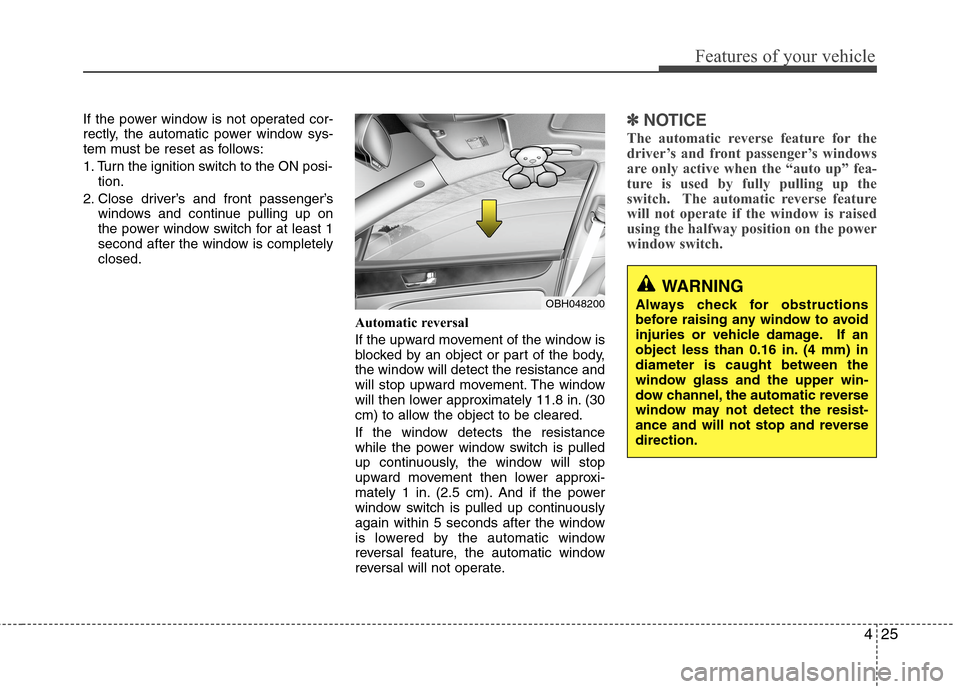
Automatic reversal
If the upward movement of the window is
blocked by an object or part of the body,
the window will detect the resistance and
will stop upward movement. The window
will then lower approximately 11.8 in. (30
cm) to allow the object to be cleared.
If the window detects the resistance
while the power window switch is pulled
up continuously, the window will stop
upward movement then lower approxi-
mately 1 in. (2.5 cm). And if the power
window switch is pulled up continuously
again within 5 seconds after the window
is lowered by the automatic window
reversal feature, the automatic window
reversal will not operate.✽ ✽
NOTICE
The automatic reverse feature for the
driver’s and front passenger’s windows
are only active when the “auto up” fea-
ture is used by fully pulling up the
switch. The automatic reverse feature
will not operate if the window is raised
using the halfway position on the power
window switch.
WARNING
Always check for obstructions
before raising any window to avoid
injuries or vehicle damage. If an
object less than 0.16 in. (4 mm) in
diameter is caught between the
window glass and the upper win-
dow channel, the automatic reverse
window may not detect the resist-
ance and will not stop and reverse
direction.OBH048200
Page 110 of 409
433
Features of your vehicle
D110500BBH
Resetting the sunroof
Whenever the vehicle battery is discon-
nected or discharged, or related fuse is
blown, you must reset your sunroof sys-
tem as follows:
1. Turn the ignition switch to the ON
position and close the sunroof com-
pletely.
2. Release the control lever.
3. Pull and hold the control lever down-
ward until the sunroof tilts and slightly
moves up and down. Then, release
the lever.
4. Pull and hold the control lever down-
ward until the sunroof is operated as
follows;
TILT DOWN →SLIDE OPEN →
SLIDE CLOSE
Then, release the control lever.
When this is complete, the sunroof sys-
tem is reset.
❈For more detailed information, contact
an authorized HYUNDAI dealer.
CAUTION
If the sunroof is not reset when the
vehicle battery is disconnected or
discharged, or related fuse is
blown, the sunroof may operate
improperly.
Page 129 of 409
Features of your vehicle
52 4
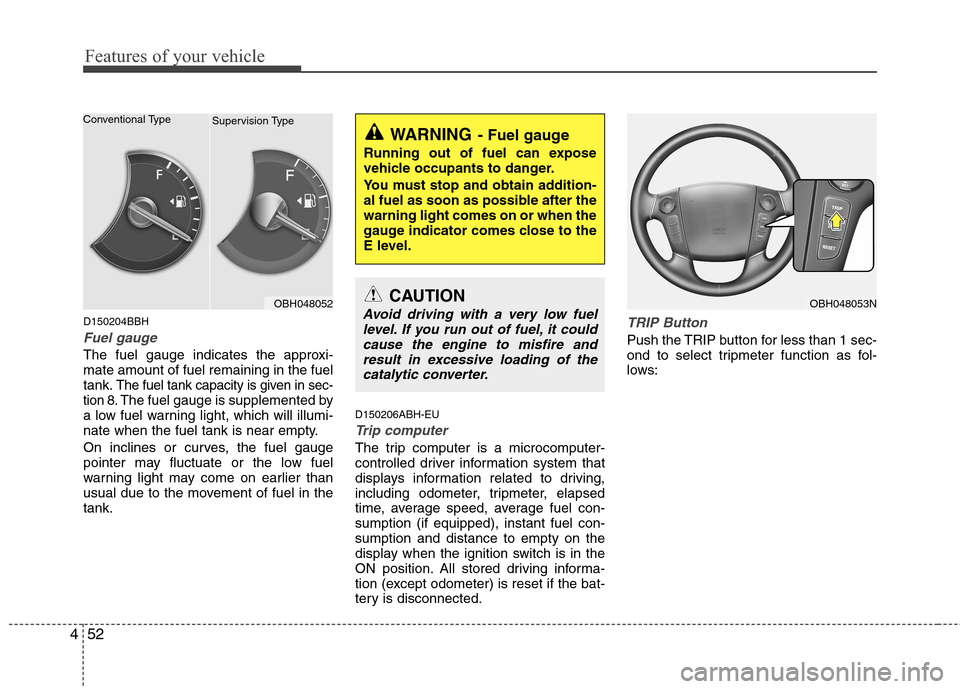
D150204BBH
Fuel gauge
The fuel gauge indicates the approxi-
mate amount of fuel remaining in the fuel
tank.
The fuel tank capacity is given in sec-
tion 8.The fuel gauge is supplemented by
a low fuel warning light, which will illumi-
nate when the fuel tank is near empty.
On inclines or curves, the fuel gauge
pointer may fluctuate or the low fuel
warning light may come on earlier than
usual due to the movement of fuel in the
tank.D150206ABH-EU
Trip computer
The trip computer is a microcomputer-
controlled driver information system that
displays information related to driving,
including odometer, tripmeter, elapsed
time, average speed, average fuel con-
sumption (if equipped), instant fuel con-
sumption and distance to empty on the
display when the ignition switch is in the
ON position. All stored driving informa-
tion (except odometer) is reset if the bat-
tery is disconnected.
TRIP Button
Push the TRIP button for less than 1 sec-
ond to select tripmeter function as fol-
lows:
WARNING- Fuel gauge
Running out of fuel can expose
vehicle occupants to danger.
You must stop and obtain addition-
al fuel as soon as possible after the
warning light comes on or when the
gauge indicator comes close to the
E level.
OBH048053NCAUTION
Avoid driving with a very low fuel
level. If you run out of fuel, it could
cause the engine to misfire and
result in excessive loading of the
catalytic converter.OBH048052 Conventional Type
Supervision Type
Page 130 of 409
453
Features of your vehicle
Conventional Type
Supervision Type
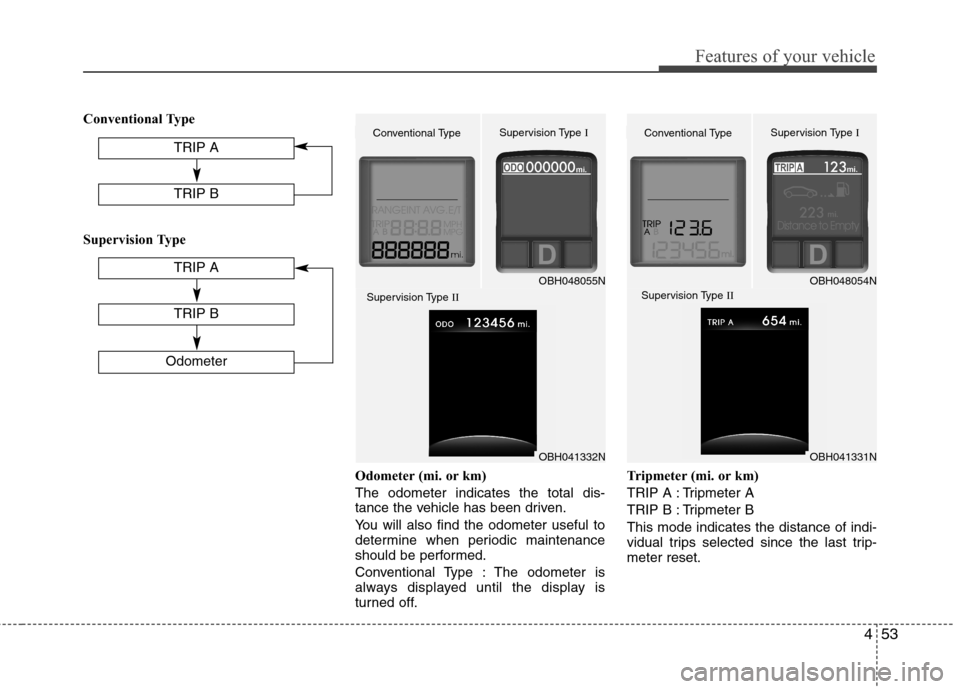
Odometer (mi. or km)
The odometer indicates the total dis-
tance the vehicle has been driven.
You will also find the odometer useful to
determine when periodic maintenance
should be performed.
Conventional Type : The odometer is
always displayed until the display is
turned off.Tripmeter (mi. or km)
TRIP A : Tripmeter A
TRIP B : Tripmeter B
This mode indicates the distance of indi-
vidual trips selected since the last trip-
meter reset. TRIP A
Odometer
TRIP B
TRIP A
TRIP B
OBH048055N
Conventional TypeSupervision Type I
OBH048054N
Conventional TypeSupervision Type I
Supervision Type II
Supervision Type II
OBH041332NOBH041331N
Page 132 of 409
455
Features of your vehicle
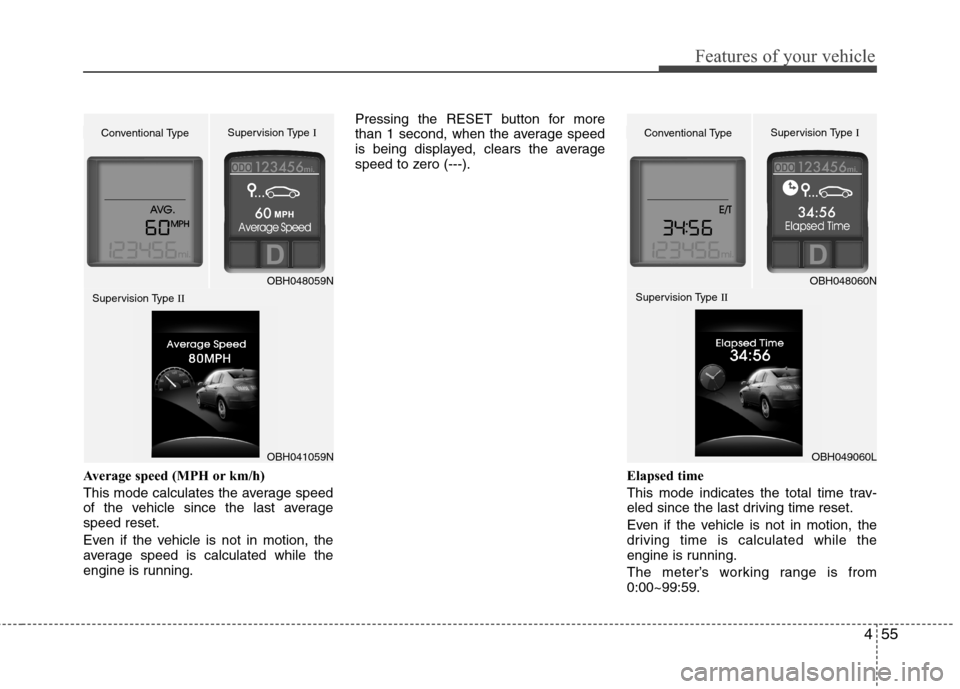
Average speed (MPH or km/h)
This mode calculates the average speed
of the vehicle since the last average
speed reset.
Even if the vehicle is not in motion, the
average speed is calculated while the
engine is running.Pressing the RESET button for more
than 1 second, when the average speed
is being displayed, clears the average
speed to zero (---).
Elapsed time
This mode indicates the total time trav-
eled since the last driving time reset.
Even if the vehicle is not in motion, the
driving time is calculated while the
engine is running.
The meter’s working range is from
0:00~99:59.
OBH048059N
Conventional TypeSupervision Type I
OBH048060N
Conventional TypeSupervision Type I
Supervision Type II
Supervision Type II
OBH041059NOBH049060L
Page 133 of 409
Features of your vehicle
56 4
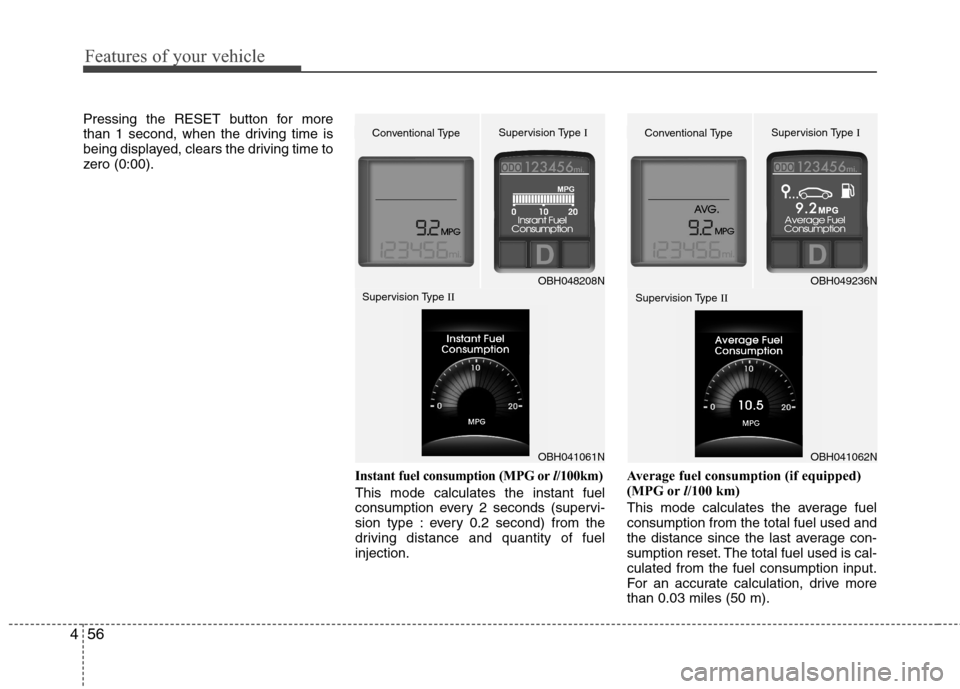
Pressing the RESET button for more
than 1 second, when the driving time is
being displayed, clears the driving time to
zero (0:00).
Instant fuel consumption (MPG orl/100km)
This mode calculates the instant fuel
consumption every 2 seconds (supervi-
sion type : every 0.2 second) from the
driving distance and quantity of fuel
injection.Average fuel consumption (if equipped)
(MPG orl/100 km)
This mode calculates the average fuel
consumption from the total fuel used and
the distance since the last average con-
sumption reset. The total fuel used is cal-
culated from the fuel consumption input.
For an accurate calculation, drive more
than 0.03 miles (50 m).
OBH048208N
Conventional TypeSupervision Type I
OBH049236N
Conventional TypeSupervision Type I
Supervision Type II
Supervision Type II
OBH041061NOBH041062N
Page 134 of 409
457
Features of your vehicle
Pressing the RESET button for more than
1 second, when the average fuel con-
sumption is being displayed, clears the
average fuel consumption to zero (----).
If the vehicle speed exceeds 1.6 MPH (1
km/h) after refueled more than 1.6 gal-
lons (6 l), the average fuel consumption
will be cleared to zero (---).
✽ ✽
NOTICE
• If the vehicle is not on level ground or
the battery power has been interrupt-
ed, the “Distance to empty” function
may not operate correctly.
The trip computer may not register
additional fuel if less than 1.6 gallons (6
liters) of fuel are added to the vehicle.
• The fuel consumption and distance to
empty values may vary significantly
based on driving conditions, driving
habits, and condition of the vehicle.
• The distance to empty value is an esti-
mate of the available driving distance.
This value may differ from the actual
driving distance available.
D150300AEN
Warnings and indicators
All warning lights are checked by turning
the ignition switch ON (do not start the
engine). Any light that does not illuminate
should be checked by an authorized
HYUNDAI dealer.
After starting the engine, check to make
sure that all warning lights are off. If any
are still on, this indicates a situation that
needs attention. When releasing the
parking brake, the brake system warning
light should go off. The fuel warning light
will stay on if the fuel level is low.
D150302ABH
Air bag warning light
This warning light will illuminate for
approximately 6 seconds each time you
turn the ignition switch to the ON posi-
tion.
This light also comes on when the
Supplemental Restraint System (SRS) is
not working properly. If the SRS air bag
warning light does not come on, or
continuously remains on after operating
for about 6 seconds when you turned the
ignition switch to the ON position or start-
ed the engine, or if it comes on while
driving, have the SRS inspected by an
authorized HYUNDAI dealer.
Page 169 of 409
Features of your vehicle
92 4
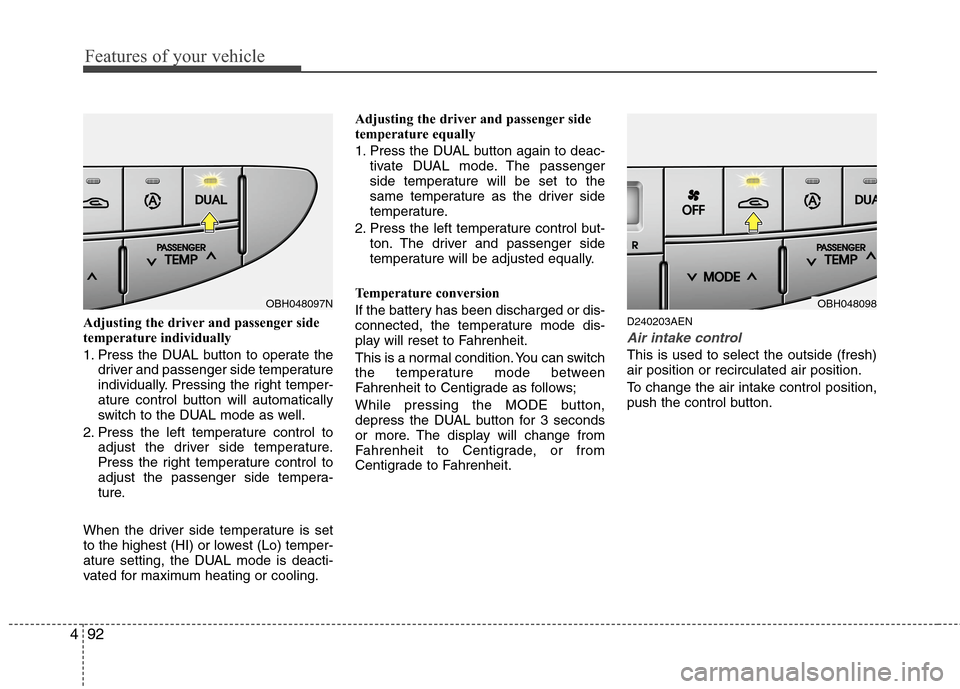
Adjusting the driver and passenger side
temperature individually
1. Press the DUAL button to operate the
driver and passenger side temperature
individually. Pressing the right temper-
ature control button will automatically
switch to the DUAL mode as well.
2. Press the left temperature control to
adjust the driver side temperature.
Press the right temperature control to
adjust the passenger side tempera-
ture.
When the driver side temperature is set
to the highest (HI) or lowest (Lo) temper-
ature setting, the DUAL mode is deacti-
vated for maximum heating or cooling.Adjusting the driver and passenger side
temperature equally
1. Press the DUAL button again to deac-
tivate DUAL mode. The passenger
side temperature will be set to the
same temperature as the driver side
temperature.
2. Press the left temperature control but-
ton. The driver and passenger side
temperature will be adjusted equally.
Temperature conversion
If the battery has been discharged or dis-
connected, the temperature mode dis-
play will reset to Fahrenheit.
This is a normal condition. You can switch
the temperature mode between
Fahrenheit to Centigrade as follows;
While pressing the MODE button,
depress the DUAL button for 3 seconds
or more. The display will change from
Fahrenheit to Centigrade, or from
Centigrade to Fahrenheit.D240203AEN
Air intake control
This is used to select the outside (fresh)
air position or recirculated air position.
To change the air intake control position,
push the control button.
OBH048097NOBH048098
Page 177 of 409
Features of your vehicle
100 4
D250202AEN-EU
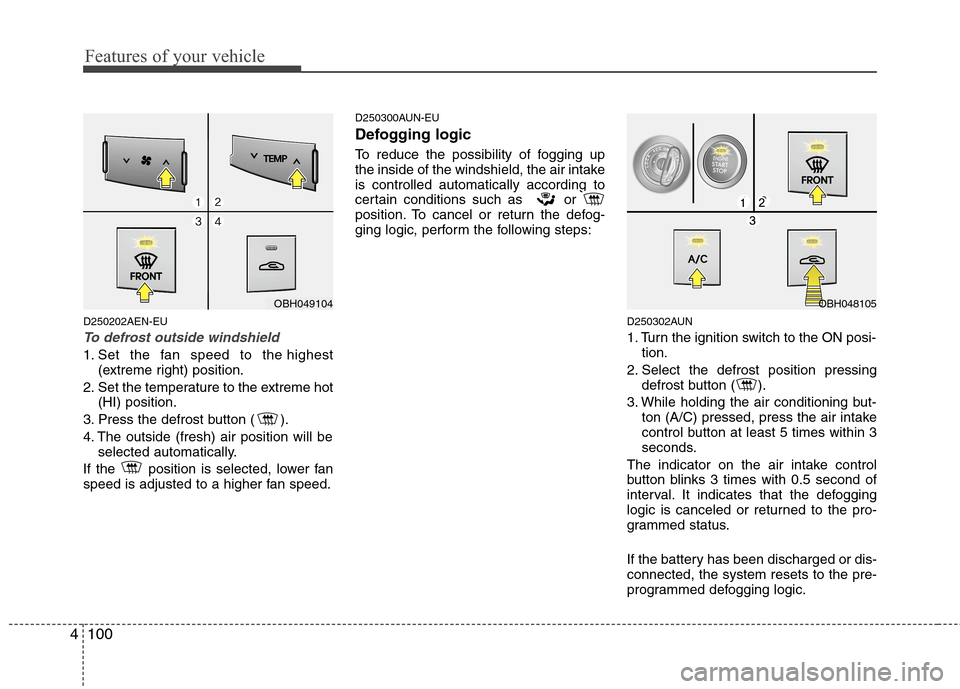
To defrost outside windshield
1. Set the fan speed to the highest
(extreme right) position.
2. Set the temperature to the extreme hot
(HI) position.
3. Press the defrost button ( ).
4. The outside (fresh) air position will be
selected automatically.
If the position is selected, lower fan
speed is adjusted to a higher fan speed.
D250300AUN-EU
Defogging logic
To reduce the possibility of fogging up
the inside of the windshield, the air intake
is controlled automatically according to
certain conditions such as or
position. To cancel or return the defog-
ging logic, perform the following steps:
D250302AUN
1. Turn the ignition switch to the ON posi-
tion.
2. Select the defrost position pressing
defrost button ( ).
3. While holding the air conditioning but-
ton (A/C) pressed, press the air intake
control button at least 5 times within 3
seconds.
The indicator on the air intake control
button blinks 3 times with 0.5 second of
interval. It indicates that the defogging
logic is canceled or returned to the pro-
grammed status.
If the battery has been discharged or dis-
connected, the system resets to the pre-
programmed defogging logic.
OBH049104OBH048105
Page 183 of 409
Features of your vehicle
106 4
D280500AEN
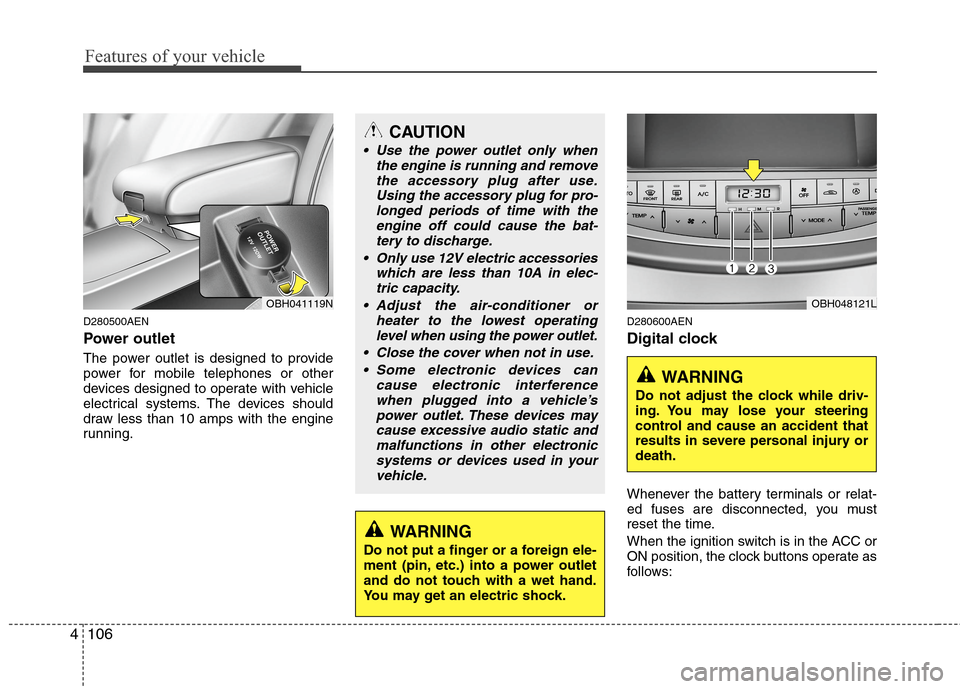
Power outlet
The power outlet is designed to provide
power for mobile telephones or other
devices designed to operate with vehicle
electrical systems. The devices should
draw less than 10 amps with the engine
running.
D280600AEN
Digital clock
Whenever the battery terminals or relat-
ed fuses are disconnected, you must
reset the time.
When the ignition switch is in the ACC or
ON position, the clock buttons operate as
follows:
CAUTION
Use the power outlet only when
the engine is running and remove
the accessory plug after use.
Using the accessory plug for pro-
longed periods of time with the
engine off could cause the bat-
tery to discharge.
Only use 12V electric accessories
which are less than 10A in elec-
tric capacity.
Adjust the air-conditioner or
heater to the lowest operating
level when using the power outlet.
Close the cover when not in use.
Some electronic devices can
cause electronic interference
when plugged into a vehicle’s
power outlet. These devices may
cause excessive audio static and
malfunctions in other electronic
systems or devices used in your
vehicle.
WARNING
Do not put a finger or a foreign ele-
ment (pin, etc.) into a power outlet
and do not touch with a wet hand.
You may get an electric shock.
OBH041119NOBH048121L
WARNING
Do not adjust the clock while driv-
ing. You may lose your steering
control and cause an accident that
results in severe personal injury or
death.