sensor Hyundai Genesis 2013 User Guide
[x] Cancel search | Manufacturer: HYUNDAI, Model Year: 2013, Model line: Genesis, Model: Hyundai Genesis 2013Pages: 429, PDF Size: 8.94 MB
Page 73 of 429
Safety features of your vehicle
54
3
C040801AEN
Air bag inflation conditions
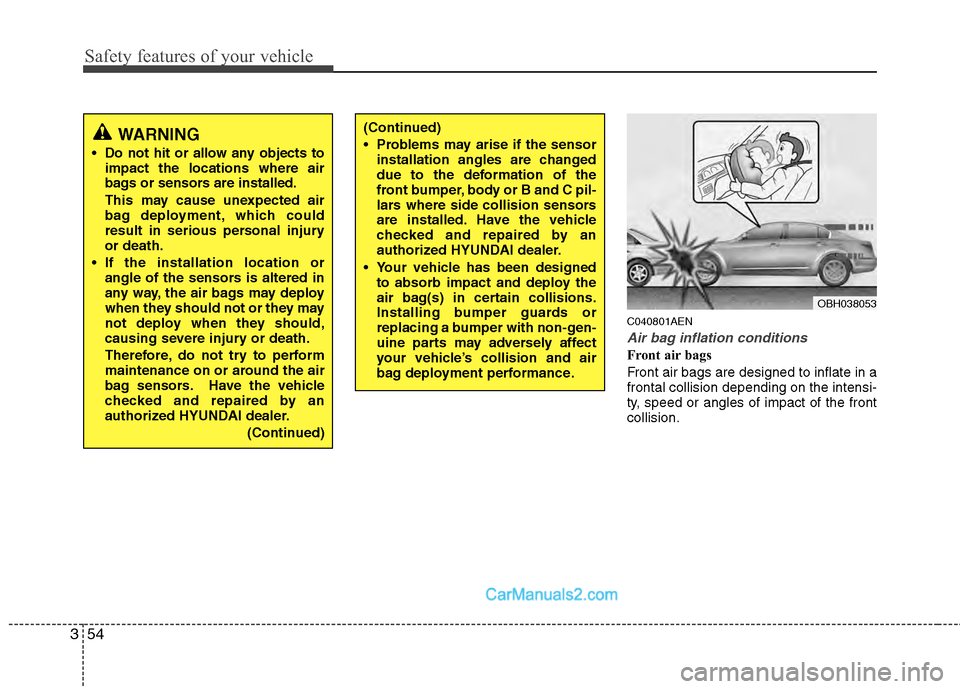
Front air bags
Front air bags are designed to inflate in a
frontal collision depending on the intensi-
ty, speed or angles of impact of the front
collision.
OBH038053
WARNING
Do not hit or allow any objects to
impact the locations where air
bags or sensors are installed.
This may cause unexpected air
bag deployment, which could
result in serious personal injury
or death.
If the installation location or angle of the sensors is altered in
any way, the air bags may deploy
when they should not or they may
not deploy when they should,
causing severe injury or death.
Therefore, do not try to perform
maintenance on or around the air
bag sensors. Have the vehicle
checked and repaired by an
authorized HYUNDAI dealer.
(Continued)
(Continued)
Problems may arise if the sensorinstallation angles are changed
due to the deformation of the
front bumper, body or B and C pil-
lars where side collision sensors
are installed. Have the vehicle
checked and repaired by an
authorized HYUNDAI dealer.
Your vehicle has been designed to absorb impact and deploy the
air bag(s) in certain collisions.
Installing bumper guards or
replacing a bumper with non-gen-
uine parts may adversely affect
your vehicle’s collision and air
bag deployment performance.
Page 74 of 429
355
Safety features of your vehicle
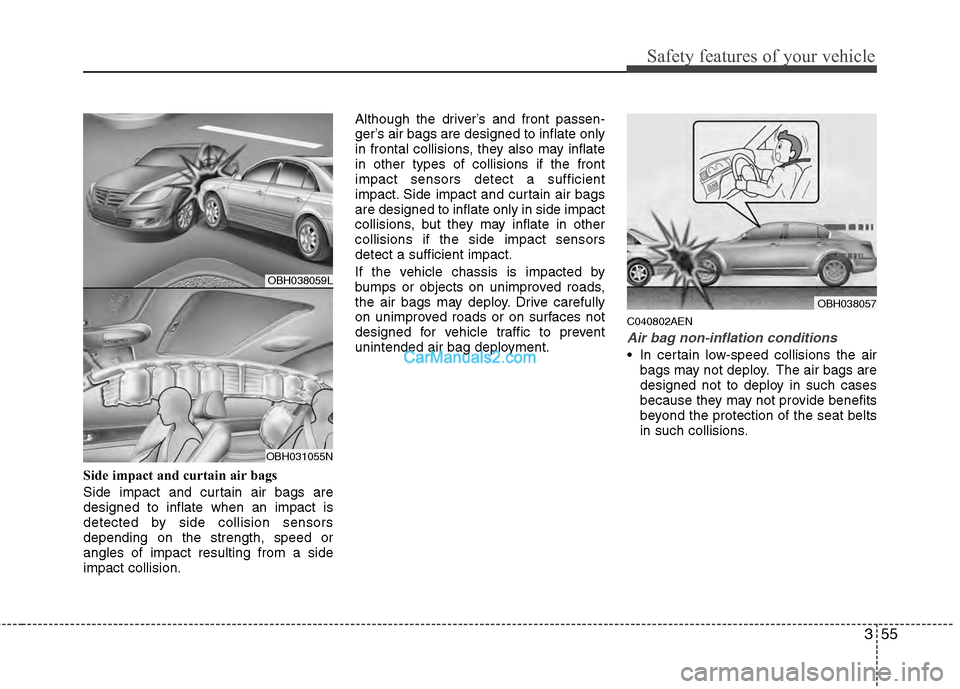
Side impact and curtain air bags
Side impact and curtain air bags are
designed to inflate when an impact is
detected by side collision sensors
depending on the strength, speed or
angles of impact resulting from a side
impact collision.Although the driver’s and front passen-
ger’s air bags are designed to inflate only
in frontal collisions, they also may inflate
in other types of collisions if the front
impact sensors detect a sufficient
impact. Side impact and curtain air bags
are designed to inflate only in side impact
collisions, but they may inflate in other
collisions if the side impact sensors
detect a sufficient impact.
If the vehicle chassis is impacted by
bumps or objects on unimproved roads,
the air bags may deploy. Drive carefully
on unimproved roads or on surfaces not
designed for vehicle traffic to prevent
unintended air bag deployment.
C040802AEN
Air bag non-inflation conditions
In certain low-speed collisions the air
bags may not deploy. The air bags are
designed not to deploy in such cases
because they may not provide benefits
beyond the protection of the seat belts
in such collisions.
OBH038057
OBH038059L
OBH031055N
Page 75 of 429
Safety features of your vehicle
56
3
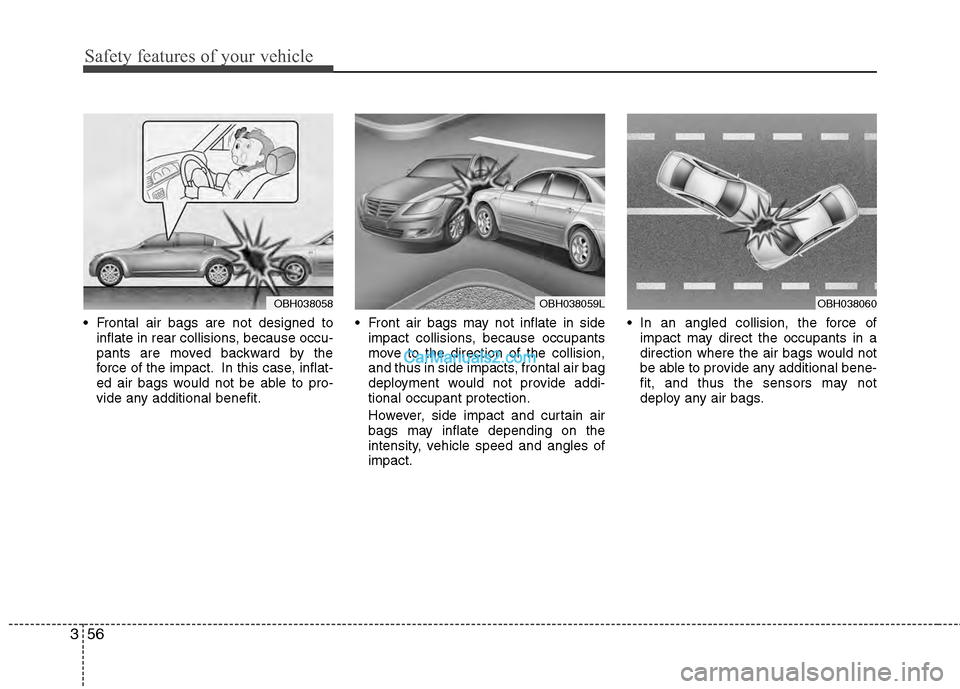
Frontal air bags are not designed to
inflate in rear collisions, because occu-
pants are moved backward by the
force of the impact. In this case, inflat-
ed air bags would not be able to pro-
vide any additional benefit. Front air bags may not inflate in side
impact collisions, because occupants
move to the direction of the collision,
and thus in side impacts, frontal air bag
deployment would not provide addi-
tional occupant protection.
However, side impact and curtain air
bags may inflate depending on the
intensity, vehicle speed and angles of
impact. In an angled collision, the force of
impact may direct the occupants in a
direction where the air bags would not
be able to provide any additional bene-
fit, and thus the sensors may not
deploy any air bags.
OBH038060OBH038059LOBH038058
Page 76 of 429
357
Safety features of your vehicle
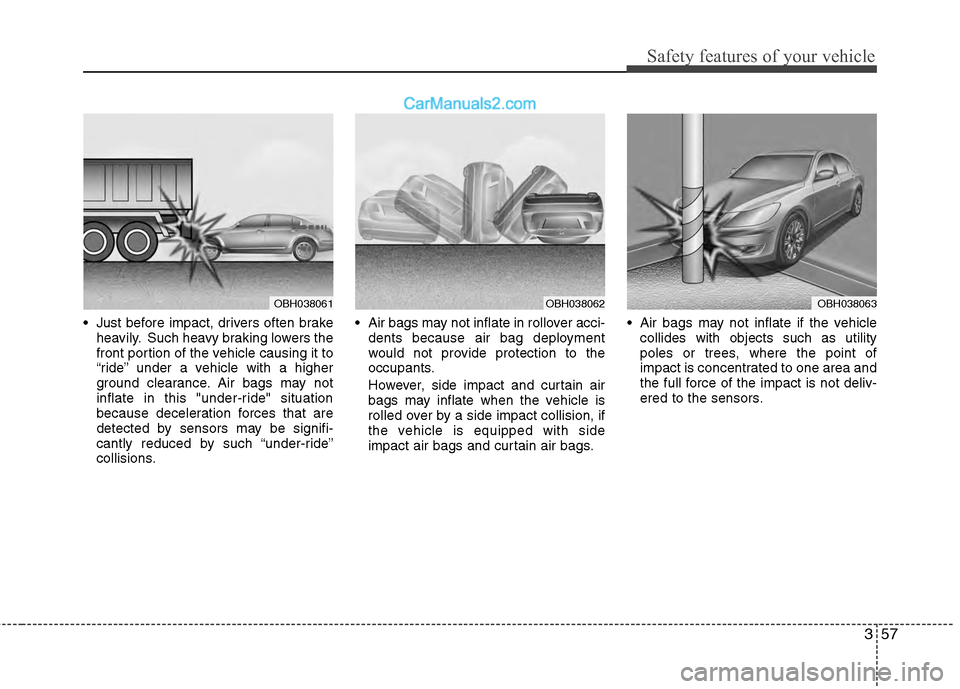
Just before impact, drivers often brakeheavily. Such heavy braking lowers the
front portion of the vehicle causing it to
“ride” under a vehicle with a higher
ground clearance. Air bags may not
inflate in this "under-ride" situation
because deceleration forces that are
detected by sensors may be signifi-
cantly reduced by such “under-ride”
collisions. Air bags may not inflate in rollover acci-
dents because air bag deployment
would not provide protection to the
occupants.
However, side impact and curtain air
bags may inflate when the vehicle is
rolled over by a side impact collision, if
the vehicle is equipped with side
impact air bags and curtain air bags. Air bags may not inflate if the vehicle
collides with objects such as utility
poles or trees, where the point of
impact is concentrated to one area and
the full force of the impact is not deliv-
ered to the sensors.
OBH038061OBH038062OBH038063
Page 118 of 429

439
Features of your vehicle
D140100AUN
Inside rearview mirror
Adjust the rearview mirror to center on
the view through the rear window. Make
this adjustment before you start driving.
D140105AEN
Electric chromic mirror (ECM) withHomeLink®system and compass
(if equipped)
Your vehicle may be equipped with a
Gentex Automatic-Dimming Mirror with a
Z-Nav™ Electronic Compass Display
and an Integrated HomeLink
®Wireless
Control System. During nighttime driving,
this feature will automatically detect and
reduce rearview mirror glare while the
compass indicates the direction the vehi-
cle is pointed. The HomeLink
®Universal
Transceiver allows you to activate your
garage door(s), electric gate, home light-
ing, etc. (1) Channel 1 button
(2) Channel 2 button
(3) Status indicator LED
(4) Channel 3 button
(5) Rear light sensor
(6) Dimming ON/OFF button
(7) Compass control button
(8) Compass display
MIRRORS
OBH048235N
WARNING
Do not modify the inside mirror and
do not install a wide mirror. It could
result in injury, during an accident
or deployment of the air bag.
WARNING - Rear visibility
Do not place objects in the rear
seat, cargo area or rear package
tray which would interfere with your
vision through the rear window.
Page 119 of 429

Features of your vehicle
40
4
Automatic-Dimming Night Vision
Safety™ (NVS®) Mirror
The NVS®Mirror in your vehicle is the
most advanced way to reduce annoying
glare in the rearview mirror during any
driving situation. For more information
regarding NVS
®mirrors and other appli-
cations, please refer to the Gentex web-
site:
www.gentex.com Automatic-dimming function
Your mirror will automatically dim upon
detecting glare from the vehicles travel-
ing behind you. The auto-dimming func-
tion can be controlled by the Dimming
ON/OFF Button:
1. Pressing the button turns the auto-
dimming function OFF which is indicat-
ed by the green Status Indicator LED
turning off.
2. Pressing the button again turns the auto-dimming function ON which is
indicated by the green Status Indicator
LED turning on.
✽ ✽NOTICE
The mirror defaults to the ON position
each time the vehicle is started.
Z-Nav™ Compass Display
The NVS™ Mirror in your vehicle is also
equipped with a Z-Nav™ Compass that
shows the vehicle Compass heading in
the Display Window using the 8 basic
cardinal headings (N, NE, E, SE, etc.).
Compass function
The Compass can be turned ON and
OFF and will remember the last state
when the ignition is cycled. To turn the
display feature ON/OFF:
1. Press and release the button to
turn the display feature OFF.
2. Press and release the button again to turn the display back ON.
Additional options can be set with press
and hold sequences of the button and
are detailed below.
There is a difference between magnetic
north and true north. The compass in the
mirror can compensate for this difference
when it knows the Magnetic Zone in
which it is operating. This is set either by
the dealer or by the user. The operating
Zone Numbers for North America are
shown in the figure on the following sec-
tion.
CAUTION
The NVS®Mirror automatically
reduces glare during driving condi- tions based upon light levels moni-tored in front of the vehicle andfrom the rear of the vehicle. Theselight sensors are visible throughopenings in the front and rear of themirror case. Any object that obstructs either light sensor willdegrade the automatic dimmingcontrol feature.
Page 125 of 429
Features of your vehicle
46
4
D140201ABH
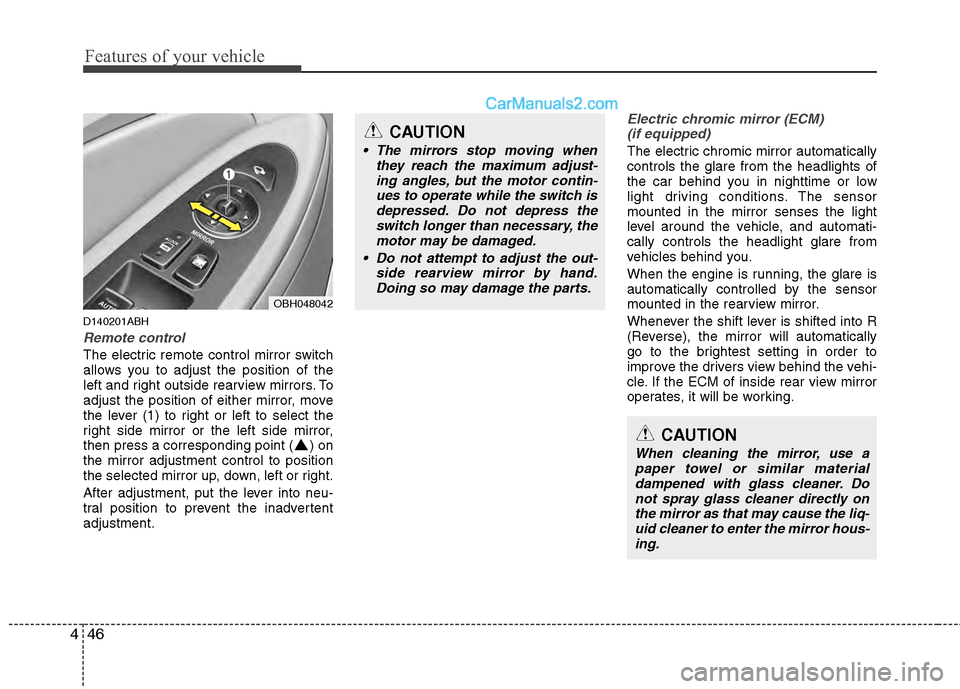
Remote control
The electric remote control mirror switch
allows you to adjust the position of the
left and right outside rearview mirrors. To
adjust the position of either mirror, move
the lever (1) to right or left to select the
right side mirror or the left side mirror,
then press a corresponding point ( ) on
the mirror adjustment control to position
the selected mirror up, down, left or right.
After adjustment, put the lever into neu-
tral position to prevent the inadvertent
adjustment.
Electric chromic mirror (ECM)
(if equipped)
The electric chromic mirror automatically
controls the glare from the headlights of
the car behind you in nighttime or low
light driving conditions. The sensor
mounted in the mirror senses the light
level around the vehicle, and automati-
cally controls the headlight glare from
vehicles behind you.
When the engine is running, the glare is
automatically controlled by the sensor
mounted in the rearview mirror.
Whenever the shift lever is shifted into R
(Reverse), the mirror will automatically
go to the brightest setting in order to
improve the drivers view behind the vehi-
cle. If the ECM of inside rear view mirror
operates, it will be working.
OBH048042
CAUTION
The mirrors stop moving when they reach the maximum adjust-ing angles, but the motor contin-ues to operate while the switch isdepressed. Do not depress the switch longer than necessary, themotor may be damaged.
Do not attempt to adjust the out- side rearview mirror by hand.Doing so may damage the parts.
CAUTION
When cleaning the mirror, use apaper towel or similar materialdampened with glass cleaner. Do not spray glass cleaner directly onthe mirror as that may cause the liq- uid cleaner to enter the mirror hous-ing.
Page 127 of 429
Features of your vehicle
48
4
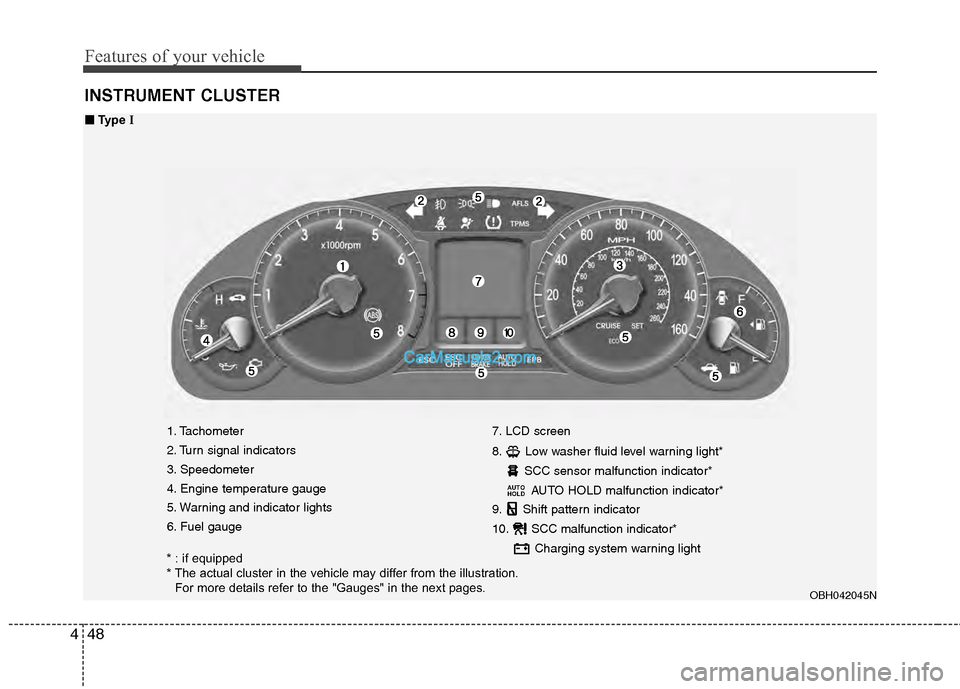
INSTRUMENT CLUSTER
1. Tachometer
2. Turn signal indicators
3. Speedometer
4. Engine temperature gauge
5. Warning and indicator lights
6. Fuel gauge 7. LCD screen
8. Low washer fluid level warning light*
SCC sensor malfunction indicator*AUTO HOLD malfunction indicator*
9. Shift pattern indicator
10. SCC malfunction indicator*
Charging system warning light
AUTO
HOLD
OBH042045N
■
■Type I
* : if equipped
* The actual cluster in the vehicle may differ from the illustration.
For more details refer to the "Gauges" in the next pages.
Page 128 of 429
449
Features of your vehicle
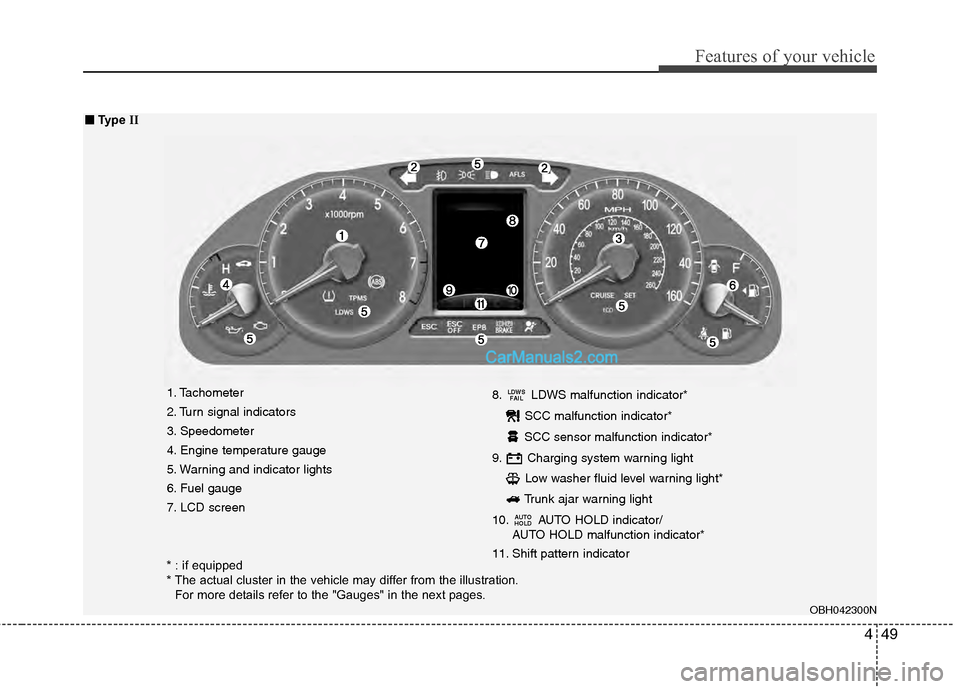
1. Tachometer
2. Turn signal indicators
3. Speedometer
4. Engine temperature gauge
5. Warning and indicator lights
6. Fuel gauge
7. LCD screen8. LDWS malfunction indicator*
SCC malfunction indicator*
SCC sensor malfunction indicator*
9. Charging system warning light Low washer fluid level warning light*
Trunk ajar warning light
10. AUTO HOLD indicator/ AUTO HOLD malfunction indicator*
11. Shift pattern indicator
AUTO
HOLD
LDWS FAIL
OBH042300N
■
■ Type II
* : if equipped
* The actual cluster in the vehicle may differ from the illustration.
For more details refer to the "Gauges" in the next pages.
Page 145 of 429
Features of your vehicle
66
4
D150320ABH
Smart cruise control indicator
(if equipped)
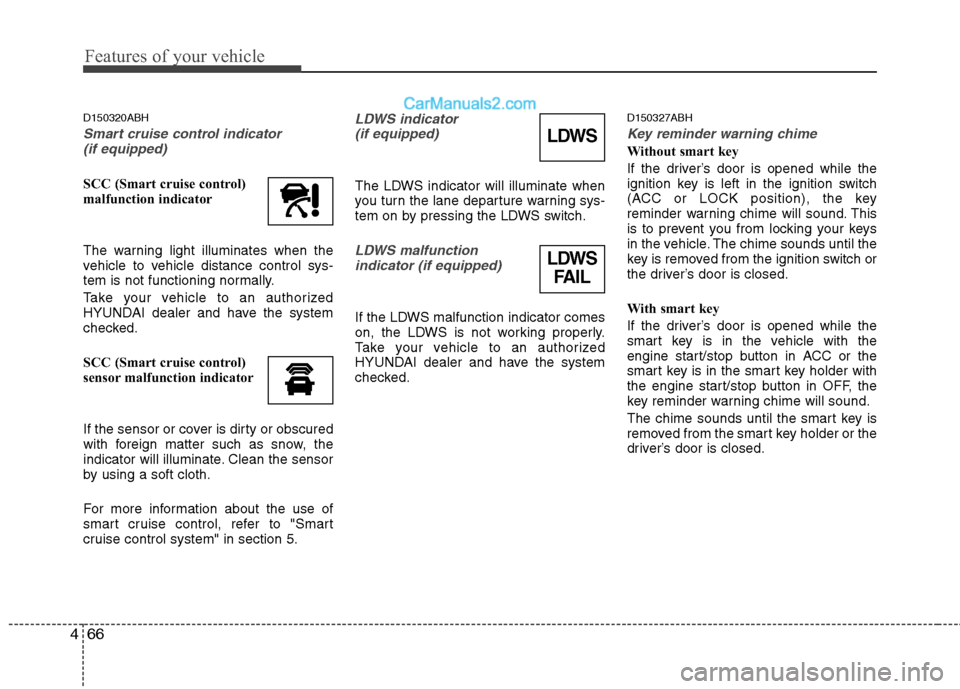
SCC (Smart cruise control)
malfunction indicator
The warning light illuminates when the
vehicle to vehicle distance control sys-
tem is not functioning normally.
Take your vehicle to an authorized
HYUNDAI dealer and have the system
checked.
SCC (Smart cruise control)
sensor malfunction indicator
If the sensor or cover is dirty or obscured
with foreign matter such as snow, the
indicator will illuminate. Clean the sensor
by using a soft cloth.
For more information about the use of
smart cruise control, refer to "Smart
cruise control system" in section 5.
LDWS indicator (if equipped)
The LDWS indicator will illuminate when
you turn the lane departure warning sys-
tem on by pressing the LDWS switch.
LDWS malfunction indicator (if equipped)
If the LDWS malfunction indicator comes
on, the LDWS is not working properly.
Take your vehicle to an authorized
HYUNDAI dealer and have the system
checked.
D150327ABH
Key reminder warning chime
Without smart key
If the driver’s door is opened while the
ignition key is left in the ignition switch
(ACC or LOCK position), the key
reminder warning chime will sound. This
is to prevent you from locking your keys
in the vehicle. The chime sounds until the
key is removed from the ignition switch or
the driver’s door is closed.
With smart key
If the driver’s door is opened while the
smart key is in the vehicle with the
engine start/stop button in ACC or the
smart key is in the smart key holder with
the engine start/stop button in OFF, the
key reminder warning chime will sound.
The chime sounds until the smart key is
removed from the smart key holder or the
driver’s door is closed.LDWS
LDWS FAIL