charging Hyundai Genesis 2016 Owner's Manual
[x] Cancel search | Manufacturer: HYUNDAI, Model Year: 2016, Model line: Genesis, Model: Hyundai Genesis 2016Pages: 503, PDF Size: 12.94 MB
Page 18 of 503
F18
Engine compartment .............................................7-3
Maintenance services ...........................................7-5
Owner's responsibility ...................................................7-5
Owner maintenance precautions ..................................7-5
Owner maintenance ...............................................7-6
Owner maintenance schedule ........................................7-7
Scheduled maintenance services.........................7-8
Normal maintenance schedule .......................................7-9
Maintenance under severe usage conditions ..........7-22
Explanation of scheduled maintenance
items.......................................................................7\
-24
Engine oil ..............................................................7-27
Checking the engine oil level .......................................7-27
Checking the engine oil and filter ..............................7-28
Engine coolant......................................................7-29
Checking the engine coolant level..............................7-29
Changing engine coolant...............................................7-31
Brake fluid ............................................................7-32
Checking the brake fluid level .....................................7-32
Washer fluid .........................................................7-34
Checking the washer fluid level ..................................7-34
Parking brake .......................................................7-34
Checking the parking brake .........................................7-34
Air cleaner ............................................................7-35
Filter replacement ...........................................................7-35
Climate control air filter .....................................7-36
Filter inspection ...............................................................7-36
Wiper blades .........................................................7-38
Blade inspection ..............................................................7-38
Blade replacement ..........................................................7-38
Battery...................................................................7-40
For best battery service................................................7-41
Battery recharging .........................................................7-42
Reset features .................................................................7-44
Tires and wheels ..................................................7-45
Tire care ........................................................................\
....7-45
Recommended cold tire inflation pressures.............7-46
Check tire inflation pressure........................................7-47
Tire rotation .....................................................................7-4\
8
Wheel alignment and tire balance ..............................7-49
Tire replacement .............................................................7-49
Wheel replacement .........................................................7-50
Tire traction ......................................................................7-\
50
Tire maintenance ............................................................7-51
Tire sidewall labeling ......................................................7-51
Tire terminology and definitions.................................7-55
All season tires ................................................................7-58
Summer tires ....................................................................7-58\
Snow tires ........................................................................\
.7-58
F18
7Maintenance
Page 193 of 503
3-99
Convenient features of your vehicle
3
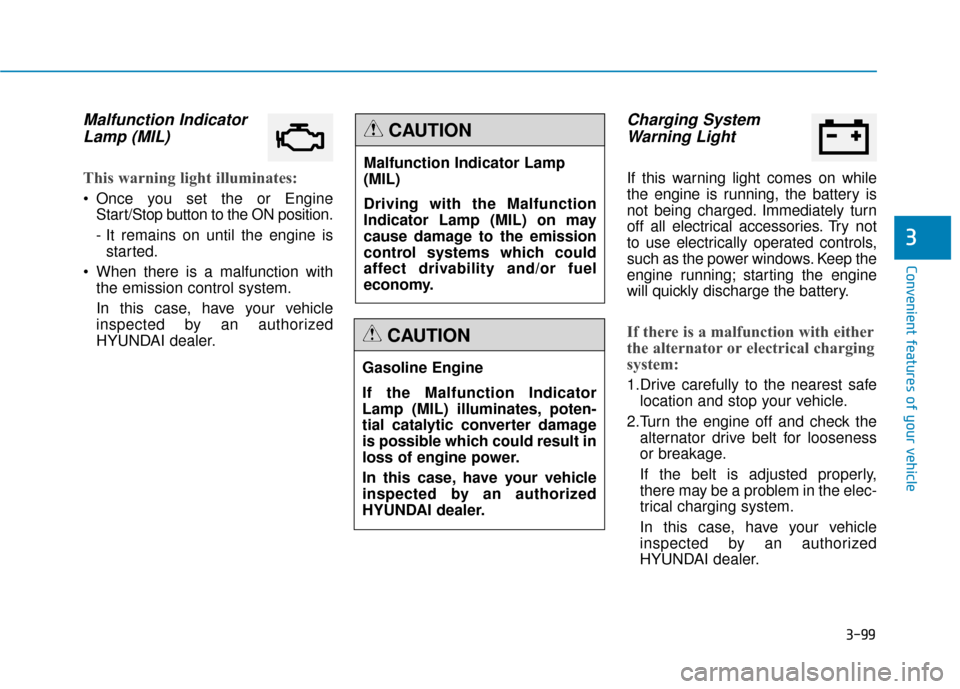
Malfunction IndicatorLamp (MIL)
This warning light illuminates:
Once you set the or Engine
Start/Stop button to the ON position.
- It remains on until the engine isstarted.
When there is a malfunction with the emission control system.
In this case, have your vehicle
inspected by an authorized
HYUNDAI dealer.
Charging SystemWarning Light
If this warning light comes on while
the engine is running, the battery is
not being charged. Immediately turn
off all electrical accessories. Try not
to use electrically operated controls,
such as the power windows. Keep the
engine running; starting the engine
will quickly discharge the battery.
If there is a malfunction with either
the alternator or electrical charging
system:
1.Drive carefully to the nearest safe
location and stop your vehicle.
2.Turn the engine off and check the alternator drive belt for looseness
or breakage.
If the belt is adjusted properly,
there may be a problem in the elec-
trical charging system.
In this case, have your vehicle
inspected by an authorized
HYUNDAI dealer.
Malfunction Indicator Lamp
(MIL)
Driving with the Malfunction
Indicator Lamp (MIL) on may
cause damage to the emission
control systems which could
affect drivability and/or fuel
economy.
CAUTION
Gasoline Engine
If the Malfunction Indicator
Lamp (MIL) illuminates, poten-
tial catalytic converter damage
is possible which could result in
loss of engine power.
In this case, have your vehicle
inspected by an authorized
HYUNDAI dealer.
CAUTION
Page 214 of 503
3-120
Convenient features of your vehicle
If a door is opened with the Engine
Start/Stop button in the ACC position
or the OFF position, the front and
rear lamps stay on for about 20 min-
utes.
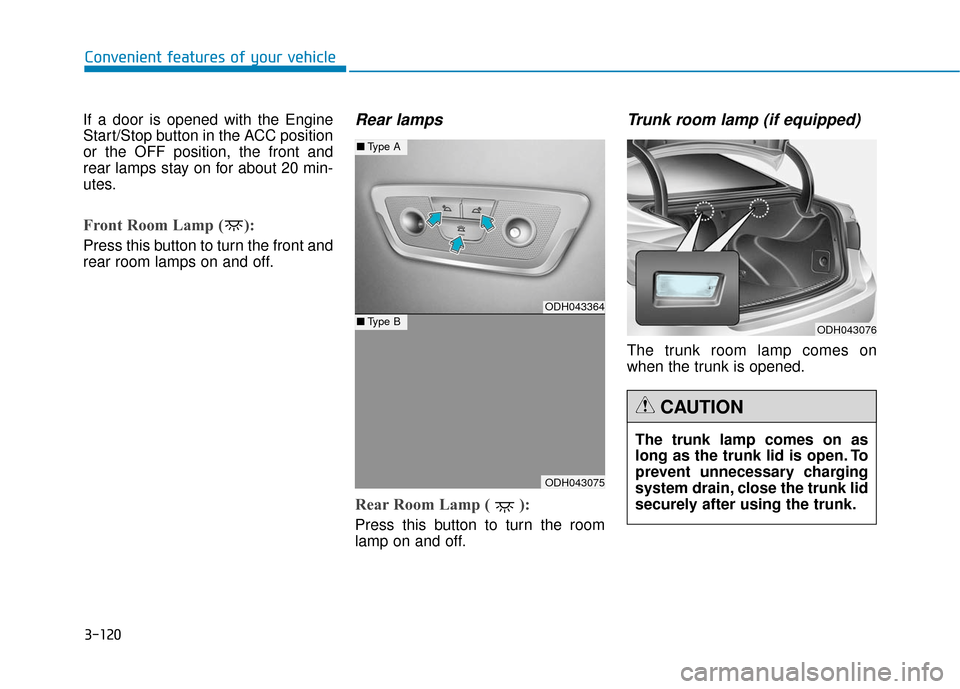
Front Room Lamp ( ):
Press this button to turn the front and
rear room lamps on and off.
Rear lamps
Rear Room Lamp ( ):
Press this button to turn the room
lamp on and off.
Trunk room lamp (if equipped)
The trunk room lamp comes on
when the trunk is opened.
ODH043364
ODH043075
■ Type A
■Type BODH043076
The trunk lamp comes on as
long as the trunk lid is open. To
prevent unnecessary charging
system drain, close the trunk lid
securely after using the trunk.
CAUTION
Page 268 of 503
5-7
Driving your vehicle
5
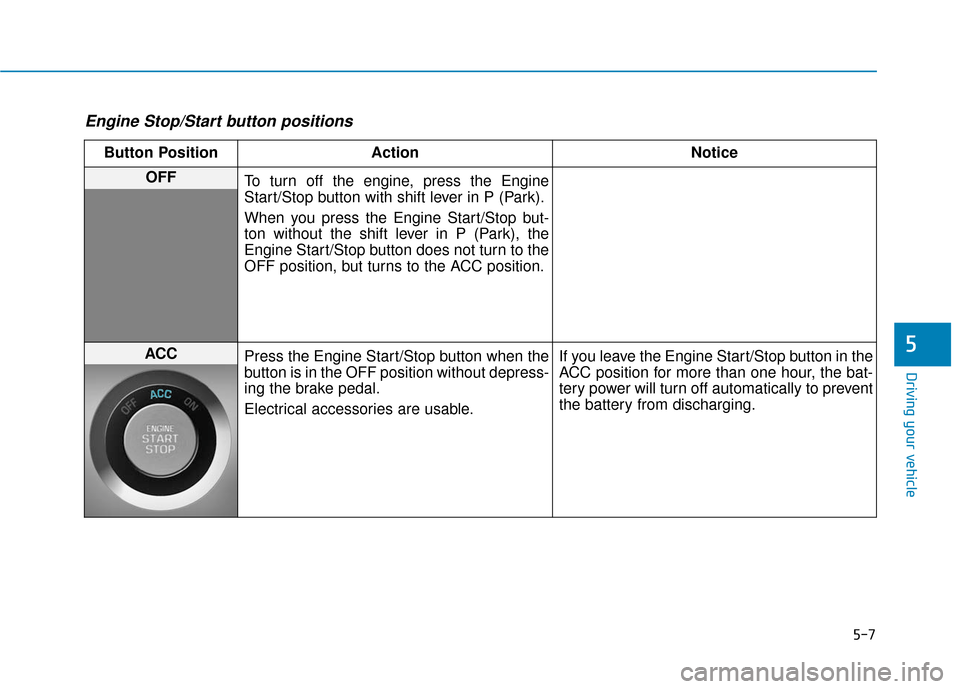
Engine Stop/Start button positions
Button PositionAction Notice
OFF
To turn off the engine, press the Engine
Start/Stop button with shift lever in P (Park).
When you press the Engine Start/Stop but-
ton without the shift lever in P (Park), the
Engine Start/Stop button does not turn to the
OFF position, but turns to the ACC position.
ACC Press the Engine Start/Stop button when the
button is in the OFF position without depress-
ing the brake pedal.
Electrical accessories are usable. If you leave the Engine Start/Stop button in the
ACC position for more than one hour, the bat-
tery power will turn off automatically to prevent
the battery from discharging.
Page 269 of 503
5-8
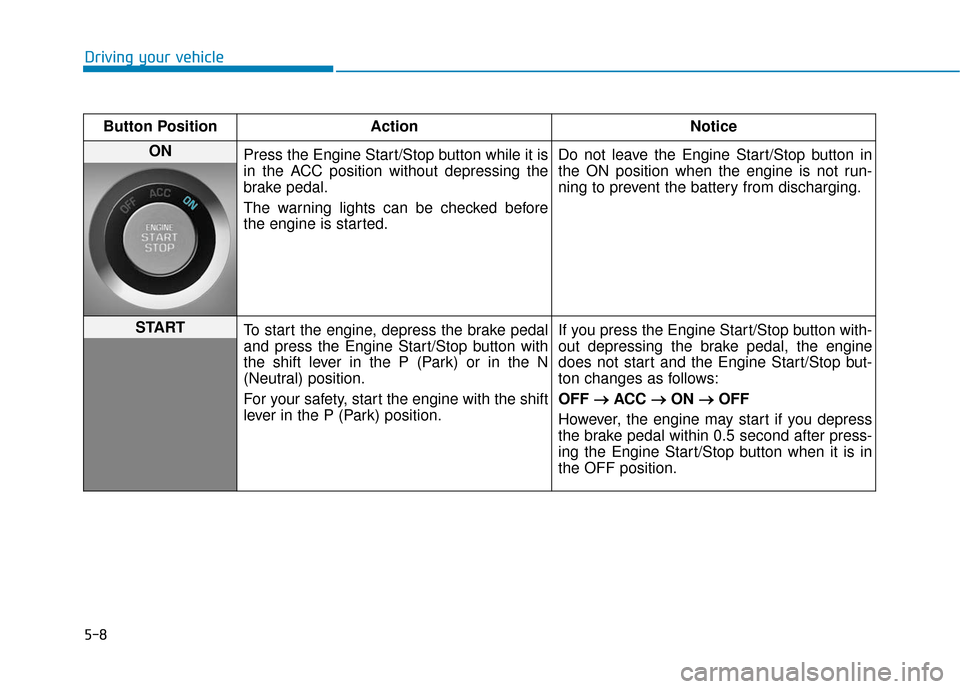
Driving your vehicleButton Position Action Notice
ON Press the Engine Start/Stop button while it is
in the ACC position without depressing the
brake pedal.
The warning lights can be checked before
the engine is started. Do not leave the Engine Start/Stop button in
the ON position when the engine is not run-
ning to prevent the battery from discharging.
START
To start the engine, depress the brake pedal
and press the Engine Start/Stop button with
the shift lever in the P (Park) or in the N
(Neutral) position.
For your safety, start the engine with the shift
lever in the P (Park) position. If you press the Engine Start/Stop button with-
out depressing the brake pedal, the engine
does not start and the Engine Start/Stop but-
ton changes as follows:
OFF
→ →
ACC →
→
ON →
→
OFF
However, the engine may start if you depress
the brake pedal within 0.5 second after press-
ing the Engine Start/Stop button when it is in
the OFF position.
Page 365 of 503
6-6
What to do in an emergency
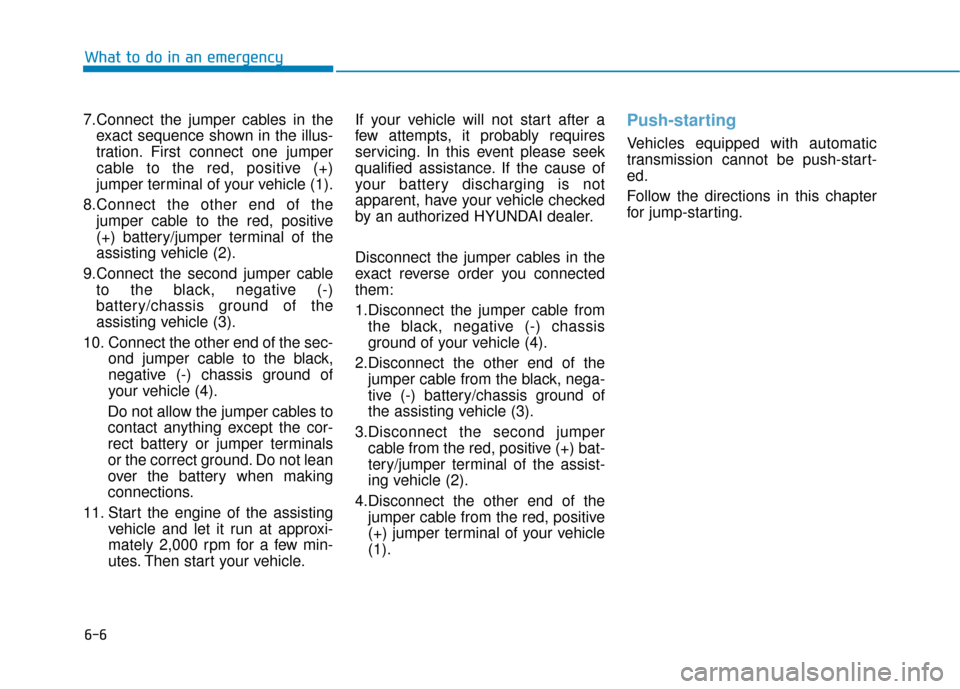
7.Connect the jumper cables in the exact sequence shown in the illus-
tration. First connect one jumper
cable to the red, positive (+)
jumper terminal of your vehicle (1).
8.Connect the other end of the jumper cable to the red, positive
(+) battery/jumper terminal of the
assisting vehicle (2).
9.Connect the second jumper cable to the black, negative (-)
battery/chassis ground of the
assisting vehicle (3).
10. Connect the other end of the sec- ond jumper cable to the black,
negative (-) chassis ground of
your vehicle (4).
Do not allow the jumper cables to
contact anything except the cor-
rect battery or jumper terminals
or the correct ground. Do not lean
over the battery when making
connections.
11. Start the engine of the assisting vehicle and let it run at approxi-
mately 2,000 rpm for a few min-
utes. Then start your vehicle. If your vehicle will not start after a
few attempts, it probably requires
servicing. In this event please seek
qualified assistance. If the cause of
your battery discharging is not
apparent, have your vehicle checked
by an authorized HYUNDAI dealer.
Disconnect the jumper cables in the
exact reverse order you connected
them:
1.Disconnect the jumper cable from
the black, negative (-) chassis
ground of your vehicle (4).
2.Disconnect the other end of the jumper cable from the black, nega-
tive (-) battery/chassis ground of
the assisting vehicle (3).
3.Disconnect the second jumper cable from the red, positive (+) bat-
tery/jumper terminal of the assist-
ing vehicle (2).
4.Disconnect the other end of the jumper cable from the red, positive
(+) jumper terminal of your vehicle
(1).
Push-starting
Vehicles equipped with automatic
transmission cannot be push-start-
ed.
Follow the directions in this chapter
for jump-starting.
Page 385 of 503
7
Maintenance
7
Maintenance
Engine compartment .............................................7-3
Maintenance services ...........................................7-5
Owner's responsibility ......................................................7-5
Owner maintenance precautions ..................................7-5
Owner maintenance ...............................................7-6
Owner maintenance schedule ........................................7-7
Scheduled maintenance services.........................7-8
Normal maintenance schedule .......................................7-9
Maintenance under severe usage conditions ..........7-22
Explanation of scheduled maintenance
items.......................................................................7\
-24
Engine oil ..............................................................7-27
Checking the engine oil level .......................................7-27
Checking the engine oil and filter ..............................7-28
Engine coolant......................................................7-29
Checking the engine coolant level..............................7-29
Changing engine coolant...............................................7-31
Brake fluid ............................................................7-32
Checking the brake fluid level .....................................7-32
Washer fluid .........................................................7-34
Checking the washer fluid level ..................................7-34
Parking brake .......................................................7-34
Checking the parking brake .........................................7-34
Air cleaner ............................................................7-35
Filter replacement ...........................................................7-35
Climate control air filter .....................................7-36
Filter inspection ...............................................................7-36
Wiper blades .........................................................7-38
Blade inspection ..............................................................7-38
Blade replacement ..........................................................7-38
Battery...................................................................7-40
For best battery service................................................7-41
Battery recharging .........................................................7-42
Reset features .................................................................7-44
Tires and wheels ..................................................7-45
Tire care ........................................................................\
....7-45
Recommended cold tire inflation pressures.............7-46
Check tire inflation pressure........................................7-47
Tire rotation .....................................................................7-4\
8
Wheel alignment and tire balance ..............................7-49
Tire replacement .............................................................7-49
Wheel replacement .........................................................7-50
Tire traction ......................................................................7-\
50
Tire maintenance ............................................................7-51
Tire sidewall labeling ......................................................7-51
Tire terminology and definitions.................................7-55
All season tires ................................................................7-58
7
Page 426 of 503
7-42
Maintenance
Keep the battery securely mount- ed.
Keep the battery top clean and dry.
Keep the terminals and connec- tions clean, tight, and coated with
petroleum jelly or terminal grease.
Rinse any spilled acid from the bat- tery immediately with a solution of
water and baking soda.
Battery recharging
By battery charger
Your vehicle has a maintenance-free,
calcium-based battery.
If the battery becomes dischargedin a short time (because, for exam-
ple, the headlights or interior lights
were left on while the vehicle was
not in use), recharge it by slow
charging (trickle) for 10 hours.
If the battery gradually discharges because of high electric load while
the vehicle is being used, recharge
it at 20-30A for two hours. AGM battery
Absorbent Glass Matt (AGM)
batteries are maintenance-
free and we recommend that
the AGM battery be serviced
by an authorized HYUNDAI
dealer. For charging your
AGM battery, use only fully
automatic battery chargers
that are specially developed
for AGM batteries.
When replacing the AGM bat-
tery, we recommend that you
use parts for replacement
from an authorized HYUNDAI
dealer.
Do not open or remove the
cap on top of the battery. This
may cause leaks of internal
electrolyte that could result in
severe injury.
CAUTION
Page 427 of 503
7-43
7
Maintenance
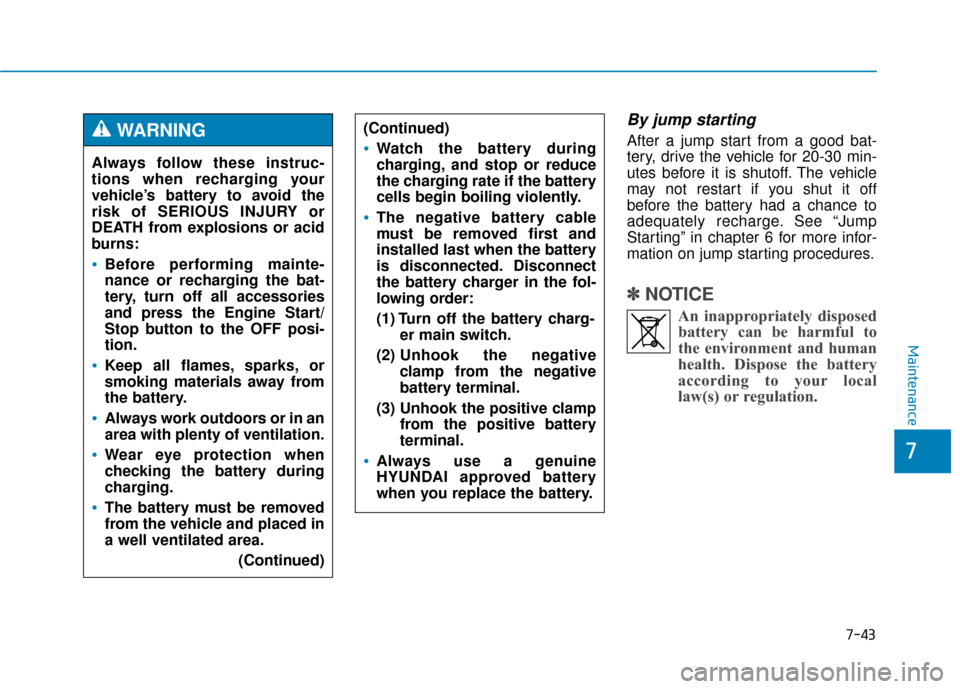
By jump starting
After a jump start from a good bat-
tery, drive the vehicle for 20-30 min-
utes before it is shutoff. The vehicle
may not restart if you shut it off
before the battery had a chance to
adequately recharge. See “Jump
Starting” in chapter 6 for more infor-
mation on jump starting procedures.
✽ ✽NOTICE
An inappropriately disposed
battery can be harmful to
the environment and human
health. Dispose the battery
according to your local
law(s) or regulation.
Always follow these instruc-
tions when recharging your
vehicle’s battery to avoid the
risk of SERIOUS INJURY or
DEATH from explosions or acid
burns:
Before performing mainte-
nance or recharging the bat-
tery, turn off all accessories
and press the Engine Start/
Stop button to the OFF posi-
tion.
Keep all flames, sparks, or
smoking materials away from
the battery.
Always work outdoors or in an
area with plenty of ventilation.
Wear eye protection when
checking the battery during
charging.
The battery must be removed
from the vehicle and placed in
a well ventilated area.
(Continued)
WARNING (Continued)
Watch the battery during
charging, and stop or reduce
the charging rate if the battery
cells begin boiling violently.
The negative battery cable
must be removed first and
installed last when the battery
is disconnected. Disconnect
the battery charger in the fol-
lowing order:
(1) Turn off the battery charg-er main switch.
(2) Unhook the negative
clamp from the negative
battery terminal.
(3) Unhook the positive clamp from the positive battery
terminal.
Always use a genuine
HYUNDAI approved battery
when you replace the battery.