buttons Hyundai Genesis Coupe 2011 Owner's Manual
[x] Cancel search | Manufacturer: HYUNDAI, Model Year: 2011, Model line: Genesis Coupe, Model: Hyundai Genesis Coupe 2011Pages: 343, PDF Size: 34.28 MB
Page 73 of 343
45
Features of your vehicle
D040000ABK
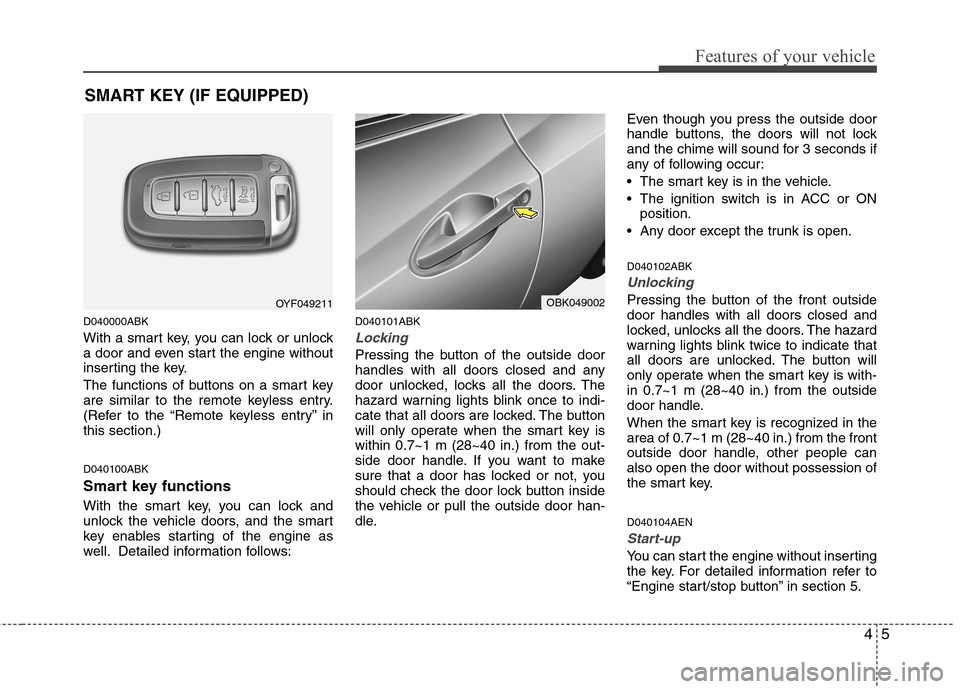
With a smart key, you can lock or unlock
a door and even start the engine without
inserting the key.
The functions of buttons on a smart key
are similar to the remote keyless entry.
(Refer to the “Remote keyless entry” inthis section.) D040100ABK
Smart key functions
With the smart key, you can lock and
unlock the vehicle doors, and the smart
key enables starting of the engine as
well. Detailed information follows:D040101ABK
Locking
Pressing the button of the outside door
handles with all doors closed and any
door unlocked, locks all the doors. The
hazard warning lights blink once to indi-
cate that all doors are locked. The button
will only operate when the smart key iswithin 0.7~1 m (28~40 in.) from the out-
side door handle. If you want to make
sure that a door has locked or not, you
should check the door lock button inside
the vehicle or pull the outside door han-
dle.Even though you press the outside door
handle buttons, the doors will not lock
and the chime will sound for 3 seconds if
any of following occur:
The smart key is in the vehicle.
The ignition switch is in ACC or ON
position.
Any door except the trunk is open. D040102ABK
Unlocking
Pressing the button of the front outside door handles with all doors closed and
locked, unlocks all the doors. The hazard
warning lights blink twice to indicate that
all doors are unlocked. The button will
only operate when the smart key is with-in 0.7~1 m (28~40 in.) from the outside
door handle.
When the smart key is recognized in the area of 0.7~1 m (28~40 in.) from the front
outside door handle, other people canalso open the door without possession of
the smart key. D040104AEN
Start-up
You can start the engine without inserting
the key. For detailed information refer to
“Engine start/stop button” in section 5.
SMART KEY (IF EQUIPPED)
OYF049211OBK049002
Page 147 of 343
479
Features of your vehicle
D240200ABH
Manual heating and air condition- ing The heating and cooling system can be
controlled manually by pushing buttons
other than the AUTO button. In this case,
the system works sequentially according
to the order of buttons selected.
When pressing any button except the
AUTO button while using automatic oper-ation, the functions not selected will be
controlled automatically.
1. Start the engine.
2. Set the mode to the desired position.For improving the effectiveness of heating and cooling;- Heating: - Cooling:
3. Set the temperature control to the desired position.
4. Set the air intake control to the outside (fresh) air position.
5. Set the fan speed control to the desired speed.
6. If air conditioning is desired, turn the air conditioning system on.
Press the AUTO button in order to con-
vert to full automatic control of the sys-tem. D240201ABH
Mode selection
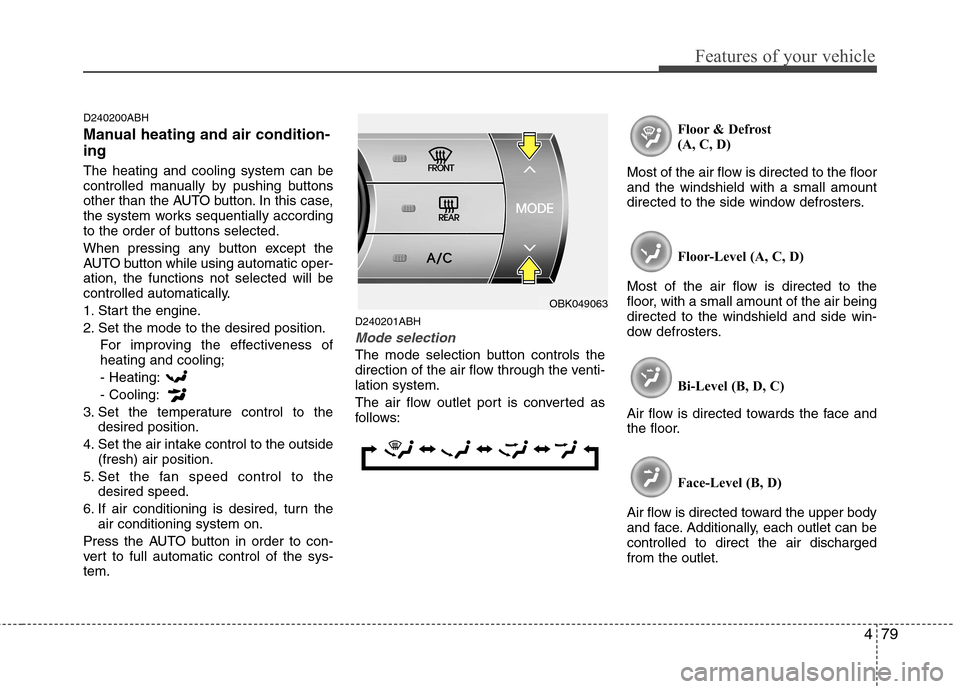
The mode selection button controls the
direction of the air flow through the venti-lation system.
The air flow outlet port is converted as
follows: Floor & Defrost
(A, C, D)
Most of the air flow is directed to the floorand the windshield with a small amount
directed to the side window defrosters.
Floor-Level (A, C, D)
Most of the air flow is directed to the
floor, with a small amount of the air beingdirected to the windshield and side win-
dow defrosters.
Bi-Level (B, D, C)
Air flow is directed towards the face and
the floor.
Face-Level (B, D)
Air flow is directed toward the upper body
and face. Additionally, each outlet can becontrolled to direct the air dischargedfrom the outlet.
OBK049063
Page 166 of 343
Features of your vehicle
98
4
D300200AEN
Steering wheel audio controls (if equipped)
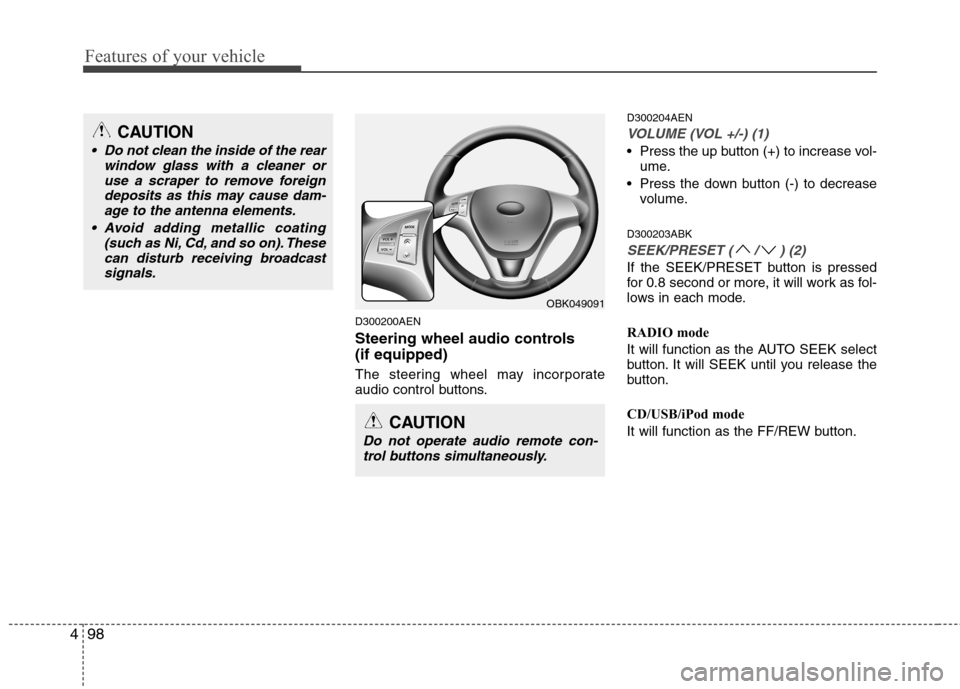
The steering wheel may incorporate
audio control buttons. D300204AEN
VOLUME (VOL +/-) (1)
Press the up button (+) to increase vol-
ume.
Press the down button (-) to decrease volume.
D300203ABK
SEEK/PRESET ( / ) (2)
If the SEEK/PRESET button is pressed
for 0.8 second or more, it will work as fol-
lows in each mode.
RADIO mode
It will function as the AUTO SEEK select
button. It will SEEK until you release the
button.
CD/USB/iPod mode
It will function as the FF/REW button.
OBK049091
CAUTION
Do not operate audio remote con- trol buttons simultaneously.
CAUTION
• Do not clean the inside of the rear window glass with a cleaner or
use a scraper to remove foreigndeposits as this may cause dam-age to the antenna elements.
Avoid adding metallic coating (such as Ni, Cd, and so on). Thesecan disturb receiving broadcastsignals.
Page 167 of 343
499
Features of your vehicle
If the SEEK/PRESET button is pressed
for less than 0.8 second, it will work as
follows in each mode.
RADIO mode
It will function as the PRESET STATION
select buttons.
CD/USB/iPod mode
It will function as the TRACK UP/DOWN
button.
Detailed information for audio control
buttons is included in the following pagesin this section.
MODE (3)
Press the MODE button to select Fadio, CD (Compact Disc).D300800AEN
How vehicle audio works
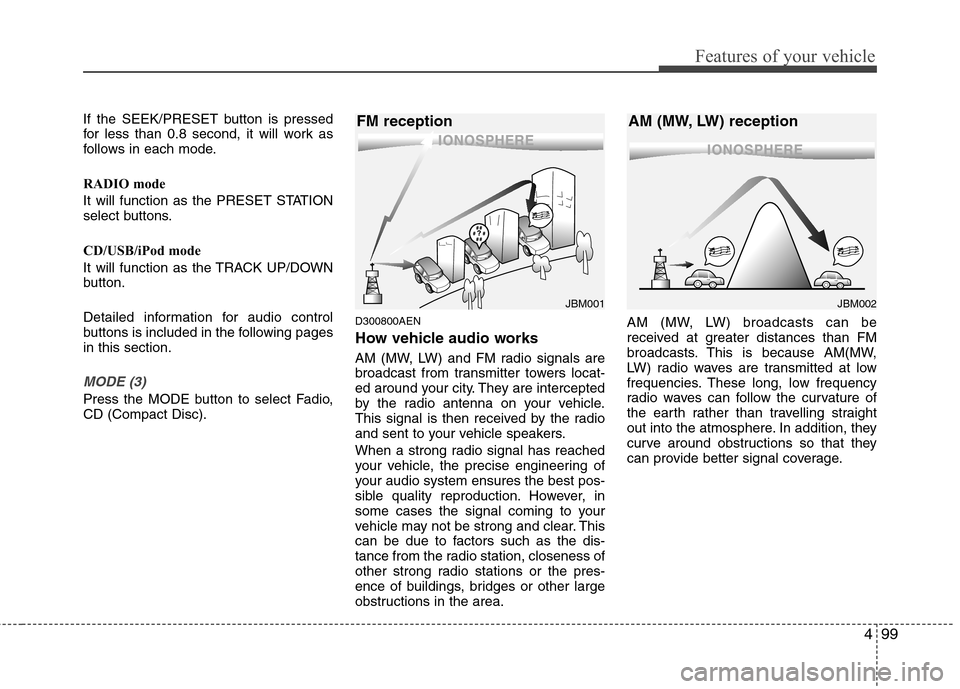
AM (MW, LW) and FM radio signals are
broadcast from transmitter towers locat-
ed around your city. They are intercepted
by the radio antenna on your vehicle.
This signal is then received by the radio
and sent to your vehicle speakers.
When a strong radio signal has reached
your vehicle, the precise engineering of
your audio system ensures the best pos-
sible quality reproduction. However, in
some cases the signal coming to your
vehicle may not be strong and clear. This
can be due to factors such as the dis-
tance from the radio station, closeness of
other strong radio stations or the pres-
ence of buildings, bridges or other large
obstructions in the area.AM (MW, LW) broadcasts can be
received at greater distances than FM
broadcasts. This is because AM(MW,
LW) radio waves are transmitted at low
frequencies. These long, low frequency
radio waves can follow the curvature of
the earth rather than travelling straight
out into the atmosphere. In addition, they
curve around obstructions so that they
can provide better signal coverage.
JBM002
AM (MW, LW) receptionJBM001
FM reception
Page 170 of 343
Features of your vehicle
102
4
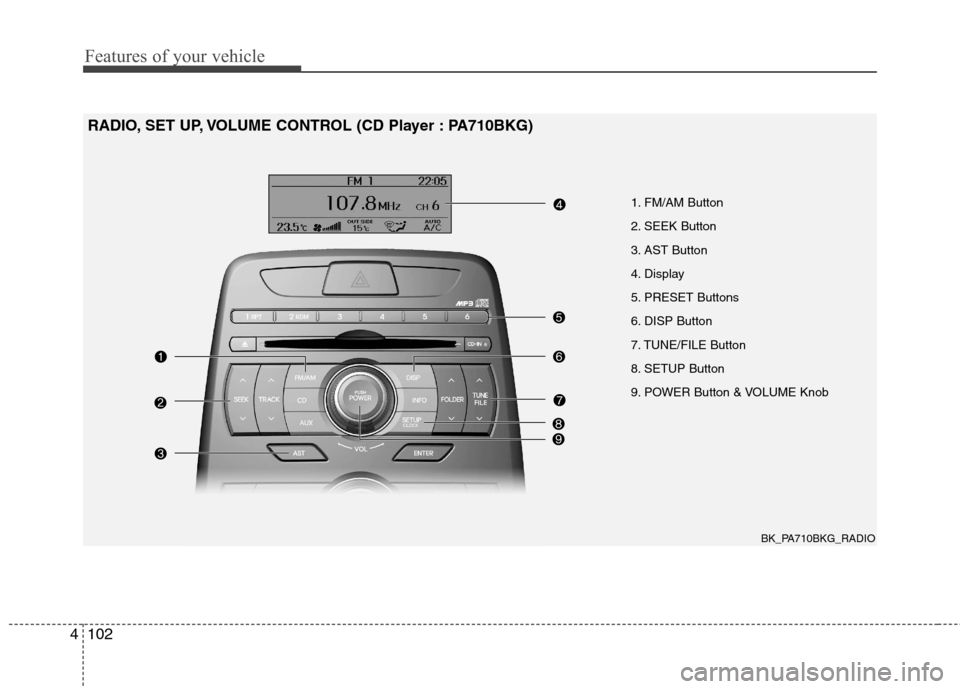
1. FM/AM Button
2. SEEK Button
3. AST Button
4. Display
5. PRESET Buttons
6. DISP Button
7. TUNE/FILE Button
8. SETUP Button
9. POWER Button & VOLUME Knob
RADIO, SET UP, VOLUME CONTROL (CD Player : PA710BKG)
BK_PA710BKG_RADIO
Page 171 of 343
4103
Features of your vehicle
Using RADIO, SET UP, VOLUME
CONTROL
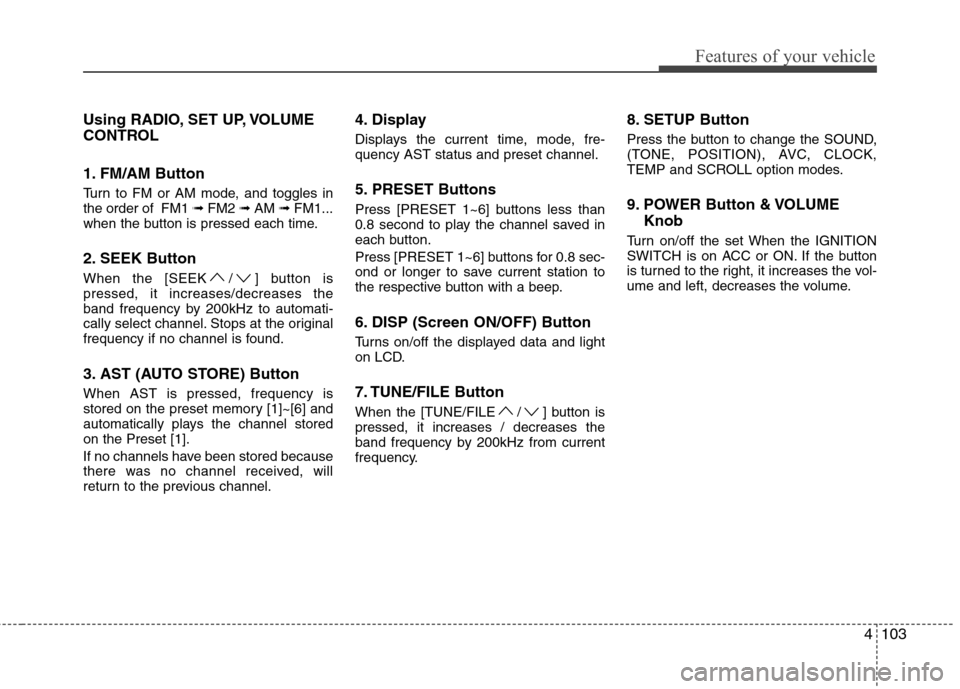
1. FM/AM Button
Turn to FM or AM mode, and toggles in the order of FM1 ➟FM2 ➟AM ➟FM1...
when the button is pressed each time.
2. SEEK Button
When the [SEEK / ] button is pressed, it increases/decreases the
band frequency by 200kHz to automati-
cally select channel. Stops at the original
frequency if no channel is found.
3. AST (AUTO STORE) Button When AST is pressed, frequency is
stored on the preset memory [1]~[6] and
automatically plays the channel storedon the Preset [1].
If no channels have been stored because
there was no channel received, will
return to the previous channel. 4. Display
Displays the current time, mode, fre- quency AST status and preset channel.
5. PRESET Buttons
Press [PRESET 1~6] buttons less than
0.8 second to play the channel saved in
each button.
Press [PRESET 1~6] buttons for 0.8 sec-
ond or longer to save current station to
the respective button with a beep.
6. DISP (Screen ON/OFF) Button
Turns on/off the displayed data and light
on LCD.
7. TUNE/FILE Button
When the [TUNE/FILE / ] button is pressed, it increases / decreases the
band frequency by 200kHz from current
frequency.
8. SETUP Button
Press the button to change the SOUND,
(TONE, POSITION), AVC, CLOCK,
TEMP and SCROLL option modes.
9. POWER Button & VOLUME
Knob
Turn on/off the set When the IGNITION
SWITCH is on ACC or ON. If the button
is turned to the right, it increases the vol-
ume and left, decreases the volume.
Page 174 of 343
![Hyundai Genesis Coupe 2011 Owners Manual Features of your vehicle
106
4
11. FOLDER Button
When the loaded CD has file folders,
[FOLDER / ] buttons will operate in
the manner described below.
Press [FOLDER ] button to move
child folder of Hyundai Genesis Coupe 2011 Owners Manual Features of your vehicle
106
4
11. FOLDER Button
When the loaded CD has file folders,
[FOLDER / ] buttons will operate in
the manner described below.
Press [FOLDER ] button to move
child folder of](/img/35/14696/w960_14696-173.png)
Features of your vehicle
106
4
11. FOLDER Button
When the loaded CD has file folders,
[FOLDER / ] buttons will operate in
the manner described below.
Press [FOLDER ] button to move
child folder of the current folder and
display the first song in the folder.
Press [ENTER] button to move to the
folder displayed. It will play the first
song in the folder.
Press [FOLDER ] button to move parent folder and display the first song
in the folder. Press [ENTER] button to
move to the folder displayed.
12. TUNE/FILE Button
When loaded CD contains MP3 or WMA
files, [TUNE/FILE / ] buttons will
operate in the manner described below.
Press [TUNE/FILE ] button to select the next song and press [ENTER] but-
ton to play.
Press [TUNE/FILE ] button to select the previous song and press [ENTER]
button to play. 13. INFO Button
Displays the information of the current
CD TRACK in the order of DISC TITLE
➟
DISC ARTIST ß TRACK TITLE ➟
TRACK ARTIST ➟TOTAL TRACK ➟
PLAY SCREEN ➟DISC TITLE... (not dis-
played if the information is not available
on the DISC.)
Page 181 of 343
4113
Features of your vehicle
✽✽NOTICE FOR USING THE
iPod DEVICE
Some iPod models might not support the communication protocol and the
files will not be played.
Supported iPod models:
- iPod Mini
- iPod 4th(Photo) ~ 6th(Classic) gen-
eration
- iPod Nano 1st~4th generation
- iPod Touch 1st~2nd generation
The order of search or playback of songs in the iPod can be different
from the order searched in the audio
system.
If the iPod disabled due to its own malfunction, reset the iPod. (Reset:
Refer to iPod manual)
An iPod may not operate normally on
low battery.
Some iPod devices, such as the
iPhone, can be connected through the
Bluetooth interface. The device must
have audio Bluetooth capability (such
as for stereo headphone Bluetooth).
The device can play, but it will not be
controlled by the audio system.CAUTION IN USING THE
iPod DEVICE
The HYUNDAI iPod Power Cable
is needed in order to operate iPod
with the audio buttons on theaudio system. The USB cable pro- vided by Apple may cause mal-function and should not be used
for HYUNDAI vehicles.
❋
❋ The HYUNDAI iPod Power
Cable may be purchasedthrough your HYUNDAI
Dealership.
When connecting iPod with the iPod Power Cable, insert the con-nector to the multimedia socket completely. If not inserted com-
pletely, communications betweeniPod and audio may be interrupt- ed.
When adjusting the sound effects of the iPod and the audio system,
the sound effects of both devices will overlap and might reduce ordistort the quality of the sound.
(Continued)
(Continued) Deactivate (turn off) the equalizer function of an iPod when adjust-ing the audio system’s volume,and turn off the equalizer of the
audio system when using theequalizer of an iPod.
When the iPod cable is connect- ed, the system can be switched to
AUX mode even without iPoddevice and may cause noise.Disconnect the iPod cable whenyou are not using the iPod device.
When not using iPod with car audio, detach the iPod cable fromiPod. Otherwise, iPod may remain in accessory mode, and may notwork properly.
Page 182 of 343
Features of your vehicle
114
4
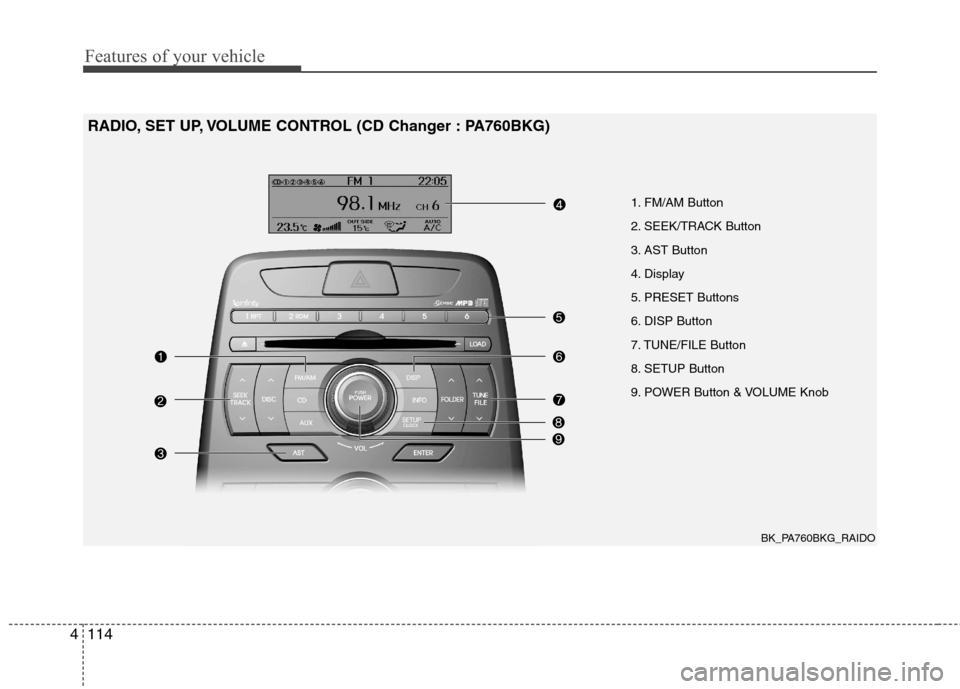
1. FM/AM Button
2. SEEK/TRACK Button
3. AST Button
4. Display
5. PRESET Buttons
6. DISP Button
7. TUNE/FILE Button
8. SETUP Button
9. POWER Button & VOLUME Knob
RADIO, SET UP, VOLUME CONTROL (CD Changer : PA760BKG)
BK_PA760BKG_RAIDO
Page 183 of 343
4115
Features of your vehicle
Using RADIO, SET UP, VOLUME
CONTROL
1. FM/AM Button
Turn to FM or AM mode, and toggles in the order of FM1 ➟FM2 ➟AM ➟FM1...
when the button is pressed each time.
2. SEEK/TRACK Button
When the [SEEK/TRACK / ] button is pressed, it increases/decreases the
band frequency by 200kHz to automati-
cally select channel. Stops at the original
frequency if no channel is found.
3. AST (AUTO STORE) Button When AST is pressed, frequency is
stored on the preset memory [1]~[6] and
automatically plays the channel storedon the Preset [1].
If no channels have been stored because
there was no channel received, will
return to the previous channel. 4. Display
Displays the current time, mode, fre- quency AST status and preset channel.
5. PRESET Buttons
Press [PRESET 1~6] buttons less than
0.8 second to play the channel saved in
each button.
Press [PRESET 1~6] buttons for more
than 0.8 second or longer to save current
station to the respective button with a
beep.
6. DISP (Screen ON/OFF) Button
Turns on/off the displayed data and light
on LCD.
7. TUNE Button
When the [TUNE / ] button is pressed, it increases/decreases the
band frequency by 200kHz from current
frequency.
8. SETUP Button
Press the button to change the SOUND,
(TONE, POSITION), AVC, CLOCK,
TEMP and SCROLL option modes.
9. POWER Button & VOLUME
Knob
Turn on/off the set When the IGNITION
SWITCH is on ACC or ON. If the button
is turned to the right, it increases the vol-
ume and left, decreases the volume.