turn signal Hyundai Genesis Coupe 2015 User Guide
[x] Cancel search | Manufacturer: HYUNDAI, Model Year: 2015, Model line: Genesis Coupe, Model: Hyundai Genesis Coupe 2015Pages: 438, PDF Size: 40.35 MB
Page 167 of 438
483
Features of your vehicle
Daytime running light
(if equipped)
Daytime Running Lights (DRL) can
make it easier for others to see the
front of your vehicle during the day.
DRL can be helpful in many different
driving conditions, and it is especially
helpful after dawn and before sunset.
The DRL system turns OFF when:
1. The multifunction switch is in the
OFF position. (if equipped)
2. The headlights are ON.
3. The turn signal is ON. (the blinking
side of the DRL will turn off)
4. The hazard warning light is ON.
5. The parking brake is applied.
6. Engine stops.
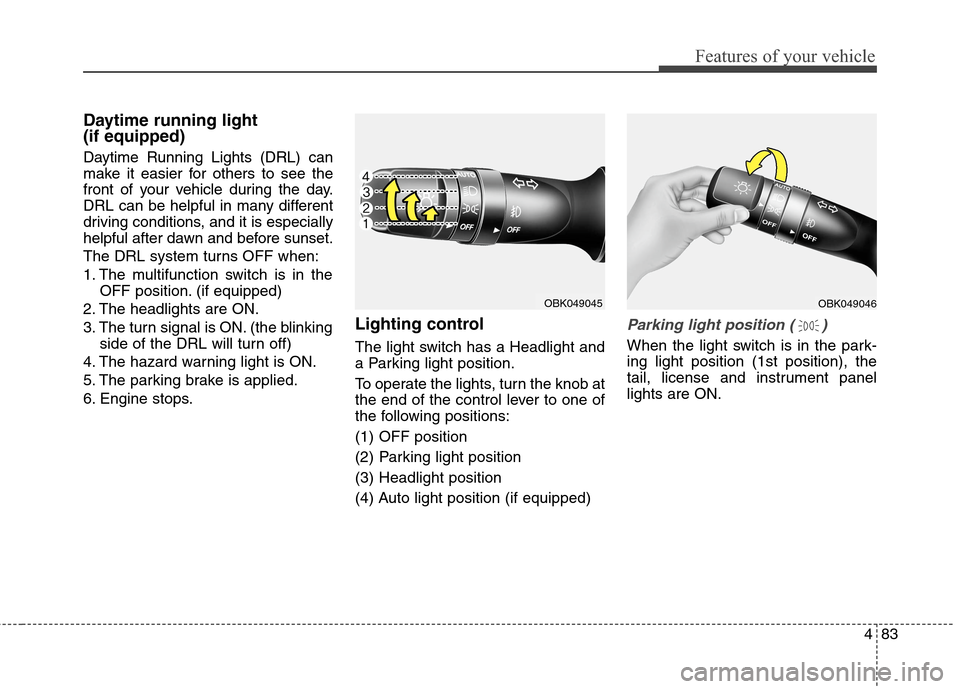
Lighting control
The light switch has a Headlight and
a Parking light position.
To operate the lights, turn the knob at
the end of the control lever to one of
the following positions:
(1) OFF position
(2) Parking light position
(3) Headlight position
(4) Auto light position (if equipped)
Parking light position ( )
When the light switch is in the park-
ing light position (1st position), the
tail, license and instrument panel
lights are ON.
OBK049046OBK049045
Page 169 of 438
485
Features of your vehicle
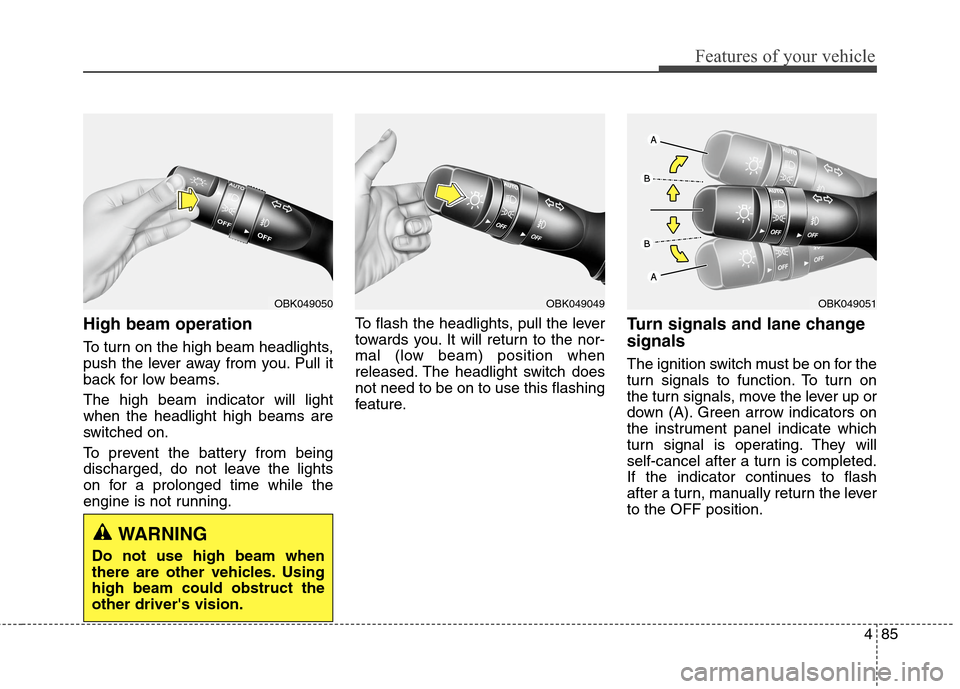
High beam operation
To turn on the high beam headlights,
push the lever away from you. Pull it
back for low beams.
The high beam indicator will light
when the headlight high beams are
switched on.
To prevent the battery from being
discharged, do not leave the lights
on for a prolonged time while the
engine is not running.To flash the headlights, pull the lever
towards you. It will return to the nor-
mal (low beam) position when
released. The headlight switch does
not need to be on to use this flashing
feature.
Turn signals and lane change
signals
The ignition switch must be on for the
turn signals to function. To turn on
the turn signals, move the lever up or
down (A). Green arrow indicators on
the instrument panel indicate which
turn signal is operating. They will
self-cancel after a turn is completed.
If the indicator continues to flash
after a turn, manually return the lever
to the OFF position.
OBK049051OBK049049OBK049050
WARNING
Do not use high beam when
there are other vehicles. Using
high beam could obstruct the
other driver's vision.
Page 170 of 438
Features of your vehicle
86 4
To signal a lane change, move the
turn signal lever slightly and hold it in
position (B). The lever will return to
the OFF position when released.
If an indicator stays on and does not
flash or if it flashes abnormally, one
of the turn signal bulbs may be
burned out and will require replace-
ment.
One-touch triple turn signal
To activate the one-touch triple turn
signal move the turn signal lever
slightly for less than 1.8 seconds and
then release it. The lane change sig-
nals will blink 3 times.
✽ ✽
NOTICE
If an indicator flash is abnormally
quick or slow, a bulb may be burned
out or have a poor electrical connec-
tion in the circuit.
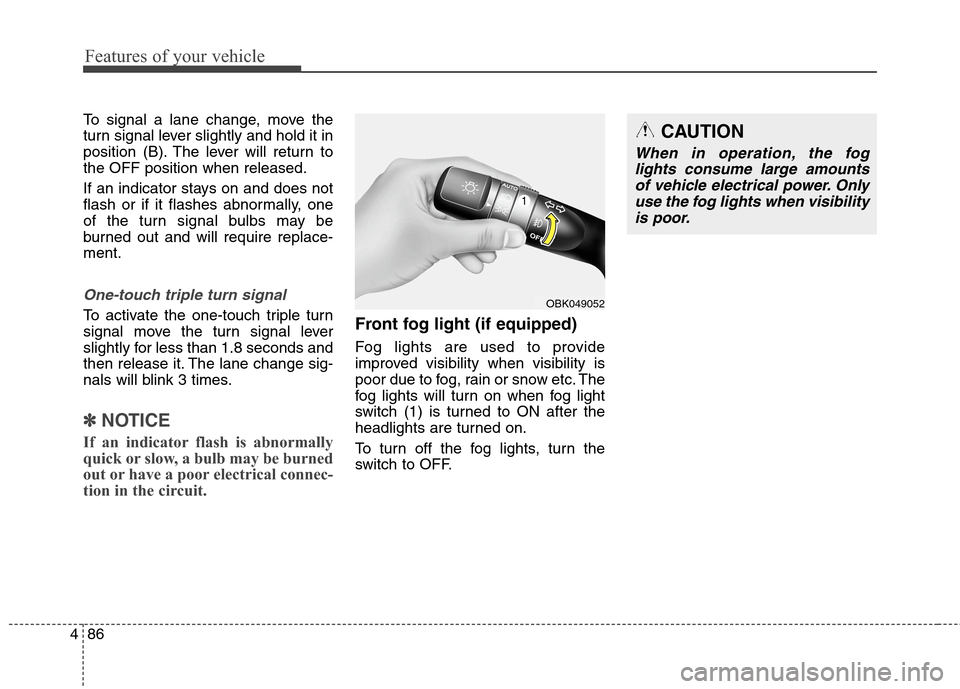
Front fog light (if equipped)
Fog lights are used to provide
improved visibility when visibility is
poor due to fog, rain or snow etc. The
fog lights will turn on when fog light
switch (1) is turned to ON after the
headlights are turned on.
To turn off the fog lights, turn the
switch to OFF.
OBK049052
CAUTION
When in operation, the fog
lights consume large amounts
of vehicle electrical power. Only
use the fog lights when visibility
is poor.
Page 212 of 438
Features of your vehicle
128 4
✽
✽
NOTICE
• If you install an after market HID
head lamp, your vehicle's audio
and electronic device may mal-
function.
• Prevent chemicals such as per-
fume, cosmetic oil, sun cream,
hand cleaner, and air freshener
from contacting the interior parts
because they may cause damage
or discoloration.
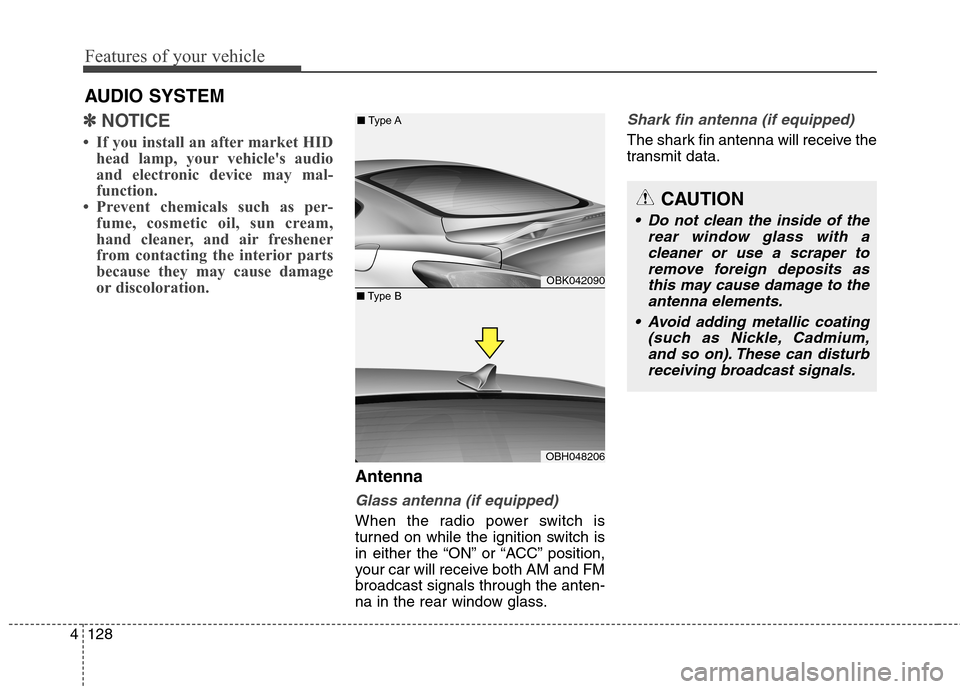
Antenna
Glass antenna (if equipped)
When the radio power switch is
turned on while the ignition switch is
in either the “ON” or “ACC” position,
your car will receive both AM and FM
broadcast signals through the anten-
na in the rear window glass.
Shark fin antenna (if equipped)
The shark fin antenna will receive the
transmit data.
CAUTION
• Do not clean the inside of the
rear window glass with a
cleaner or use a scraper to
remove foreign deposits as
this may cause damage to the
antenna elements.
Avoid adding metallic coating
(such as Nickle, Cadmium,
and so on). These can disturb
receiving broadcast signals.
AUDIO SYSTEM
OBK042090
OBH048206
■Type A
■Type B
Page 310 of 438
What to do in an emergency
2 6
ROAD WARNING
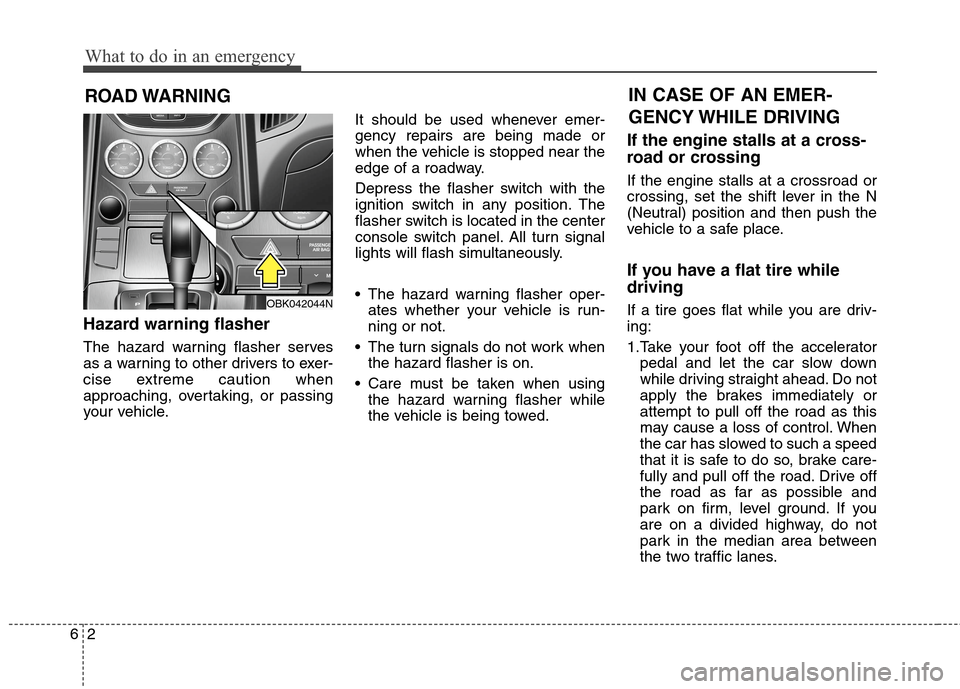
Hazard warning flasher
The hazard warning flasher serves
as a warning to other drivers to exer-
cise extreme caution when
approaching, overtaking, or passing
your vehicle.It should be used whenever emer-
gency repairs are being made or
when the vehicle is stopped near the
edge of a roadway.
Depress the flasher switch with the
ignition switch in any position. The
flasher switch is located in the center
console switch panel. All turn signal
lights will flash simultaneously.
• The hazard warning flasher oper-
ates whether your vehicle is run-
ning or not.
The turn signals do not work when
the hazard flasher is on.
Care must be taken when using
the hazard warning flasher while
the vehicle is being towed.
If the engine stalls at a cross-
road or crossing
If the engine stalls at a crossroad or
crossing, set the shift lever in the N
(Neutral) position and then push the
vehicle to a safe place.
If you have a flat tire while
driving
If a tire goes flat while you are driv-
ing:
1.Take your foot off the accelerator
pedal and let the car slow down
while driving straight ahead. Do not
apply the brakes immediately or
attempt to pull off the road as this
may cause a loss of control. When
the car has slowed to such a speed
that it is safe to do so, brake care-
fully and pull off the road. Drive off
the road as far as possible and
park on firm, level ground. If you
are on a divided highway, do not
park in the median area between
the two traffic lanes.
IN CASE OF AN EMER-
GENCY WHILE DRIVING
OBK042044N
Page 334 of 438

Light bulbs . . . . . . . . . . . . . . . . . . . . . . . . . . . . . . . . 7-66
parking light, turn signal light,
sidemarker light, front fog light bulb replacement . .
7-67
. . . . . . . . . 7-72
. . . . . . . . . . . . . 7-74
. . . . . . . . . . . . 7-74
. . . . . . . . . . . . . 7-74
7-75
Appearance care. . . . . . . . . . . . . . . . . . . . . . . . . . . . 7-76
. . . . . . . . . . . . . . . . . . . . . . . . . . . . . . . . . 7-76
. . . . . . . . . . . . . . . . . . . . . . . . . . . . . . . . . 7-82
Emission control system . . . . . . . . . . . . . . . . . . . . . 7-83
California perchlorate notice . . . . . . . . . . . . . . . . . 7-86
7
Maintenance
Page 338 of 438
Maintenance
6 7
While operating your vehicle:
Note any changes in the sound of
the exhaust or any smell of
exhaust fumes in the vehicle.
Check for vibrations in the steering
wheel. Notice any increased steer-
ing effort or looseness in the steer-
ing wheel, or change in its straight-
ahead position.
Notice if your vehicle constantly
turns slightly or “pulls” to one side
when traveling on smooth, level
road.
When stopping, listen and check
for unusual sounds, pulling to one
side, increased brake pedal travel
or “hard-to-push” brake pedal.
If any slipping or changes in the
operation of your transmission
occurs, check the transmission
fluid level.
Check automatic transmission P
(Park) function.
Check parking brake.
Check for fluid leaks under your
vehicle (water dripping from the air
conditioning system during or after
use is normal).
At least monthly:
Check the coolant level in the
engine coolant reservoir.
Check the operation of all exterior
lights, including the stoplights, turn
signals and hazard warning flash-
ers.
Check the inflation pressures of all
tires including the spare.
At least twice a year
(i.e., every Spring and Fall):
Check the radiator, heater and air
conditioning hoses for leaks or
damage.
Check the windshield washer
spray and wiper operation. Clean
the wiper blades with clean cloth
dampened with washer fluid.
Check the headlight alignment.
Check the muffler, exhaust pipes,
shields and clamps.
Check the lap/shoulder belts for
wear and function.
Check for worn tires and loose
wheel lug nuts.
Page 399 of 438

767
Maintenance
Headlight, parking light, turn
signal light, side marker light
and front fog light bulb
replacement
Ty p e A
(1) Front turn signal light /
Position light
(2) Headlight (High) /
DRL (If equipped)
(3) Headlight (Low)
(4) Front fog light
(6) Side marker light
Type B
(1) Front turn signal light /
Position light
(2) Headlight (High)
(3) Headlight (Low)
(4) Front fog light
(5) Day time running light (DRL)
(if equipped)
(6) Side marker light
1.Open the hood.
OBK072052
OBK072053
OBK072054N
OBK072026
Page 402 of 438
Maintenance
70 7
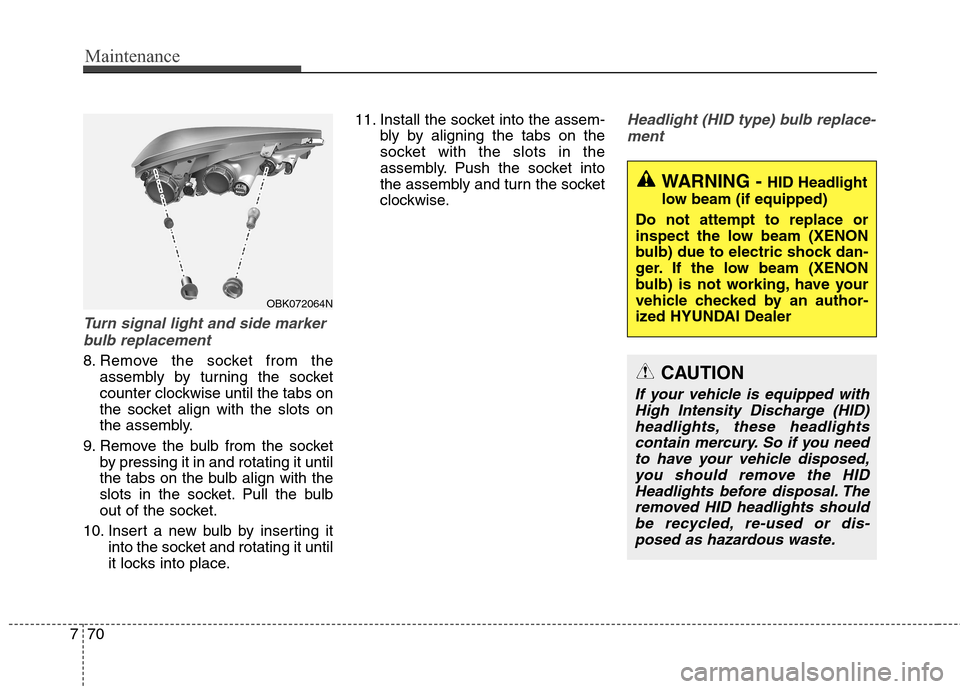
Turn signal light and side marker
bulb replacement
8. Remove the socket from the
assembly by turning the socket
counter clockwise until the tabs on
the socket align with the slots on
the assembly.
9. Remove the bulb from the socket
by pressing it in and rotating it until
the tabs on the bulb align with the
slots in the socket. Pull the bulb
out of the socket.
10. Insert a new bulb by inserting it
into the socket and rotating it until
it locks into place.11. Install the socket into the assem-
bly by aligning the tabs on the
socket with the slots in the
assembly. Push the socket into
the assembly and turn the socket
clockwise.
Headlight (HID type) bulb replace-
ment
WARNING - HID Headlight
low beam (if equipped)
Do not attempt to replace or
inspect the low beam (XENON
bulb) due to electric shock dan-
ger. If the low beam (XENON
bulb) is not working, have your
vehicle checked by an author-
ized HYUNDAI Dealer
OBK072064N
CAUTION
If your vehicle is equipped with
High Intensity Discharge (HID)
headlights, these headlights
contain mercury. So if you need
to have your vehicle disposed,
you should remove the HID
Headlights before disposal. The
removed HID headlights should
be recycled, re-used or dis-
posed as hazardous waste.
Page 404 of 438

Maintenance
72 7
Rear combination light bulb
replacement
(1) Back-up light
(2) Rear turn signal light
(3) Stop and tail light
(4) Side marker1. Open the trunk lid.
2. Remove the service cover by
pulling out the service cover.
3. Loosen the assembly retaining
nuts.
4. Remove the rear combination light
assembly from the body of the
vehicle.
OBK072028OBK072029
OBK072061
OBK072062