trunk Hyundai Genesis Coupe 2015 Owner's Manual
[x] Cancel search | Manufacturer: HYUNDAI, Model Year: 2015, Model line: Genesis Coupe, Model: Hyundai Genesis Coupe 2015Pages: 438, PDF Size: 40.35 MB
Page 7 of 438
1
2
3
4
5
6
7
8
I
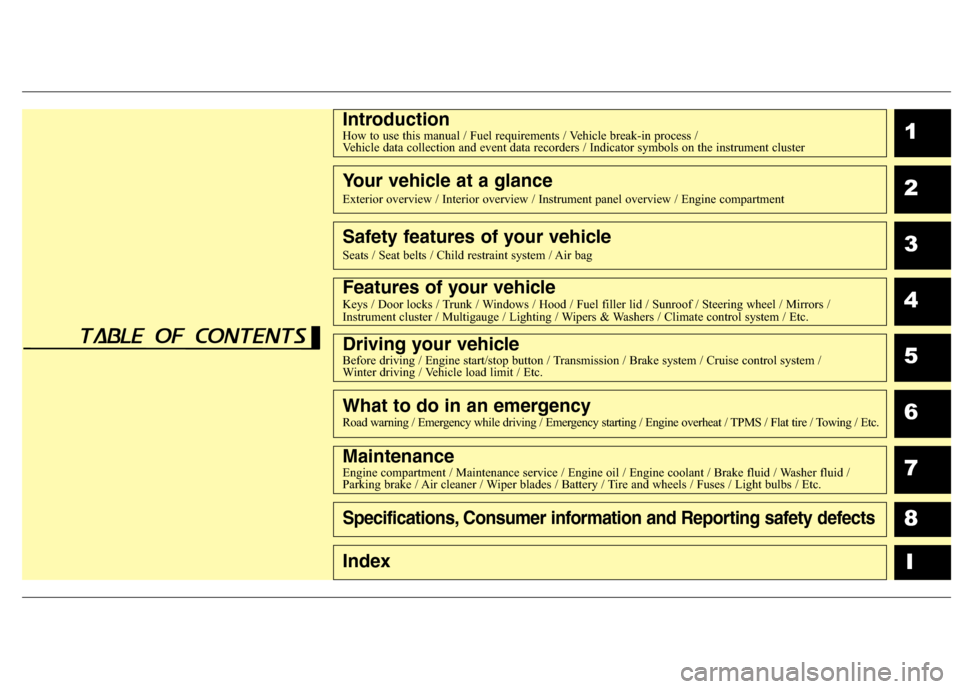
IntroductionHow to use this manual / Fuel requirements / Vehicle break-in process /
Vehicle data collection and event data recorders / Indicator symbols on the instrument cluster
Your vehicle at a glance
Exterior overview / Interior overview / Instrument panel overview / Engine compartment
Safety features of your vehicle
Seats / Seat belts / Child restraint system / Air bag
Features of your vehicleKeys / Door locks / Trunk / Windows / Hood / Fuel filler lid / Sunroof / Steering wheel / Mirrors /
Instrument cluster / Multigauge / Lighting / Wipers & Washers / Climate control system / Etc.
Driving your vehicleBefore driving / Engine start/stop button / Transmission / Brake system / Cruise control system /
Winter driving / Vehicle load limit / Etc.
What to do in an emergencyRoad warning / Emergency while driving / Emergency starting / Engine overheat / TPMS / Flat tire / Towing / Etc.
MaintenanceEngine compartment / Maintenance service / Engine oil / Engine coolant / Brake fluid / Washer fluid /
Parking brake / Air cleaner / Wiper blades / Battery / Tire and wheels / Fuses / Light bulbs / Etc.
Specifications, Consumer information and Reporting safety defects
Index
table of contents
Page 15 of 438
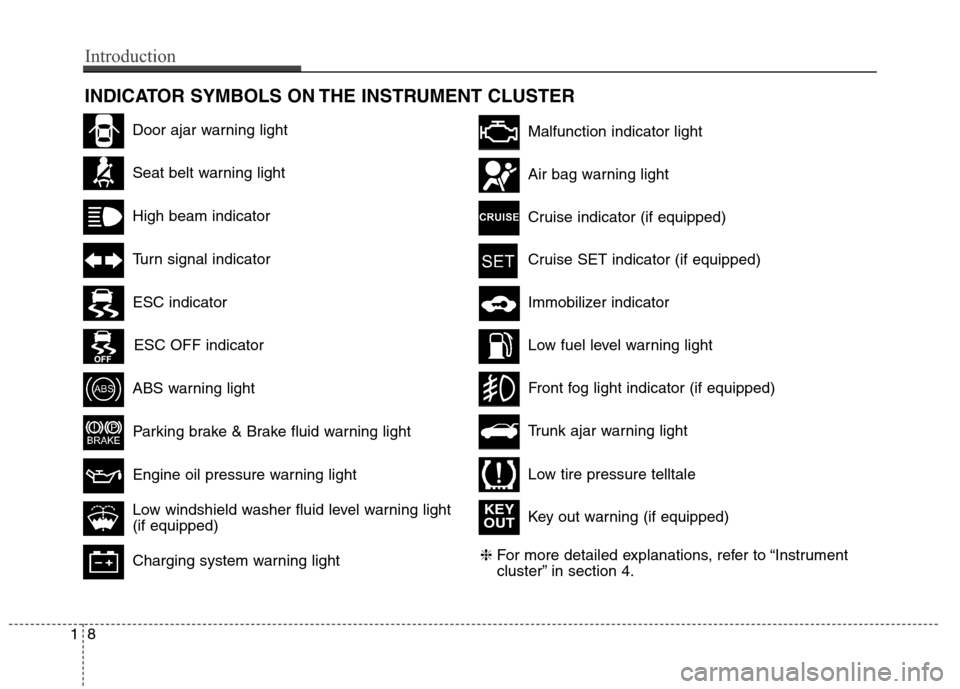
INDICATOR SYMBOLS ON THE INSTRUMENT CLUSTER
Seat belt warning light
High beam indicator
Turn signal indicator
ABS warning light
Parking brake & Brake fluid warning light
Engine oil pressure warning light
Malfunction indicator light
Air bag warning light
Cruise indicator (if equipped)
Cruise SET indicator (if equipped)
Immobilizer indicator
Low fuel level warning light
❈For more detailed explanations, refer to “Instrument
cluster” in section 4.
Charging system warning light
Low windshield washer fluid level warning light
(if equipped)
Door ajar warning light
Trunk ajar warning light
Front fog light indicator (if equipped)
Low tire pressure telltale
ESC indicator
ESC OFF indicator
Key out warning (if equipped)
KEY
OUT
18
Introduction
Page 18 of 438
23
Your vehicle at a glance
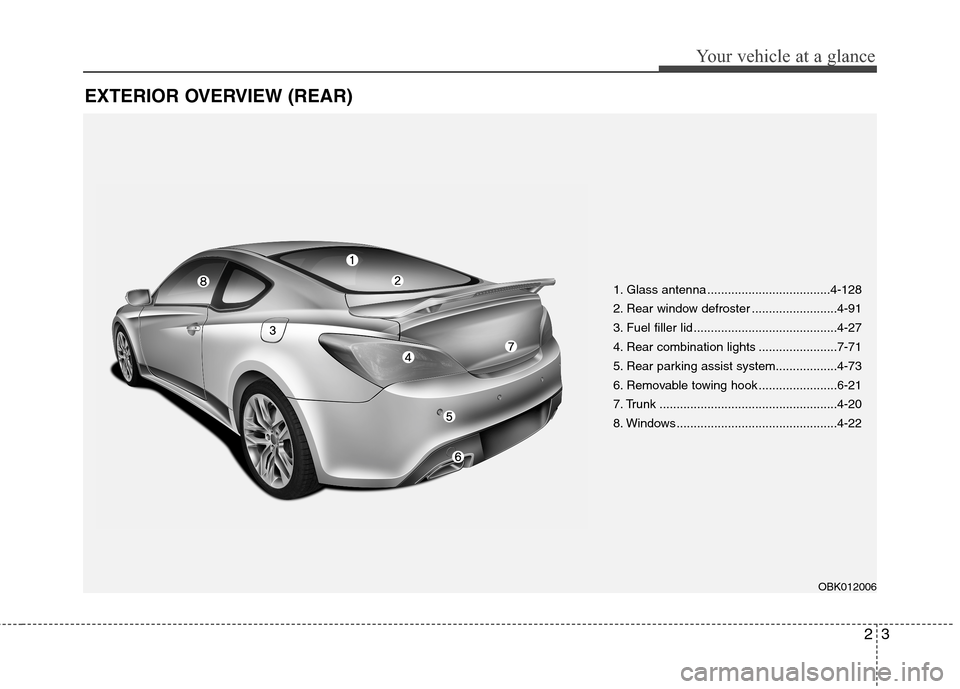
EXTERIOR OVERVIEW (REAR)
1. Glass antenna ....................................4-128
2. Rear window defroster .........................4-91
3. Fuel filler lid ..........................................4-27
4. Rear combination lights .......................7-71
5. Rear parking assist system..................4-73
6. Removable towing hook .......................6-21
7. Trunk ....................................................4-20
8. Windows ...............................................4-22
OBK012006
Page 19 of 438
Your vehicle at a glance
4 2
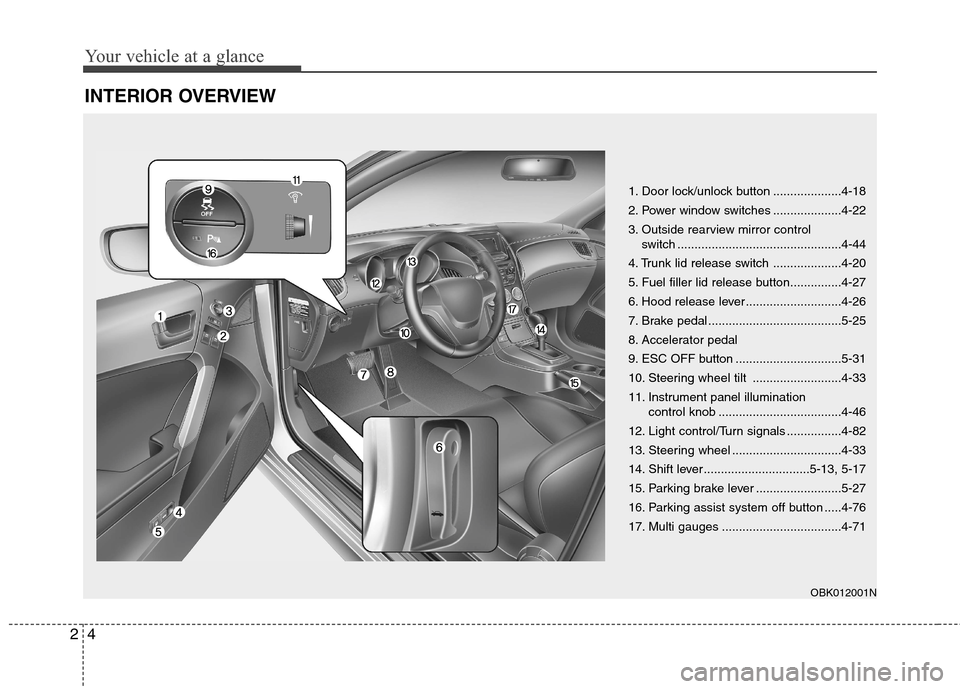
INTERIOR OVERVIEW
1. Door lock/unlock button ....................4-18
2. Power window switches ....................4-22
3. Outside rearview mirror control
switch ................................................4-44
4. Trunk lid release switch ....................4-20
5. Fuel filler lid release button...............4-27
6. Hood release lever ............................4-26
7. Brake pedal .......................................5-25
8. Accelerator pedal
9. ESC OFF button ...............................5-31
10. Steering wheel tilt ..........................4-33
11. Instrument panel illumination
control knob ....................................4-46
12. Light control/Turn signals ................4-82
13. Steering wheel ................................4-33
14. Shift lever ...............................5-13, 5-17
15. Parking brake lever .........................5-27
16. Parking assist system off button .....4-76
17. Multi gauges ...................................4-71
OBK012001N
Page 23 of 438
Safety features of your vehicle
2 3
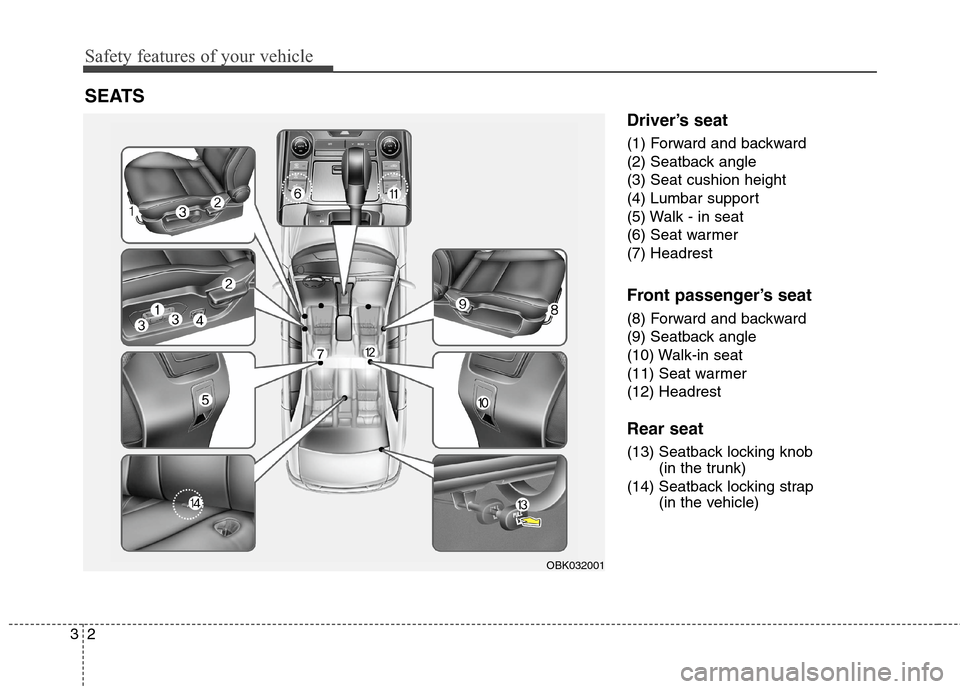
Driver’s seat
(1) Forward and backward
(2) Seatback angle
(3) Seat cushion height
(4) Lumbar support
(5) Walk - in seat
(6) Seat warmer
(7) Headrest
Front passenger’s seat
(8) Forward and backward
(9) Seatback angle
(10) Walk-in seat
(11) Seat warmer
(12) Headrest
Rear seat
(13) Seatback locking knob
(in the trunk)
(14) Seatback locking strap
(in the vehicle)
SEATS
OBK032001
Page 34 of 438
313
Safety features of your vehicle
Rear seat
Folding the rear seat
The rear seatbacks may be folded to
facilitate carrying long items or to
increase the luggage capacity of the
vehicle.
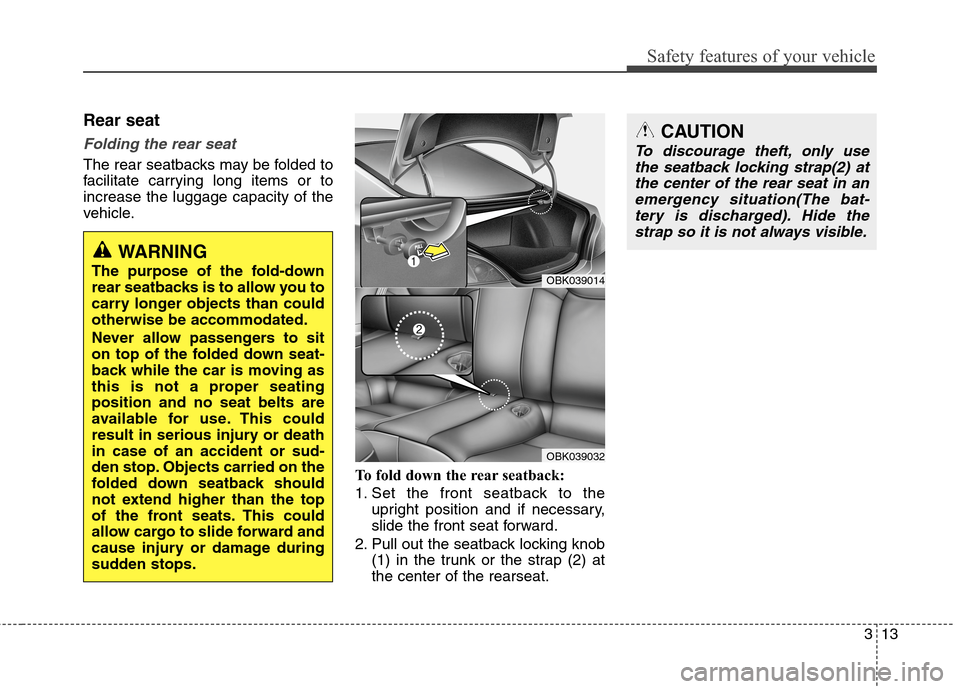
To fold down the rear seatback:
1. Set the front seatback to the
upright position and if necessary,
slide the front seat forward.
2. Pull out the seatback locking knob
(1) in the trunk or the strap (2) at
the center of the rearseat.
WARNING
The purpose of the fold-down
rear seatbacks is to allow you to
carry longer objects than could
otherwise be accommodated.
Never allow passengers to sit
on top of the folded down seat-
back while the car is moving as
this is not a proper seating
position and no seat belts are
available for use. This could
result in serious injury or death
in case of an accident or sud-
den stop. Objects carried on the
folded down seatback should
not extend higher than the top
of the front seats. This could
allow cargo to slide forward and
cause injury or damage during
sudden stops.OBK039014
OBK039032
CAUTION
To discourage theft, only use
the seatback locking strap(2) at
the center of the rear seat in an
emergency situation(The bat-
tery is discharged). Hide the
strap so it is not always visible.
Page 85 of 438
Features of your vehicle
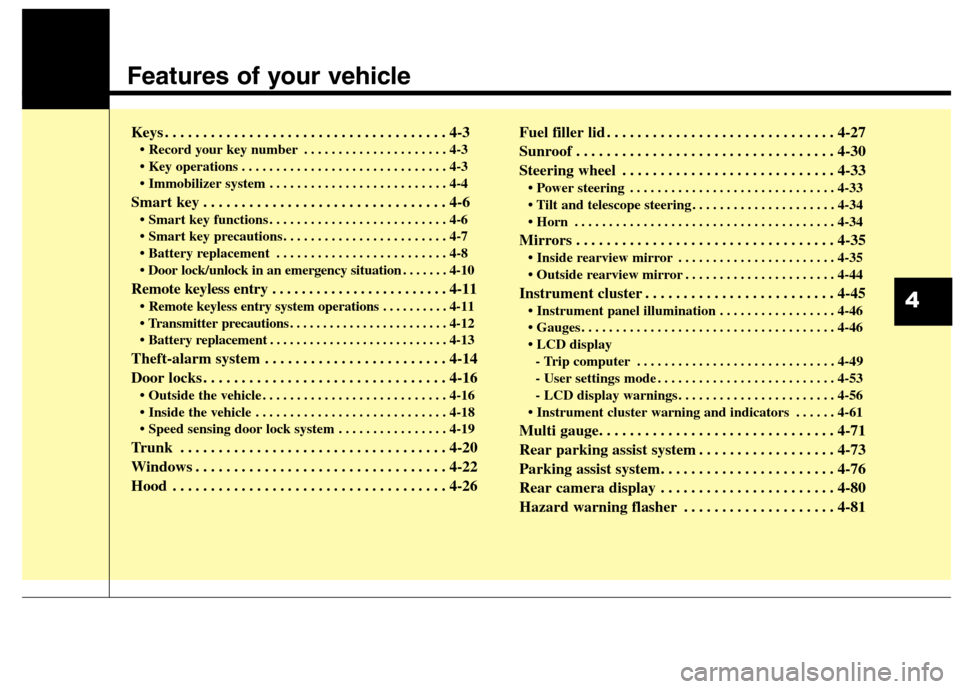
Keys . . . . . . . . . . . . . . . . . . . . . . . . . . . . . . . . . . . . . 4-3
• Record your key number . . . . . . . . . . . . . . . . . . . . . 4-3
. . . . . . . . . . . . . . . . . . . . . . . . . . . . . . 4-3
. . . . . . . . . . . . . . . . . . . . . . . . . . 4-4
Smart key . . . . . . . . . . . . . . . . . . . . . . . . . . . . . . . . 4-6
. . . . . . . . . . . . . . . . . . . . . . . . . . 4-6
. . . . . . . . . . . . . . . . . . . . . . . . 4-7
. . . . . . . . . . . . . . . . . . . . . . . . . 4-8
. . . . . . . 4-10
Remote keyless entry . . . . . . . . . . . . . . . . . . . . . . . . 4-11
. . . . . . . . . . 4-11
. . . . . . . . . . . . . . . . . . . . . . . . 4-12
. . . . . . . . . . . . . . . . . . . . . . . . . . . 4-13
Theft-alarm system . . . . . . . . . . . . . . . . . . . . . . . . 4-14
Door locks . . . . . . . . . . . . . . . . . . . . . . . . . . . . . . . . 4-16
. . . . . . . . . . . . . . . . . . . . . . . . . . . 4-16
. . . . . . . . . . . . . . . . . . . . . . . . . . . . 4-18
. . . . . . . . . . . . . . . . 4-19
Trunk . . . . . . . . . . . . . . . . . . . . . . . . . . . . . . . . . . . 4-20
Windows . . . . . . . . . . . . . . . . . . . . . . . . . . . . . . . . . 4-22
Hood . . . . . . . . . . . . . . . . . . . . . . . . . . . . . . . . . . . . 4-26Fuel filler lid . . . . . . . . . . . . . . . . . . . . . . . . . . . . . . 4-27
Sunroof . . . . . . . . . . . . . . . . . . . . . . . . . . . . . . . . . . 4-30
Steering wheel . . . . . . . . . . . . . . . . . . . . . . . . . . . . 4-33
. . . . . . . . . . . . . . . . . . . . . . . . . . . . . . 4-33
. . . . . . . . . . . . . . . . . . . . . 4-34
. . . . . . . . . . . . . . . . . . . . . . . . . . . . . . . . . . . . . . 4-34
Mirrors . . . . . . . . . . . . . . . . . . . . . . . . . . . . . . . . . . 4-35
. . . . . . . . . . . . . . . . . . . . . . . 4-35
. . . . . . . . . . . . . . . . . . . . . . 4-44
Instrument cluster . . . . . . . . . . . . . . . . . . . . . . . . . 4-45
. . . . . . . . . . . . . . . . . 4-46
. . . . . . . . . . . . . . . . . . . . . . . . . . . . . . . . . . . . . 4-46
- Trip computer . . . . . . . . . . . . . . . . . . . . . . . . . . . . . 4-49
- User settings mode . . . . . . . . . . . . . . . . . . . . . . . . . . 4-53
- LCD display warnings . . . . . . . . . . . . . . . . . . . . . . . 4-56
. . . . . . 4-61
Multi gauge. . . . . . . . . . . . . . . . . . . . . . . . . . . . . . . 4-71
Rear parking assist system . . . . . . . . . . . . . . . . . . 4-73
Parking assist system. . . . . . . . . . . . . . . . . . . . . . . 4-76
Rear camera display . . . . . . . . . . . . . . . . . . . . . . . 4-80
Hazard warning flasher . . . . . . . . . . . . . . . . . . . . 4-81
4
Page 90 of 438
Features of your vehicle
6 4
SMART KEY (IF EQUIPPED)
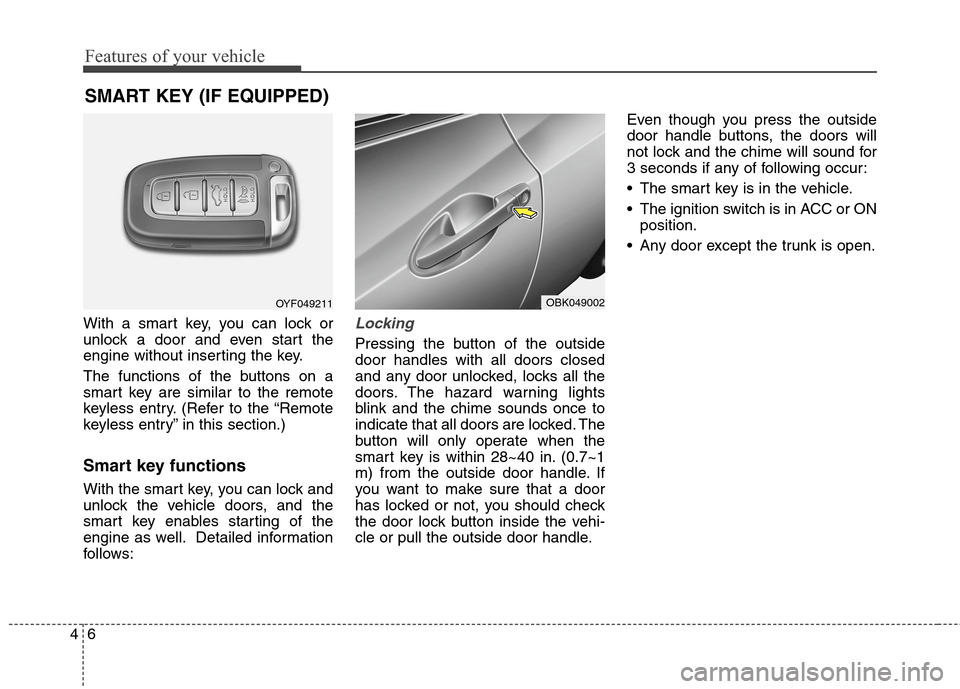
With a smart key, you can lock or
unlock a door and even start the
engine without inserting the key.
The functions of the buttons on a
smart key are similar to the remote
keyless entry. (Refer to the “Remote
keyless entry” in this section.)
Smart key functions
With the smart key, you can lock and
unlock the vehicle doors, and the
smart key enables starting of the
engine as well. Detailed information
follows:
Locking
Pressing the button of the outside
door handles with all doors closed
and any door unlocked, locks all the
doors. The hazard warning lights
blink and the chime sounds once to
indicate that all doors are locked. The
button will only operate when the
smart key is within 28~40 in. (0.7~1
m) from the outside door handle. If
you want to make sure that a door
has locked or not, you should check
the door lock button inside the vehi-
cle or pull the outside door handle.Even though you press the outside
door handle buttons, the doors will
not lock and the chime will sound for
3 seconds if any of following occur:
The smart key is in the vehicle.
The ignition switch is in ACC or ON
position.
Any door except the trunk is open.
OYF049211OBK049002
Page 95 of 438
411
Features of your vehicle
Remote keyless entry system
operations
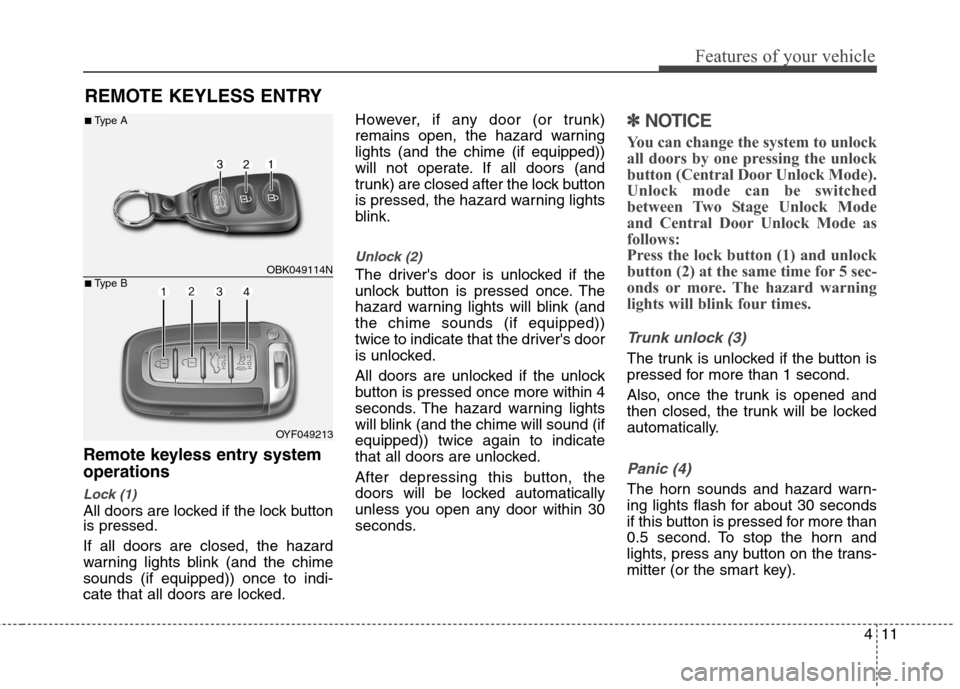
Lock (1)
All doors are locked if the lock button
is pressed.
If all doors are closed, the hazard
warning lights blink (and the chime
sounds (if equipped)) once to indi-
cate that all doors are locked.However, if any door (or trunk)
remains open, the hazard warning
lights (and the chime (if equipped))
will not operate. If all doors (and
trunk) are closed after the lock button
is pressed, the hazard warning lights
blink.
Unlock (2)
The driver's door is unlocked if the
unlock button is pressed once. The
hazard warning lights will blink (and
the chime sounds (if equipped))
twice to indicate that the driver's door
is unlocked.
All doors are unlocked if the unlock
button is pressed once more within 4
seconds. The hazard warning lights
will blink (and the chime will sound (if
equipped)) twice again to indicate
that all doors are unlocked.
After depressing this button, the
doors will be locked automatically
unless you open any door within 30
seconds.
✽ ✽
NOTICE
You can change the system to unlock
all doors by one pressing the unlock
button (Central Door Unlock Mode).
Unlock mode can be switched
between Two Stage Unlock Mode
and Central Door Unlock Mode as
follows:
Press the lock button (1) and unlock
button (2) at the same time for 5 sec-
onds or more. The hazard warning
lights will blink four times.
Trunk unlock (3)
The trunk is unlocked if the button is
pressed for more than 1 second.
Also, once the trunk is opened and
then closed, the trunk will be locked
automatically.
Panic (4)
The horn sounds and hazard warn-
ing lights flash for about 30 seconds
if this button is pressed for more than
0.5 second. To stop the horn and
lights, press any button on the trans-
mitter (or the smart key).
REMOTE KEYLESS ENTRY
OBK049114N
OYF049213
■Type A
■Type B
Page 98 of 438
Features of your vehicle
14 4
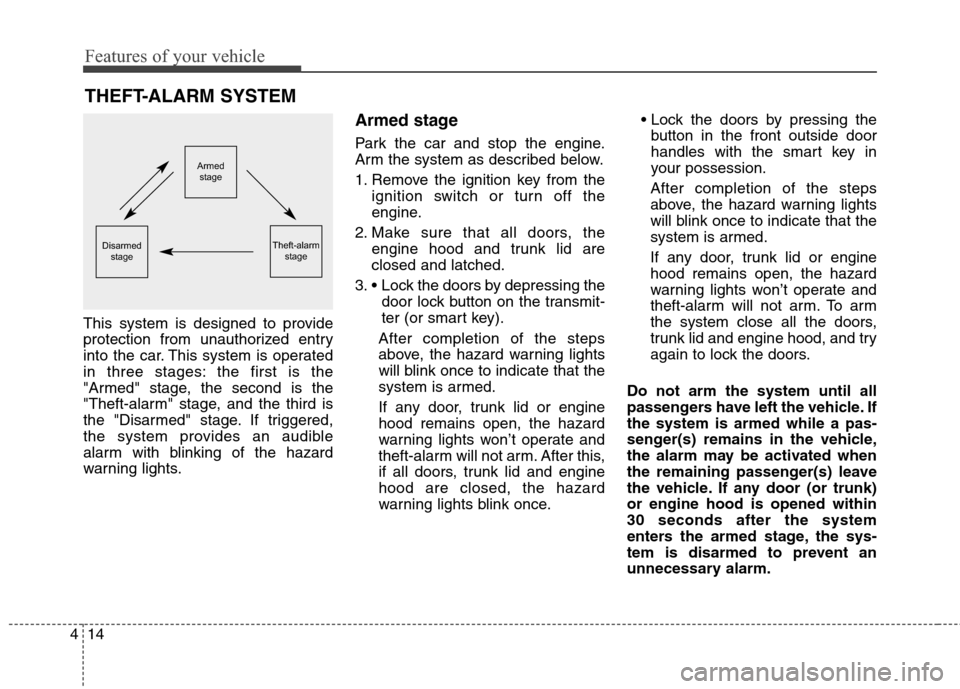
This system is designed to provide
protection from unauthorized entry
into the car. This system is operated
in three stages: the first is the
"Armed" stage, the second is the
"Theft-alarm" stage, and the third is
the "Disarmed" stage. If triggered,
the system provides an audible
alarm with blinking of the hazard
warning lights.
Armed stage
Park the car and stop the engine.
Arm the system as described below.
1. Remove the ignition key from the
ignition switch or turn off the
engine.
2. Make sure that all doors, the
engine hood and trunk lid are
closed and latched.
3.
door lock button on the transmit-
ter (or smart key).
After completion of the steps
above, the hazard warning lights
will blink once to indicate that the
system is armed.
If any door, trunk lid or engine
hood remains open, the hazard
warning lights won’t operate and
theft-alarm will not arm. After this,
if all doors, trunk lid and engine
hood are closed, the hazard
warning lights blink once.
button in the front outside door
handles with the smart key in
your possession.
After completion of the steps
above, the hazard warning lights
will blink once to indicate that the
system is armed.
If any door, trunk lid or engine
hood remains open, the hazard
warning lights won’t operate and
theft-alarm will not arm. To arm
the system close all the doors,
trunk lid and engine hood, and try
again to lock the doors.
Do not arm the system until all
passengers have left the vehicle. If
the system is armed while a pas-
senger(s) remains in the vehicle,
the alarm may be activated when
the remaining passenger(s) leave
the vehicle. If any door (or trunk)
or engine hood is opened within
30 seconds after the system
enters the armed stage, the sys-
tem is disarmed to prevent an
unnecessary alarm.
THEFT-ALARM SYSTEM
Armed
stage
Theft-alarm
stageDisarmed
stage