tire pressure HYUNDAI GENESIS G80 2021 Owner's Manual
[x] Cancel search | Manufacturer: HYUNDAI, Model Year: 2021, Model line: GENESIS G80, Model: HYUNDAI GENESIS G80 2021Pages: 516, PDF Size: 81.01 MB
Page 395 of 516
6-19
What to do in an emergency
6
If you have a tire gauge, check the
tire pressure (see "Tires and
Wheels" in chapter 8 for tire pressure
instructions.). If the pressure is lower
or higher than recommended, drive
slowly to the nearest service station
and adjust it to the recommended
pressure. Always reinstall the valve
cap after checking or adjusting tire
pressure. If the cap is not replaced,
air may leak from the tire. If you lose
a valve cap, buy another and install it
as soon as possible. After changing
tires, secure the flat tire and return
the jack and tools to their proper stor-
age locations.
✽ ✽
NOTICE
Check the tire pressure as soon as
possible after installing a spare tire.
Adjust it to the recommended pres-
sure.
If any of the equipment such as the
jack, lug nuts, studs, or other equip-
ment is damaged or in poor condi-
tion, do not attempt to change the
tire and call for assistance.
Use of compact spare tires
(if equipped)
Compact spare tires are designed for
emergency use only. Drive carefully
on the compact spare tire and
always follow the safety precautions. Your vehicle has metric threads
on the studs and lug nuts. Make
certain during tire changing
that the same nuts that were
removed are reinstalled. If you
have to replace your lug nuts
make sure they have metric
threads to avoid damaging the
studs and ensure the wheel is
properly secured to the hub.
Consult an authorized retailer
of Genesis Branded products
for assistance.
CAUTION
To prevent compact spare tire
failure and loss of control pos-
sibly resulting in an accident:
Use the compact spare tire
only in an emergency.
NEVER operate your vehicle
over 50 mph (80 km/h).
Do not exceed the vehicle’s
maximum load rating or the
load carrying capacity shown
on the sidewall of the com-
pact spare tire.
Do not use the compact spare
tire continuously. Repair or
replace the original tire as
soon as possible to avoid fail-
ure of the compact spare tire.
WARNING
Page 396 of 516
6-20
What to do in an emergency
When driving with the compact spare
tire mounted to your vehicle:
Check the tire pressure after
installing the compact spare tire.
The compact spare tire should be
inflated to 60 psi (420 kPa).
Do not take this vehicle through an
automatic car wash while the com-
pact spare tire is installed.
Do not use the compact spare tire
on any other vehicle because this
tire has been designed especially
for your vehicle.
The compact spare tire’s tread life
is shorter than a regular tire.
Inspect your compact spare tire
regularly and replace worn com-
pact spare tires with the same size
and design, mounted on the same
wheel.
Do not use more than one compact
spare tire at a time.
✽ ✽
NOTICE
When the original tire and wheel are
repaired and reinstalled on the vehi-
cle, the lug nut torque must be set
correctly. The correct lug nut tight-
ening torque is 79-94 lbf·ft (11-13
kgf·m).
To prevent damaging the com-
pact spare tire and your vehicle:
Drive slowly enough for the
road conditions to avoid all
hazards, such as a potholes
or debris.
Avoid driving over obstacles.
The compact spare tire diame-
ter is smaller than the diame-
ter of a conventional tire and
reduces the ground clearance
approximately 1 inch (25 mm).
Do not use tire chains on the
compact spare tire. Because
of the smaller size, a tire chain
will not fit properly.
Do not use the compact spare
tire on any other wheels, nor
should standard tires, snow
tires, wheel covers or trim
rings be used with the com-
pact spare wheel.
CAUTION
Page 403 of 516
7
Tires and wheels ..................................................7-43
Tire care ............................................................................7-43
Recommended cold tire inflation pressures.............7-44
Check tire inflation pressure........................................7-45
Tire rotation .....................................................................7-46
Wheel alignment and tire balance ..............................7-47
Tire replacement .............................................................7-47
Wheel replacement .........................................................7-48
Tire traction ......................................................................7-48
Tire maintenance ............................................................7-49
Tire sidewall labeling ......................................................7-49
Tire terminology and definitions.................................7-53
All season tires ................................................................7-56
Summer tires ....................................................................7-56
Snow tires .........................................................................7-56
Radial-ply tires ................................................................7-57
Low aspect ratio tires ....................................................7-57
Fuses ......................................................................7-59
Instrument panel fuse replacement ...........................7-60
Engine compartment panel fuse replacement.........7-62
Fuse/Relay panel description ......................................7-64
Light bulbs.............................................................7-76
Headlamp, position lamp, turn signal lamp, side
marker and front fog lamp bulb replacement.........7-76
Side repeater lamp replacement .................................7-79
Rear combination light bulb replacement .................7-80
High mounted stop lamp ...............................................7-82
License plate light bulb replacement .........................7-82
Interior light bulb replacement ....................................7-82
Appearance care ..................................................7-83
Exterior care ....................................................................7-83
Interior care......................................................................7-88
Emission control system .....................................7-91
California perchlorate notice .............................7-95
Page 409 of 516
7-8
Maintenance
Owner maintenance schedule
When you stop for fuel:
• Check the engine oil level.
Check coolant level in the engine
coolant reservoir.
Check the windshield washer fluid
level.
Check for low or under-inflated
tires.
While operating your vehicle:
Note any changes in the sound of
the exhaust or any smell of
exhaust fumes in the vehicle.
Check for vibrations in the steering
wheel. Notice if there is any
increased steering effort or loose-
ness in the steering wheel, or
change in its straight-ahead posi-
tion.
Notice if your vehicle constantly
turns slightly or "pulls" to one side
when traveling on smooth, level
road.
When stopping, listen and check
for unusual sounds, pulling to one
side, increased brake pedal travel
or "hard-to-push" brake pedal.
If any slipping or changes in the
operation of your transmission
occurs, check the transmission
fluid level.
Check the automatic transmission
P (Park) function. Check the parking brake.
Check for fluid leaks under your
vehicle (water dripping from the air
conditioning system during or after
use is normal).
At least monthly:
Check coolant level in the engine
coolant reservoir.
Check the operation of all exterior
lights, including the stoplights, turn
signals and hazard warning flash-
ers.
Check the inflation pressures of all
tires including the spare for tires
that are worn, show uneven wear,
or are damaged.
Check for loose wheel lug nuts. Be careful when checking your
engine coolant level when the
engine is hot. This may result in
coolant being blown out of the
opening and cause serious
burns and other injuries.
WARNING
Page 444 of 516
7-43
7
Maintenance
T TI
IR
RE
ES
S
A
AN
ND
D
W
WH
HE
EE
EL
LS
S
Tire care
For proper maintenance, safety, and
maximum fuel economy, you must
always maintain recommended tire
inflation pressures and stay within
the load limits and weight distribution
recommended for your vehicle. (Continued)Replace tires that are worn,
show uneven wear, or are
damaged. Worn tires can
cause loss of braking effec-
tiveness, steering) control, or
traction.
ALWAYS replace tires with the
same size as each tire that
was originally supplied with
this vehicle. Using tires and
wheels other than the recom-
mended sizes could cause
unusual handling characteris-
tics, poor vehicle control, or
negatively affect your vehi-
cle's Anti-Lock Brake System
(ABS) resulting in a serious
accident.
Tire failure may cause loss of
vehicle control resulting in an
accident. To reduce risk of
SERIOUS INJURY or DEATH,
take the following precautions:
Inspect your tires monthly for
proper inflation as well as
wear and damage.
The recommended cold tire
pressure for your vehicle can
be found in this manual and
on the tire label located on the
driver's side center pillar.
Always use a tire pressure
gauge to measure tire pres-
sure. Tires with too much or
too little pressure wear
unevenly causing poor han-
dling.
Check the pressure of the
spare every time you check
the pressure of the other tires
on your vehicle.
(Continued)
WARNING
Page 445 of 516
7-44
Maintenance
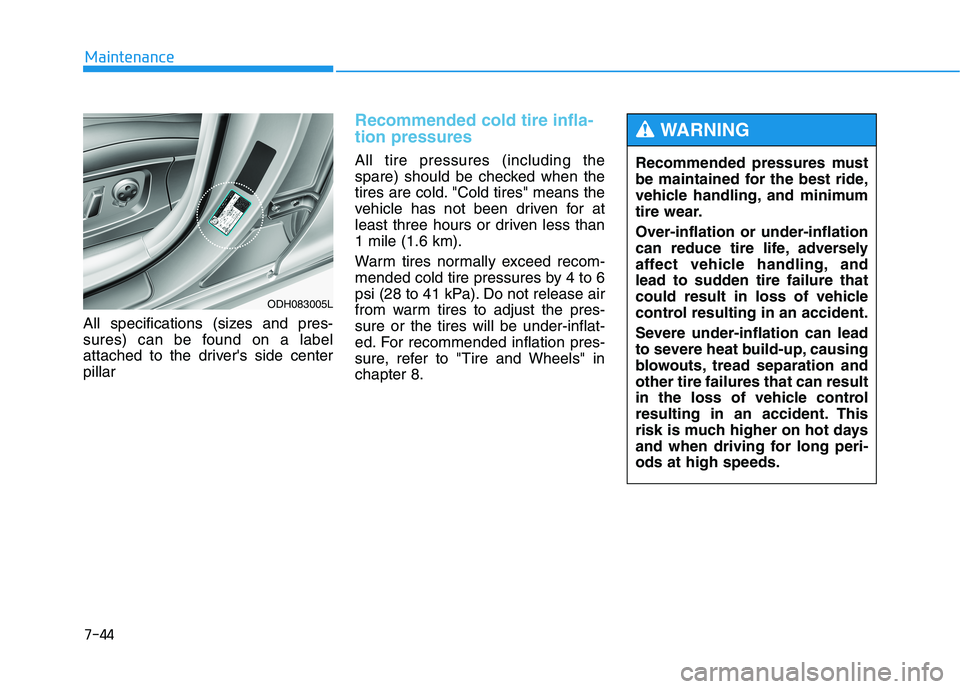
All specifications (sizes and pres-
sures) can be found on a label
attached to the driver's side center
pillar
Recommended cold tire infla-
tion pressures
All tire pressures (including the
spare) should be checked when the
tires are cold. "Cold tires" means the
vehicle has not been driven for at
least three hours or driven less than
1 mile (1.6 km).
Warm tires normally exceed recom-
mended cold tire pressures by 4 to 6
psi (28 to 41 kPa). Do not release air
from warm tires to adjust the pres-
sure or the tires will be under-inflat-
ed. For recommended inflation pres-
sure, refer to "Tire and Wheels" in
chapter 8.Recommended pressures must
be maintained for the best ride,
vehicle handling, and minimum
tire wear.
Over-inflation or under-inflation
can reduce tire life, adversely
affect vehicle handling, and
lead to sudden tire failure that
could result in loss of vehicle
control resulting in an accident.
Severe under-inflation can lead
to severe heat build-up, causing
blowouts, tread separation and
other tire failures that can result
in the loss of vehicle control
resulting in an accident. This
risk is much higher on hot days
and when driving for long peri-
ods at high speeds.
WARNING
ODH083005L
Page 446 of 516
7-45
7
Maintenance
Check tire inflation pressure
Check your tires, including the spare
tire, once a month or more.
How to check
Use a good quality tire pressure
gauge to check tire pressure. You
can not tell if your tires are properly
inflated simply by looking at them.
Radial tires may look properly inflat-
ed when they are under-inflated.
Remove the valve cap from the tire
valve stem. Press the tire gauge firm-
ly onto the valve to get a pressure
measurement. If the cold tire inflation
pressure matches the recommended
pressure on the tire and loading
information label, no further adjust-
ment is necessary. If the pressure is
low, add air until you reach the rec-
ommended pressure. Make sure to
put the valve caps back on the valve
stems. Without the valve cap, dirt or
moisture could get into the valve
core and cause air leakage. If a valve
cap is missing, install a new one as
soon as possible.If you overfill the tire, release air by
pushing on the metal stem in the
center of the tire valve. Recheck the
tire pressure with the tire gauge. Be
sure to put the valve caps back on
the valve stems. Without the valve
cap, dirt or moisture could get into
the valve core and cause air leakage.
If a valve cap is missing, install a new
one as soon as possible. Under-inflation results in exces-
sive wear, poor handling and
reduced fuel economy. Wheel
deformation is also possible.
Keep your tire pressures at the
proper levels. If a tire frequently
needs refilling, have it checked
by an authorized retailer of
Genesis Branded products.
Over-inflation produces a harsh
ride, excessive wear at the cen-
ter of the tire tread, and a
greater possibility of damage
from road hazards.
CAUTION
Page 447 of 516
7-46
Maintenance
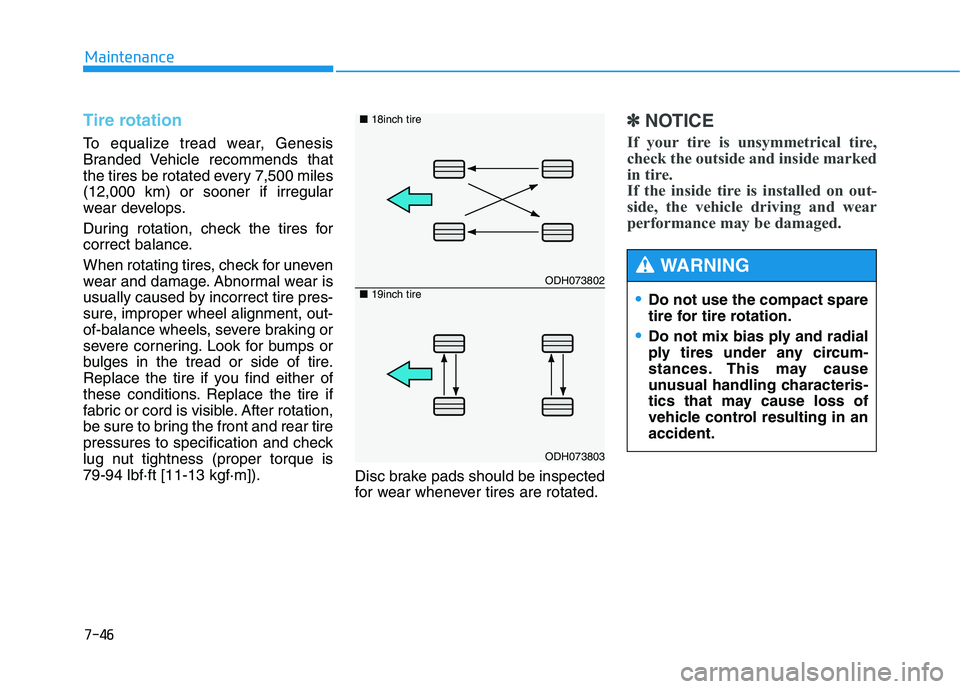
Tire rotation
To equalize tread wear, Genesis
Branded Vehicle recommends that
the tires be rotated every 7,500 miles
(12,000 km) or sooner if irregular
wear develops.
During rotation, check the tires for
correct balance.
When rotating tires, check for uneven
wear and damage. Abnormal wear is
usually caused by incorrect tire pres-
sure, improper wheel alignment, out-
of-balance wheels, severe braking or
severe cornering. Look for bumps or
bulges in the tread or side of tire.
Replace the tire if you find either of
these conditions. Replace the tire if
fabric or cord is visible. After rotation,
be sure to bring the front and rear tire
pressures to specification and check
lug nut tightness (proper torque is
79-94 lbf·ft [11-13 kgf·m]).
Disc brake pads should be inspected
for wear whenever tires are rotated.
✽ ✽
NOTICE
If your tire is unsymmetrical tire,
check the outside and inside marked
in tire.
If the inside tire is installed on out-
side, the vehicle driving and wear
performance may be damaged.
Do not use the compact spare
tire for tire rotation.
Do not mix bias ply and radial
ply tires under any circum-
stances. This may cause
unusual handling characteris-
tics that may cause loss of
vehicle control resulting in an
accident.
WARNING ODH073802
ODH073803 ■18inch tire
■19inch tire
Page 452 of 516
7-51
7
Maintenance
4. Tire ply composition and
material
The number of layers or plies of rub-
ber-coated fabric in the tire. Tire
manufacturers also must indicate the
materials in the tire, which include
steel, nylon, polyester, and others.
The letter "R" means radial ply con-
struction; the letter "D" means diago-
nal or bias ply construction; and the
letter "B" means belted-bias ply con-
struction.
5. Maximum permissible infla-
tion pressure
This number is the greatest amount
of air pressure that should be put in
the tire. Do not exceed the maximum
permissible inflation pressure. Refer
to the Tire and Loading Information
label for recommended inflation
pressure.
6. Maximum load rating
This number indicates the maximum
load in kilograms and pounds that
can be carried by the tire. When
replacing the tires on the vehicle,
always use a tire that has the same
load rating as the factory installed
tire.
7. Uniform tire quality grading
Quality grades can be found where
applicable on the tire sidewall
between tread shoulder and maxi-
mum section width.
For example:
TREAD wear 200
TRACTION AA
TEMPERATURE A
Tread wear
The tread wear grade is a compara-
tive rating based on the wear rate of
the tire when tested under controlled
conditions on a specified govern-
ment test course. For example, a tire
graded 150 would wear one-and-a-
half times (1½) as well on the gov-
ernment course as a tire graded 100.
The relative performance of tires
depends upon the actual conditions
of their use, however, and may
depart significantly from the norm
due to variations in driving habits,
service practices and differences in
road characteristics and climate.
These grades are molded on the
sidewalls of passenger vehicle tires.
The tires available as standard or
optional equipment on your vehicle
may vary with respect to grade.
Page 454 of 516
7-53
7
Maintenance
Tire terminology and defini-
tions
Air Pressure
The amount of air inside the tire
pressing outward on the tire. Air
pressure is expressed in pounds per
square inch (psi) or kilopascal (kPa).
Accessory Weight
This means the combined weight of
optional accessories. Some exam-
ples of optional accessories are
automatic transmission, power
seats, and air conditioning.
Aspect Ratio
The relationship of a tire's height to
its width.
Belt
A rubber coated layer of cords that is
located between the plies and the
tread. Cords may be made from steel
or other reinforcing materials.
Bead
The tire bead contains steel wires
wrapped by steel cords that hold the
tire onto the rim.
Bias Ply Tire
A pneumatic tire in which the plies
are laid at alternate angles less than
90 degrees to the centerline of the
tread.
Cold Tire Pressure
The amount of air pressure in a tire,
measured in pounds per square inch
(psi) or kilopascals (kPa) before a tire
has built up heat from driving.
Curb Weight
This means the weight of a motor
vehicle with standard and optional
equipment including the maximum
capacity of fuel, oil and coolant, but
without passengers and cargo.
DOT Markings
A code molded into the sidewall of a
tire signifying that the tire is in com-
pliance with the U.S. Department of
Transportation motor vehicle safety
standards. The DOT code includes
the Tire Identification Number (TIN),
an alphanumeric designator which
can also identify the tire manufactur-
er, production plant, brand and date
of production.