oil capacity Hyundai Getz 2003 Owner's Manual
[x] Cancel search | Manufacturer: HYUNDAI, Model Year: 2003, Model line: Getz, Model: Hyundai Getz 2003Pages: 444, PDF Size: 13.82 MB
Page 117 of 444
1- 102 FEATURES OF YOUR HYUNDAI
H290F01O-GAT
1. CD Select Button
o Insert the CD with the label facing
upward.
o Insert the CD to start CD playback, during radio operation or cassette tape playing.
o When a disc is in the CD deck, if you press the play button the CD playerwill begin playing even if the radio orcassette player is being used.
o The CD player can be used when
the ignition switch is in either the"ON" or "ACC" position.
2. FF/REW ( / ) If you want to fast forward or reverse through the compact disc track, push and hold in the FF ( ) or REW ( ) button.When you release the button, the com- pact disc player will resume playing. 3. TRACK UP/DOWN
o The desired track on the disc cur-
rently being played can be selected using the track number.
o Press button once to skip forwa-
rd to the beginning of the next track.Press button once to skip back to the beginning of the track.
4. REPEAT
o To repeat the music you are listen- ing to, press the RPT button. To cancel, press again.
o If you do not release RPT operation when the track ends, it will automati-cally be replayed.This process will be continued until you push the button again.
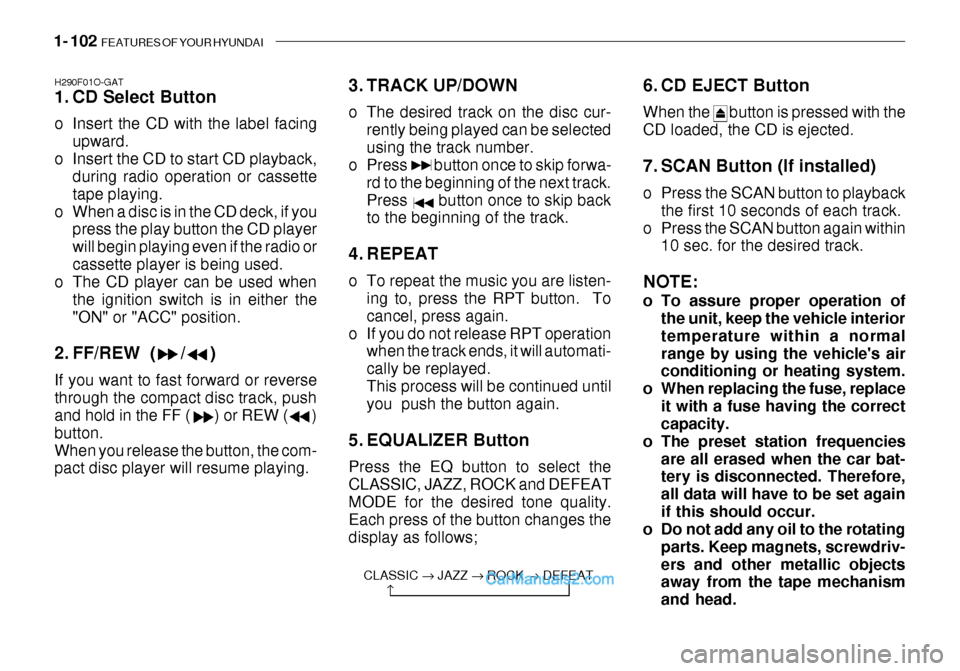
5. EQUALIZER Button Press the EQ button to select the CLASSIC, JAZZ, ROCK and DEFEATMODE for the desired tone quality. Each press of the button changes the display as follows; 6. CD EJECT Button When the button is pressed with the CD loaded, the CD is ejected.
7. SCAN Button (If installed)
o Press the SCAN button to playback
the first 10 seconds of each track.
o Press the SCAN button again within 10 sec. for the desired track.
NOTE:
o To assure proper operation of the unit, keep the vehicle interior temperature within a normalrange by using the vehicle's air conditioning or heating system.
o When replacing the fuse, replace
it with a fuse having the correctcapacity.
o The preset station frequencies
are all erased when the car bat-tery is disconnected. Therefore, all data will have to be set againif this should occur.
o Do not add any oil to the rotating
parts. Keep magnets, screwdriv-ers and other metallic objects away from the tape mechanism and head.
CLASSIC � JAZZ � ROCK � DEFEAT
�
Page 199 of 444

DO-IT-YOURSELF MAINTENANCE 6- 11
G040B03FC-GAT CHANGING THE OIL AND FILTER
(Diesel Engine: Left hand drivetype (E.C only)) The engine oil and filter should be changed at those intervals specified in the maintenance schedule in Section 5. If the car is being driven in severeconditions, more frequent oil and filter changes are required. The procedure for changing the oil and filter is as follows: 1. Park the car on level ground and set
the parking brake. Start the engine and let it warm up until the needle onthe coolant temperature gauge moves above the lowest mark. Turn the engine off and place the gearselector lever in "P" (automatic) or reverse gear (manual transaxle).
2. Open the hood and remove the en- gine oil filler cap.
3. Slide underneath the car and loosen
the oil pan drain plug by turning it counterclockwise oil pan with a wrench of the proper size. Be sure that a drain pan is in position tocatch the oil as it drains out, then remove the drain plug.
7. Refill the crankcase with the recom-
mended engine oil. Refer to the specification in chapter 9 for engineoil capacity.
8. Start the engine and check to be
sure no oil is leaking from the drainplug or oil filter.
9. Shut off the engine and recheck the
oil level.
NOTE: Always dispose of used engine oil in an environmentally acceptablemanner. It is suggested that it be placed in a sealed container and taken to a service station for recla-mation. Do not pour the oil on the ground or put it into the household trash.
WARNING:
Used motor oil may cause irritationor cancer of the skin if left in con-tact with the skin for prolonged periods of time. Wash your hands thoroughly with soap and warmwater as soon as possible after han- dling used oil.
!
Engine oil drain plug Oil filter
KCHB01A
WARNING:
Be very careful when draining the engine oil as it may be hot enough to burn you!!
4. When the oil has stopped draining, replace the drain plug using a new washer and retighten by turning it clockwise. Oil pan drain plug tightening torque: 3.5 ~ 4.5 kgf.m
............
Page 200 of 444

6- 12 DO-IT-YOURSELF MAINTENANCE
5. Loosen the oil filter drain plug by
turning it counterclockwise with a wrench of the proper size and drain out some oil in the oil filter. Be sure that a drain pan is in position tocatch the oil.
6. Loosen the oil filter upper cap with a
proper tool from the lower case untilan O-ring is seen. Then, drain the oil completely.
7. Pull out the oil filter upper cap with element from the lower case.Using a clean cloth, remove any dirt or oil accumulated around the lowercase.
8. Install a new copper washer of the
oil filter drain plug by the side oflower case and retighten by turning it clockwise. Tightening torque : 0.8 ~ 1.0 kgf.m
9. After mounting a new oil filter ele- ment and new O-ring to upper cap,install the upper cap to lower case and retighten by turning it clock-wise. Do not over-tighten. Tightening torque : 2.3 ~ 2.5 kgf.m
10.Refill the crankcase with the rec- ommended engine oil. Refer to the specification in chapter 9 for engine oil capacity.
11.Start the engine and check to be sure no oil is leaking from the drainplug or oil filter.
12.Shut off the engine and recheck the oil level.
NOTE: It is recommended that the engine oil and filter should be changed by an authorized Hyundai dealer.
G040B01FC
Oil filter drain plug O-ring
Oil filter element
Washer
Upper cap
Lower case NOTE: Always dispose of used engine oil in an environmentally acceptable manner. It is suggested that it beplaced in a sealed container and taken to a service station for maybe reclaimation. Do not pour the oil onthe ground or put it into the house- hold trash.
WARNING:
Used motor oil may cause irritation or cancer of the skin if left in con- tact with the skin for prolonged periods of time. Wash your handsthoroughly with soap and warm water as soon as possible after han- dling used oil.
!
Page 206 of 444
6- 18 DO-IT-YOURSELF MAINTENANCE
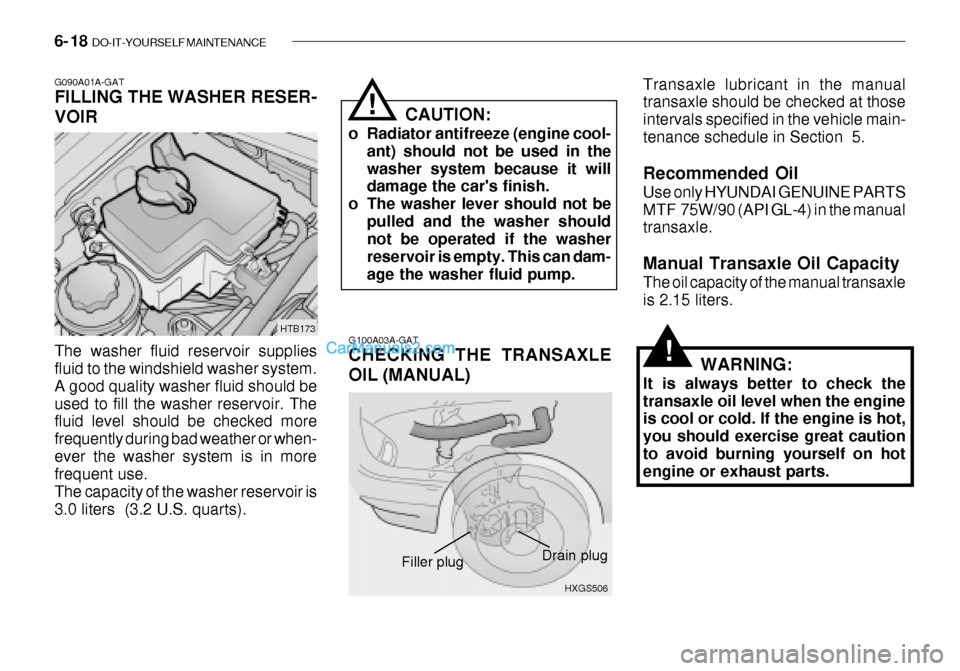
G100A03A-GAT CHECKING THE TRANSAXLE OIL (MANUAL)
G090A01A-GAT FILLING THE WASHER RESER- VOIR The washer fluid reservoir supplies fluid to the windshield washer system. A good quality washer fluid should beused to fill the washer reservoir. The fluid level should be checked more frequently during bad weather or when-ever the washer system is in more frequent use. The capacity of the washer reservoir is3.0 liters (3.2 U.S. quarts). CAUTION:
o Radiator antifreeze (engine cool- ant) should not be used in thewasher system because it will damage the car's finish.
o The washer lever should not be pulled and the washer shouldnot be operated if the washer reservoir is empty. This can dam-age the washer fluid pump.
!
HTB173
HXGS506
Drain plug
Filler plug
Transaxle lubricant in the manual transaxle should be checked at those intervals specified in the vehicle main-tenance schedule in Section 5. Recommended Oil Use only HYUNDAI GENUINE PARTS MTF 75W/90 (API GL-4) in the manual transaxle. Manual Transaxle Oil Capacity The oil capacity of the manual transaxle is 2.15 liters.
WARNING:
It is always better to check thetransaxle oil level when the engine is cool or cold. If the engine is hot, you should exercise great cautionto avoid burning yourself on hot engine or exhaust parts.
!
Page 207 of 444
DO-IT-YOURSELF MAINTENANCE 6- 19
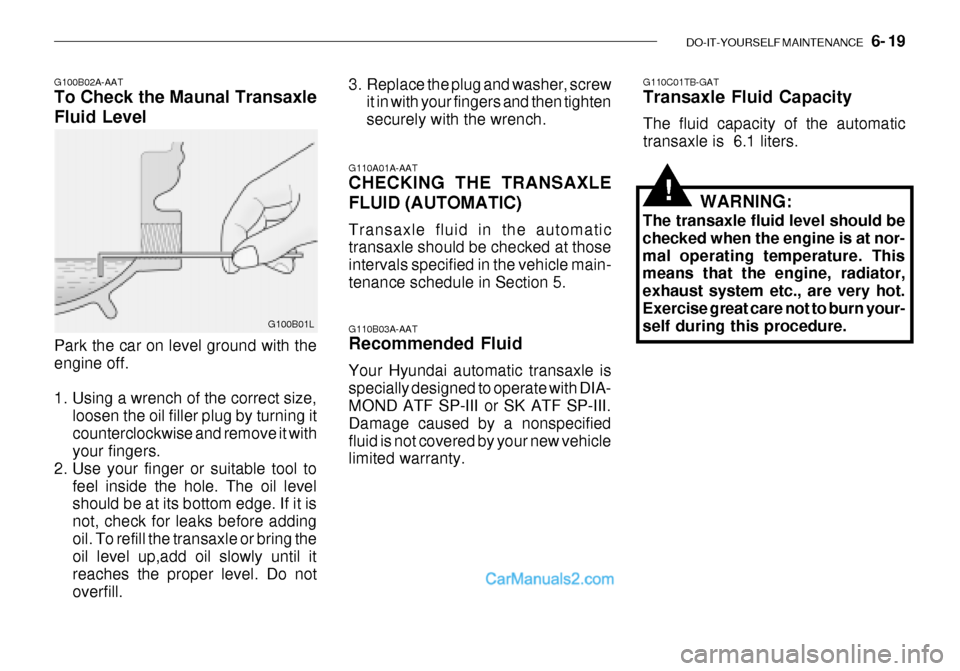
G100B02A-AAT To Check the Maunal Transaxle Fluid Level
G110A01A-AAT CHECKING THE TRANSAXLE FLUID (AUTOMATIC) Transaxle fluid in the automatic transaxle should be checked at those intervals specified in the vehicle main-tenance schedule in Section 5. G110B03A-AAT Recommended Fluid Your Hyundai automatic transaxle is specially designed to operate with DIA-
MOND ATF SP-III or SK ATF SP-III. Damage caused by a nonspecifiedfluid is not covered by your new vehicle limited warranty.G110C01TB-GAT Transaxle Fluid Capacity The fluid capacity of the automatic transaxle is 6.1 liters.
G100B01L
Park the car on level ground with the engine off.
1. Using a wrench of the correct size, loosen the oil filler plug by turning it counterclockwise and remove it with your fingers.
2. Use your finger or suitable tool to feel inside the hole. The oil levelshould be at its bottom edge. If it is not, check for leaks before addingoil. To refill the transaxle or bring the oil level up,add oil slowly until it reaches the proper level. Do notoverfill. 3. Replace the plug and washer, screw
it in with your fingers and then tightensecurely with the wrench.
WARNING:
The transaxle fluid level should bechecked when the engine is at nor-mal operating temperature. This means that the engine, radiator, exhaust system etc., are very hot.Exercise great care not to burn your- self during this procedure.
!
Page 240 of 444
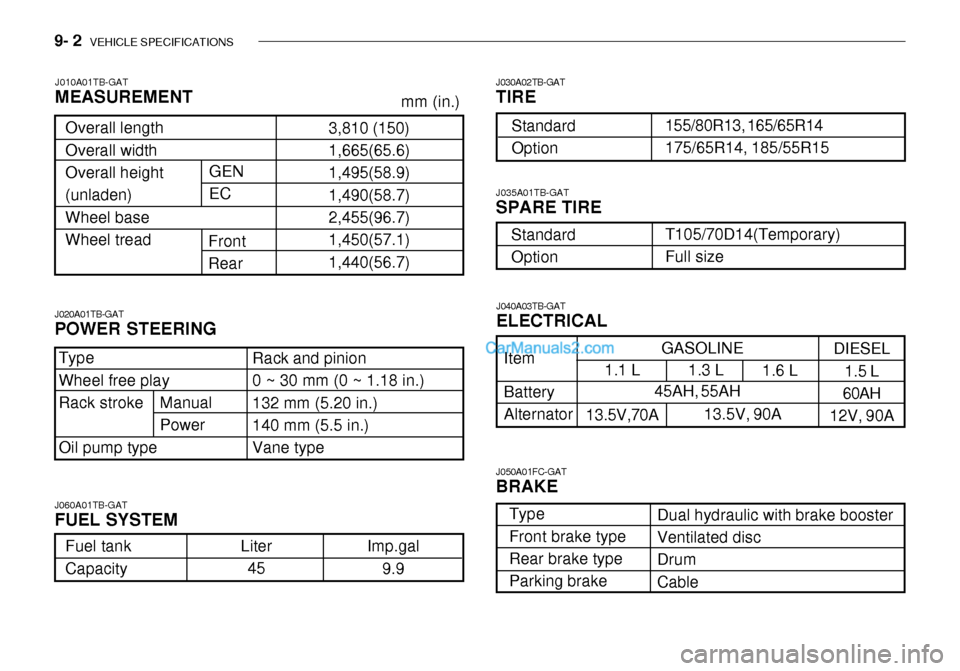
9- 2 VEHICLE SPECIFICATIONS
1.3 L
1.6 L
Type Wheel free playRack stroke Oil pump type 3,810 (150) 1,665(65.6) 1,495(58.9) 1,490(58.7)2,455(96.7) 1,450(57.1) 1,440(56.7)
Overall lengthOverall width Overall height (unladen)Wheel base Wheel tread J030A02TB-GAT TIRE1.1 L
13.5V,70A
Dual hydraulic with brake booster Ventilated disc DrumCable
J010A01TB-GAT MEASUREMENT
J060A01TB-GAT FUEL SYSTEM
Rack and pinion 0 ~ 30 mm (0 ~ 1.18 in.) 132 mm (5.20 in.)140 mm (5.5 in.) Vane type
155/80R13, 165/65R14 175/65R14, 185/55R15
StandardOption
Front Rear
mm (in.)
J020A01TB-GAT POWER STEERING
Fuel tank Capacity Liter
45 Imp.gal
9.9
J040A03TB-GAT ELECTRICAL
Item Battery Alternator
J050A01FC-GAT BRAKE Type Front brake typeRear brake type Parking brake
J035A01TB-GAT SPARE TIRE
T105/70D14(Temporary) Full size
Standard Option
DIESEL
1.5 L
60AH
12V, 90AGASOLINE
GEN EC
Manual Power 13.5V, 90A
45AH, 55AH
Page 245 of 444
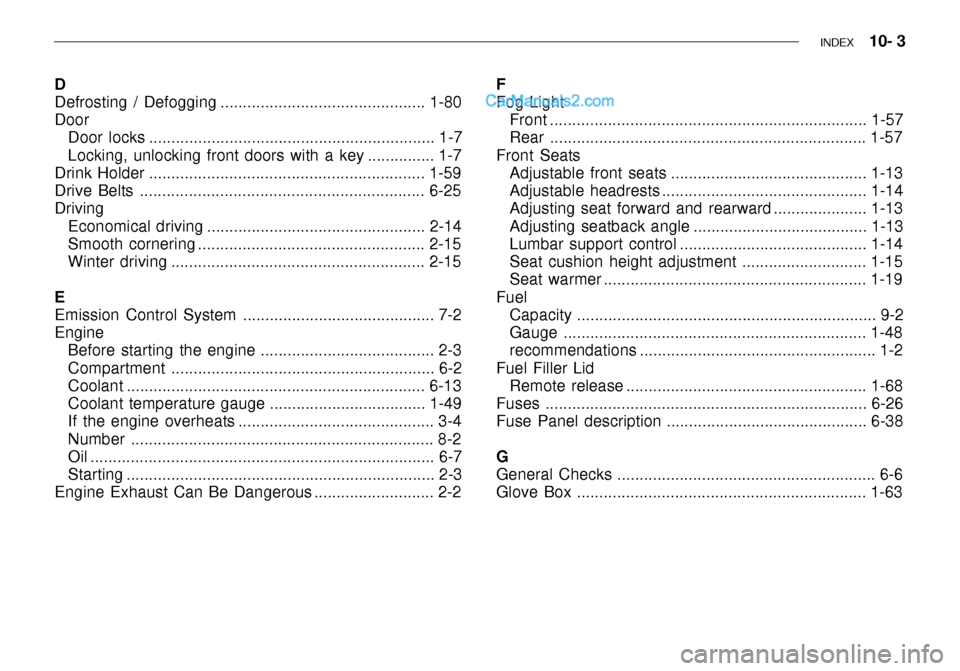
INDEX 10- 3
D
Defrosting / Defogging .............................................. 1-80 Door
Door locks ................................................................ 1-7
Locking, unlocking front doors with a key ............... 1-7
Drink Holder .............................................................. 1-59
Drive Belts ................................................................ 6-25 Driving
Economical driving ................................................. 2-14
Smooth cornering ................................................... 2-15
Winter driving ......................................................... 2-15
E
Emission Control System ........................................... 7-2 Engine Before starting the engine ....................................... 2-3
Compartment ........................................................... 6-2
Coolant ................................................................... 6-13
Coolant temperature gauge ................................... 1-49
If the engine overheats ............................................ 3-4
Number .................................................................... 8-2
Oil ............................................................................. 6-7
Starting ..................................................................... 2-3
Engine Exhaust Can Be Dangerous ........................... 2-2 F Fog Light
Front ....................................................................... 1-57
Rear ....................................................................... 1-57
Front Seats Adjustable front seats ............................................ 1-13
Adjustable headrests .............................................. 1-14
Adjusting seat forward and rearward ..................... 1-13
Adjusting seatback angle ....................................... 1-13
Lumbar support control .......................................... 1-14
Seat cushion height adjustment ............................ 1-15
Seat warmer ........................................................... 1-19
Fuel Capacity ................................................................... 9-2
Gauge .................................................................... 1-48
recommendations ..................................................... 1-2
Fuel Filler Lid Remote release ...................................................... 1-68
Fuses ........................................................................ 6-26
Fuse Panel description ............................................. 6-38 G
General Checks .......................................................... 6-6
Glove Box ................................................................. 1-63
Page 437 of 444
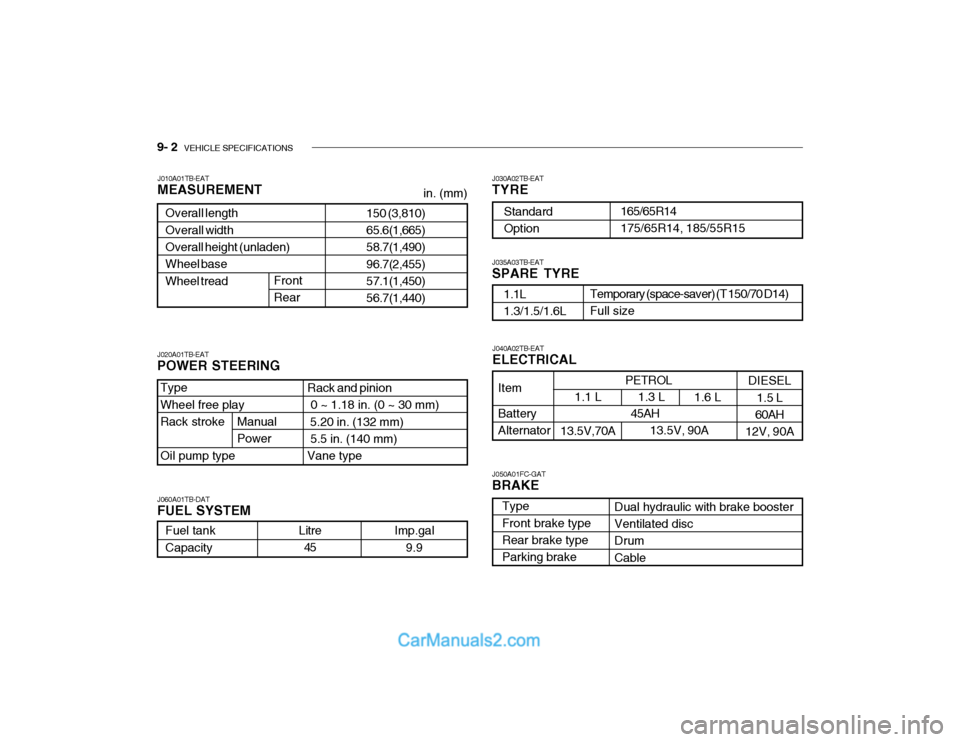
9- 2 VEHICLE SPECIFICATIONS
1.3 L
1.6 L
Type Wheel free playRack stroke Oil pump type 150 (3,810) 65.6(1,665) 58.7(1,490) 96.7(2,455)57.1(1,450) 56.7(1,440)
Overall length Overall width Overall height (unladen) Wheel baseWheel tread J030A02TB-EAT TYRE1.1 L
13.5V,70A
Dual hydraulic with brake booster Ventilated disc DrumCable
J010A01TB-EAT MEASUREMENT
J060A01TB-DAT FUEL SYSTEM
Rack and pinion 0 ~ 1.18 in. (0 ~ 30 mm) 5.20 in. (132 mm) 5.5 in. (140 mm) Vane type
165/65R14 175/65R14, 185/55R15
StandardOption
Front Rear
in. (mm)
J020A01TB-EAT POWER STEERING
Fuel tank Capacity Litre
45 Imp.gal
9.9
J040A02TB-EAT ELECTRICAL
Item Battery Alternator
J050A01FC-GAT BRAKE Type Front brake typeRear brake type Parking brake
J035A03TB-EAT SPARE TYRE
Temporary (space-saver) (T 150/70 D14) Full size
1.1L 1.3/1.5/1.6L
DIESEL
1.5 L
60AH
12V, 90APETROL
Manual Power 13.5V, 90A
45AH