warning light Hyundai Getz 2005 Owner's Guide
[x] Cancel search | Manufacturer: HYUNDAI, Model Year: 2005, Model line: Getz, Model: Hyundai Getz 2005Pages: 437, PDF Size: 11.19 MB
Page 100 of 437
2- 4 DRIVING YOUR HYUNDAI
!
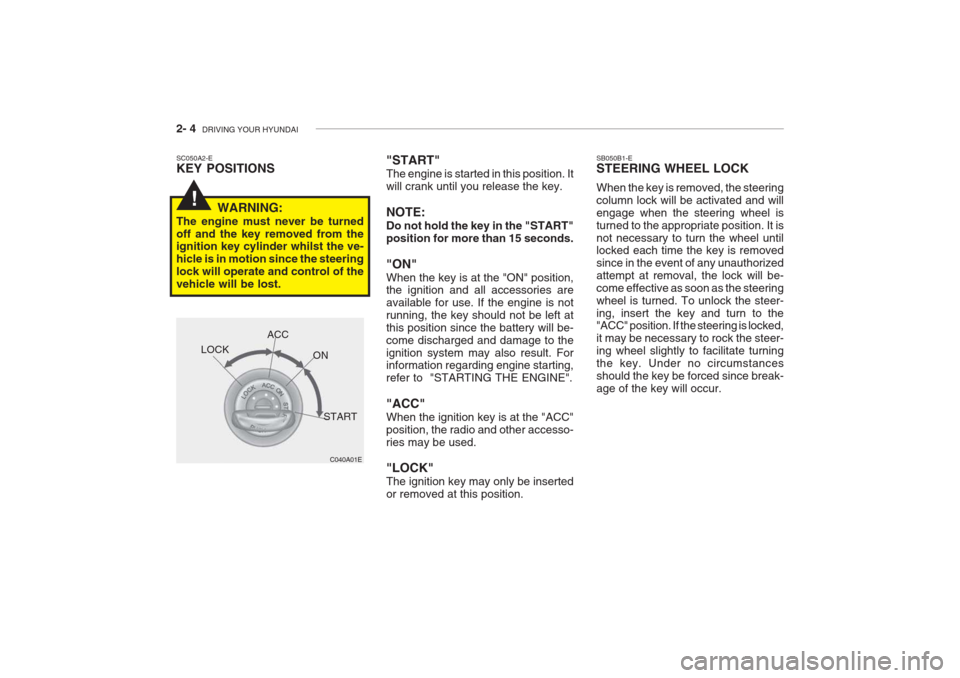
"START" The engine is started in this position. It will crank until you release the key. NOTE: Do not hold the key in the "START" position for more than 15 seconds. "ON" When the key is at the "ON" position, the ignition and all accessories are available for use. If the engine is notrunning, the key should not be left atthis position since the battery will be-come discharged and damage to theignition system may also result. For information regarding engine starting, refer to "STARTING THE ENGINE". "ACC" When the ignition key is at the "ACC" position, the radio and other accesso-ries may be used. "LOCK" The ignition key may only be inserted or removed at this position.SC050A2-E KEY POSITIONS
C040A01E
LOCK
ACC
ON
START
WARNING:
The engine must never be turned off and the key removed from the ignition key cylinder whilst the ve- hicle is in motion since the steeringlock will operate and control of thevehicle will be lost. SB050B1-E STEERING WHEEL LOCK When the key is removed, the steering column lock will be activated and willengage when the steering wheel isturned to the appropriate position. It isnot necessary to turn the wheel until locked each time the key is removed since in the event of any unauthorizedattempt at removal, the lock will be-come effective as soon as the steeringwheel is turned. To unlock the steer-ing, insert the key and turn to the "ACC" position. If the steering is locked, it may be necessary to rock the steer-ing wheel slightly to facilitate turningthe key. Under no circumstancesshould the key be forced since break-age of the key will occur.
Page 108 of 437
2- 12 DRIVING YOUR HYUNDAI
HTB217-D
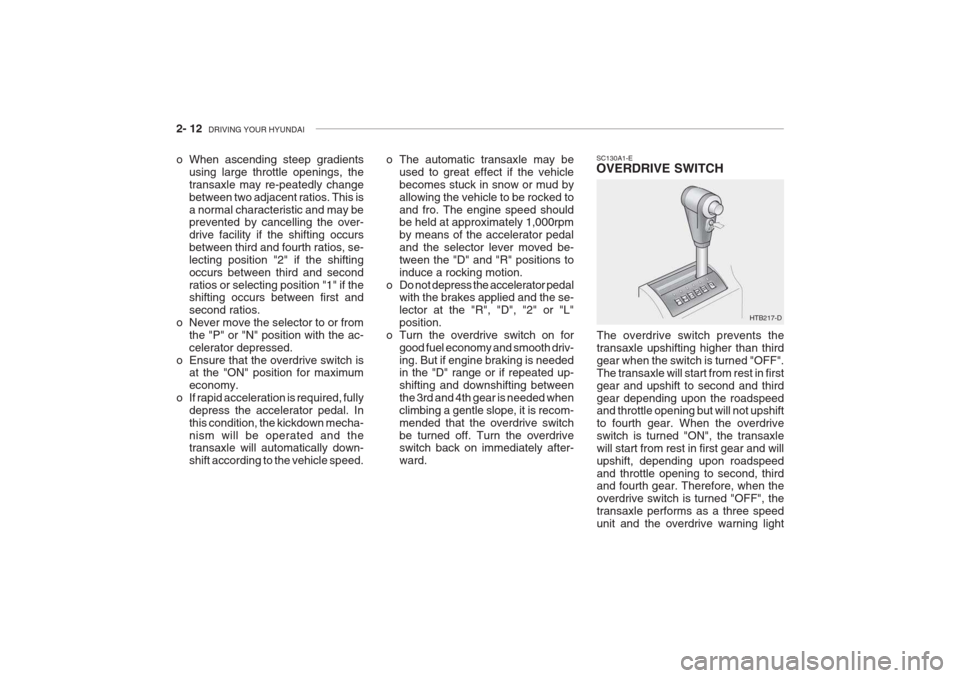
SC130A1-E OVERDRIVE SWITCH
The overdrive switch prevents the transaxle upshifting higher than thirdgear when the switch is turned "OFF".The transaxle will start from rest in firstgear and upshift to second and thirdgear depending upon the roadspeed and throttle opening but will not upshift to fourth gear. When the overdriveswitch is turned "ON", the transaxlewill start from rest in first gear and willupshift, depending upon roadspeedand throttle opening to second, third and fourth gear. Therefore, when the overdrive switch is turned "OFF", thetransaxle performs as a three speedunit and the overdrive warning light
o When ascending steep gradients
using large throttle openings, thetransaxle may re-peatedly changebetween two adjacent ratios. This isa normal characteristic and may be prevented by cancelling the over- drive facility if the shifting occursbetween third and fourth ratios, se-lecting position "2" if the shiftingoccurs between third and secondratios or selecting position "1" if the shifting occurs between first and second ratios.
o Never move the selector to or from
the "P" or "N" position with the ac-celerator depressed.
o Ensure that the overdrive switch is at the "ON" position for maximumeconomy.
o If rapid acceleration is required, fully
depress the accelerator pedal. Inthis condition, the kickdown mecha-nism will be operated and the transaxle will automatically down- shift according to the vehicle speed. o The automatic transaxle may be
used to great effect if the vehiclebecomes stuck in snow or mud byallowing the vehicle to be rocked toand fro. The engine speed should be held at approximately 1,000rpm by means of the accelerator pedaland the selector lever moved be-tween the "D" and "R" positions toinduce a rocking motion.
o Do not depress the accelerator pedal with the brakes applied and the se-lector at the "R", "D", "2" or "L"position.
o Turn the overdrive switch on for good fuel economy and smooth driv-ing. But if engine braking is needed in the "D" range or if repeated up- shifting and downshifting betweenthe 3rd and 4th gear is needed whenclimbing a gentle slope, it is recom-mended that the overdrive switchbe turned off. Turn the overdrive switch back on immediately after- ward.
Page 110 of 437
2- 14 DRIVING YOUR HYUNDAI
!WARNING:
ABS will not prevent accidents due to improper or dangerous drivingmaneuvers. Even though vehicle control is improved during emer- gency braking, always maintain asafe distance between you and ob-jects ahead. Vehicle speeds shouldalways be reduced during extremeroad conditions. The braking distance for cars equipped with an anti-lock brakingsystem may be longer than for thosewithout it in the following road con-ditions.
o Driving on rough, gravel or snow- covered roads.
o Driving with tyre chains installed.
o Driving on roads where the road
surface is pitted or has differentsurface height. These roads should be driven at reduced speeds. The safety features of an ABS equipped vehicle shouldnot be tested by high speed drivingor cornering. This could endangerthe safety of yourself or others. SC150A1-F DRIVING FOR ECONOMY You can save fuel and get more miles from your car if you follow these sug-gestions:
o Drive smoothly. Accelerate at a
moderate rate. Don't make "jack- rabbit" starts or full-throttle shiftsand maintain a steady cruisingspeed. Don't race between stop-lights. Try to adjust your speed tothat of the other traffic so you don't have to change speeds unneces- sarily.Avoid heavy traffic whenever pos-sible. Always maintain a safe dis-tance from other vehicles so youcan avoid unnecessary braking. This also reduces brake wear. o Drive at a moderate speed. The
faster you drive, the more fuel your car uses. Driving at a moderatespeed, especially on the highway, isone of the most effective ways to reduce fuel consumption.
o Don't "ride" the brake or clutch pedal. This can increase fuel consumption and also increase wear on thesecomponents. In addition, driving withyour foot resting on the brake pedal may cause the brakes to overheat, which reduces their effectivenessand may lead to more serious con-sequences.
o Take care of your tyres. Keep them inflated to the recommended pres- sure. Incorrect infla-tion, either too much or too little, results in unnec-essary tyre wear. Check the tyrepressures at least once a month.
o Be sure that the wheels are aligned correctly. Improper alignment can result from hitting curbs or driving too fast over irregular surfaces. Pooralignment causes faster tyre wearand may also result in other prob-lems as well as greater fuel con-sumption.
Page 118 of 437
3- 2 WHAT TO DO IN AN EMERGENCY
HTB165
SD020B1-E IF THE ENGINE CANNOT BE CRANKED
1. If the vehicle is fitted with manual
transaxle, ensure that the clutch pedal is depressed whilst cranking the engine. If the vehicle is fitted with automatic transaxle, ensurethat the transaxle selector is at the "P" or"N" position.
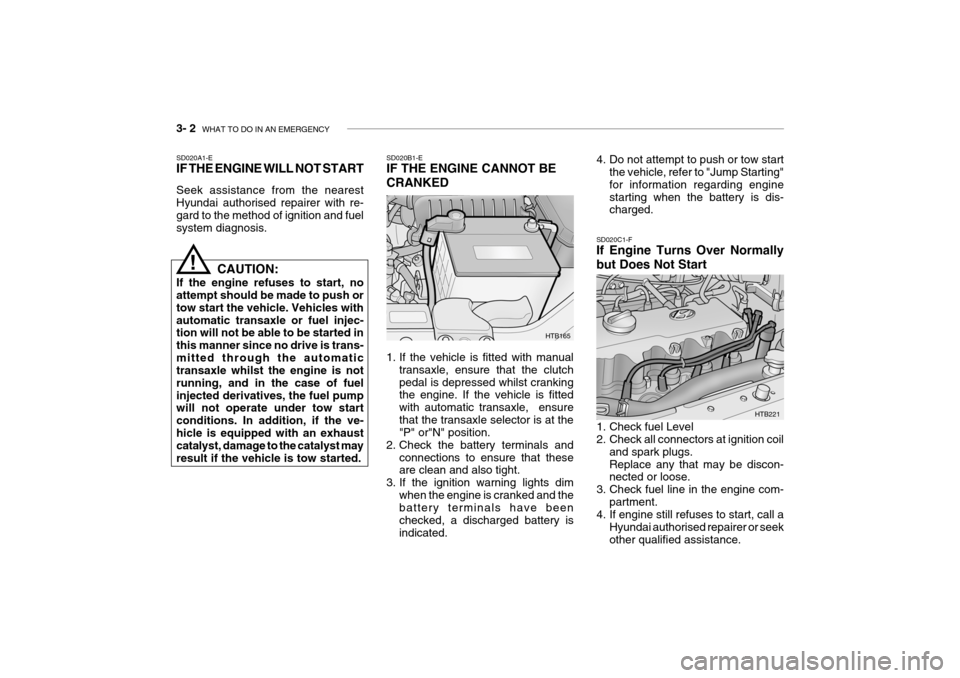
2. Check the battery terminals and
connections to ensure that theseare clean and also tight.
3. If the ignition warning lights dim
when the engine is cranked and thebattery terminals have been checked, a discharged battery isindicated. SD020C1-F If Engine Turns Over Normally but Does Not Start
SD020A1-E IF THE ENGINE WILL NOT START Seek assistance from the nearest Hyundai authorised repairer with re- gard to the method of ignition and fuelsystem diagnosis.
!
HTB221
CAUTION:
If the engine refuses to start, no attempt should be made to push or tow start the vehicle. Vehicles withautomatic transaxle or fuel injec- tion will not be able to be started in this manner since no drive is trans-mitted through the automatic transaxle whilst the engine is not running, and in the case of fuelinjected derivatives, the fuel pump will not operate under tow start conditions. In addition, if the ve-hicle is equipped with an exhaust catalyst, damage to the catalyst may result if the vehicle is tow started. 4. Do not attempt to push or tow start
the vehicle, refer to "Jump Starting"for information regarding enginestarting when the battery is dis- charged.
1. Check fuel Level
2. Check all connectors at ignition coil and spark plugs. Replace any that may be discon- nected or loose.
3. Check fuel line in the engine com- partment.
4. If engine still refuses to start, call a
Hyundai authorised repairer or seek other qualified assistance.
Page 119 of 437
WHAT TO DO IN AN EMERGENCY 3- 3
!
HTB218
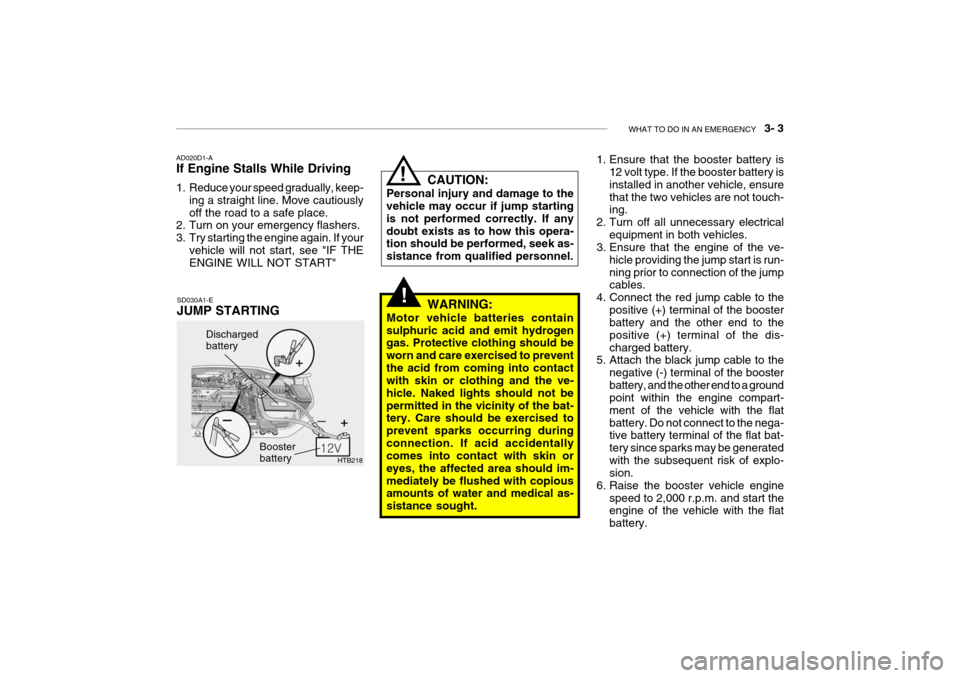
Discharged battery
Booster battery
CAUTION:
Personal injury and damage to the vehicle may occur if jump starting is not performed correctly. If anydoubt exists as to how this opera- tion should be performed, seek as- sistance from qualified personnel.
SD030A1-E JUMP STARTING
AD020D1-AIf Engine Stalls While Driving
1. Reduce your speed gradually, keep-
ing a straight line. Move cautiously off the road to a safe place.
2. Turn on your emergency flashers.
3. Try starting the engine again. If your
vehicle will not start, see "IF THE ENGINE WILL NOT START"!
WARNING:
Motor vehicle batteries contain sulphuric acid and emit hydrogen gas. Protective clothing should be worn and care exercised to preventthe acid from coming into contact with skin or clothing and the ve- hicle. Naked lights should not bepermitted in the vicinity of the bat- tery. Care should be exercised to prevent sparks occurring duringconnection. If acid accidentally comes into contact with skin or eyes, the affected area should im-mediately be flushed with copious amounts of water and medical as- sistance sought. 1. Ensure that the booster battery is
12 volt type. If the booster battery isinstalled in another vehicle, ensurethat the two vehicles are not touch- ing.
2. Turn off all unnecessary electrical equipment in both vehicles.
3. Ensure that the engine of the ve-
hicle providing the jump start is run- ning prior to connection of the jump cables.
4. Connect the red jump cable to the positive (+) terminal of the boosterbattery and the other end to the positive (+) terminal of the dis-charged battery.
5. Attach the black jump cable to the
negative (-) terminal of the boosterbattery, and the other end to a ground point within the engine compart- ment of the vehicle with the flatbattery. Do not connect to the nega- tive battery terminal of the flat bat- tery since sparks may be generatedwith the subsequent risk of explo- sion.
6. Raise the booster vehicle engine speed to 2,000 r.p.m. and start theengine of the vehicle with the flat battery.
Page 151 of 437

6- 6 DO-IT-YOURSELF MAINTENANCE
SG020B1-E DAILY OPERATING CHECKS The following items should be checked on a daily basis or whenever the vehicleis refuelled, whichever occurs sooner.
o Engine oil level.
o Engine coolant level.
o Power steering fluid level.
o Brake fluid level.
o Windscreen washer fluid level.
o Battery condition.
o Tyre condition and pressures.
o Operation and cleanliness of all light-
ing equipment.
o Windscreen wiper and washer opera- tion.
o Horn operation.
o Warning light operation.
o Adjustment and cleanliness of mir- rors.
o Seat and seat belt adjustment and operation.
o Fluid leakage. The vehicle must not be driven if the daily operating checks indicate that any item of equipment related to thesafety or roadworthiness of the vehicle is not functioning correctly. G030B03A-EAT Recommended Oil
1. Petrol engine The engine oil quality should meet the following classification. API SJ, SL or ABOVE, ILSAC GF-3 or ABOVE The oil viscosity should be selected according to the operating environment of the engine by means of the table shown above. The engine oil recom-mendations are complete in themselves and the use of additives is neither required nor recommended. The use ofengine oil additives may result in invali- dation of the vehicle warranty.
G030A01FC-EAT ENGINE OIL The correct engine oil level is of para- mount importance. An excessively highor low oil level may result in irreparable damage being sustained by the engine. The engine oil level must be checkedon a daily basis, whenever the vehicle is refuelled or before starting a long trip, whichever occurs sooner.In addition, it is imperative that only an approved grade and specification of oil is used to avoid the possibility of seri-ous engine damage and premature wear. The use of "budget price" oil is a false economy that must be avoided if themaximum reliability and useful life is to be obtained from the vehicle.
G030B01L
Page 169 of 437
6- 24 DO-IT-YOURSELF MAINTENANCE
!!
SG200A1-E FUSIBLE LINKS The fusible link prevents damage to the wiring harness in the event of an elec-trical system malfunction. Failure of a fusiblelink is indicative of a serious overload condition having occurred andtherefore the electrical system should be checked by a Hyundai authorised repairer before a replacement link isfitted.
WARNING:
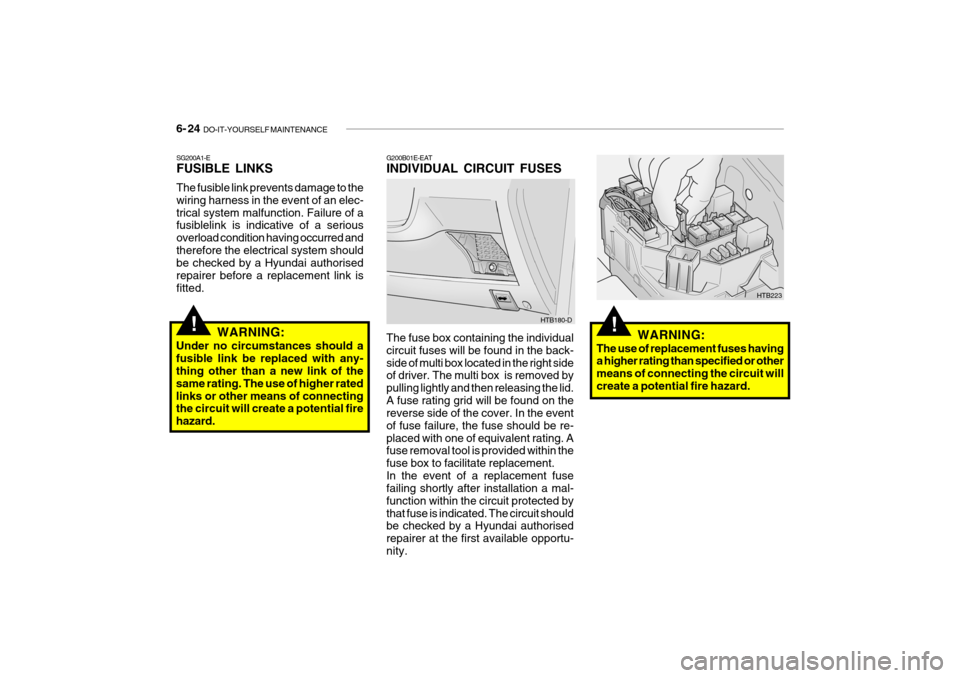
Under no circumstances should afusible link be replaced with any- thing other than a new link of the same rating. The use of higher ratedlinks or other means of connecting the circuit will create a potential fire hazard.G200B01E-EAT INDIVIDUAL CIRCUIT FUSES The fuse box containing the individual circuit fuses will be found in the back-side of multi box located in the right side of driver. The multi box is removed by pulling lightly and then releasing the lid.A fuse rating grid will be found on the reverse side of the cover. In the event of fuse failure, the fuse should be re-placed with one of equivalent rating. A fuse removal tool is provided within the fuse box to facilitate replacement.In the event of a replacement fuse failing shortly after installation a mal- function within the circuit protected bythat fuse is indicated. The circuit should be checked by a Hyundai authorised repairer at the first available opportu-nity. HTB180-D
HTB223
WARNING:
The use of replacement fuses having a higher rating than specified or other means of connecting the circuit willcreate a potential fire hazard.
Page 170 of 437

DO-IT-YOURSELF MAINTENANCE 6- 25
!
!
o If battery electrolyte is spilled onto
skin or into eyes, the effected area must be flushed with copiousamounts of water and medical assis- tance sought.
o If battery electrolyte is ingested, copious amounts of water or milkfollowed by an ant-acid (raw egg or milk of magnesia) must be drunk.Vomiting should not be induced and medical assistance must be sought.
o Batteries must only be charged in well venti-lated areas from whichnaked lights or sources of sparks are excluded.
o Ensure that children, pets or other unauthorized persons are kept awayfrom batteries.
o Do not allow anything to bridge the positive (+) and negative (-) termi-nals of the battery.
o Never invert the battery. The battery fitted during production is of the "Maintenance Free" type.
SG210A1-E BATTERY MAINTENANCE
WARNING:
Motor vehicle batteries contain sulphuric acid which is corrosive and poisonous. Hydrogen gas isemitted from the battery which is explosive when combined with oxy- gen. The following precautions mustbe strictly observed to avoid per- sonal injury or damage to the ve- hicle.
HTB165 SG220A1-E ELECTRIC COOLING FANS
WARNING:
The cooling fan is controlled by en- gine coolant temperature and maysometimes operate even when the engine is not running. Use extreme caution when working near theblades of the cooling fan so that you are not injured by a rotating fan blade. As the engine coolant tem-perature decreases, the fan will auto- matically shut off. This is a normal condition. The engine cooling fan should operate before the temperature gauge reachesthe upper portion of the scale and the condenser fan should operate when- ever the air conditioning is in use.
Page 172 of 437

DO-IT-YOURSELF MAINTENANCE 6- 27
!
5. Open the bonnet.
6. Draw the vertical line (through the
center of each headlight beam pat-tern) and the horizontal line (throughthe center of each headlight beam pattern) on the aiming screen. And then, draw the horizontal paral- lel line at 1.18 in. (30 mm ) under the horizontal line.
7. Adjust each cut-off line of the low beam to the parallel line with a phillipsscrewdriver - VERTICAL AIMING.
8. Adjust each cut-off line of the low
beam to each vertical line with aphillips screwdriver - HORIZONTAL AIMING. HTB269
Horizontal Aiming
Vertical Aiming
G290A01FC-EAT HEADLIGHT AIMING ADJUST- MENT Before performing aiming adjustment, make sure of the following.
1. Keep all tyres inflated to the correct pressure.
2. Place the vehicle on level ground
and press the front bumper and rear bumper down several times. Place the vehicle at a distance of 118 in. (3,000 mm) from the test wall.
3. See that the vehicle is unloaded (except for full levels of coolant,engine oil and fuel, and spare tyre,jack, and tools).
4. Clean the head lights lens and turn
on the headlight (low beam). WARNING:
Be sure to carefully wipe away anywater drained out in this manner, because the fuel mixed in the water might be ignited and result in a fire.
1. Remove the engine cover.
2. Disconnect the air intake hose from air cleaner cover.
3. Loosen the drain plug at the bottom
of the fuel filter.
4. Tighten the drain plug when water no longer comes out.
5. Check to be sure that the warning lamp illuminates when the ignition key is turned to "ON", and that it goes off when the engine is started.If in doubt, consult your nearest Hyundai authorised repairer.
G300B01FC
Page 174 of 437

DO-IT-YOURSELF MAINTENANCE 6- 29
!
HTB183
HTB268HTB184
Replacement instructions:
1. Allow the bulb to cool. Wear eye
protection.
2. Always grasp the bulb by its plastic base, avoid touching the glass.
3. Disconnect the power cord from the bulb base in the back of the head-light.
4. Remove the dust cover. 5. Push the bulb spring for removing
the headlight bulb. 6. Remove the protective cap from the
replacement bulb and install the new bulb by matching the plastic basewith the headlight hole. Install the dust cover after retightening the bulb spring and reconnect the power cord.
7. Use the protective cap and carton to dispose of the old bulb.
8. Check for proper headlight aim.
WARNING
The halogen bulb contains gas un-der pressure and if impacted couldshatter, resulting in flying fragments. Always wear eye protection when servicing the bulb. Protect the bulbagainst abrasions or scratches and against liquids when lighted. Turn on the bulb only when installed in aheadlight. Replace the headlight if damaged or cracked. Keep the bulb out of the reach of children and dis-pose of the used bulb with care.