dot Hyundai Getz 2010 Owner's Manual
[x] Cancel search | Manufacturer: HYUNDAI, Model Year: 2010, Model line: Getz, Model: Hyundai Getz 2010Pages: 256, PDF Size: 7.84 MB
Page 64 of 256
1- 52 FEATURES OF YOUR HYUNDAI
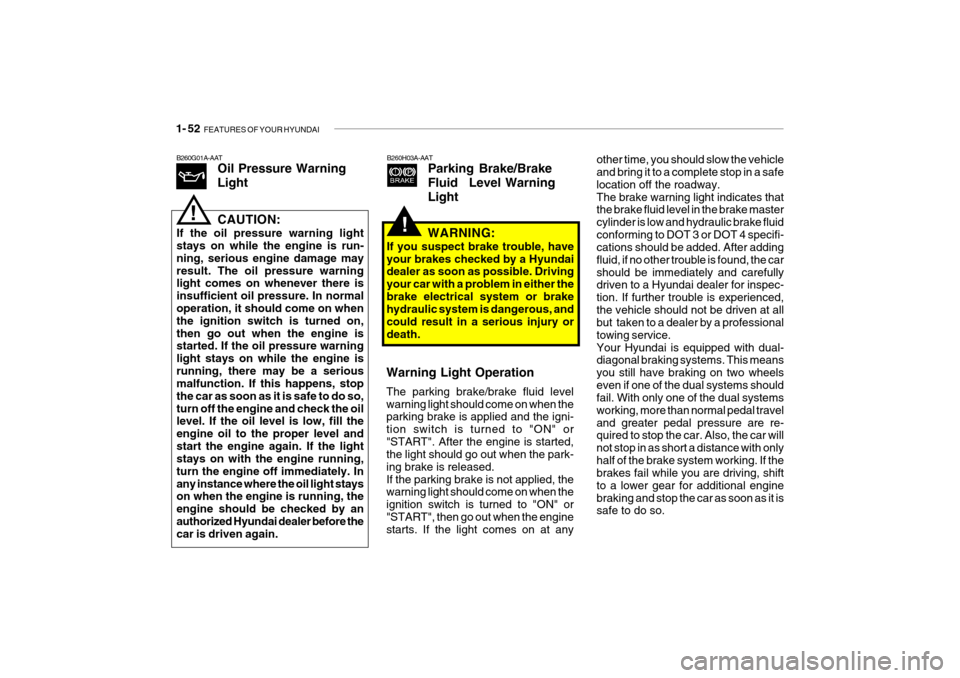
other time, you should slow the vehicle and bring it to a complete stop in a safe location off the roadway.The brake warning light indicates that the brake fluid level in the brake master cylinder is low and hydraulic brake fluidconforming to DOT 3 or DOT 4 specifi- cations should be added. After adding fluid, if no other trouble is found, the carshould be immediately and carefully driven to a Hyundai dealer for inspec- tion. If further trouble is experienced,the vehicle should not be driven at all but taken to a dealer by a professional towing service.Your Hyundai is equipped with dual- diagonal braking systems. This means you still have braking on two wheelseven if one of the dual systems should fail. With only one of the dual systems working, more than normal pedal traveland greater pedal pressure are re- quired to stop the car. Also, the car will not stop in as short a distance with onlyhalf of the brake system working. If the brakes fail while you are driving, shift to a lower gear for additional enginebraking and stop the car as soon as it is safe to do so.
B260H03A-AAT
Parking Brake/Brake
Fluid Level WarningLight
Warning Light Operation The parking brake/brake fluid level warning light should come on when the parking brake is applied and the igni- tion switch is turned to "ON" or"START". After the engine is started, the light should go out when the park- ing brake is released.If the parking brake is not applied, the warning light should come on when the ignition switch is turned to "ON" or"START", then go out when the engine starts. If the light comes on at any WARNING:
If you suspect brake trouble, have your brakes checked by a Hyundai dealer as soon as possible. Driving your car with a problem in either thebrake electrical system or brake hydraulic system is dangerous, and could result in a serious injury ordeath.
!
B260G01A-AAT Oil Pressure Warning Light
!CAUTION:
If the oil pressure warning light stays on while the engine is run- ning, serious engine damage mayresult. The oil pressure warning light comes on whenever there is insufficient oil pressure. In normaloperation, it should come on when the ignition switch is turned on, then go out when the engine is started. If the oil pressure warning light stays on while the engine isrunning, there may be a serious malfunction. If this happens, stop the car as soon as it is safe to do so,turn off the engine and check the oil level. If the oil level is low, fill the engine oil to the proper level andstart the engine again. If the light stays on with the engine running, turn the engine off immediately. Inany instance where the oil light stays on when the engine is running, the engine should be checked by anauthorized Hyundai dealer before the car is driven again.
Page 83 of 256

FEATURES OF YOUR HYUNDAI 1- 71
B460A01Y-AAT SUNROOF (If installed) Sun Shade
Your HYUNDAI is equipped with a sliding sunshade which you can manu- ally adjust to let in light with the sunroof closed, or to block sunlight. B470A01FC
WARNING:
Never adjust the sunshade whiledriving.
!
B460B02GK-GAT Opening the Sunroof System The sunroof can be electrically opened or closed with the ignition key in the "ON" position. The sunroof is moved toits fully open position by pushing the "Open" switch, and to stop at the de- sired position, push in any switches(Open, Close, Up, Down). To close, press and hold the "CLOSE" button. Release the button when the sunroofreaches the desired position. HFC2021
WARNING:
o Do not close a sunroof if anyone’s hands, arms or body are between the sliding glass and the sunroofsash, as this could result in in- jury.
o Do not place your head or arms
out of the sunroof opening at anytime.
o While the vehicle is moving, al-
ways keep the head, hands andother parts of the body of all occu- pants away from the roof opening. Otherwise, you could be seriously injured if the vehicle stops sud-denly or if the vehicle is involved in an accident.
CAUTION:
o Do not open the sunroof in se- verely cold temperature or when it is covered with ice or snow.
o Periodically remove any dirt that may have accumulated on theguide rails.!
!
Page 153 of 256
DRIVING YOUR HYUNDAI 2- 11
C090I04A-AAT
CAUTION:
o Shift into "R", "D" and "P" posi- tion only when the vehicle has completely stopped.
o Do not accelerate the engine in reverse or any of the forwardpositions with the brakes applied.
o Always apply the footbrake when shifting from "P" or "N", to "R",
"D", "2" or "L" position.
o Do not use the "P" (Park) posi- tion in place of the parking brake.Always set the parking brake, shift the transaxle into "P" (Park)position and turn off the ignition when you leave the vehicle, even momentarily. Never leave the ve-hicle unattended while the en- gine is running.
o When accelerating from a stop on a steep hill, the vehicle mayhave a tendency to roll back- wards. Shifting the shift lever into2nd gear will help prevent the vehicle from rolling backwards. C090N05A-AAT Good Driving Practices
o Never move the gear selector lever
from "P" or "N" to any other position with the accelerator pedal de- pressed.
o Never move the gear selector lever into "P" when the vehicle is in mo-tion.
o Be sure the car is completely stopped before you attempt to shift into "R"and "D".
o Never take the car out of gear and coast down a hill. This may be ex-tremely hazardous. Always leavethe car in gear when moving.
o Do not "ride" the brakes. This can
cause them to overheat and mal-function. Instead, when you are driv- ing down a long hill, slow down and shift to a lower gear. When you dothis, engine braking will help slow
! the car.
o Slow down before shifting to a lower
gear. Otherwise, the lower gear may not be engaged.
o Always use the parking brake. Do
not depend on placing the transaxlein "P" to keep the car from moving.
o Exercise extreme caution when driv-
ing on a slippery surface. Be espe-cially careful when braking, acceler- ating or shifting gears. On a slippery surface, an abrupt change in ve-hicle speed can cause the drive wheels to lose traction and the ve- hicle to go out of control.
o Optimum vehicle performance and economy is obtained by smoothlydepressing and releasing the accel-erator pedal.
o Turn the overdrive switch on for good
fuel economy and smooth driving. Ifengine braking is needed in the "D" range or if repeated upshifting and downshifting between 3rd and 4thgear is needed when climbing a gentle slope, it is recommended that the overdrive switch be turned off. Turnthe overdrive switch back on imme- diately afterward.
o Check the automatic transaxle fluidlevel regularly, and add fluid as necessary.
o See the maintenance schedule for
the proper fluid recommendation.
Page 196 of 256
5- 10 VEHICLE MAINTENANCE REQUIREMENTS
F070L01A-AAT
o Suspension Mounting Bolts
Check the suspension connections for
looseness or damage. Retighten to the specified torque. F070M01A-AAT
o Steering Gear Box, Linkage &
Boots/Lower arm Ball Joint
With the vehicle stopped and engine
off, check for excessive free-play inthe steering wheel. Check the linkage for bends or damage. Check the dust boots and ball joints for deterioration,cracks, or damage. Replace any dam- aged parts.
F070N01A-AAT
o Power Steering Pump, Belt
and Hoses
Check the power steering pump and
hoses for leakage and damage. Re- place any damaged or leaking parts immediately. Inspect the power steer- ing belt for evidence of cuts, cracks,excessive wear, oiliness and proper tension. Replace or adjust it if neces- sary.
F070J01A-AAT
o Brake Pads, Calipers and
Rotors
Check the pads for excessive wear,
discs for run out and wear, and cali-pers for fluid leakage.
F070K01A-AAT
o Exhaust Pipe and Muffler
Visually inspect the exhaust pipes,
muffler and hangers for cracks, dete-rioration, or damage. Start the engineand listen carefully for any exhaust gas leakage. Tighten connections or replace parts as necessary.
F070F01A-AAT
o Brake Hoses and Lines Visually check for proper installation, chafing, cracks, deterioration and any leakage. Replace any deteriorated or damaged parts immediately. F070G02A-AAT
o Brake Fluid Check brake fluid level in the brake fluid reservoir. The level should be between "MIN" and "MAX" marks onthe side of the reservoir. Use only hydraulic brake fluid conforming to DOT 3 or DOT 4. F070H01A-AAT
o Rear Brake Drums/Linings
Parking Brake
Check the rear brake drums and lin- ings for scoring, burning, leaking fluid, broken parts, and excessive wear. Inspect the parking brake system in-cluding the parking brake lever and cables. For detailed service proce- dures, refer to the Shop Manual.
Page 214 of 256
DO-IT-YOURSELF MAINTENANCE 6- 17
WARNING (DIESEL ONLY):
Never work on injection system with engine running or within 30 secondsafter shutting off engine. High pres- sure pump, rail, injectors and high pressure pipes are subjected to highpressure even after the engine has been switched off. The fuel jet pro- duced by fuel leaks may cause seri-ous injury, if it contacts with the body. People using pacemakers should not move closer than 30cm tothe ECU or wiring harness within the engine room with the engine run- ning, since the high currents in the Common Rail system produce con- siderable magnetic fields.
!
G120A01A-AAT CHECKING THE BRAKES G120B01A-AATChecking the Brake Fluid Level
!
CAUTION:
Because brakes are essential to the safe operation of the car, it is sug- gested that they be checked and inspected by your Hyundai dealer.The brakes should be checked and inspected for wear at those inter- vals specified in the vehicle mainte-nance schedule in Section 5. WARNING:
Use caution when handling brakefluid. It can damage your vision if it gets into your eyes. It will also dam- age your vehicle's paint if spilledon it and not removed immediately.!
G120C02A-AAT Recommended Brake Fluid Use only hydraulic brake fluid con- forming to DOT 3 or DOT 4 specifica- tions in your braking system. Follow the instructions printed on the con-tainer.
Page 215 of 256

6- 18 DO-IT-YOURSELF MAINTENANCE
G140A01A-AAT AIR CONDITIONING CARE Keeping the Condenser Clean The air conditioning condenser (and engine radiator) should be checked periodically for accumulation of dirt,dead insects, leaves, etc. These can interfere with maximum cooling effi- ciency. When removing such accumu-lations, brush or hose them away care- fully to avoid bending the cooling fans. G140B01A-AAT Checking the Air Conditioning Operation
1. Start the engine and let it run at a
fast idle for several minutes with the air conditioning set at the maximum cold setting.
2. If the air coming out of the in-dash vents is not cold, have the air condi-tioning system inspected by yourHyundai dealer.
! CAUTION:
Running the air conditioning sys- tem for extended periods of timewith a low refrigerant level may damage the compressor.
G120E02TB-AAT Adding Brake Fluid
WARNING:
Handle brake fluid carefully. It can damage your vision if it gets intoyour eyes. Use only DOT 3 or DOT 4 specification fluid from a sealed container. Do not allow the fluidcan or reservoir to remain open any longer than required. This will pre- vent entry of dirt and moisture whichcan damage the brake system and cause improper operation.
!
To add brake fluid;
1) If it is necessary, remove the air cleaner cover.
2) Wipe away any dirt then unscrew the fluid reservoir cap.
3) Slowly pour the recommended fluid
into the reservoir using by a funnel. Do not overfill. Before using, check the condition of the funnel to prevent a mixture of a foreign substance.
4) Carefully replace the cap on the res- ervoir and tighten.
G120D02A-AAT To Check the Fluid Level
HTB166
The fluid level in the brake fluid reser- voir should be checked periodically. The level should be between the "MIN" and "MAX" marks on the side of thereservoir. If the level is at or below the "MIN" mark, carefully add fluid to bring it up to "MAX". Do not overfill. NOTE: If the level is below the "MIN" mark, it should be changed by an autho-rized Hyundai dealer.
Page 226 of 256
DO-IT-YOURSELF MAINTENANCE 6- 29
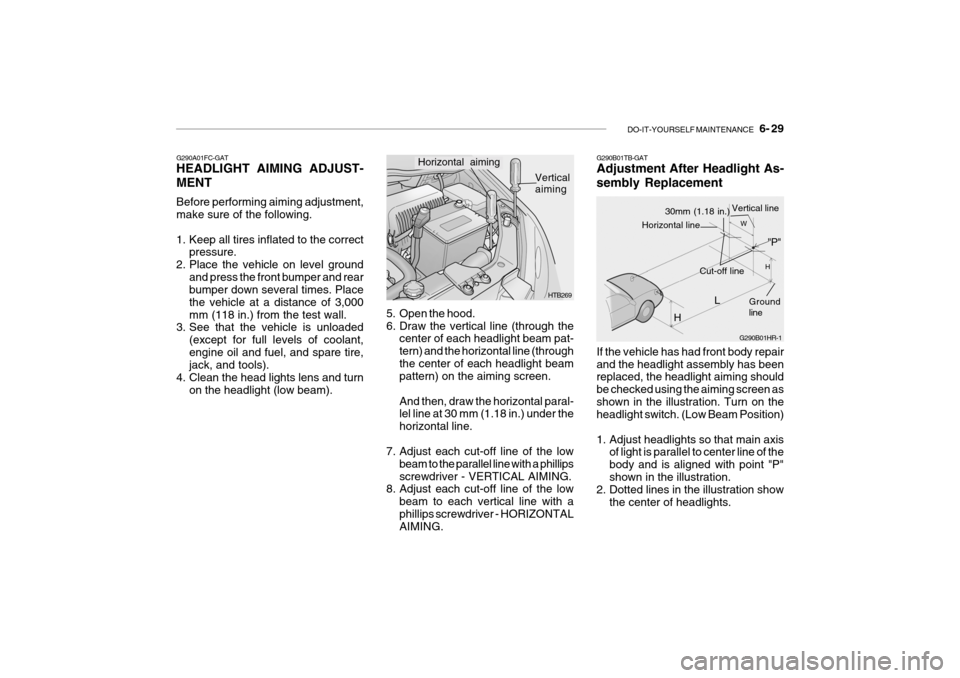
If the vehicle has had front body repair and the headlight assembly has been replaced, the headlight aiming should be checked using the aiming screen asshown in the illustration. Turn on the headlight switch. (Low Beam Position)
1. Adjust headlights so that main axis
of light is parallel to center line of the body and is aligned with point "P"shown in the illustration.
2. Dotted lines in the illustration show
the center of headlights.
G290B01TB-GAT Adjustment After Headlight As- sembly Replacement
G290B01HR-1
L
W
H
H Cut-off line
Ground line
"P"
Horizontal line
30mm (1.18 in.) Vertical line
5. Open the hood.
6. Draw the vertical line (through the
center of each headlight beam pat-tern) and the horizontal line (throughthe center of each headlight beam pattern) on the aiming screen. And then, draw the horizontal paral- lel line at 30 mm (1.18 in.) under the horizontal line.
7. Adjust each cut-off line of the low beam to the parallel line with a phillipsscrewdriver - VERTICAL AIMING.
8. Adjust each cut-off line of the low
beam to each vertical line with aphillips screwdriver - HORIZONTAL AIMING. HTB269
Horizontal aiming
Vertical aiming
G290A01FC-GAT HEADLIGHT AIMING ADJUST- MENT Before performing aiming adjustment, make sure of the following.
1. Keep all tires inflated to the correct
pressure.
2. Place the vehicle on level ground and press the front bumper and rear bumper down several times. Place the vehicle at a distance of 3,000mm (118 in.) from the test wall.
3. See that the vehicle is unloaded
(except for full levels of coolant,engine oil and fuel, and spare tire, jack, and tools).
4. Clean the head lights lens and turn on the headlight (low beam).
Page 250 of 256

9- 4 VEHICLE SPECIFICATIONS
Oil & Grease Standard
API service SAE 5W-20 (5W-30) SM* 1
or above, SAE 10W-30 (ABOVE -18°C)
ILSAC GF-4 SAE 15W-40 (ABOVE -13°C)
or above SAE 20W-50 (ABOVE -7°C)
API CH4 SAE 30 (0°C ~ 40°C)
or above, SAE 20W-40 (ABOVE -10°C)
ACEA B4 SAE 15W-40 (ABOVE -15°C)
or above SAE 10W-30 (-20°C ~ 40°C) SAE 5W-30 (-25°C ~ 40°C)SAE 0W-30 (BELOW 10°C) * 2
, * 3
* 2
. Restricted to driving condition and dealing area
* 3
. Not recommended for sustained high speed vehicle operation
Normal driving condition Severe driving condition HYUNDAI GENUINE PARTS MTF 75W/85 (API GL-4) HYUNDAI GENUINE ATF SP-III, DIAMOND ATF SP-III, SK ATF SP-III or other brands approved by Hyundai Motor Co.,PSF-3 DOT 3, DOT 4 or equivalent Ethylene glycol base for aluminum radiator
Item
Engine Oil Gaso- line Diesel
Recommends
Engine Oil Consumption Transaxle Manual Auto
Power Steering
Brake Fluid Coolant
J080A06TB-GAT LUBRICATION CHARTQuantity (liter) (Imp.qts.)
Drain and refill (with oil filter) 1.1L : 3.0 liter (2.6 Imp.qts.) 1.4L/1.6L : 3.3 liter (2.9 Imp.qts.) Drain and refill (with oil filter) : 5.3 liter (4.2 Imp.qts.) MAX. 1L / 1,500 Km MAX. 1L / 1,000 Km Gasoline : 2.15 liter (1.86 Imp.qts.) Diesel : 2.0 liter (1.75 Imp.qts.)6.1 liter (5.3 Imp.qts) (Gasoline only) As requiredAs required Gasoline : 5.5 liter (4.8 Imp.qts.) Diesel: 5.7 liter (5.0 Imp.qts.)
* 1
: If the API service SM engine oil is not available in your country, you are able to use API service SL.
J080A06TB-GAT LUBRICATION CHART