part Hyundai Getz 2010 Owner's Manual
[x] Cancel search | Manufacturer: HYUNDAI, Model Year: 2010, Model line: Getz, Model: Hyundai Getz 2010Pages: 256, PDF Size: 7.84 MB
Page 1 of 256
F1
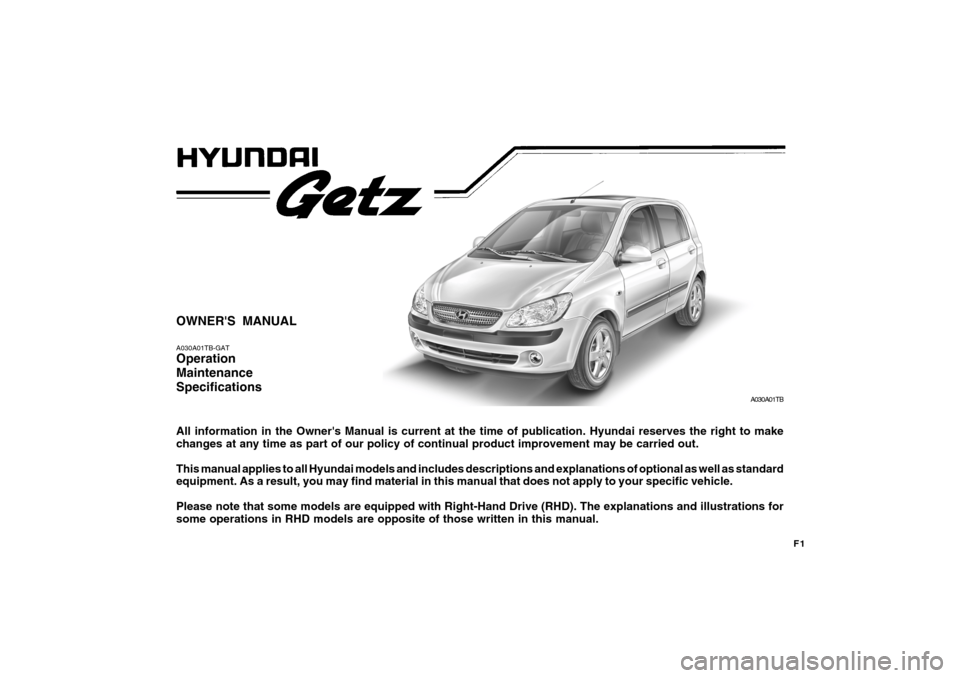
OWNER'S MANUAL A030A01TB-GAT Operation MaintenanceSpecifications All information in the Owner's Manual is current at the time of publication. Hyundai reserves the right to make changes at any time as part of our policy of continual product improvement may be carried out. This manual applies to all Hyundai models and includes descriptions and explanations of optional as well as standard equipment. As a result, you may find material in this manual that does not apply to your specific vehicle. Please note that some models are equipped with Right-Hand Drive (RHD). The explanations and illustrations for some operations in RHD models are opposite of those written in this manual.A030A01TB
Page 3 of 256

F3
A050A04A-AAT
HYUNDAI MOTOR COMPANY
Note: Because future owners will also need the information included in this manual, if you sell this
Hyundai, please leave the manual in the vehicle for their use. Thank you.
CAUTION:
Severe engine and transaxle damage may result from the use of poor quality fuels and lubricants that do not meet Hyundai specifications. You must always use high quality fuelsand lubricants that meet the specifications listed on Page 9-4 in the Vehicle Specifications section of the Owner's Manual. Copyright 2009 Hyundai Motor Company. All rights reserved. No part of this publication may be reproduced, stored in any retrieval system or transmitted in any form or by any means without the prior written permission of Hyundai Motor Company.
A040A01A-AAT
FOREWORD
Thank you for choosing Hyundai. We are pleased to welcome you to the growing number of discriminating people who drive Hyundais. The advanced engineering and high-quality construc- tion of each Hyundai we build is something of which we're very proud. Your Owner's Manual will introduce you to the features and operation of your new Hyundai. It is suggested that you read it carefully since the information it contains can contribute greatly to thesatisfaction you receive from your new car. The manufacturer also recommends that all service and maintenance on your car be performed by an authorized Hyundai dealer. Hyundai dealers are prepared to provide high-quality service, maintenance and any other assistance that may be required.
!
Page 6 of 256
F6
A100A01L-GAT GUIDE TO HYUNDAI GENUINE PARTS
1.What are Hyundai Genuine Parts?Hyundai Genuine Parts are the same parts used by Hyundai Motor Com- pany to manufacture vehicles. They are designed and tested for theoptimum safety, performance, and reliability to our customers.
2. Why should you use genuine parts? Hyundai Genuine Parts are engi- neered and built to meet rigid origi-nal manufacturing requirements.
A100A01LUsing imitation, counterfeit or used salvage parts are not covered under the Hyundai New Vehicle LimitedWarranty or any other Hyundai war- ranty. In addition, any damage to or failure of Genuine Hyundai Partscaused by the installation or failure of an imitation, counterfeit or used salvage part is not covered byHyundai Motor Company.
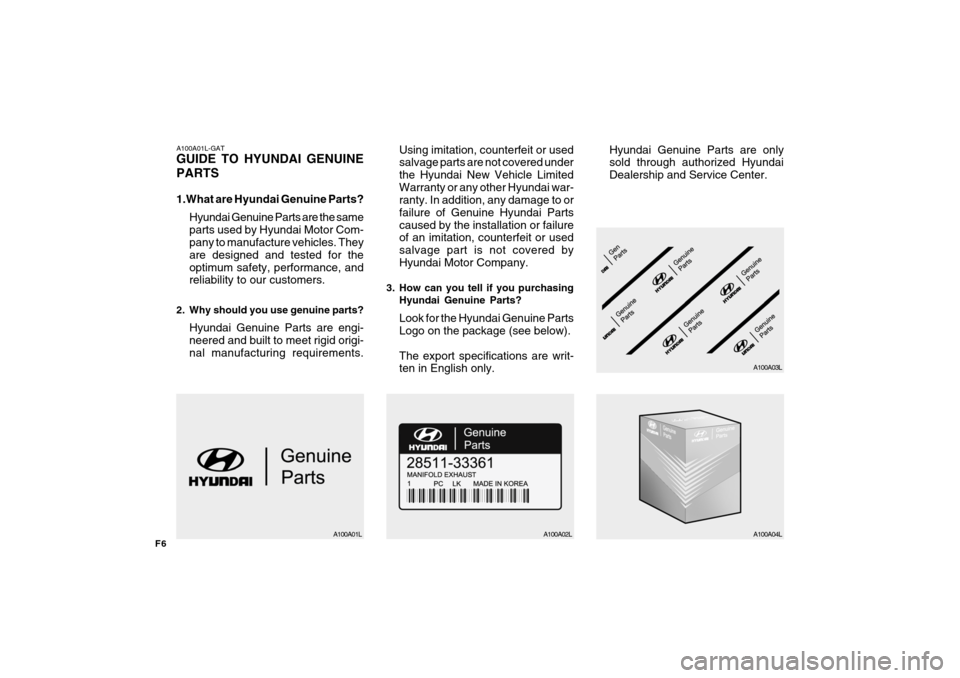
3. How can you tell if you purchasing Hyundai Genuine Parts? Look for the Hyundai Genuine Parts Logo on the package (see below). The export specifications are writ- ten in English only.
A100A02L A100A04L
A100A03L
Hyundai Genuine Parts are onlysold through authorized Hyundai Dealership and Service Center.
Page 9 of 256

YOUR VEHICLE AT A GLANCE
F9
1. Headlight Leveling Switch (If installed)
2. Front Fog Light Switch (If installed)
3. Multi-Function Light Switch
4. Instrument Cluster
5. Horn and Driver's Airbag (If installed)
6. Windshield Wiper/Washer Switch
7. Digital Clock
8. Hazard Warning Light
9. Audio System (If installed)
10. Passenger's Airbag (If installed)
11. Glove Box
CAUTION:
When installing a container of liquid air freshener inside a vehicle, do not place it near the instrument cluster nor on the instrument panel pad surface. If there is any leakage from the air freshener onto these areas (instrument cluster, instrument panel pad or air ventilator), it may damage these parts.If the liquid from the air freshener doesleak onto these areas, wash them with water immediately. 12. Hood Release Lever
13. Fuse Box
14. Audio Remote Control Switch (If installed)
15. Heating/Air Conditioning Control Panel
(If installed)
16. Cigarette Lighter
17. Ashtray
18. Front Drink Holder
19. Shift Lever (If installed)
20. Parking Brake Lever
21. Rear Drink Holder
!
Page 11 of 256

YOUR VEHICLE AT A GLANCE
F11
1. Glove Box
2. Passenger's Airbag (If installed)
3. Audio System (If installed)
4. Hazard Warning Light
5. Digital Clock
6. Windshield Wiper/Washer Switch
7. Horn and Driver's Airbag (If installed)
8. Instrument Cluster
9. Multi-Function Light Switch
10. Headlight Leveling Switch (If installed)
11. Rear Drink Holder
CAUTION:
When installing a container of liquid air freshener inside a vehicle, do not place it near the instrument cluster nor on the instrument panel pad surface. If there is any leakage from the air freshener onto these areas (instrument cluster, instrument panel pad or air ventilator), it may damage these parts. If the liquid from the air freshener does leak onto these areas, wash them with water immediately. 12. Parking Brake Lever
13. Shift Lever (If installed)
14. Front Drink Holder
15. Ashtray
16. Power Outlet (If installed)
17. Heating/Air Conditioning Control Panel
(If installed)
18. Audio Remote Control Switch (If installed)
19. Fuse Box
20. Hood Release Lever
!
Page 27 of 256
FEATURES OF YOUR HYUNDAI 1- 15
HTB064
(1)
B060A02E-AAT POWER WINDOWS (If Installed)
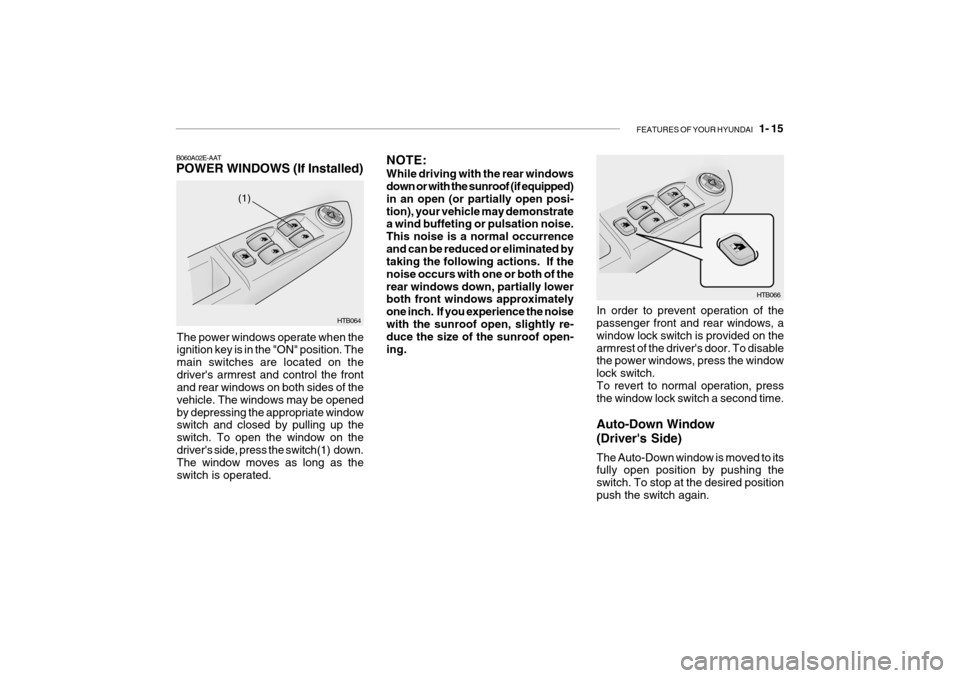
The power windows operate when the ignition key is in the "ON" position. The main switches are located on thedriver's armrest and control the front and rear windows on both sides of the vehicle. The windows may be openedby depressing the appropriate window switch and closed by pulling up the switch. To open the window on thedriver's side, press the switch(1) down. The window moves as long as the switch is operated.
HTB066
In order to prevent operation of the passenger front and rear windows, a window lock switch is provided on thearmrest of the driver's door. To disable the power windows, press the window lock switch.To revert to normal operation, press the window lock switch a second time. Auto-Down Window (Driver's Side) The Auto-Down window is moved to its fully open position by pushing the switch. To stop at the desired positionpush the switch again.
NOTE: While driving with the rear windows down or with the sunroof (if equipped) in an open (or partially open posi-tion), your vehicle may demonstrate a wind buffeting or pulsation noise. This noise is a normal occurrenceand can be reduced or eliminated by taking the following actions. If the noise occurs with one or both of therear windows down, partially lower both front windows approximately one inch. If you experience the noisewith the sunroof open, slightly re- duce the size of the sunroof open- ing.
Page 30 of 256
1- 18 FEATURES OF YOUR HYUNDAI
HTB025
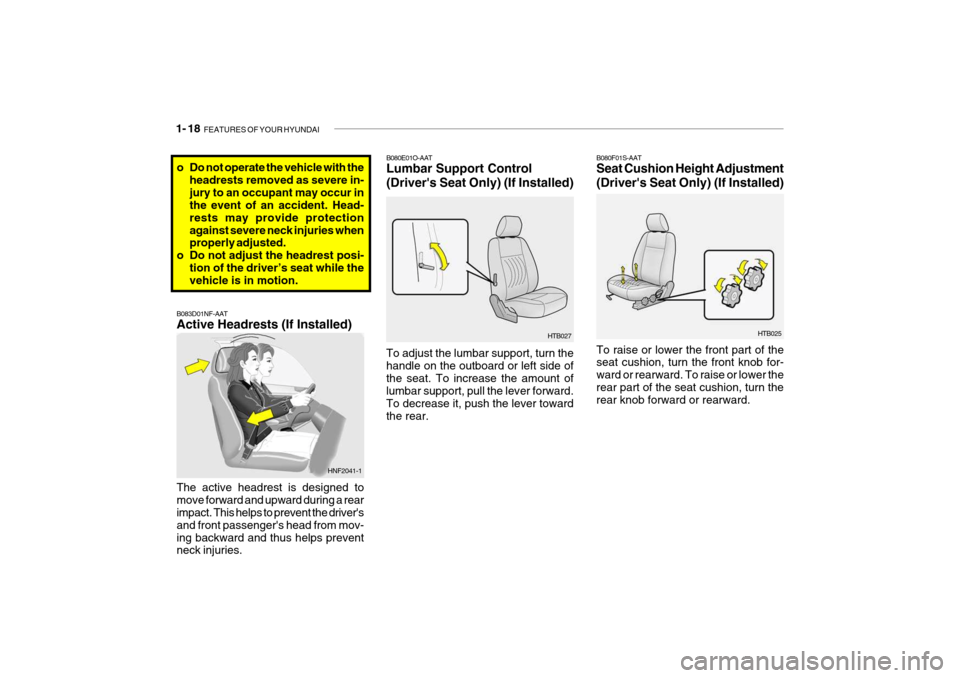
B080F01S-AAT Seat Cushion Height Adjustment (Driver's Seat Only) (If Installed) To raise or lower the front part of the seat cushion, turn the front knob for- ward or rearward. To raise or lower therear part of the seat cushion, turn the rear knob forward or rearward.HTB027
B080E01O-AAT Lumbar Support Control
(Driver's Seat Only) (If Installed)
To adjust the lumbar support, turn the handle on the outboard or left side ofthe seat. To increase the amount of lumbar support, pull the lever forward. To decrease it, push the lever towardthe rear.
o Do not operate the vehicle with the headrests removed as severe in- jury to an occupant may occur in the event of an accident. Head- rests may provide protectionagainst severe neck injuries when properly adjusted.
o Do not adjust the headrest posi-
tion of the driver’s seat while thevehicle is in motion.
B083D01NF-AAT Active Headrests (If Installed) The active headrest is designed to move forward and upward during a rear impact. This helps to prevent the driver's and front passenger's head from mov-ing backward and thus helps prevent neck injuries. HNF2041-1
Page 36 of 256
1- 24 FEATURES OF YOUR HYUNDAI
B160B01A-AAT Periodic Inspection It is recommended that all seat belts be inspected periodically for wear ordamage of any kind. Parts of the sys- tem that are damaged should be re- placed as soon as possible. B160C01A-AAT Keep Belts Clean and Dry Seat belts should be kept clean and dry. If belts become dirty, they can be cleaned by using a mild soap solutionand warm water. Bleach, dye, strong detergents or abrasives should not be used because they may damage andweaken the fabric.
B160D01A-AAT When to Replace Seat Belts Entire in-use seat belt assembly or assemblies should be replaced if the vehicle has been involved in an acci-dent. This should be done even if no damage is visible. Additional ques- tions concerning seat belt operationshould be directed to your Hyundai Dealer.B150G01A-AAT Do Not Lie Down To reduce the chance of injuries in the event of an accident, and to achievemaximum effectiveness of the restraint system, all passengers should be sit- ting up and the front seats should be inan upright position when the car is moving. A seat belt cannot provide proper protection if the person is lyingdown in the rear seat or if the front seat is in a reclined position. would be applied there, not at yourpelvic bones. This could cause serious internalinjuries. For proper protection when the ve- hicle is in motion, have the seatbackupright. Then sit back in the seat and wear your seat belt properly. See page 1-27. B160A01A-AAT CARE OF SEAT BELTS Seat belt systems should never be disassembled or modified. In addition, care should be taken to assure thatseat belts and belt hardware are not damaged by seat hinges, doors or other abuse.
WARNING:
Sitting in a reclined position or ly- ing down when your vehicle is in motion can be dangerous. Even ifyou buckle up, your seat belts can't do their job when you're reclined. The shoulder belt can't do its jobbecause it won't be against your body. Instead, it will be in front of you. In a crash you could go into itwith great force, receiving serious neck or other injuries. The lap belt can't do its job either. Ina crash the belt could go up over your abdomen. The belt forces
!
WARNING:
When you return the rear seatback to its upright position after the rear seatback was folded down, be care- ful not to damage the seat belt web-bing or buckle. Be sure that the webbing or buckle does not get caught or pinched in the rear seat.!
Page 42 of 256
1- 30 FEATURES OF YOUR HYUNDAI
o Children who are too large to be in
a child restraint should sit in the rear seat and be restrained with the available lap/shoulder belts. Never allow children to ride in thefront passenger seat.
o Always make sure that the shoul- der belt portion of the outboard lap/shoulder belt is positioned midway over the shoulder, neveracross the neck or behind the back. Moving the child closer to the center of the vehicle may helpprovide a good shoulder belt fit. The lap belt portion of the lap/ shoulder belt or the center seat lap belt must always be posi- tioned as low as possible on thechild's hips and as snug as pos- sible.
o If the seat belt will not properly fit the child, Hyundai recommends the use of an approved boosterseat in the rear seat in order to raise the child's seating height so that the seat belt will properly fitthe child.B230A04A-GAT CHILD RESTRAINT SYSTEM (If Installed) Children riding in the car should sit in the rear seat and must always be properly restrained to minimize therisk of injury in an accident, sudden stop or sudden maneuver. According to accident statistics, children are saferwhen properly restrained in the rear seats than in the front seat. Larger children not in a child restraint shoulduse one of the seat belts provided. You are required by law to use safety restraints for children. If small childrenride in your vehicle you must put them in a child restraint system (safety seat). Child restraint systems are designed tobe secured in vehicle seats by lap belts or the lap belt portion of a lap/shoulder belt, or by a tether anchor and/or ISOFIXanchors (if installed). Children could be injured or killed in a crash if their restraints are not properlysecured. For small children and babies, a child seat or infant seat must be used. Before buying a particular child restraintsystem, make sure it fits your car and seat belts, and fits your child. Follow all the instructions provided by the manu-facturer when installing the child re- straint system. WARNING:
o A child restraint system must be placed in the rear seat. Neverinstall a child or infant seat on the front passenger's seat.Should an accident occur and cause the passenger side airbag to deploy, it could severely in-jure or kill an infant or child seated in an infant or child seat. Thus, only use a child restraint in therear seat of your vehicle.
o Since a safety belt or child re- straint system can become very hot if it is left in a closed vehicle, be sure to check the seat coverand buckles before placing a child there.
o When the child restraint system is not in use, store it in the luggage compartment or fasten it with asafety belt so that it will not be thrown forward in the case of a sudden stop or an accident.
!
Page 46 of 256
1- 34 FEATURES OF YOUR HYUNDAI
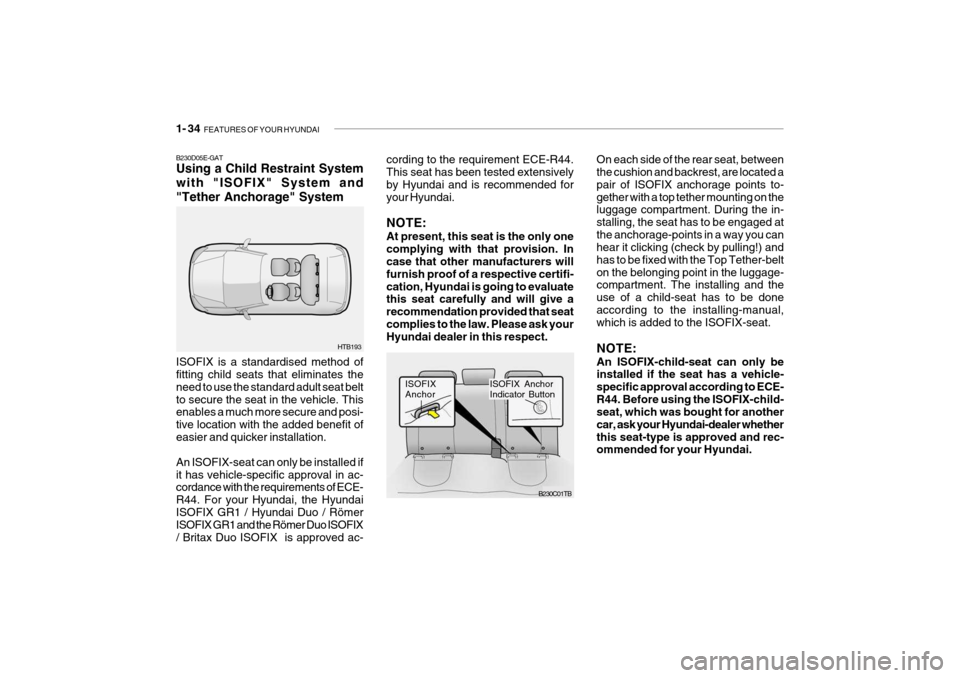
B230D05E-GAT Using a Child Restraint System with "ISOFIX" System and"Tether Anchorage" System ISOFIX is a standardised method of fitting child seats that eliminates the need to use the standard adult seat beltto secure the seat in the vehicle. This enables a much more secure and posi- tive location with the added benefit ofeasier and quicker installation. An ISOFIX-seat can only be installed if it has vehicle-specific approval in ac- cordance with the requirements of ECE- R44. For your Hyundai, the HyundaiISOFIX GR1 / Hyundai Duo / Römer ISOFIX GR1 and the Römer Duo ISOFIX / Britax Duo ISOFIX is approved ac-
HTB193 cording to the requirement ECE-R44. This seat has been tested extensively by Hyundai and is recommended foryour Hyundai. NOTE: At present, this seat is the only one complying with that provision. In case that other manufacturers will furnish proof of a respective certifi-cation, Hyundai is going to evaluate this seat carefully and will give a recommendation provided that seatcomplies to the law. Please ask your Hyundai dealer in this respect.
B230C01TB
ISOFIX Anchor
ISOFIX Anchor Indicator Button On each side of the rear seat, between the cushion and backrest, are located a pair of ISOFIX anchorage points to-gether with a top tether mounting on the luggage compartment. During the in- stalling, the seat has to be engaged atthe anchorage-points in a way you can hear it clicking (check by pulling!) and has to be fixed with the Top Tether-belton the belonging point in the luggage- compartment. The installing and the use of a child-seat has to be doneaccording to the installing-manual, which is added to the ISOFIX-seat. NOTE: An ISOFIX-child-seat can only be installed if the seat has a vehicle- specific approval according to ECE-R44. Before using the ISOFIX-child- seat, which was bought for another car, ask your Hyundai-dealer whetherthis seat-type is approved and rec- ommended for your Hyundai.