weight Hyundai Grand i10 2015 Owner's Manual
[x] Cancel search | Manufacturer: HYUNDAI, Model Year: 2015, Model line: Grand i10, Model: Hyundai Grand i10 2015Pages: 343, PDF Size: 29.47 MB
Page 4 of 343
Introduction
4
1
Gasoline containing alcohol and
methanol
Gasohol, a mixture of gasoline and
ethanol (also known as grain alcohol),and gasoline or gasohol containing
methanol (also known as wood alcohol)
are being marketed along with or instead
of leaded or unleaded gasoline.Do not use gasohol containing more than10% ethanol, and do not use gasoline or
gasohol containing any methanol. Either
of these fuels may cause drivability prob-lems and damage the fuel system.
Discontinue using gasohol of any kind if
drivability problems occur. Vehicle dam-
age or driveability problems may not be
covered by the manufacturer’s warranty if
they result from the use of:
1. Gasohol containing more than 10% ethanol.
2. Gasoline or gasohol containing methanol.
3. Leaded fuel or leaded gasohol. (Except for vehicle designed to use
leaded gasoline for some countries)
Use of MTBE
HYUNDAI recommends avoiding fuels
containing MTBE (Methyl Tertiary Butyl
Ether) over 15.0% vol. (Oxygen Content
2.7% weight) in your vehicle.
Fuel containing MTBE over 15.0% vol.
(Oxygen Content 2.7% weight) may
reduce vehicle performance and produce
vapor lock or hard starting.
Do not use methanol
Fuels containing methanol (wood alco-
hol) should not be used in your vehicle.
This type of fuel can reduce vehicle per-
formance and damage components ofthe fuel system.
CAUTION
Never use gasohol which contains
methanol. Discontinue use of anygasohol product which impairs dri-vability.
CAUTION
Your New Vehicle Limited Warrantymay not cover damage to the fuelsystem and any performance prob-lems that are caused by the use of
fuels containing methanol or fuelscontaining MTBE (Methyl Tertiary Butyl Ether) over 15.0% vol.(Oxygen Content 2.7% weight.)
CAUTION
Your New Vehicle Limited Warrantymay not cover damage to the fuelsystem and performance problems
that are caused by the use ofmethanol or fuels containing methanol.
Page 29 of 343
Safety system of your vehicle
18
3
Additional seat belt safety pre- cautions
Seat belt use during pregnancy
The seat belt should always be used dur-
ing pregnancy. The best way to protect
your unborn child is to protect yourself by
always wearing the seat belt.
Pregnant women should always wear a
lap-shoulder seat belt. Place the shoul-
der belt across the chest, routed away
from the neck. Place the lap belt below
the belt line so that it fits snugly and as
low as possible across the hips, notacross the abdomen.
Seat belt use and children
Infant and small children
Most countries have child restraint laws
which require children to travel in
approved child restraint devices, includ-
ing booster seats. The age at which seatbelts can be used instead of child
restraints differs among countries, so you
should be aware of the specific require-
ments in your country, and where you are
travelling. Infant and child restraints must
be properly placed and installed in a rear
seat. For more information refer to the
“Child Restraint Systems” in this chapter. Small children are best protected from
injury in an accident when properly
restrained in the rear seat by a child
restraint system that meets the require-
ments of the Safety Standards of your
country. Before buying any child restraint
system, make sure that it has a label cer-
tifying that it meets Safety Standard of
your country. The restraint must be
appropriate for your child's height and
weight. Check the label on the child
restraint for this information. Refer to
“Child Restraint Systems” in this chapter.
Larger children Children under age 13 and who are too
large for a booster seat must always
occupy the rear seat and use the avail-
able lap/shoulder belts. A seat beltshould lie across the upper thighs and be
snug across the shoulder and chest to
restrain the child safely. Check belt fit
periodically. A child's squirming could put
the belt out of position. In the event of an
accident, children are safest when they
are seated in the rear seat and restrained
by the seat belts or by a child restraintsystem.
WARNING
To reduce the risk of serious injury
or death to an unborn child during
an accident, pregnant womenshould NEVER place the lap por-
tion of the seat belt above or overthe area of the abdomen where the
unborn child is located.WARNING
ALWAYS properly restrain infants
and small children in a child
restraint appropriate for the child’sheight and weight.
To reduce the risk of serious injury
or death to a child and other pas-
sengers, NEVER hold a child in
your lap or arms when the vehicle
is moving. The violent forces creat-ed during an accident will tear the
child from your arms and throw the
child against the interior of the
vehicle.
Page 32 of 343
321
Safety system of your vehicle
CHILD RESTRAINT SYSTEM (CRS)
Children under age 13 must always ride
in the rear seats and must always be
properly restrained to minimize the risk of
injury in an accident, sudden stop or sud-
den maneuver. According to accident
statistics, children are safer when proper-
ly restrained in the rear seats than in the
front seat. Even with air bags, children
can be seriously injured or killed.
Children too large for a child restraint
must use the seat belts provided. Most countries have child restraint laws
which require children to travel in
approved child restraint devices. The
laws governing the age or height/weight
restrictions at which seat belts can be
used instead of child restraints differs
among countries, so you should be
aware of the specific requirements in
your country, and where you are travel-ling.
Child restraint systems must be properly
placed and installed in the rear seat. You
must use a commercially available child
restraint system that meets the require-
ments of the Safety Standards of your
country.
Child restraint systems are generally
designed to be secured in a vehicle seat
by lap belt or the lap belt portion of alap/shoulder belt in the rear seats of the
vehicle.
Child Restraint System (CRS)
Infants and younger children must be
restrained in an appropriate rear-facing
or forward-facing CRS that has first been
properly secured to the rear seat of the
vehicle. Read and comply with the
instructions for installation and use pro-
vided by the manufacturer of the child
restraint.WARNING
Always properly restrain children in
the rear seats of the vehicle.
Children of all ages are safer when
restrained in the rear seat. A child
riding in the front passenger seat
can be forcefully struck by an inflat-
ing air bag resulting in SERIOUS
INJURY or DEATH.
WARNING
An improperly secured child restraint can increase the risk of
SERIOUS INJURY or DEATH in an
accident. Always take the following
precautions when using a childrestraint system:
NEVER install a child or infant restraint in the front passenger’s seat.
Always properly secure the child restraint to a rear seat of the vehi-
cle.
Always follow the child restraint system manufacturer’s instruc-
tions for installation and use.
(Continued)
Page 33 of 343

Safety system of your vehicle
22
3
Selecting a Child Restraint System (CRS)
When selecting a CRS for your child,
always:
Make sure the CRS has a label certify-
ing that it meets applicable Safety
Standards of your country.
Select a child restraint system based on your child’s height and weight. The
required label or the instructions for
use typically provide this information.
Select a child restraint system that fits the vehicle seating position where itwill be used.
Read and comply with the warnings and instructions for installation and use
provided with the child restraint system.Child restraint system types
There are three main types of child
restraint systems: rear-facing seats, for-
ward-facing seats, and booster seats.
They are classified according to the
child’s age, height and weight.
Rear-facing child seats
WARNING
NEVER install a child or infant
restraint in the front passenger’sseat.
Placing a rear-facing child restraint
in the front seat can result in SERI-
OUS INJURY or DEATH if the child
restraint is struck by an inflating air
bag.
(Continued)
Always properly restrain your child in the child restraint.
Do not use an infant carrier or a child safety seat that "hooks“ over
a seatback, it may not provide ade-
quate protection in an accident.
After an accident, we recommend a HYUNDAI dealer check the child
restraint system, seat belts,
ISOFIX lower anchorages and top-
tether anchorages.
Page 34 of 343

323
Safety system of your vehicle
A rear-facing child seat provides restraint
with the seating surface against the back
of the child. The harness system holds
the child in place, and in an accident,
acts to keep the child positioned in the
seat and reduce the stress to the neckand spinal cord.
All children under age one must always
ride in a rear-facing infant child restraint.
Convertible and 3-in-1 child seats typi-
cally have higher height and weight limits
for the rear-facing position, allowing you
to keep your child rear-facing for a longer
period of time.Continue to use a rear-facing child seat
for as long as your child will fit within the
height and weight limits allowed by the
child seat manufacturer. It’s the best way
to keep them safe. Once your child has
outgrown the rear-facing child restraint,
your child is ready for a forward-facing
child restraint with a harness.
Forward-facing child seats
A forward-facing child seat provides
restraint for the child’s body with a har-
ness. Keep children in a forward-facing
child seat with a harness until they reach
the top height or weight limit allowed by
your child restraint’s manufacturer.
Once your child outgrows the forward-
facing child restraint, your child is ready
for a booster seat.
CRS09OUN026150
Page 120 of 343
Features of your vehicle
64
4
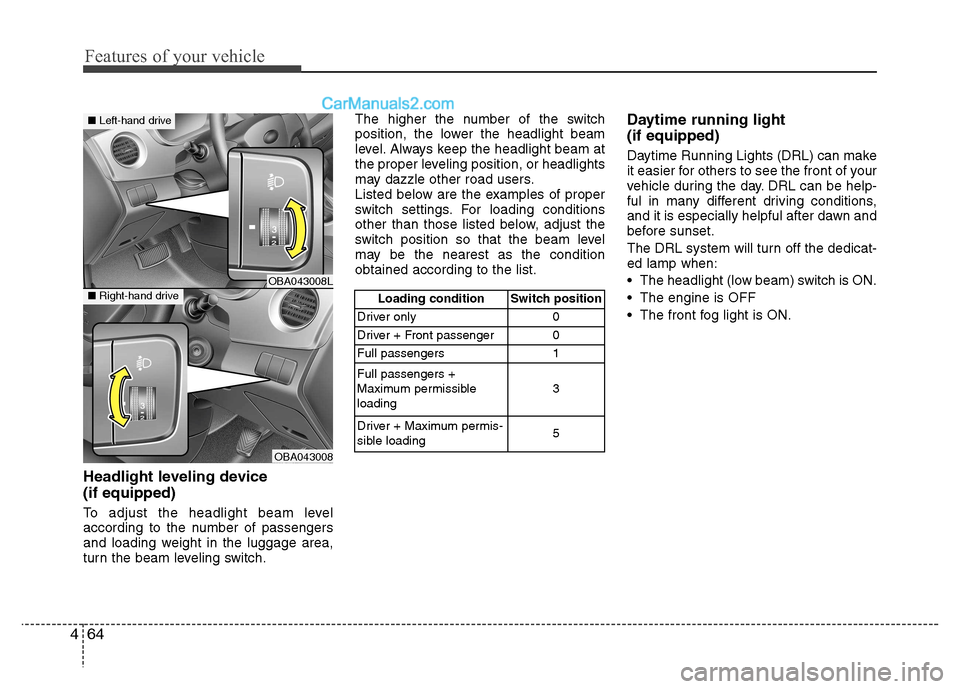
Headlight leveling device (if equipped)
To adjust the headlight beam level
according to the number of passengers
and loading weight in the luggage area,
turn the beam leveling switch. The higher the number of the switch
position, the lower the headlight beam
level. Always keep the headlight beam at
the proper leveling position, or headlights
may dazzle other road users.
Listed below are the examples of proper
switch settings. For loading conditions
other than those listed below, adjust the
switch position so that the beam level
may be the nearest as the conditionobtained according to the list.
Daytime running light (if equipped)
Daytime Running Lights (DRL) can make
it easier for others to see the front of your
vehicle during the day. DRL can be help-
ful in many different driving conditions,
and it is especially helpful after dawn and
before sunset.
The DRL system will turn off the dedicat- ed lamp when:
The headlight (low beam) switch is ON.
The engine is OFF
The front fog light is ON.
Loading condition Switch position
Driver only 0
Driver + Front passenger 0
Full passengers 1 Full passengers +
Maximum permissibleloading 3
Driver + Maximum permis-
sible loading 5
OBA043008L
OBA043008
■
Left-hand drive
■Right-hand drive
Page 189 of 343
Driving your vehicle
BEFORE DRIVING. . . . . . . . . . . . . . . . . . . . . . . . . 5-3• Before entering vehicle . . . . . . . . . . . . . . . . . . . . . . . . . 5-3
. . . . . . . . . . . . . . . . . . . . . . . . . . . . . . . 5-3
KEY IGNITION SWITCH . . . . . . . . . . . . . . . . . . . 5-4 . . . . . . . . . . . . . . . . . . . . . . . . . 5-4
. . . . . . . . . . . . . . . . . . . . . . . . . . . . 5-5
ENGINE START/STOP BUTTON . . . . . . . . . . . . . 5-6 . . . . . . . . . . . . . . 5-6
. . . . . . . . . . . . . . . . . . . . . . . . . . . . 5-9
MANUAL TRANSAXLE . . . . . . . . . . . . . . . . . . . 5-11 . . . . . . . . . . . . . . . . . . . 5-11
AUTOMATIC TRANSAXLE . . . . . . . . . . . . . . . 5-14 Automatic transaxle operation . . . . . . . . . . . . . . . . . 5-15
Parking . . . . . . . . . . . . . . . . . . . . . . . . . . . . . . . . . . . . 5-18
Good driving practices . . . . . . . . . . . . . . . . . . . . . . . . 5-18
BRAKING SYSTEM . . . . . . . . . . . . . . . . . . . . . . 5-20 . . . . . . . . . . . . . . . . . . . . . . . . . . . . . . . 5-20
. . . . . . . . . . . . . . . . . . . . 5-21
. . . . . . . . . . . . . . . . . . . . . . . . . . . . 5-21
. . . . . . . . . . . . . . . . . . . . . . . . . . . . . . . 5-21
. . . . . . . . . . . . . . 5-26
. . . . . . . . . . . . 5-29 . . . . . . . . . . . . . . . . 5-30
. . . . . . . . . . . . . . . . . . 5-31
. . . . . . . . . . . . . . . . . . . . . . . 5-31
REAR PARKING ASSIST SYSTEM. . . . . . . . . . 5-32
SPECIAL DRIVING CONDITIONS . . . . . . . . . . 5-34 . . . . . . . . . . . . . . . . . 5-34
. . . . . . . . . . . . . . . . . . . . . . . . . . . 5-34
. . . . . . . . . . . . . . . . . . . . . . . . . . . . 5-35
. . . . . . . . . . . . . . . . . . . . . . . . . . . . . . 5-35
. . . . . . . . . . . . . . . . . . . . . . . . . . . . 5-35
. . . . . . . . . . . . . . . . . . . . . . . 5-36
WINTER DRIVING . . . . . . . . . . . . . . . . . . . . . . . 5-37 Snow or icy conditions . . . . . . . . . . . . . . . . . . . . . . . . 5-37
VEHICLE WEIGHT . . . . . . . . . . . . . . . . . . . . . . 5-40 Overloading . . . . . . . . . . . . . . . . . . . . . . . . . . . . . . . . . 5-40
5
Page 228 of 343

Driving your vehicle
40
5
Two labels on your driver’s door sill show
how much weight your vehicle was
designed to carry: the Tire and Loading
Information Label and the CertificationLabel.
Before loading your vehicle, familiarize
yourself with the following terms for
determining your vehicle's weight ratings,
from the vehicle's specifications and the
Certification Label:
Base Curb Weight
This is the weight of the vehicle including a full tank of fuel and all standard equip-
ment. It does not include passengers,
cargo, or optional equipment.
Vehicle Curb Weight
This is the weight of your new vehicle
when you picked it up from your dealer
plus any aftermarket equipment.
Cargo Weight
This figure includes all weight added to
the Base Curb Weight, including cargoand optional equipment. GAW (Gross Axle Weight)
This is the total weight placed on each
axle (front and rear) - including vehicle
curb weight and all payload.
GAWR (Gross Axle Weight Rating)
This is the maximum allowable weight
that can be carried by a single axle (front
or rear). These numbers are shown on
the Certification Label. The total load on
each axle must never exceed its GAWR.
GVW (Gross Vehicle Weight)
This is the Base Curb Weight plus actual
Cargo Weight plus passengers weight.
GVWR (Gross Vehicle Weight Rating)
This is the maximum allowable weight of
the fully loaded vehicle (including all
options, equipment, passengers and
cargo). The GVWR is shown on the
Certification Label located on the driver’sdoor sill.
Overloading
VEHICLE WEIGHT
WARNING
The Gross Axle Weight Rating
(GAWR) and the Gross Vehicle
Weight Rating (GVWR) for your
vehicle are on the Certification
Label attached to the driver's (or
front passenger’s) door. Exceedingthese ratings can cause an acci-
dent or vehicle damage. You can
calculate the weight of your load byweighing the items (and people)
before putting them in the vehicle.
Be careful not to overload your
vehicle.
Page 288 of 343
741
Maintenance
TIRES AND WHEELS
Tire care
For proper maintenance, safety, and
maximum fuel economy, you must
always maintain recommended tire
inflation pressures and stay within
the load limits and weight distribution
recommended for your vehicle. Recommended cold tire inflation pressures All tire pressures (including the
spare) should be checked when the
tires are cold. “Cold Tires” means the
vehicle has not been driven for at
least three hours or driven less than1.6 km (one mile).
Recommended pressures must be
maintained for the best ride, top vehi-
cle handling, and minimum tire wear.
For recommended inflation pressure
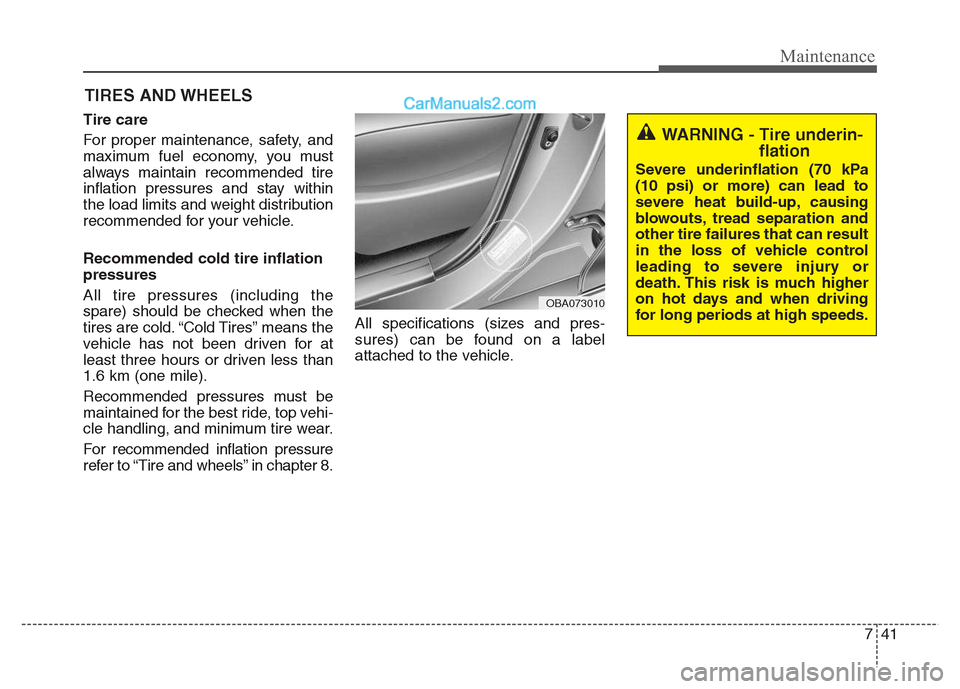
refer to “Tire and wheels” in chapter 8. All specifications (sizes and pres-
sures) can be found on a label
attached to the vehicle.
WARNING - Tire underin-
flation
Severe underinflation (70 kPa (10 psi) or more) can lead to
severe heat build-up, causing
blowouts, tread separation andother tire failures that can result
in the loss of vehicle control
leading to severe injury or
death. This risk is much higher
on hot days and when driving
for long periods at high speeds.
OBA073010
Page 292 of 343
745
Maintenance
Wheel alignment and tire balance
The wheels on your vehicle were aligned and balanced carefully at the
factory to give you the longest tire life
and best overall performance.
In most cases, you will not need to
have your wheels aligned again.
However, if you notice unusual tire
wear or your vehicle pulling one way
or the other, the alignment may needto be reset.
If you notice your vehicle vibrating
when driving on a smooth road, your
wheels may need to be rebalanced.Tire replacement
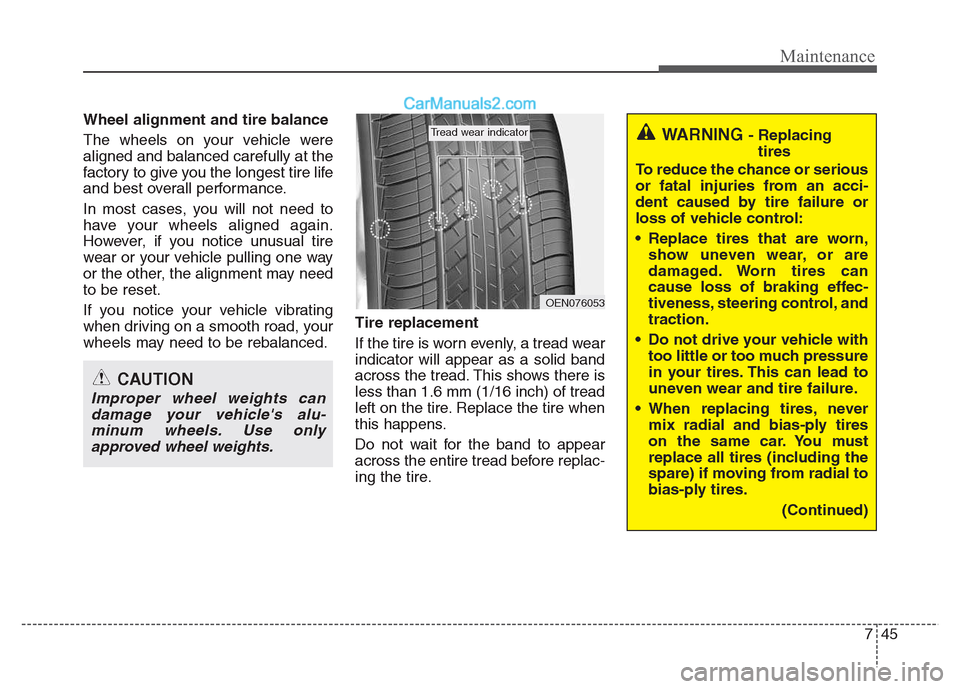
If the tire is worn evenly, a tread wear indicator will appear as a solid band
across the tread. This shows there isless than 1.6 mm (1/16 inch) of tread
left on the tire. Replace the tire when
this happens.
Do not wait for the band to appear
across the entire tread before replac-
ing the tire.
CAUTION
Improper wheel weights can
damage your vehicle's alu-minum wheels. Use only approved wheel weights.
OEN076053
Tread wear indicatorWARNING - Replacing
tires
To reduce the chance or serious
or fatal injuries from an acci-
dent caused by tire failure or
loss of vehicle control:
Replace tires that are worn, show uneven wear, or are
damaged. Worn tires can
cause loss of braking effec-
tiveness, steering control, andtraction.
Do not drive your vehicle with too little or too much pressure
in your tires. This can lead to
uneven wear and tire failure.
When replacing tires, never mix radial and bias-ply tires
on the same car. You must
replace all tires (including the
spare) if moving from radial to
bias-ply tires.
(Continued)