Fuses Hyundai Grandeur 2002 Owner's Manual
[x] Cancel search | Manufacturer: HYUNDAI, Model Year: 2002, Model line: Grandeur, Model: Hyundai Grandeur 2002Pages: 230, PDF Size: 3.82 MB
Page 152 of 230

3- 2 WHAT TO DO IN AN EMERGENCY
D010A01A-AAT IF THE ENGINE WILL NOT START
WARNING:
If the engine will not start, do not push or pull the car to start it. Thiscould result in a collision or causeother damage. In addition, push or pull starting may cause the cata- lytic converter to be overloaded andcreate a fire hazard. D010B01A-AAT If Engine Doesn't Turn Over or Turns Over Slowly 1. If your car has an automatic
transaxle, be sure the gear selector lever is in "N" or "P" and the emer-gency brake is set.
2. Check the battery connections to be sure they are clean and tight.
3. Turn on the interior light. If the light dims or goes out when you operatethe starter, the battery is discharged.
4. Check the starter connections to be sure they are securely tightened.
5. Do not push or pull the vehicle to
start it. See instructions for "JumpStarting" on the following pages. D010D01A-AAT If Engine Stalls While Driving
1. Reduce your speed gradually, keep-
ing a straight line. Move cautiously off the road to a safe place.
2. Turn on your emergency flashers.
3. Try to start the engine again. If your vehicle will not start, contact aHyundai dealer or seek other quali-fied assistance.
D010C01Y-AAT If Engine Turns Over Normally but Does Not Start
1. Check fuel level.
2. Check all connectors at ignition, coil and spark plugs. Reconnect anythat may be disconnected or loose.
3. Check the fuel line in the engine
room.
4. If engine still refuses to start, call a Hyundai dealer or seek other quali- fied assistance.
D010B01L
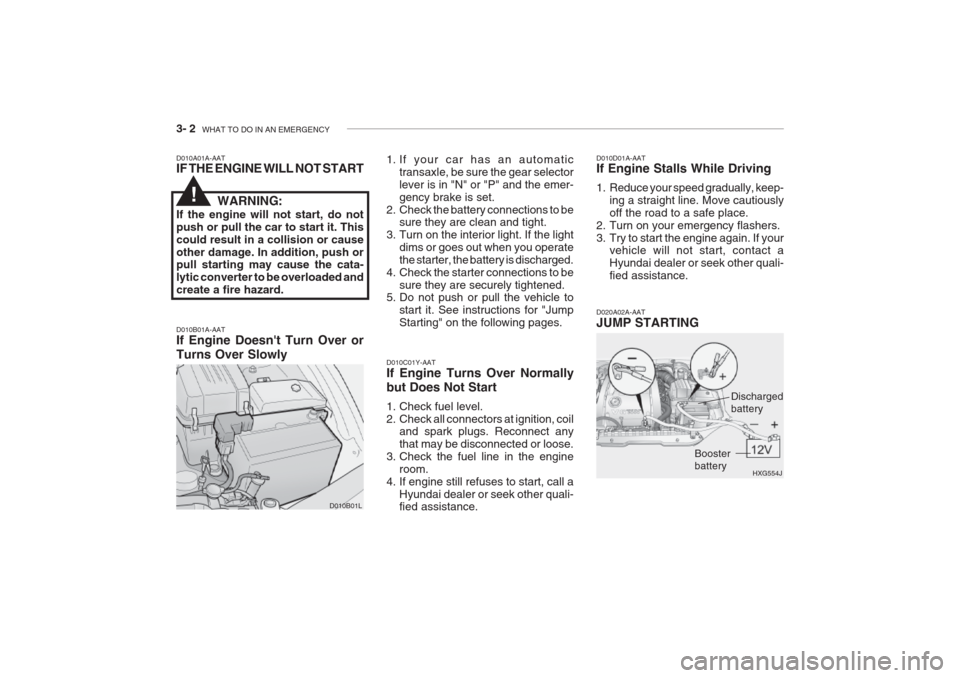
D020A02A-AAT JUMP STARTING
HXG554J
Dischargedbattery
Booster battery
!
Page 178 of 230

6. Do-It-Yourself Maintenance
Engine Compartment ..................................................................... 6-2
General Checks .............................................................................. 6-5
Checking the Engine Oil ................................................................ 6-6
Changing the Oil and Filter ........................................................... 6-7
Checking and Changing the Engine Coolant ............................... 6-8
Spark Plugs ..................................................................................6-10
Changing the Air Cleaner Filter ................................................... 6-11
Checking the Transaxle Oil (Manual) .......................................... 6-13
Checking the Transaxle Fluid (Automatic) .................................. 6-14
Checking the Brakes .................................................................... 6-15
Checking the Clutch Fluid ............................................................ 6-16
Air Conditioning Care ................................................................... 6-17
Changing the Air Filter (For Evaporator and Blower Unit) ......... 6-18
Checking Drive Belts .................................................................... 6-21
Checking and Replacing Fuses ................................................... 6-21
Power Steering Fluid Level .......................................................... 6-24
Headlight Aiming Adjustment ....................................................... 6-25
Replacement of Light Bulbs ......................................................... 6-26
Bulb Wattage ................................................................................ 6-33
Junction Box Description ............................................................. 6-34
6
Page 198 of 230

DO-IT-YOURSELF MAINTENANCE 6- 21
G190A01A-GAT
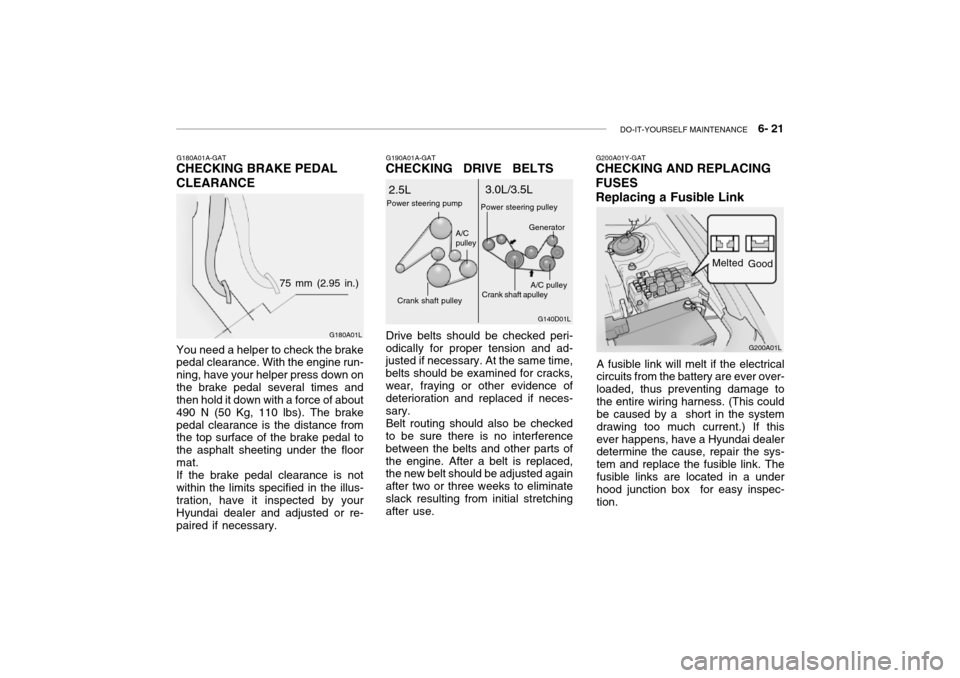
CHECKING DRIVE BELTS
Drive belts should be checked peri-
odically for proper tension and ad- justed if necessary. At the same time, belts should be examined for cracks,wear, fraying or other evidence of deterioration and replaced if neces- sary.
Belt routing should also be checked
to be sure there is no interferencebetween the belts and other parts ofthe engine. After a belt is replaced, the new belt should be adjusted again after two or three weeks to eliminateslack resulting from initial stretching after use.
G180A01A-GAT
CHECKING BRAKE PEDAL CLEARANCE
G180A01L
75 mm (2.95 in.)
You need a helper to check the brake pedal clearance. With the engine run- ning, have your helper press down onthe brake pedal several times and then hold it down with a force of about 490 N (50 Kg, 110 lbs). The brakepedal clearance is the distance from the top surface of the brake pedal to the asphalt sheeting under the floormat.If the brake pedal clearance is notwithin the limits specified in the illus-tration, have it inspected by your Hyundai dealer and adjusted or re- paired if necessary. G140D01L
2.5L
3.0L/3.5L
Power steering pump
Crank shaft pulley A/C pulley
Crank shaft apulley
A/C pulley
Power steering pulley
Generator
G200A01Y-GAT
CHECKING AND REPLACING FUSES Replacing a Fusible Link
A fusible link will melt if the electrical circuits from the battery are ever over- loaded, thus preventing damage tothe entire wiring harness. (This could be caused by a short in the system drawing too much current.) If thisever happens, have a Hyundai dealer determine the cause, repair the sys- tem and replace the fusible link. Thefusible links are located in a under hood junction box for easy inspec- tion. G200A01L
Melted
Good
Page 199 of 230

6- 22 DO-IT-YOURSELF MAINTENANCE
strument panel junction box you will find a list showing the circuits pro- tected by each fuse.
If any of your car's lights or other
electrical accessories stop working, ablown fuse could be the reason. If the fuse has burned out, you will see that the metal strip inside the fuse hasburned through. If you suspect a blown fuse, follow this procedure:
1. Turn off the ignition and all other switches.
2. Open the instrument panel junction box and examine each fuse. Re- move each fuse by pulling it toward you (a small "fuse puller" tool iscontained in the fuse box to sim- plify this operation).
3. Be sure to check all other fuses even if you find one that appears to have burned out.
HXGS416
4. Replace the blown fuse by press- ing a new fuse of the same rating into place. The fuse should be a snug fit. If it is not, have the fuseclip repaired or replaced by a Hyundai dealer. If you do not have a spare fuse, you may be able toborrow a fuse of the same or lower rating from an accessory you can temporarily get along without (theradio or cigarette lighter, for ex- ample). Always remember to re- place the borrowed fuse.
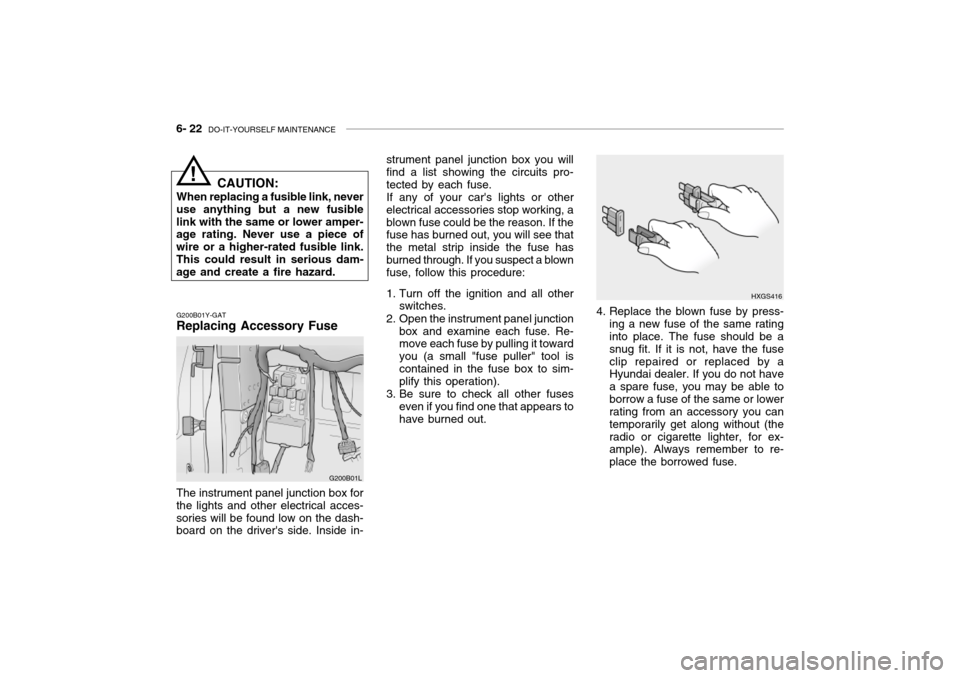
G200B01Y-GAT Replacing Accessory Fuse
G200B01L
The instrument panel junction box for the lights and other electrical acces-sories will be found low on the dash- board on the driver's side. Inside in- CAUTION:
When replacing a fusible link, never
use anything but a new fusible link with the same or lower amper- age rating. Never use a piece of wire or a higher-rated fusible link.This could result in serious dam- age and create a fire hazard.
!
Page 227 of 230

INDEX 10- 3
D Defrosting / Defogging .............................................. 1-81
Door Door locks ................................................................ 1-6
Door courtesy light ................................................. 1-70
Locking and unlocking front doors with a key ......... 1-6
Drink Holder .............................................................. 1-56
Drive Belts ...................................................... 6-18, 6-21
Driving
Economical driving ..................................... 2-14 ~ 2-15
Smooth cornering ................................................... 2-15
Winter driving ......................................................... 2-15
E Emission Control System ................................. 7-1 ~ 7-3
Engine Before starting the engine ....................................... 2-3
Compartment ................................................... 6-1~6-3 Coolant ......................................................... 6-8 ~ 6-10
Coolant temperature gauge ................................... 1-45
If the engine overheats ............................................ 3-4
Number .................................................................... 8-2
Oil ............................................................................. 6-6
Starting ..................................................................... 2-4
Engine Exhaust Can Be Dangerous ........................... 2-2F Fan Speed Control
.................................................... 1-77
Fog Light Front ....................................................................... 1-47
Rear ........................................................... 1-47 ~ 1-48
Front Seats Adjustable front seats ............................................ 1-11
Adjustable headrests .................................. 1-12 ~ 1-13
Adjusting seat forward and rearward ......... 1-11 ~ 1-12 Adjusting seatback angle ....................................... 1-12
Lumbar support control .......................................... 1-13 Seat cushion height adjustment............................ 1-13
Seat warmer ........................................................... 1-17
Fuel Capacity ................................................................... 9-2
Gauge .................................................................... 1-45
recommendations ..................................................... 1-2
Fuel Filler Lid Remote release ...................................................... 1-67
Manual ................................................................... 1-67
Fuses ............................................................ 6-21 ~ 6-23 G General Checks .......................................................... 6-5
Glove Box ................................................................. 1-61