length Hyundai Grandeur 2002 Owner's Manual
[x] Cancel search | Manufacturer: HYUNDAI, Model Year: 2002, Model line: Grandeur, Model: Hyundai Grandeur 2002Pages: 230, PDF Size: 3.82 MB
Page 34 of 230
FEATURES OF YOUR HYUNDAI 1- 21
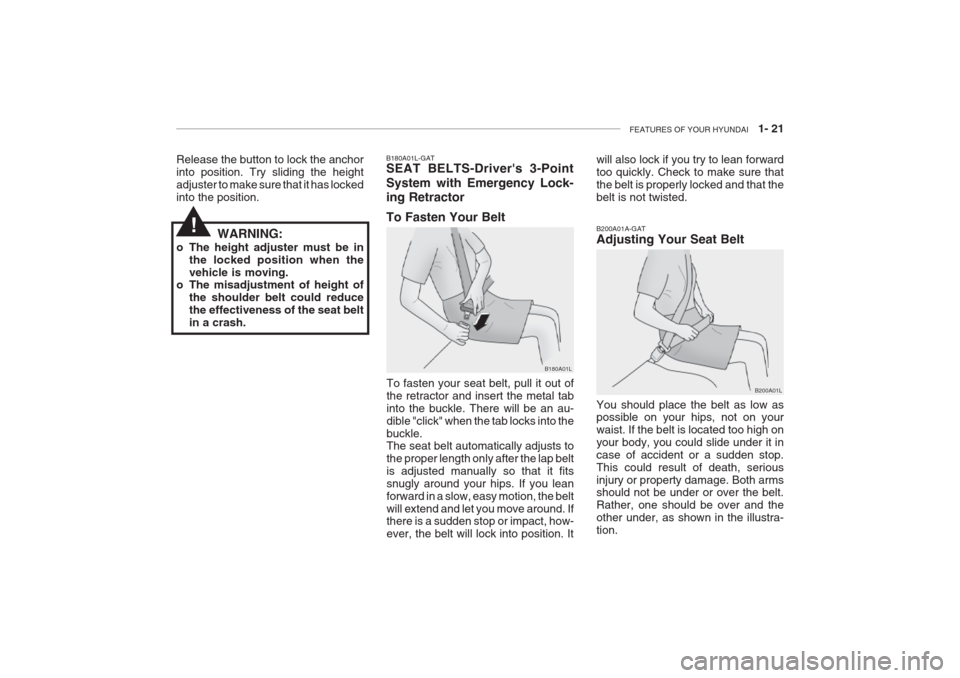
B180A01L-GAT SEAT BELTS-Driver's 3-Point System with Emergency Lock- ing Retractor To Fasten Your Belt
To fasten your seat belt, pull it out of the retractor and insert the metal tabinto the buckle. There will be an au-dible "click" when the tab locks into thebuckle. The seat belt automatically adjusts to the proper length only after the lap beltis adjusted manually so that it fitssnugly around your hips. If you leanforward in a slow, easy motion, the beltwill extend and let you move around. If there is a sudden stop or impact, how-
ever, the belt will lock into position. It
Release the button to lock the anchorinto position. Try sliding the heightadjuster to make sure that it has lockedinto the position.
B180A01L
B200A01A-GAT Adjusting Your Seat Belt You should place the belt as low as possible on your hips, not on your waist. If the belt is located too high onyour body, you could slide under it incase of accident or a sudden stop.This could result of death, seriousinjury or property damage. Both arms should not be under or over the belt. Rather, one should be over and theother under, as shown in the illustra-tion. B200A01L
will also lock if you try to lean forwardtoo quickly. Check to make sure thatthe belt is properly locked and that thebelt is not twisted.
!WARNING:
o The height adjuster must be in the locked position when the vehicle is moving.
o The misadjustment of height of
the shoulder belt could reducethe effectiveness of the seat beltin a crash.
Page 35 of 230
1- 22 FEATURES OF YOUR HYUNDAI
Never wear the seat belt under the arm nearest the door.
B220A01L
(a)
(c)
(b) (d)
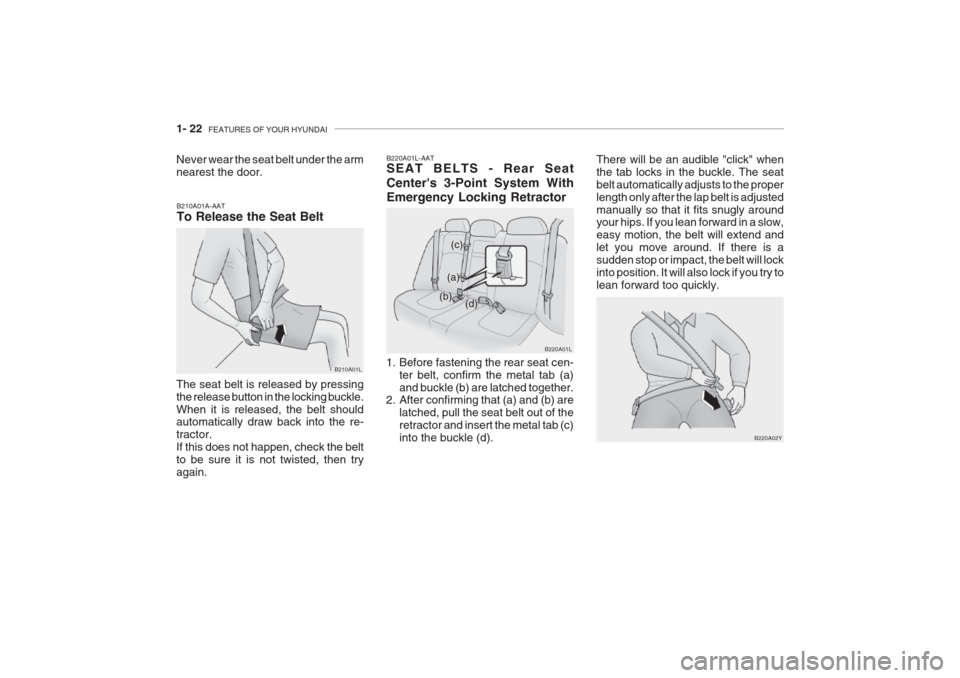
1. Before fastening the rear seat cen- ter belt, confirm the metal tab (a) and buckle (b) are latched together.
2. After confirming that (a) and (b) are
latched, pull the seat belt out of theretractor and insert the metal tab (c)into the buckle (d).
B220A01L-AAT SEAT BELTS - Rear Seat Center's 3-Point System With Emergency Locking Retractor
B210A01A-AAT To Release the Seat Belt
The seat belt is released by pressing the release button in the locking buckle.When it is released, the belt should automatically draw back into the re- tractor.If this does not happen, check the beltto be sure it is not twisted, then tryagain. B210A01L
B220A02Y
There will be an audible "click" whenthe tab locks in the buckle. The seatbelt automatically adjusts to the properlength only after the lap belt is adjustedmanually so that it fits snugly around your hips. If you lean forward in a slow, easy motion, the belt will extend andlet you move around. If there is asudden stop or impact, the belt will lockinto position. It will also lock if you try tolean forward too quickly.
Page 38 of 230
FEATURES OF YOUR HYUNDAI 1- 25
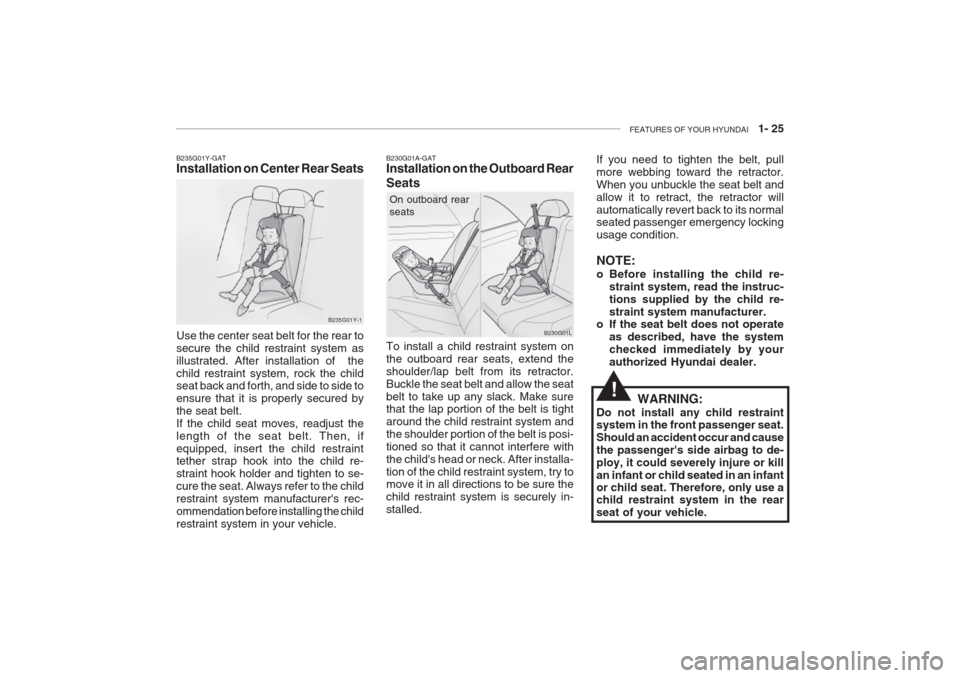
B235G01Y-GAT Installation on Center Rear Seats
B235G01Y-1
Use the center seat belt for the rear to secure the child restraint system asillustrated. After installation of thechild restraint system, rock the child seat back and forth, and side to side to ensure that it is properly secured bythe seat belt.If the child seat moves, readjust thelength of the seat belt. Then, ifequipped, insert the child restraint tether strap hook into the child re- straint hook holder and tighten to se-cure the seat. Always refer to the childrestraint system manufacturer's rec-ommendation before installing the childrestraint system in your vehicle.
On outboard rear seats
B230G01A-GAT Installation on the Outboard Rear Seats To install a child restraint system on the outboard rear seats, extend theshoulder/lap belt from its retractor.Buckle the seat belt and allow the seatbelt to take up any slack. Make sure that the lap portion of the belt is tight around the child restraint system andthe shoulder portion of the belt is posi-tioned so that it cannot interfere withthe child's head or neck. After installa-tion of the child restraint system, try to move it in all directions to be sure the child restraint system is securely in-stalled. B230G01L
If you need to tighten the belt, pullmore webbing toward the retractor.When you unbuckle the seat belt andallow it to retract, the retractor willautomatically revert back to its normal seated passenger emergency locking usage condition. NOTE:
o Before installing the child re-
straint system, read the instruc- tions supplied by the child re-straint system manufacturer.
o If the seat belt does not operate
as described, have the systemchecked immediately by yourauthorized Hyundai dealer.
WARNING:
Do not install any child restraint system in the front passenger seat. Should an accident occur and causethe passenger's side airbag to de-ploy, it could severely injure or killan infant or child seated in an infantor child seat. Therefore, only use a child restraint system in the rear seat of your vehicle.
!
Page 64 of 230
FEATURES OF YOUR HYUNDAI 1- 51
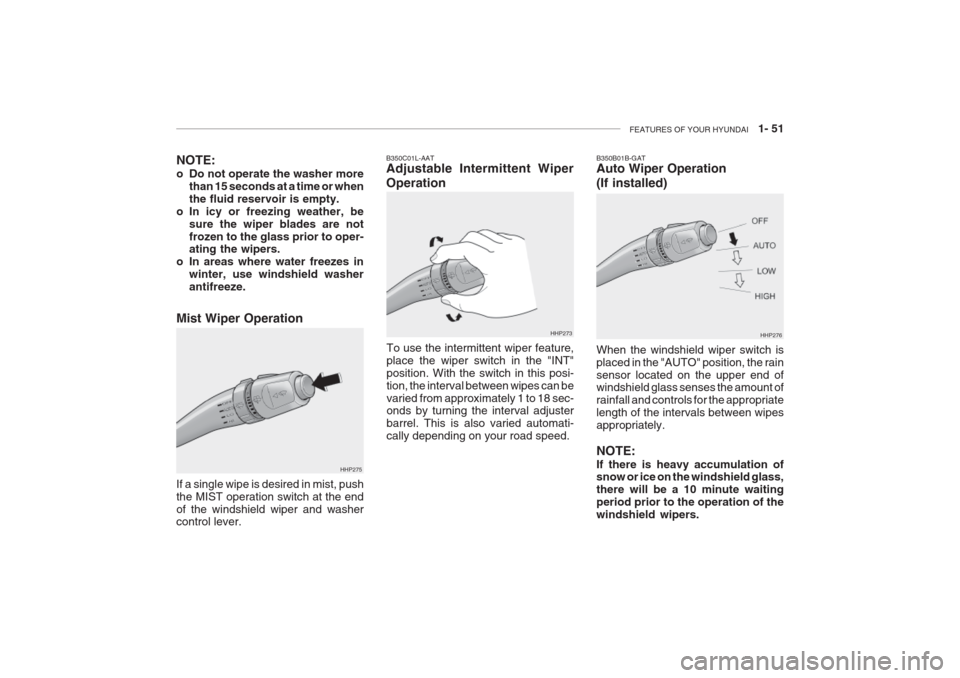
B350C01L-AAT Adjustable Intermittent Wiper Operation
To use the intermittent wiper feature, place the wiper switch in the "INT"position. With the switch in this posi-tion, the interval between wipes can bevaried from approximately 1 to 18 sec- onds by turning the interval adjuster barrel. This is also varied automati-cally depending on your road speed. HHP273B350B01B-GAT Auto Wiper Operation (If installed)
HHP276
When the windshield wiper switch is placed in the "AUTO" position, the rainsensor located on the upper end of windshield glass senses the amount of rainfall and controls for the appropriatelength of the intervals between wipesappropriately. NOTE: If there is heavy accumulation of snow or ice on the windshield glass, there will be a 10 minute waitingperiod prior to the operation of thewindshield wipers.
Mist Wiper Operation If a single wipe is desired in mist, push the MIST operation switch at the endof the windshield wiper and washer control lever. HHP275
NOTE:
o Do not operate the washer more
than 15 seconds at a time or when the fluid reservoir is empty.
o In icy or freezing weather, be sure the wiper blades are notfrozen to the glass prior to oper- ating the wipers.
o In areas where water freezes in winter, use windshield washer antifreeze.
Page 75 of 230
1- 62 FEATURES OF YOUR HYUNDAI
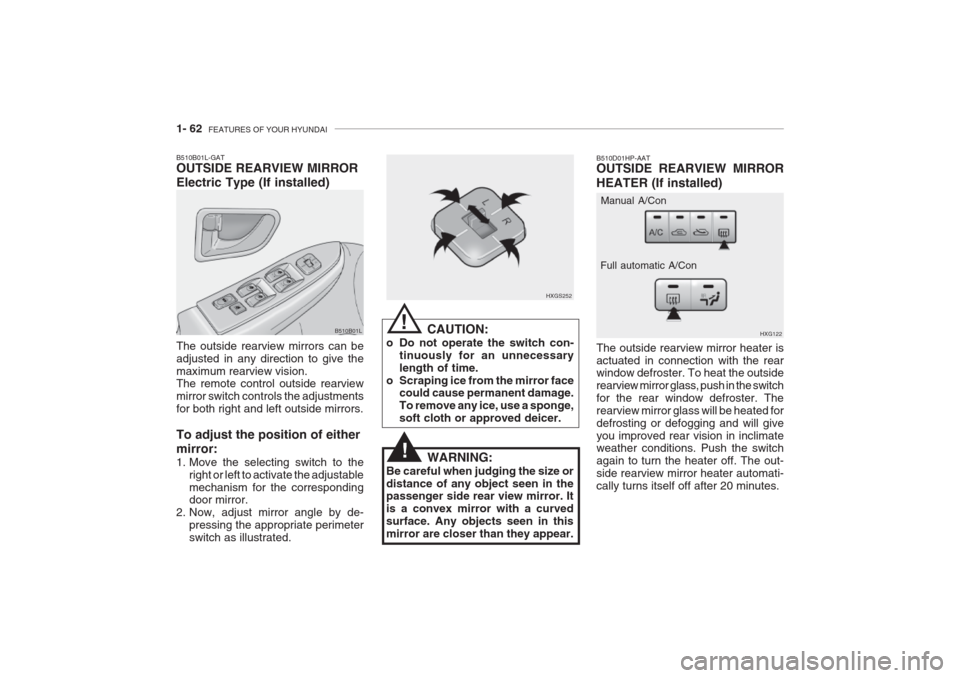
B510D01HP-AAT OUTSIDE REARVIEW MIRROR HEATER (If installed) The outside rearview mirror heater is actuated in connection with the rear window defroster. To heat the outside rearview mirror glass, push in the switchfor the rear window defroster. Therearview mirror glass will be heated fordefrosting or defogging and will giveyou improved rear vision in inclimate weather conditions. Push the switch again to turn the heater off. The out-side rearview mirror heater automati-cally turns itself off after 20 minutes. HXG122
Manual A/Con
Full automatic A/Con
CAUTION:
o Do not operate the switch con- tinuously for an unnecessary length of time.
o Scraping ice from the mirror face could cause permanent damage.To remove any ice, use a sponge,soft cloth or approved deicer. HXGS252
B510B01L-GAT OUTSIDE REARVIEW MIRROR Electric Type (If installed) The outside rearview mirrors can be adjusted in any direction to give themaximum rearview vision. The remote control outside rearview mirror switch controls the adjustmentsfor both right and left outside mirrors. To adjust the position of either mirror:
1. Move the selecting switch to the
right or left to activate the adjustable mechanism for the corresponding door mirror.
2. Now, adjust mirror angle by de- pressing the appropriate perimeter switch as illustrated. B510B01L
!
WARNING:
Be careful when judging the size or distance of any object seen in the passenger side rear view mirror. It is a convex mirror with a curvedsurface. Any objects seen in thismirror are closer than they appear.
!
Page 222 of 230

9- 2 VEHICLE SPECIFICATIONS
3.0 V6
J010A02L-GAT MEASUREMENT
4,875 (191.8) 1,800 (70.86)
1,420 (55.9)
2,750 (108.2) 1,540 (60.6)
1,530 (60.23)
Overall lengthOverall widthOverall height Wheel base Wheel tread
Front
Rear
Type Wheel free play Rack strokeOil pump type Rack and pinion0 ~ 30 mm (0 ~ 1.18 in.) 146 mm (5.74 in.) Vane type
J060A01L-GAT FUEL SYSTEM
J020A01L-GAT POWER STEERING
Fuel tank capacity 70 liter J030A03L-GAT TIRE
205/65 R15 94V 205/60 R16 96V
StandardOption
J050A01L-GAT BRAKE
Dual hydraulic with brake booster Ventilated discSolid disc Cable operated on rear wheel
Type Front brake typeRear brake type Parking brake
Item Battery
Alternator 120A (13.5V)
2.5 V6
110A (13.5V)
J040A02L-GAT ELECTRICAL
MF 68AH (MF)
3.5 V6
mm (in.)