warning Hyundai Grandeur 2002 Owner's Manual
[x] Cancel search | Manufacturer: HYUNDAI, Model Year: 2002, Model line: Grandeur, Model: Hyundai Grandeur 2002Pages: 230, PDF Size: 3.82 MB
Page 7 of 230
!
SAFETY AND VEHICLE DAMAGE WARNING
This manual includes information titled as WARNING, CAUTION and NOTE. These titles indicate the following:
WARNING:
This indicates that a condition may result in harm, serious injury or death toyou or other persons if the warning is not heeded. Follow the advice providedwith the warning.
CAUTION:
This indicates that a condition may result in damage to your vehicle or itsequipment if the caution is not heeded. Follow the advice provided with thecaution. NOTE: This indicates that interesting or helpful information is being provided.
A090A01A-AAT
!
Page 10 of 230
YOUR VEHICLE AT A GLANCE
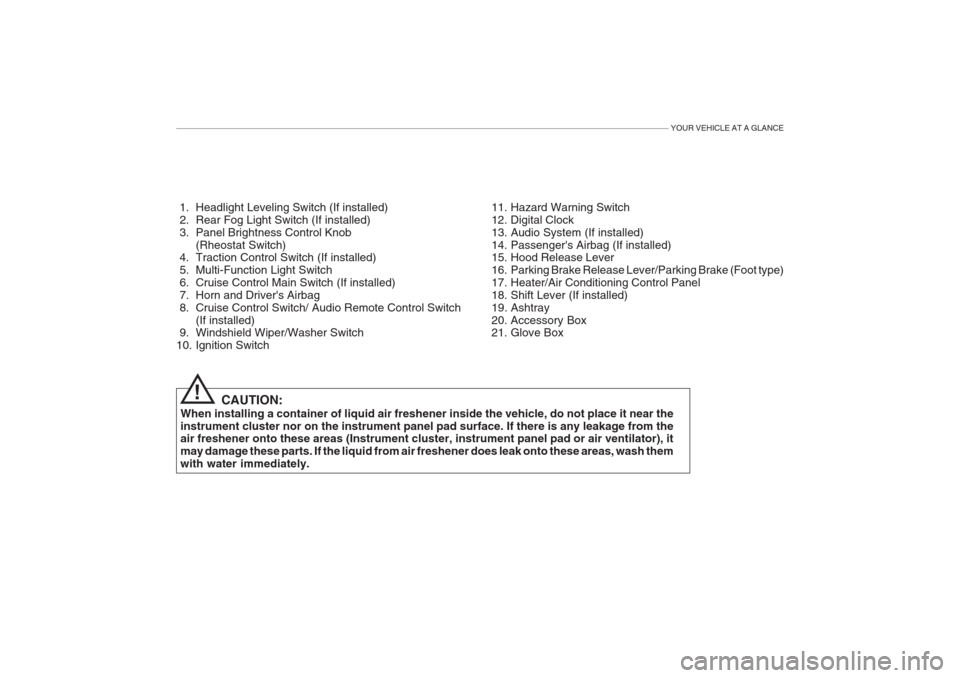
1. Headlight Leveling Switch (If installed)
2. Rear Fog Light Switch (If installed)
3. Panel Brightness Control Knob(Rheostat Switch)
4. Traction Control Switch (If installed)
5. Multi-Function Light Switch
6. Cruise Control Main Switch (If installed)
7. Horn and Driver's Airbag
8. Cruise Control Switch/ Audio Remote Control Switch
(If installed)
9. Windshield Wiper/Washer Switch
10. Ignition Switch
CAUTION:
When installing a container of liquid air freshener inside the vehicle, do not place it near theinstrument cluster nor on the instrument panel pad surface. If there is any leakage from the air freshener onto these areas (Instrument cluster, instrument panel pad or air ventilator), it may damage these parts. If the liquid from air freshener does leak onto these areas, wash themwith water immediately. 11. Hazard Warning Switch
12. Digital Clock
13. Audio System (If installed)
14. Passenger's Airbag (If installed)
15. Hood Release Lever
16. Parking Brake Release Lever/Parking Brake (Foot type)
17. Heater/Air Conditioning Control Panel
18. Shift Lever (If installed)
19. Ashtray
20. Accessory Box
21. Glove Box
!
Page 12 of 230
YOUR VEHICLE AT A GLANCE
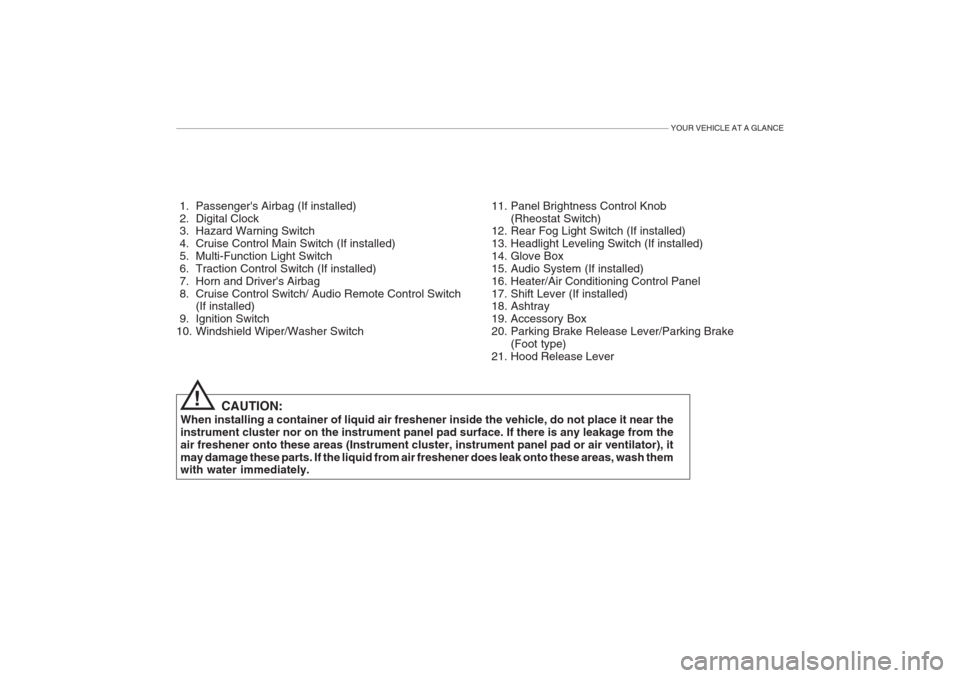
1. Passenger's Airbag (If installed)
2. Digital Clock
3. Hazard Warning Switch
4. Cruise Control Main Switch (If installed)
5. Multi-Function Light Switch
6. Traction Control Switch (If installed)
7. Horn and Driver's Airbag
8. Cruise Control Switch/ Audio Remote Control Switch(If installed)
9. Ignition Switch
10. Windshield Wiper/Washer Switch 11. Panel Brightness Control Knob
(Rheostat Switch)
12. Rear Fog Light Switch (If installed)
13. Headlight Leveling Switch (If installed)
14. Glove Box
15. Audio System (If installed)
16. Heater/Air Conditioning Control Panel
17. Shift Lever (If installed)
18. Ashtray
19. Accessory Box
20. Parking Brake Release Lever/Parking Brake
(Foot type)
21. Hood Release Lever
CAUTION:
When installing a container of liquid air freshener inside the vehicle, do not place it near theinstrument cluster nor on the instrument panel pad surface. If there is any leakage from theair freshener onto these areas (Instrument cluster, instrument panel pad or air ventilator), itmay damage these parts. If the liquid from air freshener does leak onto these areas, wash them with water immediately.
!
Page 13 of 230
YOUR VEHICLE AT A GLANCE
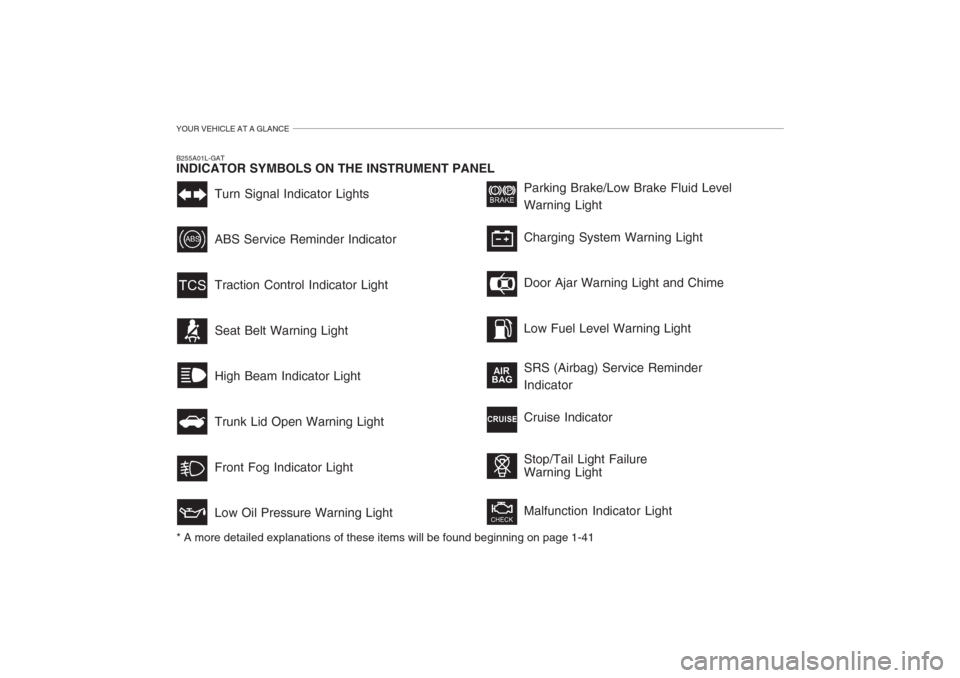
Turn Signal Indicator Lights ABS Service Reminder Indicator Traction Control Indicator LightSeat Belt Warning Light High Beam Indicator Light Trunk Lid Open Warning LightFront Fog Indicator Light Low Oil Pressure Warning LightParking Brake/Low Brake Fluid Level Warning Light Charging System Warning Light Door Ajar Warning Light and Chime Low Fuel Level Warning Light SRS (Airbag) Service Reminder Indicator Cruise Indicator Stop/Tail Light Failure Warning Light Malfunction Indicator Light
B255A01L-GAT INDICATOR SYMBOLS ON THE INSTRUMENT PANEL * A more detailed explanations of these items will be found beginning on page 1-41
Page 14 of 230
1. FEATURES OF YOUR HYUNDAI
Fuel Recommendations .................................................................. 1-2
Breaking In Your New Hyundai ...................................................... 1-3
Key (Immobilizer System) ............................................................... 1-4
Door Locks (Theft-Alarm System) .................................................. 1-6
Power Windows ............................................................................1-10
Seat (Power Seat) ........................................................................ 1-11
I.M.S (Integrated Memory System) ............................................... 1-15
Seat Belt ....................................................................................... 1-18
Child Restraint System ................................................................. 1-23
Supplemental Restraint (AIRBAG) System .................................. 1-31
Instrument Cluster and Indicator Lights ........................................ 1-39
Warning Light and Indicator ......................................................... 1-41
Multi-function Light Switch ............................................................ 1-48
Windshield Wiper/Washer Switch .................................................1-50
Trip Computer ............................................................................... 1-53
Sunroof ......................................................................................... 1-57
Mirror ............................................................................................. 1-62
Hood Release ............................................................................... 1-68
Cruise Control ............................................................................... 1-72
Audio Rmote Control Switch ......................................................... 1-75
Heating and Cooling Control ........................................................ 1-76
Stereo Sound System ................................................................... 1-91
Audio Syste m ................................................................................ 1-93
Antenna ...................................................................................... 1-115
1
Page 19 of 230
1- 6 FEATURES OF YOUR HYUNDAI
UNLOCK
LOCK
HXG018
B040A01A-AAT DOOR LOCKS
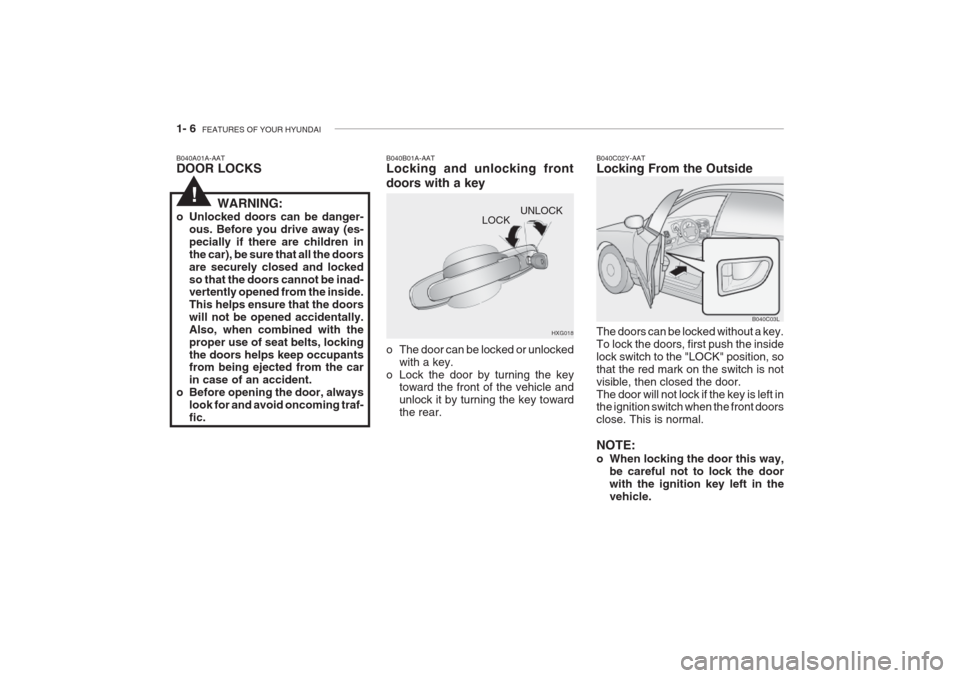
B040B01A-AATLocking and unlocking front doors with a key
o The door can be locked or unlocked
with a key.
o Lock the door by turning the key toward the front of the vehicle and unlock it by turning the key towardthe rear.
!
B040C03L
B040C02Y-AAT Locking From the Outside The doors can be locked without a key. To lock the doors, first push the insidelock switch to the "LOCK" position, sothat the red mark on the switch is notvisible, then closed the door.The door will not lock if the key is left in the ignition switch when the front doors close. This is normal. NOTE:
o When locking the door this way,
be careful not to lock the door with the ignition key left in thevehicle.
WARNING:
o Unlocked doors can be danger- ous. Before you drive away (es-pecially if there are children inthe car), be sure that all the doorsare securely closed and lockedso that the doors cannot be inad- vertently opened from the inside. This helps ensure that the doorswill not be opened accidentally.Also, when combined with theproper use of seat belts, lockingthe doors helps keep occupants from being ejected from the car in case of an accident.
o Before opening the door, always
look for and avoid oncoming traf-fic.
Page 24 of 230
FEATURES OF YOUR HYUNDAI 1- 11
WARNING:
1) Be careful that someone's head, hands and body are not trapped by a closing window.
2) Never try to operate the main
switch on the driver's door andthe individual door windowswitch in opposing directions at the same time. If this is done, the window will stop and cannot beopened or closed.
3) Do not leave children alone in the car. Always remove the ignitionkey for their safety. HXG029
Close
Open
HXG179
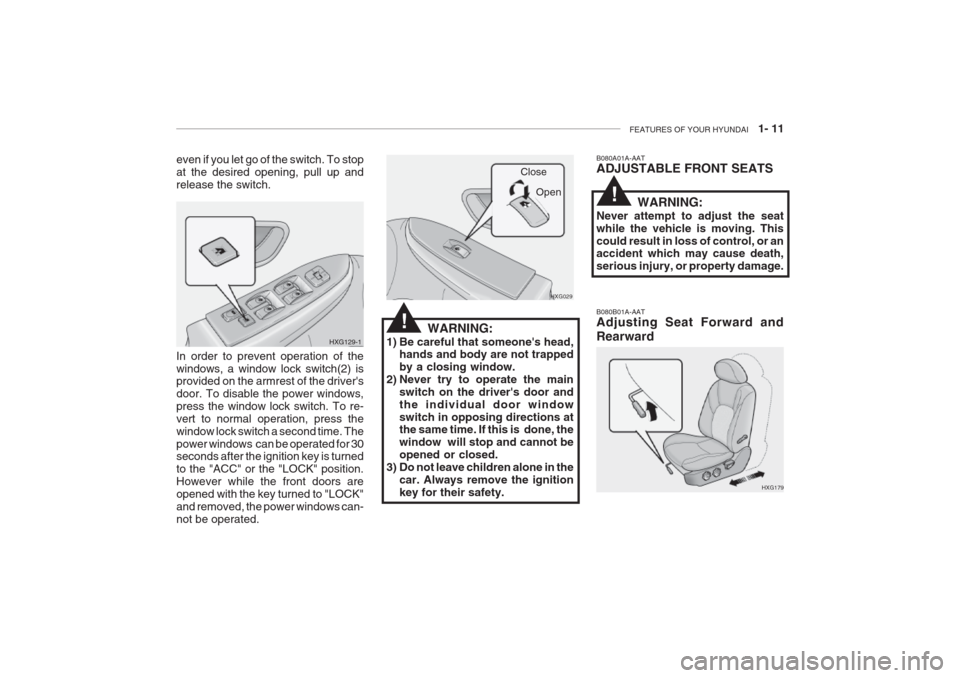
B080B01A-AAT Adjusting Seat Forward and Rearward
B080A01A-AAT ADJUSTABLE FRONT SEATS
In order to prevent operation of the windows, a window lock switch(2) is provided on the armrest of the driver's door. To disable the power windows,press the window lock switch. To re-vert to normal operation, press thewindow lock switch a second time. Thepower windows can be operated for 30 seconds after the ignition key is turned to the "ACC" or the "LOCK" position.However while the front doors areopened with the key turned to "LOCK"and removed, the power windows can-not be operated.
HXG129-1
even if you let go of the switch. To stopat the desired opening, pull up andrelease the switch.
!WARNING:
Never attempt to adjust the seat while the vehicle is moving. Thiscould result in loss of control, or an accident which may cause death, serious injury, or property damage.
!
Page 25 of 230
1- 12 FEATURES OF YOUR HYUNDAI
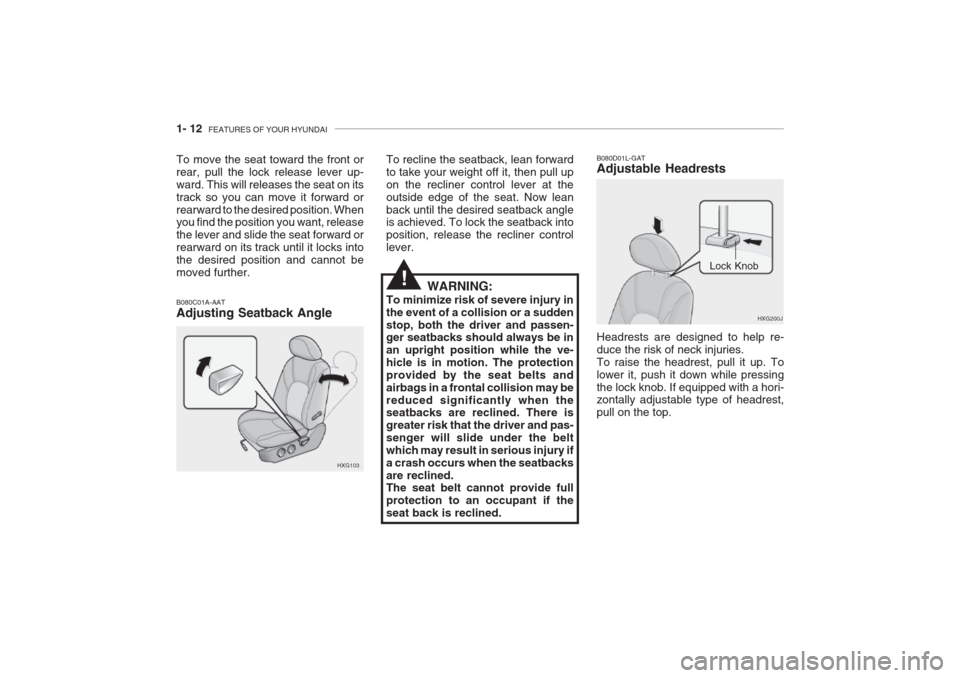
To move the seat toward the front or rear, pull the lock release lever up-ward. This will releases the seat on itstrack so you can move it forward orrearward to the desired position. When you find the position you want, release the lever and slide the seat forward orrearward on its track until it locks intothe desired position and cannot bemoved further.
HXG103
B080C01A-AAT Adjusting Seatback Angle
To recline the seatback, lean forward to take your weight off it, then pull upon the recliner control lever at theoutside edge of the seat. Now leanback until the desired seatback angle is achieved. To lock the seatback into position, release the recliner controllever.
WARNING:
To minimize risk of severe injury inthe event of a collision or a suddenstop, both the driver and passen- ger seatbacks should always be in an upright position while the ve-hicle is in motion. The protectionprovided by the seat belts andairbags in a frontal collision may bereduced significantly when the seatbacks are reclined. There is greater risk that the driver and pas-senger will slide under the beltwhich may result in serious injury ifa crash occurs when the seatbacksare reclined. The seat belt cannot provide full protection to an occupant if theseat back is reclined.
!
HXG200J
Lock Knob
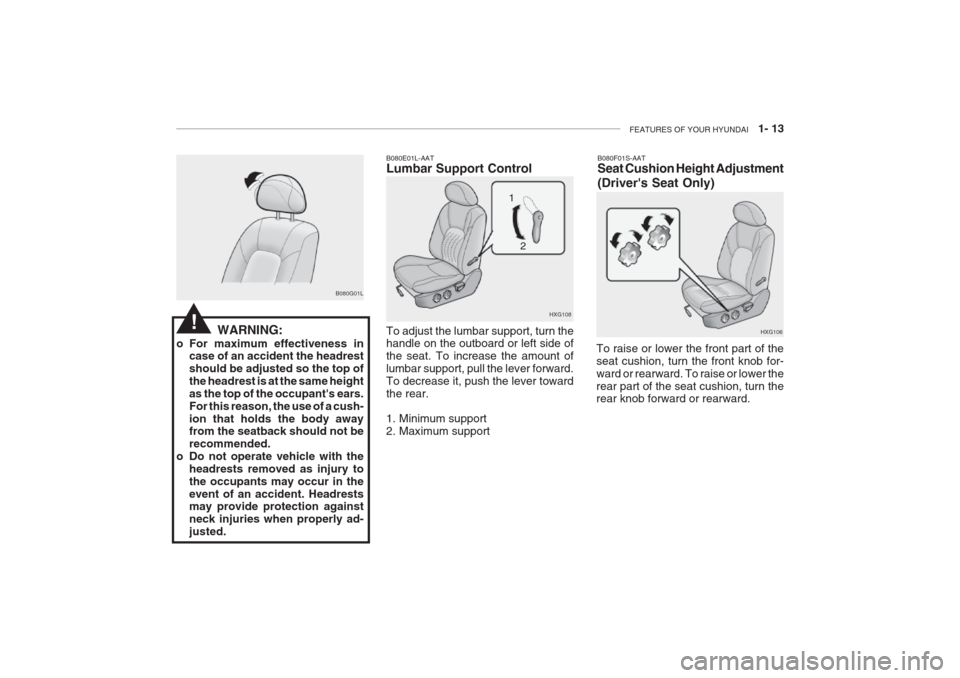
B080D01L-GAT Adjustable Headrests Headrests are designed to help re- duce the risk of neck injuries.To raise the headrest, pull it up. Tolower it, push it down while pressingthe lock knob. If equipped with a hori- zontally adjustable type of headrest, pull on the top.
Page 26 of 230
FEATURES OF YOUR HYUNDAI 1- 13
B080F01S-AAT Seat Cushion Height Adjustment (Driver's Seat Only)
To raise or lower the front part of the seat cushion, turn the front knob for-ward or rearward. To raise or lower therear part of the seat cushion, turn the rear knob forward or rearward. HXG106B080E01L-AAT Lumbar Support Control To adjust the lumbar support, turn the handle on the outboard or left side of the seat. To increase the amount oflumbar support, pull the lever forward.To decrease it, push the lever towardthe rear.
1. Minimum support
2. Maximum supportHXG108
2
1
B080G01L
WARNING:
o For maximum effectiveness in case of an accident the headrestshould be adjusted so the top ofthe headrest is at the same heightas the top of the occupant's ears.For this reason, the use of a cush-ion that holds the body away from the seatback should not be recommended.
o Do not operate vehicle with the headrests removed as injury tothe occupants may occur in theevent of an accident. Headrests may provide protection against neck injuries when properly ad-justed.
!
Page 27 of 230
1- 14 FEATURES OF YOUR HYUNDAI
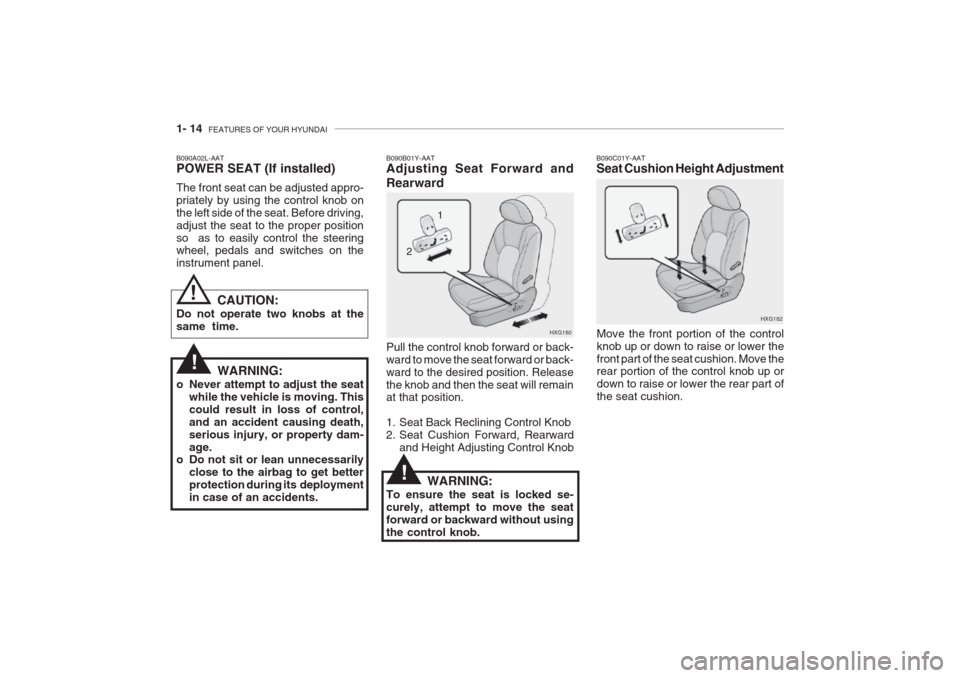
B090A02L-AAT POWER SEAT (If installed) The front seat can be adjusted appro- priately by using the control knob onthe left side of the seat. Before driving,adjust the seat to the proper positionso as to easily control the steering wheel, pedals and switches on the instrument panel.
HXG180
1
2
B090B01Y-AAT Adjusting Seat Forward and Rearward Pull the control knob forward or back- ward to move the seat forward or back-ward to the desired position. Releasethe knob and then the seat will remain at that position.
1. Seat Back Reclining Control Knob
2. Seat Cushion Forward, Rearward
and Height Adjusting Control Knob
WARNING:
o Never attempt to adjust the seat while the vehicle is moving. Thiscould result in loss of control,and an accident causing death,serious injury, or property dam-age.
o Do not sit or lean unnecessarily
close to the airbag to get betterprotection during its deploymentin case of an accidents.
CAUTION:
Do not operate two knobs at the same time.
WARNING:
To ensure the seat is locked se- curely, attempt to move the seatforward or backward without usingthe control knob.
B090C01Y-AAT Seat Cushion Height Adjustment
Move the front portion of the control knob up or down to raise or lower thefront part of the seat cushion. Move the rear portion of the control knob up or down to raise or lower the rear part ofthe seat cushion. HXG182
!
!
!