ECU Hyundai H-1 (Grand Starex) 2004 Owner's Manual
[x] Cancel search | Manufacturer: HYUNDAI, Model Year: 2004, Model line: H-1 (Grand Starex), Model: Hyundai H-1 (Grand Starex) 2004Pages: 273, PDF Size: 11.26 MB
Page 22 of 273
1BEFORE DRIVING YOUR VEHICLE
8
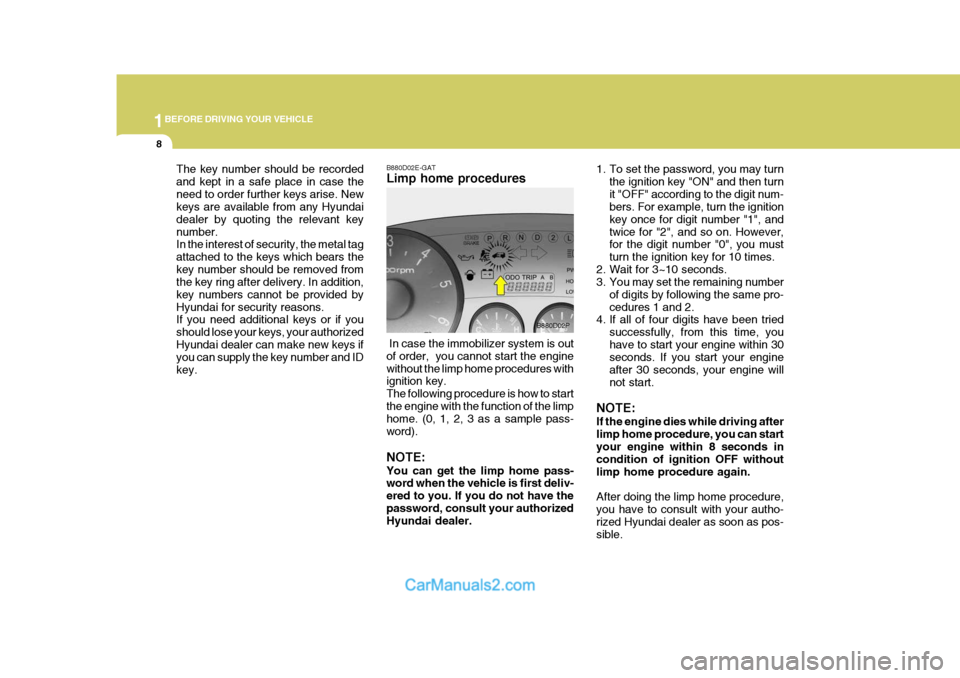
The key number should be recorded and kept in a safe place in case theneed to order further keys arise. New keys are available from any Hyundai dealer by quoting the relevant keynumber. In the interest of security, the metal tag attached to the keys which bears thekey number should be removed from the key ring after delivery. In addition, key numbers cannot be provided byHyundai for security reasons. If you need additional keys or if you should lose your keys, your authorizedHyundai dealer can make new keys if you can supply the key number and ID key. B880D02E-GAT Limp home procedures
1. To set the password, you may turn
the ignition key "ON" and then turn it "OFF" according to the digit num- bers. For example, turn the ignition key once for digit number "1", andtwice for "2", and so on. However, for the digit number "0", you must turn the ignition key for 10 times.
2. Wait for 3~10 seconds.
3. You may set the remaining number
of digits by following the same pro- cedures 1 and 2.
4. If all of four digits have been tried
successfully, from this time, youhave to start your engine within 30 seconds. If you start your engine after 30 seconds, your engine willnot start.
NOTE: If the engine dies while driving after limp home procedure, you can startyour engine within 8 seconds in condition of ignition OFF without limp home procedure again. After doing the limp home procedure, you have to consult with your autho-rized Hyundai dealer as soon as pos- sible.
B880D02P
In case the immobilizer system is out of order, you cannot start the enginewithout the limp home procedures with ignition key. The following procedure is how to startthe engine with the function of the limp home. (0, 1, 2, 3 as a sample pass- word). NOTE: You can get the limp home pass- word when the vehicle is first deliv- ered to you. If you do not have thepassword, consult your authorized Hyundai dealer.
Page 24 of 273
1BEFORE DRIVING YOUR VEHICLE
10
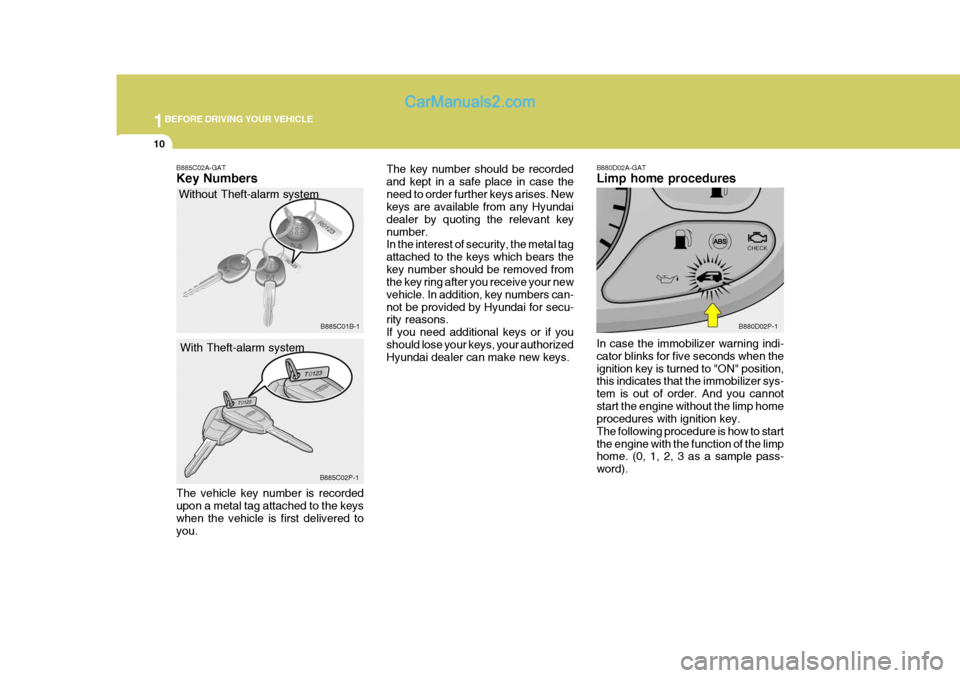
B885C02A-GAT Key Numbers
Without Theft-alarm system
With Theft-alarm system
The vehicle key number is recorded upon a metal tag attached to the keys when the vehicle is first delivered toyou. The key number should be recordedand kept in a safe place in case theneed to order further keys arises. New keys are available from any Hyundai dealer by quoting the relevant keynumber. In the interest of security, the metal tag attached to the keys which bears thekey number should be removed from the key ring after you receive your new vehicle. In addition, key numbers can-not be provided by Hyundai for secu- rity reasons. If you need additional keys or if youshould lose your keys, your authorized Hyundai dealer can make new keys.
B880D02A-GAT Limp home procedures In case the immobilizer warning indi- cator blinks for five seconds when theignition key is turned to "ON" position, this indicates that the immobilizer sys- tem is out of order. And you cannotstart the engine without the limp home procedures with ignition key. The following procedure is how to startthe engine with the function of the limp home. (0, 1, 2, 3 as a sample pass- word).
B885C01B-1
B885C02P-1 B880D02P-1
Page 26 of 273
1BEFORE DRIVING YOUR VEHICLE
12DOOR
!
B040A01A-AAT DOOR LOCKS
WARNING:
o Unlocked doors can be danger- ous. Before you drive away (es- pecially if there are children in the car), be sure that all the doorsare securely closed and locked so that the doors cannot be inad- vertently opened from the inside.This helps assure that doors will not be opened accidentally. Also, when combined with theproper use of seat belts, locking the doors helps keep occupants from being ejected from the carin case of an accident.
o Before opening the door, always
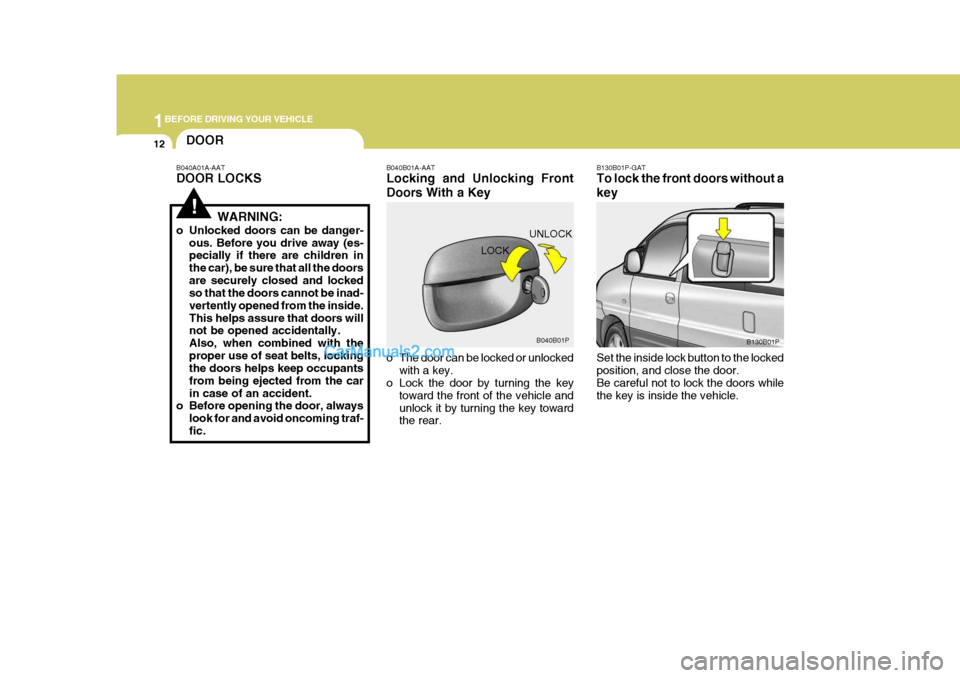
look for and avoid oncoming traf-fic. B040B01A-AAT Locking and Unlocking Front Doors With a Key
o The door can be locked or unlocked
with a key.
o Lock the door by turning the key
toward the front of the vehicle and unlock it by turning the key toward the rear. LOCK
B130B01P-GAT To lock the front doors without a key Set the inside lock button to the locked position, and close the door. Be careful not to lock the doors while the key is inside the vehicle.
B040B01P
B130B01P
UNLOCK
Page 40 of 273
1BEFORE DRIVING YOUR VEHICLE
26
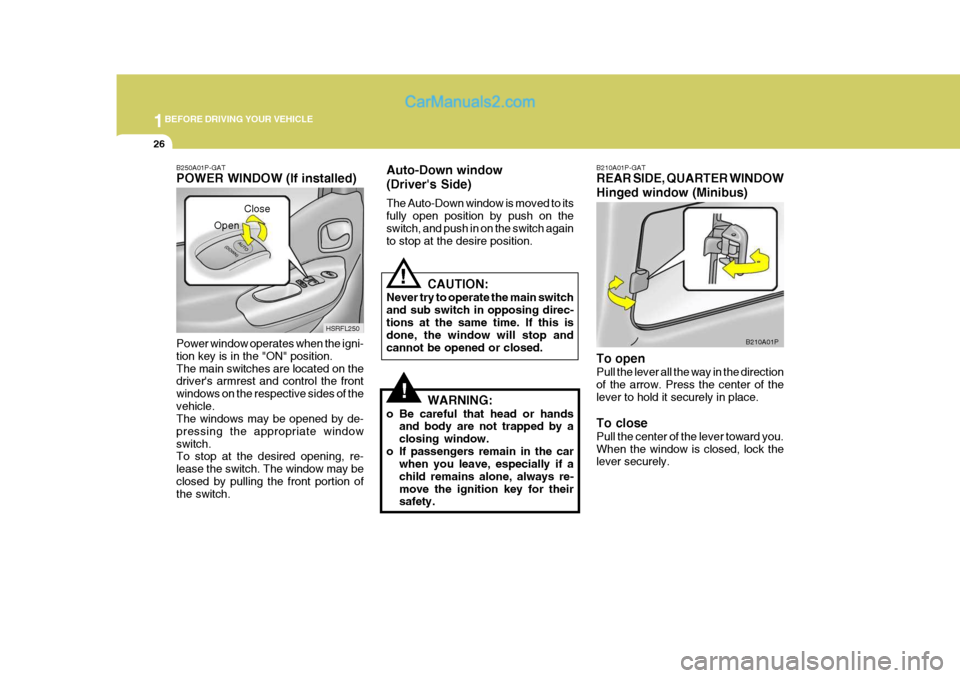
B210A01P-GAT REAR SIDE, QUARTER WINDOW Hinged window (Minibus) To open Pull the lever all the way in the direction of the arrow. Press the center of the lever to hold it securely in place. To close Pull the center of the lever toward you. When the window is closed, lock the lever securely. B210A01P
B250A01P-GAT POWER WINDOW (If installed) Power window operates when the igni- tion key is in the "ON" position.The main switches are located on the driver's armrest and control the front windows on the respective sides of thevehicle. The windows may be opened by de- pressing the appropriate windowswitch. To stop at the desired opening, re- lease the switch. The window may beclosed by pulling the front portion of the switch. Close
HSRFL250
Open
!
Auto-Down window (Driver's Side) The Auto-Down window is moved to its fully open position by push on theswitch, and push in on the switch again to stop at the desire position.
CAUTION:
Never try to operate the main switch and sub switch in opposing direc-tions at the same time. If this is done, the window will stop and cannot be opened or closed.
WARNING:
o Be careful that head or hands and body are not trapped by aclosing window.
o If passengers remain in the car when you leave, especially if achild remains alone, always re-move the ignition key for their safety.
!
Page 45 of 273
1
BEFORE DRIVING YOUR VEHICLE
31
5
!
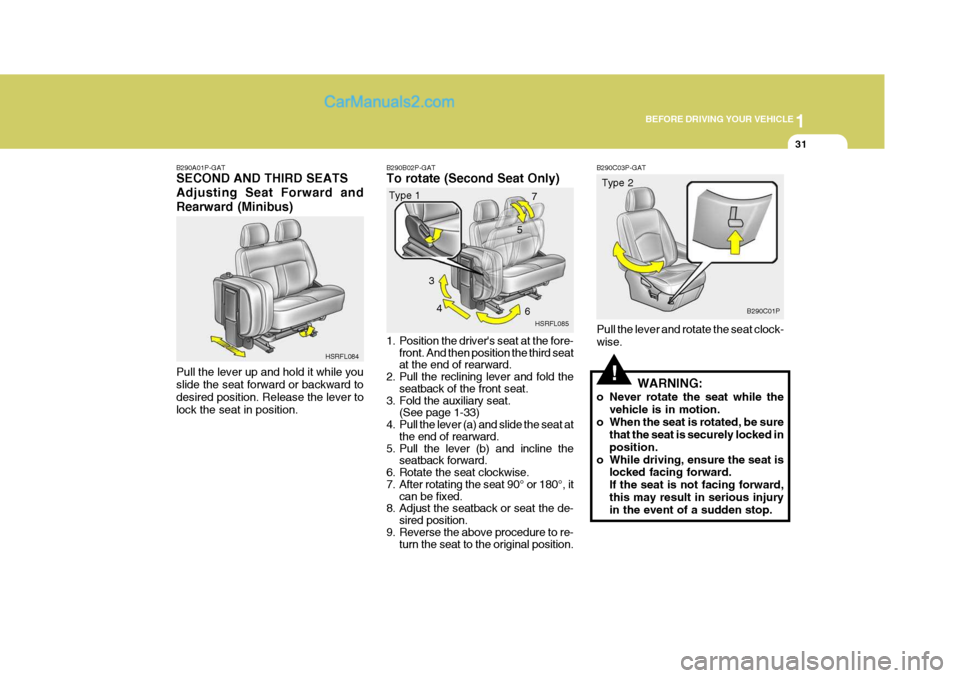
B290C03P-GAT Pull the lever and rotate the seat clock- wise.
WARNING:
o Never rotate the seat while the vehicle is in motion.
o When the seat is rotated, be sure that the seat is securely locked inposition.
o While driving, ensure the seat is locked facing forward.If the seat is not facing forward,this may result in serious injury in the event of a sudden stop.
B290A01P-GAT SECOND AND THIRD SEATS Adjusting Seat Forward andRearward (Minibus) Pull the lever up and hold it while you slide the seat forward or backward to desired position. Release the lever tolock the seat in position.
B290B02P-GAT To rotate (Second Seat Only)
1. Position the driver's seat at the fore-
front. And then position the third seat at the end of rearward.
2. Pull the reclining lever and fold the seatback of the front seat.
3. Fold the auxiliary seat. (See page 1-33)
4. Pull the lever (a) and slide the seat at the end of rearward.
5. Pull the lever (b) and incline the seatback forward.
6. Rotate the seat clockwise.
7. After rotating the seat 90° or 180°, it can be fixed.
8. Adjust the seatback or seat the de-
sired position.
9. Reverse the above procedure to re-
turn the seat to the original position.
HSRFL084
Type 1
HSRFL085Type 2
B290C01P
3
4 67
Page 46 of 273
1BEFORE DRIVING YOUR VEHICLE
32
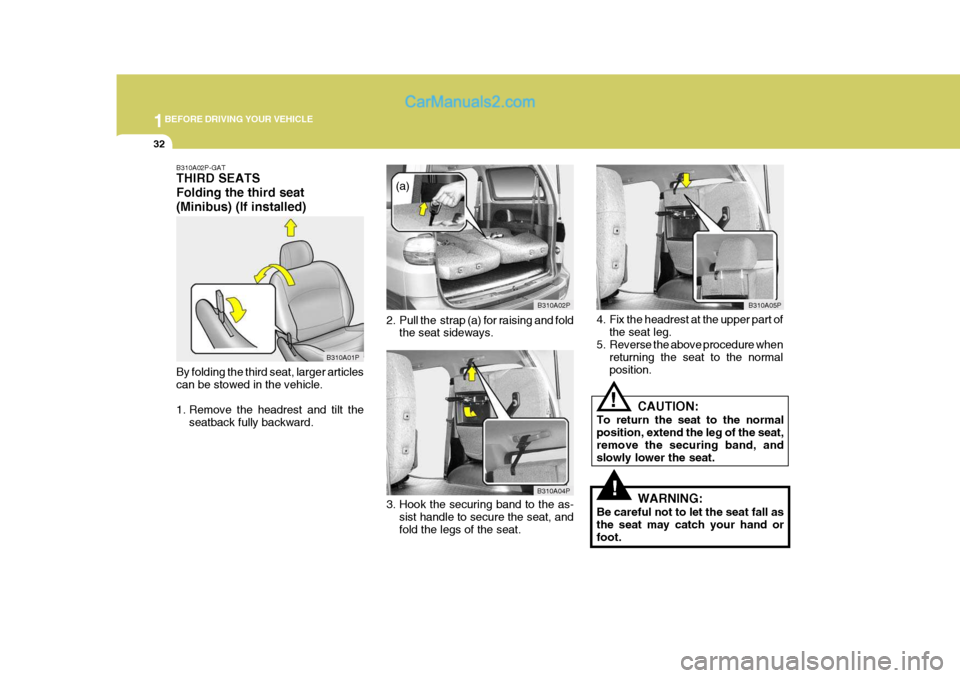
B310A02P-GAT THIRD SEATS Folding the third seat(Minibus) (If installed) By folding the third seat, larger articles can be stowed in the vehicle.
1. Remove the headrest and tilt the
seatback fully backward. 2. Pull the strap (a) for raising and fold
the seat sideways.
3. Hook the securing band to the as- sist handle to secure the seat, and fold the legs of the seat.
B310A01P
B310A02P
B310A04P B310A05P
(a)
4. Fix the headrest at the upper part ofthe seat leg.
5. Reverse the above procedure when returning the seat to the normalposition.
WARNING:
Be careful not to let the seat fall asthe seat may catch your hand orfoot.
!
! CAUTION:
To return the seat to the normal position, extend the leg of the seat, remove the securing band, andslowly lower the seat.
Page 49 of 273
1
BEFORE DRIVING YOUR VEHICLE
35
CAUTION:
o To make a flat seat, stop the ve- hicle in a safe place.
o Do not walk around on top of the
seats after they have been laid flat. To avoid loosing your foot- ing, step on the center of the seats and walk slowly.
o To ensure the seats are locked securely, attempt to move themback and forth.
o Do not jump on, or impact the seatbacks heavily.
o Never drive with the luggage or passengers on the flat seat. Thisis highly dangerous if heavy brak-ing is required.
o To raise the seatback, sit on the
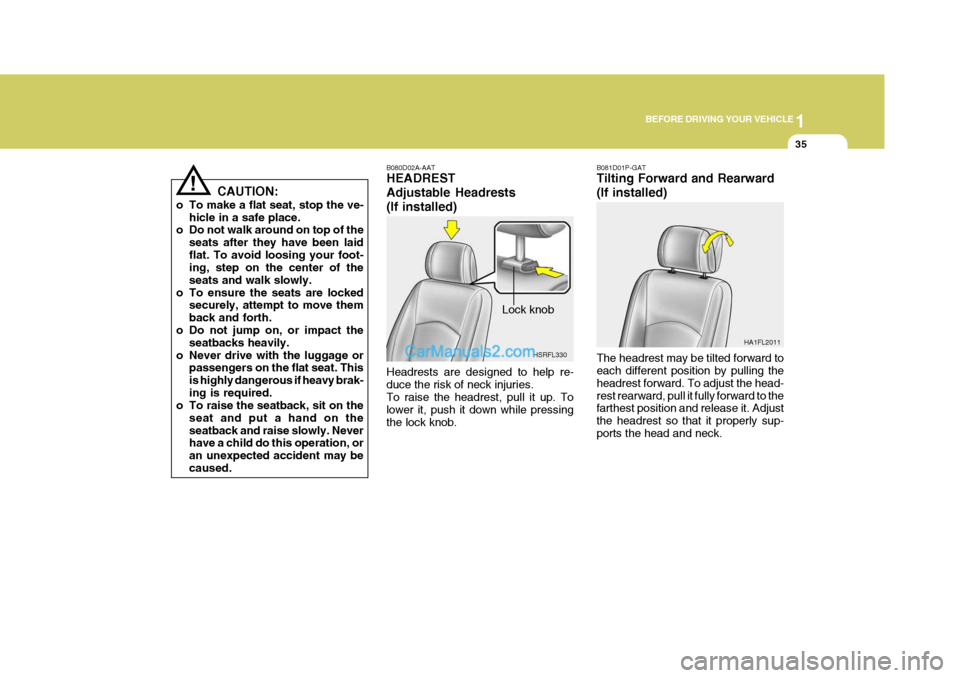
seat and put a hand on theseatback and raise slowly. Never have a child do this operation, or an unexpected accident may becaused. B080D02A-AAT HEADREST Adjustable Headrests(If installed) Headrests are designed to help re- duce the risk of neck injuries. To raise the headrest, pull it up. To lower it, push it down while pressingthe lock knob.
Lock knob
HSRFL330! B081D01P-GAT Tilting Forward and Rearward (If installed) The headrest may be tilted forward to each different position by pulling the headrest forward. To adjust the head-rest rearward, pull it fully forward to the farthest position and release it. Adjust the headrest so that it properly sup-ports the head and neck.HA1FL2011
Page 57 of 273
1
BEFORE DRIVING YOUR VEHICLE
43
o Children who are too large to be
in a child restraint should sit in the rear seat and be restrainedwith the available lap/shoulder belts.
o Always make sure that the shoul-
der belt portion of the outboardlap/shoulder belt is positioned midway over the shoulder, neveracross the neck. Moving the child closer to the center of the vehicle may help provide a good shoul-der belt fit. The lap belt portion of the lap/shoulder belt or the cen- ter seat lap belt must always bepositioned as low as possible on the child's hips and as snug as possible.
o If the seat belt will not properly fit the child, we recommend the useof an approved booster seat inthe rear seat in order to raise the child's seating height so that the seat belt will properly fit the child.
o Never allow a child to stand up or kneel on the seat.o Never use an infant carrier orchild safety seat that "hooks" over a seatback; it may not pro-vide adequate security in an ac- cident.
o Never allow a child to be held in
a person's arms while they are ina moving vehicle, as this could result in serious injury to thechild in the event of an accident or a sudden stop. Holding a child in a moving vehicle does notprovide the child with any means of protection during an accident, even if the person holding thechild is wearing a seat belt.
o If the child restaint seat is not
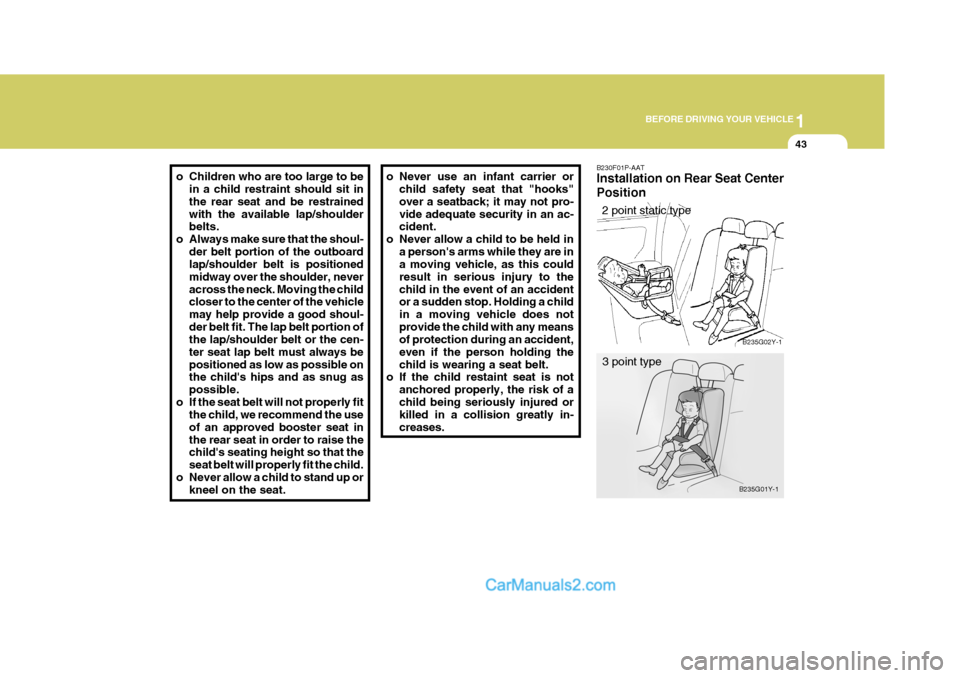
anchored properly, the risk of achild being seriously injured or killed in a collision greatly in- creases. B230F01P-AAT Installation on Rear Seat Center Position
2 point static type
B235G02Y-1
B235G01Y-1
3 point type
Page 58 of 273
1BEFORE DRIVING YOUR VEHICLE
44
!
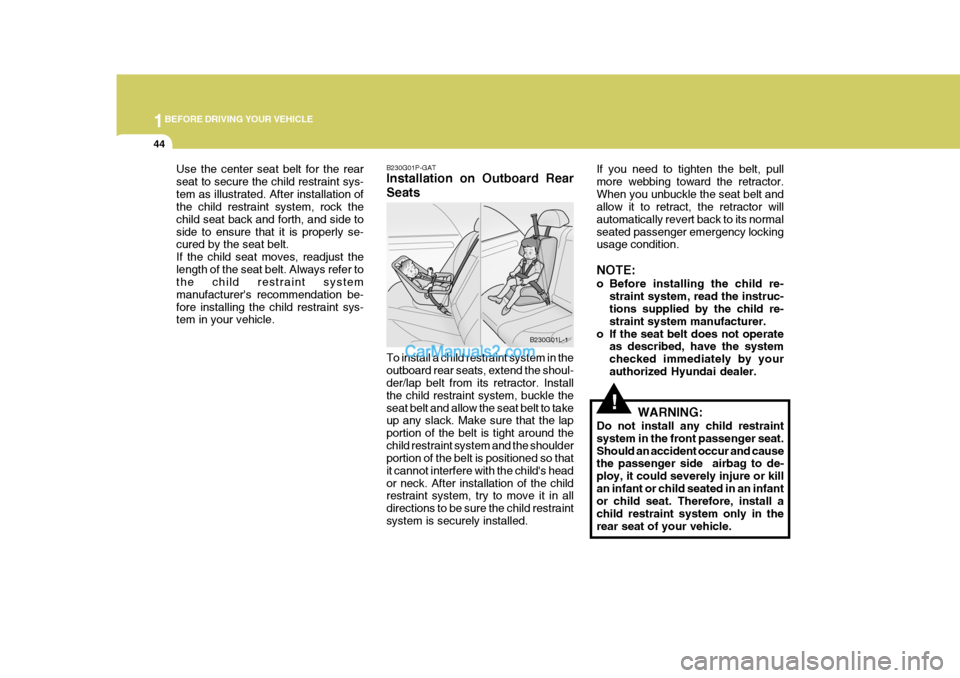
B230G01P-GAT Installation on Outboard Rear Seats To install a child restraint system in the outboard rear seats, extend the shoul- der/lap belt from its retractor. Install the child restraint system, buckle theseat belt and allow the seat belt to take up any slack. Make sure that the lap portion of the belt is tight around thechild restraint system and the shoulder portion of the belt is positioned so that it cannot interfere with the child's heador neck. After installation of the child restraint system, try to move it in all directions to be sure the child restraintsystem is securely installed. If you need to tighten the belt, pullmore webbing toward the retractor.When you unbuckle the seat belt and allow it to retract, the retractor will automatically revert back to its normalseated passenger emergency locking usage condition. NOTE:
o Before installing the child re-
straint system, read the instruc- tions supplied by the child re- straint system manufacturer.
o If the seat belt does not operate as described, have the systemchecked immediately by yourauthorized Hyundai dealer.
WARNING:
Do not install any child restraintsystem in the front passenger seat.Should an accident occur and cause the passenger side airbag to de- ploy, it could severely injure or killan infant or child seated in an infant or child seat. Therefore, install a child restraint system only in therear seat of your vehicle.
B230G01L-1
Use the center seat belt for the rearseat to secure the child restraint sys-tem as illustrated. After installation of the child restraint system, rock the child seat back and forth, and side toside to ensure that it is properly se- cured by the seat belt. If the child seat moves, readjust thelength of the seat belt. Always refer to the child restraint system manufacturer's recommendation be-fore installing the child restraint sys- tem in your vehicle.
Page 60 of 273
1BEFORE DRIVING YOUR VEHICLE
46SUPPLEMENTAL RESTRAINT (AIRBAG) SYSTEMSTEERING WHEEL TILT LEVER
!
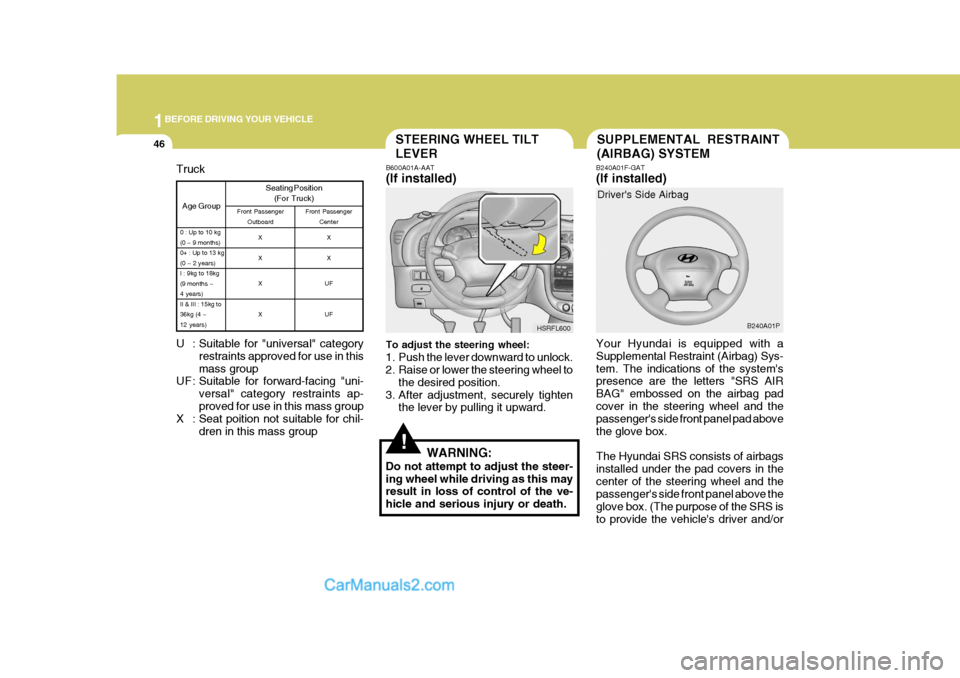
B600A01A-AAT (If installed) To adjust the steering wheel:
1. Push the lever downward to unlock.
2. Raise or lower the steering wheel to the desired position.
3. After adjustment, securely tighten the lever by pulling it upward.
WARNING:
Do not attempt to adjust the steer- ing wheel while driving as this may result in loss of control of the ve- hicle and serious injury or death. HSRFL600
B240A01F-GAT (If installed) Your Hyundai is equipped with a Supplemental Restraint (Airbag) Sys-tem. The indications of the system's presence are the letters "SRS AIR BAG" embossed on the airbag padcover in the steering wheel and the passenger's side front panel pad above the glove box. The Hyundai SRS consists of airbags installed under the pad covers in thecenter of the steering wheel and the passenger's side front panel above the glove box. (The purpose of the SRS isto provide the vehicle's driver and/orDriver's Side Airbag
B240A01P
U : Suitable for "universal" category restraints approved for use in thismass group
UF : Suitable for forward-facing "uni-
versal" category restraints ap-proved for use in this mass group
X : Seat poition not suitable for chil-
dren in this mass group
Age Group
0 : Up to 10 kg (0 ~ 9 months)0+ : Up to 13 kg(0 ~ 2 years)I : 9kg to 18kg(9 months ~4 years)II & III : 15kg to36kg (4 ~12 years)
Truck Seating Position(For Truck)
Front Passenger Outboard Front Passenger
Center
X X X X X X
UF UF