electrical Hyundai H-1 (Grand Starex) 2004 Owner's Manual
[x] Cancel search | Manufacturer: HYUNDAI, Model Year: 2004, Model line: H-1 (Grand Starex), Model: Hyundai H-1 (Grand Starex) 2004Pages: 273, PDF Size: 11.26 MB
Page 18 of 273
1BEFORE DRIVING YOUR VEHICLE
4
B070A01P-GAT MAINTENANCE It is necessary to maintain your vehicle in top operating condition in order to enjoy safe and pleasant driving.Some maintenance items can be done by the owner (Consumer information), while others should be done only by anauthorized dealer (periodic inspection and maintenance). For the maintenance items to be doneby the owner, prepare the appropriate materials and tools and follow the pro- cedures given in the "Consumer infor- mation" section of this manual. However, the periodic inspection andmaintenance should not be attempted by the owner, but should be done by an authorized HYUNDAI dealer.Correct performance of the periodic inspection and maintenance items re- quires specialized knowledge andequipment. Having these items performed by an authorized HYUNDAI dealer with thelatest technology and equipment will ensure that your vehicle is maintained for optimum performance, economy,and safety. In addition, having all periodic inspec-tion and maintenance done by an au-thorized HYUNDAI dealer is a prereq- uisite for validity of the warranty on your vehicle in the event of a claim.Refer to the separate "Service Book- let" for the periodic inspection and maintenance items and intervals. B080A01P-GAT INSTALLATION OF ACCESSO- RIES Consult an authorized HYUNDAI dealer when installing accessories.
o Installation of some accessories
may be restricted by regulations.
o Improper installation of electrical
parts could cause fire.
o Never use tires or wheels which do not meet specifications. For wheel and tire sizes, refer to the"CONSUMER INFORMATION" section of this manual.
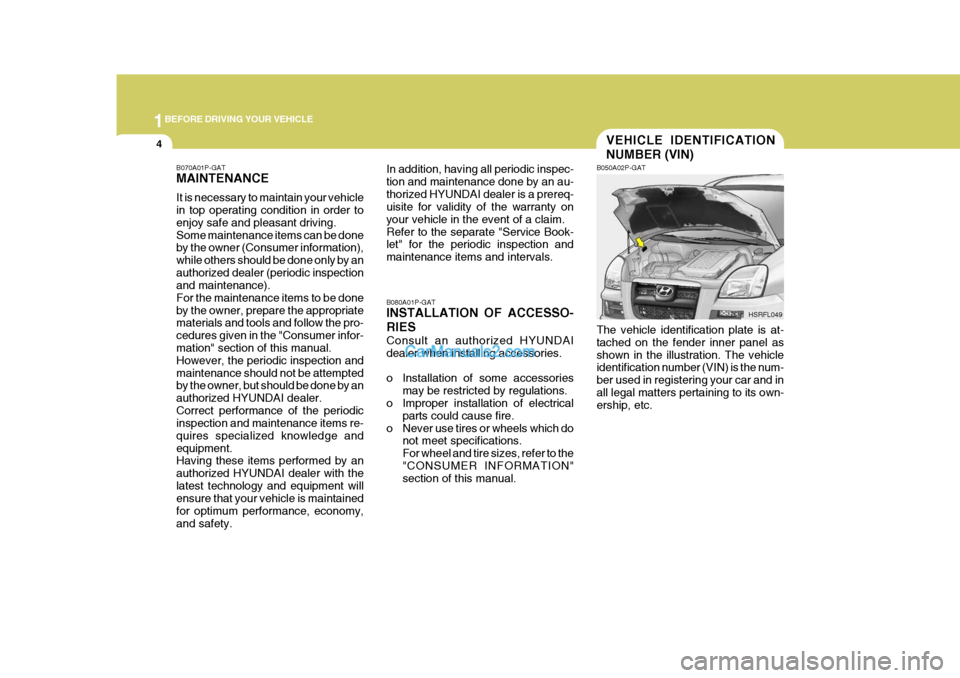
VEHICLE IDENTIFICATION NUMBER (VIN)
B050A02P-GAT The vehicle identification plate is at- tached on the fender inner panel asshown in the illustration. The vehicle identification number (VIN) is the num- ber used in registering your car and inall legal matters pertaining to its own- ership, etc. HSRFL049
Page 74 of 273
2
INSTRUMENTS AND CONTROLS
9
B260G01A-AAT
Low Oil Pressure Warning Light CAUTION:
If the oil pressure warning light stays on while the engine is running, seri-ous engine damage may result. The oil pressure warning light comes on whenever there is insufficient oilpressure. In normal operation, it should come on when the ignition switch is turned on, then go outwhen the engine is started. If the oil pressure warning light stays on while the engine is running, there may bea serious malfunction. If this happens, stop the car as soon as it is safe to do so, turn off theengine and check the oil level. If the oil level is low, fill the engine oil to the proper level and start the engineagain. If the light stays on with the engine running, turn the engine off immediately. In any instance wherethe oil light stays on when the en- gine is running, the engine should be checked by an authorizedHyundai dealer before the car is driven again.
!
!
B260H03A-AAT Parking Brake/Low Brake Fluid Level Warning Light-Red If the parking brake is not applied, the warning light should come on when theignition switch is turned to "ON" or "START", then go out when the engine starts. If the light comes on at anyother time, you should slow the vehicle and bring it to a complete stop in a safe location off the roadway.The brake warning light indicates that the brake fluid level in the brake mas- ter cylinder is low and hydraulic brakefluid conforming to DOT 3 or DOT 4 specifications should be added. After adding fluid, if no other trouble is found,the car should be immediately and carefully driven to a Hyundai dealer for inspection. If further trouble is experi-enced, the vehicle should not be driven at all but taken to a dealer by a professional towing service or someother safe method.
WARNING:
If you suspect brake trouble, have your brakes checked by a Hyundaidealer as soon as possible. Driving your car with a problem in either the brake electrical system or brake hy-draulic system is dangerous, and could result in a serious injury or death. Warning Light Operation The parking brake/brake fluid level warning light should come on when the parking brake is applied and the igni- tion switch is turned to "ON" or"START". After the engine is started, the light should go out when the park- ing brake is released.
Page 96 of 273
2
INSTRUMENTS AND CONTROLS
31
!
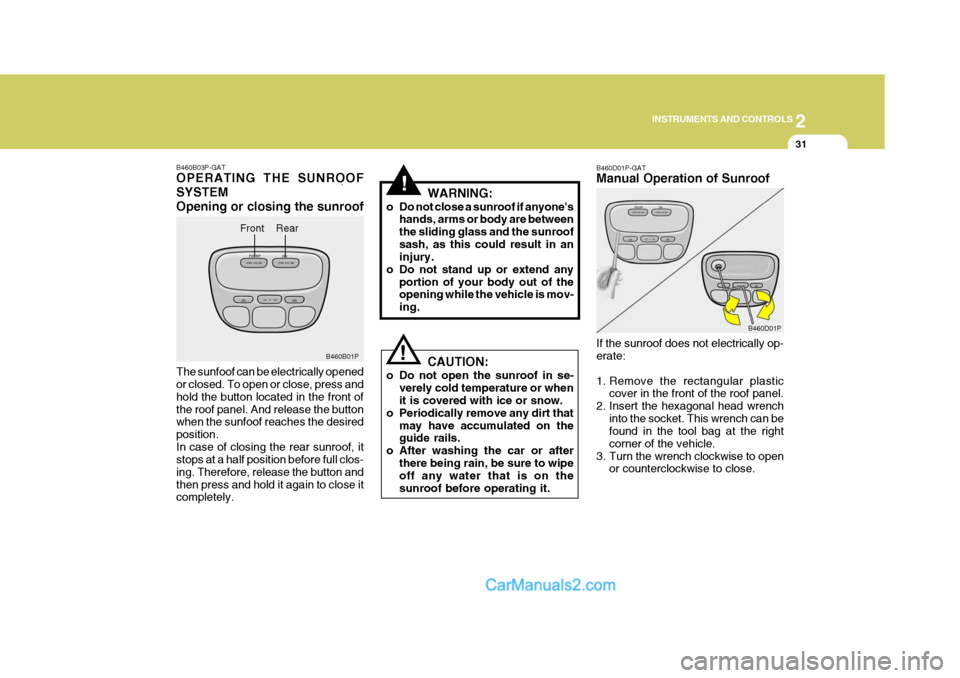
! B460D01P-GAT Manual Operation of Sunroof If the sunroof does not electrically op- erate:
1. Remove the rectangular plastic
cover in the front of the roof panel.
2. Insert the hexagonal head wrench
into the socket. This wrench can be found in the tool bag at the right corner of the vehicle.
3. Turn the wrench clockwise to open or counterclockwise to close.
WARNING:
o Do not close a sunroof if anyone's hands, arms or body are betweenthe sliding glass and the sunroofsash, as this could result in an injury.
o Do not stand up or extend any portion of your body out of theopening while the vehicle is mov- ing.
CAUTION:
o Do not open the sunroof in se- verely cold temperature or when it is covered with ice or snow.
o Periodically remove any dirt that may have accumulated on theguide rails.
o After washing the car or after
there being rain, be sure to wipeoff any water that is on the sunroof before operating it. B460D01P
B460B03P-GAT OPERATING THE SUNROOF SYSTEMOpening or closing the sunroof The sunfoof can be electrically opened or closed. To open or close, press and hold the button located in the front ofthe roof panel. And release the button when the sunfoof reaches the desired position.In case of closing the rear sunroof, it stops at a half position before full clos- ing. Therefore, release the button andthen press and hold it again to close it completely. Front
B460B01P
Rear
Page 97 of 273
2 INSTRUMENTS AND CONTROLS
32
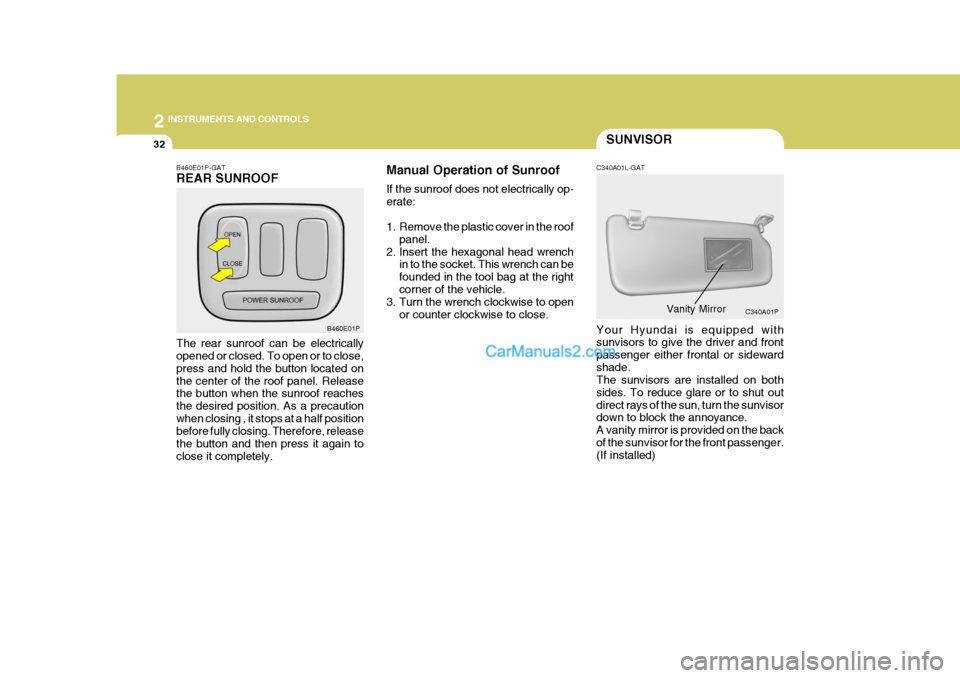
B460E01P-GAT REAR SUNROOF The rear sunroof can be electrically opened or closed. To open or to close, press and hold the button located onthe center of the roof panel. Release the button when the sunroof reaches the desired position. As a precautionwhen closing , it stops at a half position before fully closing. Therefore, release the button and then press it again toclose it completely. B460E01P
SUNVISOR
Manual Operation of Sunroof If the sunroof does not electrically op- erate:
1. Remove the plastic cover in the roof panel.
2. Insert the hexagonal head wrench in to the socket. This wrench can be founded in the tool bag at the rightcorner of the vehicle.
3. Turn the wrench clockwise to open
or counter clockwise to close. C340A01L-GAT Your Hyundai is equipped with sunvisors to give the driver and front passenger either frontal or sidewardshade. The sunvisors are installed on both sides. To reduce glare or to shut outdirect rays of the sun, turn the sunvisor down to block the annoyance. A vanity mirror is provided on the backof the sunvisor for the front passenger. (If installed)
Vanity Mirror
C340A01P
Page 115 of 273
2 INSTRUMENTS AND CONTROLS
50
!
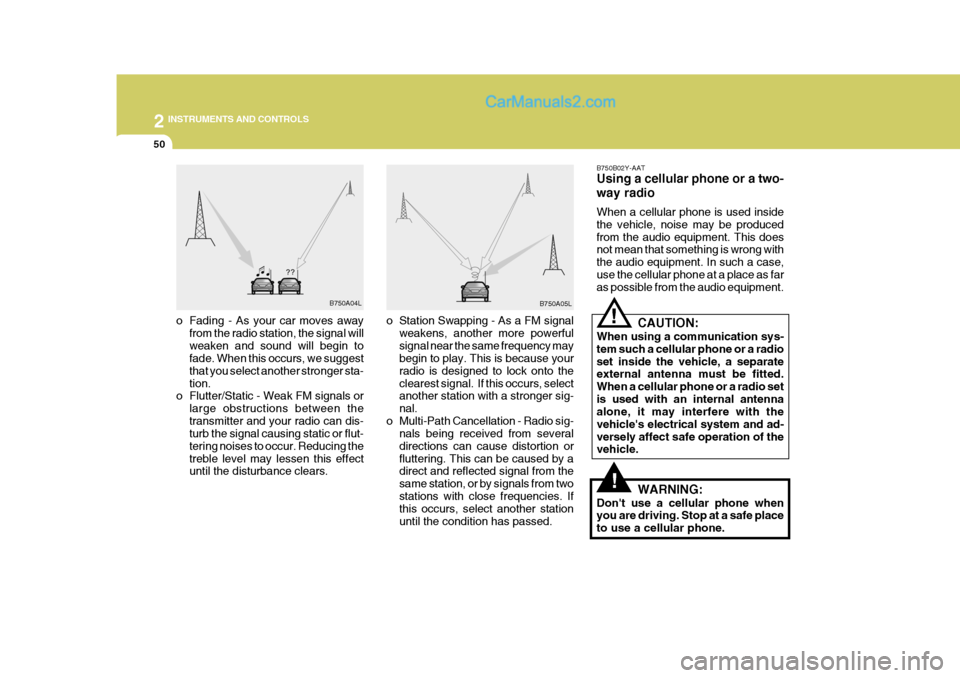
o Station Swapping - As a FM signal
weakens, another more powerful signal near the same frequency may begin to play. This is because your radio is designed to lock onto theclearest signal. If this occurs, select another station with a stronger sig- nal.
o Multi-Path Cancellation - Radio sig- nals being received from severaldirections can cause distortion orfluttering. This can be caused by a direct and reflected signal from the same station, or by signals from twostations with close frequencies. If this occurs, select another station until the condition has passed.
o Fading - As your car moves away
from the radio station, the signal willweaken and sound will begin to fade. When this occurs, we suggest that you select another stronger sta-tion.
o Flutter/Static - Weak FM signals or
large obstructions between thetransmitter and your radio can dis- turb the signal causing static or flut- tering noises to occur. Reducing thetreble level may lessen this effect until the disturbance clears. B750B02Y-AAT Using a cellular phone or a two- way radio When a cellular phone is used inside the vehicle, noise may be producedfrom the audio equipment. This does not mean that something is wrong with the audio equipment. In such a case,use the cellular phone at a place as far as possible from the audio equipment.!
CAUTION:
When using a communication sys- tem such a cellular phone or a radioset inside the vehicle, a separate external antenna must be fitted. When a cellular phone or a radio setis used with an internal antenna alone, it may interfere with the vehicle's electrical system and ad-versely affect safe operation of the vehicle.
WARNING:
Don't use a cellular phone whenyou are driving. Stop at a safe place to use a cellular phone.
B750A04L
B750A05L
Page 144 of 273
3 STARTING AND OPERATING
4
C070C01E-1
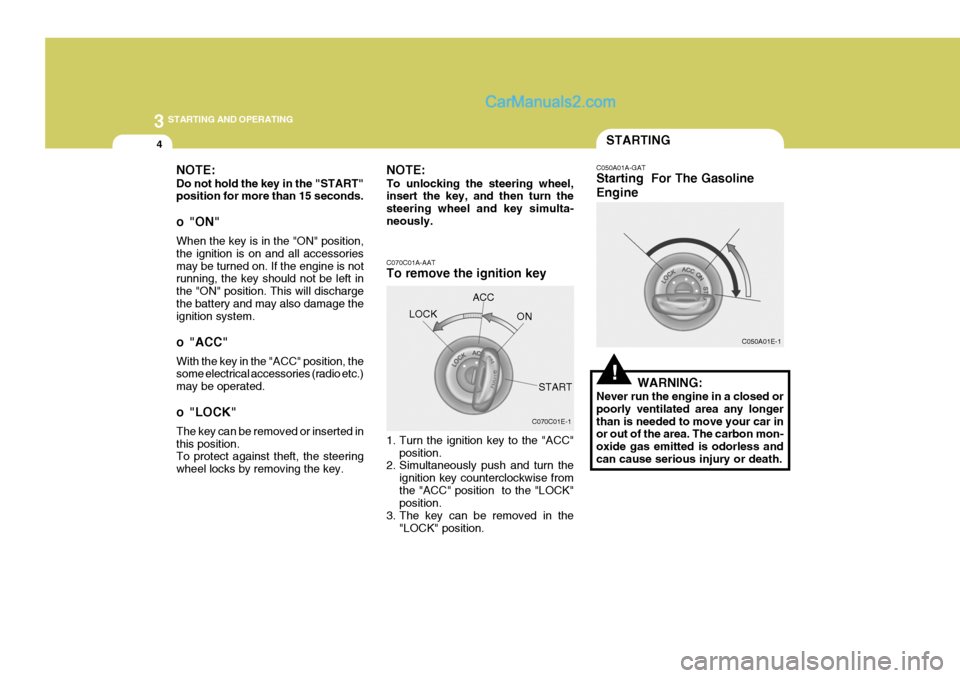
C070C01A-AAT To remove the ignition key
1. Turn the ignition key to the "ACC"
position.
2. Simultaneously push and turn the
ignition key counterclockwise from the "ACC" position to the "LOCK" position.
3. The key can be removed in the
"LOCK" position.LOCK
ACC
ON
START
NOTE: Do not hold the key in the "START" position for more than 15 seconds.
o "ON" When the key is in the "ON" position, the ignition is on and all accessoriesmay be turned on. If the engine is not running, the key should not be left in the "ON" position. This will dischargethe battery and may also damage the ignition system.
o "ACC" With the key in the "ACC" position, the some electrical accessories (radio etc.) may be operated.
o "LOCK" The key can be removed or inserted in this position. To protect against theft, the steering wheel locks by removing the key. NOTE: To unlocking the steering wheel, insert the key, and then turn the steering wheel and key simulta-neously.
!
STARTING
C050A01A-GAT Starting For The Gasoline Engine
C050A01E-1
WARNING:
Never run the engine in a closed or poorly ventilated area any longerthan is needed to move your car in or out of the area. The carbon mon- oxide gas emitted is odorless andcan cause serious injury or death.
Page 189 of 273
4
CORROSION PREVENTION AND APPEARANCE CARE
17
4
IN CASE OF EMERGENCY
17
!WARNING:
o Improperly loading your car and trailer can serious affect its steer- ing and braking performance causing a crash in which youmay be seriously injured.
o For automatic transmission ve-
hicles, the trailer should be towedwith the towing vehicle unloaded, with the exception of the driver. Otherwise, the automatic trans-mission oil temperature may rise to a temperature that may result in serious damage of the auto- matic transmission. C190F01A-GAT Trailer or Vehicle Towing Tips
1. Before towing, check hitch and
safety chain connections as well as proper operation of the trailer run- ning lights, brake lights, and turn signals.
2. Always drive your vehicle at a mod- erate speed (Less than 100 km/h).
3. Trailer towing requires more fuel than normal conditions.
4. To maintain engine braking effi-
ciency and electrical charging per-formance, do not use fifth gear (manual transmission) or overdrive (automatic transmission).
5. Always secure items in the trailer to prevent load shift while driving.
6. Check the condition and air pres- sure of all tires on the trailer and your car. Low tire pressure can se- riously affect the handling. Alsocheck the spare tire.
7. The vehicle/trailer combination is
more affected by crosswind andbuffeting. When being passed by a large vehicle, keep a constant speed and steer straight ahead. If there is too much wind buffeting, slow downto get out of the other vehicle’s air turbulence.
8. When parking your car and trailer, especially on a hill, be sure to followall the normal precautions. Turn your front wheel into the curb, set theparking brake firmly, and put the transmission in 1st or "R" (manual transmission) or "P" (automatictransmission). In addition, place wheel chocks at each of the trailer’s tires.
9. If the trailer has electric brakes, start your vehicle and trailer mov-ing, and then apply the trailer brakecontroller by hand to be sure the brakes are working. This lets you check your electrical connection atthe same time.
10.During your trip, check occasion-
ally to be sure that the load issecure, and that the lights and any trailer brakes are still working.
11.Avoid jerky starts, sudden accel- eration or sudden stops.
12.Avoid sharp turns and rapid lane
changes.
Page 194 of 273
44IN CASE OF EMERGENCY
22IF THE ENGINE OVERHEATS
CAUTION:
o Do not allow the jumper cable clips to touch one another.
o Do not connect the jumper cable
to the negative terminal of the flat battery. The battery generates explosive gas, and a spark caused whenthe jumper cable is disconnected from the negative terminal could ignite this gas and cause an ex-plosion.
o Be careful that the jumper cable
becomes not caught in the cool-ing fan, etc.
! D030A02A-AAT If your temperature gauge indicates overheating, you experience a loss of power, or hear loud pinging or knock- ing and the engine is probably too hot.If this happens to you, you should:
1. Pull off the road and stop as soon as
it is safe to do so.
2. Place the gear selector lever in "P"
(automatic transmission), or neutral (manual transmission) and set the parking brake. If the air conditioning is on, turn it off.
3. If engine coolant is running out un- der the car or steam is coming outfrom the hood, stop the engine. Donot open the hood until the engine coolant has stopped running or the steaming has stopped. If there is novisible loss of engine coolant and no steam, leave the engine running and check to be sure the enginecooling fan is operating. If the fan is not running, turn the engine off.
the other end to the engine block of the vehicle with the flat batteryat the point farthest from the battery.
8. Start engine as described "Starting the engine" in section 3.
9. After the engine is started, discon- nect the cables in the reverse order.
1. Both batteries must be 12V. The
capacity (Ah) of the battery supply- ing current should not be signifi- cantly below that of the discharged battery.
2. Use only heavy-duty jumper cables.
3. A discharged battery can freeze. A
frozen battery must be thawed out before connecting the jumper cables.
4. There should be no contact be-
tween the two vehicles; otherwisecurrent may flow when the positive terminal is connected.
5. The discharged battery must be correctly connected to the vehicleelectrical system.
6. Run the engine of the vehicle sup- plying current.
7. Connect the jumper cables as fol-
lows:
(1) Connect one end of one jumper cable to the positive terminal of the flat battery, and the other end to the positive terminal of the booster battery.
(2) Connect one end of the other jumper cable to the negative ter-minal of the booster battery, and
Page 196 of 273
44IN CASE OF EMERGENCY
24
CAUTION:
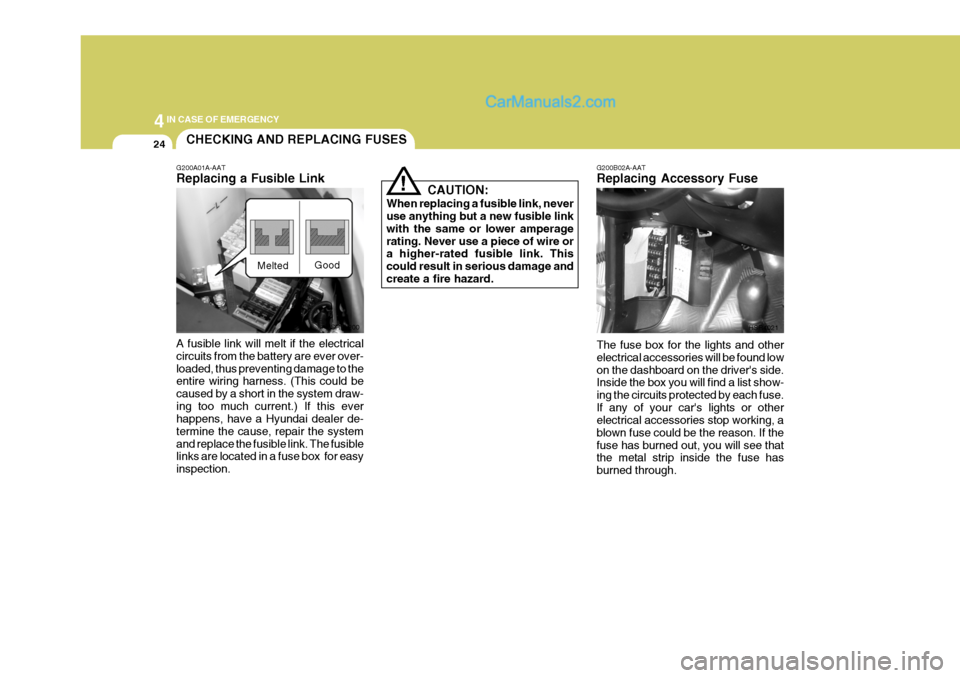
When replacing a fusible link, never use anything but a new fusible link with the same or lower amperagerating. Never use a piece of wire or a higher-rated fusible link. This could result in serious damage andcreate a fire hazard.! G200B02A-AAT Replacing Accessory Fuse The fuse box for the lights and other electrical accessories will be found lowon the dashboard on the driver's side. Inside the box you will find a list show- ing the circuits protected by each fuse.If any of your car's lights or other electrical accessories stop working, a blown fuse could be the reason. If thefuse has burned out, you will see that the metal strip inside the fuse has burned through.HSR4021
CHECKING AND REPLACING FUSES
G200A01A-AAT Replacing a Fusible Link
HSRFL200
Melted
Good
A fusible link will melt if the electrical circuits from the battery are ever over-loaded, thus preventing damage to the entire wiring harness. (This could be caused by a short in the system draw-ing too much current.) If this ever happens, have a Hyundai dealer de- termine the cause, repair the systemand replace the fusible link. The fusible links are located in a fuse box for easy inspection.
Page 197 of 273
4
CORROSION PREVENTION AND APPEARANCE CARE
25
4
IN CASE OF EMERGENCY
25
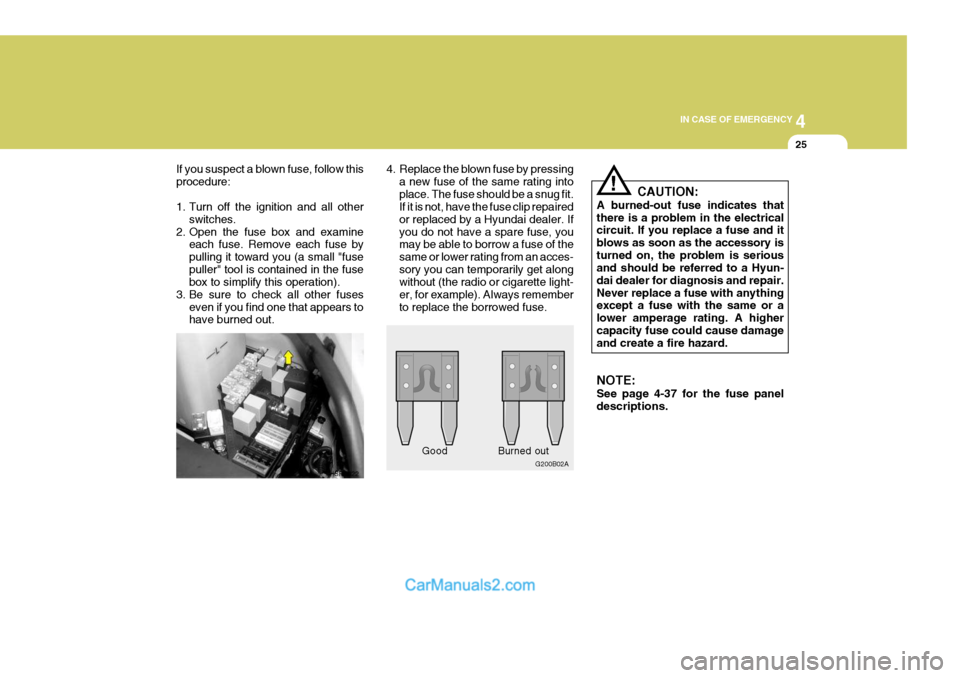
If you suspect a blown fuse, follow this procedure:
1. Turn off the ignition and all other
switches.
2. Open the fuse box and examine each fuse. Remove each fuse by pulling it toward you (a small "fusepuller" tool is contained in the fuse box to simplify this operation).
3. Be sure to check all other fuses even if you find one that appears tohave burned out.
HSR40224. Replace the blown fuse by pressing
a new fuse of the same rating into place. The fuse should be a snug fit. If it is not, have the fuse clip repaired or replaced by a Hyundai dealer. Ifyou do not have a spare fuse, you may be able to borrow a fuse of the same or lower rating from an acces-sory you can temporarily get along without (the radio or cigarette light- er, for example). Always rememberto replace the borrowed fuse.
G200B02A
Good
Burned out
!
CAUTION:
A burned-out fuse indicates that there is a problem in the electrical circuit. If you replace a fuse and it blows as soon as the accessory isturned on, the problem is serious and should be referred to a Hyun- dai dealer for diagnosis and repair.Never replace a fuse with anything except a fuse with the same or a lower amperage rating. A highercapacity fuse could cause damage and create a fire hazard. NOTE: See page 4-37 for the fuse panel descriptions.