air condition Hyundai H-1 (Grand Starex) 2005 Owner's Manual
[x] Cancel search | Manufacturer: HYUNDAI, Model Year: 2005, Model line: H-1 (Grand Starex), Model: Hyundai H-1 (Grand Starex) 2005Pages: 205, PDF Size: 9.14 MB
Page 11 of 205
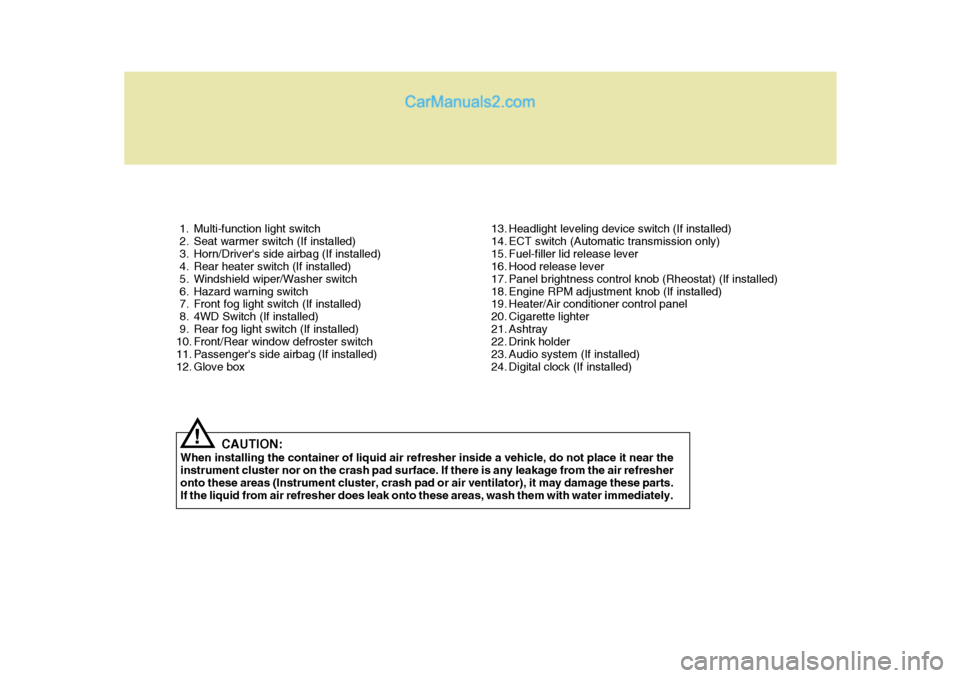
1. Multi-function light switch
2. Seat warmer switch (If installed)
3. Horn/Driver's side airbag (If installed)
4. Rear heater switch (If installed)
5. Windshield wiper/Washer switch
6. Hazard warning switch
7. Front fog light switch (If installed)
8. 4WD Switch (If installed)
9. Rear fog light switch (If installed)
10. Front/Rear window defroster switch
11. Passenger's side airbag (If installed)
12. Glove box13. Headlight leveling device switch (If installed)
14. ECT switch (Automatic transmission only)
15. Fuel-filler lid release lever
16. Hood release lever
17. Panel brightness control knob (Rheostat) (If installed)
18. Engine RPM adjustment knob (If installed)
19. Heater/Air conditioner control panel
20. Cigarette lighter
21. Ashtray
22. Drink holder
23. Audio system (If installed)
24. Digital clock (If installed)
CAUTION:
When installing the container of liquid air refresher inside a vehicle, do not place it near theinstrument cluster nor on the crash pad surface. If there is any leakage from the air refresher onto these areas (Instrument cluster, crash pad or air ventilator), it may damage these parts. If the liquid from air refresher does leak onto these areas, wash them with water immediately.
!
Page 13 of 205
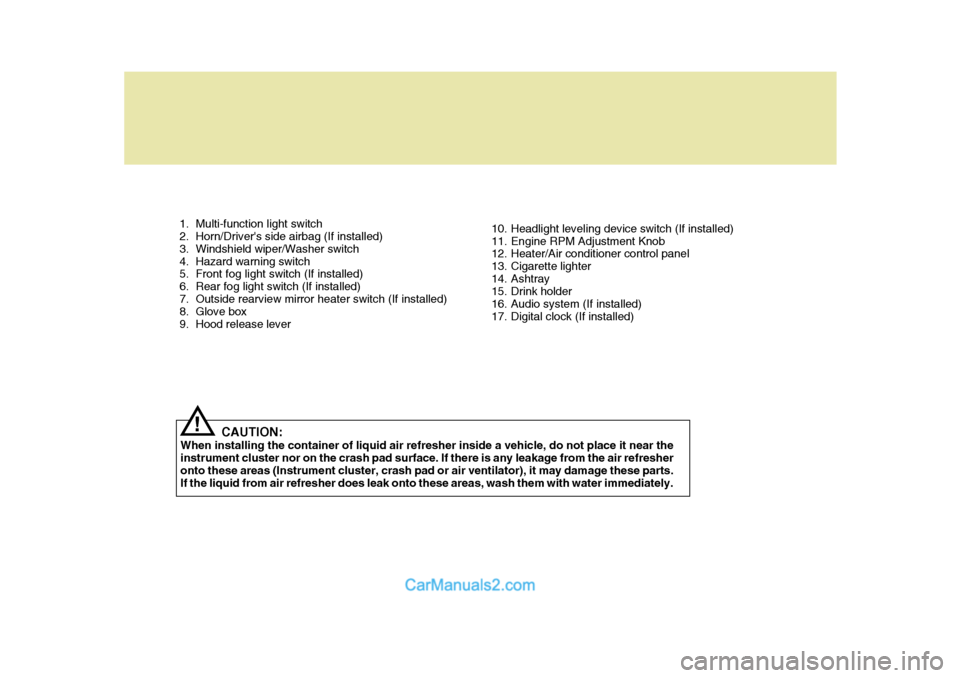
1. Multi-function light switch
2. Horn/Driver's side airbag (If installed)
3. Windshield wiper/Washer switch
4. Hazard warning switch
5. Front fog light switch (If installed)
6. Rear fog light switch (If installed)
7. Outside rearview mirror heater switch (If installed)
8. Glove box
9. Hood release lever10. Headlight leveling device switch (If installed)
11. Engine RPM Adjustment Knob
12. Heater/Air conditioner control panel
13. Cigarette lighter
14. Ashtray
15. Drink holder
16. Audio system (If installed)
17. Digital clock (If installed)
CAUTION:
When installing the container of liquid air refresher inside a vehicle, do not place it near theinstrument cluster nor on the crash pad surface. If there is any leakage from the air refresheronto these areas (Instrument cluster, crash pad or air ventilator), it may damage these parts. If the liquid from air refresher does leak onto these areas, wash them with water immediately.
!
Page 61 of 205
1
BEFORE DRIVING YOUR VEHICLE
47
!
If you need to tighten the belt, pull more webbing toward the retractor.When you unbuckle the seat belt and allow it to retract, the retractor will automatically revert back to its normalseated passenger emergency locking usage condition. NOTE:
o Before installing the child re-
straint system, read the instruc- tions supplied by the child re- straint system manufacturer.
o If the seat belt does not operate as described, have the systemchecked immediately by yourauthorized Hyundai dealer.
WARNING:
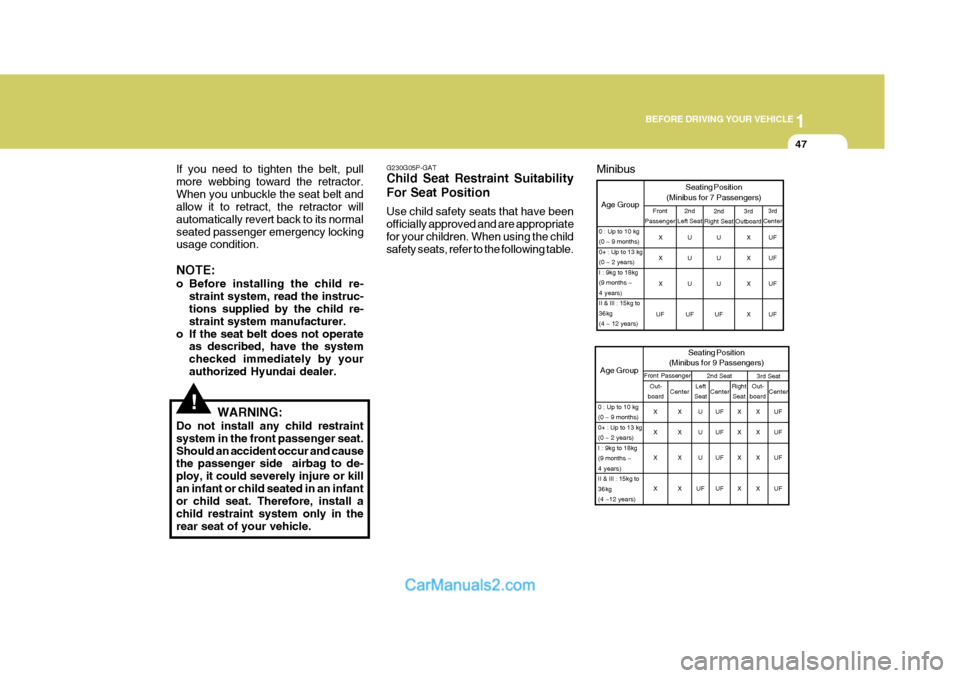
Do not install any child restraintsystem in the front passenger seat.Should an accident occur and cause the passenger side airbag to de- ploy, it could severely injure or killan infant or child seated in an infant or child seat. Therefore, install a child restraint system only in therear seat of your vehicle. G230G05P-GAT Child Seat Restraint Suitability For Seat Position Use child safety seats that have been officially approved and are appropriatefor your children. When using the child safety seats, refer to the following table.
UF UF UF UF
0 : Up to 10 kg (0 ~ 9 months)0+ : Up to 13 kg(0 ~ 2 years)I : 9kg to 18kg(9 months ~4 years)II & III : 15kg to36kg(4 ~ 12 years) 3rd
Center
3rd
Outboard
Age Group Seating Position
(Minibus for 7 Passengers)2nd
Left Seat2nd
Right Seat
U U U
UF U U U
UF X X X X
Front
Passenger
X X X
UF
3rd SeatAge Group Seating Position
(Minibus for 9 Passengers)Front Passenger 2nd Seat
0 : Up to 10 kg (0 ~ 9 months)0+ : Up to 13 kg(0 ~ 2 years)I : 9kg to 18kg(9 months ~4 years)II & III : 15kg to36kg(4 ~12 years)Out-
board Center Left
Seat Right
Seat
Center Out-
board Center
X X X X X X X XU U U
UF UF UF UF UF X X X XX X X XUF UF UF UF
Minibus
Page 65 of 205
1
BEFORE DRIVING YOUR VEHICLE
51
CAUTION:
When installing the container of liquid air refresher inside a vehicle, do not place it near the instrumentcluster nor on the crash pad sur- face. If there is any leakage from the air refresher onto these areas (In-strument cluster, crash pad or air ventilator), it may damage these parts. If the liquid from air refresherdoes leak onto these areas, wash them with water immediately.!
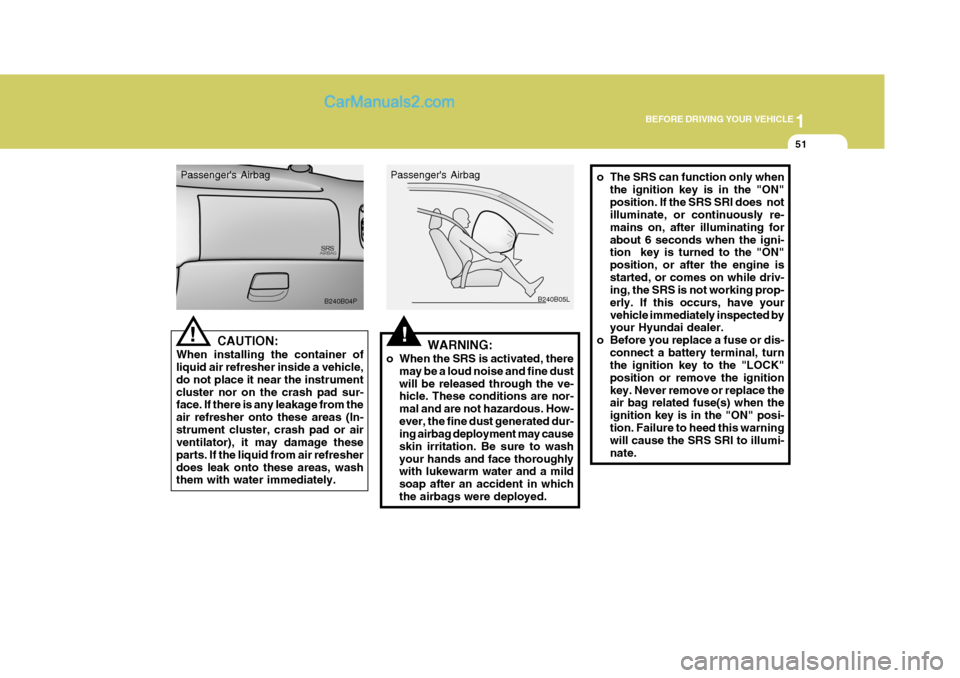
Passenger's Airbag
B240B04P!WARNING:
o When the SRS is activated, there may be a loud noise and fine dust will be released through the ve- hicle. These conditions are nor- mal and are not hazardous. How-ever, the fine dust generated dur- ing airbag deployment may cause skin irritation. Be sure to washyour hands and face thoroughly with lukewarm water and a mild soap after an accident in whichthe airbags were deployed. B240B05L
Passenger's Airbag
o The SRS can function only when
the ignition key is in the "ON" position. If the SRS SRI does not illuminate, or continuously re- mains on, after illuminating forabout 6 seconds when the igni- tion key is turned to the "ON" position, or after the engine isstarted, or comes on while driv- ing, the SRS is not working prop- erly. If this occurs, have yourvehicle immediately inspected by your Hyundai dealer.
o Before you replace a fuse or dis-
connect a battery terminal, turnthe ignition key to the "LOCK" position or remove the ignitionkey. Never remove or replace the air bag related fuse(s) when the ignition key is in the "ON" posi-tion. Failure to heed this warning will cause the SRS SRI to illumi- nate.
Page 94 of 205
3 STARTING AND OPERATING
26
o Keep your car in good condition. Forbetter fuel economy and reduced maintenance costs, maintain your car in accordance with the mainte- nance schedule in Section 6. If youdrive your car in severe conditions, more frequent maintenance is re- quired (see Section 6 for details).
o Keep your car clean. For maximum service, your Hyundai should bekept clean and free of corrosivematerials. It is especially important that mud, dirt, ice, etc. not be al- lowed to accumulate on the under-side of the car. This extra weight can result in increased fuel con- sumption and also contribute to cor-rosion.
o Travel lightly. Don't carry unneces-
sary weight in your car. Weight re-duces fuel economy.
o Don't let the engine idle longer than
necessary. If you are waiting (andnot in traffic), turn off your engine and restart only when you're ready to go. o Remember, your Hyundai does not
require extended warm-up. As soonas the engine is running smoothly, you can drive away. In very cold weather, however, give your enginea slightly longer warm-up period.
o Don't "lug" or "over-rev" the engine.
Lugging is driving too slowly in toohigh a gear resulting in the engine bucking. If this happens, shift to a lower gear. Over-revving is racingthe engine beyond its safe limit. This can be avoided by shifting at the recommended speeds.
o Use your air conditioning sparingly. The air conditioning system is oper-ated by engine power so your fueleconomy is reduced when you use it.
o Don't "ride" the brake or clutch pedal.
This can increase fuel consumption and also increase wear on these components. In addition, driving with your foot resting on the brake pedalmay cause the brakes to overheat, which reduces their effectiveness and may lead to more serious con-sequences.
o Take care of your tires. Keep them
inflated to the recommended pres-sure. Incorrect inflation, either too much or too little, results in unnec- essary tire wear. Check the tire pres-sures at least once a month.
o Be sure that the wheels are aligned
correctly. Improper alignment canresult from hitting curbs or driving too fast over irregular surfaces. Poor alignment causes faster tire wearand may also result in other prob- lems as well as greater fuel con- sumption.
Page 95 of 205
3
STARTING AND OPERATING
27
D170B01P-GAT (1) Speed Avoid rapid acceleration, sudden starts, and maximum speed driving; suchoperation will result in more fuel con- sumption. D170C01P-GAT (2) Shifting Shift only at an appropriate vehicle speed and engine rpm.Always use the highest gear possible. Fuel consumption depends largely on the manner in which vehicle is drivenbut it is also affected by other driving conditions. D170D01P-GAT (3) City traffic Frequent starting and stopping in- creases the average fuel consump- tion. Use roads with smooth traffic flowwhenever possible. When driving on congested roads, avoid use of a low gear at high engine rpm. D170G01P-GAT (6) Tire inflation pressure Check the tire inflation pressure at regular intervals. Low tire inflation pres- sures increase road resistance and fuel consumption. In addition, low tirepressures adversely affect tire wear and driving control.D170H01P-GAT (7) Load Do not drive with unnecessary articles in the luggage compartment.Especially during city driving where frequent starting and stopping is nec- essary, the increased weight of thevehicle will greatly affect fuel consump- tion. Also avoid driving with unnecessaryluggage, etc., on the roof; the increased air resistance will cause more fuel consumption.
D170I01P-GAT (8) Cold engine starting Starting of a cold engine consumes more fuel. Unnecessary fuel consump- tion is also caused by keeping a hot engine running. After the engine isstarted, begin driving soon.
D170E01P-GAT (4) Idling The vehicle consumes fuel even dur- ing idling. Avoid extended idling when-ever possible. D170F01P-GAT (5) High speed The higher the vehicles speed, the more fuel consumed. Avoid driving at full speed. Even a slight release of the accelerator pedal will save significant amount of fuel.
Page 104 of 205
4
CORROSION PREVENTION AND APPEARANCE CARE
3
4
IN CASE OF EMERGENCY
3
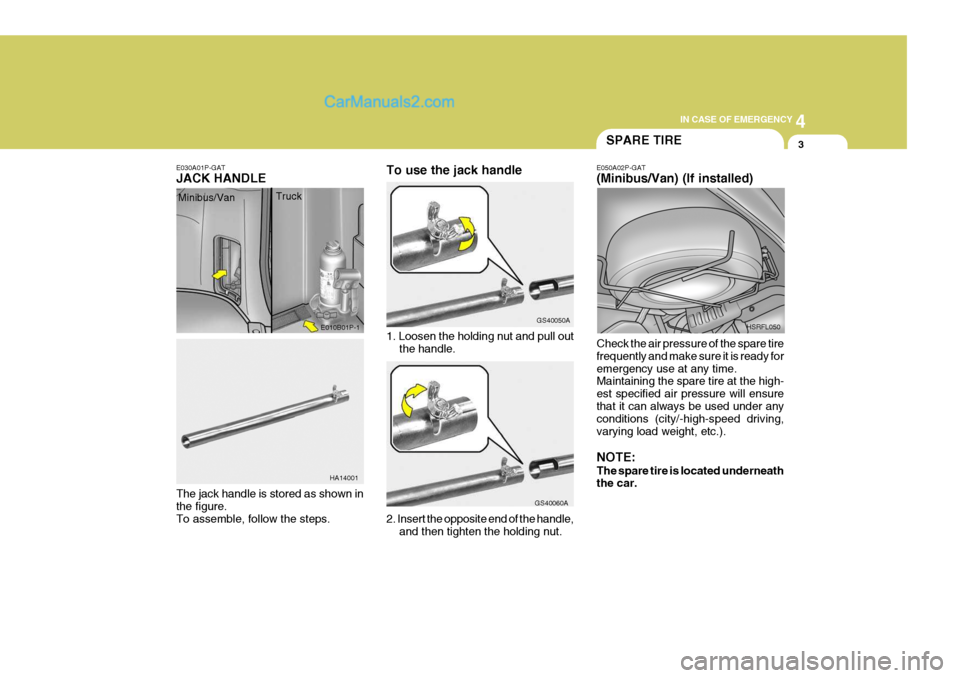
E030A01P-GAT JACK HANDLE
1. Loosen the holding nut and pull outthe handle.
The jack handle is stored as shown in the figure. To assemble, follow the steps. 2. Insert the opposite end of the handle,
and then tighten the holding nut.
E010B01P-1
HA14001 GS40050A
GS40060A
SPARE TIRE
E050A02P-GAT (Minibus/Van) (If installed) Check the air pressure of the spare tire frequently and make sure it is ready foremergency use at any time. Maintaining the spare tire at the high- est specified air pressure will ensurethat it can always be used under any conditions (city/-high-speed driving, varying load weight, etc.). NOTE: The spare tire is located underneath the car. HSRFL050
Minibus/Van
Truck To use the jack handle
Page 121 of 205
44IN CASE OF EMERGENCY
20
!WARNING:
o Improperly loading your car and trailer can serious affect its steer- ing and braking performance causing a crash in which youmay be seriously injured.
o For automatic transmission ve-
hicles, the trailer should be towedwith the towing vehicle unloaded, with the exception of the driver. Otherwise, the automatic trans-mission oil temperature may rise to a temperature that may result in serious damage of the auto- matic transmission. C190F02A-GAT Trailer or Vehicle Towing Tips
1. Before towing, check hitch and
safety chain connections as well as proper operation of the trailer run- ning lights, brake lights, and turn signals.
2. Always drive your vehicle at a mod- erate speed (Less than 100 km/h).
3. Trailer towing requires more fuel than normal conditions.
4. To maintain engine braking effi-
ciency and electrical charging per-formance, do not use fifth gear (manual transmission) or overdrive (automatic transmission).
5. Always secure items in the trailer to prevent load shift while driving.
6. Check the condition and air pres- sure of all tires on the trailer and your car. Low tire pressure can se- riously affect the handling. Alsocheck the spare tire.
7. The vehicle/trailer combination is
more affected by crosswind andbuffeting. When being passed by a large vehicle, keep a constant speed and steer straight ahead. If there is too much wind buffeting,slow down to get out of the othervehicle’s air turbulence.
8. When parking your car and trailer,
especially on a hill, be sure to followall the normal precautions. Turn your front wheel into the curb, set the parking brake firmly, and put thetransmission in 1st or "R" (manual transmission) or "P" (automatic transmission). In addition, placewheel chocks at each of the trailer’s tires.
9. If the trailer has electric brakes, start your vehicle and trailer mov-ing, and then apply the trailer brake controller by hand to be sure thebrakes are working. This lets you check your electrical connection at the same time.
10.During your trip, check occasion- ally to be sure that the load issecure, and that the lights and anytrailer brakes are still working.
11.Avoid jerky starts, sudden accel-
eration or sudden stops.
12.Avoid sharp turns and rapid lane changes.
Page 122 of 205
4
CORROSION PREVENTION AND APPEARANCE CARE
21
4
IN CASE OF EMERGENCY
21BLEEDING THE FUEL SYSTEM
CAUTION:
If overheating should occur when towing, (temperature gauge reads near red zone), taking the followingaction may reduce or eliminate the problem.
1. Turn off the air conditioner.
2. Reduce highway speed.
3. Select a lower gear when going uphill.
4. While in stop and go traffic, place
the gear selection in park or neu-tral and idle the engine at a higher speed.
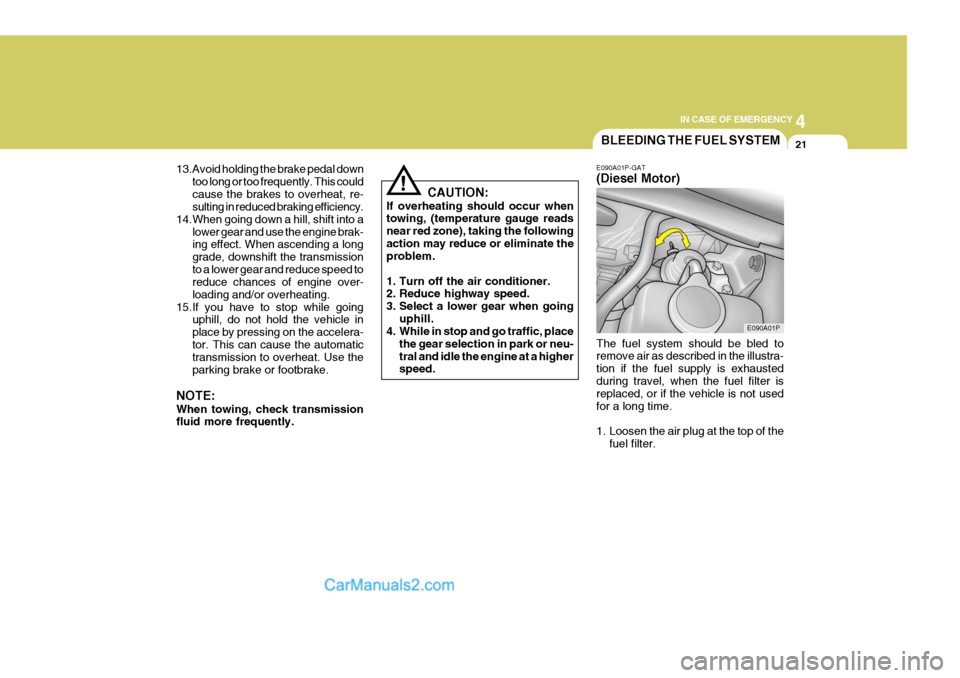
! E090A01P-GAT (Diesel Motor) The fuel system should be bled to remove air as described in the illustra- tion if the fuel supply is exhaustedduring travel, when the fuel filter is replaced, or if the vehicle is not used for a long time.
1. Loosen the air plug at the top of the
fuel filter. E090A01P
13.Avoid holding the brake pedal down
too long or too frequently. This could cause the brakes to overheat, re- sulting in reduced braking efficiency.
14.When going down a hill, shift into a
lower gear and use the engine brak-ing effect. When ascending a long grade, downshift the transmissionto a lower gear and reduce speed to reduce chances of engine over- loading and/or overheating.
15.If you have to stop while going uphill, do not hold the vehicle inplace by pressing on the accelera-tor. This can cause the automatic transmission to overheat. Use the parking brake or footbrake.
NOTE: When towing, check transmission fluid more frequently.
Page 126 of 205
4
CORROSION PREVENTION AND APPEARANCE CARE
25
4
IN CASE OF EMERGENCY
25IF THE ENGINE OVERHEATS
CAUTION:
o Do not allow the jumper cable clips to touch one another.
o Do not connect the jumper cable
to the negative terminal of the flat battery. The battery generates explosive gas, and a spark caused whenthe jumper cable is disconnected from the negative terminal could ignite this gas and cause an ex-plosion.
o Be careful that the jumper cable
becomes not caught in the cool-ing fan, etc.
! D030A01TB-AAT If your temperature gauge indicates overheating, you experience a loss of power, or hear loud pinging or knock- ing and the engine is probably too hot.If this happens to you, you should:
1. Pull off the road and stop as soon as
it is safe to do so.
2. Place the gear selector lever in "P"
(automatic transmission), or neutral (manual transmission) and set the parking brake. If the air conditioning is on, turn it off.
3. If engine coolant is running out un- der the car or steam is coming outfrom the hood, stop the engine. Donot open the hood until the engine coolant has stopped running or the steaming has stopped. If there is novisible loss of engine coolant and no steam, leave the engine running and check to be sure the enginecooling fan is operating. If the fan is not running, turn the engine off.
the other end to the engine block of the vehicle with the flat batteryat the point farthest from the battery.
8. Start engine as described "Starting the engine" in section 3.
9. After the engine is started, discon- nect the cables in the reverse order.
1. Both batteries must be 12V. The
capacity (Ah) of the battery supply- ing current should not be signifi- cantly below that of the discharged battery.
2. Use only heavy-duty jumper cables.
3. A discharged battery can freeze. A
frozen battery must be thawed out before connecting the jumper cables.
4. There should be no contact be-
tween the two vehicles; otherwisecurrent may flow when the positive terminal is connected.
5. The discharged battery must be correctly connected to the vehicleelectrical system.
6. Run the engine of the vehicle sup- plying current.
7. Connect the jumper cables as fol-
lows:
(1) Connect one end of one jumper cable to the positive terminal of the flat battery, and the other end to the positive terminal of the booster battery.
(2) Connect one end of the other jumper cable to the negative ter-minal of the booster battery, and