ESP Hyundai H-1 (Grand Starex) 2013 User Guide
[x] Cancel search | Manufacturer: HYUNDAI, Model Year: 2013, Model line: H-1 (Grand Starex), Model: Hyundai H-1 (Grand Starex) 2013Pages: 353, PDF Size: 9.18 MB
Page 100 of 353
Features of your vehicle
30 4
D140201AEN
Remote control (if equipped)
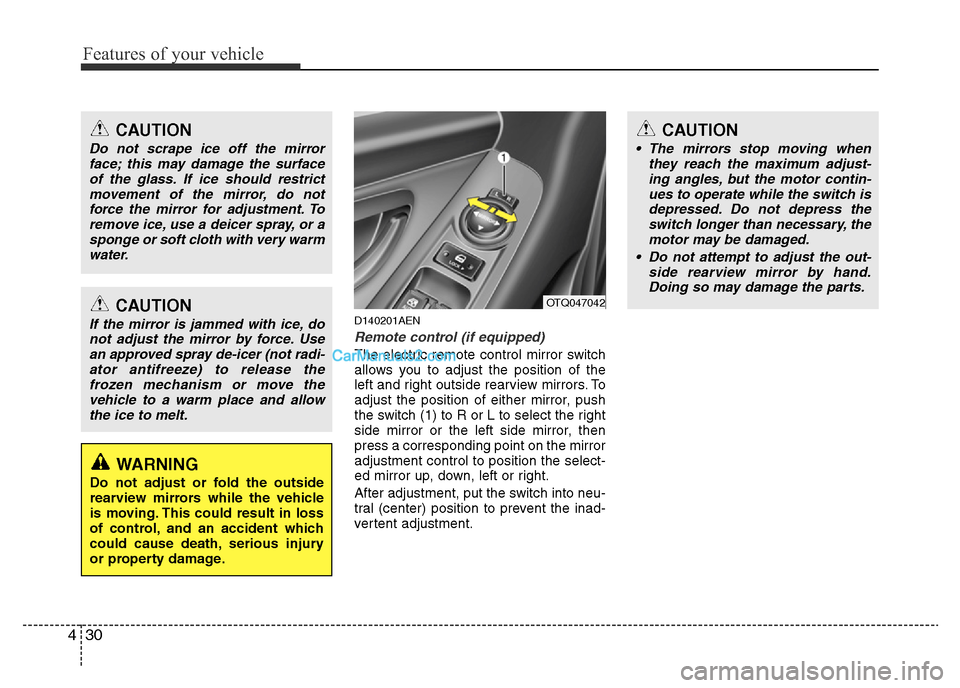
The electric remote control mirror switch
allows you to adjust the position of the
left and right outside rearview mirrors. To
adjust the position of either mirror, push
the switch (1) to R or L to select the right
side mirror or the left side mirror, then
press a corresponding point on the mirror
adjustment control to position the select-
ed mirror up, down, left or right.
After adjustment, put the switch into neu-
tral (center) position to prevent the inad-
vertent adjustment.
CAUTION
Do not scrape ice off the mirror
face; this may damage the surface
of the glass. If ice should restrict
movement of the mirror, do not
force the mirror for adjustment. To
remove ice, use a deicer spray, or a
sponge or soft cloth with very warm
water.
CAUTION
If the mirror is jammed with ice, do
not adjust the mirror by force. Use
an approved spray de-icer (not radi-
ator antifreeze) to release the
frozen mechanism or move the
vehicle to a warm place and allow
the ice to melt.
WARNING
Do not adjust or fold the outside
rearview mirrors while the vehicle
is moving. This could result in loss
of control, and an accident which
could cause death, serious injury
or property damage.
OTQ047042
CAUTION
• The mirrors stop moving when
they reach the maximum adjust-
ing angles, but the motor contin-
ues to operate while the switch is
depressed. Do not depress the
switch longer than necessary, the
motor may be damaged.
• Do not attempt to adjust the out-
side rearview mirror by hand.
Doing so may damage the parts.
Page 115 of 353
445
Features of your vehicle
ESP (ESC) indicator (Electronic
Stability Program) (if equipped)
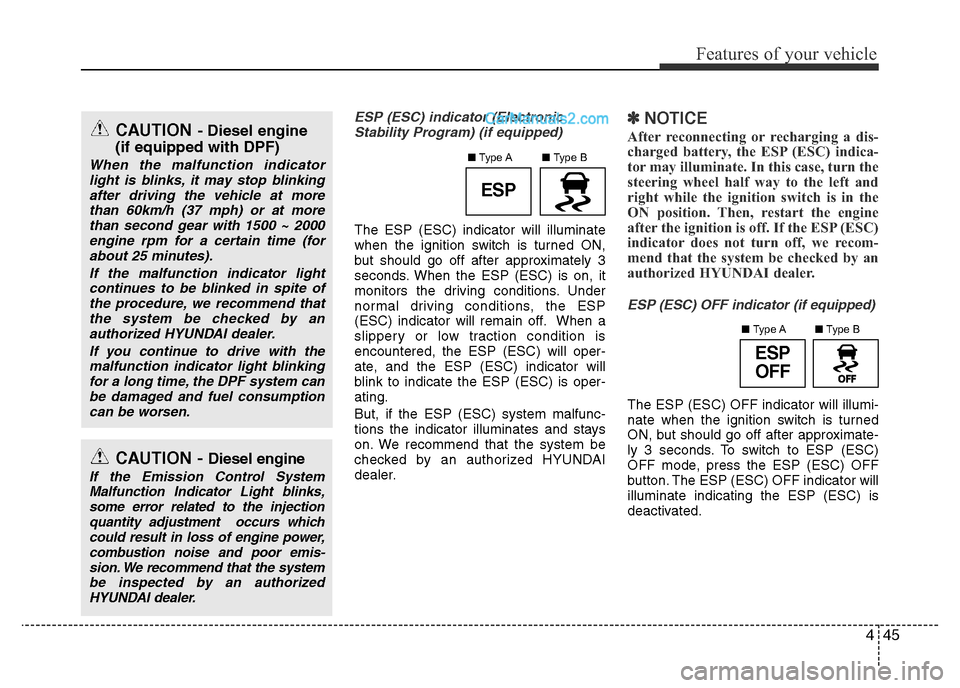
The ESP (ESC) indicator will illuminate
when the ignition switch is turned ON,
but should go off after approximately 3
seconds. When the ESP (ESC) is on, it
monitors the driving conditions. Under
normal driving conditions, the ESP
(ESC) indicator will remain off. When a
slippery or low traction condition is
encountered, the ESP (ESC) will oper-
ate, and the ESP (ESC) indicator will
blink to indicate the ESP (ESC) is oper-
ating.
But, if the ESP (ESC) system malfunc-
tions the indicator illuminates and stays
on. We recommend that the system be
checked by an authorized HYUNDAI
dealer.
✽NOTICE
After reconnecting or recharging a dis-
charged battery, the ESP (ESC) indica-
tor may illuminate. In this case, turn the
steering wheel half way to the left and
right while the ignition switch is in the
ON position. Then, restart the engine
after the ignition is off. If the ESP (ESC)
indicator does not turn off, we recom-
mend that the system be checked by an
authorized HYUNDAI dealer.
ESP (ESC) OFF indicator (if equipped)
The ESP (ESC) OFF indicator will illumi-
nate when the ignition switch is turned
ON, but should go off after approximate-
ly 3 seconds. To switch to ESP (ESC)
OFF mode, press the ESP (ESC) OFF
button. The ESP (ESC) OFF indicator will
illuminate indicating the ESP (ESC) is
deactivated.
CAUTION- Diesel engine
(if equipped with DPF)
When the malfunction indicator
light is blinks, it may stop blinking
after driving the vehicle at more
than 60km/h (37 mph) or at more
than second gear with 1500 ~ 2000
engine rpm for a certain time (for
about 25 minutes).
If the malfunction indicator light
continues to be blinked in spite of
the procedure, we recommend that
the system be checked by an
authorized HYUNDAI dealer.
If you continue to drive with the
malfunction indicator light blinking
for a long time, the DPF system can
be damaged and fuel consumption
can be worsen.
CAUTION - Diesel engine
If the Emission Control System
Malfunction Indicator Light blinks,
some error related to the injection
quantity adjustment occurs which
could result in loss of engine power,
combustion noise and poor emis-
sion. We recommend that the system
be inspected by an authorized
HYUNDAI dealer.
ESP
ESP
OFF
■Type B ■Type A
■Type B ■Type A
Page 117 of 353
447
Features of your vehicle
D150327AUN
Key reminder warning chime
(if equipped)
If the driver’s door is opened while the
ignition key is left in the ignition switch
(ACC or LOCK position), the key
reminder warning chime will sound. This
is to prevent you from locking your keys
in the vehicle. The chime sounds until the
key is removed from the ignition switch or
the driver’s door is closed.
D170000AEN
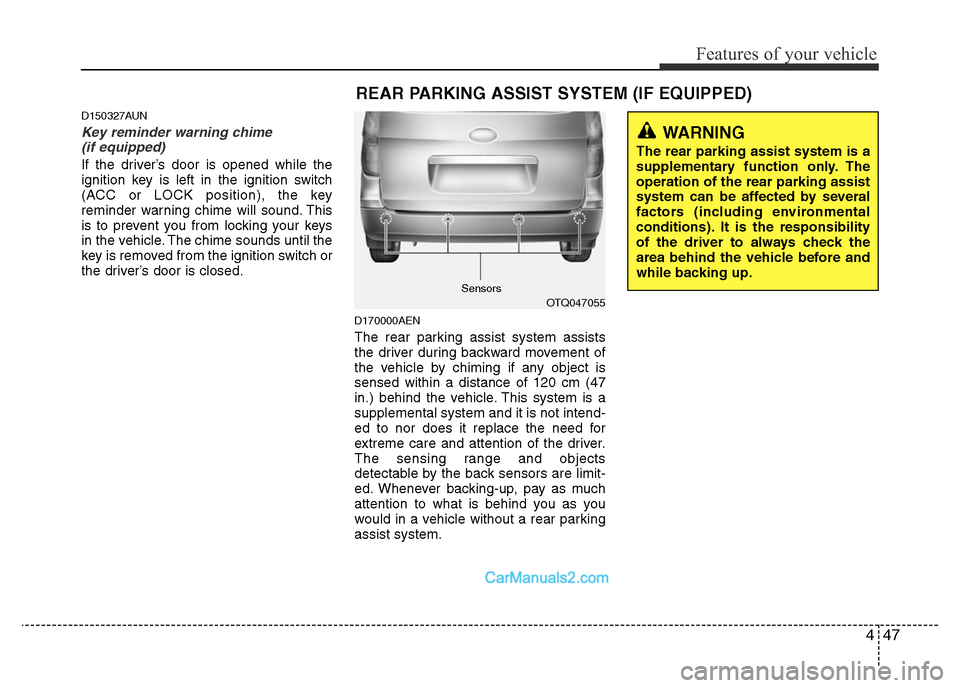
The rear parking assist system assists
the driver during backward movement of
the vehicle by chiming if any object is
sensed within a distance of 120 cm (47
in.) behind the vehicle. This system is a
supplemental system and it is not intend-
ed to nor does it replace the need for
extreme care and attention of the driver.
The sensing range and objects
detectable by the back sensors are limit-
ed. Whenever backing-up, pay as much
attention to what is behind you as you
would in a vehicle without a rear parking
assist system.
REAR PARKING ASSIST SYSTEM (IF EQUIPPED)
OTQ047055
WARNING
The rear parking assist system is a
supplementary function only. The
operation of the rear parking assist
system can be affected by several
factors (including environmental
conditions). It is the responsibility
of the driver to always check the
area behind the vehicle before and
while backing up.
Sensors
Page 119 of 353
449
Features of your vehicle
D170300AEN
Rear parking assist system pre-
cautions
• The rear parking assist system may
not sound sequentially depending on
the speed and shapes of the objects
detected.
• The rear parking assist system may
malfunction if the vehicle bumper
height or sensor installation has been
modified or damaged. Any non-factory
installed equipment or accessories
may also interfere with the sensor per-
formance.
• The sensor may not recognize objects
less than 40 cm (15 in.) from the sen-
sor, or it may sense an incorrect dis-
tance. Use caution.
• When the sensor is frozen or stained
with snow, dirt, or water, the sensor
may be inoperative until the stains are
removed using a soft cloth.
• Do not push, scratch or strike the sen-
sor. Sensor damage could occur.
✽NOTICE
This system can only sense objects with-
in the range and location of the sensors;
It can not detect objects in other areas
where sensors are not installed. Also,
small or slim objects, such as poles or
objects located between sensors may not
be detected by the sensors.
Always visually check behind the vehi-
cle when backing up.
Be sure to inform any drivers of the
vehicle that may be unfamiliar with the
system regarding the systems capabili-
ties and limitations.
D170400AEN
Self-diagnosis
If you don’t hear an audible warning
sound or if the buzzer sounds intermit-
tently when shifting the gear to the R
(Reverse) position, this may indicate a
malfunction in the rear parking assist sys-
tem. If this occurs, we recommend that
the system be checked by an authorized
HYUNDAI dealer.
WARNING
Pay close attention when the vehi-
cle is driven close to objects on the
road, particularly pedestrians, and
especially children. Be aware that
some objects may not be detected
by the sensors, due to the object’s
distance, size or material, all of
which can limit the effectiveness of
the sensor. Always perform a visu-
al inspection to make sure the vehi-
cle is clear of all obstructions
before moving the vehicle in any
direction.
WARNING
Your new vehicle warranty does not
cover any accidents or damage to
the vehicle or injuries to its occu-
pants due to a rear parking assist
system malfunction. Always drive
safely and cautiously.
Page 124 of 353
Features of your vehicle
54 4
The rear fog lights turn on when the rear
fog switch is pressed after the front fog
switch is turned to ON and the headlight
switch to the parklight position. (if
equipped)
To turn the rear fog lights off, press the
rear fog light switch again or turn the
headlight switch to the OFF position.
D190900AUN
Daytime running light
(if equipped)
Daytime Running Lights (DRL) can make
it easier for others to see the front of your
vehicle during the day. DRL can be help-
ful in many different driving conditions,
and it is especially helpful after dawn and
before sunset.
The DRL system will make the head-
lights turn OFF when:
1. The parklight switch is ON.
2. Engine stops.
Headlight leveling device
(if equipped)
D191001ATQ
Manual type
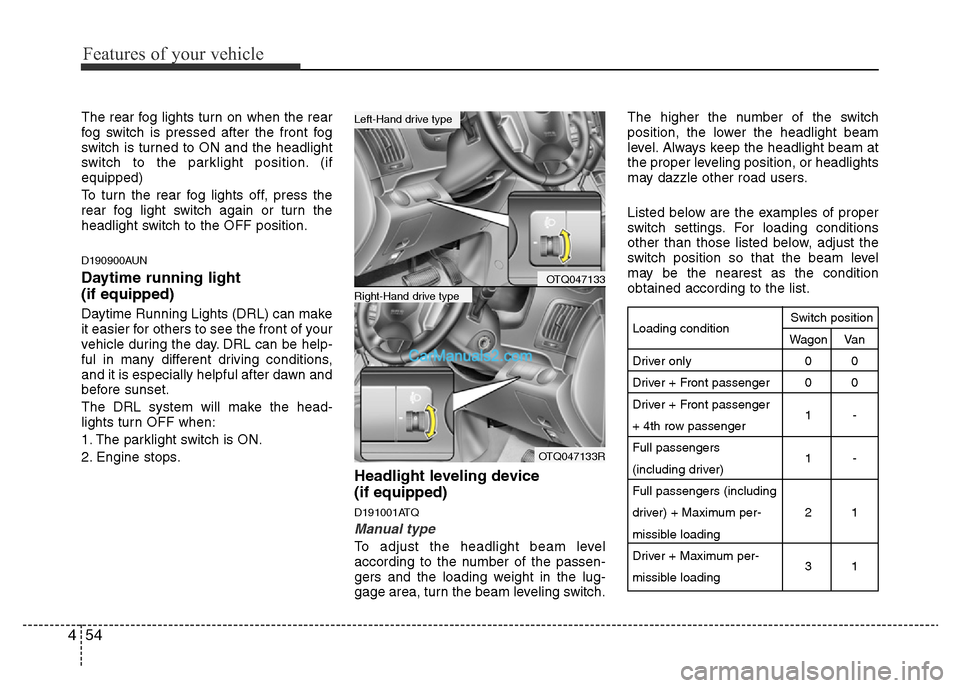
To adjust the headlight beam level
according to the number of the passen-
gers and the loading weight in the lug-
gage area, turn the beam leveling switch.The higher the number of the switch
position, the lower the headlight beam
level. Always keep the headlight beam at
the proper leveling position, or headlights
may dazzle other road users.
Listed below are the examples of proper
switch settings. For loading conditions
other than those listed below, adjust the
switch position so that the beam level
may be the nearest as the condition
obtained according to the list.
OTQ047133
OTQ047133R
Right-Hand drive type
Left-Hand drive type
Loading condition
Driver only
Driver + Front passenger
Driver + Front passenger
+ 4th row passenger
Full passengers
(including driver)
Full passengers (including
driver) + Maximum per-
missible loading
Driver + Maximum per-
missible loadingSwitch position
Wagon Van
00
00
1-
1-
21
31
Page 142 of 353
Features of your vehicle
72 4
D250000AEN
• For maximum defrosting, set the temper-
ature control to the extreme right/hot
position and the fan speed control to the
highest speed.
• If warm air to the floor is desired while
defrosting or defogging, set the mode to
the floor-defrost position.
• Before driving, clear all snow and ice
from the windshield, rear window, outside
rear view mirrors, and all side windows.
• Clear all snow and ice from the hood and
air inlet in the cowl grill to improve heater
and defroster efficiency and to reduce the
probability of fogging up the inside of the
windshield.
Manual climate control system
D250101ATQ
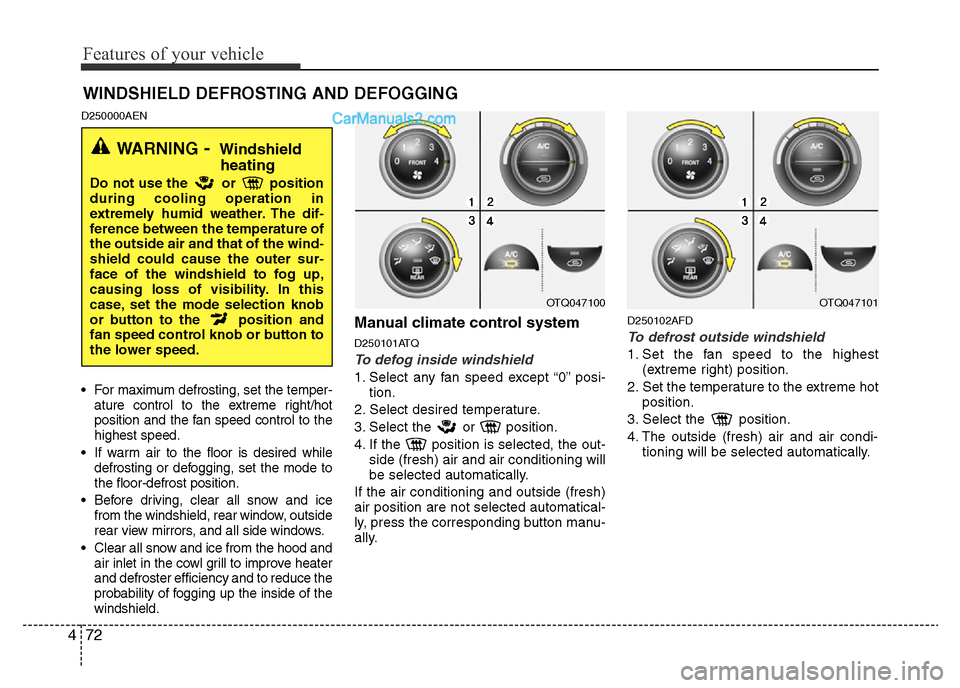
To defog inside windshield
1. Select any fan speed except “0” posi-
tion.
2. Select desired temperature.
3. Select the or position.
4. If the position is selected, the out-
side (fresh) air and air conditioning will
be selected automatically.
If the air conditioning and outside (fresh)
air position are not selected automatical-
ly, press the corresponding button manu-
ally.
D250102AFD
To defrost outside windshield
1. Set the fan speed to the highest
(extreme right) position.
2. Set the temperature to the extreme hot
position.
3. Select the position.
4. The outside (fresh) air and air condi-
tioning will be selected automatically.
WINDSHIELD DEFROSTING AND DEFOGGING
OTQ047100
WARNING- Windshield
heating
Do not use the or position
during cooling operation in
extremely humid weather. The dif-
ference between the temperature of
the outside air and that of the wind-
shield could cause the outer sur-
face of the windshield to fog up,
causing loss of visibility. In this
case, set the mode selection knob
or button to the position and
fan speed control knob or button to
the lower speed.
OTQ047101
Page 159 of 353
489
Features of your vehicle
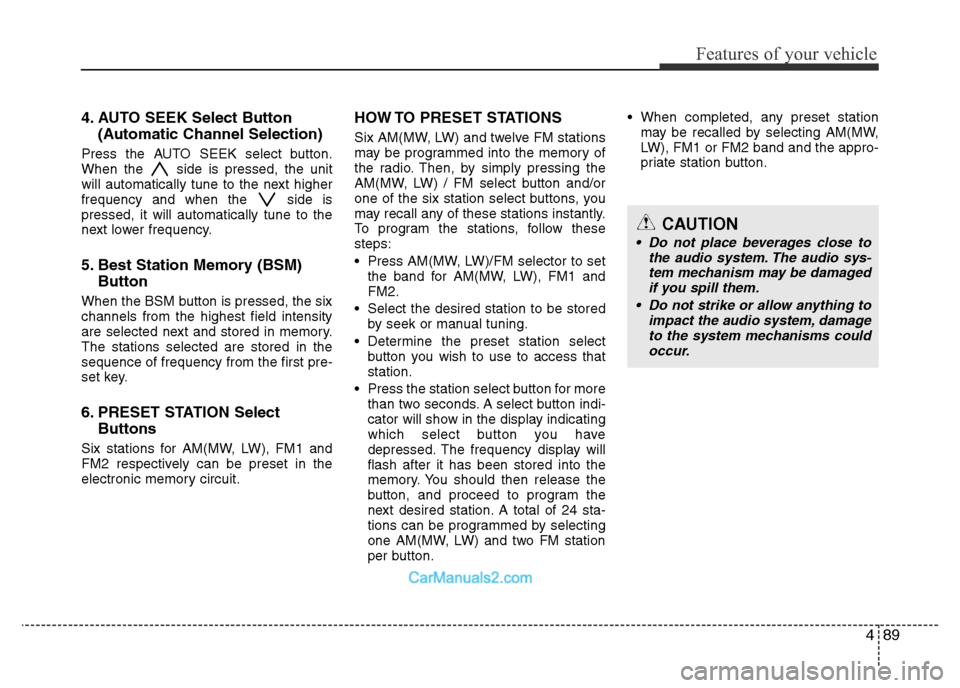
4. AUTO SEEK Select Button
(Automatic Channel Selection)
Press the AUTO SEEK select button.
When the side is pressed, the unit
will automatically tune to the next higher
frequency and when the side is
pressed, it will automatically tune to the
next lower frequency.
5. Best Station Memory (BSM)
Button
When the BSM button is pressed, the six
channels from the highest field intensity
are selected next and stored in memory.
The stations selected are stored in the
sequence of frequency from the first pre-
set key.
6. PRESET STATION Select
Buttons
Six stations for AM(MW, LW), FM1 and
FM2 respectively can be preset in the
electronic memory circuit.
HOW TO PRESET STATIONS
Six AM(MW, LW) and twelve FM stations
may be programmed into the memory of
the radio. Then, by simply pressing the
AM(MW, LW) / FM select button and/or
one of the six station select buttons, you
may recall any of these stations instantly.
To program the stations, follow these
steps:
• Press AM(MW, LW)/FM selector to set
the band for AM(MW, LW), FM1 and
FM2.
• Select the desired station to be stored
by seek or manual tuning.
• Determine the preset station select
button you wish to use to access that
station.
• Press the station select button for more
than two seconds. A select button indi-
cator will show in the display indicating
which select button you have
depressed. The frequency display will
flash after it has been stored into the
memory. You should then release the
button, and proceed to program the
next desired station. A total of 24 sta-
tions can be programmed by selecting
one AM(MW, LW) and two FM station
per button.• When completed, any preset station
may be recalled by selecting AM(MW,
LW), FM1 or FM2 band and the appro-
priate station button.
CAUTION
• Do not place beverages close to
the audio system. The audio sys-
tem mechanism may be damaged
if you spill them.
• Do not strike or allow anything to
impact the audio system, damage
to the system mechanisms could
occur.
Page 164 of 353
Features of your vehicle
94 4
5. Best Station Memory (BSM)
Button
When the BSM button is pressed, the six
channels from the highest field intensity
are selected next and stored in memory.
The stations selected are stored in the
sequence frequency from the first preset
key.
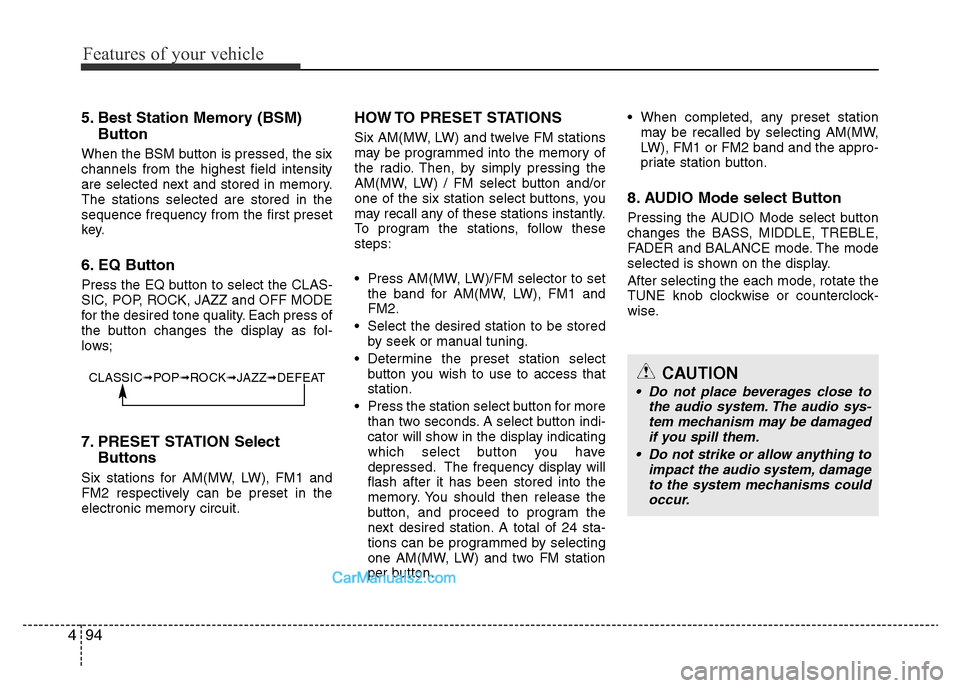
6. EQ Button
Press the EQ button to select the CLAS-
SIC, POP, ROCK, JAZZ and OFF MODE
for the desired tone quality. Each press of
the button changes the display as fol-
lows;
7. PRESET STATION Select
Buttons
Six stations for AM(MW, LW), FM1 and
FM2 respectively can be preset in the
electronic memory circuit.
HOW TO PRESET STATIONS
Six AM(MW, LW) and twelve FM stations
may be programmed into the memory of
the radio. Then, by simply pressing the
AM(MW, LW) / FM select button and/or
one of the six station select buttons, you
may recall any of these stations instantly.
To program the stations, follow these
steps:
• Press AM(MW, LW)/FM selector to set
the band for AM(MW, LW), FM1 and
FM2.
• Select the desired station to be stored
by seek or manual tuning.
• Determine the preset station select
button you wish to use to access that
station.
• Press the station select button for more
than two seconds. A select button indi-
cator will show in the display indicating
which select button you have
depressed. The frequency display will
flash after it has been stored into the
memory. You should then release the
button, and proceed to program the
next desired station. A total of 24 sta-
tions can be programmed by selecting
one AM(MW, LW) and two FM station
per button.• When completed, any preset station
may be recalled by selecting AM(MW,
LW), FM1 or FM2 band and the appro-
priate station button.
8. AUDIO Mode select Button
Pressing the AUDIO Mode select button
changes the BASS, MIDDLE, TREBLE,
FADER and BALANCE mode. The mode
selected is shown on the display.
After selecting the each mode, rotate the
TUNE knob clockwise or counterclock-
wise.
CLASSIC➟POP➟ROCK➟JAZZ➟DEFEATCAUTION
• Do not place beverages close to
the audio system. The audio sys-
tem mechanism may be damaged
if you spill them.
• Do not strike or allow anything to
impact the audio system, damage
to the system mechanisms could
occur.
Page 170 of 353
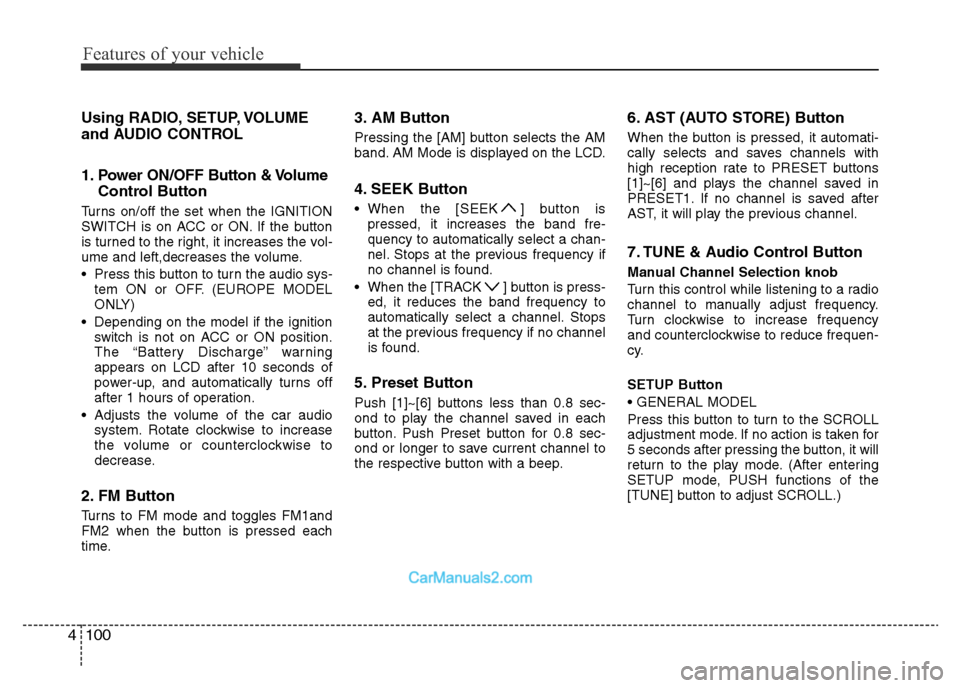
Features of your vehicle
100 4
Using RADIO, SETUP, VOLUME
and AUDIO CONTROL
1. Power ON/OFF Button & Volume
Control Button
Turns on/off the set when the IGNITION
SWITCH is on ACC or ON. If the button
is turned to the right, it increases the vol-
ume and left,decreases the volume.
• Press this button to turn the audio sys-
tem ON or OFF. (EUROPE MODEL
ONLY)
• Depending on the model if the ignition
switch is not on ACC or ON position.
The “Battery Discharge” warning
appears on LCD after 10 seconds of
power-up, and automatically turns off
after 1 hours of operation.
• Adjusts the volume of the car audio
system. Rotate clockwise to increase
the volume or counterclockwise to
decrease.
2. FM Button
Turns to FM mode and toggles FM1and
FM2 when the button is pressed each
time.
3. AM Button
Pressing the [AM] button selects the AM
band. AM Mode is displayed on the LCD.
4. SEEK Button
• When the [SEEK ] button is
pressed, it increases the band fre-
quency to automatically select a chan-
nel. Stops at the previous frequency if
no channel is found.
• When the [TRACK ] button is press-
ed, it reduces the band frequency to
automatically select a channel. Stops
at the previous frequency if no channel
is found.
5. Preset Button
Push [1]~[6] buttons less than 0.8 sec-
ond to play the channel saved in each
button. Push Preset button for 0.8 sec-
ond or longer to save current channel to
the respective button with a beep.
6. AST (AUTO STORE) Button
When the button is pressed, it automati-
cally selects and saves channels with
high reception rate to PRESET buttons
[1]~[6] and plays the channel saved in
PRESET1. If no channel is saved after
AST, it will play the previous channel.
7. TUNE & Audio Control Button
Manual Channel Selection knob
Turn this control while listening to a radio
channel to manually adjust frequency.
Turn clockwise to increase frequency
and counterclockwise to reduce frequen-
cy.
SETUP Button
• GENERAL MODEL
Press this button to turn to the SCROLL
adjustment mode. If no action is taken for
5 seconds after pressing the button, it will
return to the play mode. (After entering
SETUP mode, PUSH functions of the
[TUNE] button to adjust SCROLL.)
Page 184 of 353
![Hyundai H-1 (Grand Starex) 2013 User Guide Features of your vehicle
114 4
RADIO, SET UP, VOLUME CON-
TROL
1. FM/AM Button
Pressing the [FM/AM] button selects the
FM/AM band and toggles in the order of
FM1
➟ FM2 ➟ AM ➟ ...➟ FM1... when Hyundai H-1 (Grand Starex) 2013 User Guide Features of your vehicle
114 4
RADIO, SET UP, VOLUME CON-
TROL
1. FM/AM Button
Pressing the [FM/AM] button selects the
FM/AM band and toggles in the order of
FM1
➟ FM2 ➟ AM ➟ ...➟ FM1... when](/img/35/14835/w960_14835-183.png)
Features of your vehicle
114 4
RADIO, SET UP, VOLUME CON-
TROL
1. FM/AM Button
Pressing the [FM/AM] button selects the
FM/AM band and toggles in the order of
FM1
➟ FM2 ➟ AM ➟ ...➟ FM1... when
the button is pressed each time. FM/AM
Mode is displayed on the LCD.
2. POWER Button & Volume Knob
Turns the set on/off when the IGNITION
SWITCH is on ACC or ON.
If the button is turned to the right, it
increases the volume and left, decreases
the volume.
3. SEEK Button
• When the [SEEK ] button is
pressed, it increases the band fre-
quency to automatically select a chan-
nel. Stops at the previous frequency if
no channel is found.
• When the [TRACK ] button is
pressed, it reduces the band frequency
to automatically select a channel.
Stops at the previous frequency if no
channel is found.
4. Preset Buttons
Push [1]~[6] buttons less than 0.8 sec-
ond to play the channel saved in each
button. Push Preset button for 0.8 sec-
ond or longer to save current channel to
the respective button with a beep.
5. BSM Button
When the button is pressed, it automati-
cally selects and saves channels with
high reception rate to [PRESET] buttons
[1]~[6] and plays the channel saved in
PRESET1. If no channel is saved after
BSM, it will play the previous channel.
6. TUNE & AUDIO Control Knob
Turn this control while listening to a radio
channel to manually adjust frequency.
Turn clockwise to increase frequency
and counterclockwise to reduce frequen-
cy.
Pressing the button changes the BASS,
TREBLE, FADER and BALANCE TUNE
mode. The mode selected is shown on
the display.
After selecting each mode, rotate the
Audio control knob clockwise or counter-
clockwise.BASS Control
To increase the BASS, rotate the knob
clockwise, while to decrease the BASS,
rotate the knob counterclockwise.
TREBLE Control
To increase the TREBLE, rotate the knob
clockwise, while to decrease the TRE-
BLE, rotate the knob counterclockwise.
FADER Control
Turn the control knob clockwise to
emphasize rear speaker sound (front
speaker sound will be attenuated).
When the control knob is turned counter-
clockwise, front speaker sound will be
emphasized (rear speaker sound will be
attenuated).
BALANCE Control
Rotate the knob clockwise to emphasize
right speaker sound (left speaker sound
will be attenuated). When the control
knob is turned counter clockwise, left
speaker sound will be emphasized (right
speaker sound will be attenuated).