recommended oil Hyundai H-100 Truck 2010 Owner's Manuals
[x] Cancel search | Manufacturer: HYUNDAI, Model Year: 2010, Model line: H-100 Truck, Model: Hyundai H-100 Truck 2010Pages: 207, PDF Size: 7.9 MB
Page 116 of 207
2
DRIVING YOUR HYUNDAI
13WINTER DRIVING
chains on the tire will provide a greater driving force, but will not prevent sideskids. NOTE: Tire chains are not legal in all prov- inces. Check province laws beforefitting tire chains. C160C01A-AAT Use High Quality Ethylene Glycol Coolant Your Hyundai is delivered with high quality ethylene glycol coolant in thecooling system. It is the only type of coolant that should be used because it helps prevent corrosion in the coolingsystem, lubricates the water pump and prevents freezing. Be sure to replace or replenish your coolant in accor-dance with the maintenance schedule in Section 5. Before winter, have your coolant tested to assure that its freez-ing point is sufficient for the tempera- tures anticipated during the winter.
C160A01A-AAT The more severe weather conditions of winter result in greater wear and other problems. To minimize the prob- lems of winter driving, you should fol-low these suggestions:
C160B01A-GAT Snowy or Icy Conditions To drive your vehicle in deep snow, it may be necessary to use snow tires orto install tire chains on your tires. If snow tires are needed, it is necessary to select tires equivalent in size andtype to the original equipment tires. Failure to do so may adversely affect the safety and handling of your car.Speeding, rapid acceleration, sudden brake applications, and sharp turns are potentially very hazardous prac-tices. During deceleration, use engine braking to the fullest extent. Sudden brake applications on snowy or icyroads may cause skids to occur. You need to keep sufficient distance be- tween the vehicle in front and yourvehicle. Also, apply the brake gently. It should be noted that installing tire C160D01A-AAT Check Battery and Cables Winter puts additional burdens on the battery system. Visually inspect thebattery and cables as described in Section 6. The level of charge in your battery can be checked by your Hyun-dai dealer or a service station.
C160E01A-AAT Change to "Winter Weight" Oil if Necessary In some climates it is recommended that a lower viscosity "winter weight" oil be used during cold weather. SeeSection 9 for recommendations. If you aren't sure what weight oil you should use, consult your Hyundai dealer.
Page 148 of 207
5VEHICLE MAINTENANCE REQUIREMENTS
2MAINTENANCE INTERVALS
F010C01HR-GAT
Specified Scheduled Procedures
These are the procedures such as
inspections, adjustments and replace- ments that are listed in the mainte-nance charts starting on page 5-4. These procedures must be performed at the intervals shown in the mainte-nance schedule to assure that your warranty remains in effect. Although it is strongly recommended that they beperformed by the factory-trained or distributor-trained technicians at your Hyundai dealer, these procedures maybe performed at any qualified service facility. F010D01A-GAT
General Checks
These are the regular checks you should perform when you drive your Hyundai or you fill the fuel tank. A list of these items will be found on page6-5.
F010A01A-GAT Service Requirements To assure that you receive the great- est number of kilometers of satisfying operation from your Hyundai, certain maintenance procedures must beperformed. Although careful design and engineering have reduced these to a minimum, those that are requiredare of the utmost importance.It is your responsibility to have thesemaintenance procedures performed to comply with the terms of the war- ranties covering your new Hyundai.The Service Passport supplied with your new vehicle provides further in- formation about these warranties.
F010B01A-AAT
Maintenance Requirements
The maintenance required for your
Hyundai can be divided into three main areas:
o Specified scheduled procedures
o General checks
o Do-it-yourself maintenance It is suggested that genuine Hyundai
service parts be used for any requiredrepairs or replacements. Other parts of equivalent quality such as engine oil, engine coolant, manual transmission
oil, brake fluid and so on which are not supplied by Hyundai Motor Company or its distributor may be used withoutaffecting your warranty coverage but you should always be sure these are equivalent to the quality of the originalHyundai parts. Your Service Passport provides further information about your warranty coverage.
Page 156 of 207
5VEHICLE MAINTENANCE REQUIREMENTS
10
F060F01A-AAT
o Vacuum and Crankcase
Ventilation Hoses
Inspect the surface of hoses for evi- dence of heat and/or mechanical dam- age. Hard and brittle rubber, cracking, tears, cuts, abrasions, and excessiveswelling indicate deterioration. Particu- lar attention should be paid to examin- ing those hose surfaces nearest tohigh heat sources, such as the ex- haust manifold. Inspect the hose routing to assure that the hoses do not come in contact with any heat source, sharp edges or mov- ing component which might cause heatdamage or mechanical wear. Inspect all hose connections, such as clamps and couplings, to make sure they aresecure, and that no leaks are present. Hoses should be replaced immedi- ately if there is any evidence of dete-rioration or damage. F060B01HR-GAT
o Drive Belts
Inspect all drive belts (water pump andalternator) for evidence of cuts, cracks, excessive wear or oiliness, and re- place if necessary. Drive belts shouldbe checked periodically for proper ten- sion and adjusted as necessary. F060E01A-GAT
o Timing Belt
Inspect all parts related with the timing
belt for damage and deformation. Re- place any damaged parts immediately.
F060H01A-AAT
o Air Cleaner Filter
A Genuine Hyundai air cleaner filter isrecommended when the filter is re-placed.
F060G01A-AAT
o Vapor Hose and Fuel Filler Cap
The vapor hose and fuel filler cap
should be inspected at those intervals specified in the maintenance sched- ule. Make sure that a new vapor hoseor fuel filler cap is correctly replaced.
F070B01A-GAT
o Cooling System
Check the cooling system part, suchas radiator, coolant reservoir, hoses and connections for leakage and dam- age. Replace any damaged parts. F070C01A-AAT
o Coolant
The coolant should be changed at the intervals specified in the mainte- nance schedule. F070D01HP-GAT
o Manual Transmission Oil
Inspect the manual transmission oil
according to the maintenance sched- ule. NOTE:
If the oil level is low, check for
possible leaks before adding oil. Do not overfill.
Page 164 of 207
6 DO-IT-YOURSELF MAINTENANCE
6
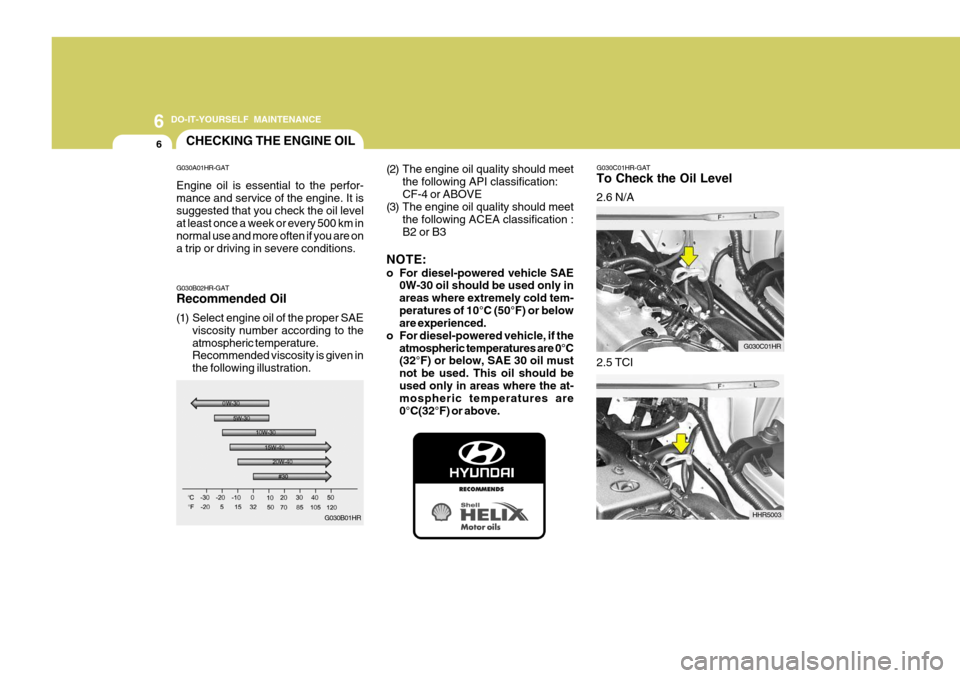
G030C01HR-GAT To Check the Oil Level 2.6 N/A
HHR5003
2.5 TCI
CHECKING THE ENGINE OIL
G030B01HR
G030B02HR-GAT Recommended Oil
(1) Select engine oil of the proper SAE
viscosity number according to the atmospheric temperature. Recommended viscosity is given in the following illustration. (2) The engine oil quality should meet
the following API classification:CF-4 or ABOVE
(3) The engine oil quality should meet
the following ACEA classification :B2 or B3
NOTE:
o For diesel-powered vehicle SAE 0W-30 oil should be used only in areas where extremely cold tem-peratures of 10°C (50°F) or below are experienced.
o For diesel-powered vehicle, if the
atmospheric temperatures are 0°C(32°F) or below, SAE 30 oil must not be used. This oil should beused only in areas where the at- mospheric temperatures are 0°C(32°F) or above. G030C01HR
G030A01HR-GAT Engine oil is essential to the perfor- mance and service of the engine. It issuggested that you check the oil level at least once a week or every 500 km in normal use and more often if you are ona trip or driving in severe conditions.
Page 167 of 207
6
DO-IT-YOURSELF MAINTENANCE
9
!WARNING:
Be very careful when draining the engine oil as it may be hot enough to burn you!
4. When the oil has stopped draining, replace the drain plug using a new gasket and retighten by turning it clockwise.
Tightening torque : 3.5 ~ 4.5 kgf.m
5. Remove the oil filter by turning it counterclockwise with a oil filter wrench of the proper size. A certainamount of oil will come out when you remove the filter. So be sure to have your drain pan in place underneathit.
6. Install a new oil filter in accordance
with the instructions on the carton oron the filter itself. Do not over-tighten.
Tightening torque: 2.3 ~ 2.5 kgf.m Be sure that the mounting surfaceon the engine is clean and that theold gasket is removed completely. Lubricate the new gasket on the filter with clean engine oil beforeinstallation.!
7. Remove the engine oil level dipstick.
8. Refill the crankcase with the recom- mended engine oil slowly. Refer to the specification in chapter 9 for engine oil capacity.
CAUTION:
Slowly pour the recommended oilby using a funnel. Do not overfill not to damage the engine.
9. Start the engine and check to be sure no oil is leaking from the drain plug or oil filter.
10. Shut off the engine and recheck the
oil level.
NOTE: Always dispose of used engine oil in an environmentally acceptable man-ner. It is suggested that it be placed in a sealed container and taken to a service station for reclamation. Donot pour the oil on the ground or put it into the household trash. WARNING:
Used motor oil may cause irritation or cancer of the skin if left in contact with the skin for prolonged periods of time. Wash your hands thoroughlywith soap and warm water as soon as possible after handling used oil.
!
Page 173 of 207
6
DO-IT-YOURSELF MAINTENANCE
15
CAUTION:
o Radiator antifreeze (engine cool- ant) should not be used in the washer system because it will damage the car's finish.
o The washer should not be oper- ated if the washer reservoir isempty. This can damage thewasher fluid pump.!
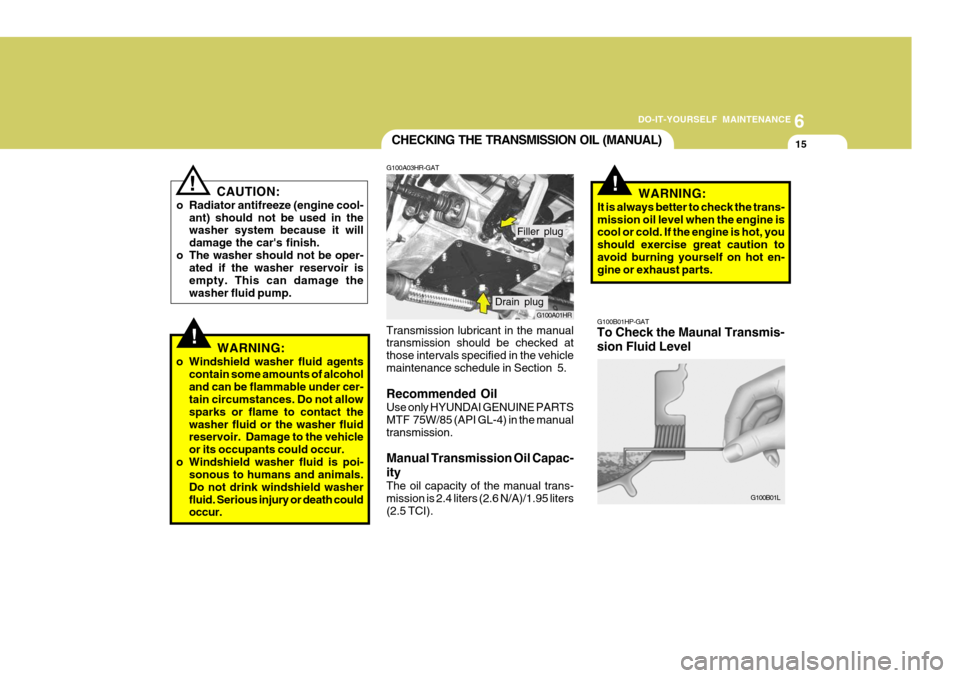
CHECKING THE TRANSMISSION OIL (MANUAL)
G100A03HR-GAT
G100A01HR
Transmission lubricant in the manual transmission should be checked at those intervals specified in the vehiclemaintenance schedule in Section 5. Recommended Oil Use only HYUNDAI GENUINE PARTS MTF 75W/85 (API GL-4) in the manualtransmission. Manual Transmission Oil Capac- ity The oil capacity of the manual trans- mission is 2.4 liters (2.6 N/A)/1.95 liters(2.5 TCI).
Drain plug Filler plug
!WARNING:
o Windshield washer fluid agents contain some amounts of alcohol and can be flammable under cer- tain circumstances. Do not allow sparks or flame to contact thewasher fluid or the washer fluid reservoir. Damage to the vehicle or its occupants could occur.
o Windshield washer fluid is poi- sonous to humans and animals.Do not drink windshield washerfluid. Serious injury or death could occur.
!
G100B01HP-GAT To Check the Maunal Transmis- sion Fluid Level
G100B01L
WARNING:
It is always better to check the trans- mission oil level when the engine is cool or cold. If the engine is hot, you should exercise great caution toavoid burning yourself on hot en- gine or exhaust parts.
Page 174 of 207
6 DO-IT-YOURSELF MAINTENANCE
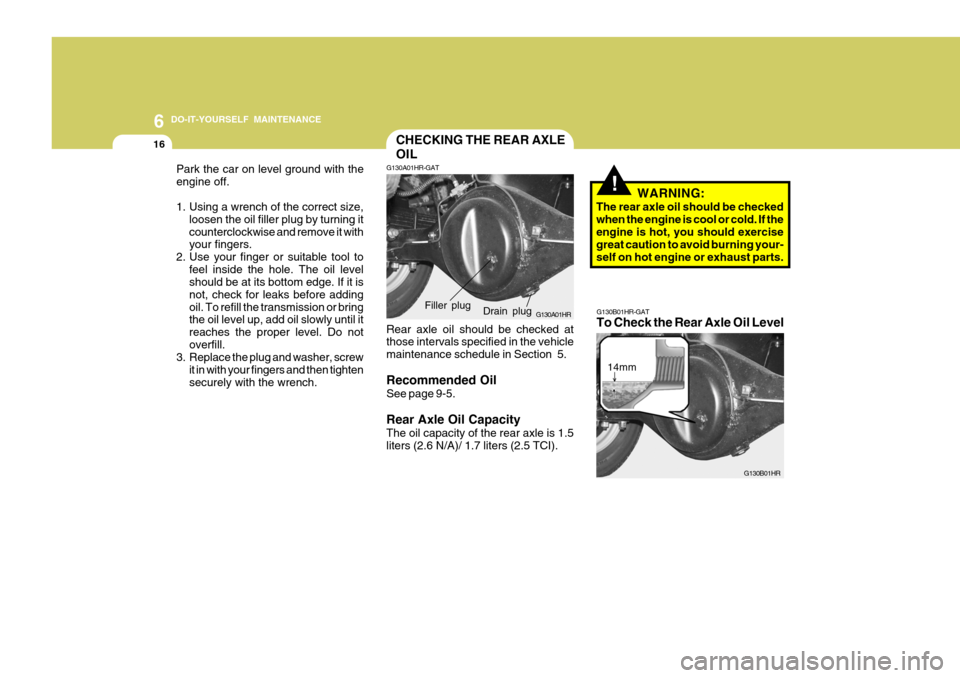
16CHECKING THE REAR AXLE OIL
!
Park the car on level ground with the engine off.
1. Using a wrench of the correct size,
loosen the oil filler plug by turning it counterclockwise and remove it with your fingers.
2. Use your finger or suitable tool to
feel inside the hole. The oil levelshould be at its bottom edge. If it is not, check for leaks before addingoil. To refill the transmission or bring the oil level up, add oil slowly until it reaches the proper level. Do notoverfill.
3. Replace the plug and washer, screw
it in with your fingers and then tightensecurely with the wrench. G130A01HR-GAT
G130A01HR
Rear axle oil should be checked at those intervals specified in the vehicle maintenance schedule in Section 5. Recommended Oil See page 9-5. Rear Axle Oil Capacity The oil capacity of the rear axle is 1.5 liters (2.6 N/A)/ 1.7 liters (2.5 TCI). WARNING:
The rear axle oil should be checkedwhen the engine is cool or cold. If the engine is hot, you should exercise great caution to avoid burning your-self on hot engine or exhaust parts.
Drain plug
Filler plug
G130B01HR-GAT To Check the Rear Axle Oil Level
G130B01HR
14mm
Page 175 of 207
6
DO-IT-YOURSELF MAINTENANCE
17
Park the car on level ground with the engine off.
1. Using a wrench of the correct size, loosen the oil filler plug by turning it counterclockwise and remove it with your fingers.
2. Use a suitable tool to feel inside the
hole. The oil level should be within 14mm from its bottom edge. If it is not, check for leaks before adding oil. Torefill the rear axle or bring the oil level up,add oil slowly until it reaches the proper level. Do not overfill.
3. Replace the plug and washer, screw it in with your fingers and then tightensecurely with the wrench.
NOTE: It is recommended that the rear axle oil should be checked by an autho- rized Hyundai dealer.
!
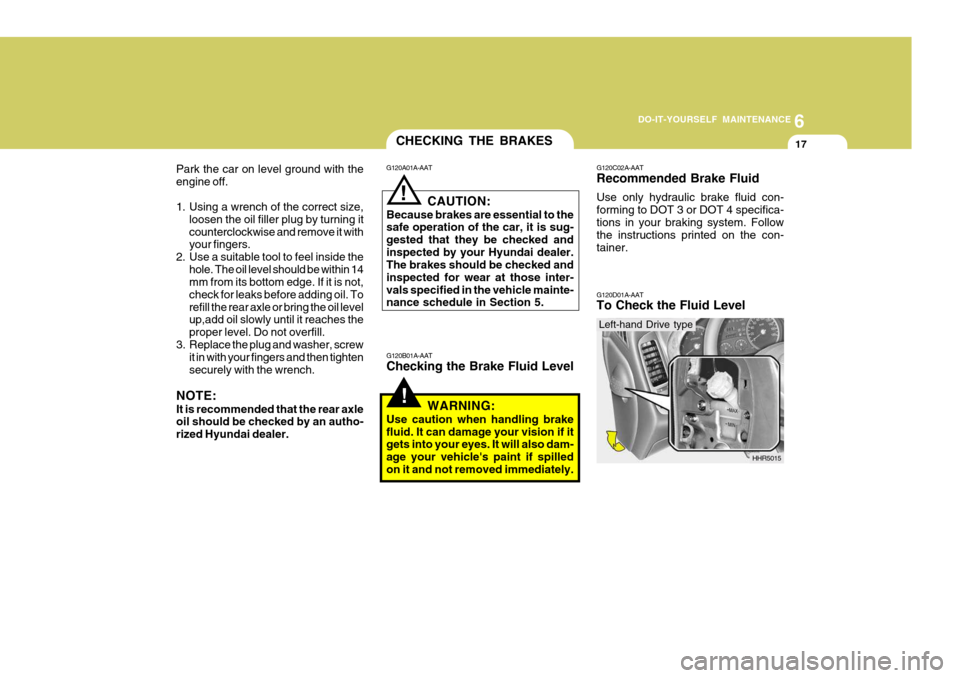
CHECKING THE BRAKES
G120A01A-AAT
G120B01A-AAT Checking the Brake Fluid Level
! CAUTION:
Because brakes are essential to the safe operation of the car, it is sug- gested that they be checked andinspected by your Hyundai dealer. The brakes should be checked and inspected for wear at those inter-vals specified in the vehicle mainte- nance schedule in Section 5.
WARNING:
Use caution when handling brake fluid. It can damage your vision if it gets into your eyes. It will also dam- age your vehicle's paint if spilledon it and not removed immediately.
G120C02A-AAT Recommended Brake Fluid Use only hydraulic brake fluid con- forming to DOT 3 or DOT 4 specifica-tions in your braking system. Follow the instructions printed on the con- tainer. G120D01A-AAT To Check the Fluid Level
HHR5015
Left-hand Drive type
Page 185 of 207
6
DO-IT-YOURSELF MAINTENANCE
27
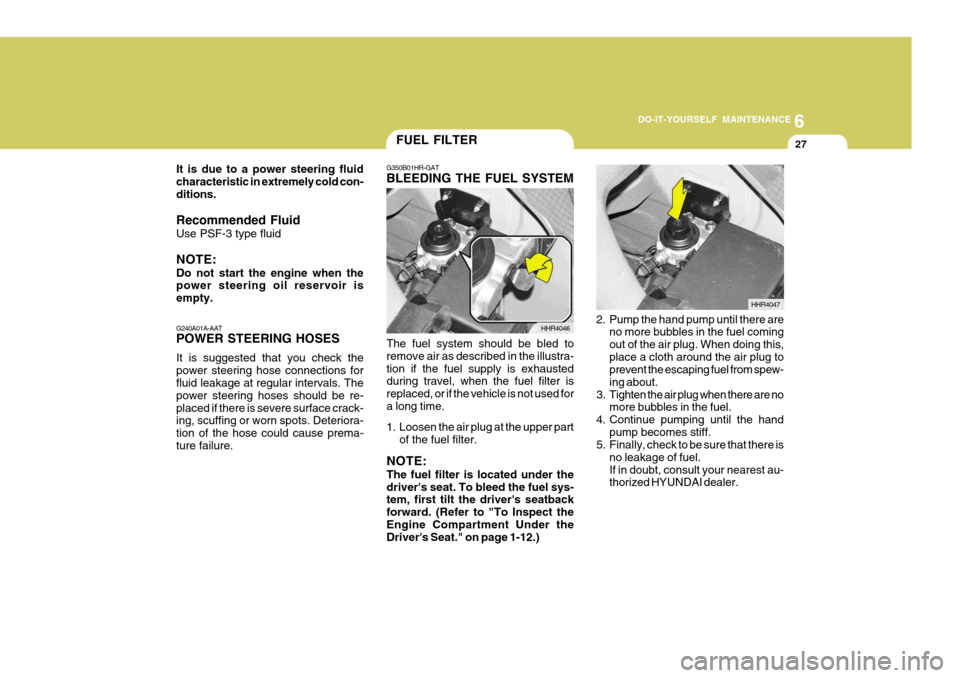
G350B01HR-GAT BLEEDING THE FUEL SYSTEM
The fuel system should be bled to remove air as described in the illustra-tion if the fuel supply is exhausted during travel, when the fuel filter is replaced, or if the vehicle is not used fora long time.
1. Loosen the air plug at the upper part of the fuel filter.
NOTE: The fuel filter is located under the driver's seat. To bleed the fuel sys- tem, first tilt the driver's seatback forward. (Refer to "To Inspect theEngine Compartment Under the Driver's Seat." on page 1-12.) HHR4046
2. Pump the hand pump until there are
no more bubbles in the fuel coming out of the air plug. When doing this,place a cloth around the air plug to prevent the escaping fuel from spew- ing about.
3. Tighten the air plug when there are no more bubbles in the fuel.
4. Continue pumping until the hand
pump becomes stiff.
5. Finally, check to be sure that there is
no leakage of fuel.If in doubt, consult your nearest au- thorized HYUNDAI dealer. HHR4047
FUEL FILTER
G240A01A-AAT POWER STEERING HOSES It is suggested that you check the power steering hose connections for fluid leakage at regular intervals. The power steering hoses should be re-placed if there is severe surface crack- ing, scuffing or worn spots. Deteriora- tion of the hose could cause prema-ture failure.
It is due to a power steering fluidcharacteristic in extremely cold con-ditions. Recommended Fluid Use PSF-3 type fluid NOTE: Do not start the engine when the power steering oil reservoir is empty.
Page 187 of 207
6
DO-IT-YOURSELF MAINTENANCE
29
!WARNING:
o Do not smoke or have any other open flame near the vehicle while bleeding the fuel system.
o Be sure to carefully wipe away any
water drained out in this manner,because the fuel mixed in the wa- ter might be ignited and result in a fire.
HEADLIGHT AIMING ADJUSTMENT
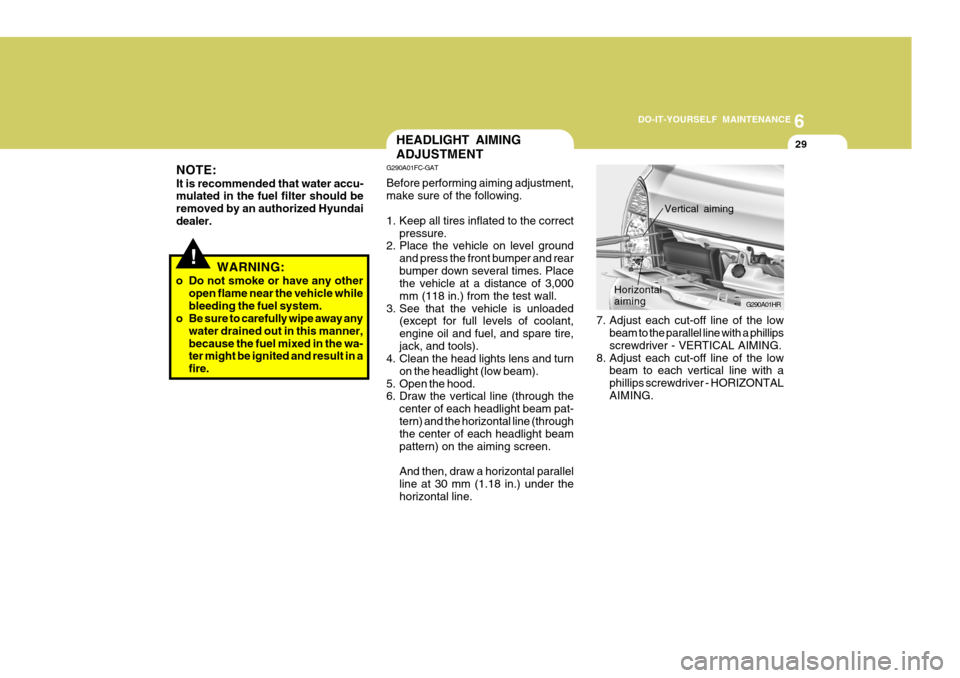
7. Adjust each cut-off line of the lowbeam to the parallel line with a phillips screwdriver - VERTICAL AIMING.
8. Adjust each cut-off line of the low beam to each vertical line with a phillips screwdriver - HORIZONTALAIMING. G290A01HR
Horizontal aiming
Vertical aiming
G290A01FC-GAT Before performing aiming adjustment, make sure of the following.
1. Keep all tires inflated to the correct
pressure.
2. Place the vehicle on level ground
and press the front bumper and rear bumper down several times. Place the vehicle at a distance of 3,000 mm (118 in.) from the test wall.
3. See that the vehicle is unloaded (except for full levels of coolant,engine oil and fuel, and spare tire,jack, and tools).
4. Clean the head lights lens and turn
on the headlight (low beam).
5. Open the hood.
6. Draw the vertical line (through the
center of each headlight beam pat- tern) and the horizontal line (through the center of each headlight beam pattern) on the aiming screen. And then, draw a horizontal parallel line at 30 mm (1.18 in.) under thehorizontal line.
NOTE: It is recommended that water accu- mulated in the fuel filter should be removed by an authorized Hyundaidealer.