fuse box Hyundai H-100 Truck 2012 Owner's Manual
[x] Cancel search | Manufacturer: HYUNDAI, Model Year: 2012, Model line: H-100 Truck, Model: Hyundai H-100 Truck 2012Pages: 217, PDF Size: 9.37 MB
Page 9 of 217
F9
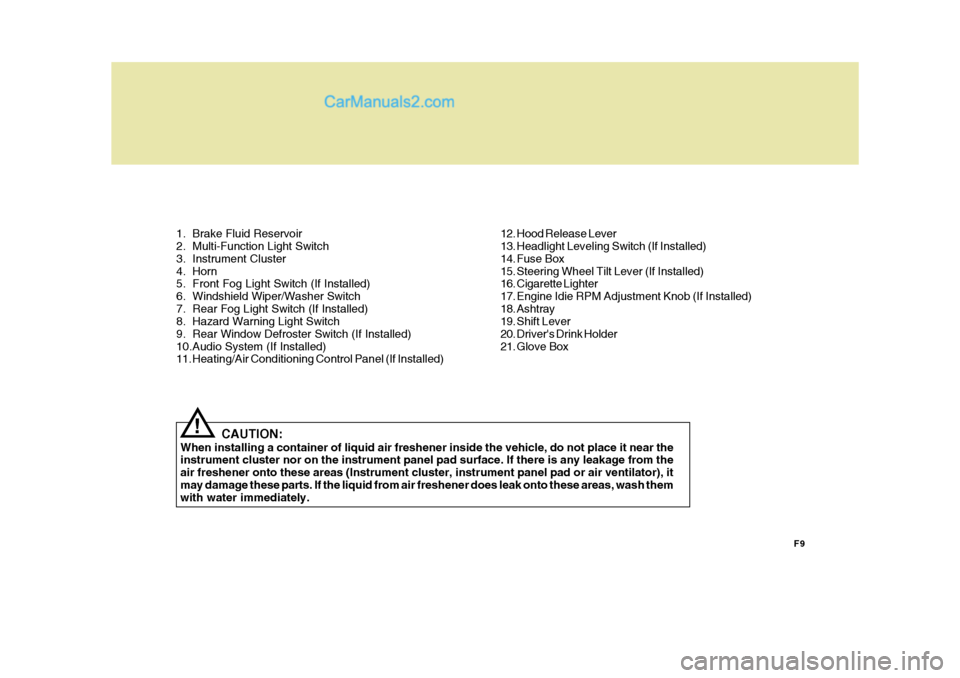
1. Brake Fluid Reservoir
2. Multi-Function Light Switch
3. Instrument Cluster
4. Horn
5. Front Fog Light Switch (If Installed)
6. Windshield Wiper/Washer Switch
7. Rear Fog Light Switch (If Installed)
8. Hazard Warning Light Switch
9. Rear Window Defroster Switch (If Installed)
10.Audio System (If Installed)
11. Heating/Air Conditioning Control Panel (If Installed)
CAUTION:
When installing a container of liquid air freshener inside the vehicle, do not place it near theinstrument cluster nor on the instrument panel pad surface. If there is any leakage from the air freshener onto these areas (Instrument cluster, instrument panel pad or air ventilator), itmay damage these parts. If the liquid from air freshener does leak onto these areas, wash them with water immediately.
! 12. Hood Release Lever
13. Headlight Leveling Switch (If Installed)
14. Fuse Box
15. Steering Wheel Tilt Lever (If Installed)
16. Cigarette Lighter
17. Engine Idie RPM Adjustment Knob (If Installed)
18. Ashtray
19. Shift Lever
20. Driver's Drink Holder
21. Glove Box
Page 11 of 217
F11
CAUTION:
When installing a container of liquid air freshener inside the vehicle, do not place it near the instrument cluster nor on the instrument panel pad surface. If there is any leakage from the air freshener onto these areas (Instrument cluster, instrument panel pad or air ventilator), it may damage these parts. If the liquid from air freshener does leak onto these areas, wash themwith water immediately.
!
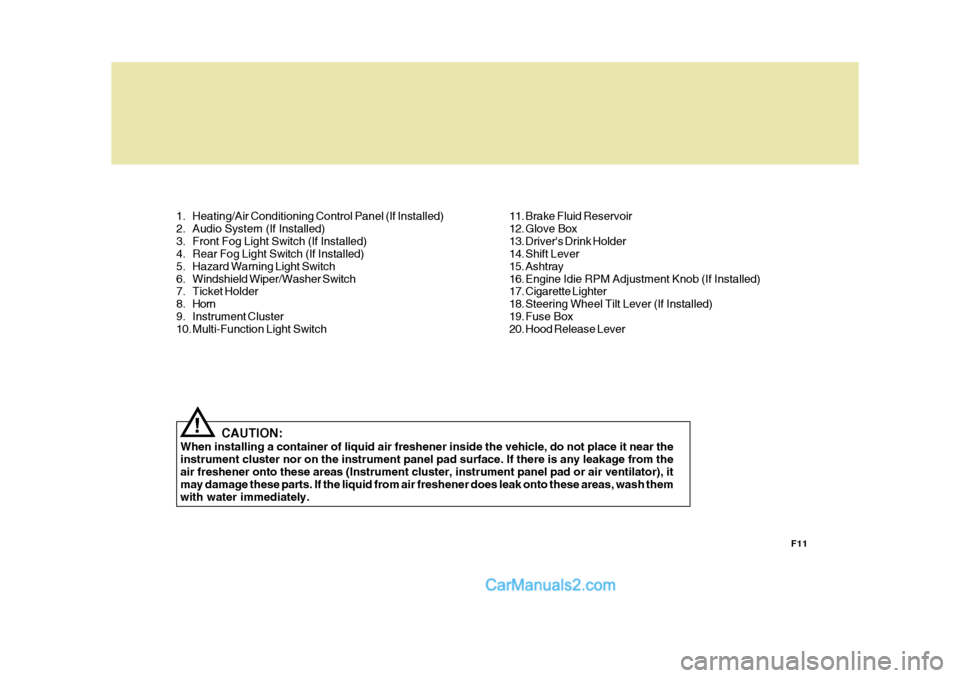
1. Heating/Air Conditioning Control Panel (If Installed)
2. Audio System (If Installed)
3. Front Fog Light Switch (If Installed)
4. Rear Fog Light Switch (If Installed)
5. Hazard Warning Light Switch
6. Windshield Wiper/Washer Switch
7. Ticket Holder
8. Horn
9. Instrument Cluster
10. Multi-Function Light Switch
11. Brake Fluid Reservoir
12. Glove Box
13. Driver's Drink Holder
14. Shift Lever
15. Ashtray
16. Engine Idie RPM Adjustment Knob (If Installed)
17. Cigarette Lighter
18. Steering Wheel Tilt Lever (If Installed)
19. Fuse Box
20. Hood Release Lever
Page 155 of 217
6
DO-IT-YOURSELF MAINTENANCE
3ENGINE COMPARTMENT
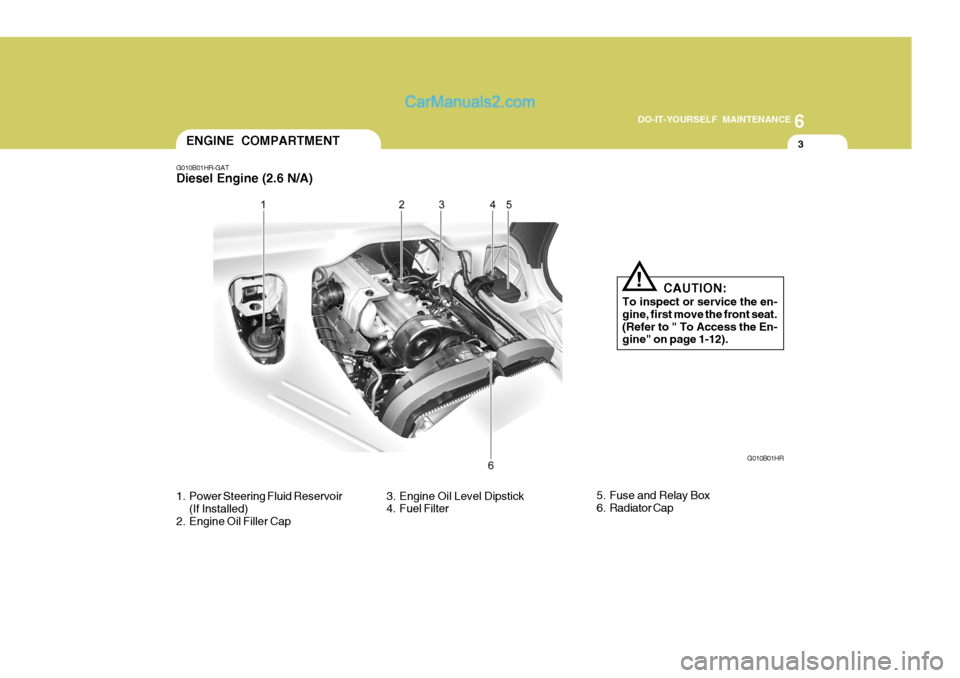
1. Power Steering Fluid Reservoir (If Installed)
2. Engine Oil Filler Cap 3. Engine Oil Level Dipstick
4. Fuel Filter
G010B01HR-GAT Diesel Engine (2.6 N/A)
G010B01HR
5. Fuse and Relay Box
6. Radiator CapCAUTION:
To inspect or service the en-gine, first move the front seat.(Refer to " To Access the En- gine" on page 1-12).
!
Page 156 of 217
6 DO-IT-YOURSELF MAINTENANCE
4
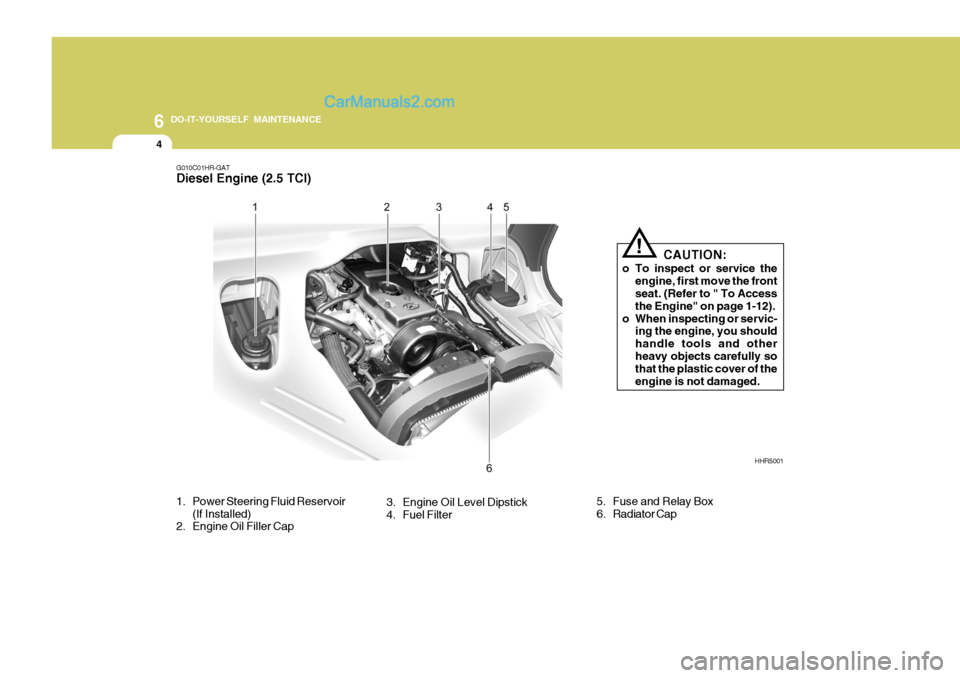
G010C01HR-GAT Diesel Engine (2.5 TCI)
HHR5001
1. Power Steering Fluid Reservoir (If Installed)
2. Engine Oil Filler Cap 3. Engine Oil Level Dipstick
4. Fuel Filter CAUTION:
o To inspect or service the engine, first move the front seat. (Refer to " To Access the Engine" on page 1-12).
o When inspecting or servic- ing the engine, you shouldhandle tools and other heavy objects carefully so that the plastic cover of theengine is not damaged.
!
5. Fuse and Relay Box
6. Radiator Cap
Page 174 of 217
6 DO-IT-YOURSELF MAINTENANCE
22CHECKING AND REPLACING FUSES
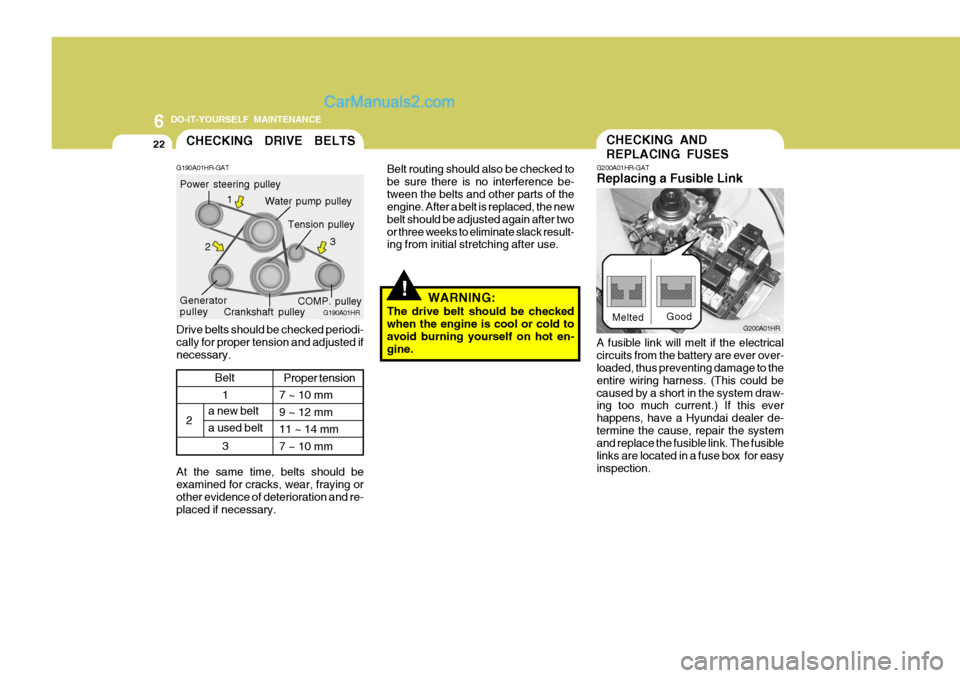
G200A01HR-GAT Replacing a Fusible Link
G200A01HR
Melted
Good
A fusible link will melt if the electrical circuits from the battery are ever over- loaded, thus preventing damage to the entire wiring harness. (This could becaused by a short in the system draw- ing too much current.) If this ever happens, have a Hyundai dealer de-termine the cause, repair the system and replace the fusible link. The fusible links are located in a fuse box for easyinspection.
1
2
3
CHECKING DRIVE BELTS
Water pump pulley
G190A01HR-GAT
G190A01HR
Drive belts should be checked periodi- cally for proper tension and adjusted ifnecessary. Power steering pulley
Crankshaft pulley
Generator pulley Tension pulley
COMP. pulley
1
2 3
a new belt a used beltProper tension
7 ~ 10 mm9 ~ 12 mm11 ~ 14 mm7 ~ 10 mm
Belt
At the same time, belts should be examined for cracks, wear, fraying or other evidence of deterioration and re-placed if necessary.
!
Belt routing should also be checked to be sure there is no interference be-tween the belts and other parts of the engine. After a belt is replaced, the new belt should be adjusted again after twoor three weeks to eliminate slack result- ing from initial stretching after use. WARNING:
The drive belt should be checked when the engine is cool or cold to avoid burning yourself on hot en- gine.
Page 175 of 217
6
DO-IT-YOURSELF MAINTENANCE
23
CAUTION:
When replacing a fusible link, never use anything but a new fusible link with the same or lower amperagerating. Never use a piece of wire or a higher-rated fusible link. This could result in serious damage andcreate a fire hazard.!
!WARNING:
Never install a wire or aluminum foil instead of the proper fuse - even as a temporary repair. It may cause ex- tensive wiring damage and a pos-sible fire.NOTE:
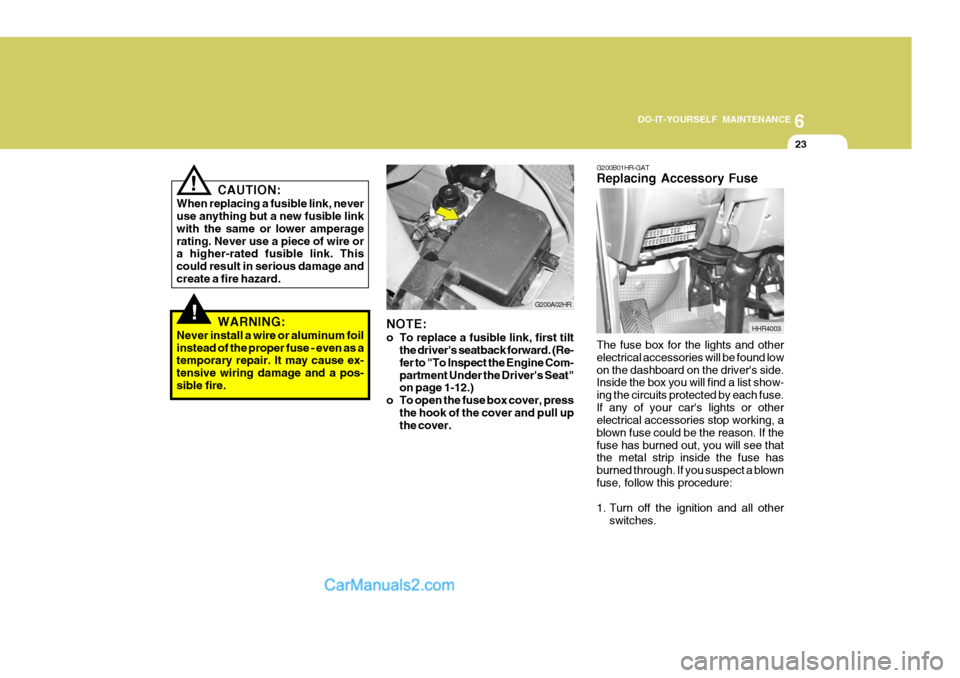
o To replace a fusible link, first tilt the driver's seatback forward. (Re- fer to "To Inspect the Engine Com-partment Under the Driver's Seat" on page 1-12.)
o To open the fuse box cover, press the hook of the cover and pull upthe cover. G200A02HR
G200B01HR-GAT Replacing Accessory Fuse The fuse box for the lights and other electrical accessories will be found lowon the dashboard on the driver's side. Inside the box you will find a list show- ing the circuits protected by each fuse.If any of your car's lights or other electrical accessories stop working, a blown fuse could be the reason. If thefuse has burned out, you will see that the metal strip inside the fuse has burned through. If you suspect a blownfuse, follow this procedure:
1. Turn off the ignition and all other
switches. HHR4003
Page 176 of 217
6 DO-IT-YOURSELF MAINTENANCE
24
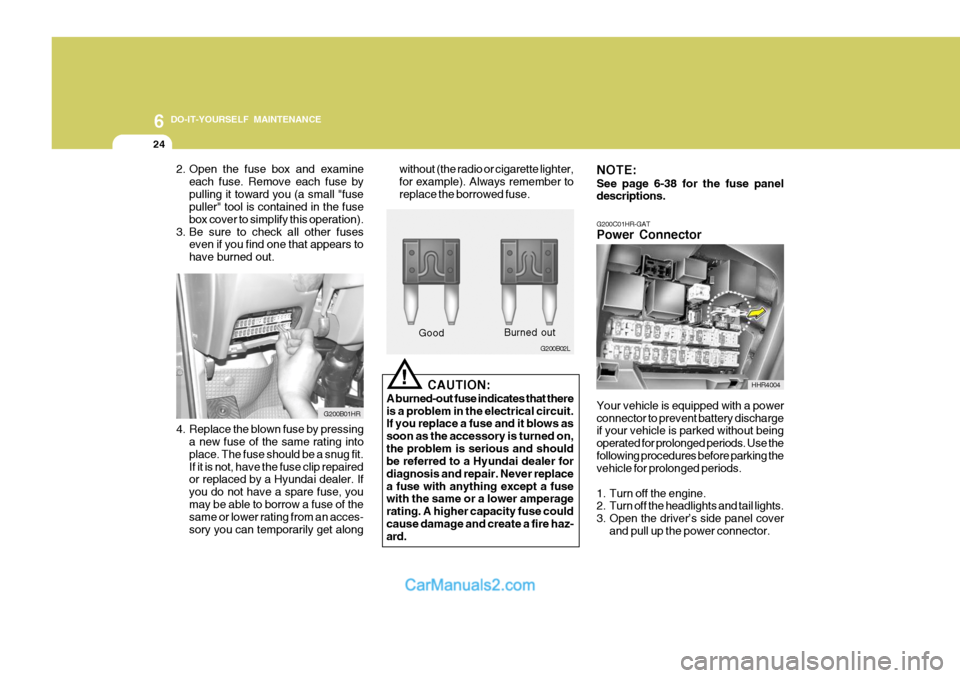
G200C01HR-GAT Power Connector Your vehicle is equipped with a power connector to prevent battery discharge if your vehicle is parked without being operated for prolonged periods. Use thefollowing procedures before parking the vehicle for prolonged periods.
1. Turn off the engine.
2. Turn off the headlights and tail lights.
3. Open the driver’s side panel coverand pull up the power connector.
HHR4004
NOTE: See page 6-38 for the fuse panel descriptions.
2. Open the fuse box and examine
each fuse. Remove each fuse by pulling it toward you (a small "fuse puller" tool is contained in the fuse box cover to simplify this operation).
3. Be sure to check all other fuses even if you find one that appears tohave burned out.
G200B01HR
4. Replace the blown fuse by pressinga new fuse of the same rating into place. The fuse should be a snug fit.If it is not, have the fuse clip repaired or replaced by a Hyundai dealer. If you do not have a spare fuse, youmay be able to borrow a fuse of the same or lower rating from an acces- sory you can temporarily get along
! G200B02L
Good
Burned out
without (the radio or cigarette lighter, for example). Always remember toreplace the borrowed fuse.
CAUTION:
A burned-out fuse indicates that thereis a problem in the electrical circuit. If you replace a fuse and it blows as soon as the accessory is turned on,the problem is serious and should be referred to a Hyundai dealer for diagnosis and repair. Never replacea fuse with anything except a fuse with the same or a lower amperage rating. A higher capacity fuse couldcause damage and create a fire haz- ard.
Page 191 of 217
6
DO-IT-YOURSELF MAINTENANCE
39
BATT
GLOW IGN
ECU
BATT
LAMP
COND ABS2
PTC1 ABS1
PTC2
BLWR PTC3
FFHS
GLOW ALT_SSTOP
HORN
A/CON TCU
ECU1 ECU2
DESCRIPTION
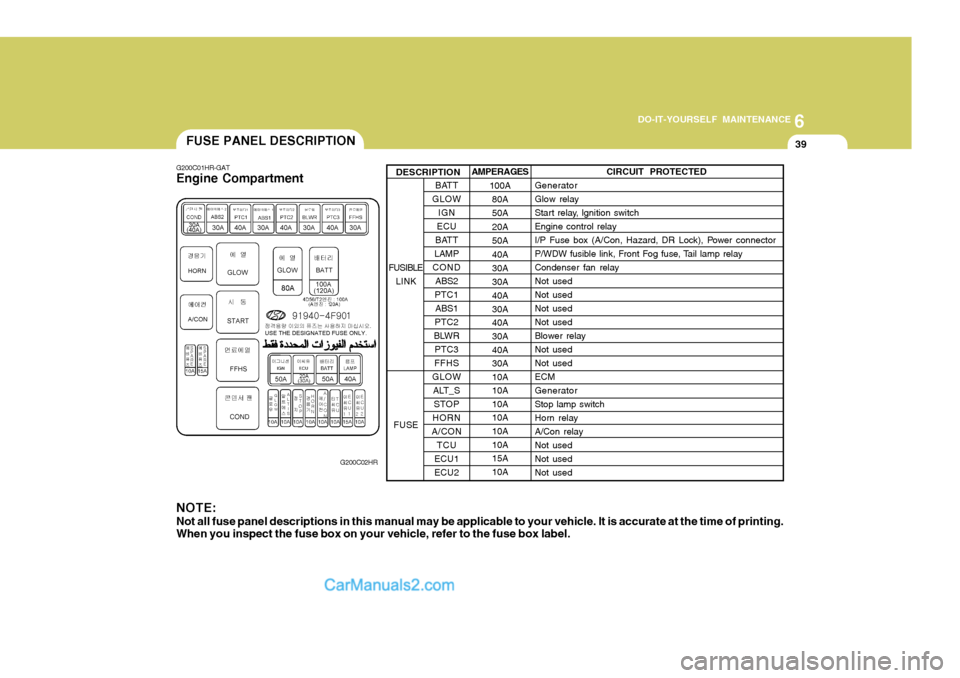
G200C01HR-GAT Engine Compartment
G200C02HR
NOTE:
Not all fuse panel descriptions in this manual may be applicable to your vehicle. It is accurate at the time of printing.
When you inspect the fuse box on your vehicle, refer to the fuse box label. AMPERAGES
100A80A 50A20A50A40A30A 30A40A 30A40A30A 40A 30A10A10A10A10A 10A 10A15A10A CIRCUIT PROTECTED
Generator Glow relay
Start relay, lgnition switchEngine control relay
I/P Fuse box (A/Con, Hazard, DR Lock), Power connector
P/WDW fusible link, Front Fog fuse, Tail lamp relayCondenser fan relayNot usedNot usedNot usedNot usedBlower relayNot usedNot usedECMGeneratorStop lamp switchHorn relayA/Con relayNot usedNot usedNot used
FUSIBLE LINK
FUSE
FUSE PANEL DESCRIPTION
Page 214 of 217
10
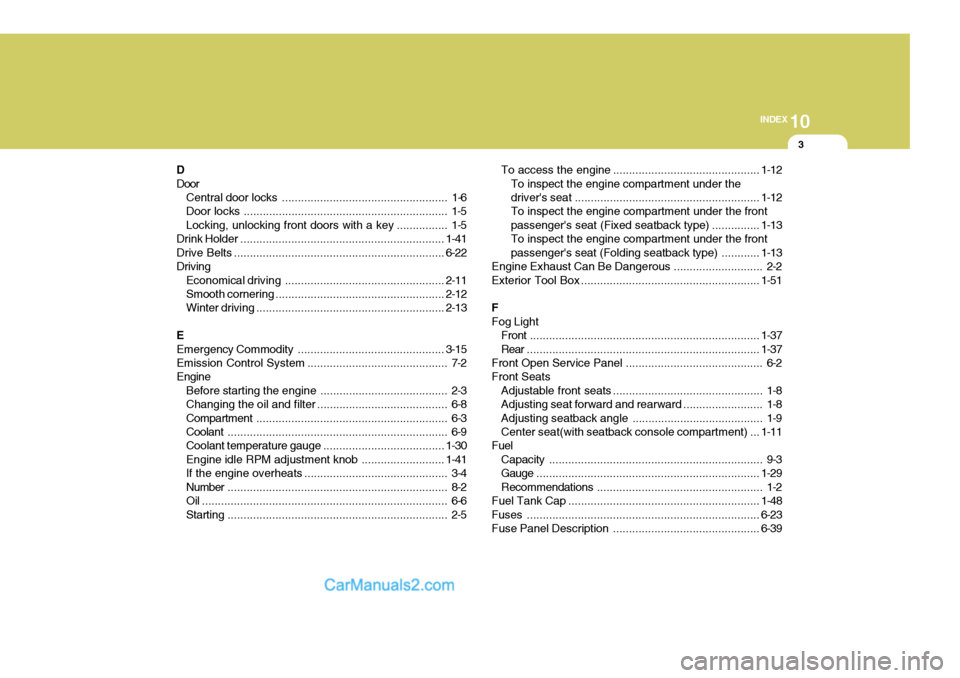
INDEX
3
D Door Central door locks .................................................... 1-6
Door locks ................................................................ 1-5Locking, unlocking front doors with a key ................ 1-5
Drink Holder ................................................................ 1-41
Drive Belts .................................................................. 6-22
Driving Economical driving .................................................. 2-11
Smooth corneri ng ..................................................... 2-12
Winter driving ........................................................... 2-13
E
Emergency Commodity .............................................. 3-15
Emission Contro l System ............................................ 7-2
Engine
Before starting the engine ........................................ 2-3
Changing the oil and filter ......................................... 6-8Compartment ............................................................ 6-3
Coolant ..................................................................... 6-9
Coolant temperature gauge ......................................1-30
Engine idle RPM adjustment knob ..........................1-41
If the engine overheats ............................................. 3-4
Number ..................................................................... 8-2
Oil ............................................................................. 6-6Starting ..................................................................... 2-5 To access the
engine .............................................. 1-12
To inspect the engine compartment under the
driver's seat .......................................................... 1-12
To inspect the engine compartment under the frontpassenger's seat (Fixed seatback type) ............... 1-13
To inspect the engine compartment under the frontpassenger's seat (Fol ding seatback type) ............ 1-13
Engine Exhaust Can Be Dangerous ............................ 2-2
Exterior Tool Box ........................................................ 1-51
FFog Light Front ........................................................................ 1-37
Rear ......................................................................... 1-37
Front Open Service Panel ........................................... 6-2
Front Seats Adjustable front seats ............................................... 1-8
Adjusting seat forward and rearward ......................... 1-8
Adjusting seatback angle ......................................... 1-9
Center seat(with seatback console compartment) ... 1-11
Fuel
Capacity ................................................................... 9-3
Gauge ...................................................................... 1-29
Recommendations .................................................... 1-2
Fuel Tank Cap ............................................................ 1-48
Fuses ......................................................................... 6-23
Fuse Panel Description .............................................. 6-39