ECU HYUNDAI I10 2010 User Guide
[x] Cancel search | Manufacturer: HYUNDAI, Model Year: 2010, Model line: I10, Model: HYUNDAI I10 2010Pages: 354, PDF Size: 37.04 MB
Page 53 of 354
Safety features of your vehicle
34
3
C030104APA
Securing a child restraint system
with “ISOFIX” system and “TetherAnchorage” system (if equipped)
ISOFIX is a standardized method of fit- ting child seats that eliminates the needto use the standard adult seat belt to
secure the seat in the vehicle. This
enables a much more secure and posi-
tive location with the added benefit of
easier and quicker installation. An ISOFIX-seat can only be installed if it
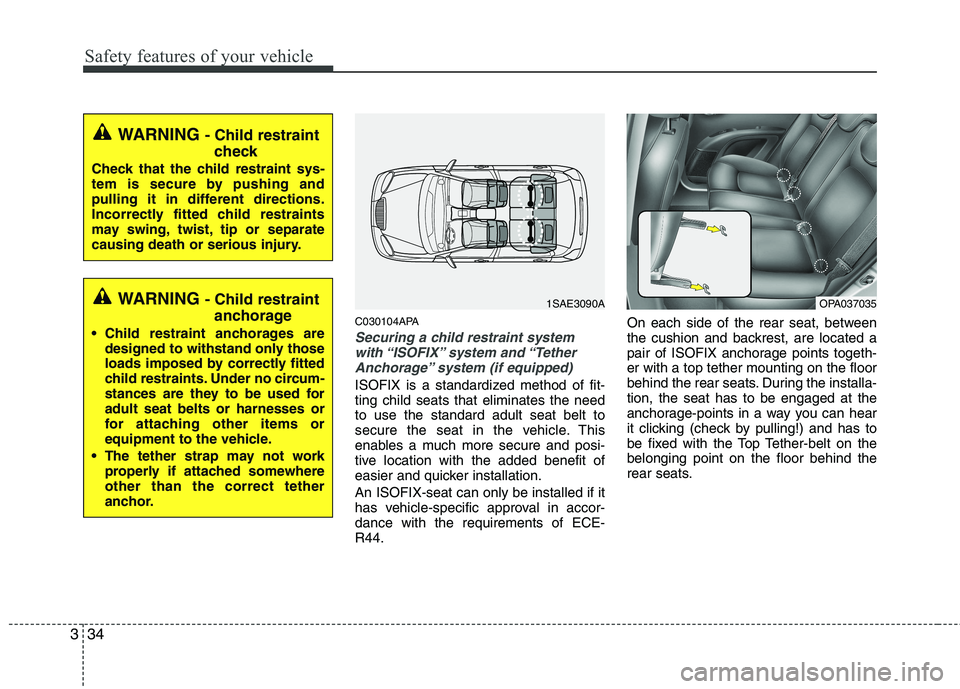
has vehicle-specific approval in accor-dance with the requirements of ECE-R44. On each side of the rear seat, between
the cushion and backrest, are located a
pair of ISOFIX anchorage points togeth-er with a top tether mounting on the floor
behind the rear seats. During the installa-tion, the seat has to be engaged at the
anchorage-points in a way you can hear
it clicking (check by pulling!) and has to
be fixed with the Top Tether-belt on thebelonging point on the floor behind the
rear seats.
WARNING
- Child restraint
check
Check that the child restraint sys-
tem is secure by pushing and
pulling it in different directions.
Incorrectly fitted child restraints
may swing, twist, tip or separate
causing death or serious injury.
WARNING - Child restraint
anchorage
Child restraint anchorages are designed to withstand only those
loads imposed by correctly fitted
child restraints. Under no circum-
stances are they to be used foradult seat belts or harnesses or
for attaching other items or
equipment to the vehicle.
The tether strap may not work properly if attached somewhereother than the correct tether
anchor.1SAE3090AOPA037035
Page 54 of 354
335
Safety features of your vehicle
The installing and the use of a child-seat has to be done according to the
installing-manual, which is added to theISOFIX-seat.To secure the child restraint seat:
1. To engage the child restraint seat to
the ISOFIX anchor, insert the child
restraint seat latch into the ISOFIX
anchor. Listen for the audible “click”sound.
2. Connect the tether strap hook to the child restraint hook holder and tighten
to secure the seat. (Refer to the previ-
ous page.)
WARNING
When using the vehicle's "ISOFIX"
system to install a child restraint
system in the rear seat, all unused
vehicle rear seat belt metal latch
plates or tabs must be latched
securely in their seat belt buckles
and the seat belt webbing must be
retracted behind the child restraint
to prevent the child from reachingand taking hold of unretracted seat
belts. Unlatched metal latch plates
or tabs may allow the child to reach
the unretracted seat belts which
may result in strangulation and a
serious injury or death to the child
in the child restraint.
WARNING
Do not install a child restraint seat at the center of the rear seat
using the vehicle's ISOFIX
anchors. The ISOFIX anchors are
only provided for the left and
right outboard rear seating posi-
tions. Do not misuse the ISOFIX
anchors by attempting to attach a
child restraint seat in the middleof the rear seat to the ISOFIX
anchors.
(Continued)
(Continued)In a crash, the child restraint seat
ISOFIX attachments may not be
strong enough to secure the child
restraint seat properly in the cen-
ter of the rear seat and may
break, causing serious injury ordeath.
Do not mount more than one child restraint to a child restraint
lower anchorage point. The
improper increased load may
cause the anchorage points or
tether anchor to break, causing
serious injury or death.
Attach the ISOFIX or ISOFIX-com- patible child restraint seat only to
the appropriate locations shownin the illustration.
Always follow the installation and use instructions provided by the
manufacturer of the childrestraint.
CAUTION
Do not allow the rear seat belt web-
bing to get scratched or pinched bythe ISOFIX-seat latch and ISOFIXanchor during the installation.
Page 59 of 354
Safety features of your vehicle
40
3
C041000AEN
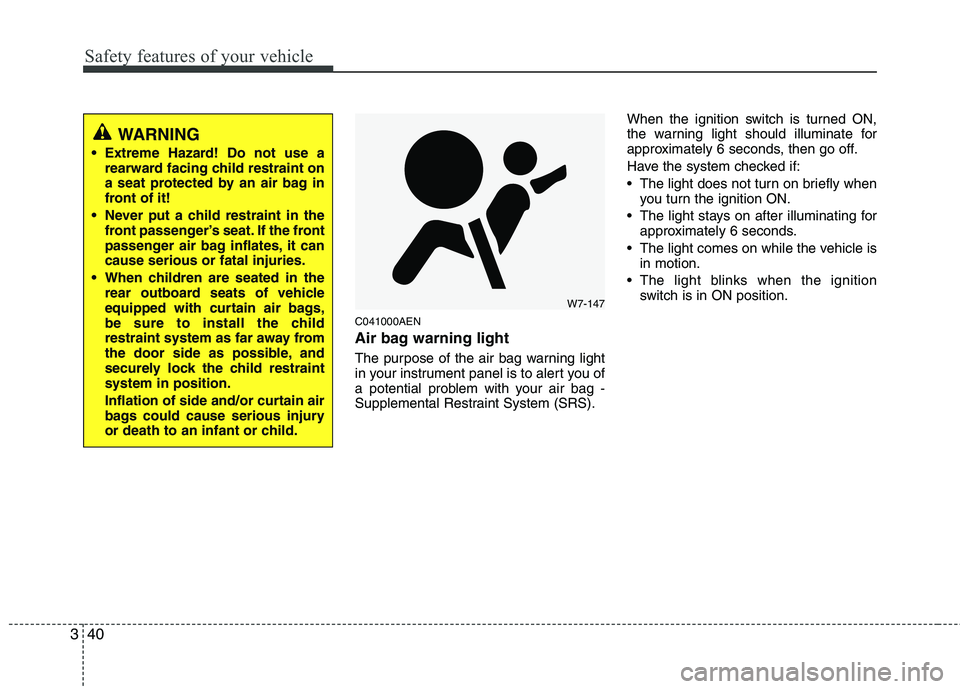
Air bag warning light
The purpose of the air bag warning light
in your instrument panel is to alert you of
a potential problem with your air bag -
Supplemental Restraint System (SRS). When the ignition switch is turned ON,
the warning light should illuminate for
approximately 6 seconds, then go off.
Have the system checked if:
The light does not turn on briefly when
you turn the ignition ON.
The light stays on after illuminating for approximately 6 seconds.
The light comes on while the vehicle is in motion.
The light blinks when the ignition switch is in ON position.
WARNING
Extreme Hazard! Do not use a rearward facing child restraint on
a seat protected by an air bag in
front of it!
Never put a child restraint in the front passenger’s seat. If the front
passenger air bag inflates, it cancause serious or fatal injuries.
When children are seated in the rear outboard seats of vehicle
equipped with curtain air bags,
be sure to install the child
restraint system as far away from
the door side as possible, and
securely lock the child restraintsystem in position.
Inflation of side and/or curtain air
bags could cause serious injury
or death to an infant or child.
W7-147
Page 69 of 354
Safety features of your vehicle
50
3
The side impact air bags are designed to
deploy only during certain side-impact
collisions, depending on the crash sever-
ity, angle, speed and point of impact. Theside impact air bags are not designed to
deploy in all side impact situations.(Continued)
Never place accessory seat cov-
ers, blankets or aftermarket seat
warmers on the passenger seat
as these may interfere with the
side air bag deployment.
Do not install any accessories on the side or near the side impact
air bag.
Do not place any objects over the air bag or between the air bag
and yourself.
Do not place any objects (an umbrella, bag, etc.) between the
front door and the front seat.
Such objects may become dan-
gerous projectiles and cause
injury if the supplemental side
impact air bag inflates.
To prevent unexpected deploy- ment of the side impact air bag
that may result in personal injury,
avoid impact to the side impact
sensor when the ignition switchis on.
If the seat or seat cover is dam- aged, have the vehicle checked
and repaired by an authorized
HYUNDAI dealer because your
vehicle is equipped with side
impact air bags.
WARNING
The side impact air bag is sup- plemental to the driver's and the
passenger's seat belt systems
and is not a substitute for them.
Therefore your seat belts must be
worn at all times while the vehicle
is in motion. The air bags deploy
only in certain side impact condi-
tions severe enough to cause
significant injury to the vehicleoccupants.
For best protection from the side impact air bag system and to
avoid being injured by the
deploying side impact air bag,
both front seat occupants shouldsit in an upright position with the
seat belt properly fastened. Thedriver's hands should be placedon the steering wheel at the 9:00
and 3:00 positions. The passen-
ger's arms and hands should beplaced on their laps.
(Continued)
WARNING
In order for side air bags to pro- vide the best protection, both
front seat occupants should sit inan upright position with the seat
belts properly fastened.
Importantly, children should sit in
a proper child restraint system inthe rear seat.
When a child is seated in the front passenger’s seat, the child
must be seated in the proper
child restraint system. Make sure
to position the child restraint sys-
tem as far away from the door
side as possible, and secure the
child restraint system in a lockedposition.
Do not allow the passengers to lean their heads or bodies onto
doors, put their arms on the
doors, stretch their arms out of
the window, or place objects
between the doors and passen-
gers when they are seated onseats equipped with side air
bags.
(Continued)
Page 71 of 354
Safety features of your vehicle
52
3
WARNING
In order for side impact and cur- tain air bags to provide the best
protection, both front seat occu-
pants and both outboard rearoccupants should sit in anupright position with the seat
belts properly fastened.
Importantly, children should sit in
a proper child restraint system inthe rear seat.
When children are seated in the rear outboard seats, they must be
seated in the proper childrestraint system.
Make sure to put the child
restraint system as far away from
the door side as possible, and
secure the child restraint system
in a locked position.
(Continued)(Continued)
Do not allow the passengers tolean their heads or bodies onto
doors, put their arms on the
doors, stretch their arms out of
the window, or place objects
between the doors and passen-
gers when they are seated onseats equipped with side and/or
curtain air bags.
Never try to open or repair any components of the side curtain
air bag system. This should only
be done by an authorized
HYUNDAI dealer.
Failure to follow the above men-tioned instructions can result in
injury or death to the vehicle occu-pants in an accident.
Page 89 of 354
Features of your vehicle
10
4
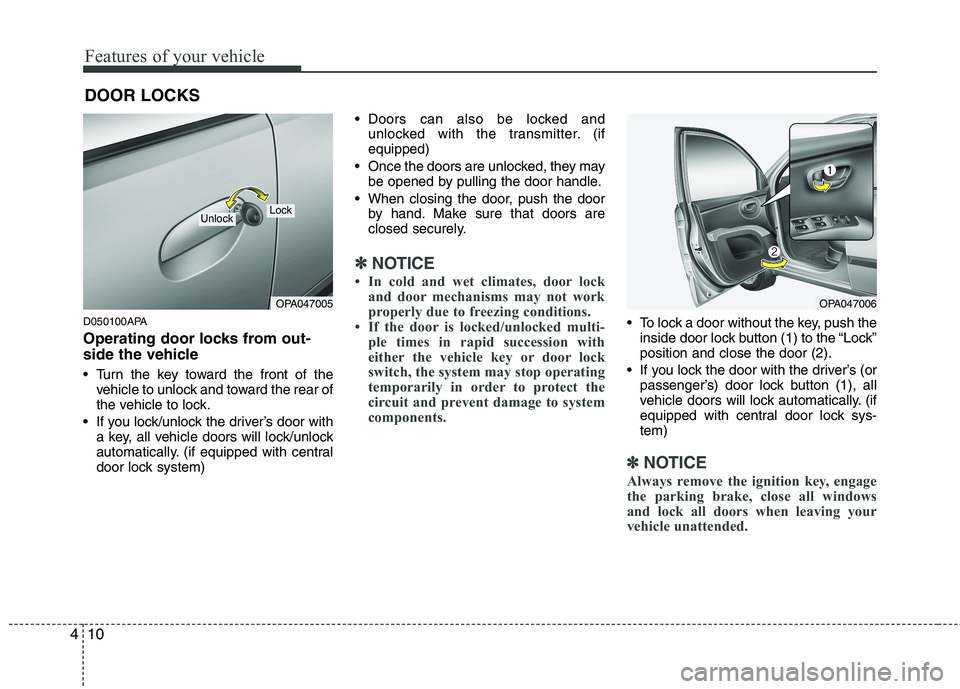
D050100APA
Operating door locks from out-
side the vehicle
Turn the key toward the front of the
vehicle to unlock and toward the rear of
the vehicle to lock.
If you lock/unlock the driver’s door with a key, all vehicle doors will lock/unlock
automatically. (if equipped with central
door lock system) Doors can also be locked and
unlocked with the transmitter. (ifequipped)
Once the doors are unlocked, they may be opened by pulling the door handle.
When closing the door, push the door by hand. Make sure that doors are
closed securely.
✽✽ NOTICE
In cold and wet climates, door lock and door mechanisms may not work
properly due to freezing conditions.
If the door is locked/unlocked multi- ple times in rapid succession with
either the vehicle key or door lock
switch, the system may stop operating
temporarily in order to protect the
circuit and prevent damage to system
components.
To lock a door without the key, push theinside door lock button (1) to the “Lock” position and close the door (2).
If you lock the door with the driver’s (or passenger’s) door lock button (1), all
vehicle doors will lock automatically. (if
equipped with central door lock sys-tem)
✽✽ NOTICE
Always remove the ignition key, engage
the parking brake, close all windows
and lock all doors when leaving your
vehicle unattended.
DOOR LOCKS
OPA047005
LockUnlock
OPA047006
Page 92 of 354
413
Features of your vehicle
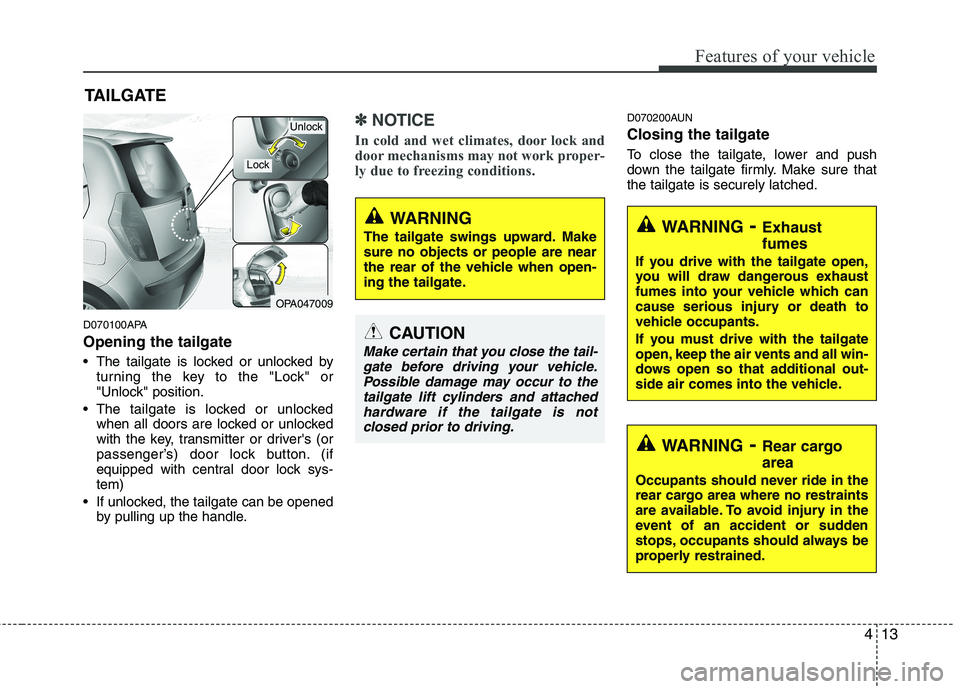
D070100APA Opening the tailgate
The tailgate is locked or unlocked byturning the key to the "Lock" or
"Unlock" position.
The tailgate is locked or unlocked when all doors are locked or unlocked
with the key, transmitter or driver's (or
passenger’s) door lock button. (if
equipped with central door lock sys-tem)
If unlocked, the tailgate can be opened by pulling up the handle.
✽✽ NOTICE
In cold and wet climates, door lock and
door mechanisms may not work proper-
ly due to freezing conditions.D070200AUN Closing the tailgate
To close the tailgate, lower and push
down the tailgate firmly. Make sure thatthe tailgate is securely latched.
TAILGATE
OPA047009
WARNING
The tailgate swings upward. Make sure no objects or people are near
the rear of the vehicle when open-
ing the tailgate.
CAUTION
Make certain that you close the tail- gate before driving your vehicle.
Possible damage may occur to thetailgate lift cylinders and attachedhardware if the tailgate is not closed prior to driving.
WARNING - Exhaust fumes
If you drive with the tailgate open,
you will draw dangerous exhaust
fumes into your vehicle which can
cause serious injury or death to
vehicle occupants.
If you must drive with the tailgate
open, keep the air vents and all win-
dows open so that additional out-
side air comes into the vehicle.
Lock
Unlock
WARNING - Rear cargo area
Occupants should never ride in the
rear cargo area where no restraints
are available. To avoid injury in the
event of an accident or sudden
stops, occupants should always be
properly restrained.
Page 98 of 354
419
Features of your vehicle
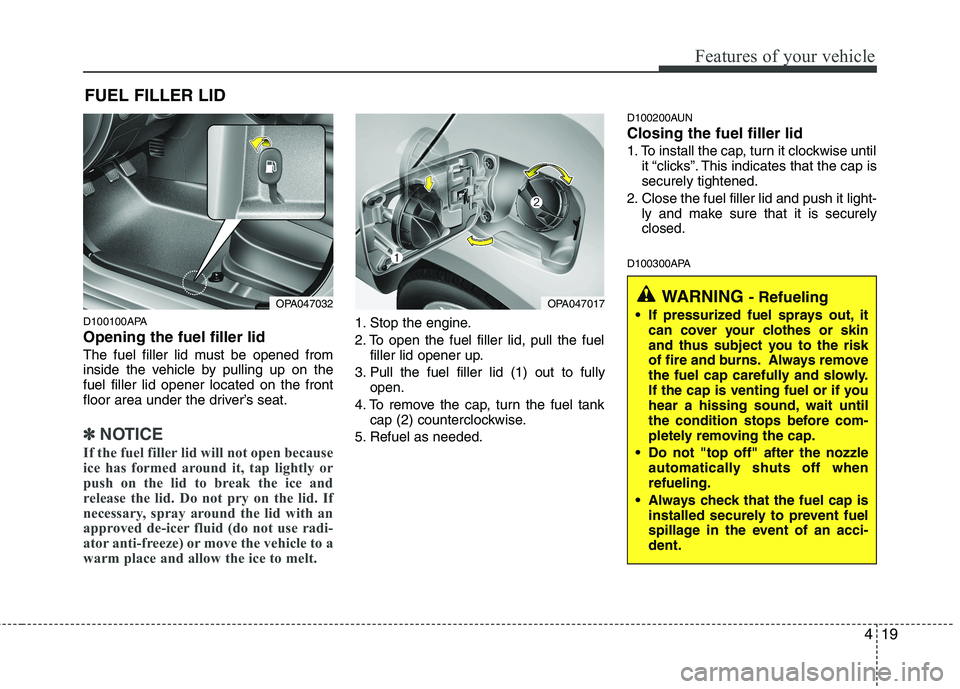
D100100APA Opening the fuel filler lid
The fuel filler lid must be opened from
inside the vehicle by pulling up on thefuel filler lid opener located on the front
floor area under the driver’s seat.
✽✽NOTICE
If the fuel filler lid will not open because
ice has formed around it, tap lightly or
push on the lid to break the ice and
release the lid. Do not pry on the lid. If
necessary, spray around the lid with an
approved de-icer fluid (do not use radi-
ator anti-freeze) or move the vehicle to a
warm place and allow the ice to melt.
1. Stop the engine.
2. To open the fuel filler lid, pull the fuel filler lid opener up.
3. Pull the fuel filler lid (1) out to fully open.
4. To remove the cap, turn the fuel tank cap (2) counterclockwise.
5. Refuel as needed. D100200AUN Closing the fuel filler lid
1. To install the cap, turn it clockwise until
it “clicks”. This indicates that the cap is securely tightened.
2. Close the fuel filler lid and push it light- ly and make sure that it is securelyclosed.
D100300APA
FUEL FILLER LID
OPA047032OPA047017WARNING
- Refueling
If pressurized fuel sprays out, it can cover your clothes or skin
and thus subject you to the risk
of fire and burns. Always remove
the fuel cap carefully and slowly.
If the cap is venting fuel or if you
hear a hissing sound, wait until
the condition stops before com-
pletely removing the cap.
Do not "top off" after the nozzle automatically shuts off whenrefueling.
Always check that the fuel cap is installed securely to prevent fuel
spillage in the event of an acci-dent.
Page 99 of 354
Features of your vehicle
20
4
(Continued)
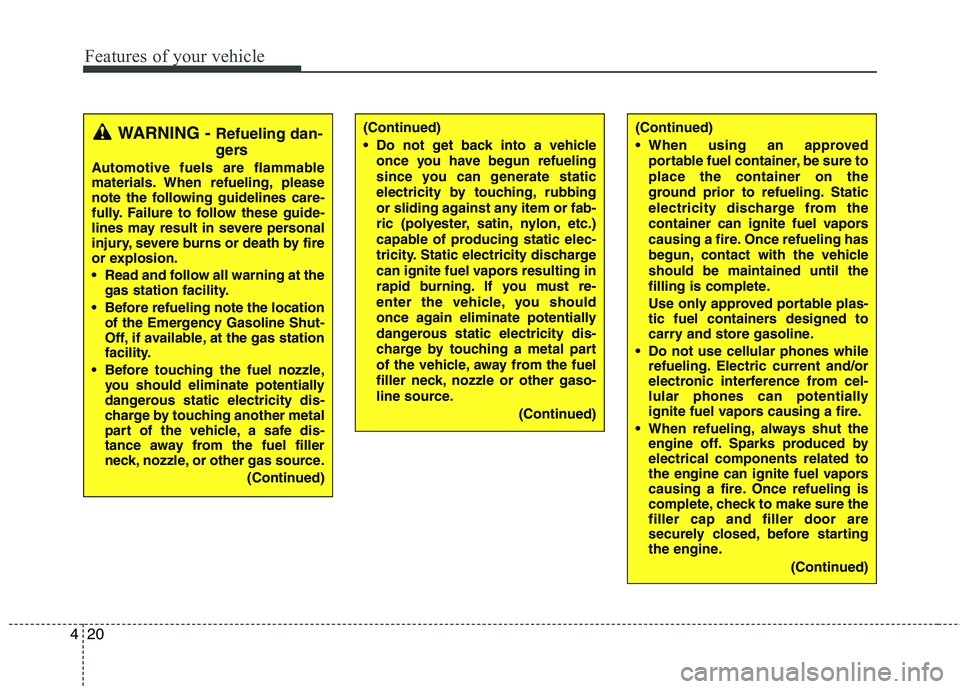
Do not get back into a vehicle
once you have begun refueling
since you can generate static
electricity by touching, rubbing
or sliding against any item or fab-
ric (polyester, satin, nylon, etc.)
capable of producing static elec-
tricity. Static electricity discharge
can ignite fuel vapors resulting in
rapid burning. If you must re-
enter the vehicle, you should
once again eliminate potentially
dangerous static electricity dis-
charge by touching a metal part
of the vehicle, away from the fuel
filler neck, nozzle or other gaso-
line source.
(Continued)WARNING - Refueling dan-
gers
Automotive fuels are flammable
materials. When refueling, please
note the following guidelines care-
fully. Failure to follow these guide-
lines may result in severe personal
injury, severe burns or death by fire
or explosion.
Read and follow all warning at the gas station facility.
Before refueling note the location of the Emergency Gasoline Shut-
Off, if available, at the gas station
facility.
Before touching the fuel nozzle, you should eliminate potentially
dangerous static electricity dis-
charge by touching another metal
part of the vehicle, a safe dis-
tance away from the fuel filler
neck, nozzle, or other gas source.
(Continued)(Continued)
When using an approvedportable fuel container, be sure to place the container on the
ground prior to refueling. Static
electricity discharge from the
container can ignite fuel vapors
causing a fire. Once refueling has
begun, contact with the vehicleshould be maintained until the
filling is complete.
Use only approved portable plas-
tic fuel containers designed to
carry and store gasoline.
Do not use cellular phones while refueling. Electric current and/or
electronic interference from cel-
lular phones can potentially
ignite fuel vapors causing a fire.
When refueling, always shut the engine off. Sparks produced byelectrical components related to
the engine can ignite fuel vapors
causing a fire. Once refueling is
complete, check to make sure thefiller cap and filler door are
securely closed, before starting
the engine.
(Continued)
Page 100 of 354
421
Features of your vehicle
(Continued)
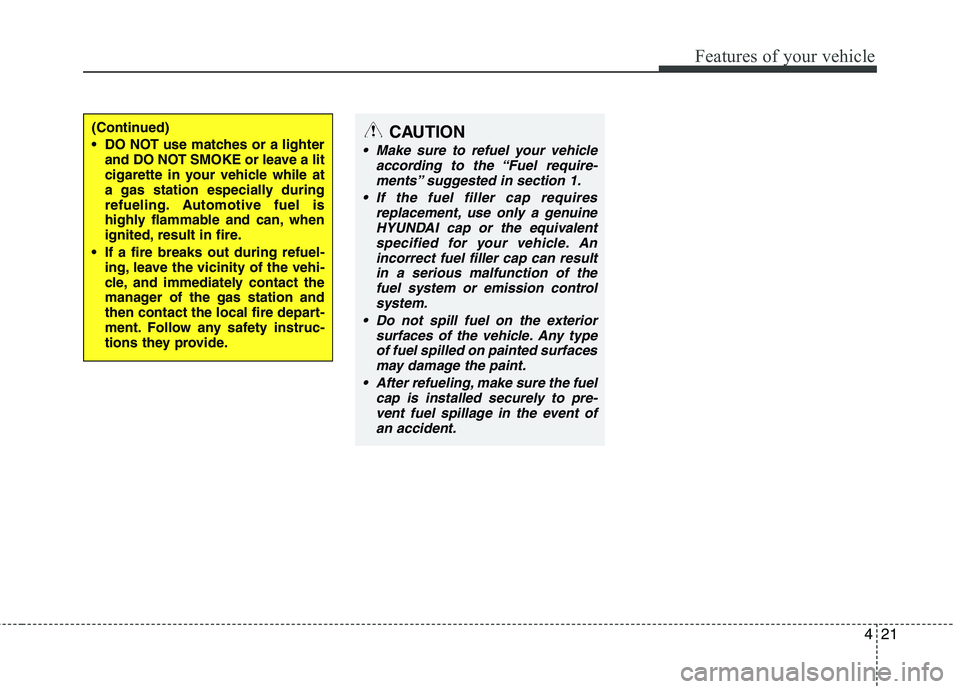
DO NOT use matches or a lighterand DO NOT SMOKE or leave a lit
cigarette in your vehicle while at
a gas station especially during
refueling. Automotive fuel is
highly flammable and can, when
ignited, result in fire.
If a fire breaks out during refuel- ing, leave the vicinity of the vehi-
cle, and immediately contact the
manager of the gas station and
then contact the local fire depart-
ment. Follow any safety instruc-
tions they provide.CAUTION
Make sure to refuel your vehicle
according to the “Fuel require-
ments” suggested in section 1.
If the fuel filler cap requires replacement, use only a genuineHYUNDAI cap or the equivalent
specified for your vehicle. An incorrect fuel filler cap can resultin a serious malfunction of thefuel system or emission control
system.
Do not spill fuel on the exterior surfaces of the vehicle. Any typeof fuel spilled on painted surfacesmay damage the paint.
After refueling, make sure the fuel cap is installed securely to pre-vent fuel spillage in the event ofan accident.