brake light HYUNDAI I20 2009 Owners Manual
[x] Cancel search | Manufacturer: HYUNDAI, Model Year: 2009, Model line: I20, Model: HYUNDAI I20 2009Pages: 207, PDF Size: 2.46 MB
Page 12 of 207
Introduction
6 1
A050000APB
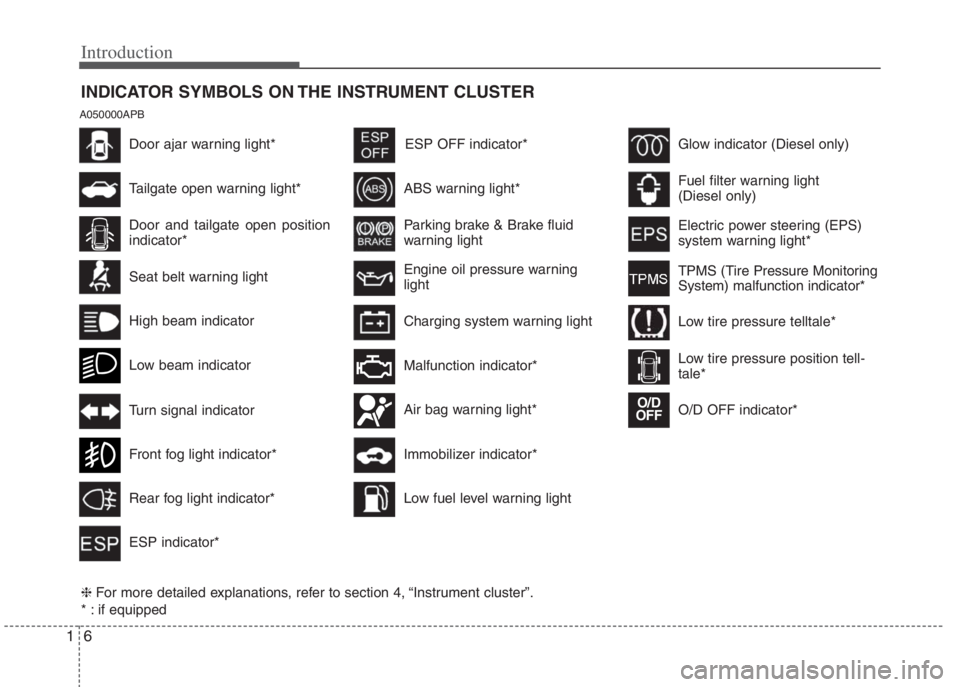
INDICATOR SYMBOLS ON THE INSTRUMENT CLUSTER
Door and tailgate open position
indicator*
Seat belt warning light
High beam indicator
Low beam indicator
Turn signal indicator
Front fog light indicator*
Rear fog light indicator*
ABS warning light*
Parking brake & Brake fluid
warning light
Engine oil pressure warning
light
Charging system warning light
ESP indicator*
ESP OFF indicator*
Malfunction indicator*
Air bag warning light*
Immobilizer indicator*
Low fuel level warning light
Glow indicator (Diesel only)
Fuel filter warning light
(Diesel only)
Electric power steering (EPS)
system warning light*
❈For more detailed explanations, refer to section 4, “Instrument cluster”.
* : if equipped
TPMS (Tire Pressure Monitoring
System) malfunction indicator*
Low tire pressure telltale*
Low tire pressure position tell-
tale*
Door ajar warning light*
Tailgate open warning light*
O/D OFF indicator*
O/D
OFF
Page 15 of 207
23
Your vehicle at a glance
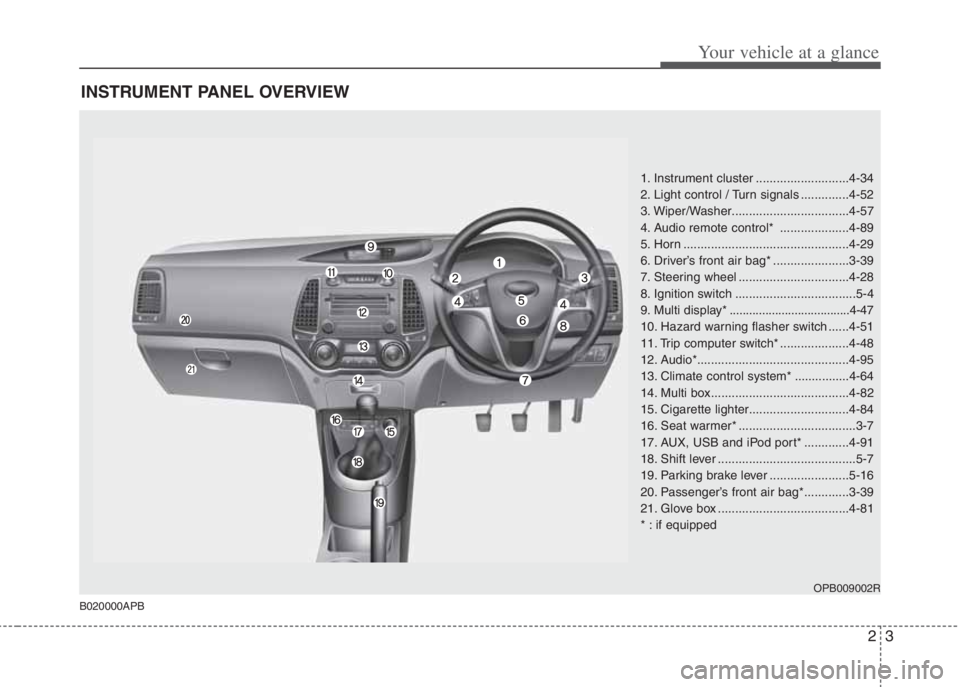
INSTRUMENT PANEL OVERVIEW
1. Instrument cluster ...........................4-34
2. Light control / Turn signals ..............4-52
3. Wiper/Washer..................................4-57
4. Audio remote control* ....................4-89
5. Horn ................................................4-29
6. Driver’s front air bag* ......................3-39
7. Steering wheel ................................4-28
8. Ignition switch ...................................5-4
9. Multi display*.....................................4-47
10. Hazard warning flasher switch ......4-51
11. Trip computer switch* ....................4-48
12. Audio*............................................4-95
13. Climate control system* ................4-64
14. Multi box........................................4-82
15. Cigarette lighter.............................4-84
16. Seat warmer* ..................................3-7
17. AUX, USB and iPod port* .............4-91
18. Shift lever ........................................5-7
19. Parking brake lever .......................5-16
20. Passenger’s front air bag*.............3-39
21. Glove box ......................................4-81
* : if equipped
OPB009002R
B020000APB
Page 110 of 207
Features of your vehicle
38 4
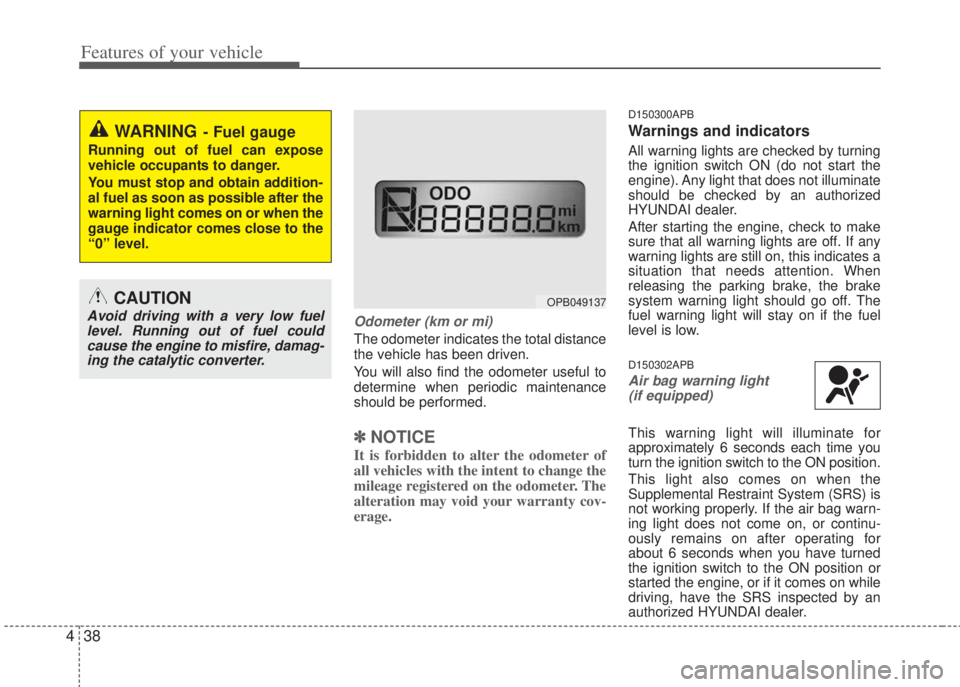
Odometer (km or mi)
The odometer indicates the total distance
the vehicle has been driven.
You will also find the odometer useful to
determine when periodic maintenance
should be performed.
✽NOTICE
It is forbidden to alter the odometer of
all vehicles with the intent to change the
mileage registered on the odometer. The
alteration may void your warranty cov-
erage.
D150300APB
Warnings and indicators
All warning lights are checked by turning
the ignition switch ON (do not start the
engine). Any light that does not illuminate
should be checked by an authorized
HYUNDAI dealer.
After starting the engine, check to make
sure that all warning lights are off. If any
warning lights are still on, this indicates a
situation that needs attention. When
releasing the parking brake, the brake
system warning light should go off. The
fuel warning light will stay on if the fuel
level is low.
D150302APB
Air bag warning light
(if equipped)
This warning light will illuminate for
approximately 6 seconds each time you
turn the ignition switch to the ON position.
This light also comes on when the
Supplemental Restraint System (SRS) is
not working properly. If the air bag warn-
ing light does not come on, or continu-
ously remains on after operating for
about 6 seconds when you have turned
the ignition switch to the ON position or
started the engine, or if it comes on while
driving, have the SRS inspected by an
authorized HYUNDAI dealer.
WARNING- Fuel gauge
Running out of fuel can expose
vehicle occupants to danger.
You must stop and obtain addition-
al fuel as soon as possible after the
warning light comes on or when the
gauge indicator comes close to the
“0” level.
CAUTION
Avoid driving with a very low fuel
level. Running out of fuel could
cause the engine to misfire, damag-
ing the catalytic converter.OPB049137
Page 111 of 207
439
Features of your vehicle
D150303APB
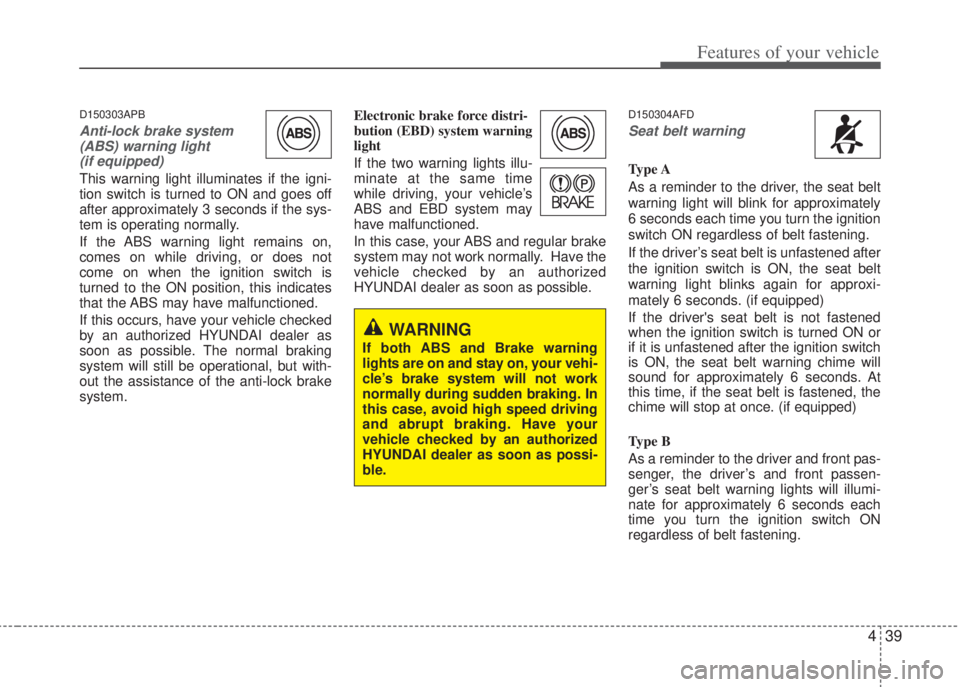
Anti-lock brake system
(ABS) warning light
(if equipped)
This warning light illuminates if the igni-
tion switch is turned to ON and goes off
after approximately 3 seconds if the sys-
tem is operating normally.
If the ABS warning light remains on,
comes on while driving, or does not
come on when the ignition switch is
turned to the ON position, this indicates
that the ABS may have malfunctioned.
If this occurs, have your vehicle checked
by an authorized HYUNDAI dealer as
soon as possible. The normal braking
system will still be operational, but with-
out the assistance of the anti-lock brake
system.Electronic brake force distri-
bution (EBD) system warning
light
If the two warning lights illu-
minate at the same time
while driving, your vehicle’s
ABS and EBD system may
have malfunctioned.
In this case, your ABS and regular brake
system may not work normally. Have the
vehicle checked by an authorized
HYUNDAI dealer as soon as possible.
D150304AFD
Seat belt warning
Type A
As a reminder to the driver, the seat belt
warning light will blink for approximately
6 seconds each time you turn the ignition
switch ON regardless of belt fastening.
If the driver’s seat belt is unfastened after
the ignition switch is ON, the seat belt
warning light blinks again for approxi-
mately 6 seconds. (if equipped)
If the driver's seat belt is not fastened
when the ignition switch is turned ON or
if it is unfastened after the ignition switch
is ON, the seat belt warning chime will
sound for approximately 6 seconds. At
this time, if the seat belt is fastened, the
chime will stop at once. (if equipped)
Ty p e B
As a reminder to the driver and front pas-
senger, the driver’s and front passen-
ger’s seat belt warning lights will illumi-
nate for approximately 6 seconds each
time you turn the ignition switch ON
regardless of belt fastening.
WARNING
If both ABS and Brake warning
lights are on and stay on, your vehi-
cle’s brake system will not work
normally during sudden braking. In
this case, avoid high speed driving
and abrupt braking. Have your
vehicle checked by an authorized
HYUNDAI dealer as soon as possi-
ble.
Page 113 of 207
441
Features of your vehicle
D150308APB
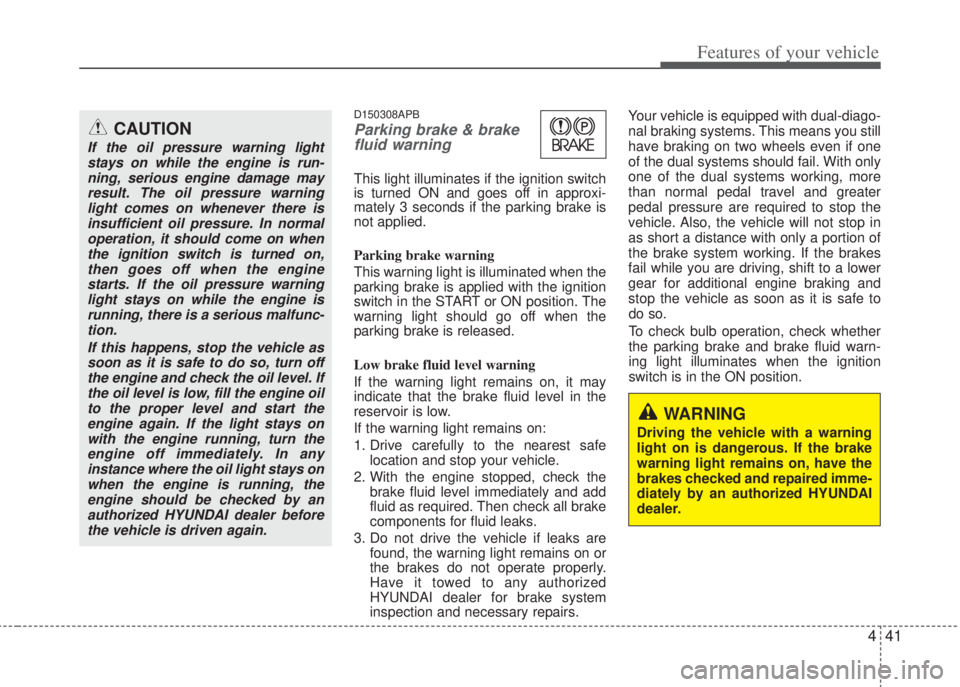
Parking brake & brake
fluid warning
This light illuminates if the ignition switch
is turned ON and goes off in approxi-
mately 3 seconds if the parking brake is
not applied.
Parking brake warning
This warning light is illuminated when the
parking brake is applied with the ignition
switch in the START or ON position. The
warning light should go off when the
parking brake is released.
Low brake fluid level warning
If the warning light remains on, it may
indicate that the brake fluid level in the
reservoir is low.
If the warning light remains on:
1. Drive carefully to the nearest safe
location and stop your vehicle.
2. With the engine stopped, check the
brake fluid level immediately and add
fluid as required. Then check all brake
components for fluid leaks.
3. Do not drive the vehicle if leaks are
found, the warning light remains on or
the brakes do not operate properly.
Have it towed to any authorized
HYUNDAI dealer for brake system
inspection and necessary repairs.Your vehicle is equipped with dual-diago-
nal braking systems. This means you still
have braking on two wheels even if one
of the dual systems should fail. With only
one of the dual systems working, more
than normal pedal travel and greater
pedal pressure are required to stop the
vehicle. Also, the vehicle will not stop in
as short a distance with only a portion of
the brake system working. If the brakes
fail while you are driving, shift to a lower
gear for additional engine braking and
stop the vehicle as soon as it is safe to
do so.
To check bulb operation, check whether
the parking brake and brake fluid warn-
ing light illuminates when the ignition
switch is in the ON position.
CAUTION
If the oil pressure warning light
stays on while the engine is run-
ning, serious engine damage may
result. The oil pressure warning
light comes on whenever there is
insufficient oil pressure. In normal
operation, it should come on when
the ignition switch is turned on,
then goes off when the engine
starts. If the oil pressure warning
light stays on while the engine is
running, there is a serious malfunc-
tion.
If this happens, stop the vehicle as
soon as it is safe to do so, turn off
the engine and check the oil level. If
the oil level is low, fill the engine oil
to the proper level and start the
engine again. If the light stays on
with the engine running, turn the
engine off immediately. In any
instance where the oil light stays on
when the engine is running, the
engine should be checked by an
authorized HYUNDAI dealer before
the vehicle is driven again.
WARNING
Driving the vehicle with a warning
light on is dangerous. If the brake
warning light remains on, have the
brakes checked and repaired imme-
diately by an authorized HYUNDAI
dealer.
Page 114 of 207
Features of your vehicle
42 4
D150331AFD
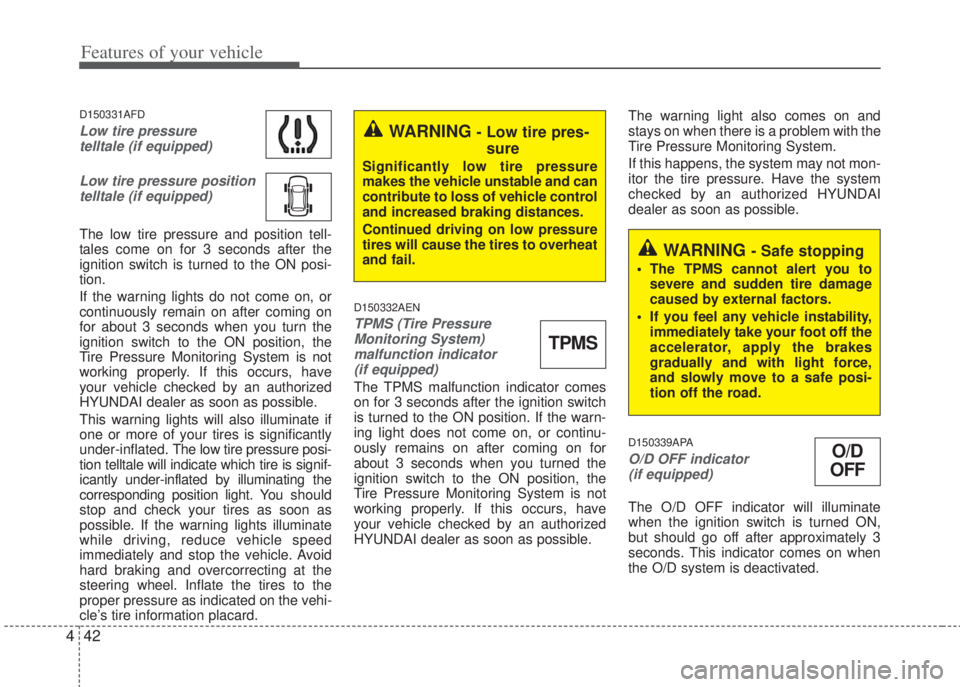
Low tire pressure
telltale (if equipped)
Low tire pressure position
telltale (if equipped)
The low tire pressure and position tell-
tales come on for 3 seconds after the
ignition switch is turned to the ON posi-
tion.
If the warning lights do not come on, or
continuously remain on after coming on
for about 3 seconds when you turn the
ignition switch to the ON position, the
Tire Pressure Monitoring System is not
working properly. If this occurs, have
your vehicle checked by an authorized
HYUNDAI dealer as soon as possible.
This warning lights will also illuminate if
one or more of your tires is significantly
under-inflated. The low tire pressure posi-
tion telltale will indicate which tire is signif-
icantly under-inflated by illuminating the
corresponding position light. You should
stop and check your tires as soon as
possible. If the warning lights illuminate
while driving, reduce vehicle speed
immediately and stop the vehicle. Avoid
hard braking and overcorrecting at the
steering wheel. Inflate the tires to the
proper pressure as indicated on the vehi-
cle’s tire information placard.
D150332AEN
TPMS (Tire Pressure
Monitoring System)
malfunction indicator
(if equipped)
The TPMS malfunction indicator comes
on for 3 seconds after the ignition switch
is turned to the ON position. If the warn-
ing light does not come on, or continu-
ously remains on after coming on for
about 3 seconds when you turned the
ignition switch to the ON position, the
Tire Pressure Monitoring System is not
working properly. If this occurs, have
your vehicle checked by an authorized
HYUNDAI dealer as soon as possible.The warning light also comes on and
stays on when there is a problem with the
Tire Pressure Monitoring System.
If this happens, the system may not mon-
itor the tire pressure. Have the system
checked by an authorized HYUNDAI
dealer as soon as possible.
D150339APA
O/D OFF indicator
(if equipped)
The O/D OFF indicator will illuminate
when the ignition switch is turned ON,
but should go off after approximately 3
seconds. This indicator comes on when
the O/D system is deactivated.
WARNING - Low tire pres-
sure
Significantly low tire pressure
makes the vehicle unstable and can
contribute to loss of vehicle control
and increased braking distances.
Continued driving on low pressure
tires will cause the tires to overheat
and fail.
TPMS
WARNING - Safe stopping
• The TPMS cannot alert you to
severe and sudden tire damage
caused by external factors.
• If you feel any vehicle instability,
immediately take your foot off the
accelerator, apply the brakes
gradually and with light force,
and slowly move to a safe posi-
tion off the road.
O/D
OFF
Page 186 of 207
53
Driving your vehicle
E020100AUN
Before entering vehicle
• Be sure that all windows, outside mir-
ror(s), and outside lights are clean.
• Check the condition of the tires.
• Check under the vehicle for any sign of
leaks.
• Be sure there are no obstacles behind
you if you intend to back up.
E020200AUN
Necessary inspections
Fluid levels, such as engine oil, engine
coolant, brake fluid, and washer fluid
should be checked on a regular basis,
with the exact interval depending on the
fluid. Further details are provided in
Section 7, “Maintenance”.
E020300AHM
Before starting
• Close and lock all doors.
• Position the seat so that all controls
are easily reached.
• Adjust the inside and outside rearview
mirrors.• Be sure that all lights work.
• Check all gauges.
• Check the operation of warning lights
when the ignition switch is turned to
the ON position.
• Release the parking brake and make
sure the brake warning light goes out.
For safe operation, be sure you are famil-
iar with your vehicle and its equipment.
BEFORE DRIVING
WARNING
All passengers must be properly
belted whenever the vehicle is
moving. Refer to “Seat belts” in
section 3 for more information on
their proper use.
WARNING
Always check the surrounding
areas near your vehicle for people,
especially children, before putting
a vehicle into D (Drive) or R
(Reverse).
WARNING
When you intend to park or stop the
vehicle with the engine on, be care-
ful not to depress the accelerator
pedal for a long period of time. It
may overheat the engine or
exhaust system and cause fire.
WARNING- Driving under
the influence of alcohol or
drugs
Drinking and driving is dangerous.
Drunk driving is the number one
contributor to the highway death
toll each year. Even a small amount
of alcohol will affect your reflexes,
perceptions and judgement.
Driving while under the influence of
drugs is as dangerous or more dan-
gerous than driving drunk.
You are much more likely to have a
serious accident if you drink or
take drugs and drive.
If you are drinking or taking drugs,
don’t drive. Do not ride with a driv-
er who has been drinking or taking
drugs. Choose a designated driver
or call a cab.
Page 187 of 207
Driving your vehicle
4 5
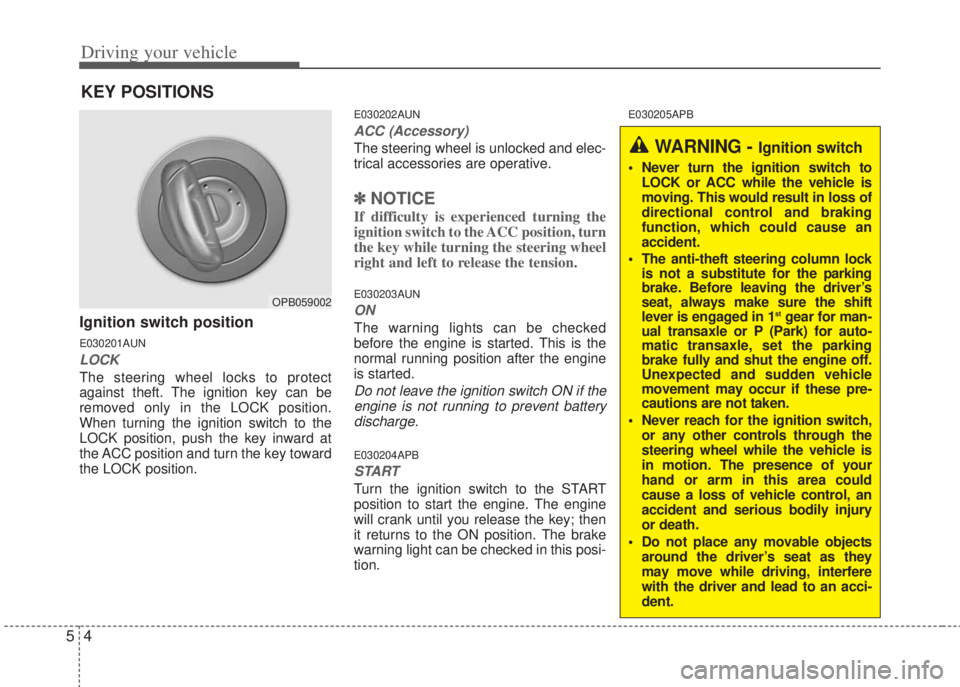
Ignition switch position
E030201AUN
LOCK
The steering wheel locks to protect
against theft. The ignition key can be
removed only in the LOCK position.
When turning the ignition switch to the
LOCK position, push the key inward at
the ACC position and turn the key toward
the LOCK position.
E030202AUN
ACC (Accessory)
The steering wheel is unlocked and elec-
trical accessories are operative.
✽NOTICE
If difficulty is experienced turning the
ignition switch to the ACC position, turn
the key while turning the steering wheel
right and left to release the tension.
E030203AUN
ON
The warning lights can be checked
before the engine is started. This is the
normal running position after the engine
is started.
Do not leave the ignition switch ON if the
engine is not running to prevent battery
discharge.
E030204APB
START
Turn the ignition switch to the START
position to start the engine. The engine
will crank until you release the key; then
it returns to the ON position. The brake
warning light can be checked in this posi-
tion.
E030205APB
KEY POSITIONS
OPB059002
WARNING - Ignition switch
• Never turn the ignition switch to
LOCK or ACC while the vehicle is
moving. This would result in loss of
directional control and braking
function, which could cause an
accident.
• The anti-theft steering column lock
is not a substitute for the parking
brake. Before leaving the driver’s
seat, always make sure the shift
lever is engaged in 1
stgear for man-
ual transaxle or P (Park) for auto-
matic transaxle, set the parking
brake fully and shut the engine off.
Unexpected and sudden vehicle
movement may occur if these pre-
cautions are not taken.
• Never reach for the ignition switch,
or any other controls through the
steering wheel while the vehicle is
in motion. The presence of your
hand or arm in this area could
cause a loss of vehicle control, an
accident and serious bodily injury
or death.
• Do not place any movable objects
around the driver’s seat as they
may move while driving, interfere
with the driver and lead to an acci-
dent.
Page 189 of 207
Driving your vehicle
6 5
E040101APB
Starting the diesel engine
To start the diesel engine when the
engine is cold, it has to be pre-heated
before starting the engine and then has
to be warmed up before starting to drive.
1. Make sure the parking brake is
applied.
2. Depress the clutch pedal fully and shift
the transaxle into Neutral. Keep the
clutch pedal and brake pedal
depressed while turning the ignition
switch to the start position.
3. Turn the ignition switch
to the ON position to pre-
heat the engine. Then
the glow indicator light
will illuminate.
4. If the glow indicator light goes out, turn
the ignition switch to the START posi-
tion and hold it there until the engine
starts (a maximum of 10 seconds),
then release the key.
✽ NOTICE
If the engine does not start within 10
seconds after the preheating is complet-
ed, turn the ignition key once more to
the LOCK position for 10 seconds, and
then to the ON position, in order to pre-
heat again.
✽ NOTICE - Kick down mechanism
If your vehicle is equipped with a kick
down mechanism in an accelerator
pedal,it prevents you from driving at
full throttle unintentionally by making
the driver require increased effort to
depress the accelerator pedal. However
if you depress the pedal more than
approximately 80% the vehicle can be
full throttle and the accelerator pedal
will be easier to depress.This is not a
malfunction but a normal condition.
Starting and stopping the engine for tur-
bocharger intercooler
1. Do not race or accelerate the engine
immediately after starting it.
If the engine is cold, idle it for several
seconds before sufficient lubrication is
ensured in the turbocharger unit.
2. After high speed or extended driving,
requiring a heavy engine load, idle the
engine about 1 minute before turning it
off.
This idle time will allow the tur-
bocharger to cool prior to shutting the
engine off.
CAUTION
Do not turn the engine off immedi-
ately after it has been subjected to
a heavy load. Doing so may cause
severe damage to the engine or
turbo charger unit.W-60
Page 191 of 207
Driving your vehicle
8 5
• During cold weather, shifting may be
difficult until the transaxle lubricant has
warmed up. This is normal and not
harmful to the transaxle.
• If you've come to a complete stop and
it's hard to shift into 1st or R (Reverse),
put the shift lever in N (Neutral) posi-
tion and release the clutch. Depress
the clutch pedal back down, and then
shift into 1st or R (Reverse) gear posi-
tion.E050101APB
Using the clutch
The clutch should be depressed all the
way to the floor before shifting, then
released slowly. The clutch pedal should
always be fully released while driving. Do
not rest your foot on the clutch pedal
while driving. This can cause unneces-
sary wear. Do not partially engage the
clutch to hold the vehicle on an incline.
This causes unnecessary wear. Use the
foot brake or parking brake to hold the
vehicle on an incline. Do not operate the
clutch pedal rapidly and repeatedly.
E050102APB
Downshifting
When you must slow down in heavy traf-
fic or while driving up steep hills, down-
shift before the engine starts to labor.
Downshifting reduces the chance of
stalling and gives better acceleration
when you need to increase your speed
again. When the vehicle is traveling
down steep hills, downshifting helps
maintain safe speed and prolongs brake
life.
CAUTION
• To avoid premature clutch wear
and damage, do not drive with
your foot resting on the clutch
pedal. Also, don’t use the clutch
to hold the vehicle on an uphill
grade, while waiting for a traffic
light, etc.
• Do not use the shift lever as a
handrest during driving, as this
can result in premature wear of
the transaxle shift forks.
WARNING
• Before leaving the driver’s seat,
always set the parking brake fully
and shut the engine off. Then
make sure the transaxle is shifted
into 1st gear when the vehicle is
parked on a level or uphill grade,
and shifted into R (Reverse) on a
downhill grade. Unexpected and
sudden vehicle movement can
occur if these precautions are not
followed in the order identified.
• If your vehicle has a manual
transaxle not equipped with a
ignition lock switch, it may move
and cause a serious accident
when starting the engine without
depressing the clutch pedal while
the parking brake is released and
the shift lever not in the N
(Neutral) position.