sensor HYUNDAI I30 2020 Owner's Manual
[x] Cancel search | Manufacturer: HYUNDAI, Model Year: 2020, Model line: I30, Model: HYUNDAI I30 2020Pages: 659, PDF Size: 17.14 MB
Page 125 of 659
3-123
Convenient features of your vehicle
3
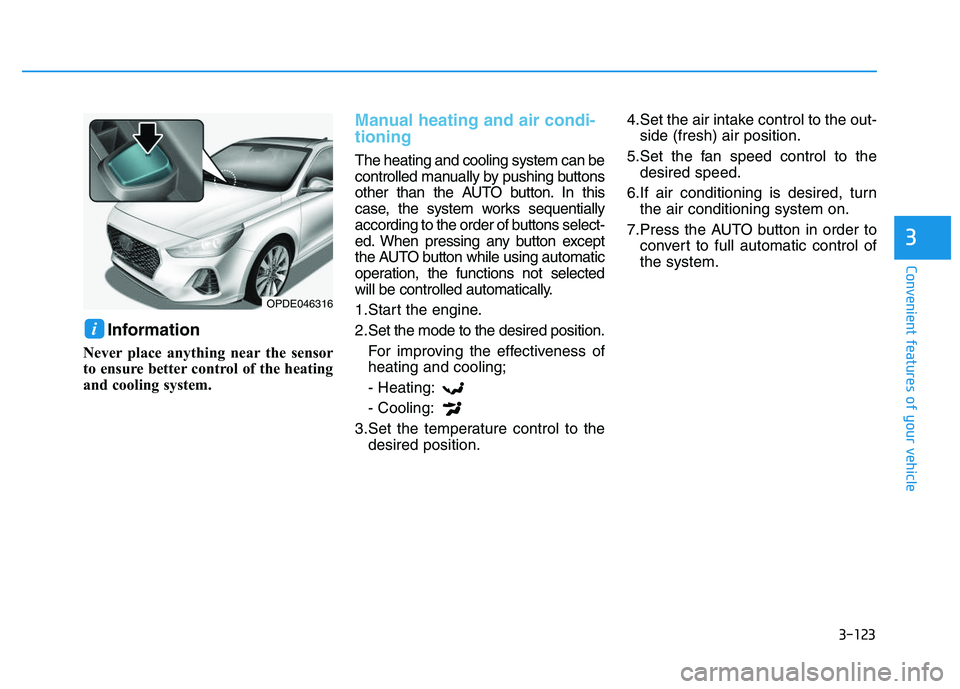
Information
Never place anything near the sensor
to ensure better control of the heating
and cooling system.
Manual heating and air condi-
tioning
The heating and cooling system can be
controlled manually by pushing buttons
other than the AUTO button. In this
case, the system works sequentially
according to the order of buttons select-
ed. When pressing any button except
the AUTO button while using automatic
operation, the functions not selected
will be controlled automatically.
1.Start the engine.
2.Set the mode to the desired position.For improving the effectiveness of
heating and cooling;
- Heating:
- Cooling:
3.Set the temperature control to the desired position. 4.Set the air intake control to the out-
side (fresh) air position.
5.Set the fan speed control to the desired speed.
6.If air conditioning is desired, turn the air conditioning system on.
7.Press the AUTO button in order to convert to full automatic control of
the system.
i
OPDE046316
Page 138 of 659
3-136
Convenient features of your vehicle
Auto defogging system
(only for automatic climate
control system, if equipped)
Auto defogging reduces the possibil-
ity of fogging up the inside of the
windshield by automatically sensing
the moisture of inside the windshield.
The auto defogging system operates
when the heater or air conditioning is
on.
Information
The auto defogging system may not
operate normally, when the outside
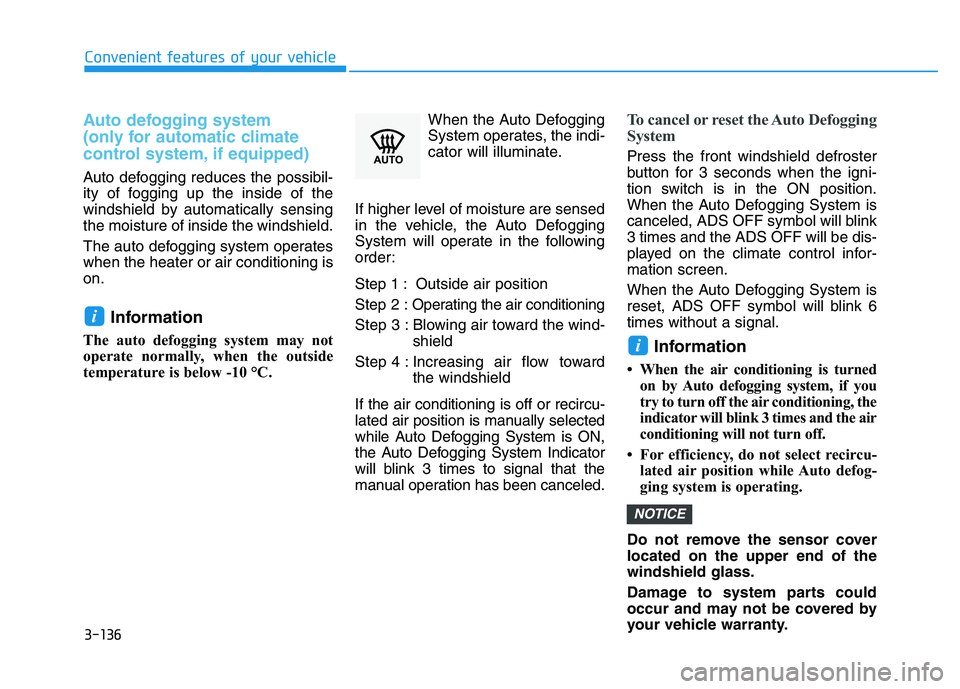
temperature is below -10 °C.When the Auto Defogging
System operates, the indi-
cator will illuminate.
If higher level of moisture are sensed
in the vehicle, the Auto Defogging
System will operate in the following
order:
Step 1 : Outside air position
Step 2 : Operating the air conditioning
Step 3 : Blowing air toward the wind- shield
Step 4 : Increasing air flow toward the windshield
If the air conditioning is off or recircu-
lated air position is manually selected
while Auto Defogging System is ON,
the Auto Defogging System Indicator
will blink 3 times to signal that the
manual operation has been canceled.
To cancel or reset the Auto Defogging
System
Press the front windshield defroster
button for 3 seconds when the igni-
tion switch is in the ON position.
When the Auto Defogging System is
canceled, ADS OFF symbol will blink
3 times and the ADS OFF will be dis-
played on the climate control infor-
mation screen.
When the Auto Defogging System is
reset, ADS OFF symbol will blink 6
times without a signal.
Information
• When the air conditioning is turned on by Auto defogging system, if you
try to turn off the air conditioning, the
indicator will blink 3 times and the air
conditioning will not turn off.
• For efficiency, do not select recircu- lated air position while Auto defog-
ging system is operating.
Do not remove the sensor cover
located on the upper end of the
windshield glass.
Damage to system parts could
occur and may not be covered by
your vehicle warranty.
NOTICE
i
i
Page 173 of 659
3-23
Convenient features of your vehicle
3
Electric Chromic Mirror (ECM) (if equipped)
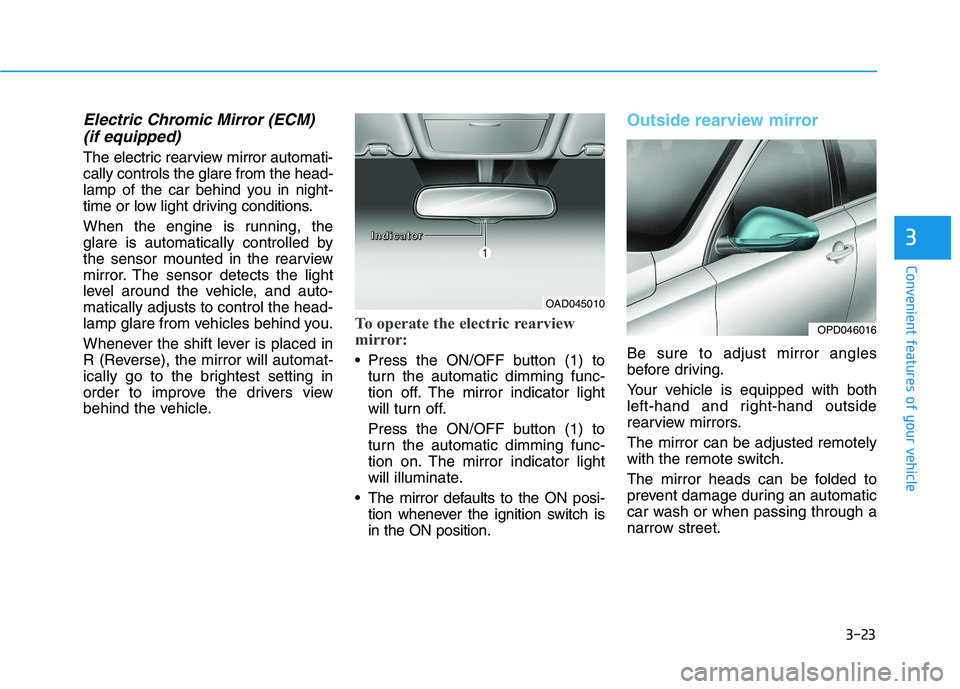
The electric rearview mirror automati-
cally controls the glare from the head-
lamp of the car behind you in night-
time or low light driving conditions.
When the engine is running, the
glare is automatically controlled by
the sensor mounted in the rearview
mirror. The sensor detects the light
level around the vehicle, and auto-
matically adjusts to control the head-
lamp glare from vehicles behind you.
Whenever the shift lever is placed in
R (Reverse), the mirror will automat-
ically go to the brightest setting in
order to improve the drivers view
behind the vehicle.
To operate the electric rearview
mirror:
Press the ON/OFF button (1) to
turn the automatic dimming func-
tion off. The mirror indicator light
will turn off.
Press the ON/OFF button (1) to
turn the automatic dimming func-
tion on. The mirror indicator light
will illuminate.
The mirror defaults to the ON posi- tion whenever the ignition switch is
in the ON position.
Outside rearview mirror
Be sure to adjust mirror angles
before driving.
Your vehicle is equipped with both
left-hand and right-hand outside
rearview mirrors.
The mirror can be adjusted remotely
with the remote switch.
The mirror heads can be folded to
prevent damage during an automatic
car wash or when passing through a
narrow street.
OAD045010
OPD046016
I
I
I
I
n
n
n
n
d
d
d
d
i
i
i
i
c
c
c
c
a
a
a
a
t
t
t
t
o
o
o
o
r
r
r
r
Page 272 of 659
![HYUNDAI I30 2020 Owners Manual 4-40
Multimedia System
Setup
Access Display, Sound, Date/Time,
Bluetooth*, System and Display Off
settings.
Press the[SETUP/CLOCK] button
on the audio system.
* if equipped
Display
Press the [SETUP/C HYUNDAI I30 2020 Owners Manual 4-40
Multimedia System
Setup
Access Display, Sound, Date/Time,
Bluetooth*, System and Display Off
settings.
Press the[SETUP/CLOCK] button
on the audio system.
* if equipped
Display
Press the [SETUP/C](/img/35/56147/w960_56147-271.png)
4-40
Multimedia System
Setup
Access Display, Sound, Date/Time,
Bluetooth*, System and Display Off
settings.
Press the[SETUP/CLOCK] button
on the audio system.
* if equipped
Display
Press the [SETUP/CLOCK] button
on the audio system ➟Select
[Display].
Dimming mode: Audio screen brightness can be adjusted to the
time of day.
Brightness: The brightness of the audio screen can be changed.
Screensaver: Set the information displayed when the audio system
is switched off or the screen is
turned off.
Sound
Press the [SETUP/CLOCK] button
on the audio system ➟Select
[Sound].
Position: Sound balance and pan- ning can be adjusted.
Equaliser: Sound tone color can be adjusted.
Rear parking sensors prioritised: Automatically lower audio volume
while reversing.
Speed dependent volume control: Automatically adjust volume based
on vehicle speed.
Date/Time
Press the [SETUP/CLOCK] button
on the audio system ➟Select
[Date/Time].
Set time: Set the time displayed on the audio screen.
Time format: Choose betw een 12-
hour and 24-hour time formats.
Set date: Set the date displayed on the audio screen.
Bluetooth (if equipped)
Press the [SETUP/CLOCK] button
➟ Select [Bluetooth].
Connections: Control pairing, dele- tion, connection and disconnection
of Bluetooth
®devices.
Auto connection priority: Set the connection priority of Bluetooth
®
devices when the vehicle is started.
Update contacts: Contacts can be
downloaded from connected
Bluetooth
®devices.
Bluetooth voice guidance: Play or mute voice prompts for Bluetooth
®
device pairing, connection and
errors.
Page 302 of 659
![HYUNDAI I30 2020 Owners Manual 4-70
Multimedia System
Setup
Access Display, Sound, Date/Time,
Bluetooth, System, Screensaver and
Display Off settings.
Press the[SETUP]button on the
audio system.
Display
Press the [SETUP]button on HYUNDAI I30 2020 Owners Manual 4-70
Multimedia System
Setup
Access Display, Sound, Date/Time,
Bluetooth, System, Screensaver and
Display Off settings.
Press the[SETUP]button on the
audio system.
Display
Press the [SETUP]button on](/img/35/56147/w960_56147-301.png)
4-70
Multimedia System
Setup
Access Display, Sound, Date/Time,
Bluetooth, System, Screensaver and
Display Off settings.
Press the[SETUP]button on the
audio system.
Display
Press the [SETUP]button on the
audio system ➟Select [Display].
Dimming mode: Audio screen bright- ness can be adjusted to the time of
day.
Brightness: The brightness of the audio screen can be changed.
Text scroll: If text is too long to be displayed on the screen, enable the
text scroll function. (if equipped)
Sound
Press the [SETUP]button on the
audio system ➟Select [Sound].
Position: Sound balance and pan- ning can be adjusted.
Equaliser: Sound tone color can be adjusted.
Rear parking sensors prioritised: Automatically lower audio volume
while reversing.
Speed dependent volume control: Automatically adjust volume based
on vehicle speed.
Beep: Select whether to play a beep sound when the screen is touched.
Date/Time
Press the [SETUP]button on the
audio system ➟Select [Date/Time].
Set time: Set the time displayed on the audio screen.
Time format: Choose between 12- hour and 24-hour time formats.
Set date: Set the date displayed on the audio screen.
Bluetooth
Press the [SETUP]button on the
audio system ➟Select [Bluetooth].
Connections: Control pairing, dele- tion, connection and disconnection
of Bluetooth
®devices.
Auto connection priority: Set the connection priority of Bluetooth
®
devices when the vehicle is started.
Update contacts: Contacts can be downloaded from connected
Bluetooth
®devices.
Bluetooth voice guidance: Play or mute voice prompts for Bluetooth
®
device pairing, connection and
errors.
Page 305 of 659
Driving your vehicle
Before driving.........................................................5-5
Before entering the vehicle ...........................................5-5
Before starting...................................................................5-5
Ignition switch ........................................................5-7
Key ignition switch ............................................................5-7
Engine Start/Stop button ..............................................5-11
Manual transmission............................................5-20
Manual transmission operation ...................................5-20
Good driving practices ...................................................5-22
Automatic transmission .......................................5-24
Automatic transmission operation ..............................5-24
Parking ...............................................................................5-29
Good driving practices ...................................................5-29
Dual clutch transmission .....................................5-31
Dual clutch transmission operation ............................5-31
Parking ...............................................................................5-39
Good driving practices ...................................................5-39
Braking system.....................................................5-41
Power brakes ...................................................................5-41
Disc brakes wear indicator ...........................................5-42
Parking brake (Hand type) ...........................................5-42
Electronic Parking Brake (EPB)...................................5-44
AUTO HOLD ......................................................................5-49
Anti-lock Brake System (ABS) ....................................5-53Electronic Stability Control (ESC)................................5-55
Vehicle Stability Management......................................5-58
Hill-Start Assist Control (HAC) ....................................5-60
Emergency Stop Signal (ESS) ......................................5-60
Good braking practices..................................................5-61
ISG (Idle Stop and Go) system ...........................5-62
To activate the ISG system ...........................................5-62
To deactivate the ISG system ......................................5-66
ISG system malfunction .................................................5-66
The battery sensor deactivation .................................5-67
Drive mode integrated control system .............5-68
Blind Spot Detection System (BSD) ..................5-70
BSD (Blind Spot Detection) /
LCA (Lane Change Assist) .............................................5-71
RCTA (Rear Cross Traffic Alert) ..................................5-74
Limitations of the system .............................................5-77
Autonomous Emergency Braking (AEB)
- Sensor fusion type ...........................................5-78
System setting and activation......................................5-78
AEB warning message and system control ..............5-80
AEB sensor .......................................................................5-82
System malfunction ........................................................5-84
Limitations of the system .............................................5-85
5
Page 306 of 659
5
Autonomous Emergency Braking (AEB)
- Camera type ......................................................5-90
System setting and activation......................................5-90
AEB warning message and system control ..............5-92
AEB sensor .......................................................................5-94
System malfunction ........................................................5-95
Limitations of the system .............................................5-97
Speed Limit Information Function (SLIF) .......5-101
System setting and activation ...................................5-102
Display .............................................................................5-102
Limitations of the system ...........................................5-104
Lane Keeping Assist System (LKAS) ...............5-106
LKAS operation..............................................................5-107
Warning light and message ........................................5-111
LKAS function change .................................................5-112
Limitations of the System...........................................5-113
Lane Departure Warning System (LDWS) ......5-114
LDWS operation ............................................................5-115
Warning light and message ........................................5-116
Limitations of the system ...........................................5-116
Driver Attention Alert System (DAA)..............5-118
System setting and activation ...................................5-118
Resetting the system ...................................................5-119
System standby .............................................................5-120
System malfunction......................................................5-120
Speed limit control system ...............................5-122
Speed Limit Control operation ...................................5-122
Cruise control .....................................................5-124
Cruise Control operation .............................................5-124
Advanced smart cruise control system ..........5-130
Smart Cruise Control speed........................................5-132
Smart Cruise Control Vehicle-to-Vehicle
Distance ...........................................................................5-136 Sensor to detect distance to the vehicle ahead ...5-139
To adjust the sensitivity of
Smart Cruise Control ....................................................5-141 To convert to Cruise Control mode ..........................5-141
Limitations of the system ...........................................5-142
Page 370 of 659
5-66
To deactivate the ISG system
Press the ISG OFF button to deac-tivate the ISG system. Then, the
ISG OFF button indicator illumi-
nates, and the message "Auto
Stop System Off" appears on the
LCD display.
Press the ISG OFF button again to reactivate the ISG system. Then,
the ISG OFF button indicator turns
OFF.
ISG system malfunction
The ISG system may not operate:
When there is a malfunction with the
ISG sensors or the ISG system.
The followings occur, when there is
a malfunction with the ISG system:
Page 371 of 659
5-67
Driving your vehicle
5
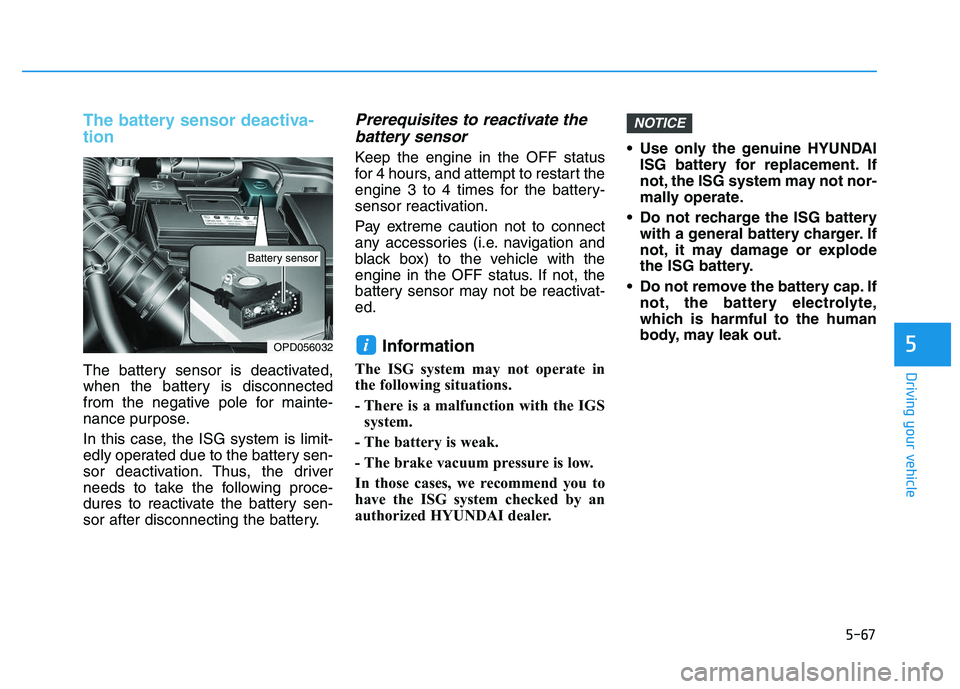
The battery sensor deactiva-
tion
The battery sensor is deactivated,
when the battery is disconnected
from the negative pole for mainte-
nance purpose.
In this case, the ISG system is limit-
edly operated due to the battery sen-
sor deactivation. Thus, the driver
needs to take the following proce-
dures to reactivate the battery sen-
sor after disconnecting the battery.
Prerequisites to reactivate thebattery sensor
Keep the engine in the OFF status
for 4 hours, and attempt to restart the
engine 3 to 4 times for the battery-
sensor reactivation.
Pay extreme caution not to connect
any accessories (i.e. navigation and
black box) to the vehicle with the
engine in the OFF status. If not, the
battery sensor may not be reactivat-
ed.
Information
The ISG system may not operate in
the following situations.
- There is a malfunction with the IGS
system.
- The battery is weak.
- The brake vacuum pressure is low.
In those cases, we recommend you to
have the ISG system checked by an
authorized HYUNDAI dealer. Use only the genuine HYUNDAI
ISG battery for replacement. If
not, the ISG system may not nor-
mally operate.
Do not recharge the ISG battery with a general battery charger. If
not, it may damage or explode
the ISG battery.
Do not remove the battery cap. If not, the battery electrolyte,
which is harmful to the human
body, may leak out.
NOTICE
iOPD056032
Battery sensor
Page 374 of 659
5-70
Driving your vehicle
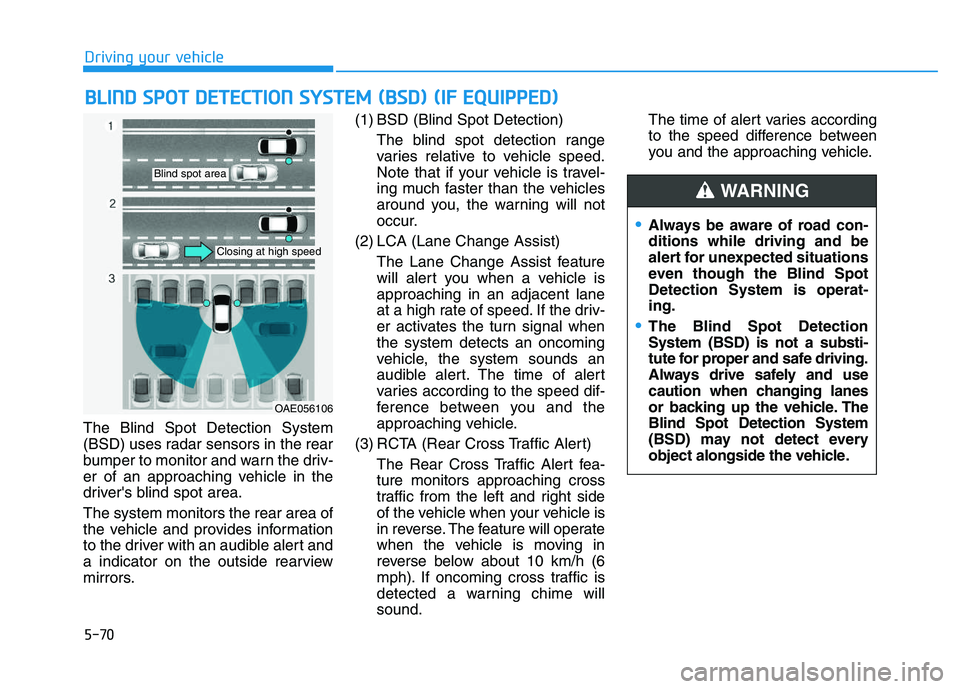
The Blind Spot Detection System
(BSD) uses radar sensors in the rear
bumper to monitor and warn the driv-
er of an approaching vehicle in the
driver's blind spot area.
The system monitors the rear area of
the vehicle and provides information
to the driver with an audible alert and
a indicator on the outside rearview
mirrors. (1) BSD (Blind Spot Detection)
The blind spot detection range
varies relative to vehicle speed.
Note that if your vehicle is travel-
ing much faster than the vehicles
around you, the warning will not
occur.
(2) LCA (Lane Change Assist) The Lane Change Assist feature
will alert you when a vehicle is
approaching in an adjacent lane
at a high rate of speed. If the driv-
er activates the turn signal when
the system detects an oncoming
vehicle, the system sounds an
audible alert. The time of alert
varies according to the speed dif-
ference between you and the
approaching vehicle.
(3) RCTA (Rear Cross Traffic Alert) The Rear Cross Traffic Alert fea-
ture monitors approaching cross
traffic from the left and right side
of the vehicle when your vehicle is
in reverse. The feature will operate
when the vehicle is moving in
reverse below about 10 km/h (6
mph). If oncoming cross traffic is
detected a warning chime will
sound. The time of alert varies according
to the speed difference between
you and the approaching vehicle.
B
B L
L I
I N
N D
D
S
S P
P O
O T
T
D
D E
E T
T E
E C
C T
T I
I O
O N
N
S
S Y
Y S
S T
T E
E M
M
(
( B
B S
S D
D )
)
(
( I
I F
F
E
E Q
Q U
U I
I P
P P
P E
E D
D )
)
OAE056106
Blind spot area
Closing at high speed
Always be aware of road con-
ditions while driving and be
alert for unexpected situations
even though the Blind Spot
Detection System is operat-
ing.
The Blind Spot Detection
System (BSD) is not a substi-
tute for proper and safe driving.
Always drive safely and use
caution when changing lanes
or backing up the vehicle. The
Blind Spot Detection System
(BSD) may not detect every
object alongside the vehicle.
WARNING