lights HYUNDAI I30 2022 Owners Manual
[x] Cancel search | Manufacturer: HYUNDAI, Model Year: 2022, Model line: I30, Model: HYUNDAI I30 2022Pages: 659, PDF Size: 17.14 MB
Page 44 of 659
2-24
Safety system of your vehicle
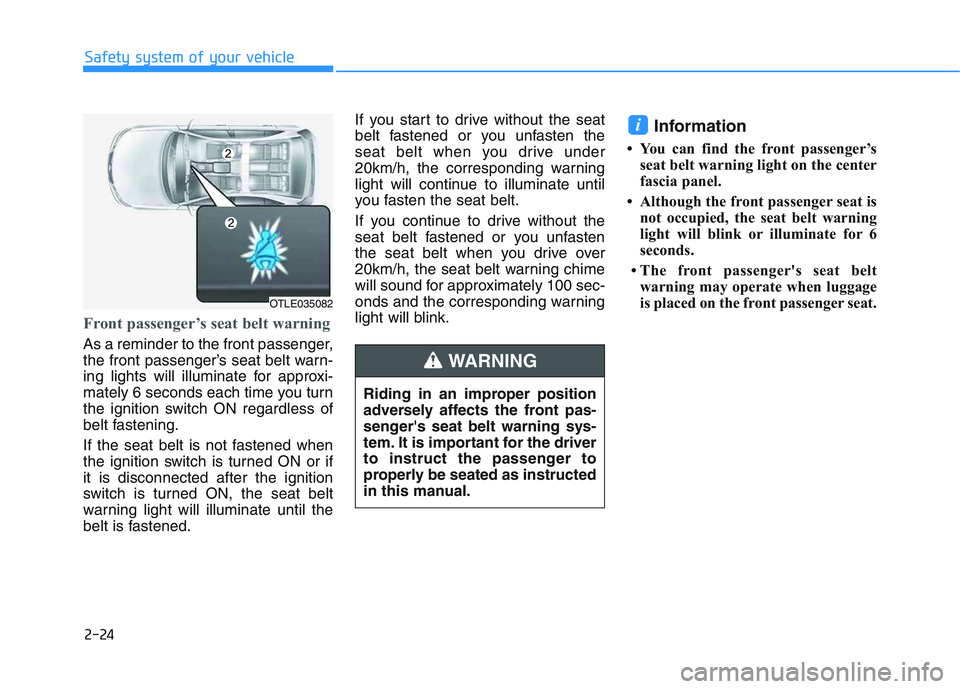
Front passenger’s seat belt warning
As a reminder to the front passenger,
the front passenger’s seat belt warn-
ing lights will illuminate for approxi-
mately 6 seconds each time you turn
the ignition switch ON regardless of
belt fastening.
If the seat belt is not fastened when
the ignition switch is turned ON or if
it is disconnected after the ignition
switch is turned ON, the seat belt
warning light will illuminate until the
belt is fastened.If you start to drive without the seat
belt fastened or you unfasten the
seat belt when you drive under
20km/h, the corresponding warning
light will continue to illuminate until
you fasten the seat belt.
If you continue to drive without the
seat belt fastened or you unfasten
the seat belt when you drive over
20km/h, the seat belt warning chime
will sound for approximately 100 sec-
onds and the corresponding warning
light will blink.
Information
• You can find the front passenger’s
seat belt warning light on the center
fascia panel.
• Although the front passenger seat is not occupied, the seat belt warning
light will blink or illuminate for 6
seconds.
• The front passenger's seat belt warning may operate when luggage
is placed on the front passenger seat.
i
Riding in an improper position
adversely affects the front pas-
senger's seat belt warning sys-
tem. It is important for the driver
to instruct the passenger to
properly be seated as instructed
in this manual.
WARNING
OTLE035082
Page 45 of 659
2-25
Safety system of your vehicle
2
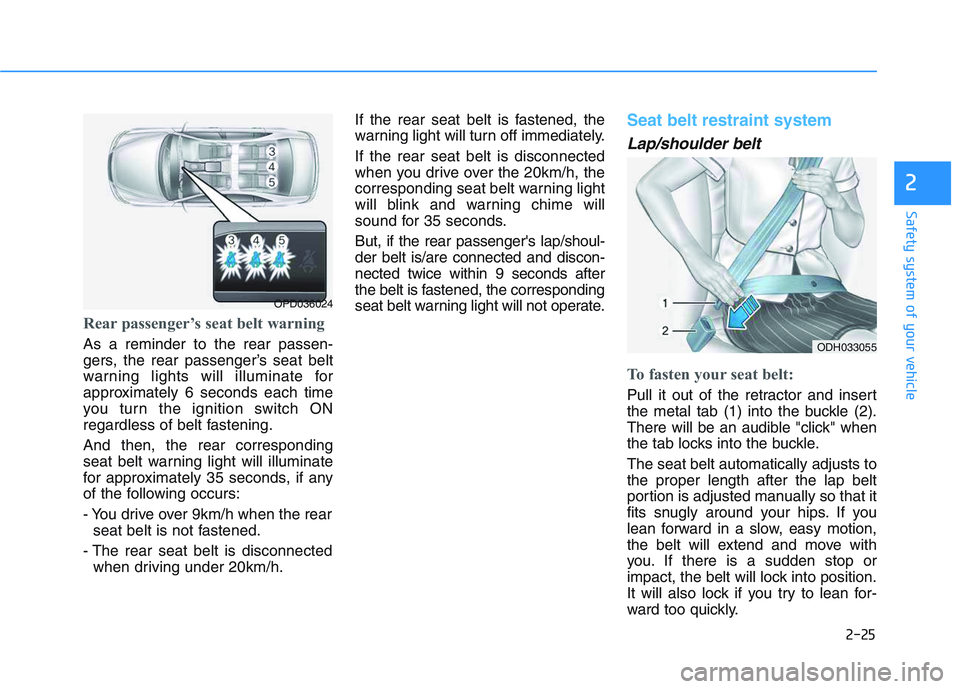
Rear passenger’s seat belt warning
As a reminder to the rear passen-
gers, the rear passenger’s seat belt
warning lights will illuminate for
approximately 6 seconds each time
you turn the ignition switch ON
regardless of belt fastening.
And then, the rear corresponding
seat belt warning light will illuminate
for approximately 35 seconds, if any
of the following occurs:
- You drive over 9km/h when the rearseat belt is not fastened.
- The rear seat belt is disconnected when driving under 20km/h. If the rear seat belt is fastened, the
warning light will turn off immediately.
If the rear seat belt is disconnected
when you drive over the 20km/h, the
corresponding seat belt warning light
will blink and warning chime will
sound for 35 seconds.
But, if the rear passenger's lap/shoul-
der belt is/are connected and discon-
nected twice within 9 seconds after
the belt is fastened, the corresponding
seat belt warning light will not operate.
Seat belt restraint system
Lap/shoulder belt
To fasten your seat belt:
Pull it out of the retractor and insert
the metal tab (1) into the buckle (2).
There will be an audible "click" when
the tab locks into the buckle.
The seat belt automatically adjusts to
the proper length after the lap belt
portion is adjusted manually so that it
fits snugly around your hips. If you
lean forward in a slow, easy motion,
the belt will extend and move with
you. If there is a sudden stop or
impact, the belt will lock into position.
It will also lock if you try to lean for-
ward too quickly.
OPD036024
ODH033055
Page 84 of 659
Convenient features of your vehicle
Accessing your vehicle .........................................3-3
Remote key .........................................................................3-3
Smart key ............................................................................3-6
Immobilizer system .........................................................3-10
DOOR LOCKS ........................................................3-11
Operating door locks from outside the vehicle ......3-11
Operating door locks from inside the vehicle .........3-12
Auto door lock/unlock features..................................3-14
Child-protector rear door locks ..................................3-15
Theft-alarm system.............................................3-16
Driver position memory system .........................3-17
Storing memory positions .............................................3-17
Recalling memory positions..........................................3-17
Easy access function .....................................................3-18
Steering wheel......................................................3-19
Electric power steering (EPS) ......................................3-19
Tilt steering / Telescope steering...............................3-20
Heated steering wheel ...................................................3-21
Horn ....................................................................................3-21
Mirrors ...................................................................3-22
Inside rearview mirror....................................................3-22
Outside rearview mirror ................................................3-23
Reverse parking aid function.......................................3-26
Windows ................................................................3-27
Power windows................................................................3-27
Manual windows ..............................................................3-31
Panorama sunroof ...............................................3-32
Sunshade ...........................................................................3-33
Sliding the sunroof .........................................................3-33
Tilting the sunroof ..........................................................3-34
Closing the sunroof ........................................................3-34
Resetting the sunroof ....................................................3-35
Sunroof open warning ...................................................3-36
Exterior features .................................................3-37
Hood ...................................................................................3-37
Tailgate...............................................................................3-38
Fuel filler door .................................................................3-40
Instrument cluster................................................3-43
Instrument cluster control ............................................3-44
Gauges and meters .........................................................3-45
Transmission shift indicator .........................................3-48
Manual transmission shift indicator ...........................3-48
Warning and indicator lights ........................................3-51
LCD display messages ....................................................3-65
LCD Display ...........................................................3-71
LCD display control.........................................................3-71
LCD modes ........................................................................3-72
Trip computer .......................................................3-79
Trip modes ........................................................................3-79
Light .......................................................................3-83
Exterior lights ..................................................................3-83
Static bending light .........................................................3-92
Welcome system..............................................................3-92
3
Page 85 of 659
3-83
Convenient features of your vehicle
3
Exterior lights
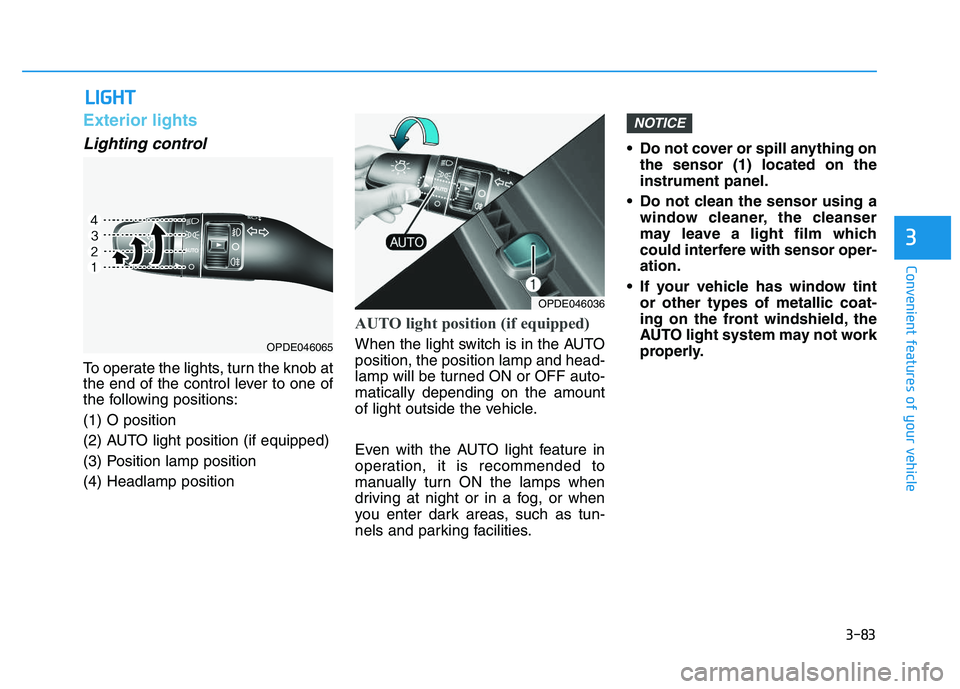
Lighting control
To operate the lights, turn the knob at
the end of the control lever to one of
the following positions:
(1) O position
(2) AUTO light position (if equipped)
(3) Position lamp position
(4) Headlamp position
AUTO light position (if equipped)
When the light switch is in the AUTO
position, the position lamp and head-
lamp will be turned ON or OFF auto-
matically depending on the amount
of light outside the vehicle.
Even with the AUTO light feature in
operation, it is recommended to
manually turn ON the lamps when
driving at night or in a fog, or when
you enter dark areas, such as tun-
nels and parking facilities.• Do not cover or spill anything on
the sensor (1) located on the
instrument panel.
Do not clean the sensor using a window cleaner, the cleanser
may leave a light film which
could interfere with sensor oper-
ation.
If your vehicle has window tint or other types of metallic coat-
ing on the front windshield, the
AUTO light system may not work
properly.
NOTICE
L
L I
I G
G H
H T
T
OPDE046036
OPDE046065
Page 88 of 659
3-86
The high beam switches to low beam
in the below conditions.
- When the Smart High Beam is off.
- When the light switch is not in theAUTO position.
- When the headlamp is detected from the on-coming vehicle.
- When the tail lamp is detected from the front vehicle.
- When the surrounding is bright enough high beams are not needed.
- When streetlights or other lights are detected.
- When vehicle speed is below 35km/h (15mph).Warning light and message
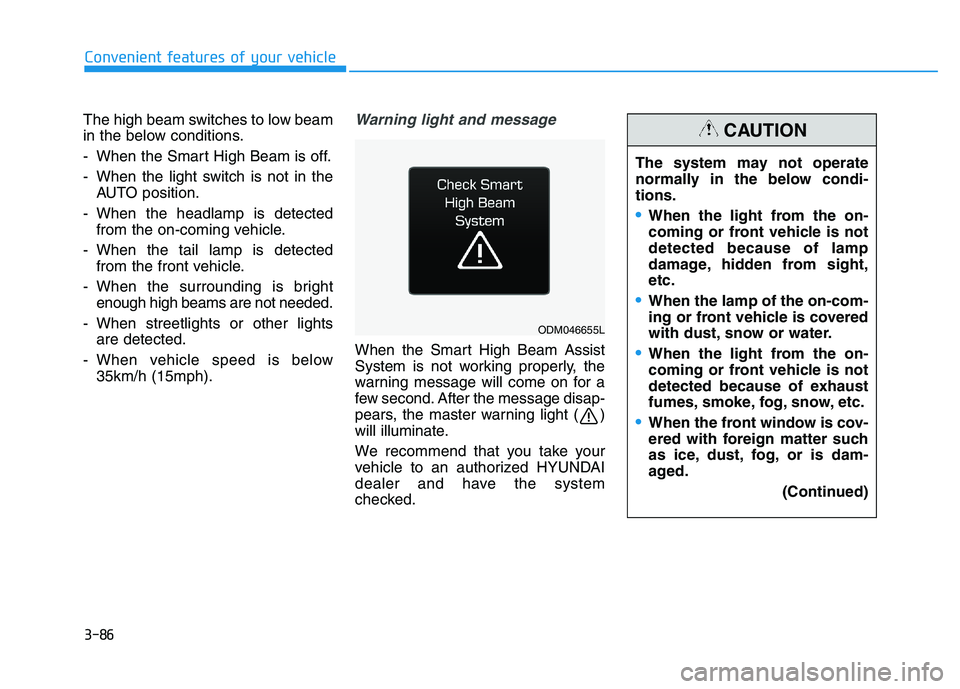
When the Smart High Beam Assist
System is not working properly, the
warning message will come on for a
few second. After the message disap-
pears, the master warning light ( )
will illuminate.
We recommend that you take your
vehicle to an authorized HYUNDAI
dealer and have the system
checked.
Convenient features of your vehicle
ODM046655L
The system may not operate
normally in the below condi-
tions.
When the light from the on-
coming or front vehicle is not
detected because of lamp
damage, hidden from sight,
etc.
When the lamp of the on-com-
ing or front vehicle is covered
with dust, snow or water.
When the light from the on-
coming or front vehicle is not
detected because of exhaust
fumes, smoke, fog, snow, etc.
When the front window is cov-
ered with foreign matter such
as ice, dust, fog, or is dam-
aged.
(Continued)
CAUTION
Page 93 of 659
3-91
Convenient features of your vehicle
3
Daytime running light (DRL) (if equipped)
The Daytime Running Lights (DRL)
can make it easier for others to see
the front of your vehicle during the
day, especially after dawn and before
sunset.
The DRL system will turn the dedi-
cated lamp OFF when:
1. The headlights or front fog lights
are in the ON position.
2. The position light switch is in the ON position.
3. The engine is turned off.
Headlight leveling device (if equipped)
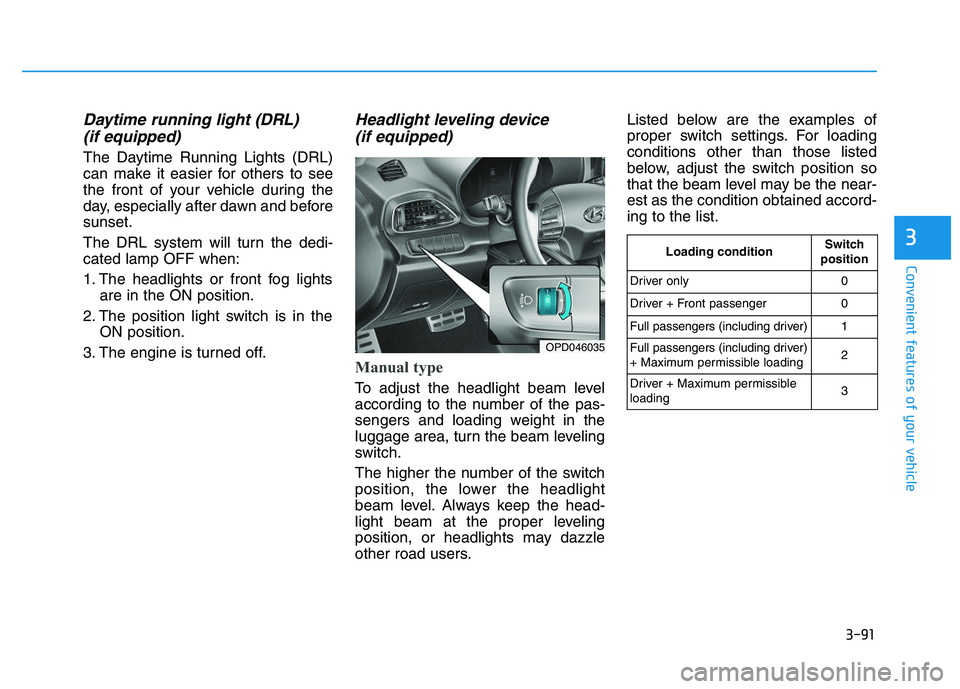
Manual type
To adjust the headlight beam level
according to the number of the pas-
sengers and loading weight in the
luggage area, turn the beam leveling
switch.
The higher the number of the switch
position, the lower the headlight
beam level. Always keep the head-
light beam at the proper leveling
position, or headlights may dazzle
other road users. Listed below are the examples of
proper switch settings. For loading
conditions other than those listed
below, adjust the switch position so
that the beam level may be the near-
est as the condition obtained accord-
ing to the list.
OPD046035
Loading conditionSwitch
position
Driver only0
Driver + Front passenger0
Full passengers (including driver)1
Full passengers (including driver)
+ Maximum permissible loading2
Driver + Maximum permissible
loading 3
Page 95 of 659

3-93
Convenient features of your vehicle
Door handle lamp (if equipped)
When all the doors (and tailgate) are
closed and locked, the door handle
lamp will come on for about 15 sec-
onds if any of the below is performed.
When the door unlock button ispressed on the remote key or
smart key.
When the button of the outside door handle is pressed with the
smart key in possession.
Headlamp and position lamp
When the headlamp (lamp switch in
the headlamp or AUTO position) is on
and all doors (and tailgate) are locked
and closed, the position lamp and
headlamp will come on for 15 seconds
if/or any of the below is performed.
When the door unlock button ispressed on the remote key or
smart key.
At this time, if you press the door lock
or unlock button, the position lamp and
headlamp will turn off immediately.
You can activate or deactivate the
Welcome Light from the User
Settings mode on the LCD display.
For more details, refer to "LCD
Display" in this chapter.
Interior lamp
When the interior lamp switch is in
the DOOR position and all doors (and
tailgate) are closed and locked, the
room lamp will come on for 30 sec-
onds if any of the below is performed.
When the door unlock button is pressed on the remote key or
smart key.
When the button of the outside door handle is pressed with the
smart key in possession.
At this time, if you press the door lock
or unlock button, the room lamp will
turn off immediately.
Interior lights
Do not use the interior lights for
extended periods when the engine
is turned off or the battery will dis-
charge.
Interior lamp AUTO cut
The interior lamps will automatically
go off approximately 20 minutes after
the engine is turned off and the
doors closed. If a door is opened, the
lamp will go off 40 minutes after the
engine is turned off. If the doors are
locked and the vehicle enters the
armed stage of the theft alarm sys-
tem, the lamps will go off five sec-
onds later.
NOTICE
3
Do not use the interior lights
when driving in the dark. The inte-
rior lights may obscure your view
and cause an accident.
WARNING
Page 152 of 659
Interior lights ....................................................................3-93
Wipers and washers ............................................3-97
Windshield wipers ..........................................................3-98
Windshield washers .......................................................3-99
Rear window wiper and washer switch ..................3-100
Driver assist system ..........................................3-101
Rear view camera ........................................................3-101
Rear parking assist system ........................................3-102
Parking assist system .................................................3-106
Defroster .............................................................3-109
Rear window defroster ...............................................3-109
Manual climate control system........................3-111
Heating and air conditioning......................................3-112
System operation ..........................................................3-116
System maintenance ....................................................3-118
Automatic climate control system ...................3-121
Automatic heating and air conditioning ..................3-122
Manual heating and air conditioning .......................3-123
System operation ..........................................................3-128
System maintenance ....................................................3-131
Windshield defrosting and defogging ............3-133
Manual climate control system .................................3-133
Automatic climate control system ............................3-134
Defogging logic ............................................................3-135
Auto defogging system
(only for automatic climate control system) .........3-136
Climate control additional features.................3-137
Cluster ionizer ..............................................................3-137
Automatic ventilation ..................................................3-137
To cancel or set the automatic ventilation ............3-137
Sunroof inside air recirculation ...............................3-137
Storage compartment ........................................3-138
Center console storage ...............................................3-138
Glove box ........................................................................3-138
Sunglass holder ............................................................3-139
Multi box ........................................................................3-139
Interior features ...............................................3-140
Ashtray ...........................................................................3-140
Cup holder.......................................................................3-140
Sliding armrest .............................................................3-141
Sunvisor ...........................................................................3-142
Power outlet .................................................................3-142
Cigarette lighter ...........................................................3-144
Wireless cellular phone charging system ..............3-144
Clock .................................................................................3-146
Clothes hanger .............................................................3-146
Floor mat anchor(s) ....................................................3-147
Luggage net (holder) ...................................................3-147
Cargo area cover .........................................................3-148
Exterior features ...............................................3-149
Mounting bracket for roof carrier ..........................3-149
3
Page 153 of 659
3-3
Convenient features of your vehicle
3
Remote key
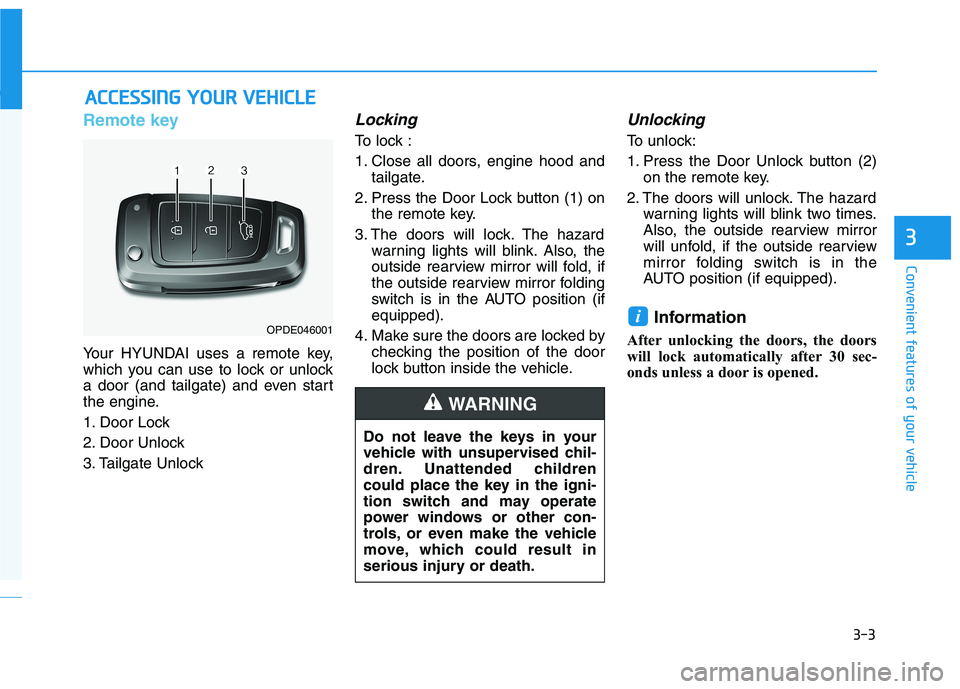
Your HYUNDAI uses a remote key,
which you can use to lock or unlock
a door (and tailgate) and even start
the engine.
1. Door Lock
2. Door Unlock
3. Tailgate Unlock
Locking
To lock :
1. Close all doors, engine hood andtailgate.
2. Press the Door Lock button (1) on the remote key.
3. The doors will lock. The hazard warning lights will blink. Also, the
outside rearview mirror will fold, if
the outside rearview mirror folding
switch is in the AUTO position (if
equipped).
4. Make sure the doors are locked by checking the position of the door
lock button inside the vehicle.
Unlocking
To unlock:
1. Press the Door Unlock button (2)on the remote key.
2. The doors will unlock. The hazard warning lights will blink two times.
Also, the outside rearview mirror
will unfold, if the outside rearview
mirror folding switch is in the
AUTO position (if equipped).
Information
After unlocking the doors, the doors
will lock automatically after 30 sec-
onds unless a door is opened.
i
A
A C
C C
C E
E S
S S
S I
I N
N G
G
Y
Y O
O U
U R
R
V
V E
E H
H I
I C
C L
L E
E
Do not leave the keys in your
vehicle with unsupervised chil-
dren. Unattended children
could place the key in the igni-
tion switch and may operate
power windows or other con-
trols, or even make the vehicle
move, which could result in
serious injury or death.
WARNING
OPDE046001
Page 154 of 659
3-4
Convenient features of your vehicle
Tailgate unlocking
To unlock:
1. Press the Tailgate Unlock button(3) on the remote key for more
than one second.
2. The hazard warning lights will blink two times.
Information
The word "HOLD" is written on the
button to inform you that you must
press and hold the button for more
than one second.
Start-up
For detailed information refer to “Key
Ignition Switch” in chapter 5.
To prevent damaging the remote
key:
• Keep the remote key away fromwater or any liquid and fire. If the
inside of the remote key gets
damp (due to drinks or mois-
ture), or is heated, internal cir-
cuit may malfunction, excluding
the car from the warranty.
Avoid dropping or throwing the remote key.
Protect the remote key from extreme temperatures.
Mechanical key
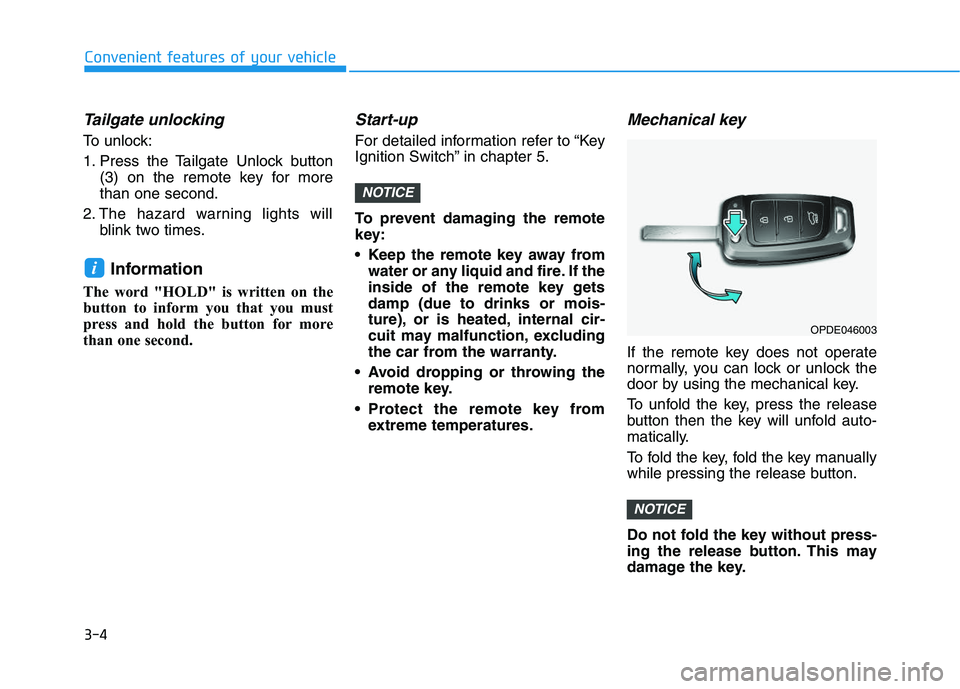
If the remote key does not operate
normally, you can lock or unlock the
door by using the mechanical key.
To unfold the key, press the release
button then the key will unfold auto-
matically.
To fold the key, fold the key manually
while pressing the release button.
Do not fold the key without press-
ing the release button. This may
damage the key.
NOTICE
NOTICE
i
OPDE046003