window HYUNDAI I40 2015 User Guide
[x] Cancel search | Manufacturer: HYUNDAI, Model Year: 2015, Model line: I40, Model: HYUNDAI I40 2015Pages: 534, PDF Size: 11.05 MB
Page 115 of 534
Downloaded from www.Manualslib.com manuals search engine Features of your vehicle
28
4
✽
✽
NOTICE
If the power window does not operate
normally, the automatic power window
system must be reset as follows:
1. Turn the ignition switch to the ON
position.
2. Close the driver’s window and contin- ue pulling up the driver’s power win-
dow switch for at least 1 second after
the window is completely closed.
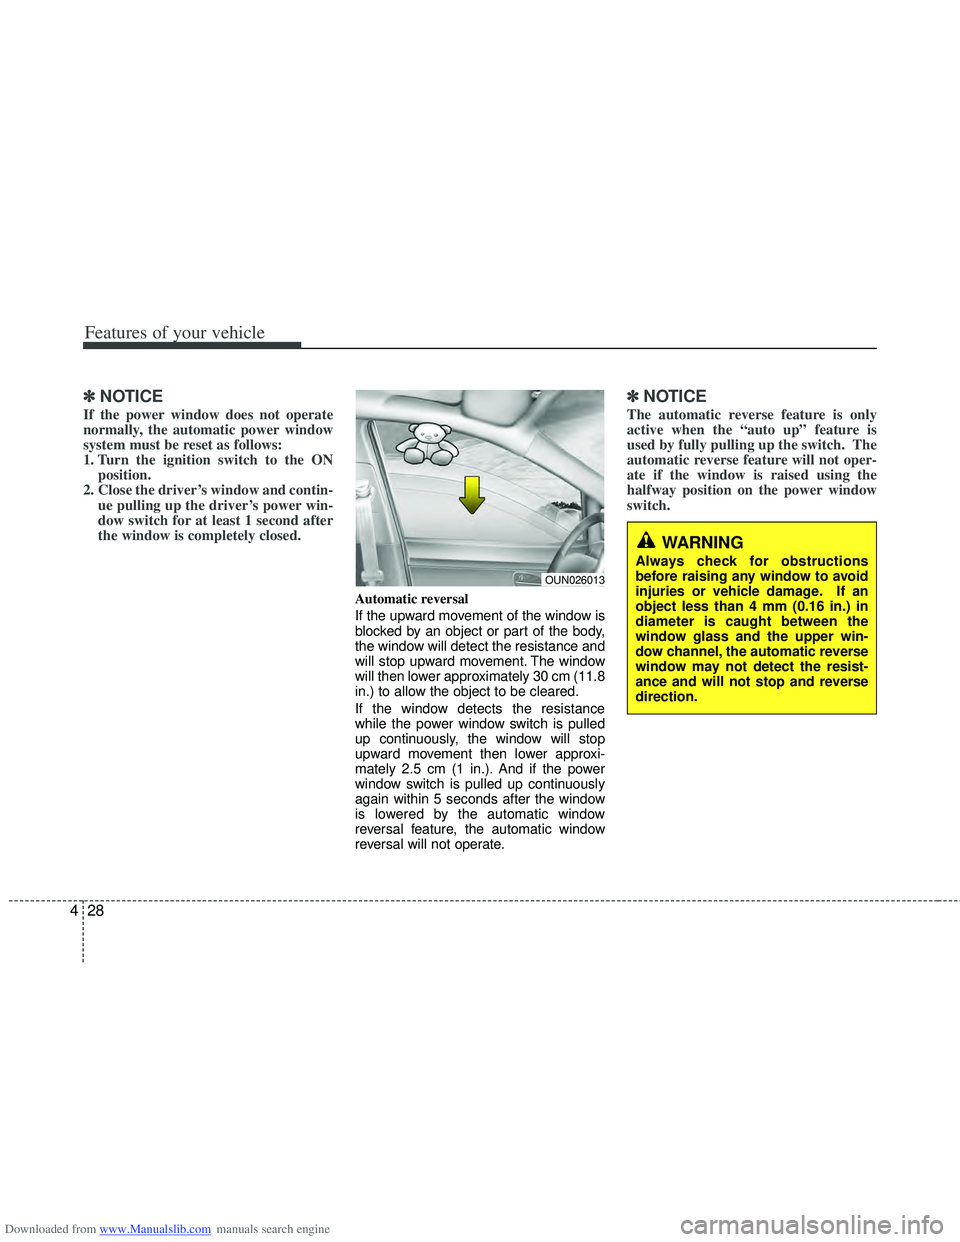
Automatic reversal
If the upward movement of the window is
blocked by an object or part of the body,
the window will detect the resistance and
will stop upward movement. The window
will then lower approximately 30 cm (11.8
in.) to allow the object to be cleared.
If the window detects the resistance
while the power window switch is pulled
up continuously, the window will stop
upward movement then lower approxi-
mately 2.5 cm (1 in.). And if the power
window switch is pulled up continuously
again within 5 seconds after the window
is lowered by the automatic window
reversal feature, the automatic window
reversal will not operate.
✽ ✽NOTICE
The automatic reverse feature is only
active when the “auto up” feature is
used by fully pulling up the switch. The
automatic reverse feature will not oper-
ate if the window is raised using the
halfway position on the power window
switch.
OUN026013
WARNING
Always check for obstructions
before raising any window to avoid
injuries or vehicle damage. If an
object less than 4 mm (0.16 in.) in
diameter is caught between the
window glass and the upper win-
dow channel, the automatic reverse
window may not detect the resist-
ance and will not stop and reverse
direction.
Page 116 of 534
Downloaded from www.Manualslib.com manuals search engine 429
Features of your vehicle
WARNING - Windows
NEVER leave the ignition key inthe vehicle.
NEVER leave any child unattend- ed in the vehicle. Even very
young children may inadvertently
cause the vehicle to move, entan-
gle themselves in the windows,
or otherwise injure themselves or
others.
Always double check to make sure all arms, hands, head and
other obstructions are safely out
of the way before closing a win-
dow.
Do not allow children to play with the power windows. Keep the dri-
ver’s door power window lock
switch in the LOCK position
(pressed). Serious injury can
result from unintentional window
operation by the child.
Do not extend face or arms out- side the window while driving.
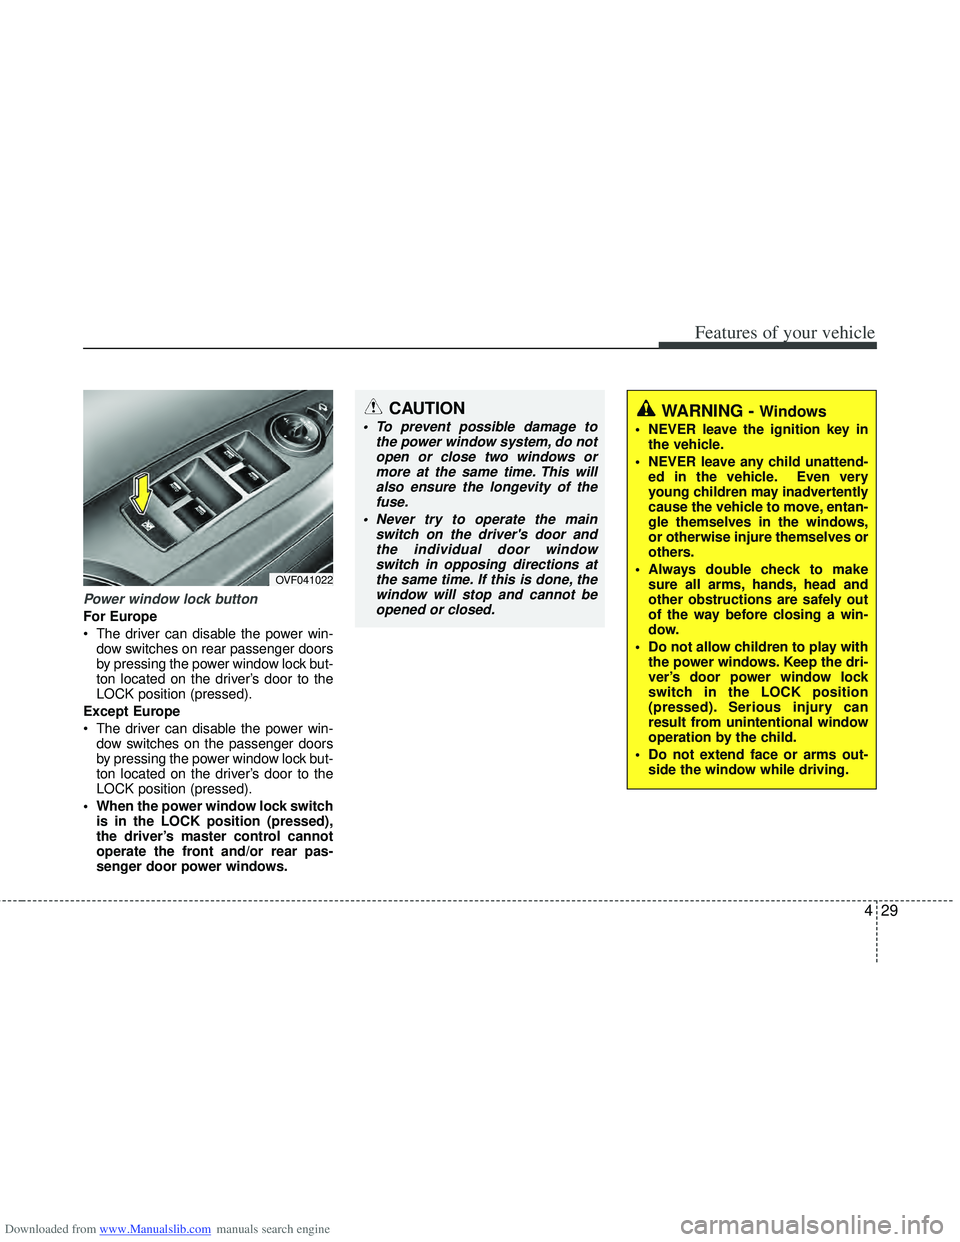
Power window lock button
For Europe
The driver can disable the power win-dow switches on rear passenger doors
by pressing the power window lock but-
ton located on the driver’s door to the
LOCK position (pressed).
Except Europe
The driver can disable the power win- dow switches on the passenger doors
by pressing the power window lock but-
ton located on the driver’s door to the
LOCK position (pressed).
When the power window lock switch is in the LOCK position (pressed),
the driver’s master control cannot
operate the front and/or rear pas-
senger door power windows.
OVF041022
CAUTION
To prevent possible damage to the power window system, do notopen or close two windows ormore at the same time. This willalso ensure the longevity of the fuse.
Never try to operate the main switch on the driver's door andthe individual door windowswitch in opposing directions atthe same time. If this is done, thewindow will stop and cannot beopened or closed.
Page 131 of 534
Downloaded from www.Manualslib.com manuals search engine Features of your vehicle
44
4
Inside rearview mirror
Adjust the rearview mirror so that the
center view through the rear window is
seen. Make this adjustment before you
start driving.
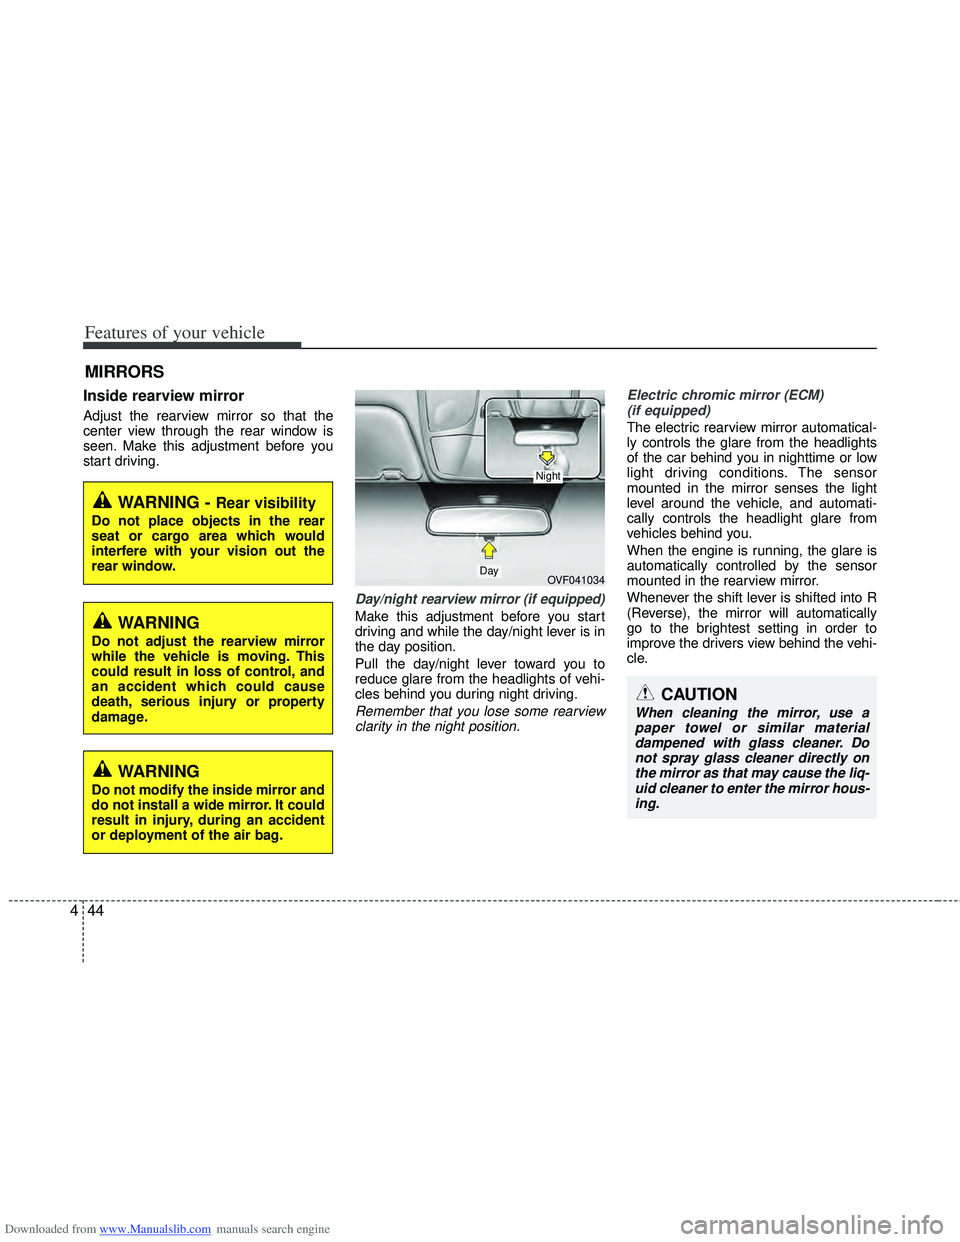
Day/night rearview mirror (if equipped)
Make this adjustment before you start
driving and while the day/night lever is in
the day position.
Pull the day/night lever toward you to
reduce glare from the headlights of vehi-
cles behind you during night driving.
Remember that you lose some rearview
clarity in the night position. Electric chromic mirror (ECM)
(if equipped)
The electric rearview mirror automatical-
ly controls the glare from the headlights
of the car behind you in nighttime or low
light driving conditions. The sensor
mounted in the mirror senses the light
level around the vehicle, and automati-
cally controls the headlight glare from
vehicles behind you.
When the engine is running, the glare is
automatically controlled by the sensor
mounted in the rearview mirror.
Whenever the shift lever is shifted into R
(Reverse), the mirror will automatically
go to the brightest setting in order to
improve the drivers view behind the vehi-
cle.
MIRRORS
WARNING - Rear visibility
Do not place objects in the rear
seat or cargo area which would
interfere with your vision out the
rear window.
OVF041034
CAUTION
When cleaning the mirror, use a paper towel or similar materialdampened with glass cleaner. Donot spray glass cleaner directly onthe mirror as that may cause the liq- uid cleaner to enter the mirror hous-ing.
Day
Night
WARNING
Do not adjust the rearview mirror
while the vehicle is moving. This
could result in loss of control, and
an accident which could cause
death, serious injury or property
damage.
WARNING
Do not modify the inside mirror and
do not install a wide mirror. It could
result in injury, during an accident
or deployment of the air bag.
Page 185 of 534

Downloaded from www.Manualslib.com manuals search engine Features of your vehicle
98
4
Headlight position ( )
When the light switch is in the headlight
position the head, tail, position, license
and instrument panel lights are ON.
✽ ✽
NOTICE
The ignition switch must be in the ON
position to turn on the headlights.
Auto light/AFLS position
(if equipped)
When the light switch is in the AUTO light
position, the taillights and headlights will
be turned ON or OFF automatically
depending on the amount of light outside
the vehicle.
If your vehicle is equipped with the adap-
tive front lighting system (AFLS), it will
also operate when the headlamp is ON.
OVF041123
CAUTION
Never place anything over the sensor (1) located on the instru-ment panel, this will ensure better auto-light system control.
Don’t clean the sensor using a window cleaner, the cleaner mayleave a light film which could interfere with sensor operation.
If your vehicle has window tint or other types of coating on thefront windshield, the Auto light system may not work properly.
OVF041121
Page 191 of 534
Downloaded from www.Manualslib.com manuals search engine Features of your vehicle
104
4
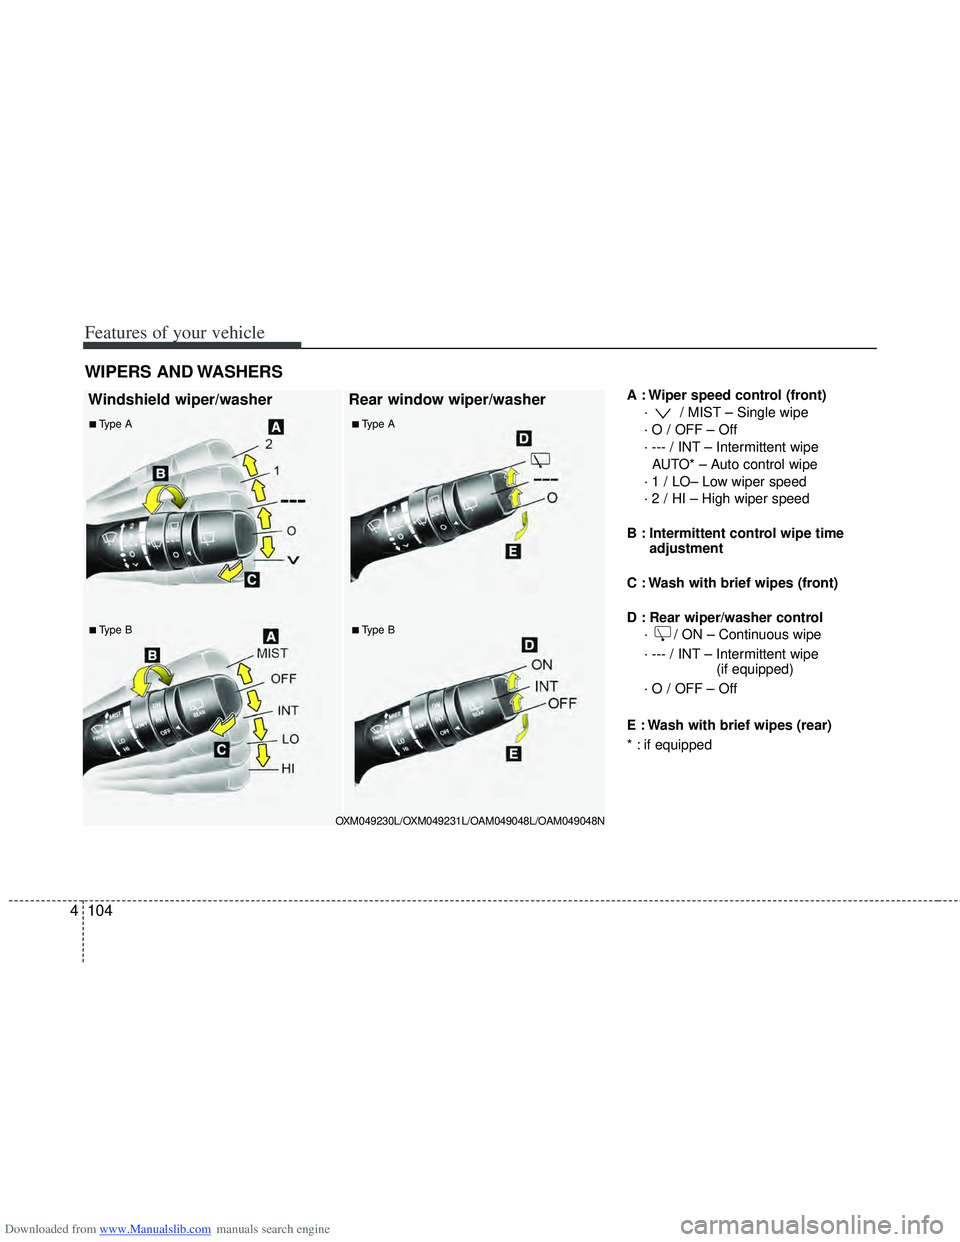
A : Wiper speed control (front)
· / MIST – Single wipe
· O / OFF – Off
· --- / INT – Intermittent wipe AUTO* – Auto control wipe
· 1 / LO– Low wiper speed
· 2 / HI – High wiper speed
B : Intermittent control wipe time adjustment
C : Wash with brief wipes (front)
D : Rear wiper/washer control · / ON – Continuous wipe
· --- / INT – Intermittent wipe (if equipped)
· O / OFF – Off
E : Wash with brief wipes (rear)
* : if equipped
WIPERS AND WASHERS
Windshield wiper/washer Rear window wiper/washer
OXM049230L/OXM049231L/OAM049048L/OAM049048N
■Type A■Type A
■Type B■Type B
Page 194 of 534
Downloaded from www.Manualslib.com manuals search engine 4107
Features of your vehicle
Headlight washer (if equipped)
If your vehicle is equipped with the head-
light washer it will operate at the same
time when you operate the windshield
washer. It will operate when the headlight
switch is in the first or second position
and the ignition switch or engine
start/stop button is in the ON position.
The washer fluid will be sprayed on to the
headlights.
✽ ✽NOTICE
Check the headlight washers periodical-
ly to confirm that the washer fluid is
being sprayed properly onto the head-
light lenses.
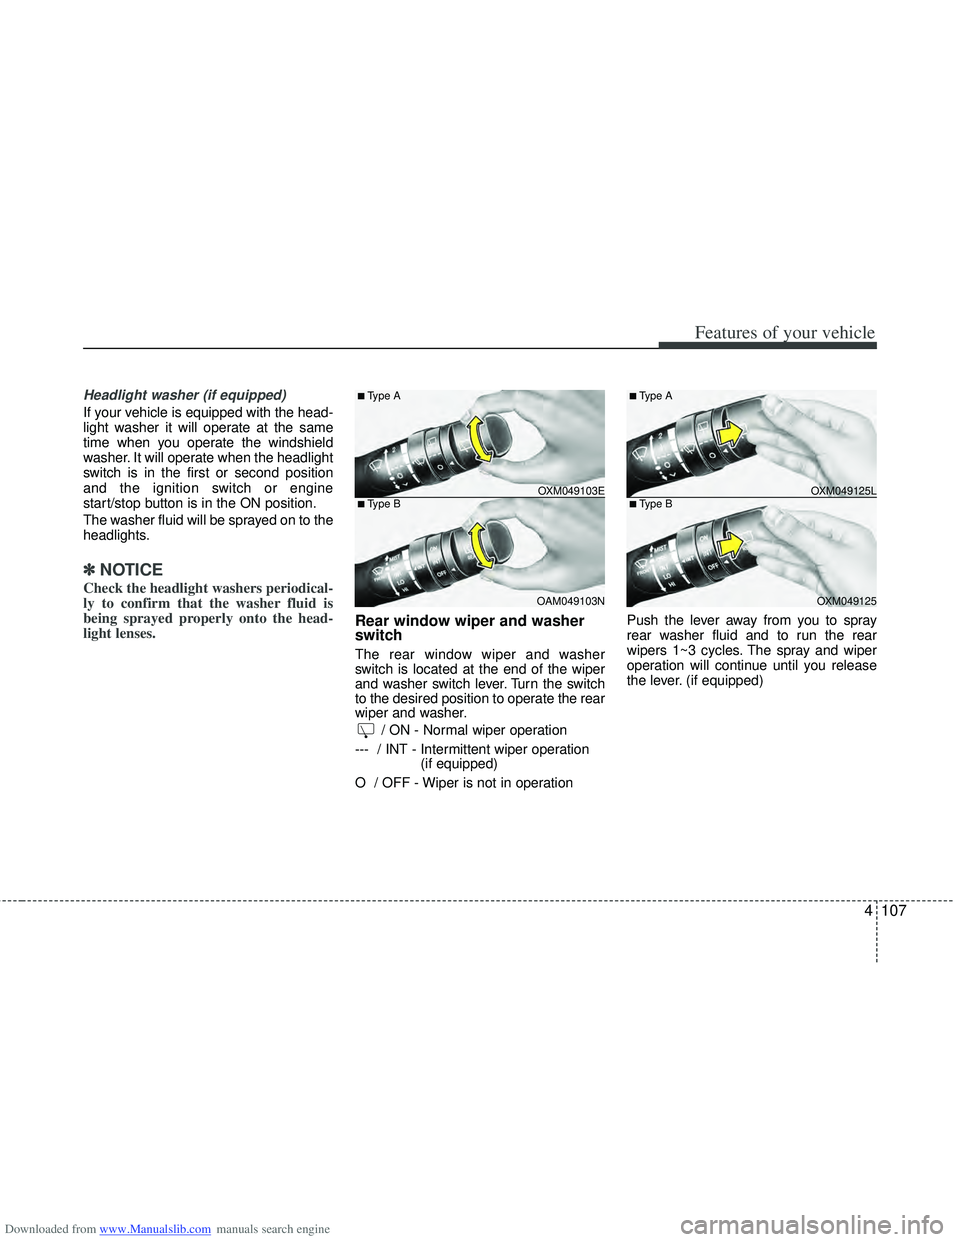
Rear window wiper and washer
switch
The rear window wiper and washer
switch is located at the end of the wiper
and washer switch lever. Turn the switch
to the desired position to operate the rear
wiper and washer.
/ ON - Normal wiper operation
--- / INT - Intermittent wiper operation (if equipped)
O / OFF - Wiper is not in operation Push the lever away from you to spray
rear washer fluid and to run the rear
wipers 1~3 cycles. The spray and wiper
operation will continue until you release
the lever. (if equipped)
OXM049103E
OAM049103N
■Type A
■Type BOXM049125L OXM049125
■Type A
■Type B
Page 198 of 534
Downloaded from www.Manualslib.com manuals search engine 4111
Features of your vehicle
✽
✽NOTICE
If you want to defrost and defog the
front windshield, refer to “Windshield
Defrosting and Defogging” in this sec-
tion.
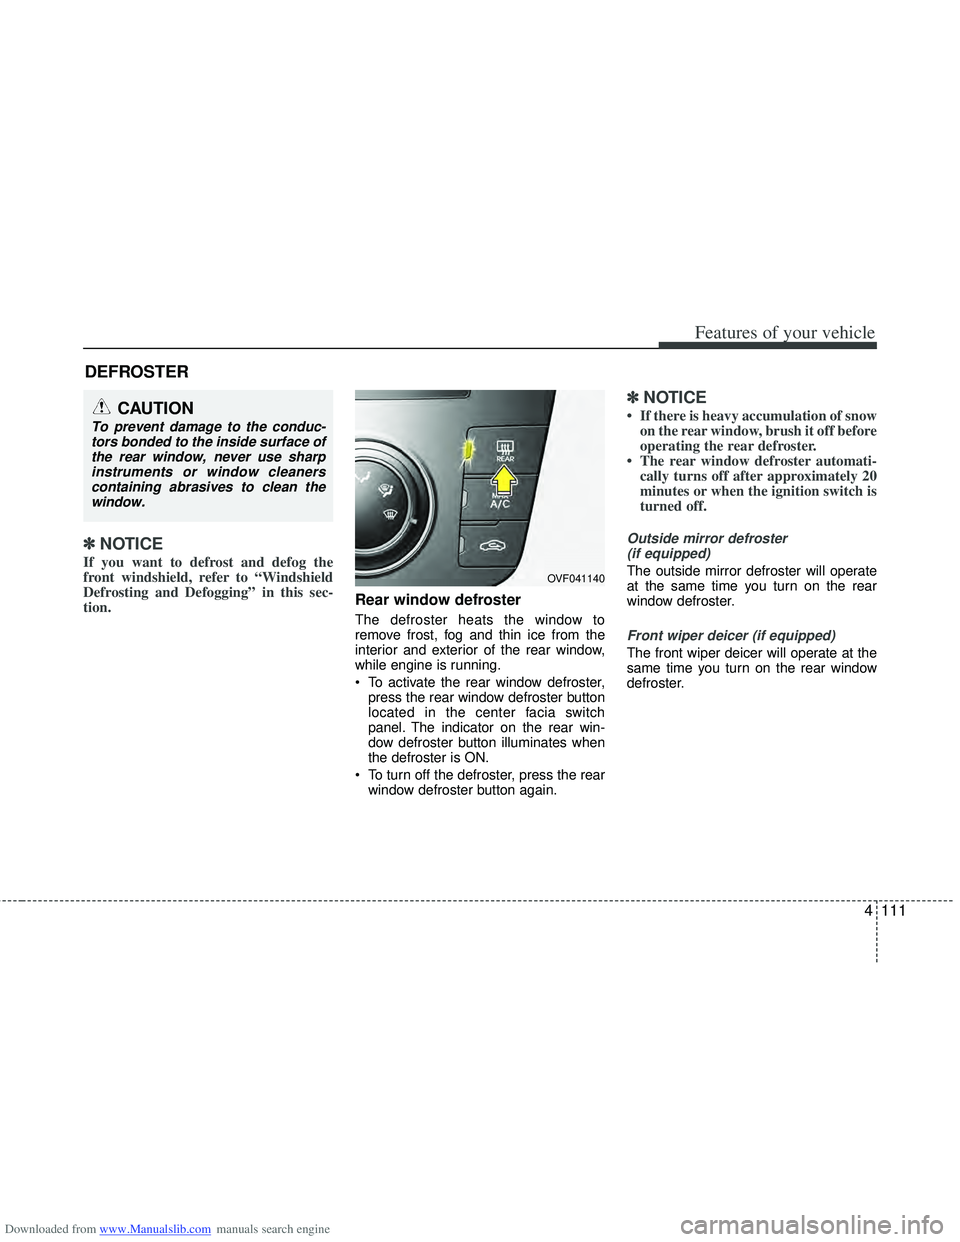
Rear window defroster
The defroster heats the window to
remove frost, fog and thin ice from the
interior and exterior of the rear window,
while engine is running.
To activate the rear window defroster,
press the rear window defroster button
located in the center facia switch
panel. The indicator on the rear win-
dow defroster button illuminates when
the defroster is ON.
To turn off the defroster, press the rear window defroster button again.
✽ ✽ NOTICE
• If there is heavy accumulation of snow
on the rear window, brush it off before
operating the rear defroster.
• The rear window defroster automati- cally turns off after approximately 20
minutes or when the ignition switch is
turned off.
Outside mirror defroster
(if equipped)
The outside mirror defroster will operate
at the same time you turn on the rear
window defroster.
Front wiper deicer (if equipped)
The front wiper deicer will operate at the
same time you turn on the rear window
defroster.
DEFROSTER
CAUTION
To prevent damage to the conduc-tors bonded to the inside surface ofthe rear window, never use sharpinstruments or window cleanerscontaining abrasives to clean the window.
OVF041140
Page 201 of 534
Downloaded from www.Manualslib.com manuals search engine Features of your vehicle
114
4
Face-Level (B, D, F)
Air flow is directed toward the upper body
and face. Additionally, each outlet can be
controlled to direct the air discharged
from the outlet.
Bi-Level (B, D, C, E, F)
Air flow is directed towards the face and
the floor.
Floor-Level (A, C, E, D)
Most of the air flow is directed to the
floor, with a small amount of the air being
directed to the windshield and side win-
dow defrosters.
-
Floor/Defrost-Level (A, C, D, E, F)
Most of the air flow is directed to the floor
and the windshield with a small amount
directed to the side window defrosters.
Defrost-Level (A, D)
Most of the air flow is directed to the
windshield with a small amount of air
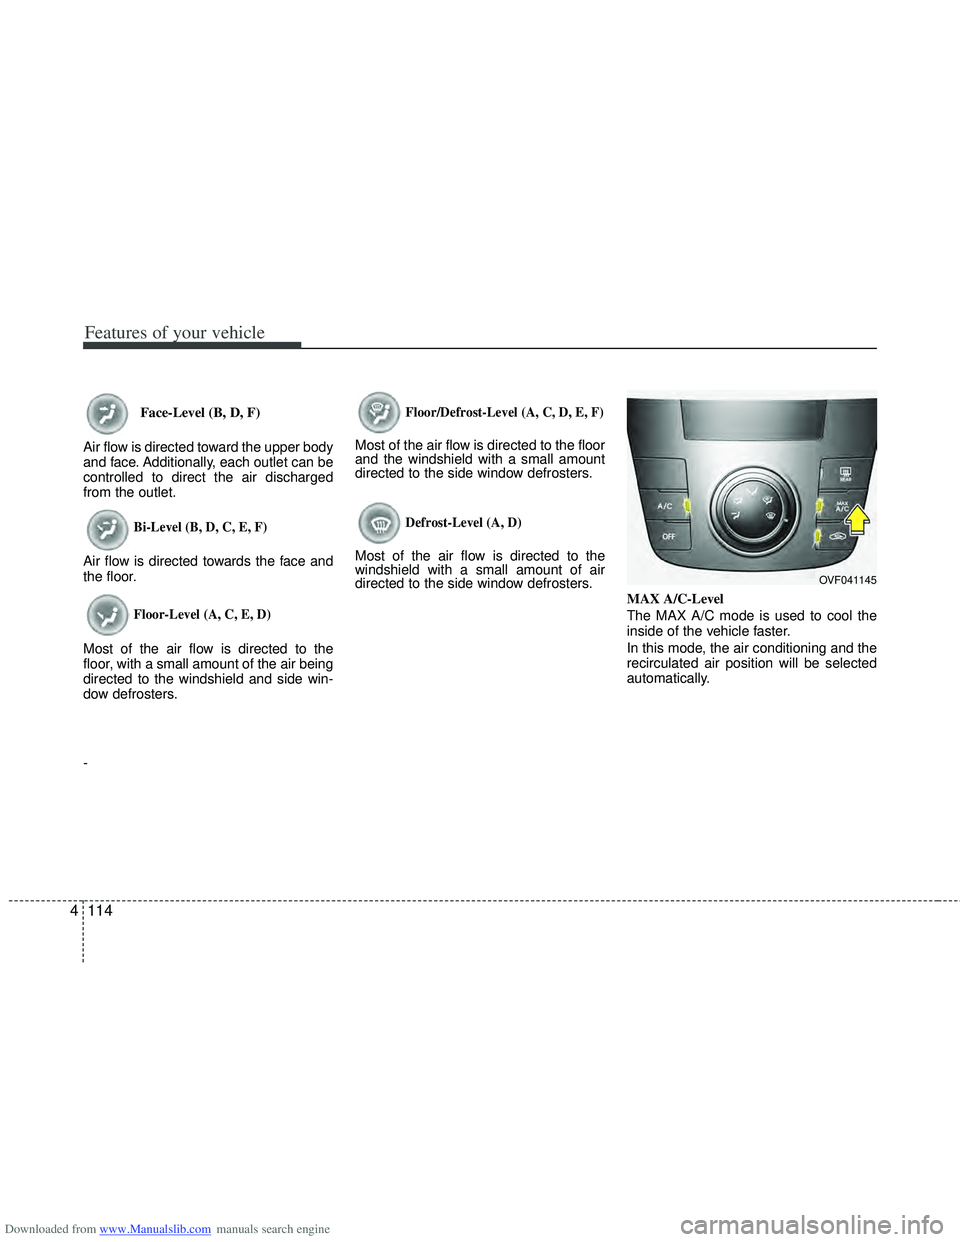
directed to the side window defrosters. MAX A/C-Level
The MAX A/C mode is used to cool the
inside of the vehicle faster.
In this mode, the air conditioning and the
recirculated air position will be selected
automatically.
OVF041145
Page 203 of 534
Downloaded from www.Manualslib.com manuals search engine Features of your vehicle
116
4
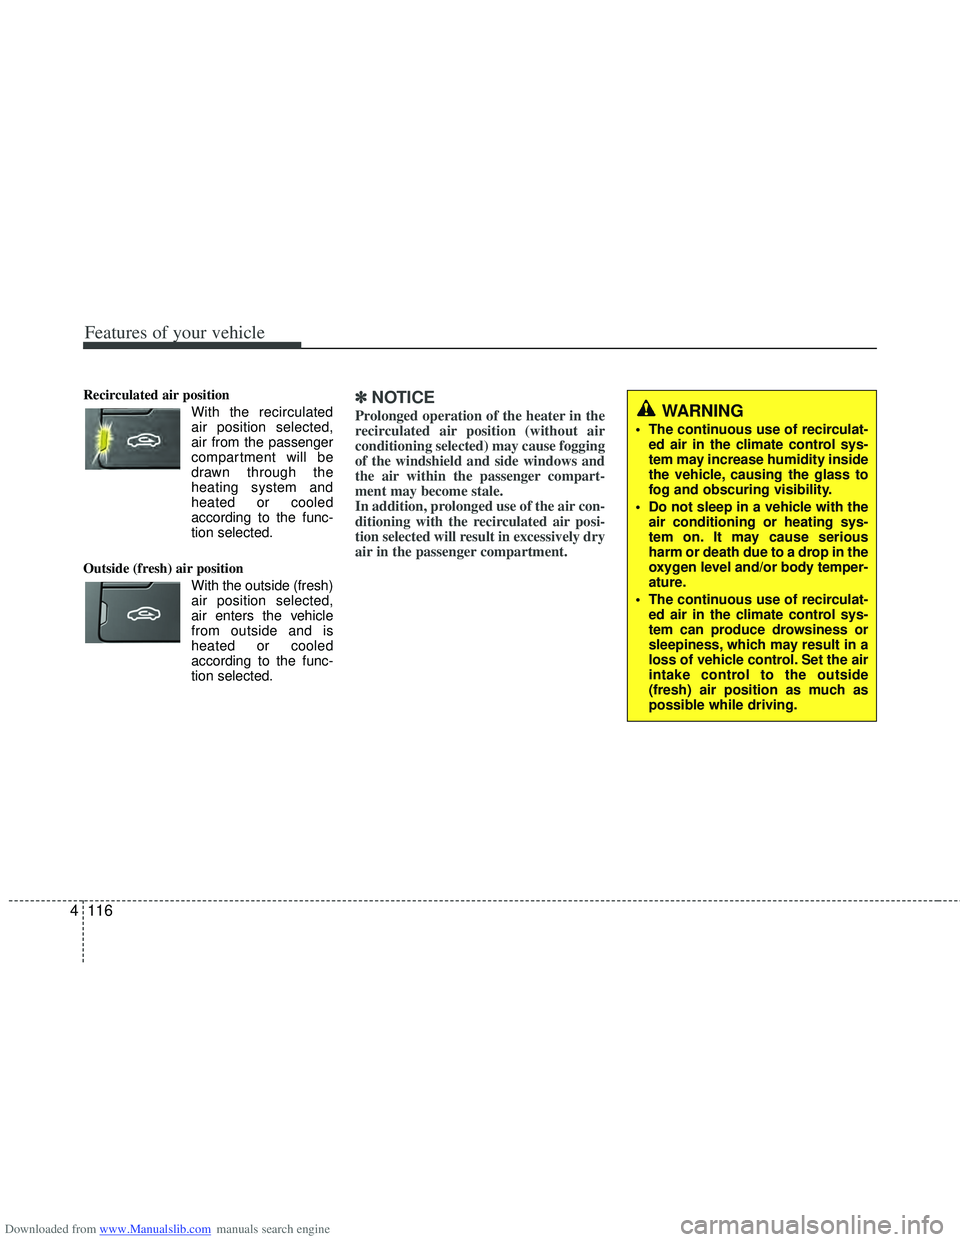
Recirculated air position
With the recirculated
air position selected,
air from the passenger
compartment will be
drawn through the
heating system and
heated or cooled
according to the func-
tion selected.
Outside (fresh) air position With the outside (fresh)
air position selected,
air enters the vehicle
from outside and is
heated or cooled
according to the func-
tion selected.✽ ✽ NOTICE
Prolonged operation of the heater in the
recirculated air position (without air
conditioning selected) may cause fogging
of the windshield and side windows and
the air within the passenger compart-
ment may become stale.
In addition, prolonged use of the air con-
ditioning with the recirculated air posi-
tion selected will result in excessively dry
air in the passenger compartment. WARNING
The continuous use of recirculat-
ed air in the climate control sys-
tem may increase humidity inside
the vehicle, causing the glass to
fog and obscuring visibility.
Do not sleep in a vehicle with the air conditioning or heating sys-
tem on. It may cause serious
harm or death due to a drop in the
oxygen level and/or body temper-
ature.
The continuous use of recirculat- ed air in the climate control sys-
tem can produce drowsiness or
sleepiness, which may result in a
loss of vehicle control. Set the air
intake control to the outside
(fresh) air position as much as
possible while driving.
Page 206 of 534
Downloaded from www.Manualslib.com manuals search engine 4119
Features of your vehicle
✽
✽NOTICE
• When using the air conditioning sys-
tem, monitor the temperature gauge
closely while driving up hills or in
heavy traffic when outside tempera-
tures are high. Air conditioning sys-
tem operation may cause engine over-
heating. Continue to use the blower
fan but turn the air conditioning sys-
tem off if the temperature gauge indi-
cates engine overheating.
• When opening the windows in humid weather air conditioning may create
water droplets inside the vehicle.
Since excessive water droplets may
cause damage to electrical equipment,
air conditioning should only be used
with the windows closed.
Air conditioning system operation tips
If the vehicle has been parked in direct
sunlight during hot weather, open the
windows for a short time to let the hot
air inside the vehicle escape.
Use air conditioning to reduce humidi- ty and moisture inside the vehicle on
rainy or humid days.
During air conditioning system opera- tion, you may occasionally notice a
slight change in engine speed as the
air conditioning compressor cycles.
This is a normal system operation
characteristic.
Use the air conditioning system every month only for a few minutes to ensure
maximum system performance. When using the air conditioning sys-
tem, you may notice clear water drip-
ping (or even puddling) on the ground
under the passenger side of the vehi-
cle. This is a normal system operation
characteristic.
Operating the air conditioning system in the recirculated air position provides
maximum cooling, however, continual
operation in this mode may cause the
air inside the vehicle to become stale.
During cooling operation, you may occasionally notice a misty air flow
because of rapid cooling and humid air
intake. This is a normal system opera-
tion characteristic.