window HYUNDAI I40 2019 Owners Manual
[x] Cancel search | Manufacturer: HYUNDAI, Model Year: 2019, Model line: I40, Model: HYUNDAI I40 2019Pages: 534, PDF Size: 11.05 MB
Page 20 of 534
Downloaded from www.Manualslib.com manuals search engine Your vehicle at a glance
62
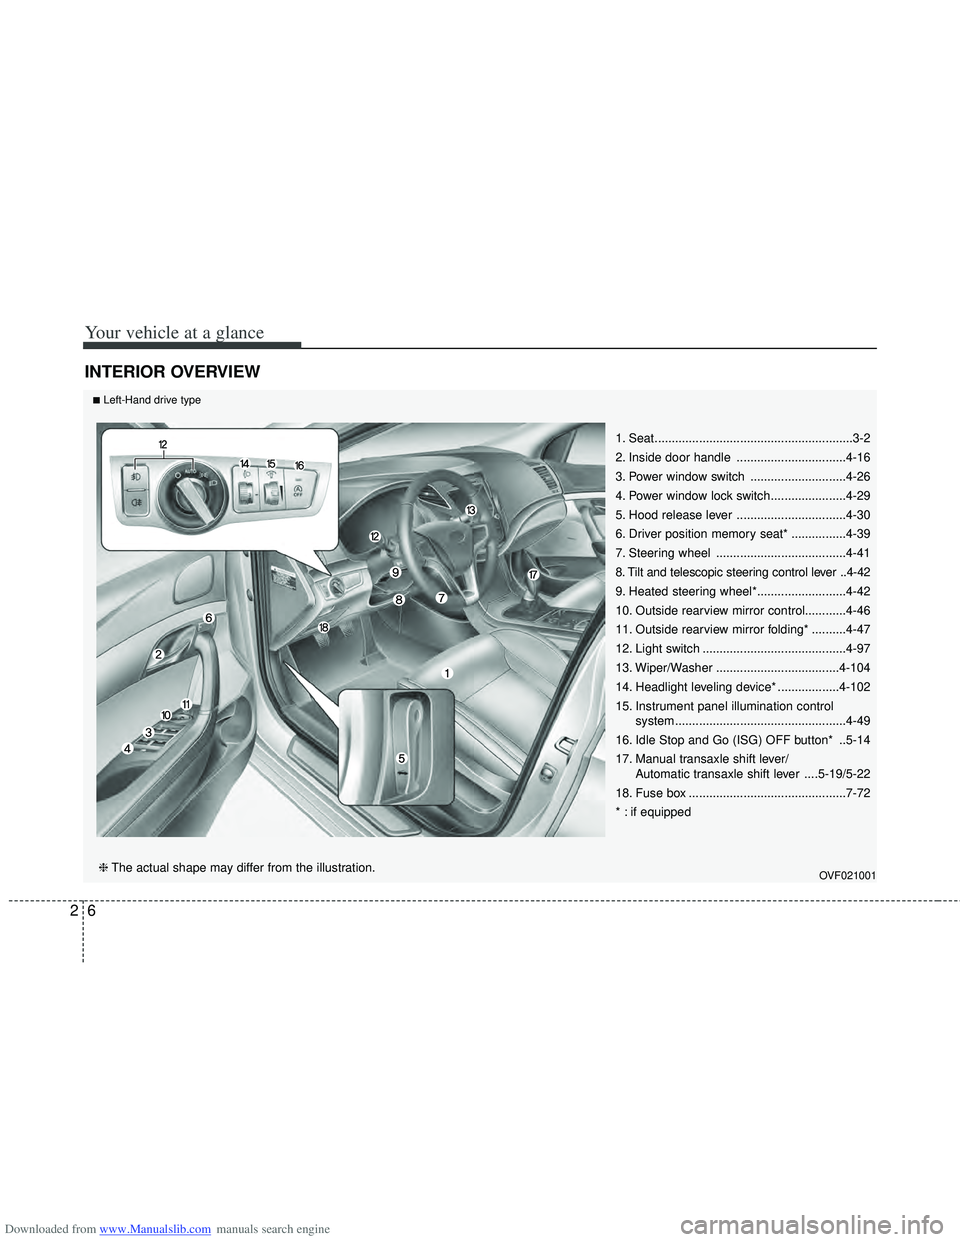
INTERIOR OVERVIEW
1. Seat..........................................................3-2
2. Inside door handle ................................4-16
3. Power window switch ............................4-26
4. Power window lock switch......................4-29
5. Hood release lever ................................4-30
6. Driver position memory seat* ................4-39
7. Steering wheel ......................................4-41
8. Tilt and telescopic steering control lever ..4-42
9. Heated steering wheel*..........................4-42
10. Outside rearview mirror control............4-46
11. Outside rearview mirror folding* ..........4-47
12. Light switch ..........................................4-97
13. Wiper/Washer ....................................4-104
14. Headlight leveling device* ..................4-102
15. Instrument panel illumination control system..................................................4-49
16. Idle Stop and Go (ISG) OFF button* ..5-14
17. Manual transaxle shift lever/ Automatic transaxle shift lever ....5-19/5-22
18. Fuse box ..............................................7-72
* : if equipped
OVF021001
■Left-Hand drive type
❈ The actual shape may differ from the illustration.
Page 21 of 534
Downloaded from www.Manualslib.com manuals search engine 27
Your vehicle at a glance
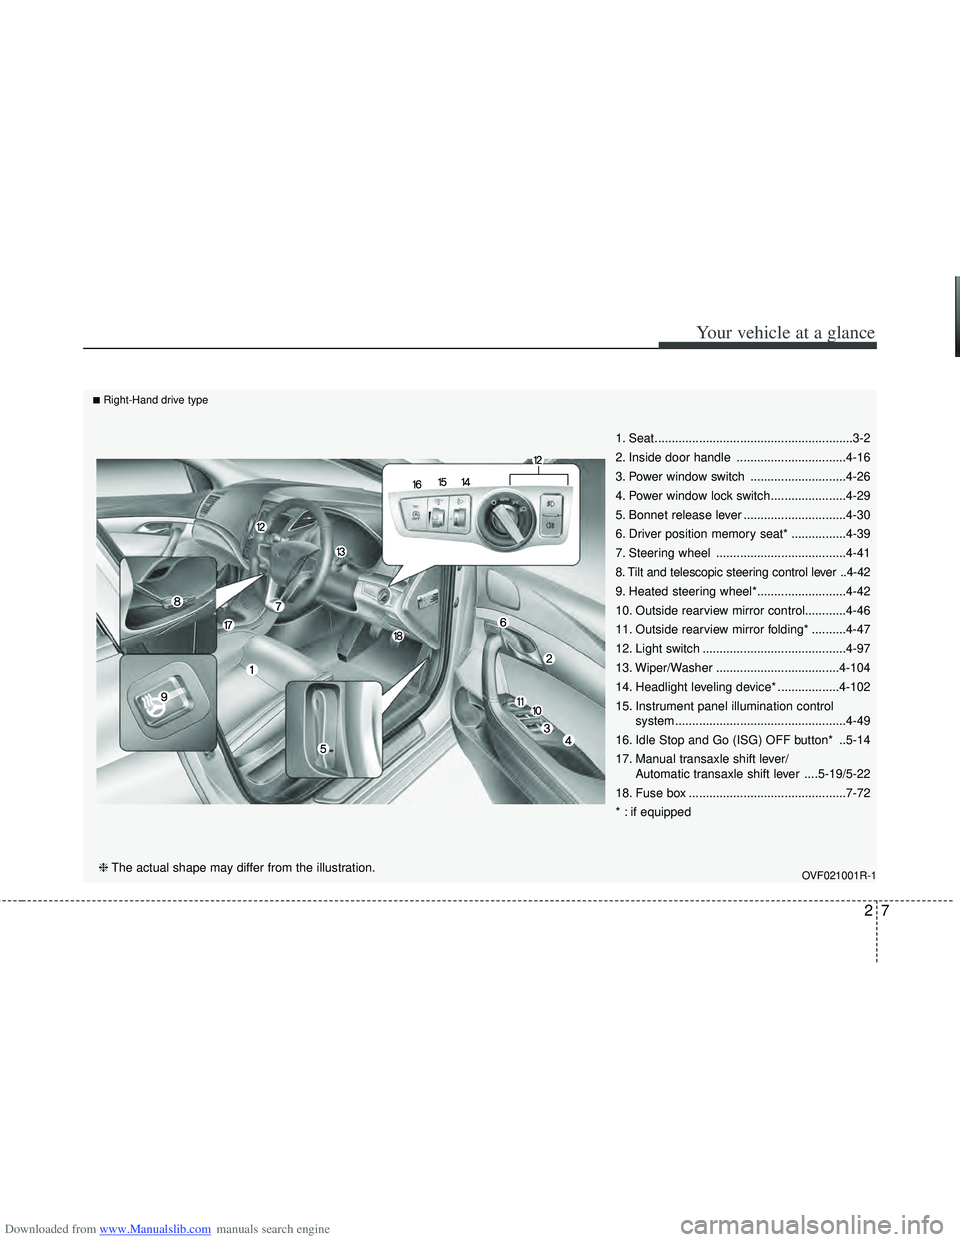
1. Seat..........................................................3-2
2. Inside door handle ................................4-16
3. Power window switch ............................4-26
4. Power window lock switch......................4-29
5. Bonnet release lever ..............................4-30
6. Driver position memory seat* ................4-39
7. Steering wheel ......................................4-41
8. Tilt and telescopic steering control lever ..4-42
9. Heated steering wheel*..........................4-42
10. Outside rearview mirror control............4-46
11. Outside rearview mirror folding* ..........4-47
12. Light switch ..........................................4-97
13. Wiper/Washer ....................................4-104
14. Headlight leveling device* ..................4-102
15. Instrument panel illumination control system..................................................4-49
16. Idle Stop and Go (ISG) OFF button* ..5-14
17. Manual transaxle shift lever/ Automatic transaxle shift lever ....5-19/5-22
18. Fuse box ..............................................7-72
* : if equipped
OVF021001R-1❈ The actual shape may differ from the illustration.
■Right-Hand drive type
Page 66 of 534

Downloaded from www.Manualslib.com manuals search engine Safety system of your vehicle
42
3
Noise and smoke
When the air bags inflate, they make a
loud noise and they leave smoke and
powder in the air inside of the vehicle.
This is normal and is a result of the igni-
tion of the air bag inflator. After the air
bag inflates, you may feel substantial dis-
comfort in breathing due to the contact of
your chest with both the seat belt and the
air bag, as well as from breathing the
smoke and powder. Open your doors
and/or windows as soon as possible
after impact in order to reduce dis-
comfort and prevent prolonged expo-
sure to the smoke and powder.
Though smoke and powder are non-
toxic, it may cause irritation to the skin
(eyes, nose and throat, etc.). If this is the
case, wash and rinse with cold water
immediately and consult the doctor if the
symptom persists.
Installing a child restraint on a front passenger’s seat is forbidden whenthe air bag is active
Never place a rear-facing child restraint
in the front passenger’s seat. If the air
bag deploys, it would impact the rear-fac-
ing child restraint, causing serious or
fatal injury.
In addition, do not place front-facing child
restraints in the front passenger’s seat
either. If the front passenger air bag
inflates, it would cause serious or fatal
injuries to the child.
If your vehicle is equipped with the pas-
senger’s front air bag ON/OFF switch,
you can activate or deactivate the front
passenger’s air bag when necessary.
For more details, please refer to 3-44
page.
1JBH3051
WARNING
When the air bags deploy, the air
bag related parts in the steering
wheel and/or instrument panel
and/or in both sides of the roof rails
above the front and rear doors are
very hot. To prevent injury, do not
touch the air bag storage areas
internal components immediately
after an air bag has inflated.
Page 77 of 534

Downloaded from www.Manualslib.com manuals search engine 353
Safety system of your vehicle
Side impact air bag (if equipped)
Your vehicle is equipped with a side
impact air bag in each front and outboard
rear seat. The purpose of the air bag is to
provide the vehicle's driver and/or the
front passenger with additional protec-
tion than that offered by the seat belt
alone.
The side impact air bags are designed to
deploy only during certain side-impact
collisions, depending on the crash sever-
ity, angle, speed and point of impact. The
side air bags are not designed to deploy
in all side impact situations.
WARNING
The side impact air bag is sup-plemental to the driver's and the
passenger's seat belt systems
and is not a substitute for them.
Therefore your seat belts must be
worn at all times while the vehicle
is in motion. The air bags deploy
only in certain side impact condi-
tions severe enough to cause
significant injury to the vehicle
occupants.
For best protection from the side impact air bag system and to
avoid being injured by the
deploying side impact air bag,
both front seat occupants should
sit in an upright position with the
seat belt properly fastened. The
driver's hands should be placed
on the steering wheel at the 9:00
and 3:00 positions. The passen-
ger's arms and hands should be
placed on their laps.
Do not use any accessory seat covers.
(Continued)
WARNING
Do not allow the passengers to lean
their heads or bodies onto doors,
put their arms on the doors, stretch
their arms out of the window, or
place objects between the doors
and passengers when they are
seated on seats equipped with side
and/or curtain air bags.
■Front
■Rear
OVF031071 OVF031047
OVF031048
Page 79 of 534

Downloaded from www.Manualslib.com manuals search engine 355
Safety system of your vehicle
(Continued)
Do not allow the passengers tolean their heads or bodies onto
doors, put their arms on the
doors, stretch their arms out of
the window, or place objects
between the doors and passen-
gers when they are seated on
seats equipped with side and/or
curtain air bags.
Never try to open or repair any components of the side curtain
air bag system. This should only
be done by an authorized
HYUNDAI dealer.
Failure to follow the above men-
tioned instructions can result in
injury or death to the vehicle occu-
pants in an accident.WARNING
In order for side impact and cur- tain air bags to provide the best
protection, both front seat occu-
pants and both outboard rear
occupants should sit in an
upright position with the seat
belts properly fastened.
Importantly, children should sit in
a proper child restraint system in
the rear seat.
When children are seated in the rear outboard seats, they must be
seated in the proper child
restraint system.
Make sure to put the child
restraint system as far away from
the door side as possible, and
secure the child restraint system
in a locked position.
(Continued)
Page 88 of 534
Downloaded from www.Manualslib.com manuals search engine 4
Keys / 4-3
Remote keyless entry / 4-5
Smart key / 4-9
Theft-alarm system / 4-12
Door locks / 4-15
Tailgate / 4-20
Windows / 4-26
Hood / 4-30
Fuel filler lid / 4-32
Panorama Sunroof / 4-35
Driver position memory system / 4-39
Steering wheel / 4-41
Mirrors / 4-44
Instrument cluster / 4-48
Parking assist system / 4-79
Smart parking assist system / 4-83
Rearview camera / 4-94
Hazard warning flasher / 4-95
Lighting / 4-96
Wipers and washers / 4-104
Interior light / 4-108
Welcome system / 4-110
Defroster / 4-111
Features of your vehicle
Page 90 of 534
Downloaded from www.Manualslib.com manuals search engine 43
Features of your vehicle
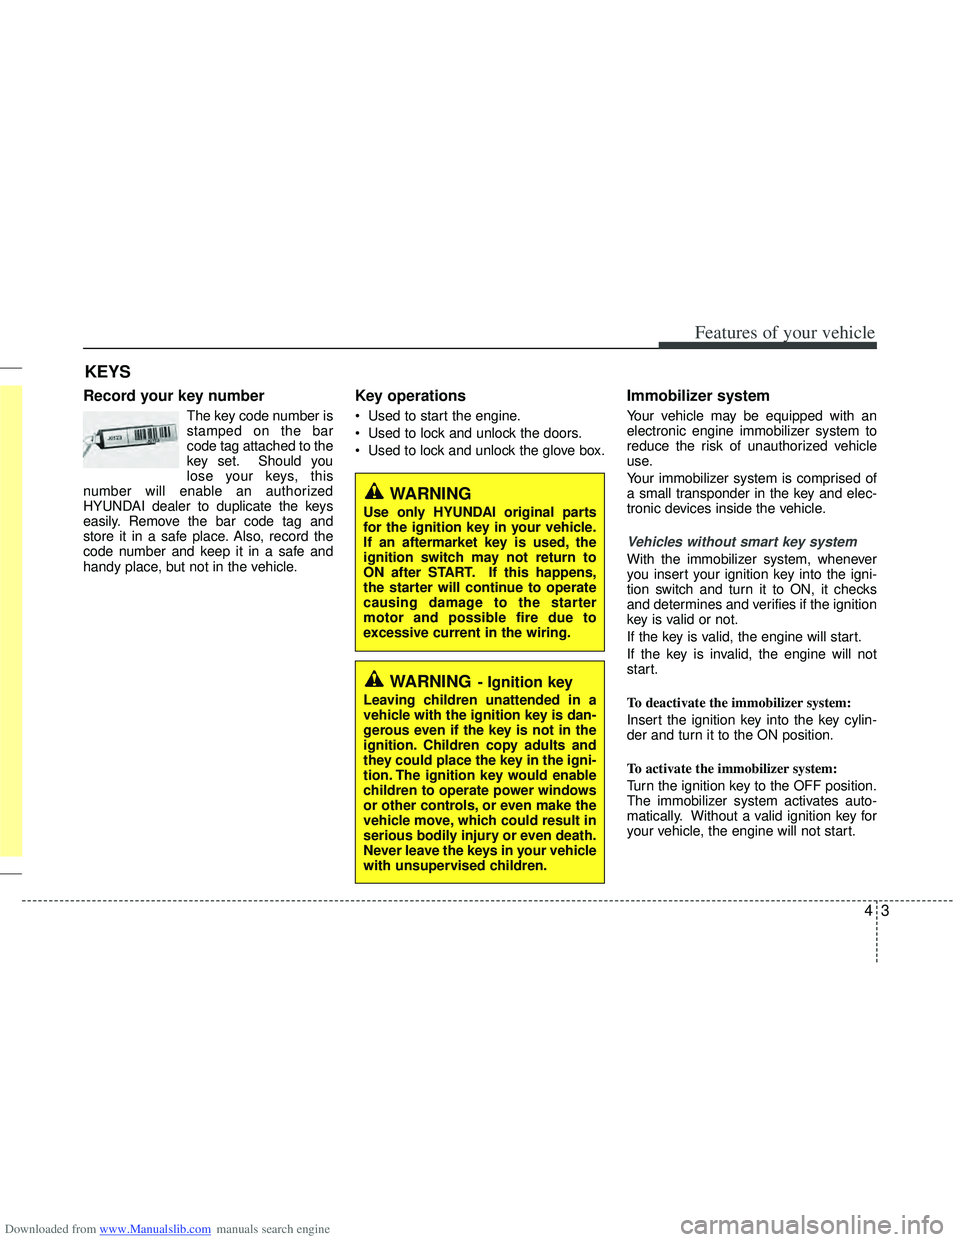
Record your key number
The key code number is
stamped on the bar
code tag attached to the
key set. Should you
lose your keys, this
number will enable an authorized
HYUNDAI dealer to duplicate the keys
easily. Remove the bar code tag and
store it in a safe place. Also, record the
code number and keep it in a safe and
handy place, but not in the vehicle.
Key operations
• Used to start the engine.
Used to lock and unlock the doors.
Used to lock and unlock the glove box.
Immobilizer system
Your vehicle may be equipped with an
electronic engine immobilizer system to
reduce the risk of unauthorized vehicle
use.
Your immobilizer system is comprised of
a small transponder in the key and elec-
tronic devices inside the vehicle.
Vehicles without smart key system
With the immobilizer system, whenever
you insert your ignition key into the igni-
tion switch and turn it to ON, it checks
and determines and verifies if the ignition
key is valid or not.
If the key is valid, the engine will start.
If the key is invalid, the engine will not
start.
To deactivate the immobilizer system:
Insert the ignition key into the key cylin-
der and turn it to the ON position.
To activate the immobilizer system:
Turn the ignition key to the OFF position.
The immobilizer system activates auto-
matically. Without a valid ignition key for
your vehicle, the engine will not start.
KEYS
WARNING- Ignition key
Leaving children unattended in a
vehicle with the ignition key is dan-
gerous even if the key is not in the
ignition. Children copy adults and
they could place the key in the igni-
tion. The ignition key would enable
children to operate power windows
or other controls, or even make the
vehicle move, which could result in
serious bodily injury or even death.
Never leave the keys in your vehicle
with unsupervised children.
WARNING
Use only HYUNDAI original parts
for the ignition key in your vehicle.
If an aftermarket key is used, the
ignition switch may not return to
ON after START. If this happens,
the starter will continue to operate
causing damage to the starter
motor and possible fire due to
excessive current in the wiring.
Page 104 of 534
Downloaded from www.Manualslib.com manuals search engine 417
Features of your vehicle
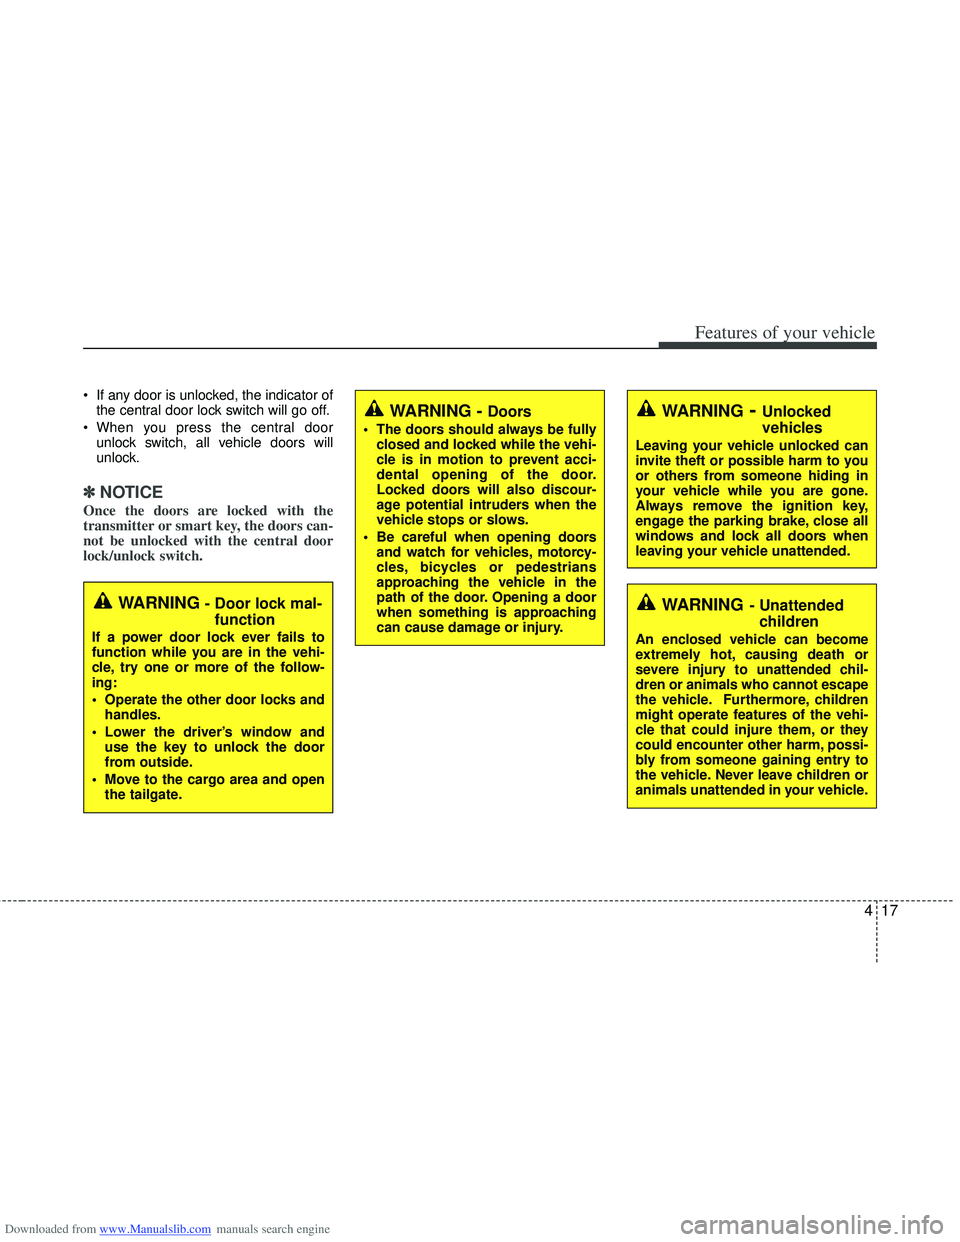
If any door is unlocked, the indicator ofthe central door lock switch will go off.
When you press the central door unlock switch, all vehicle doors will
unlock.
✽ ✽ NOTICE
Once the doors are locked with the
transmitter or smart key, the doors can-
not be unlocked with the central door
lock/unlock switch.
WARNING - Doors
The doors should always be fully
closed and locked while the vehi-
cle is in motion to prevent acci-
dental opening of the door.
Locked doors will also discour-
age potential intruders when the
vehicle stops or slows.
Be careful when opening doors and watch for vehicles, motorcy-
cles, bicycles or pedestrians
approaching the vehicle in the
path of the door. Opening a door
when something is approaching
can cause damage or injury.
WARNING- Unlocked
vehicles
Leaving your vehicle unlocked can
invite theft or possible harm to you
or others from someone hiding in
your vehicle while you are gone.
Always remove the ignition key,
engage the parking brake, close all
windows and lock all doors when
leaving your vehicle unattended.
WARNING- Unattendedchildren
An enclosed vehicle can become
extremely hot, causing death or
severe injury to unattended chil-
dren or animals who cannot escape
the vehicle. Furthermore, children
might operate features of the vehi-
cle that could injure them, or they
could encounter other harm, possi-
bly from someone gaining entry to
the vehicle. Never leave children or
animals unattended in your vehicle.
WARNING - Door lock mal-function
If a power door lock ever fails to
function while you are in the vehi-
cle, try one or more of the follow-
ing:
Operate the other door locks and
handles.
Lower the driver’s window and use the key to unlock the door
from outside.
Move to the cargo area and open the tailgate.
Page 113 of 534
Downloaded from www.Manualslib.com manuals search engine Features of your vehicle
26
4
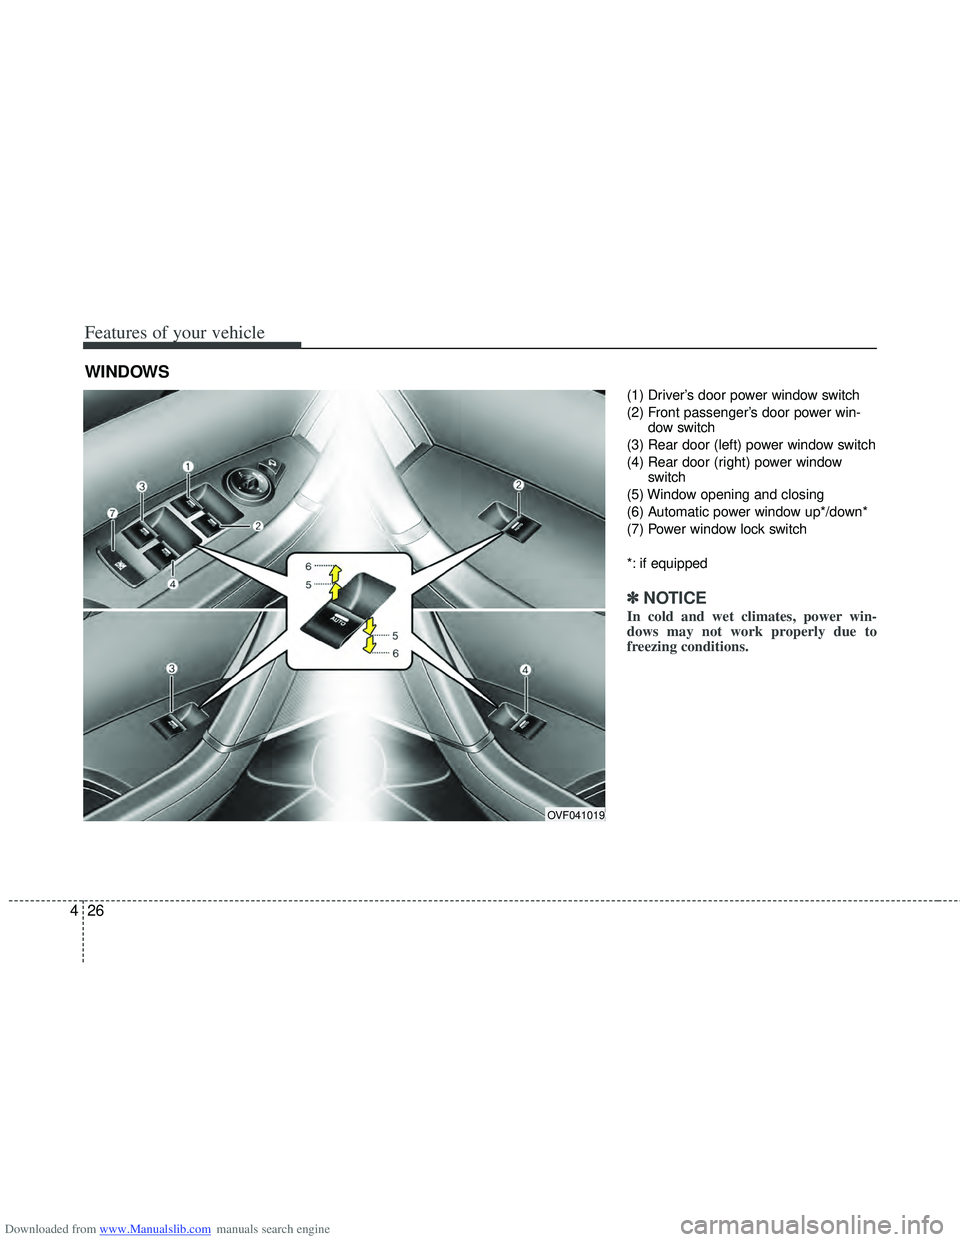
(1) Driver’s door power window switch
(2) Front passenger’s door power win-
dow switch
(3) Rear door (left) power window switch
(4) Rear door (right) power window switch
(5) Window opening and closing
(6) Automatic power window up*/down*
(7) Power window lock switch
*: if equipped
✽ ✽ NOTICE
In cold and wet climates, power win-
dows may not work properly due to
freezing conditions.
WINDOWS
OVF041019
Page 114 of 534
Downloaded from www.Manualslib.com manuals search engine 427
Features of your vehicle
Power windows
The ignition switch must be in the ON
position for power windows to operate.
Each door has a power window switch
that controls the door’s window. The dri-
ver’s door has a master power window
switch that controls all the windows in the
vehicle. Also, the driver has a power win-
dow lock switch which can block the
operation of rear passenger windows.
The power windows can be operated for
approximately 30 seconds after the igni-
tion key is removed or turned to the ACC
or LOCK position. However, if the front
doors are opened, the power windows
cannot be operated even within the 30
seconds period.
✽ ✽NOTICE
While driving with the rear windows
down or with the sunroof (if equipped) in
an open (or partially open position), your
vehicle may demonstrate a wind buffet-
ing or pulsation noise. This noise is a
normal occurrence and can be reduced
or eliminated by taking the following
actions. If the noise occurs with one or
both of the rear windows down, partially
lower both front windows approximate-
ly one inch. If you experience the noise
with the sunroof open, slightly reduce the
size of the sunroof opening.
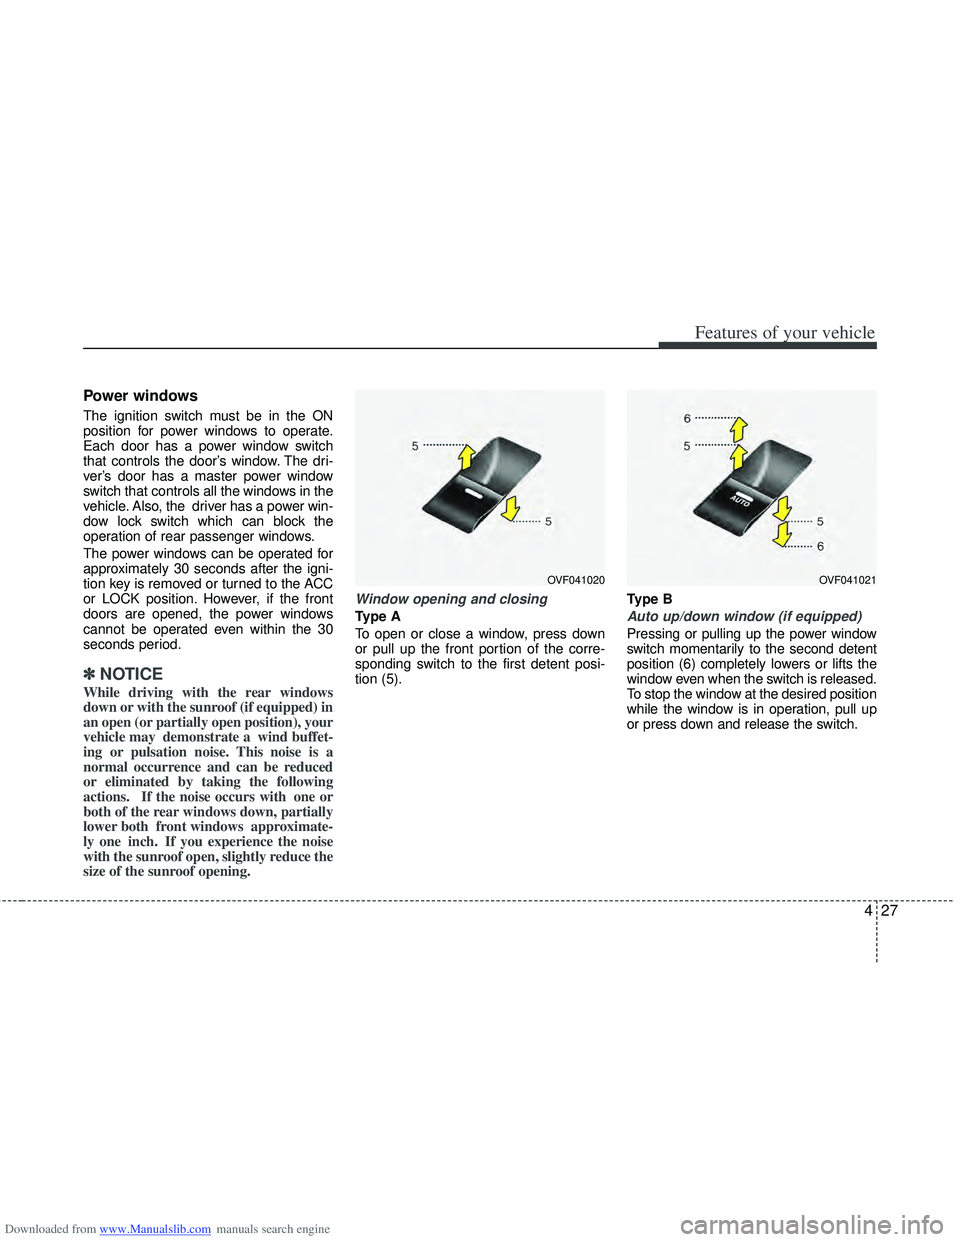
Window opening and closing
Type A
To open or close a window, press down
or pull up the front portion of the corre-
sponding switch to the first detent posi-
tion (5). Type BAuto up/down window (if equipped)
Pressing or pulling up the power window
switch momentarily to the second detent
position (6) completely lowers or lifts the
window even when the switch is released.
To stop the window at the desired position
while the window is in operation, pull up
or press down and release the switch.
OVF041020OVF041021