HYUNDAI IONIQ 2020 Owners Manual
Manufacturer: HYUNDAI, Model Year: 2020, Model line: IONIQ, Model: HYUNDAI IONIQ 2020Pages: 561, PDF Size: 24.5 MB
Page 371 of 561
5-135
Driving your vehicle
5
Hazardous Driving Conditions
When hazardous driving elements
are encountered such as water,
snow, ice, mud and sand, take the
bellow suggestions:
Drive cautiously and keep a longer
braking distance.
Avoid abrupt braking or steering.
When your vehicle is stuck in snow,
mud, or sand, use second gear.
Accelerate slowly to avoid unnec-
essary wheel spin.
Put sand, rock salt, tire chains or
other non-slip materials under the
wheels to provide additional trac-
tion while the vehicle becomes
stuck in ice, snow, or mud.
Rocking the Vehicle
If it is necessary to rock the vehicle
to free it from snow, sand, or mud,
first turn the steering wheel right and
left to clear the area around your
front wheels. Then, shift back and
forth between R (Reverse) and a for-
ward gear.
Try to avoid spinning the wheels, and
do not race the vehicle.
To prevent reduction gear wear, wait
until the wheels stop spinning before
shifting gears. Release the accelera-
tor pedal while shifting, and press
lightly on the accelerator pedal while
the reduction gear is in gear. Slowly
spinning the wheels in forward and
reverse directions causes a rocking
motion that may free the vehicle.
S SP
PE
EC
CI
IA
AL
L
D
DR
RI
IV
VI
IN
NG
G
C
CO
ON
ND
DI
IT
TI
IO
ON
NS
S
If the vehicle is stuck and
excessive wheel spin occurs,
the temperature in the tires can
increase very quickly. If the tires
become damaged, a tire blow
out or tire explosion can occur.
This condition is dangerous -
you and others may be injured.
Do not attempt this procedure if
people or objects are anywhere
near the vehicle.
If you attempt to free the vehi-
cle, the vehicle can overheat
quickly, possibly causing an
motor compartment fire or
other damage. Try to avoid spin-
ning the wheels as much as
possible to prevent overheating
of either the tires or the vehicle.
DO NOT allow the vehicle to
spin the wheels above 56 km/h
(35 mph).
WARNING
Page 372 of 561
5-136
Driving your vehicle
Information
The ESC system (if equipped) must be
turned OFF before rocking the vehi-
cle.
If you are still stuck after rocking
the vehicle a few times, have the
vehicle pulled out by a tow vehicle
to avoid vehicle overheating, pos-
sible damage to the reduction
gear and tire damage. See
"Towing" in chapter 6.
Smooth Cornering
Avoid braking or gear changing in
corners, especially when roads are
wet. Ideally, corners should always
be taken under gentle acceleration.
Driving at Night
Night driving presents more hazards
than driving in the daylight. Here are
some important tips to remember:
Slow down and keep more dis-
tance between you and other vehi-
cles, as it may be more difficult to
see at night, especially in areas
where there may not be any street
lights.
Adjust your mirrors to reduce the
glare from other driver's head-
lamps.
Keep your headlamps clean and
properly aimed. Dirty or improperly
aimed headlamps will make it
much more difficult to see at night.
Avoid staring directly at the head-
lamps of oncoming vehicles. You
could be temporarily blinded, and it
will take several seconds for your
eyes to readjust to the darkness.
Driving in the Rain
Rain and wet roads can make driving
dangerous. Here are a few things to
consider when driving in the rain or
on slick pavement:
Slow down and allow extra follow-
ing distance. A heavy rainfall
makes it harder to see and increas-
es the distance needed to stop
your vehicle.
Turn OFF your Cruise Control. (if
equipped)
Replace your windshield wiper
blades when they show signs of
streaking or missing areas on the
windshield.
Be sure your tires have enough
tread. If your tires do not have
enough tread, making a quick stop
on wet pavement can cause a skid
and possibly lead to an accident.
See "Tire Tread" in chapter 7.
Turn on your headlamps to make it
easier for others to see you.
Driving too fast through large pud-
dles can affect your brakes. If you
must go through puddles, try to
drive through them slowly.
NOTICE
i
Page 373 of 561
5-137
Driving your vehicle
5
If you believe your brakes may be
wet, apply them lightly while driv-
ing until normal braking operation
returns.
Hydroplaning
If the road is wet enough and you are
going fast enough, your vehicle may
have little or no contact with the road
surface and actually ride on the
water. The best advice is SLOW
DOWN when the road is wet.
The risk of hydroplaning increas-
es as the depth of tire tread
decreases, refer to "Tire Tread" in
chapter 7.
Driving in Flooded Areas
Avoid driving through flooded areas
unless you are sure the water is no
higher than the bottom of the wheel
hub. Drive through any water slowly.
Allow adequate stopping distance
because brake performance may be
reduced.
After driving through water, dry the
brakes by gently applying them sev-
eral times while the vehicle is moving
slowly.
Highway Driving
Tires
Adjust the tire inflation, as specified.
Under-inflation may overheat or
damage the tires.
Do not install worn-out or damaged
tires, which may reduce traction or
fail the braking operation.
Information
Never over-inflate your tires above the
maximum inflation pressure, as speci-
fied on your tires.
Coolant and high voltage bat-
tery
Be sure to check both the coolant
level and the high voltage battery
level before driving.
i
Page 374 of 561
5-138
Driving your vehicle
The severe weather conditions of
winter quickly wear out tires and
cause other problems. To minimize
winter driving problems, you should
take the following suggestions:
Snow or Icy Conditions
You need to keep sufficient distance
between your vehicle and the vehicle
in front of you.
Apply the brakes gently. Speeding,
rapid acceleration, sudden brake
applications, and sharp turns are
potentially very hazardous practices.
During deceleration use the paddle
shifter (left side lever) to increase
regenerative braking. However, avoid
increasing the regenerative braking
level suddenly. Sudden change of the
regenerative braking level on snowy
or icy roads may cause the vehicle to
skid and may cause loss of vehicle
control leading to an accident.
To drive your vehicle in deep snow, it
may be necessary to use snow tires.
Always carry emergency equipment.
Some of the items you may want to
carry include tow straps or chains, a
flashlight, emergency flares, sand, a
shovel, jumper cables, a window
scraper, gloves, ground cloth, cover-
alls, a blanket, etc.
Snow tires
If you mount snow tires on your vehi-
cle, make sure to use radial tires of
the same size and load range as the
original tires. Mount snow tires on all
four wheels to balance your vehicle’s
handling in all weather conditions.
The traction provided by snow tires
on dry roads may not be as high as
your vehicle's original equipment
tires. Check with the tire dealer for
maximum speed recommendations.
Information
Do not install studded tires without
first checking local, state and munici-
pal regulations for possible restric-
tions against their use.
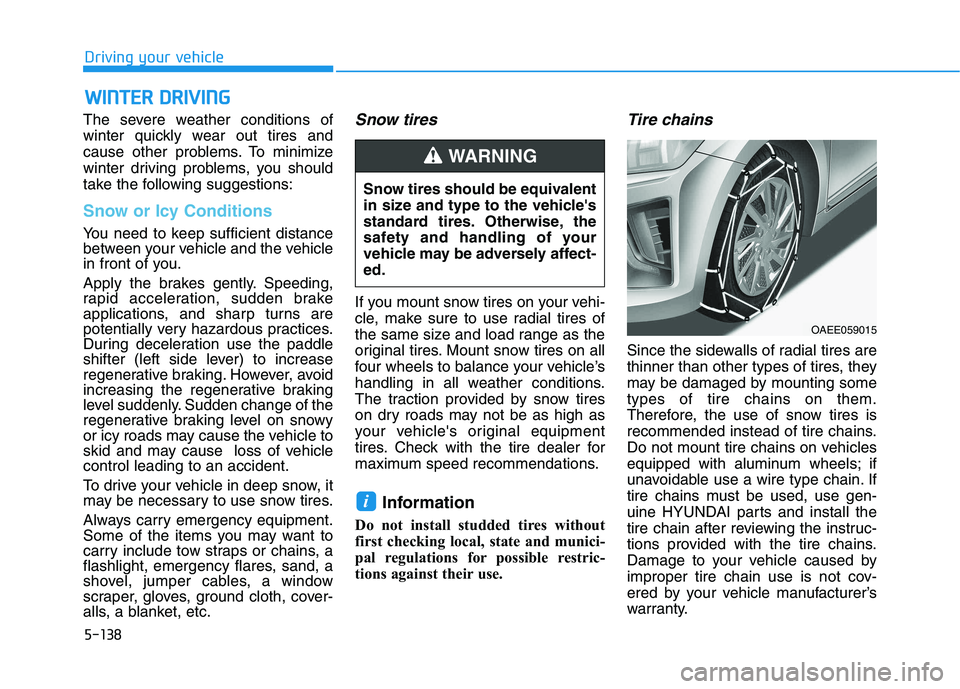
Tire chains
Since the sidewalls of radial tires are
thinner than other types of tires, they
may be damaged by mounting some
types of tire chains on them.
Therefore, the use of snow tires is
recommended instead of tire chains.
Do not mount tire chains on vehicles
equipped with aluminum wheels; if
unavoidable use a wire type chain. If
tire chains must be used, use gen-
uine HYUNDAI parts and install the
tire chain after reviewing the instruc-
tions provided with the tire chains.
Damage to your vehicle caused by
improper tire chain use is not cov-
ered by your vehicle manufacturer’s
warranty.
i
W WI
IN
NT
TE
ER
R
D
DR
RI
IV
VI
IN
NG
G
Snow tires should be equivalent
in size and type to the vehicle's
standard tires. Otherwise, the
safety and handling of your
vehicle may be adversely affect-
ed.
WARNING
OAEE059015
Page 375 of 561
5-139
Driving your vehicle
5
The use of tire chains may
adversely affect vehicle han-
dling:
Drive less than 20 mph (30
km/h) or the chain manufac-
turer's recommended speed
limit, whichever is lower.
Drive carefully and avoid
bumps, holes, sharp turns,
and other road hazards, which
may cause the vehicle to
bounce.
Avoid sharp turns or locked
wheel braking.
WARNING Information
• Install tire chains only in pairs and
on the front tires. It should be noted
that installing tire chains on the
tires will provide a greater driving
force, but will not prevent side
skids.
• Do not install studded tires without
first checking local, state and
municipal regulations for possible
restrictions against their use.
Chain Installation
When installing tire chains, follow the
manufacturer's instructions and
mount them as tightly possible. Drive
slowly (less than 20 mph (30 km/h))
with chains installed. If you hear the
chains contacting the body or chas-
sis, stop and tighten them. If they still
make contact, slow down until the
noise stops. Remove the tire chains
as soon as you begin driving on
cleared roads.
When mounting snow chains, park
the vehicle on level ground away
from traffic. Turn on the vehicle
Hazard Warning Flasher and place a
triangular emergency warning device
behind the vehicle (if available).
Always place the vehicle in P (Park),
apply the parking brake and turn off
the vehicle before installing snow
chains.i
Page 376 of 561
5-140
Driving your vehicle
When using tire chains:
Wrong size chains or improperly
installed chains can damage
your vehicle's brake lines, sus-
pension, body and wheels.
Use SAE "S" class or wire
chains.
If you hear noise caused by
chains contacting the body,
retighten the chain to prevent
contact with the vehicle body.
To prevent body damage,
retighten the chains after driving
0.3~0.6 miles (0.5~1.0 km).
Do not use tire chains on vehi-
cles equipped with aluminum
wheels. If unavoidable, use a
wire type chain.
Use wire chains less than 0.47 in
(12 mm) thick to prevent damage
to the chain's connection.
Winter Precautions
Change to "winter weight" oil if
necessary
In some climates it is recommended
that a lower viscosity "winter weight"
oil be used during cold weather. See
chapter 8 for recommendations. If
you aren't sure what weight oil you
should use, consult an authorized
HYUNDAI dealer.
Check battery and cables
Winter puts additional burdens on
the battery system. Visually inspect
the battery and cables as described
in chapter 7. The level of charge in
your battery can be checked by an
authorized HYUNDAI dealer or a
service station.
Use approved window washer
anti-freeze in system
To keep the water in the window
washer system from freezing, add an
approved window washer anti-freeze
solution in accordance with instruc-
tions on the container. Window wash-
er anti-freeze is available from an
authorized HYUNDAI dealer and
most auto parts outlets. Do not use
coolant or other types of anti-freeze
as these may damage the paint fin-
ish.
Do not let your parking brake
freeze
Under some conditions your parking
brake can freeze in the engaged
position. This is most likely to happen
when there is an accumulation of
snow or ice around or near the rear
brakes or if the brakes are wet. If
there is a risk the parking brake may
freeze, apply it only temporarily while
you shift to P (Park) and block the
rear wheels so the car cannot roll.
Then release the parking brake.
NOTICE
Page 377 of 561
5-141
Driving your vehicle
5
Do not let ice and snow accu-
mulate underneath
Under some conditions, snow and
ice can build up under the fenders
and interfere with the steering. When
driving in severe winter conditions
where this may happen, you should
periodically check underneath the
car to be sure the movement of the
front wheels and the steering com-
ponents is not obstructed.
Don't place foreign objects or
materials in the motor compart-
ment
Placement of foreign object or mate-
rials which prevent cooling of the
vehicle, in the motor compartment,
may cause a failure. The manufactur-
er is not responsible for the damage
caused by such placement.
To keep locks from freezing
To keep the locks from freezing,
squirt an approved de-icer fluid or
glycerine into the key opening. If a
lock is covered with ice, squirt it with
an approved de-icing fluid to remove
the ice. If the lock is frozen internally,
you may be able to thaw it out by
using a heated key. Handle the heat-
ed key with care to avoid injury.
Page 378 of 561
5-142
Driving your vehicle
Two labels on your driver's door sill
show how much weight your vehicle
was designed to carry: the Tire and
Loading Information Label and the
Certification Label.
Before loading your vehicle, familiar-
ize yourself with the following terms
for determining your vehicle’s weight
ratings, from the vehicle's specifica-
tions and the Certification Label:
Base Curb Weight
This is the weight of the vehicle
including a full tank of fuel and all
standard equipment. It does not
include passengers, cargo, or option-
al equipment.
Vehicle Curb Weight
This is the weight of your new vehicle
when you picked it up from your deal-
er plus any aftermarket equipment.
Cargo Weight
This figure includes all weight added
to the Base Curb Weight, including
cargo and optional equipment.GAW (Gross Axle Weight)
This is the total weight placed on
each axle (front and rear) - including
vehicle curb weight and all payload.
GAWR (Gross Axle Weight Rating)
This is the maximum allowable
weight that can be carried by a single
axle (front or rear). These numbers
are shown on the Certification Label.
The total load on each axle must
never exceed its GAWR.
GVW (Gross Vehicle Weight)
This is the Base Curb Weight plus
actual Cargo Weight plus passen-
gers.
GVWR (Gross Vehicle Weight
Rating)
This is the maximum allowable
weight of the fully loaded vehicle
(including all options, equipment,
passengers and cargo). The GVWR
is shown on the Certification Label
located on the driver’s door sill.
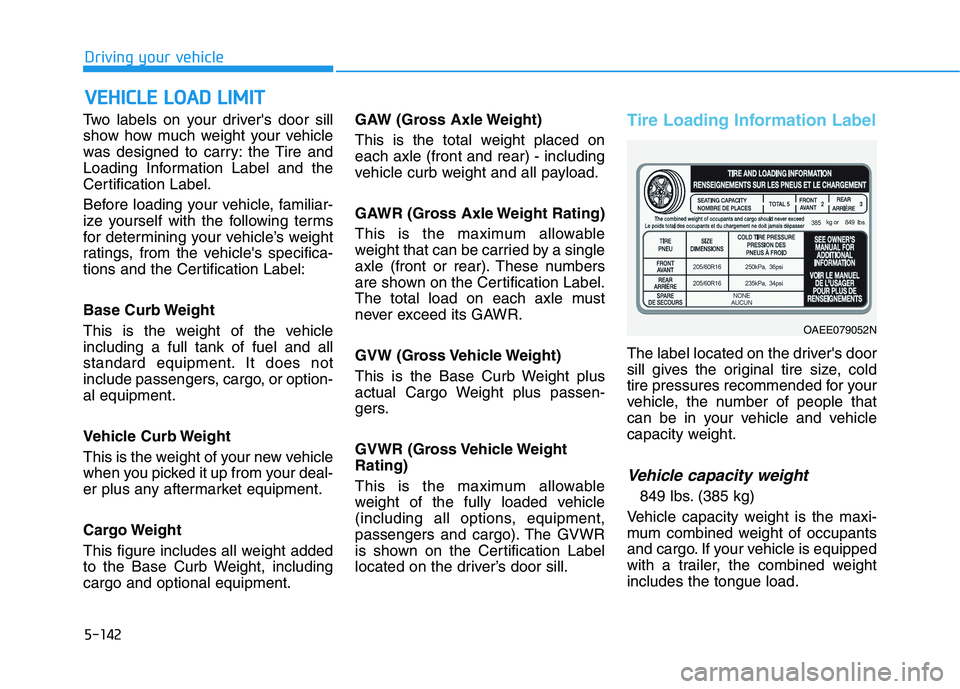
Tire Loading Information Label
The label located on the driver's door
sill gives the original tire size, cold
tire pressures recommended for your
vehicle, the number of people that
can be in your vehicle and vehicle
capacity weight.
Vehicle capacity weight
849 lbs. (385 kg)
Vehicle capacity weight is the maxi-
mum combined weight of occupants
and cargo. If your vehicle is equipped
with a trailer, the combined weight
includes the tongue load.
V VE
EH
HI
IC
CL
LE
E
L
LO
OA
AD
D
L
LI
IM
MI
IT
T
OAEE079052N
Page 379 of 561
5-143
Driving your vehicle
5
Seating capacity
Total : 5 persons
(Front seat : 2 persons,
Rear seat : 3 persons)
Seating capacity is the maximum
number of occupants including a
driver, your vehicle may carry.
However, the seating capacity may
be reduced based upon the weight of
all of the occupants, and the weight
of the cargo being carried or towed.
Do not overload the vehicle as there
is a limit to the total weight, or load
limit including occupants and cargo,
the vehicle can carry.
Towing capacity
We do not recommend using this
vehicle for trailer towing.
Cargo capacity
The cargo capacity of your vehicle
will increase or decrease depending
on the weight and the number of
occupants and the tongue load, if
your vehicle is equipped with a trailer.
Steps for determining correct
load limit
1. Locate the statement "The com-
bined weight of occupants and
cargo should never exceed XXX
kg or XXX lbs." on your vehicle's
placard.
2. Determine the combined weight of
the driver and passengers that will
be riding in your vehicle.
3. Subtract the combined weight of
the driver and passengers from
XXX kg or XXX lbs.
4. The resulting figure equals the
available amount of cargo and lug-
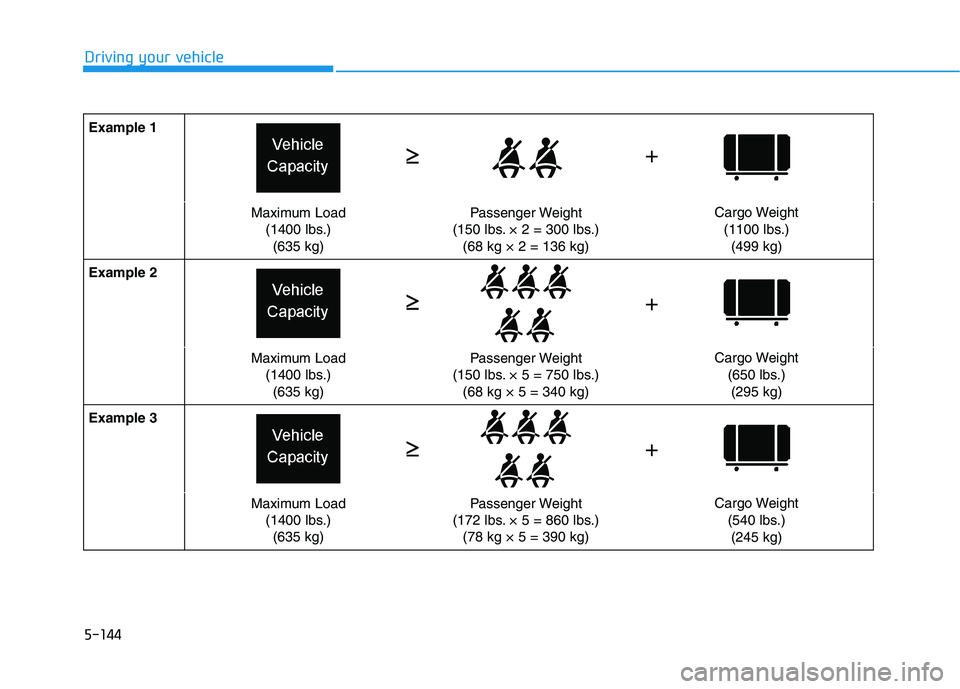
gage load capacity. For example, if
the "XXX" amount equals 1400
lbs. and there will be five 150 lb
passengers in your vehicle, the
amount of available cargo and lug-
gage load capacity is 650 lbs.
(1400 - 750 (5 x 150) = 650 lbs.)
5. Determine the combined weight of
luggage and cargo being loaded
on the vehicle. That weight may
not safely exceed the available
cargo and luggage load capacity
calculated in Step 4.6. If your vehicle will be towing a trail-
er, load from your trailer will be
transferred to your vehicle. Consult
this manual to determine how this
reduces the available cargo and
luggage load capacity of your vehi-
cle.
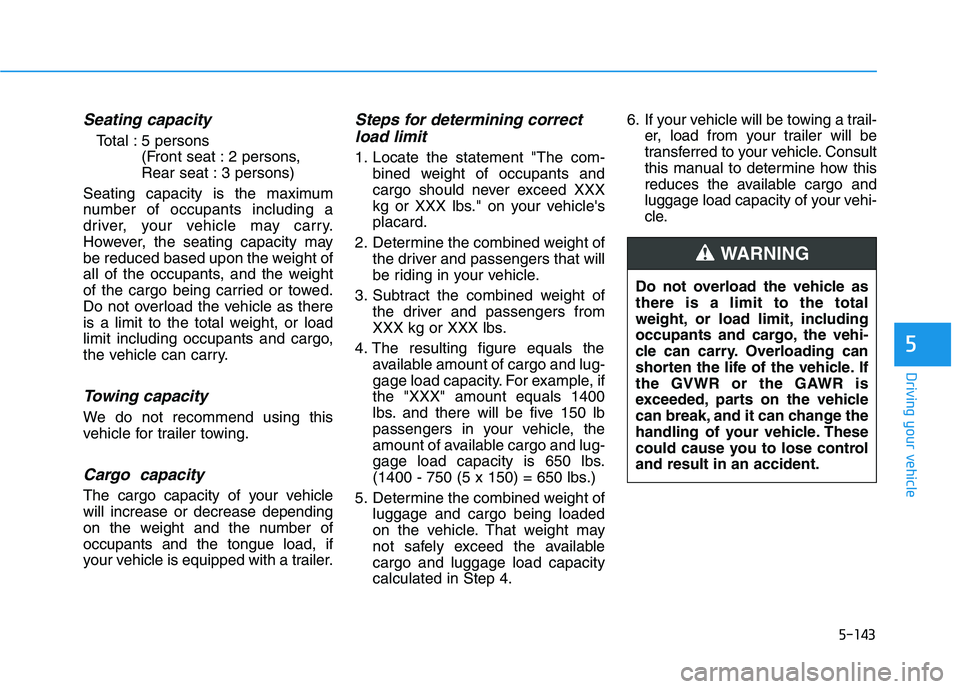
Do not overload the vehicle as
there is a limit to the total
weight, or load limit, including
occupants and cargo, the vehi-
cle can carry. Overloading can
shorten the life of the vehicle. If
the GVWR or the GAWR is
exceeded, parts on the vehicle
can break, and it can change the
handling of your vehicle. These
could cause you to lose control
and result in an accident.
WARNING
Page 380 of 561
5-144
Driving your vehicle
Example 1
Maximum Load
(1400 lbs.)
(635 kg)Passenger Weight
(150 lbs. × 2 = 300 lbs.)
(68 kg × 2 = 136 kg)Cargo Weight
(1100 lbs.)
(499 kg)
Example 2
Maximum Load
(1400 lbs.)
(635 kg)Passenger Weight
(150 lbs. × 5 = 750 lbs.)
(68 kg × 5 = 340 kg)Cargo Weight
(650 lbs.)
(295 kg)
Example 3
Maximum Load
(1400 lbs.)
(635 kg)Passenger Weight
(172 lbs. × 5 = 860 lbs.)
(78 kg × 5 = 390 kg)Cargo Weight
(540 lbs.)
(245 kg)
+
≥ ≥
≥ ≥
≥ ≥+
+