ESP HYUNDAI IONIQ 2020 Repair Manual
[x] Cancel search | Manufacturer: HYUNDAI, Model Year: 2020, Model line: IONIQ, Model: HYUNDAI IONIQ 2020Pages: 561, PDF Size: 24.5 MB
Page 439 of 561
7-33
7
Maintenance
Bead
The tire bead contains steel wires
wrapped by steel cords that hold the
tire onto the rim.
Bias Ply Tire
A pneumatic tire in which the plies
are laid at alternate angles less than
90 degrees to the centerline of the
tread.
Cold Tire Pressure
The amount of air pressure in a tire,
measured in pounds per square inch
(psi) or kilopascals (kPa) before a tire
has built up heat from driving.
Curb Weight
This means the weight of a motor
vehicle with standard and optional
equipment including the maximum
capacity of fuel, oil and coolant, but
without passengers and cargo.
DOT Markings
A code molded into the sidewall of a
tire signifying that the tire is in com-
pliance with the U.S. Department of
Transportation motor vehicle safety
standards. The DOT code includes
the Tire Identification Number (TIN),
an alphanumeric designator which
can also identify the tire manufactur-
er, production plant, brand and date
of production.
GVWR
Gross Vehicle Weight Rating
GAWR FRT
Gross Axle Weight Rating for the
Front Axle.
GAWR RR
Gross Axle Weight Rating for the
Rear axle.
Intended Outboard Sidewall
The side of an asymmetrical tire, that
must always face outward when
mounted on a vehicle.
Kilopascal (kPa)
The metric unit for air pressure.
Light truck(LT) tire
A tire designated by its manufacturer
as primarily intended for use on light-
weight trucks or multipurpose pas-
senger vehicles.
Load ratings
The maximum load that a tire is rated
to carry for a given inflation pressure.
Load Index
An assigned number ranging from 1
to 279 that corresponds to the load
carrying capacity of a tire.
Page 458 of 561
7-52
Maintenance
L LI
IG
GH
HT
T
B
BU
UL
LB
BS
S
Consult an authorized HYUNDAI
dealer to replace most vehicle light
bulbs. It is difficult to replace vehicle
light bulbs because other parts of the
vehicle must be removed before you
can get to the bulb. This is especially
true for removing the headlamp
assembly to get to the bulb(s).
Removing/installing the headlamp
assembly can result in damage to
the vehicle.
Information
The headlamp and tail lamp lenses
could appear frosty if the vehicle is
washed after driving or the vehicle is
driven at night in wet weather. This
condition is caused by temperature
difference between the lamp inside
and outside and, it does not indicate a
problem with your vehicle. When
moisture condenses in the lamp, it will
be removed after driving with the
headlamp on. The removable level
may differ depending on lamp size,
lamp position and environmental con-
dition. However, if moisture is not
removed, we recommend that your
vehicle is inspected by an authorized
HYUNDAI dealer.
Information
• A normally functioning lamp may
flicker momentarily to stabilize the
vehicle’s electrical control system.
However, if the lamp goes out after
flickering momentarily, or contin-
ues to flicker, we recommend the
system be checked by an authorized
HYUNDAI dealer.
• The position lamp may not turn on
when the position lamp switch is
turned on, but the position lamp and
headlamp switch may turn on when
the headlamp switch is turned on.
This may be caused by network fail-
ure or vehicle electrical control sys-
tem malfunction. If this occurs, we
recommend the system be checked
by an authorized HYUNDAI dealer.
i
i
Prior to replacing a lamp,
depress the foot brake, shift
to P (Park), apply the parking
brake, place the POWER but-
ton in the OFF position and
take the key with you when
leaving the vehicle to avoid
sudden movement of the vehi-
cle and to prevent possible
electric shock.
Be aware the bulbs may be
hot and may burn your fin-
gers.
WARNING
Page 470 of 561
7-64
Maintenance
Do not use strong soap, chemi-
cal detergents or hot water, and
do not wash the vehicle in direct
sunlight or when the body of the
vehicle is warm.
Be careful when washing the
side windows of your vehicle.
Especially, with high-pressure
water, water may leak through
the windows and wet the interi-
or.
To prevent damage to the plastic
parts, do not clean with chemi-
cal solvents or strong deter-
gents.
To prevent damage to the charg-
ing door, make sure to close and
lock the vehicle doors when
washing (high-pressure wash-
ing, automatic car washing, etc.)
the vehicle.
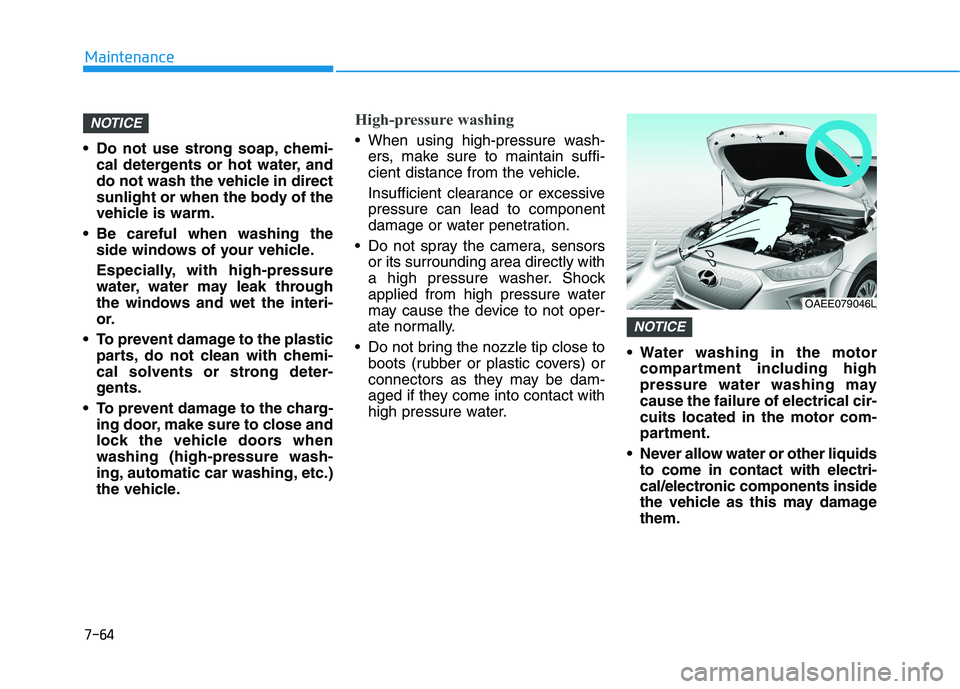
High-pressure washing
When using high-pressure wash-
ers, make sure to maintain suffi-
cient distance from the vehicle.
Insufficient clearance or excessive
pressure can lead to component
damage or water penetration.
Do not spray the camera, sensors
or its surrounding area directly with
a high pressure washer. Shock
applied from high pressure water
may cause the device to not oper-
ate normally.
Do not bring the nozzle tip close to
boots (rubber or plastic covers) or
connectors as they may be dam-
aged if they come into contact with
high pressure water. Water washing in the motor
compartment including high
pressure water washing may
cause the failure of electrical cir-
cuits located in the motor com-
partment.
Never allow water or other liquids
to come in contact with electri-
cal/electronic components inside
the vehicle as this may damage
them.
NOTICE
NOTICE
OAEE079046L
Page 502 of 561
H14
Charging Information
AC Charge :
The electric vehicle is charged by
plugging into a AC charger installed
in your home or a public charging
station. (For further details, refer to
the 'AC Charge'.)
DC Charge (if equipped):
You can charge at high speeds at
public charging stations. Refer to
the respective company's manual
that is provided for each DC charg-
er type.
Battery performance and durability
can deteriorate if the DC charger is
used constantly.
Use of DC charge should be mini-
mized in order to help prolong high
voltage battery life.
Trickle Charge :
The Electric vehicle can be charged
by using household electricity. The
electrical outlet in your home must
comply with regulations and can
safely accommodate the Voltage /
Current (Amps) / Power (Watts) rat-
ings specified on the portable
charge.
Charging Time Information
AC Charge :
Takes about 6 hours 5 minutes at
room temperature. (Can be
charged to 100%.)
DC Charge (if equipped):
- 50 kw charger : Takes about 57
minutes at room temperature
when charged to 80%.
- 100 kw charger : Takes about 54
minutes at room temperature
when charged to 80%.
Both 50/100 kw charger can be
charged to 100%.
Trickle Charge :
Takes about 35 hours 30 minutes
at room temperature. (120V-12A)
(Can be charged to 100%.)
Information
Depending on the condition and dura-
bility of the high voltage battery,
charger specifications, and ambient
temperature, the time required for
charging the high voltage battery may
vary.
i
C CH
HA
AR
RG
GE
E
T
TY
YP
PE
ES
S
F
FO
OR
R
E
EL
LE
EC
CT
TR
RI
IC
C
V
VE
EH
HI
IC
CL
LE
E
Page 516 of 561
H28
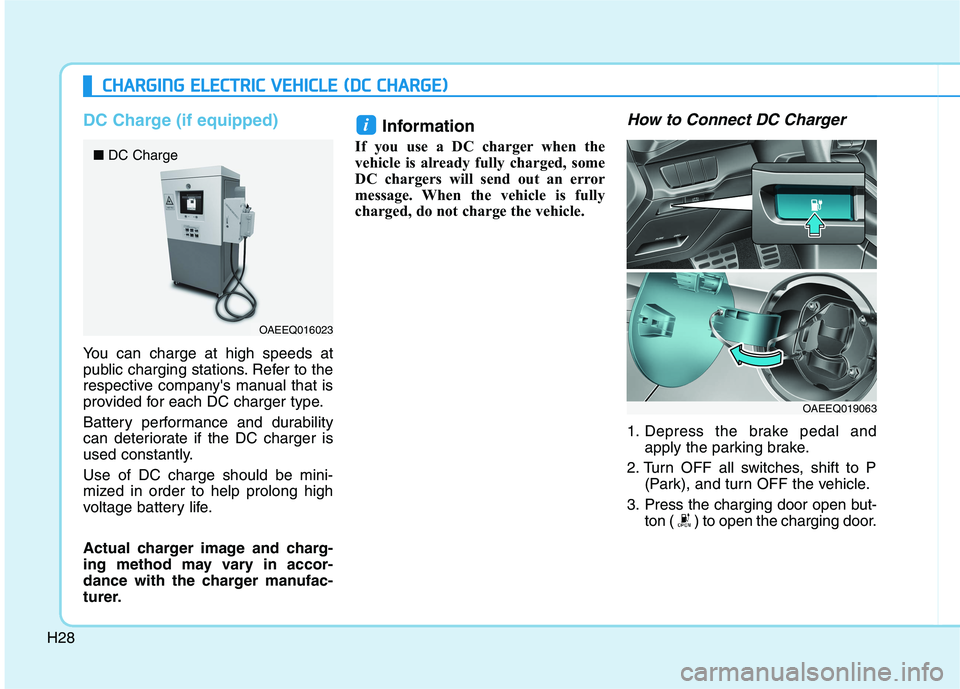
DC Charge (if equipped)
You can charge at high speeds at
public charging stations. Refer to the
respective company's manual that is
provided for each DC charger type.
Battery performance and durability
can deteriorate if the DC charger is
used constantly.
Use of DC charge should be mini-
mized in order to help prolong high
voltage battery life.
Actual charger image and charg-
ing method may vary in accor-
dance with the charger manufac-
turer.
Information
If you use a DC charger when the
vehicle is already fully charged, some
DC chargers will send out an error
message. When the vehicle is fully
charged, do not charge the vehicle.
How to Connect DC Charger
1. Depress the brake pedal and
apply the parking brake.
2. Turn OFF all switches, shift to P
(Park), and turn OFF the vehicle.
3. Press the charging door open but-
ton ( ) to open the charging door.
i
C CH
HA
AR
RG
GI
IN
NG
G
E
EL
LE
EC
CT
TR
RI
IC
C
V
VE
EH
HI
IC
CL
LE
E
(
(D
DC
C
C
CH
HA
AR
RG
GE
E)
)
OAEEQ016023
■DC Charge
OAEEQ019063
Page 520 of 561
H32
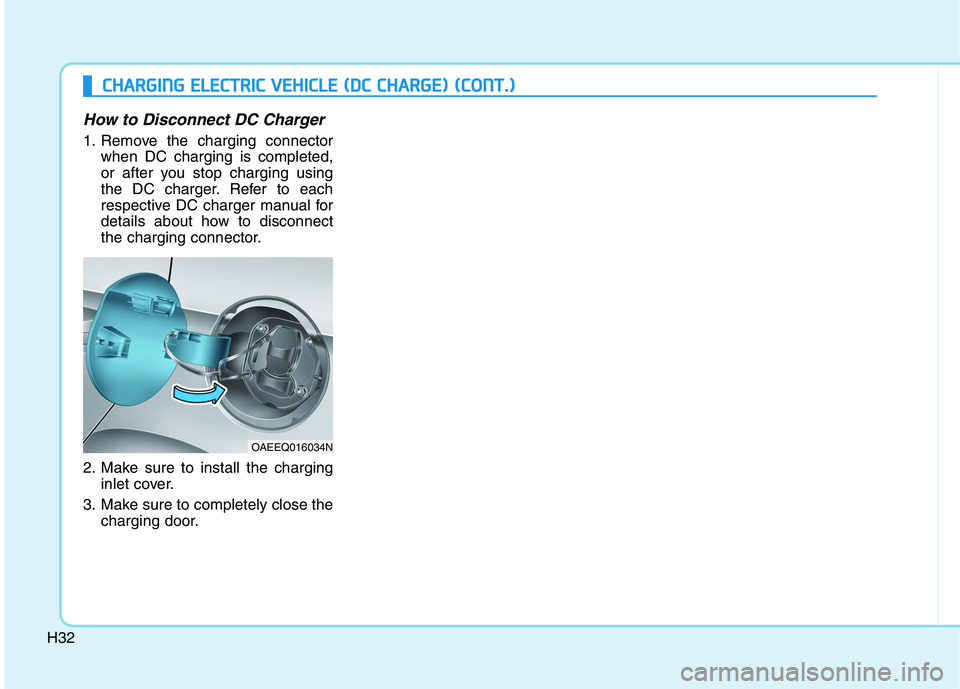
How to Disconnect DC Charger
1. Remove the charging connector
when DC charging is completed,
or after you stop charging using
the DC charger. Refer to each
respective DC charger manual for
details about how to disconnect
the charging connector.
2. Make sure to install the charging
inlet cover.
3. Make sure to completely close the
charging door.
OAEEQ016034N
C CH
HA
AR
RG
GI
IN
NG
G
E
EL
LE
EC
CT
TR
RI
IC
C
V
VE
EH
HI
IC
CL
LE
E
(
(D
DC
C
C
CH
HA
AR
RG
GE
E)
)
(
(C
CO
ON
NT
T.
.)
)
Page 558 of 561
I-5
Power Outlet.............................................................3-139
Sunvisor ....................................................................3-139
Wireless Cellular Phone Charging System .............3-140
Interior Overview..............................................................1-4
Jump Starting (12V Battery) .............................................6-4
Lane Following Assist (LFA)........................................5-111
LFA operation ...........................................................5-113
Limitations of the system .........................................5-116
Warning message ......................................................5-114
Lane Keeping Assist (LKA) ...........................................5-62
Limitations of the System ..........................................5-68
LKA operation ............................................................5-64
LKA system function change .....................................5-70
Warning light and message ........................................5-67
LCD Display ..................................................................3-83
LCD Display Control .................................................3-83
LCD display modes ....................................................3-84
Light ..............................................................................3-101
Exterior Lights..........................................................3-101
Interior Lights...........................................................3-109
Welcome System .....................................................3-112Light Bulbs .....................................................................7-52
Daytime Running Light (DRL) ..................................7-57
Headlamp, Parking Lamp, Turn Signal Lamp and
Side Marker ..............................................................7-53
High Mounted Stop Light Replacement ....................7-60
Interior Light Bulb Replacement ...............................7-61
License Plate Light Bulb Replacement ......................7-61
Rear Combination Light Bulb Replacement ..............7-58
Side Repeater Lamp Replacement .............................7-58
Maintenance Services .......................................................7-4
Owner Maintenance Precautions..................................7-4
Owner's Responsibility.................................................7-4
Mirrors ............................................................................3-19
Inside Rearview Mirror ..............................................3-19
Reverse Parking Aid Function ..................................3-40
Side View Mirrors ....................................................3-37
Motor Compartment ..................................................1-6, 7-3
Motor Number ..................................................................8-8
Owner Maintenance ..........................................................7-5
Owner Maintenance Schedule......................................7-6
I
Index
J
L
M
O