service HYUNDAI IONIQ 5 2023 Owner's Manual
[x] Cancel search | Manufacturer: HYUNDAI, Model Year: 2023, Model line: IONIQ 5, Model: HYUNDAI IONIQ 5 2023Pages: 680, PDF Size: 48.22 MB
Page 401 of 680
06
6-75
WARNING
To prevent serious or fatal injury: • Do not get out of the vehicle without
the parking brake firmly set. If you
have left the vehicle running, the
vehicle can move suddenly. You and
others could be seriously or fatally
injured.
• Do not apply the accelerator pedal to
hold the vehicle on an uphill.
Driving the vehicle after it has been
parked on a hill
1. With the gear in P (Park), apply your brakes and hold the brake pedal down
while you:
• Start your vehicle;
• Shift into gear; and
• Release the parking brake.
2. Slowly remove your foot from the brake pedal.
3. Drive slowly until the trailer is clear of the chocks.
4. Stop and have someone pick up and
store the chocks.Maintenance when Towing a
Trailer
Your vehicle will need service more
often when you regularly pull a trailer.
Important items to pay particular
attention to include reduction gear fluid,
axle lubricant and cooling system fluid.
Brake condition is another important
item to frequently check. If you’re
trailering, it’s a good idea to review these
items before you start your trip. Don’t
forget to also maintain your trailer and
hitch. Follow the maintenance schedule
that accompanied your trailer and check
it periodically. Preferably, conduct the
check at the start of each day’s driving.
Most importantly, all hitch nuts and bolts
should be tight.
NOTICE
To prevent vehicle damage: • Due to higher load during trailer
usage, overheating might occur on
hot days or during uphill driving.
• When towing check reduction gear
fluid more frequently.
Page 495 of 680
07
7-93
•
The driver goes off course the route
set in the navigation
• The route to the destination is
changed or canceled by resetting the
navigation
• The vehicle enters a service station or
rest area
• Android Auto or Car Play is operating
• The navigation cannot detect the
current vehicle position (for example,
elevated roads including overpass
adjacent to general roads or nearby
roads exist in a parallel way)
• The navigation is being updated while driving
• The navigation is being restarted while driving
• The speed limit of some sections
changes according to the road
situations
• Driving on a road under construction
• Driving on a road that is controlled
• There is bad weather, such as heavy
rain, heavy snow, etc.
• Driving on a road that is sharply
curved
OJX1070280L
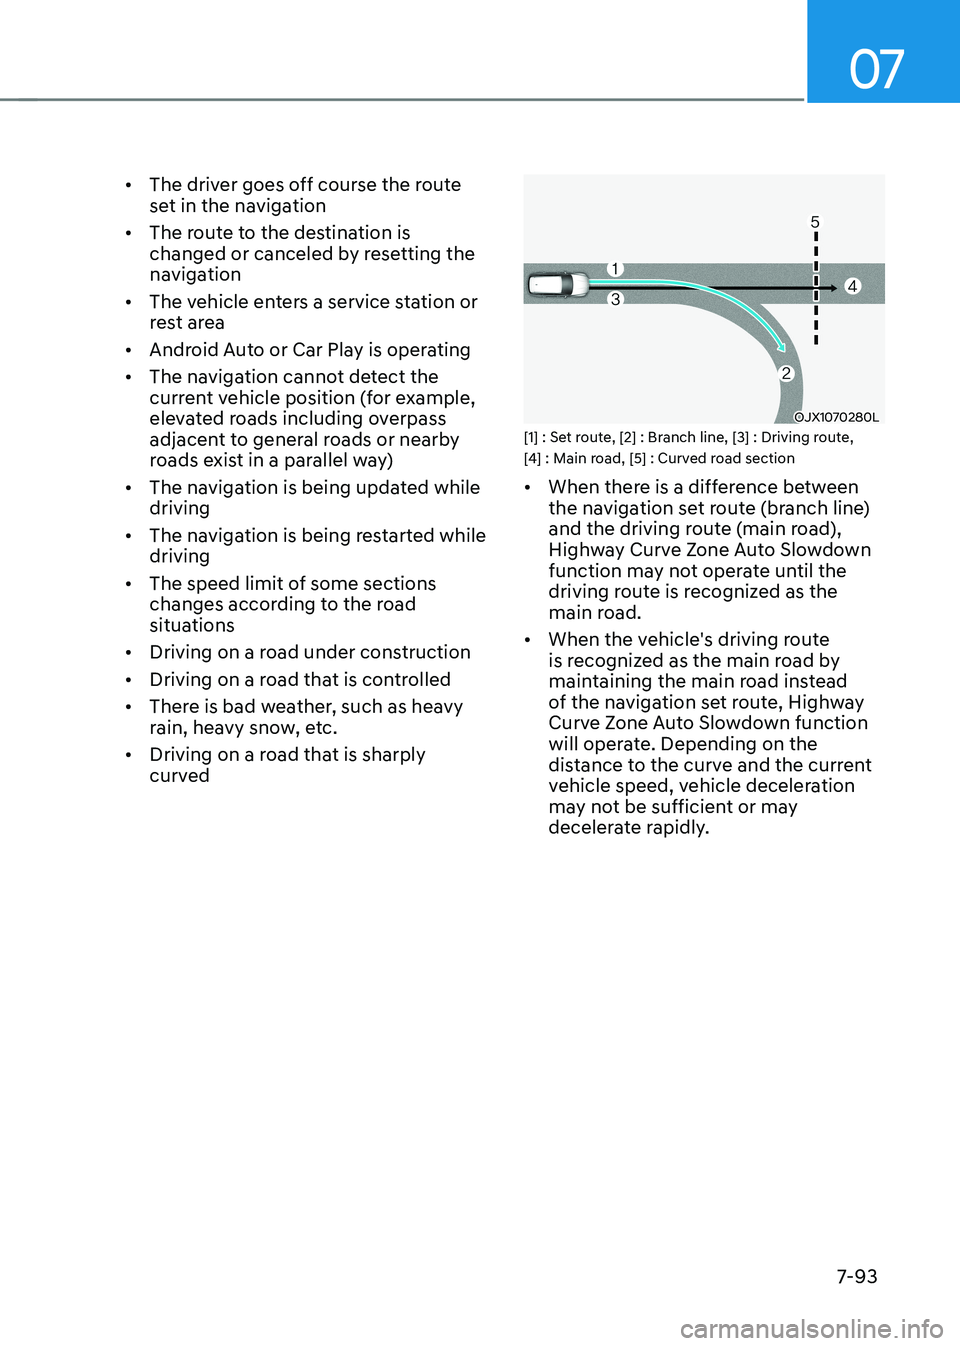
[1] : Set route, [2] : Branch line, [3] : Driving route,
[4] : Main road, [5] : Curved road section • When there is a difference between
the navigation set route (branch line)
and the driving route (main road),
Highway Curve Zone Auto Slowdown
function may not operate until the
driving route is recognized as the
main road.
• When the vehicle's driving route
is recognized as the main road by
maintaining the main road instead
of the navigation set route, Highway
Curve Zone Auto Slowdown function
will operate. Depending on the
distance to the curve and the current
vehicle speed, vehicle deceleration
may not be sufficient or may
decelerate rapidly.
Page 514 of 680
Driver Assistance System
7-112
•
If the vehicle is driven at high speed
above a certain speed at a curve,
your vehicle may drive to one side or
may depart from the driving lane.
• When you are towing a trailer or
another vehicle, turn off Highway
Driving Assist for safety reasons.
• The hands–off warning message
may appear early or late depending
on how the steering wheel is held or
road conditions. Always have your
hands on the steering wheel while driving.
• For your safety, please read the
owner's manual before using the
Highway Driving Assist.
• Highway Driving Assist will not
operate when the vehicle is started,
or when the detecting sensors or
navigation is being initialized.
Limitations of Highway Driving
Assist
Highway Driving Assist and Highway
Lane Change function may not operate
properly, or may not operate under the
following circumstances: • The map information and the
actual road is different because the
navigation is not updated
• The map information and the actual
road is different because of real-time
GPS data or map information error
• The infotainment system is overloaded
by simultaneously performing
functions such as route search, video
playback, voice recognition, etc. •
GPS signals are blocked in areas such as a tunnel
• The driver goes off course or the
route to the destination is changed or
canceled by resetting the navigation
• The vehicle enters a service station or
rest area
• Android Auto or Car Play is operating
• The navigation cannot detect the
current vehicle position (for example,
elevated roads including overpass
adjacent to general roads or nearby
roads exist in a parallel way)
• White single dotted lane line or road
edge cannot be detected
• The road is temporarily controlled due
to construction, etc.
• There is no structure, such as a
medium strip, guardrails, etc., on the
road
• There is a changeable lane in the
direction of lane change
Information
For more details on the limitations of
the front view camera, front radar, front
corner radar and rear corner radar, refer
to “Forward Collision-Avoidance Assist
(FCA)” section in this chapter.
Page 579 of 680
8
Hazard Warning Flasher ................................................................................... 8-2
In Case of an Emergency While Driving ..........................................................8-2
If the Vehicle Stalls While Driving ............................................................................... 8-2
If the Vehicle Stalls at A Crossroad or Crossing .........................................................8-2
If You Have a Flat Tire While Driving ........................................................................... 8-3
If the vehicle will not start ................................................................................ 8-3
Confirm the EV Battery is not Low on the Charge Gauge .........................................8-3
Jump Starting (12V battery) ............................................................................. 8-4
Tire Pressure Monitoring System (TPMS) .........................................................8 -7
Check Tire Pressure ...................................................................................................... 8 -7
Tire Pressure Monitoring System ............................................................................... 8-8
Low Tire Pressure Warning Light ................................................................................ 8-9
Low Tire Pressure Position and Tire Pressure Telltale ...............................................8-9
TPMS (Tire Pressure Monitoring System) Malfunction Indicator ............................8-10
Changing a Tire with TPMS ....................................................................................... 8-10
If You have a Flat Tire (with Tire Mobility Kit) .................................................8-12
Introduction ................................................................................................................ 8-12
Notes on the Safe Use of the Tire Mobility Kit .........................................................8-13
Components of the Tire Mobility Kit ......................................................................... 8-14
Using the Tire Mobility Kit When a Tire is Flat ..........................................................8-15
How to Adjust Tire Pressure ...................................................................................... 8-18
Notes on the Safe Use of the Tire Mobility Kit .........................................................8-19
Towing ............................................................................................................. 8-20
Towing Service .......................................................................................................... 8-20
Removable Towing Hook ........................................................................................... 8-21
Emergency Towing ..................................................................................................... 8-22
8. Emergency Situations
Page 582 of 680
Emergency Situations
8-4
Jump starting can be dangerous if done
incorrectly. Follow the jump starting
procedure in this section to avoid serious
injury or damage to your vehicle. If in
doubt about how to properly jump start
your vehicle, have a service technician or
towing service do it for you.
WARNING
To prevent SERIOUS INJURY or DEATH
to you or bystanders, always follow
these precautions when working near
or handling the battery:
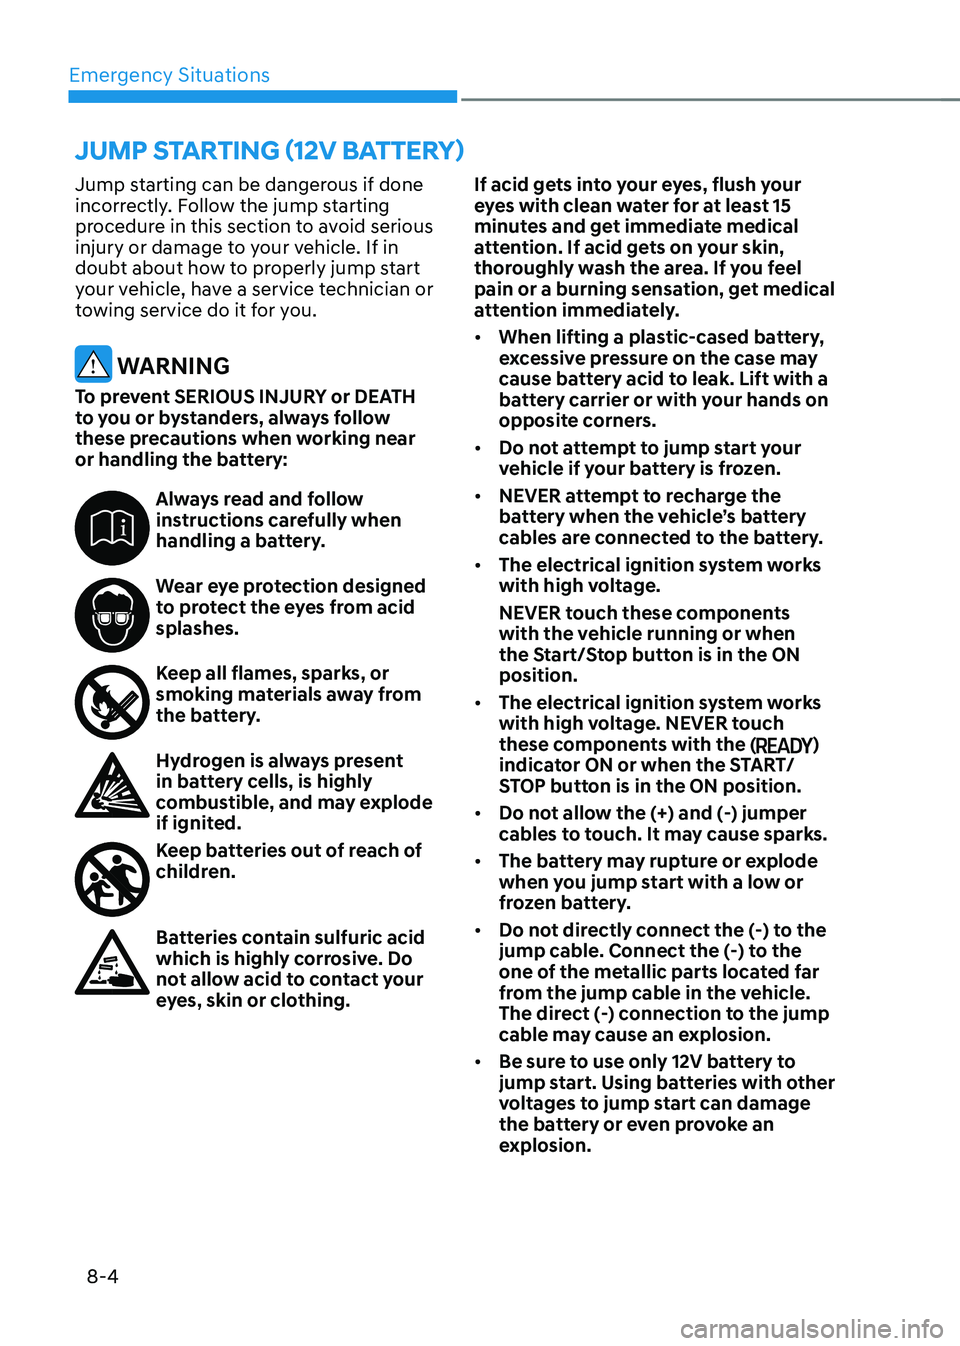
Always read and follow
instructions carefully when
handling a battery.
Wear eye protection designed
to protect the eyes from acid splashes.
Keep all flames, sparks, or
smoking materials away from
the battery.
Hydrogen is always present
in battery cells, is highly
combustible, and may explode
if ignited.
Keep batteries out of reach of
children.
Batteries contain sulfuric acid
which is highly corrosive. Do
not allow acid to contact your
eyes, skin or clothing. If acid gets into your eyes, flush your
eyes with clean water for at least 15
minutes and get immediate medical
attention. If acid gets on your skin,
thoroughly wash the area. If you feel
pain or a burning sensation, get medical
attention immediately. •
When lifting a plastic-cased battery,
excessive pressure on the case may
cause battery acid to leak. Lift with a
battery carrier or with your hands on
opposite corners.
• Do not attempt to jump start your
vehicle if your battery is frozen.
• NEVER attempt to recharge the
battery when the vehicle’s battery
cables are connected to the battery.
• The electrical ignition system works
with high voltage.
NEVER touch these components
with the vehicle running or when
the Start/Stop button is in the ON position.
• The electrical ignition system works
with high voltage. NEVER touch
these components with the (
)
indicator ON or when the START/
STOP button is in the ON position.
• Do not allow the (+) and (-) jumper
cables to touch. It may cause sparks.
• The battery may rupture or explode
when you jump start with a low or
frozen battery.
• Do not directly connect the (-) to the
jump cable. Connect the (-) to the
one of the metallic parts located far
from the jump cable in the vehicle.
The direct (-) connection to the jump
cable may cause an explosion.
• Be sure to use only 12V battery to
jump start. Using batteries with other
voltages to jump start can damage
the battery or even provoke an
explosion.
Jump starting (12V battery)
Page 587 of 680
08
8-9
Low Tire Pressure
Warning Light
Low Tire Pressure Position and
Tire Pressure Telltale
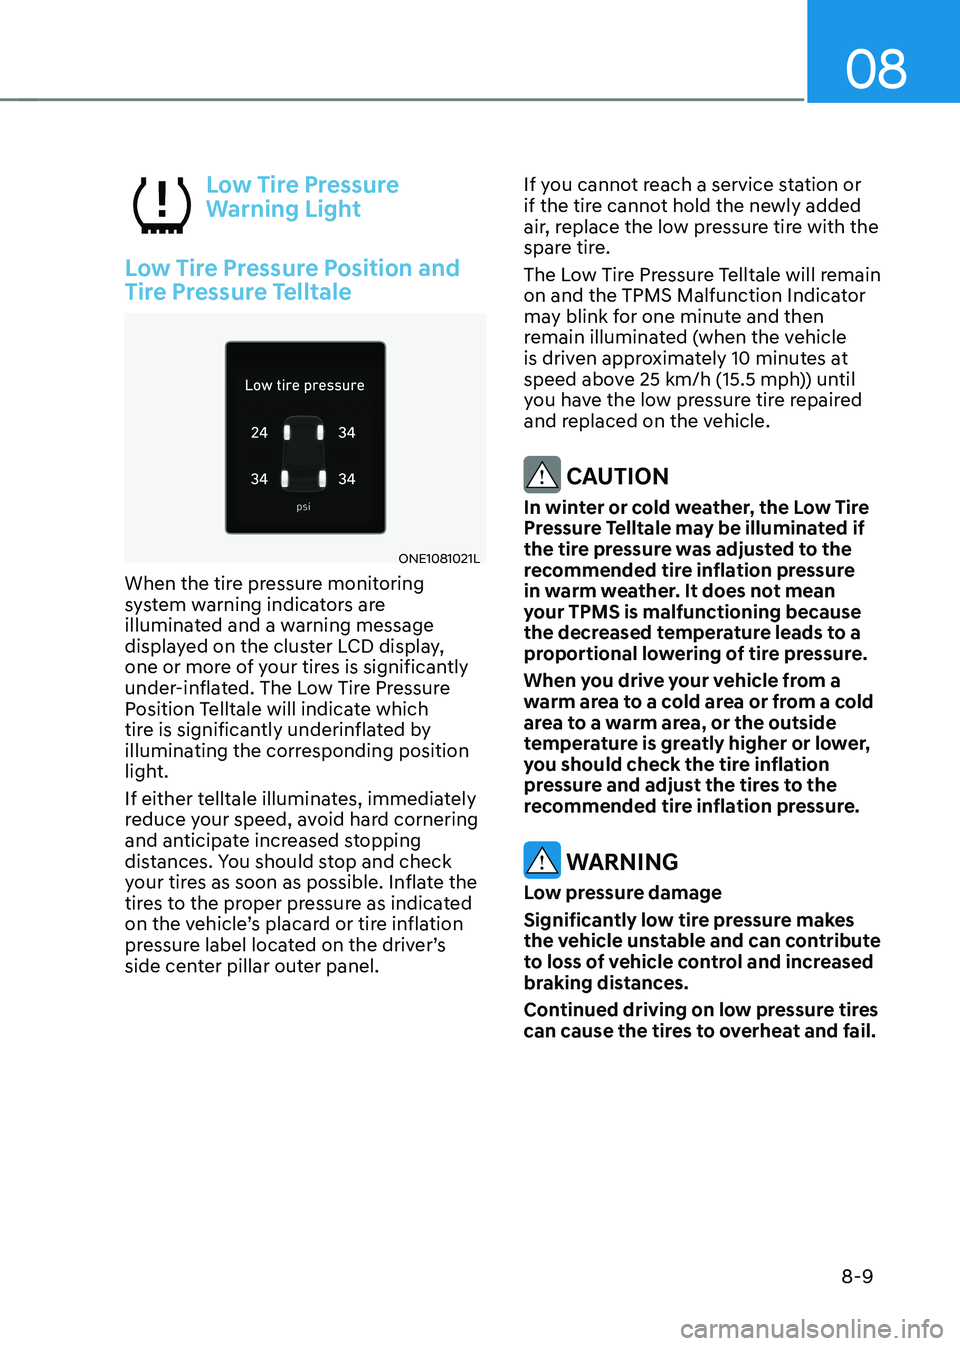
ONE1081021L
When the tire pressure monitoring
system warning indicators are
illuminated and a warning message
displayed on the cluster LCD display,
one or more of your tires is significantly
under-inflated. The Low Tire Pressure
Position Telltale will indicate which
tire is significantly underinflated by
illuminating the corresponding position
light.
If either telltale illuminates, immediately
reduce your speed, avoid hard cornering
and anticipate increased stopping
distances. You should stop and check
your tires as soon as possible. Inflate the
tires to the proper pressure as indicated
on the vehicle’s placard or tire inflation
pressure label located on the driver’s
side center pillar outer panel. If you cannot reach a service station or
if the tire cannot hold the newly added
air, replace the low pressure tire with the
spare tire.
The Low Tire Pressure Telltale will remain
on and the TPMS Malfunction Indicator
may blink for one minute and then
remain illuminated (when the vehicle
is driven approximately 10 minutes at
speed above 25 km/h (15.5 mph)) until
you have the low pressure tire repaired
and replaced on the vehicle.
CAUTION
In winter or cold weather, the Low Tire
Pressure Telltale may be illuminated if
the tire pressure was adjusted to the
recommended tire inflation pressure
in warm weather. It does not mean
your TPMS is malfunctioning because
the decreased temperature leads to a
proportional lowering of tire pressure.
When you drive your vehicle from a
warm area to a cold area or from a cold
area to a warm area, or the outside
temperature is greatly higher or lower,
you should check the tire inflation
pressure and adjust the tires to the
recommended tire inflation pressure.
WARNING
Low pressure damage
Significantly low tire pressure makes
the vehicle unstable and can contribute
to loss of vehicle control and increased
braking distances.
Continued driving on low pressure tires
can cause the tires to overheat and fail.
Page 589 of 680
08
8-11
Each wheel is equipped with a tire
pressure sensor mounted inside the tire
behind the valve stem (except for the
spare tire). You must use TPMS specific
wheels. It is recommended that you
always have your tires serviced by an
authorized HYUNDAI dealer.
You may not be able to identify a tire
with low pressure by simply looking at it.
Always use a good quality tire pressure
gauge to measure. Please note that a tire
that is hot (from being driven) will have a
higher pressure measurement than a tire
that is cold.
A cold tire means the vehicle has been
sitting for 3 hours and driven for less
than 1.6 km (1 mile) in that 3 hour period.
Allow the tire to cool before measuring
the inflation pressure. Always be sure
the tire is cold before inflating to the
recommended pressure.
WARNING
• The TPMS cannot alert you to severe
and sudden tire damage caused by
external factors such as nails or road debris.
• If you feel any vehicle instability,
immediately take your foot off
the accelerator, apply the brakes
gradually with light force, and slowly
move to a safe position off the road.
WARNING
Tampering with, modifying, or disabling
the Tire Pressure Monitoring System
(TPMS) components may interfere
with the system’s ability to warn the
driver of low tire pressure conditions
and/or TPMS malfunctions. Tampering
with, modifying, or disabling the Tire
Pressure Monitoring System (TPMS)
components may void the warranty for
that portion of the vehicle.
WARNING
This device complies with Part 15 of the
FCC rules.
Operation is subject to the following
three conditions: 1. This device may not cause harmful
interference.
2. This device must accept any
interference received, including
interference that may cause
undesired operation of the device.
3. Changes or modifications not
expressly approved by the party
responsible for compliance could
void the user’s authority to operate
the device.
Information
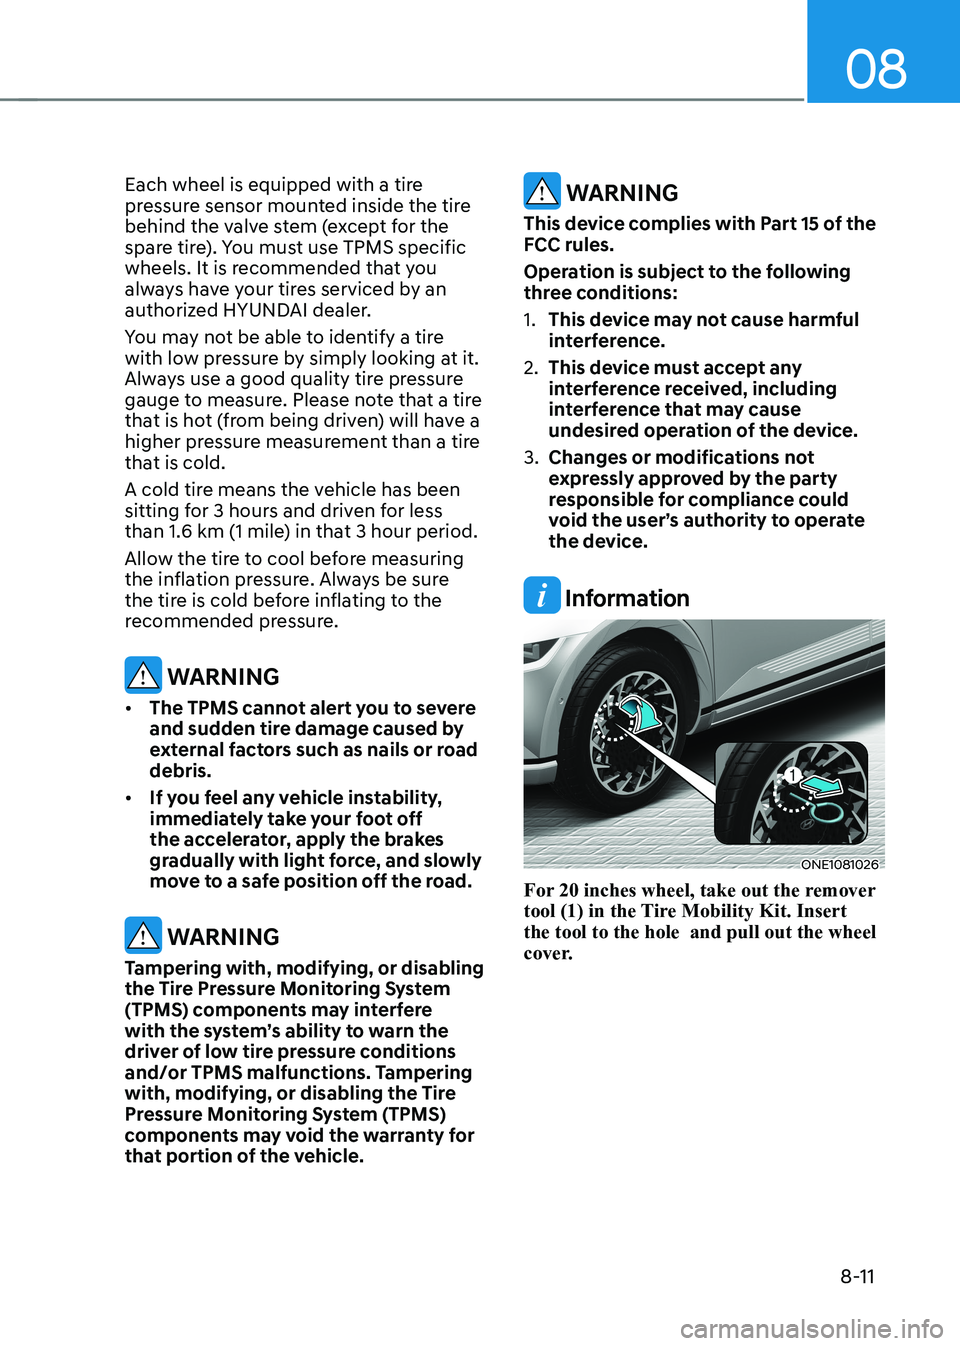
ONE1081026
For 20 inches wheel, take out the remover
tool (1) in the Tire Mobility Kit. Insert the tool to the hole and pull out the wheel
cover.
Page 590 of 680
Emergency Situations
8-12
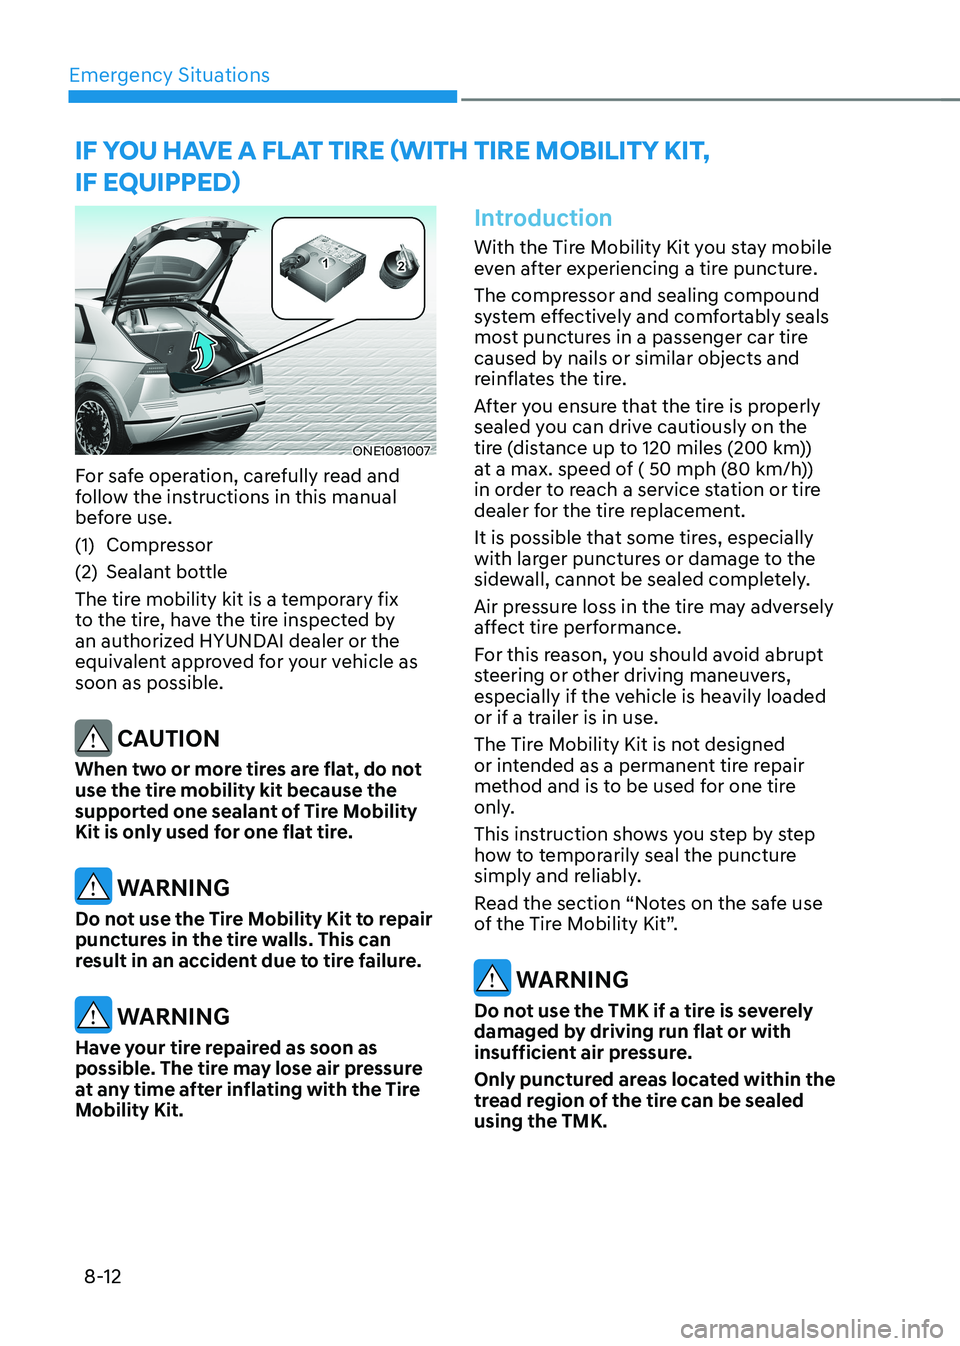
ONE1081007
For safe operation, carefully read and
follow the instructions in this manual
before use.
(1) Compressor
(2) Sealant bottle
The tire mobility kit is a temporary fix
to the tire, have the tire inspected by
an authorized HYUNDAI dealer or the
equivalent approved for your vehicle as soon as possible.
CAUTION
When two or more tires are flat, do not
use the tire mobility kit because the
supported one sealant of Tire Mobility
Kit is only used for one flat tire.
WARNING
Do not use the Tire Mobility Kit to repair
punctures in the tire walls. This can
result in an accident due to tire failure.
WARNING
Have your tire repaired as soon as
possible. The tire may lose air pressure
at any time after inflating with the Tire
Mobility Kit.
Introduction
With the Tire Mobility Kit you stay mobile
even after experiencing a tire puncture.
The compressor and sealing compound
system effectively and comfortably seals
most punctures in a passenger car tire
caused by nails or similar objects and
reinflates the tire.
After you ensure that the tire is properly
sealed you can drive cautiously on the
tire (distance up to 120 miles (200 km))
at a max. speed of ( 50 mph (80 km/h))
in order to reach a service station or tire
dealer for the tire replacement.
It is possible that some tires, especially
with larger punctures or damage to the
sidewall, cannot be sealed completely.
Air pressure loss in the tire may adversely
affect tire performance.
For this reason, you should avoid abrupt
steering or other driving maneuvers,
especially if the vehicle is heavily loaded
or if a trailer is in use.
The Tire Mobility Kit is not designed
or intended as a permanent tire repair
method and is to be used for one tire
only.
This instruction shows you step by step
how to temporarily seal the puncture
simply and reliably.
Read the section “Notes on the safe use
of the Tire Mobility Kit”.
WARNING
Do not use the TMK if a tire is severely
damaged by driving run flat or with
insufficient air pressure.
Only punctured areas located within the
tread region of the tire can be sealed using the TMK.
if you haVe a flat tire (with tire mobility Kit,
if equipped)
Page 594 of 680
Emergency Situations
8-16
ONE1081010
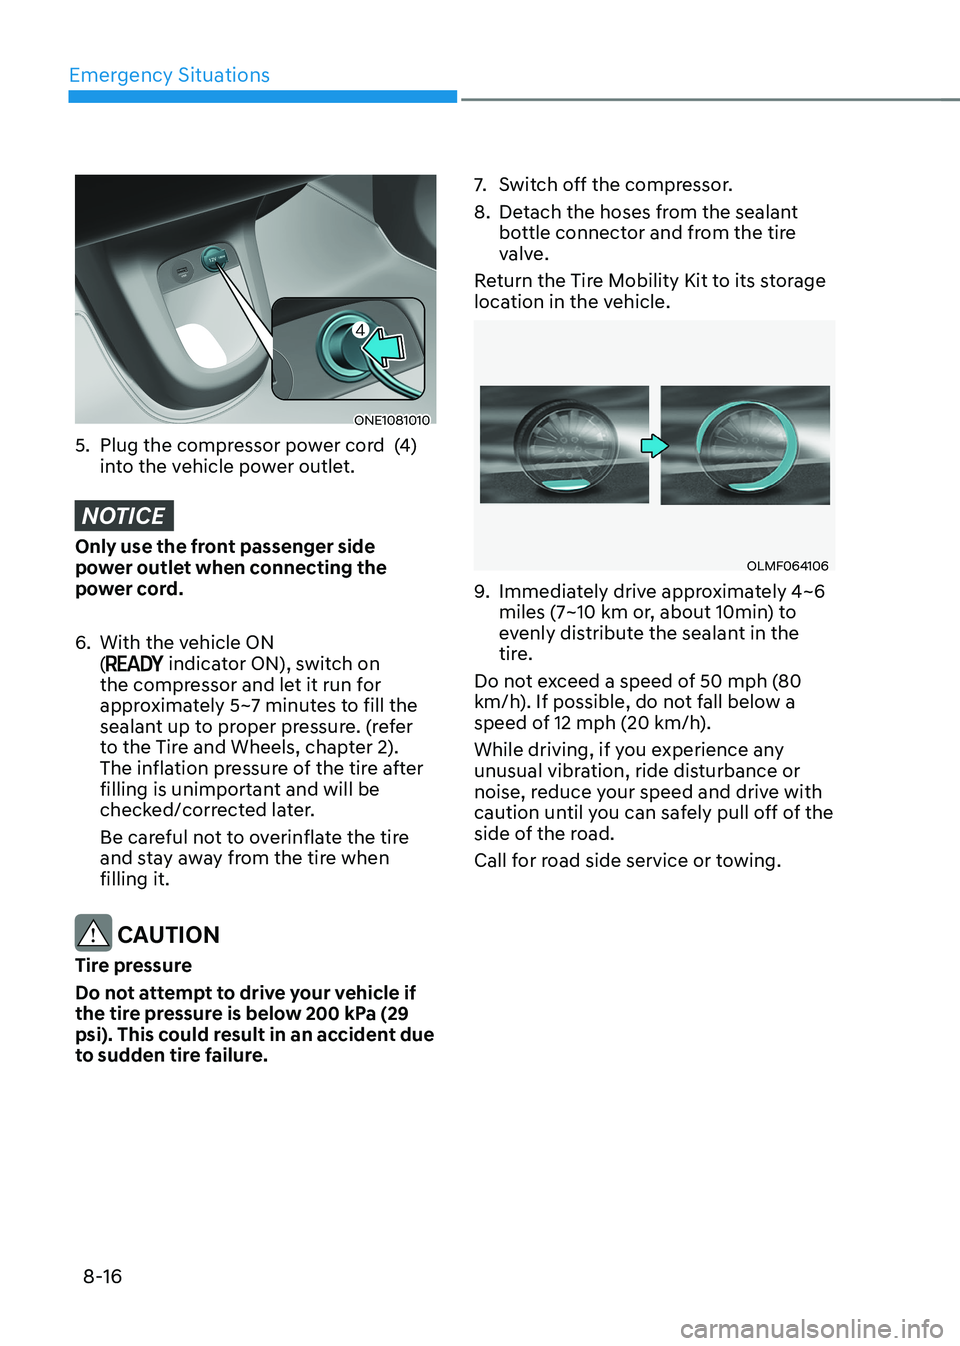
5. Plug the compressor power cord (4) into the vehicle power outlet.
NOTICE
Only use the front passenger side
power outlet when connecting the
power cord.
6. With the vehicle ON (
indicator ON), switch on
the compressor and let it run for
approximately 5~7 minutes to fill the
sealant up to proper pressure. (refer
to the Tire and Wheels, chapter 2).
The inflation pressure of the tire after
filling is unimportant and will be
checked/corrected later.
Be careful not to overinflate the tire
and stay away from the tire when filling it.
CAUTION
Tire pressure
Do not attempt to drive your vehicle if
the tire pressure is below 200 kPa (29
psi). This could result in an accident due
to sudden tire failure. 7.
Switch off the compressor.
8. Detach the hoses from the sealant bottle connector and from the tire
valve.
Return the Tire Mobility Kit to its storage
location in the vehicle.
OLMF064106
9. Immediately drive approximately 4~6
miles (7~10 km or, about 10min) to
evenly distribute the sealant in the
tire.
Do not exceed a speed of 50 mph (80
km/h). If possible, do not fall below a
speed of 12 mph (20 km/h).
While driving, if you experience any
unusual vibration, ride disturbance or
noise, reduce your speed and drive with
caution until you can safely pull off of the
side of the road.
Call for road side service or towing.
Page 595 of 680
08
8-17
OIGH067043
ONE1081009
10. After driving approximately 4~6 miles
(7~10 km or about 10 min), stop at a
safety location.
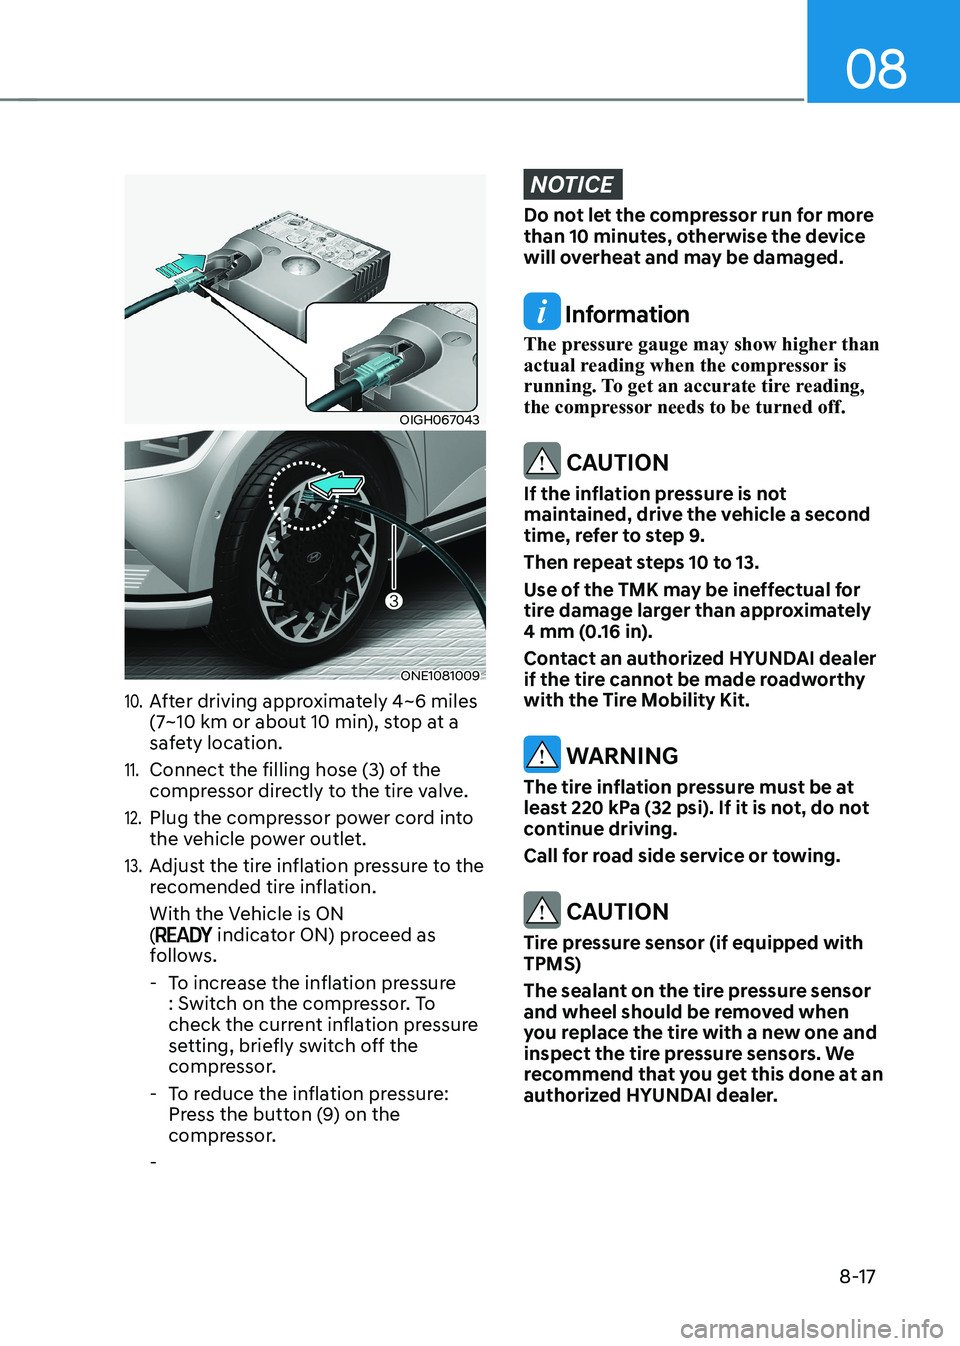
11. Connect the filling hose (3) of the
compressor directly to the tire valve.
12. Plug the compressor power cord into
the vehicle power outlet.
13. Adjust the tire inflation pressure to the
recomended tire inflation.
With the Vehicle is ON (
indicator ON) proceed as
follows.
- To increase the inflation pressure : Switch on the compressor. To
check the current inflation pressure
setting, briefly switch off the
compressor.
- To reduce the inflation pressure: Press the button (9) on the
compressor.
-
NOTICE
Do not let the compressor run for more
than 10 minutes, otherwise the device
will overheat and may be damaged.
Information
The pressure gauge may show higher than
actual reading when the compressor is
running. To get an accurate tire reading,
the compressor needs to be turned off.
CAUTION
If the inflation pressure is not
maintained, drive the vehicle a second
time, refer to step 9.
Then repeat steps 10 to 13.
Use of the TMK may be ineffectual for
tire damage larger than approximately
4 mm (0.16 in).
Contact an authorized HYUNDAI dealer
if the tire cannot be made roadworthy
with the Tire Mobility Kit.
WARNING
The tire inflation pressure must be at
least 220 kPa (32 psi). If it is not, do not
continue driving.
Call for road side service or towing.
CAUTION
Tire pressure sensor (if equipped with TPMS)
The sealant on the tire pressure sensor
and wheel should be removed when
you replace the tire with a new one and
inspect the tire pressure sensors. We
recommend that you get this done at an
authorized HYUNDAI dealer.