check electric vehicle system HYUNDAI IONIQ 5 2023 Owners Manual
[x] Cancel search | Manufacturer: HYUNDAI, Model Year: 2023, Model line: IONIQ 5, Model: HYUNDAI IONIQ 5 2023Pages: 680, PDF Size: 48.22 MB
Page 21 of 680
Foreword / Electric Vehicle System Overview
1-16
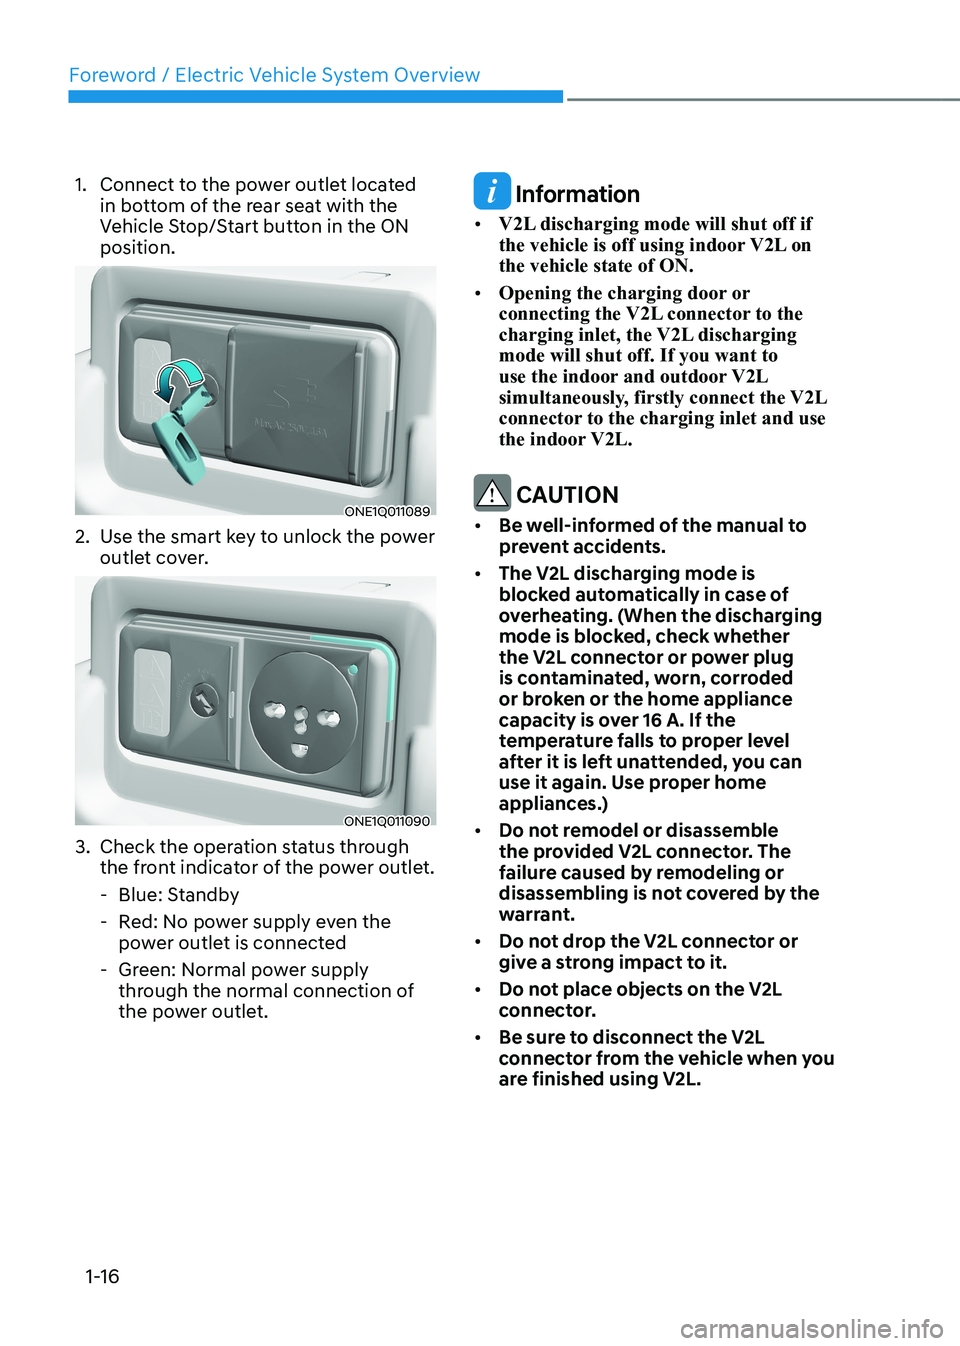
1. Connect to the power outlet located
in bottom of the rear seat with the
Vehicle Stop/Start button in the ON position.
ONE1Q011089
2. Use the smart key to unlock the power outlet cover.
ONE1Q011090
3. Check the operation status through the front indicator of the power outlet.
- Blue: Standby
- Red: No power supply even the power outlet is connected
- Green: Normal power supply through the normal connection of
the power outlet.
Information
• V2L discharging mode will shut off if
the vehicle is off using indoor V2L on the vehicle state of ON.
• Opening the charging door or
connecting the V2L connector to the
charging inlet, the V2L discharging mode will shut off. If you want to
use the indoor and outdoor V2L
simultaneously, firstly connect the V2L
connector to the charging inlet and use
the indoor V2L.
CAUTION
• Be well-informed of the manual to
prevent accidents.
• The V2L discharging mode is
blocked automatically in case of
overheating. (When the discharging
mode is blocked, check whether
the V2L connector or power plug
is contaminated, worn, corroded
or broken or the home appliance
capacity is over 16 A. If the
temperature falls to proper level
after it is left unattended, you can
use it again. Use proper home
appliances.)
• Do not remodel or disassemble
the provided V2L connector. The
failure caused by remodeling or
disassembling is not covered by the
warrant.
• Do not drop the V2L connector or
give a strong impact to it.
• Do not place objects on the V2L
connector.
• Be sure to disconnect the V2L
connector from the vehicle when you
are finished using V2L.
Page 33 of 680
Foreword / Electric Vehicle System Overview
1-28
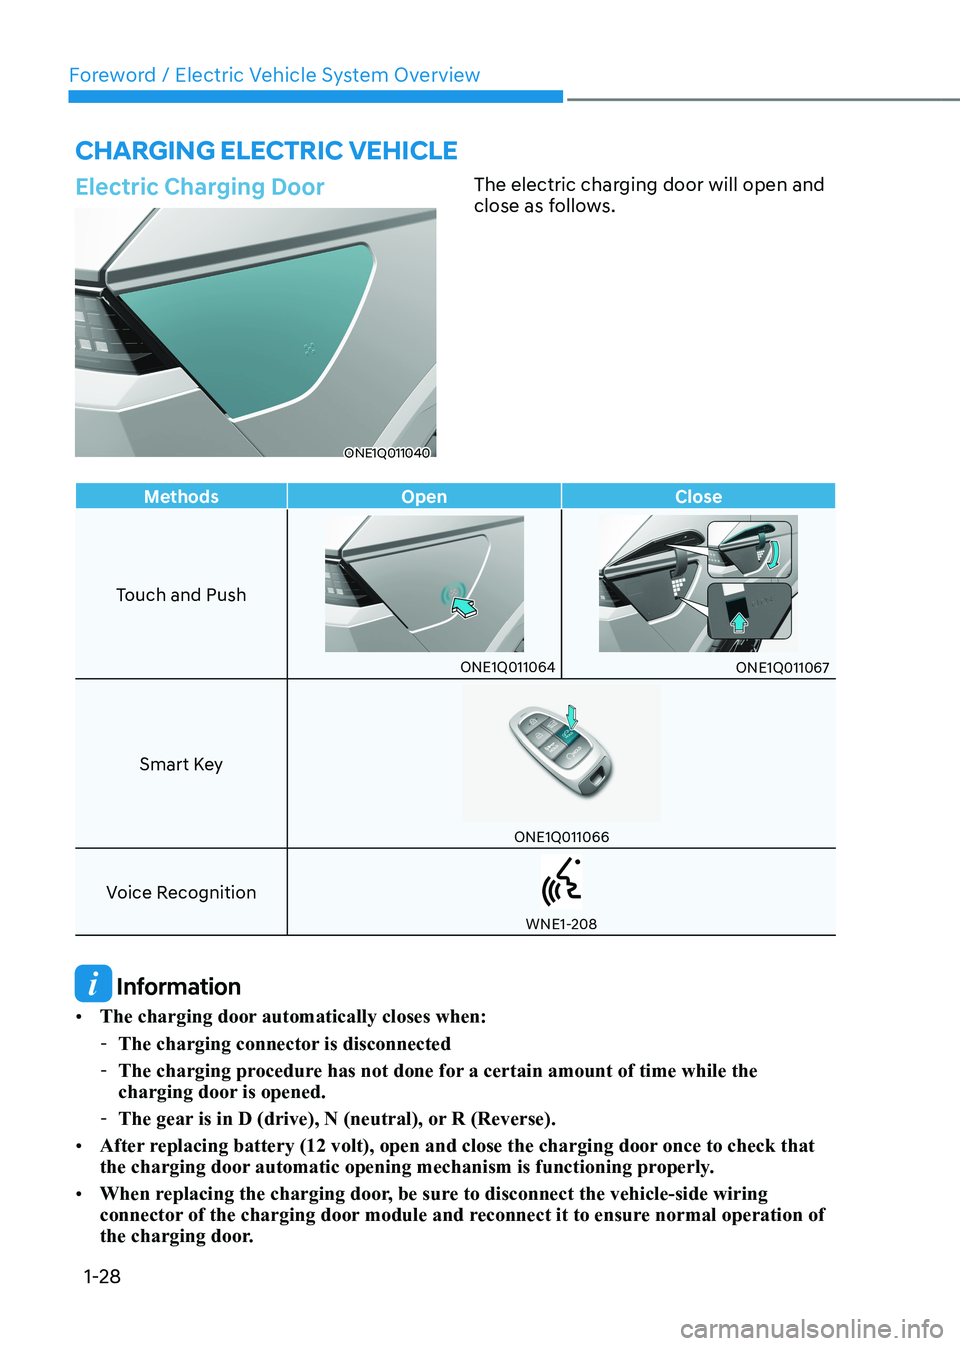
Electric Charging Door
ONE1Q011040The electric charging door will open and
close as follows.
CHarging eleCtriC VeHiCle
Methods Open Close
Touch and Push
ONE1Q011064ONE1Q011067
Smart Key
ONE1Q011066
Voice Recognition
WNE1-208
Information
• The charging door automatically closes when:
- The charging connector is disconnected
- The charging procedure has not done for a certain amount of time while the
charging door is opened.
- The gear is in D (drive), N (neutral), or R (Reverse).
• After replacing battery (12 volt), open and close the charging door once to check that
the charging door automatic opening mechanism is functioning properly.
• When replacing the charging door, be sure to disconnect the vehicle-side wiring
connector of the charging door module and reconnect it to ensure normal operation of
the charging door.
Page 37 of 680
Foreword / Electric Vehicle System Overview
1-32
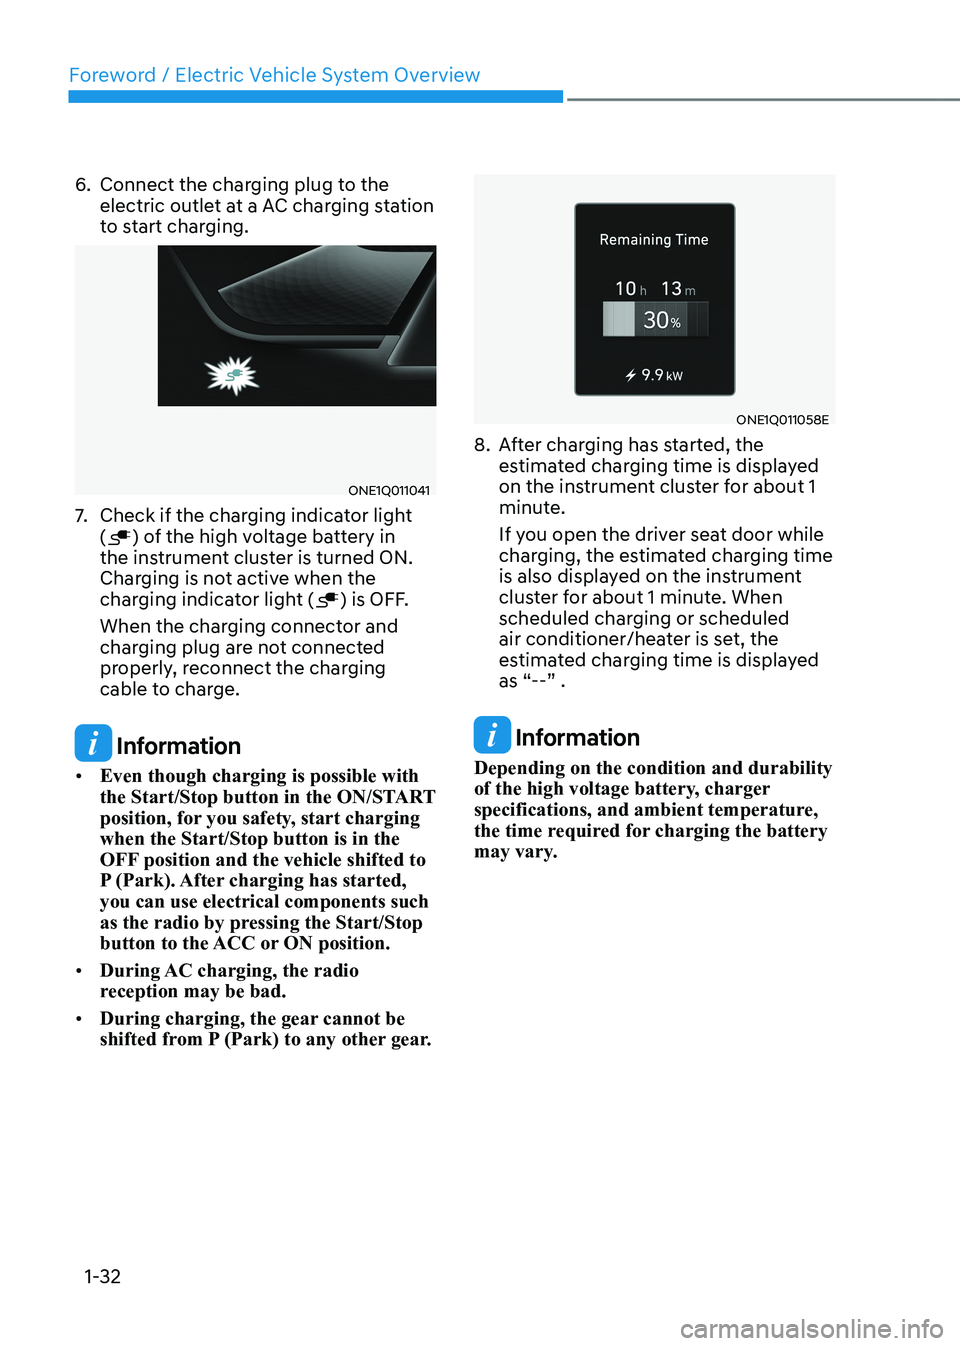
6. Connect the charging plug to the
electric outlet at a AC charging station
to start charging.
ONE1Q011041
7. Check if the charging indicator light (
) of the high voltage battery in
the instrument cluster is turned ON.
Charging is not active when the
charging indicator light (
) is OFF.
When the charging connector and
charging plug are not connected
properly, reconnect the charging
cable to charge.
Information
• Even though charging is possible with
the Start/Stop button in the ON/START
position, for you safety, start charging when the Start/Stop button is in the
OFF position and the vehicle shifted to
P (Park). After charging has started, you can use electrical components such
as the radio by pressing the Start/Stop
button to the ACC or ON position.
• During AC charging, the radio
reception may be bad.
• During charging, the gear cannot be
shifted from P (Park) to any other gear.
ONE1Q011058E
8. After charging has started, the estimated charging time is displayed
on the instrument cluster for about 1
minute.
If you open the driver seat door while
charging, the estimated charging time
is also displayed on the instrument
cluster for about 1 minute. When
scheduled charging or scheduled
air conditioner/heater is set, the
estimated charging time is displayed
as “--” .
Information
Depending on the condition and durability
of the high voltage battery, charger
specifications, and ambient temperature,
the time required for charging the battery
may vary.
Page 39 of 680
Foreword / Electric Vehicle System Overview
1-34
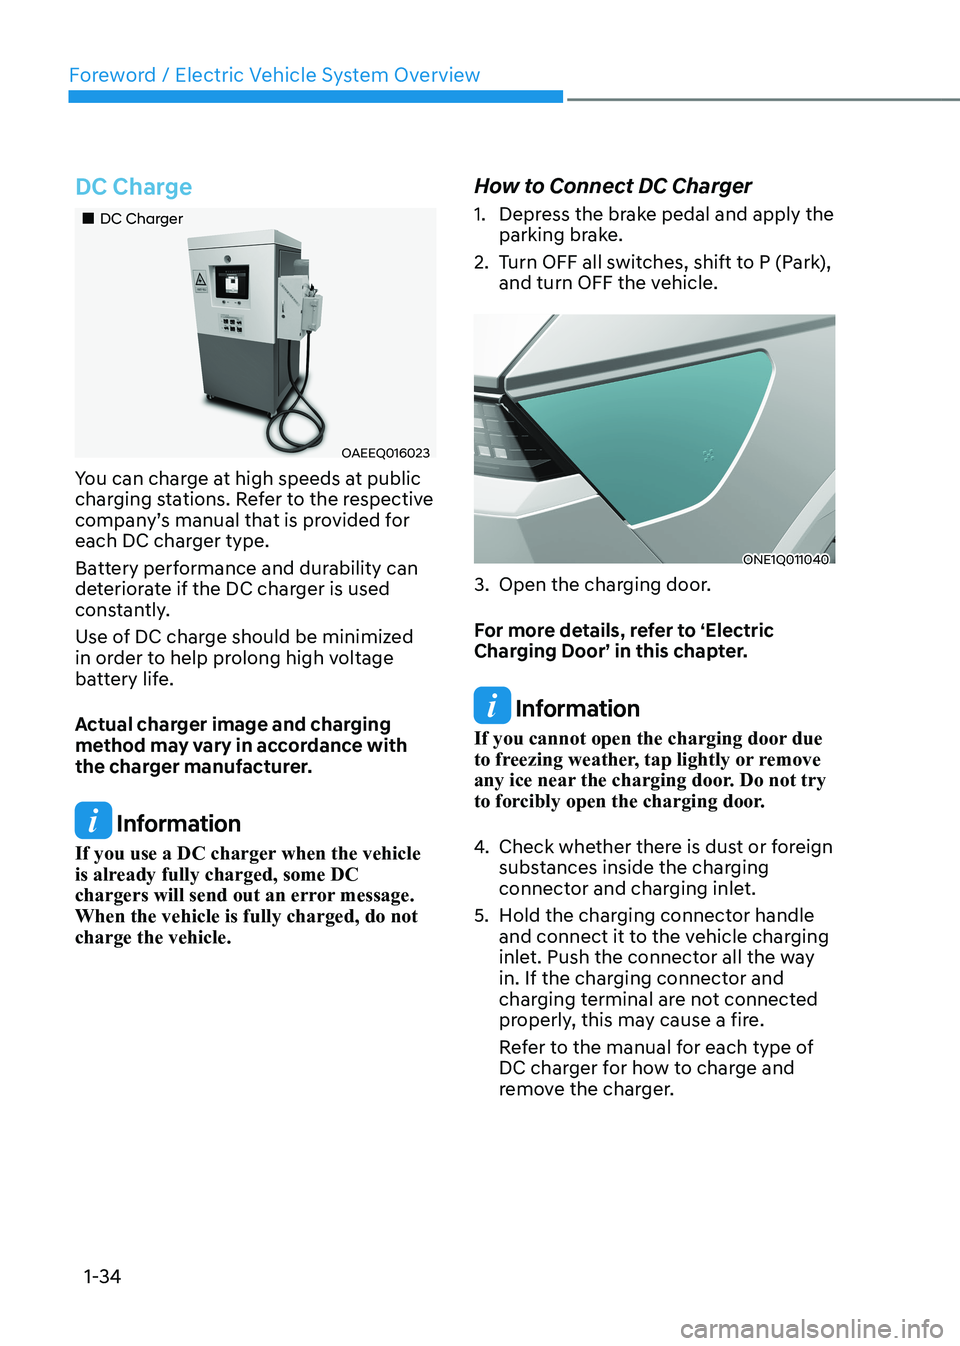
DC Charge
„„DC Charger
OAEEQ016023
You can charge at high speeds at public
charging stations. Refer to the respective
company’s manual that is provided for
each DC charger type.
Battery performance and durability can
deteriorate if the DC charger is used
constantly.
Use of DC charge should be minimized
in order to help prolong high voltage
battery life.
Actual charger image and charging
method may vary in accordance with
the charger manufacturer.
Information
If you use a DC charger when the vehicle
is already fully charged, some DC
chargers will send out an error message. When the vehicle is fully charged, do not charge the vehicle. How to Connect DC Charger
1. Depress the brake pedal and apply the
parking brake.
2. Turn OFF all switches, shift to P (Park), and turn OFF the vehicle.
ONE1Q011040
3. Open the charging door.
For more details, refer to ‘Electric
Charging Door’ in this chapter.
Information
If you cannot open the charging door due
to freezing weather, tap lightly or remove
any ice near the charging door. Do not try
to forcibly open the charging door.
4. Check whether there is dust or foreign
substances inside the charging
connector and charging inlet.
5. Hold the charging connector handle and connect it to the vehicle charging
inlet. Push the connector all the way
in. If the charging connector and
charging terminal are not connected
properly, this may cause a fire.
Refer to the manual for each type of
DC charger for how to charge and
remove the charger.
Page 40 of 680
01
1-35
ONE1Q011041
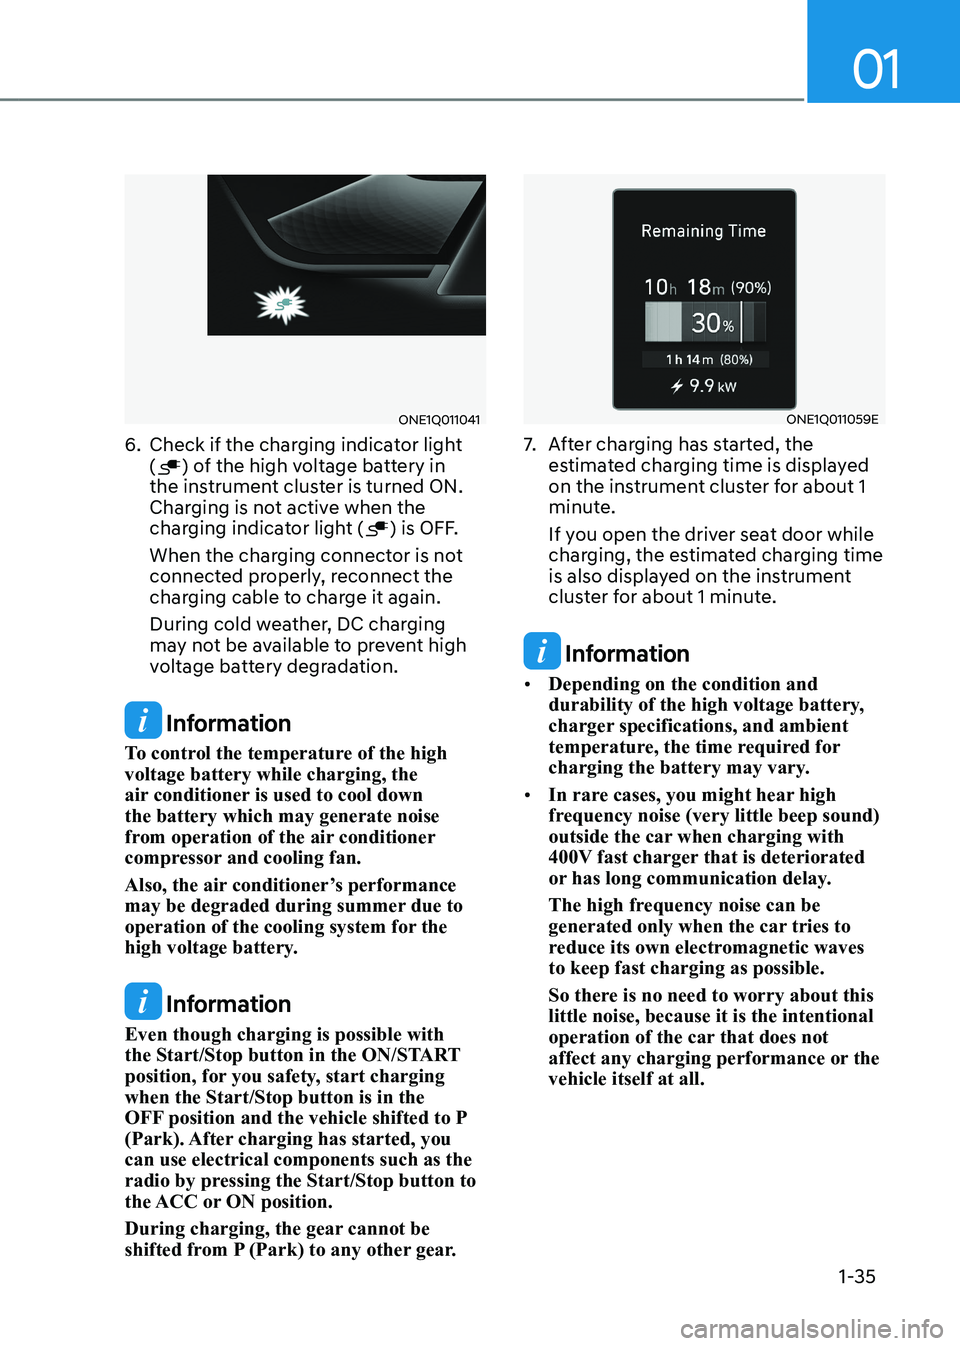
6. Check if the charging indicator light (
) of the high voltage battery in
the instrument cluster is turned ON.
Charging is not active when the
charging indicator light (
) is OFF.
When the charging connector is not
connected properly, reconnect the
charging cable to charge it again.
During cold weather, DC charging
may not be available to prevent high
voltage battery degradation.
Information
To control the temperature of the high voltage battery while charging, the
air conditioner is used to cool down the battery which may generate noise
from operation of the air conditioner
compressor and cooling fan.
Also, the air conditioner’s performance
may be degraded during summer due to
operation of the cooling system for the
high voltage battery.
Information
Even though charging is possible with
the Start/Stop button in the ON/START
position, for you safety, start charging when the Start/Stop button is in the
OFF position and the vehicle shifted to P
(Park). After charging has started, you can use electrical components such as the
radio by pressing the Start/Stop button to
the ACC or ON position.
During charging, the gear cannot be
shifted from P (Park) to any other gear.
ONE1Q011059E
7. After charging has started, the
estimated charging time is displayed
on the instrument cluster for about 1
minute.
If you open the driver seat door while
charging, the estimated charging time
is also displayed on the instrument
cluster for about 1 minute.
Information
• Depending on the condition and
durability of the high voltage battery,
charger specifications, and ambient
temperature, the time required for
charging the battery may vary.
• In rare cases, you might hear high
frequency noise (very little beep sound)
outside the car when charging with
400V fast charger that is deteriorated
or has long communication delay.
The high frequency noise can be
generated only when the car tries to
reduce its own electromagnetic waves to keep fast charging as possible.
So there is no need to worry about this little noise, because it is the intentional
operation of the car that does not
affect any charging performance or the vehicle itself at all.
Page 41 of 680
Foreword / Electric Vehicle System Overview
1-36
Checking Charging Status
When charging the high voltage battery,
the charge level can be checked from
outside the vehicle.
For more details, refer to ‘Charge
Indicator Lamp for Electric Vehicle’ in
this chapter.
How to Disconnect DC Charger
1. Remove the charging connector
when DC charging is completed, or
after you stop charging using the DC
charger. Refer to each respective DC
charger manual for details about how
to disconnect the charging connector.
2. Make sure to completely close the charging door.
Portable Charge
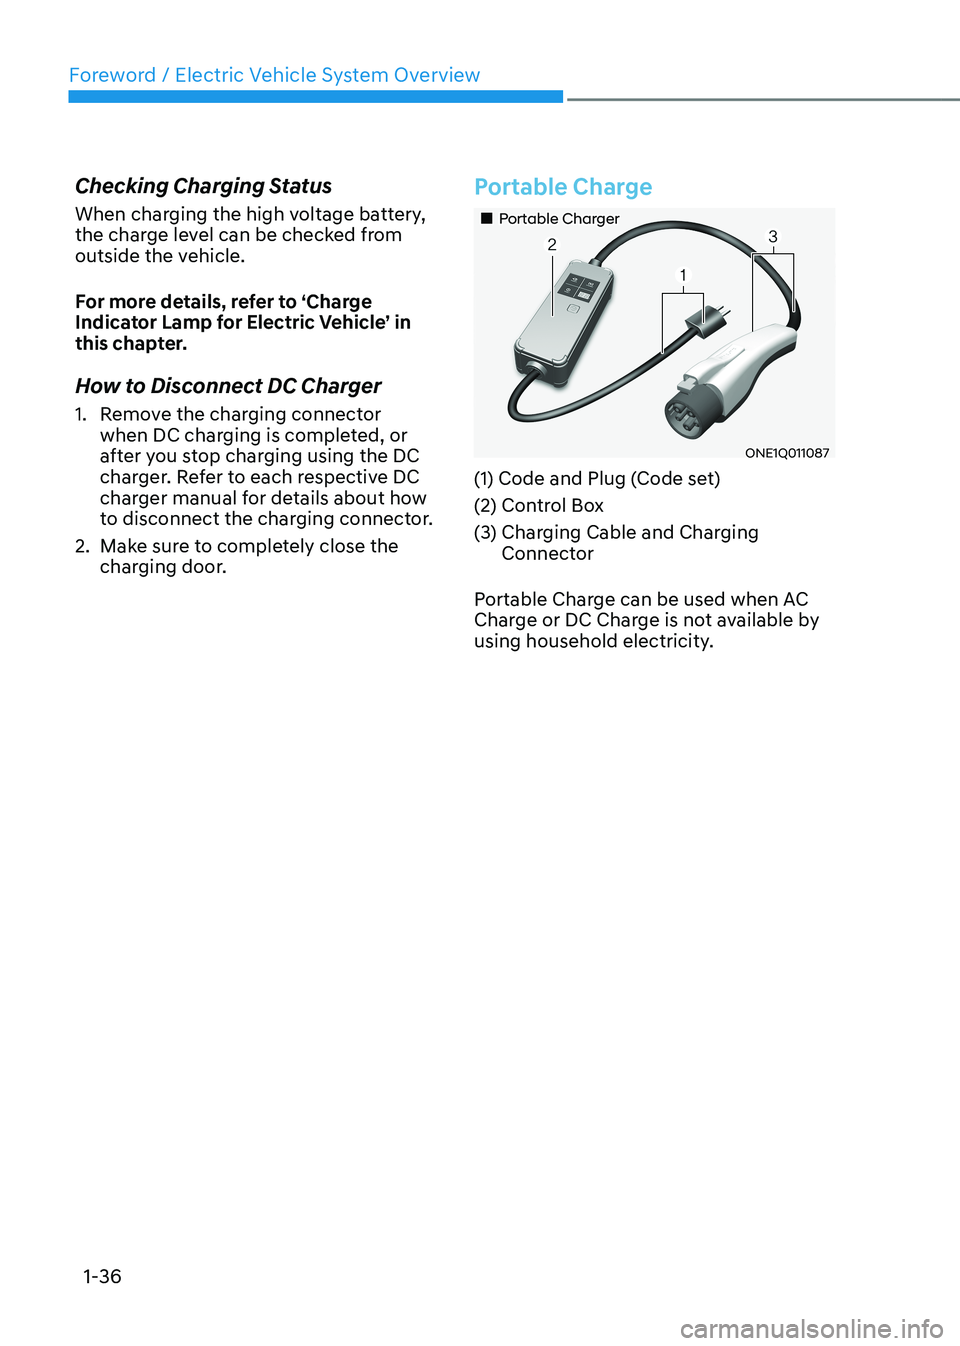
„„Portable Charger
ONE1Q011087
(1) Code and Plug (Code set)
(2) Control Box
(3) Charging Cable and Charging Connector
Portable Charge can be used when AC
Charge or DC Charge is not available by
using household electricity.
Page 45 of 680
Foreword / Electric Vehicle System Overview
1-40
Information
Locking Charging Cable
Select ‘Settings → ECO Vehicle →
Charging Connector Locking Mode’ in
the infotainment. The charging connector
is locked in the inlet at a different period according to which mode is selected. • Always mode : The connector locks
when the charging connector is plugged into the charging inlet.
• While charging mode : The connector locks when charging starts.
For more details, refer to “Locking
Charging Cable” in this chapter.
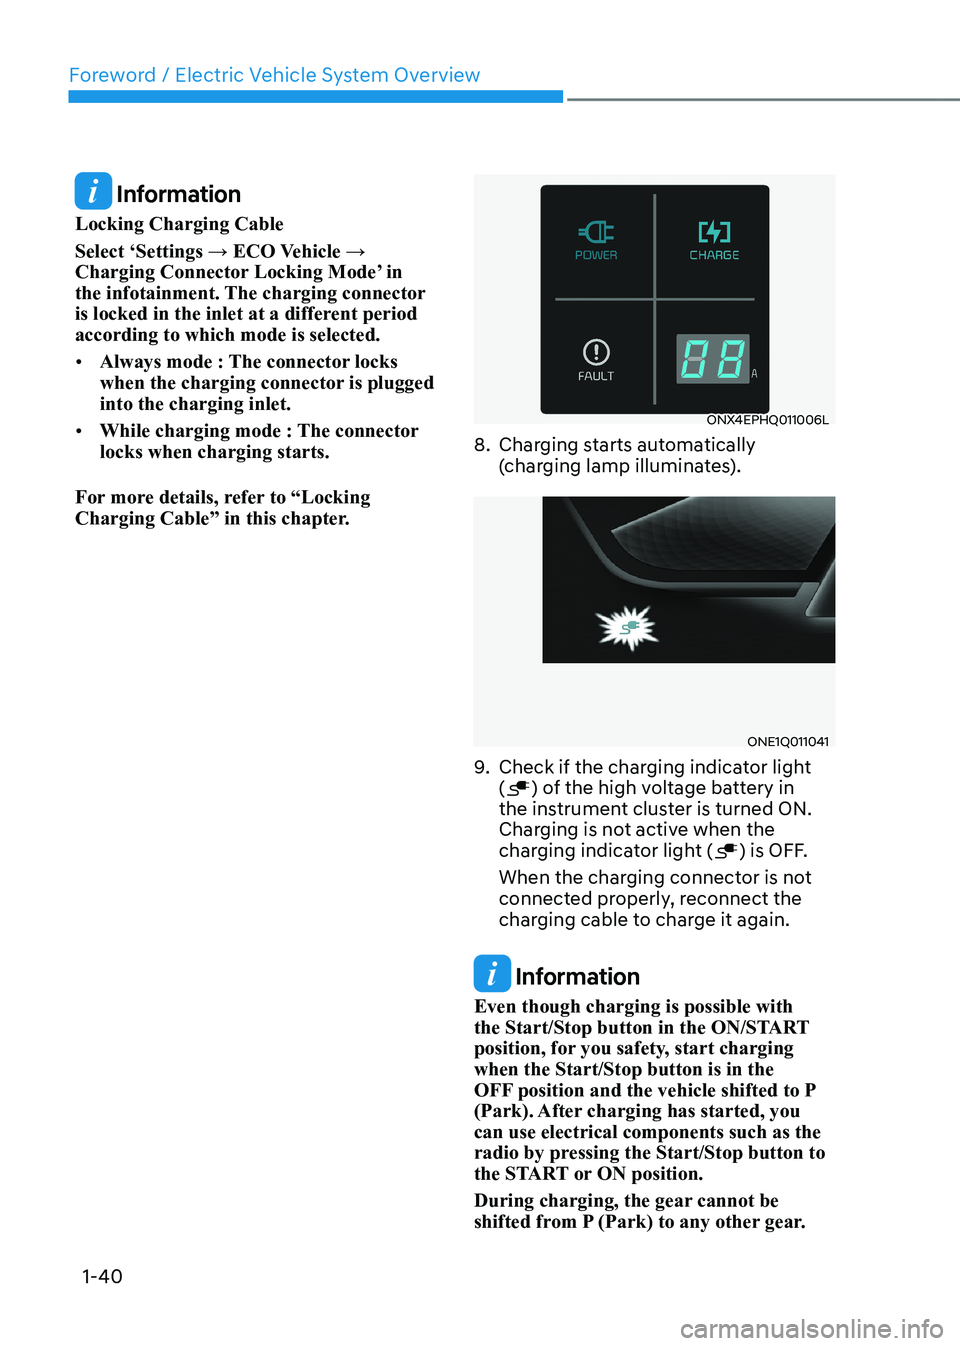
ONX4EPHQ011006L
8. Charging starts automatically (charging lamp illuminates).
ONE1Q011041
9. Check if the charging indicator light (
) of the high voltage battery in
the instrument cluster is turned ON.
Charging is not active when the
charging indicator light (
) is OFF.
When the charging connector is not
connected properly, reconnect the
charging cable to charge it again.
Information
Even though charging is possible with
the Start/Stop button in the ON/START
position, for you safety, start charging when the Start/Stop button is in the
OFF position and the vehicle shifted to P
(Park). After charging has started, you can use electrical components such as the
radio by pressing the Start/Stop button to
the START or ON position.
During charging, the gear cannot be
shifted from P (Park) to any other gear.
Page 53 of 680
Foreword / Electric Vehicle System Overview
1-48
Precautions for Portable Charger
(ICCB: In-Cable Control Box) •
Use the portable charger that is certified
by HYUNDAI Motors.
• Do not try to repair, disassemble, or adjust
the portable charger.
• Do not use an extension cord or adapter.
• Stop using immediately when failure
occurs.
• Do not touch the plug and charging
connector with wet hands.
• Do not touch the terminal part of the AC
charging connector and the AC charging
inlet on the vehicle.
• Do not connect the charging connector
to voltage that does not comply with
regulations.
• Do not use the portable charger if it is
worn out, exposed, or there exists any
type of damage on the portable charger.
• If the ICCB case and AC charging
connector is damaged, cracked, or the
wires are exposed in any way, do not use
the portable charger. •
Do not let children operate or touch the
portable charger.
• Keep the control box free of water.
• Keep the normal charging connector or
plug terminal free of foreign substances.
• Do not step on the cable or cord. Do not
pull the cable or cord and do not twist or bend it.
• Do not charge when there is lightning.
• Do not drop the control box or place a
heavy object on the control box.
• Do not place an object that can generate
high temperatures near the charger when
charging.
• Charging with the worn out or damaged
household electric outlet can result in a
risk of electric shock. If you are in doubt
to the household electric outlet condition,
have it checked by a licensed electrician.
• Stop using the portable charger
immediately if the household electric
outlet or any components is overheated
or you notice burnt odors.
Page 55 of 680
Foreword / Electric Vehicle System Overview
1-50
driVing eleCtriC VeHiCle
How to Start the Vehicle
1. Holding the smart key, sit in the driver’s seat.
2. Fasten the seat belt before starting the vehicle.
3. Make sure to engage the parking brake.
4. Turn OFF all electrical devices.
5. Make sure to depress and hold the brake pedal.
6. While depressing the brake pedal, shift to P (Park).
7. Depress and hold the brake pedal
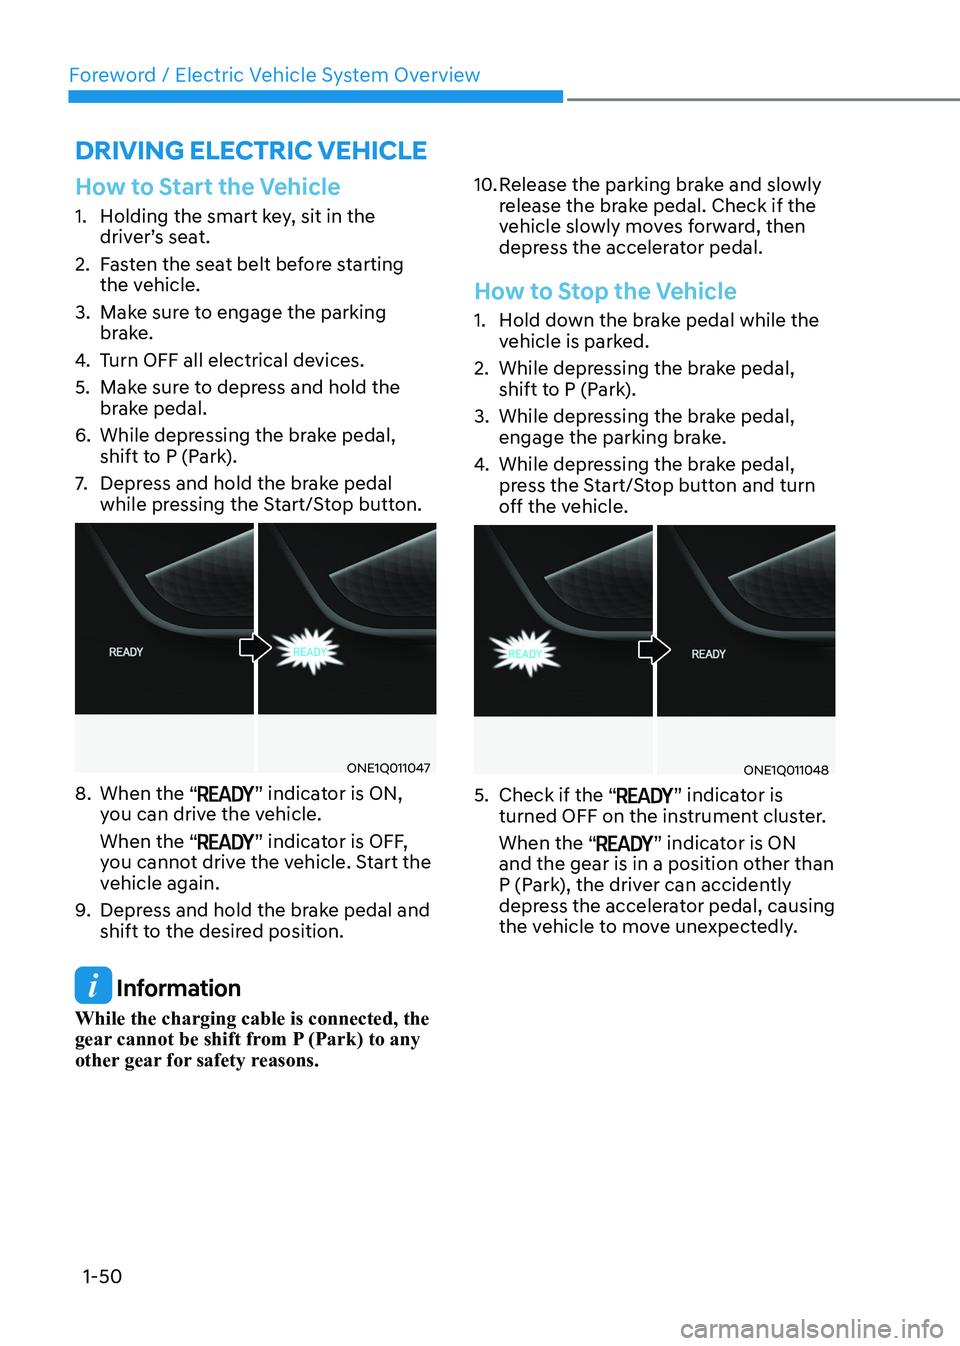
while pressing the Start/Stop button.
ONE1Q011047
8. When the “
” indicator is ON,
you can drive the vehicle. When the “
” indicator is OFF,
you cannot drive the vehicle. Start the
vehicle again.
9. Depress and hold the brake pedal and
shift to the desired position.
Information
While the charging cable is connected, the
gear cannot be shift from P (Park) to any
other gear for safety reasons. 10. Release the parking brake and slowly
release the brake pedal. Check if the
vehicle slowly moves forward, then
depress the accelerator pedal.
How to Stop the Vehicle
1. Hold down the brake pedal while the
vehicle is parked.
2. While depressing the brake pedal, shift to P (Park).
3. While depressing the brake pedal, engage the parking brake.
4. While depressing the brake pedal,
press the Start/Stop button and turn
off the vehicle.
ONE1Q011048
5. Check if the “
” indicator is
turned OFF on the instrument cluster. When the “
” indicator is ON
and the gear is in a position other than
P (Park), the driver can accidently
depress the accelerator pedal, causing
the vehicle to move unexpectedly.
Page 56 of 680
01
1-51
Virtual Engine Sound System
The Virtual Engine Sound System
generates engine sound for pedestrians
to hear vehicle sound because there is
no sound while the Electric Vehicle (EV)
is operating. • If the vehicle is in the ready (
)
mode and the gear is not in P (Park),
the VESS will be operated.
• When the gear is shifted to R
(Reverse), an additional warning
sound will be heard.
CAUTION
• The vehicle is much quieter while
driving than a conventional gasoline-
powered vehicle. Be aware of your
surroundings and always drive safely.
• After you park the vehicle or while
you are waiting at a traffic light,
check whether there are children or
obstacles around the vehicle.
• Check if there is something behind
the vehicle when driving in reverse.
Pedestrians may not hear the sound
of the vehicle.
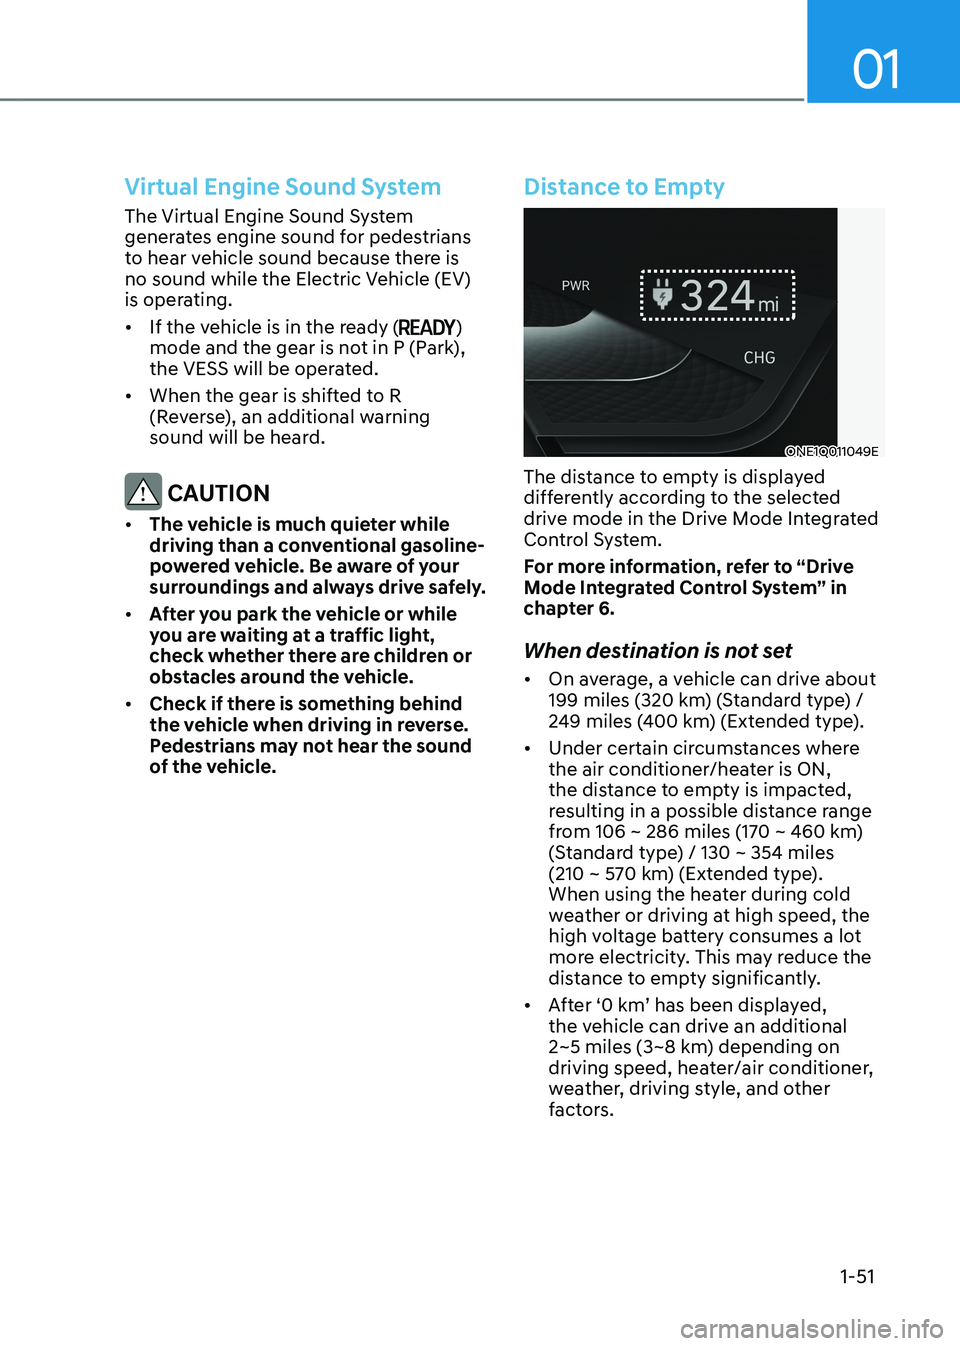
Distance to Empty
ONE1Q011049E
The distance to empty is displayed
differently according to the selected
drive mode in the Drive Mode Integrated
Control System.
For more information, refer to “Drive
Mode Integrated Control System” in
chapter 6.
When destination is not set • On average, a vehicle can drive about
199 miles (320 km) (Standard type) /
249 miles (400 km) (Extended type).
• Under certain circumstances where
the air conditioner/heater is ON,
the distance to empty is impacted,
resulting in a possible distance range
from 106 ~ 286 miles (170 ~ 460 km)
(Standard type) / 130 ~ 354 miles
(210 ~ 570 km) (Extended type).
When using the heater during cold
weather or driving at high speed, the
high voltage battery consumes a lot
more electricity. This may reduce the
distance to empty significantly.
• After ‘0 km’ has been displayed,
the vehicle can drive an additional
2~5 miles (3~8 km) depending on
driving speed, heater/air conditioner,
weather, driving style, and other
factors.