Change HYUNDAI IONIQ 6 2023 Owners Manual
[x] Cancel search | Manufacturer: HYUNDAI, Model Year: 2023, Model line: IONIQ 6, Model: HYUNDAI IONIQ 6 2023Pages: 582, PDF Size: 10.77 MB
Page 1 of 582
OWNER’S MANUAL
Operation
Maintenance
Specifications
All information in this Owner’s Manual is current at the time of
publication. However, HYUNDAI reserves the right to make
changes at any time so that our policy of continual product
improvement may be carried out.
This manual applies to all models of this vehicle and includes
descriptions and explanations of optional as well as standard
equipment.
As a result, you may find material in this manual that does not
apply to your specific vehicle.
Hyundai_CE_en_US.book Page 1
Page 36 of 582
Introduction/Getting Started with Your Electric Vehicle
1-30
• If an error occurs, you can reset the portable charger by disconnecting and reconnecting the power plug, and then pressing the button on the control box for more
than two seconds.
• If the same symptom repeats after resetting the portable charger, have the vehicle inspected by an authorized HYUNDAI dealer.
• If there is no status change for more than one minute, the portable charger will be switched to power saving mode, and the display light will be turned off.
Charging with a portable charger
Follow the instructions below to charge the vehicle with a portable charger.
1. Connect the power plug of the portable charger to the electrical outlet at tour home.
• The power indicator light on the control box will turn green.
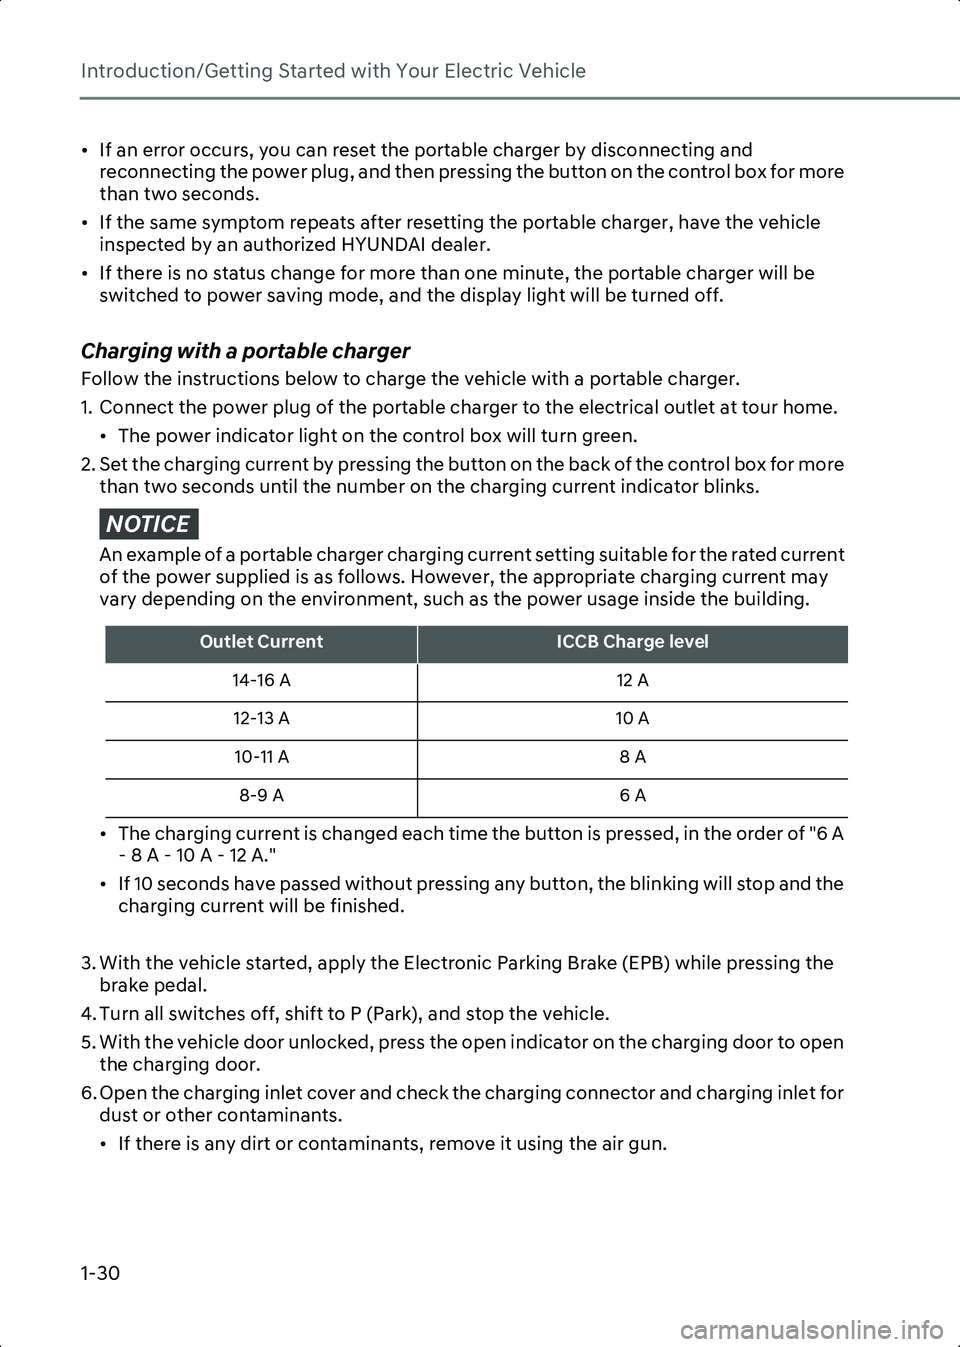
2. Set the charging current by pressing the button on the back of the control box for more than two seconds until the number on the charging current indicator blinks.
NOTICE An example of a portable charger charging current setting suitable for the rated current
of the power supplied is as follows. However, the appropriate charging current may
vary depending on the environment, such as the power usage inside the building.
• The charging current is changed each time the button is pressed, in the order of "6 A - 8 A - 10 A - 12 A."
• If 10 seconds have passed without pressing any button, the blinking will stop and the charging current will be finished.
3. With the vehicle started, apply the Electronic Parking Brake (EPB) while pressing the brake pedal.
4. Turn all switches off, shift to P (Park), and stop the vehicle.
5. With the vehicle door unlocked, press the open indicator on the charging door to open the charging door.
6. Open the charging inlet cover and check the charging connector and charging inlet for dust or other contaminants.
• If there is any dirt or contaminants, remove it using the air gun.
Outlet CurrentICCB Charge level
14-16 A 12 A
12-13 A 10 A
10-11 A 8 A
8-9 A 6 A
Hyundai_CE_en_US.book Page 30
Page 41 of 582
1
1-35
Checking the battery status
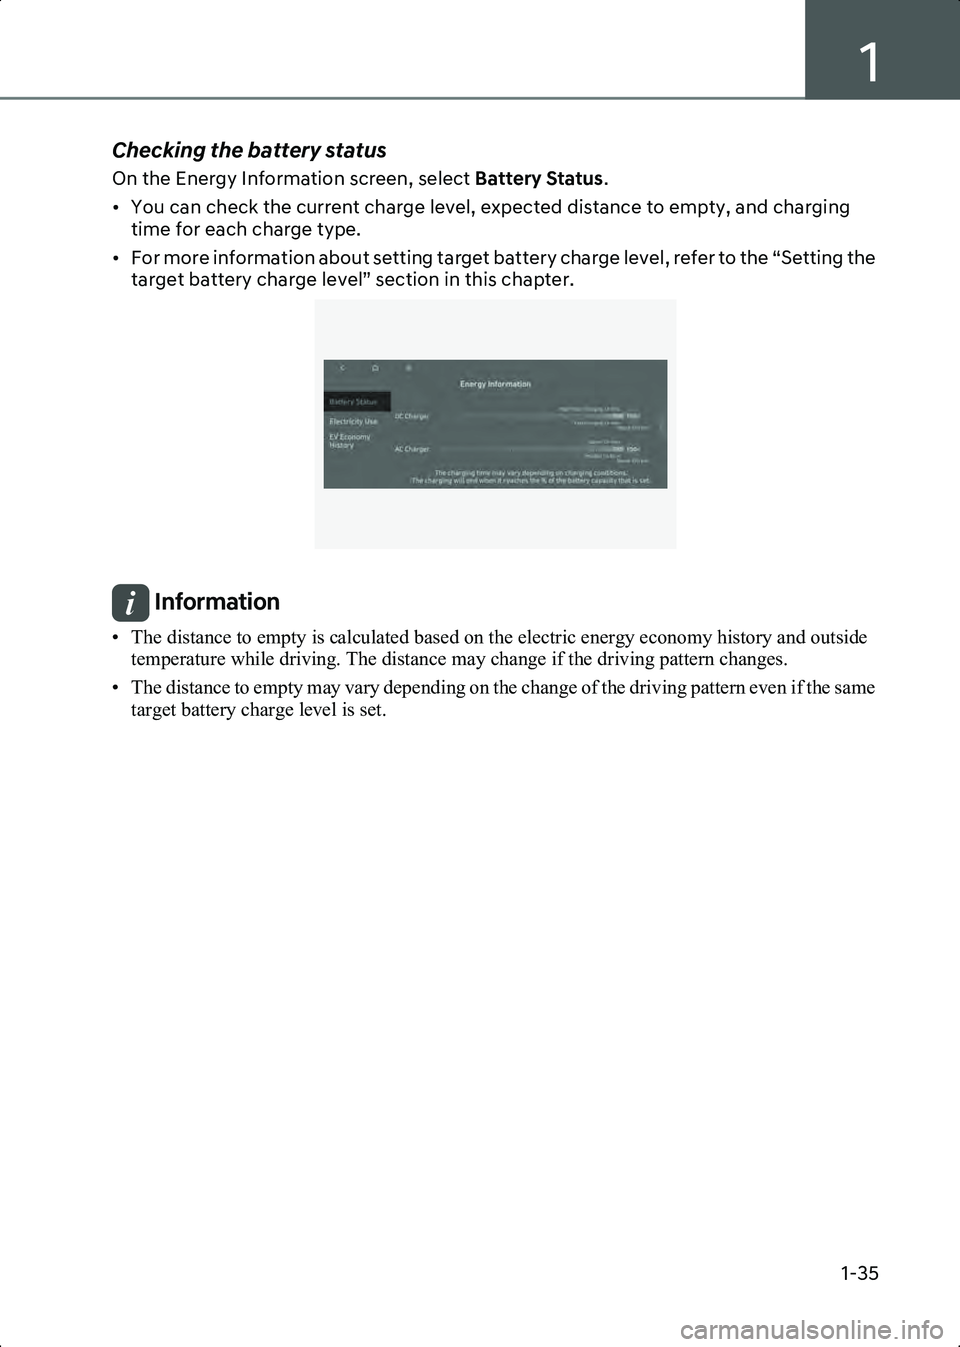
On the Energy Information screen, select Battery Status.
• You can check the current charge level, expected distance to empty, and charging time for each charge type.
• For more information about setting target battery charge level, refer to the “Setting the target battery charge level” section in this chapter.
B0001702
Information • The distance to empty is calculated based on the electric energy economy history and outside temperature while driving. The distance may change if the driving pattern changes.
• The distance to empty may vary depending on the change of the driving pattern even if the same target battery charge level is set.
Hyundai_CE_en_US.book Page 35
Page 47 of 582
1
1-41
B0002001
Setting Electric Vehicle Specialized Functions
You can set various EV specialized functions such as target battery charge level, charging
current, battery conditioning mode, and utility mode from the EV Settings screen.
Setting the target battery charge level
Follow the instructions below to set the target battery charge level when charged with an
AC charger or a DC charger.
1. On the infotainment system, swipe the Home screen to the left to display the All menus
screen.
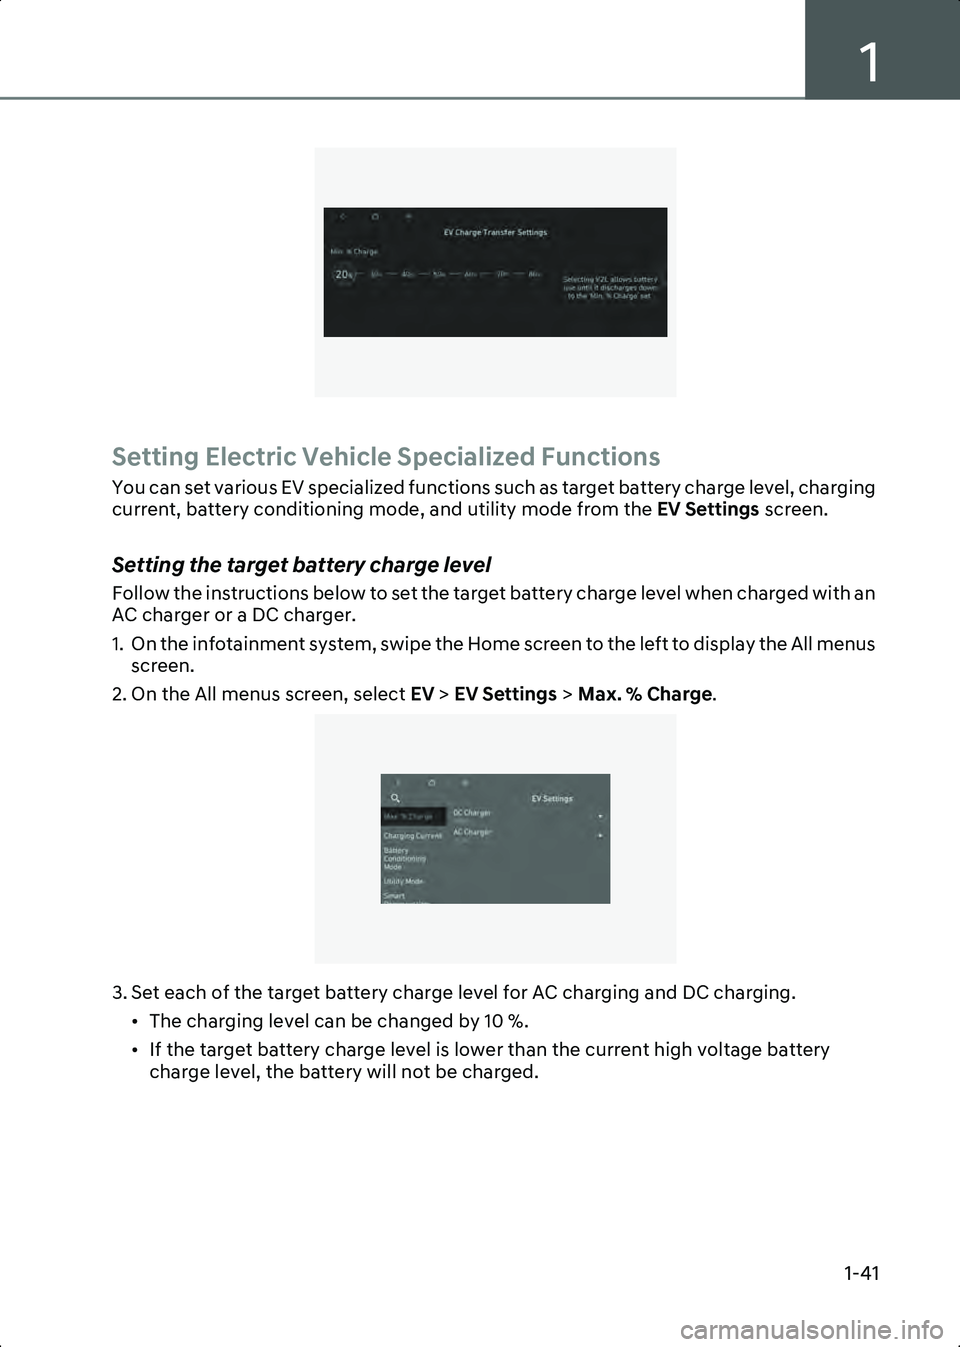
2. On the All menus screen, select EV > EV Settings > Max. % Charge .
B0002101
3. Set each of the target battery charge level for AC charging and DC charging.
• The charging level can be changed by 10 %.
• If the target battery charge level is lower than the current high voltage battery charge level, the battery will not be charged.
Hyundai_CE_en_US.book Page 41
Page 55 of 582
1
1-49
Information • When the V2L connector is connected to the charging inlet of the vehicle, all doors and connectors will be automatically locked to prevent theft and separation. To disconnect the V2L
connector, unlock the door and pull the connector with the open switch pressed.
• Before using the V2L function, deactivate the scheduled climate setting referring to the “Setting Scheduled Charging and Climate”. The V2L function may be cut off depending on the
scheduled climate setting.
• To check and change the V2L setting, refer to the “Setting a Battery Discharging Limit When Using Vehicle to Load (V2L)”.
• If an electric device that exceeds the maximum power capacity is connected, a warning message appears on the instrument cluster and the power supply shuts off immediately.
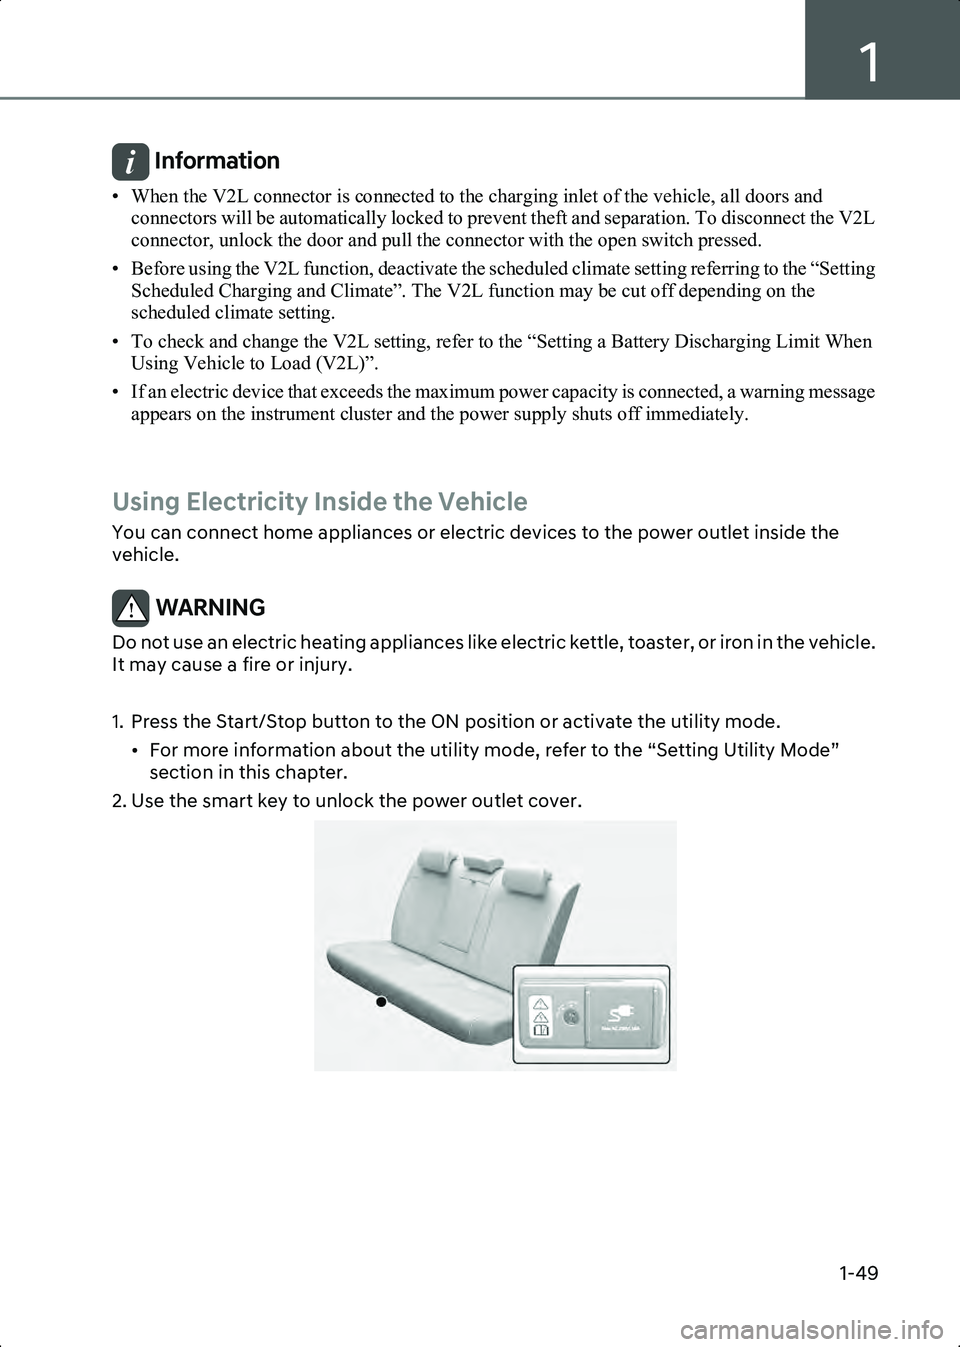
Using Electricity Inside the Vehicle
You can connect home appliances or electric devices to the power outlet inside the
vehicle.
WARNING Do not use an electric heating appliances like electric kettle, toaster, or iron in the vehicle.
It may cause a fire or injury.
1. Press the Start/Stop button to the ON position or activate the utility mode. • For more information about the utility mode, refer to the “Setting Utility Mode” section in this chapter.
2. Use the smart key to unlock the power outlet cover.
B0002501
Hyundai_CE_en_US.book Page 49
Page 61 of 582
1
1-55
• The driving habits: The driving speed and tendency of accelerating and decelerating. High speed driving or frequent accelerating and decelerating reduces the distance to
empty.
• The power usage: Additional power use, such as the air conditioner, heater, lights, etc. As the power usage increases, the distance to empty reduces.
• The driving conditions: The weather, temperature, and terrain. If you drive in snow/rain/strong wind or low temperature, the distance to empty will be reduced. The
distance to empty will also be reduced when driving uphill or on slippery or rough
roads.
• The high voltage battery energy: Proportional to the State of Charge (SOC), but may vary depending on the battery temperature and the State of Health (SOH) of a battery.
Change in the distance to empty when 100 % charged
In case the distance to empty has been reduced due to learning of the driving habit or the
driving conditions, you can increase the distance to empty again by continuously driving
following the “Tips for enhancing the distance to empty”.
• Resetting the previously learned driving patterns at the service center may increase the distance to empty displayed on the bottom of the instrument cluster, but it does
not increase the actual distance to empty. The distance to empty may not be accurate
until the learning proceeds.
• If the high voltage battery temperature is low in winter, the distance to empty reduces but it is not a permanent change. The distance to empty will increase again once the
temperature rises.
• If you reduce the power usage, the distance to empty will increase.
• Natural degradation may occur with the high voltage battery depending on the number of years the vehicle is used. This may reduce the distance to empty.
When setting a destination
When the destination is set, the distance to empty may change because the distance to
empty is recalculated using the information of the destination instead of the learned
electric energy economy history.
Information The distance to empty may vary significantly based on traffic conditions or driving speed.
Hyundai_CE_en_US.book Page 55
Page 86 of 582
Vehicle Information, Consumer Information, and Reporting Safety Defects
2-12
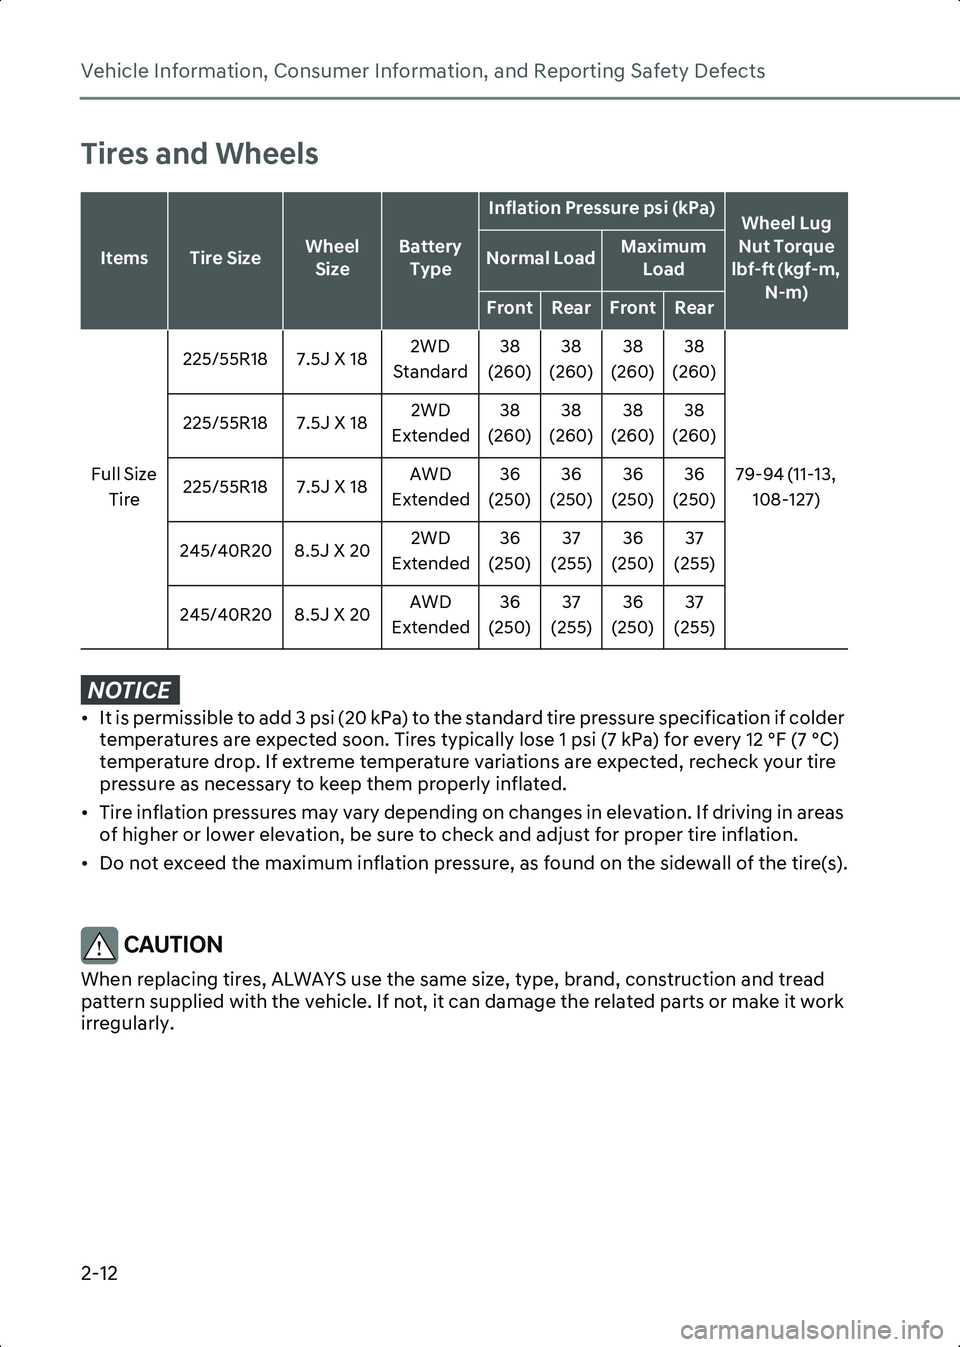
Tires and Wheels
NOTICE • It is permissible to add 3 psi (20 kPa) to the standard tire pressure specification if colder temperatures are expected soon. Tires typically lose 1 psi (7 kPa) for every 12 °F (7 °C)
temperature drop. If extreme temperature variations are expected, recheck your tire
pressure as necessary to keep them properly inflated.
• Tire inflation pressures may vary depending on changes in elevation. If driving in areas of higher or lower elevation, be sure to check and adjust for proper tire inflation.
• Do not exceed the maximum inflation pressure, as found on the sidewall of the tire(s).
CAUTION When replacing tires, ALWAYS use the same size, type, brand, construction and tread
pattern supplied with the vehicle. If not, it can damage the related parts or make it work
irregularly.
ItemsTire SizeWheel SizeBattery Type
Inflation Pressure psi (kPa)Wheel Lug
Nut Torque
lbf-ft (kgf-m, N-m)
Normal LoadMaximum Load
FrontRearFrontRear
Full Size Tire 225/55R18 7.5J X 18
2WD
Standard 38
(260) 38
(260) 38
(260) 38
(260)
79-94 (11-13, 108-127)
225/55R18 7.5J X 18
2WD
Extended 38
(260) 38
(260) 38
(260) 38
(260)
225/55R18 7.5J X 18 AWD
Extended 36
(250) 36
(250) 36
(250) 36
(250)
245/40R20 8.5J X 20 2WD
Extended 36
(250) 37
(255) 36
(250) 37
(255)
245/40R20 8.5J X 20 AWD
Extended 36
(250) 37
(255) 36
(250) 37
(255)
Hyundai_CE_en_US.book Page 12
Page 98 of 582
Seats & Safety System
3-4
ONE1031077L
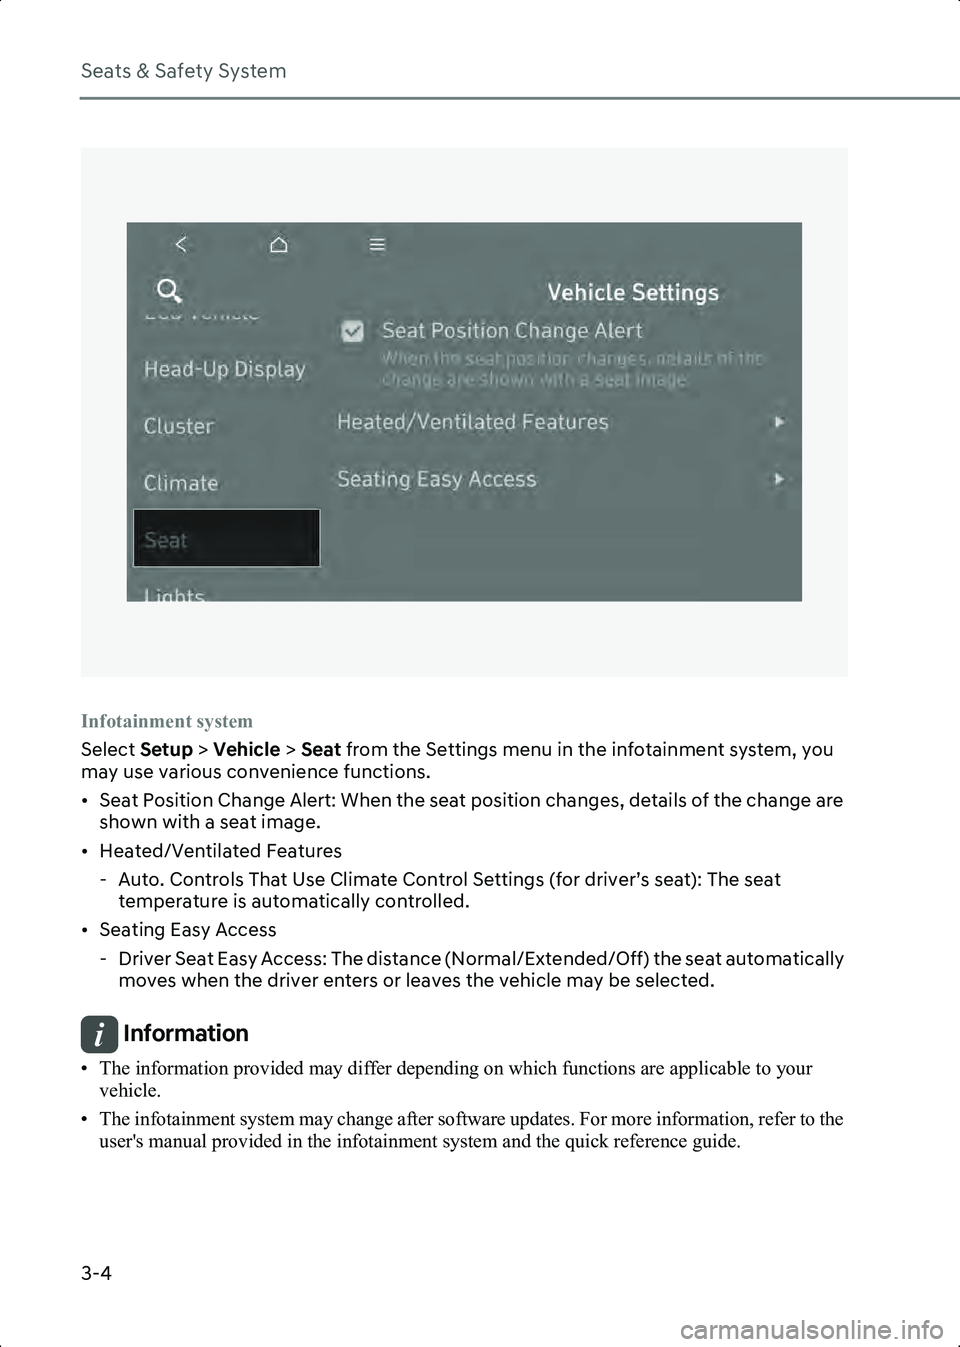
Infotainment system
Select Setup > Vehicle > Seat from the Settings menu in the infotainment system, you
may use various convenience functions.
• Seat Position Change Alert: When the seat position changes, details of the change are shown with a seat image.
• Heated/Ventilated Features - Auto. Controls That Use Climate Control Settings (for driver’s seat): The seat temperature is automatically controlled.
• Seating Easy Access - Driver Seat Easy Access: The distance (Normal/Extended/Off) the seat automatically moves when the driver enters or leaves the vehicle may be selected.
Information • The information provided may differ depending on which functions are applicable to your vehicle.
• The infotainment system may change after software updates. For more information, refer to the user's manual provided in the infotainment system and the quick reference guide.
Hyundai_CE_en_US.book Page 4
Page 101 of 582
3
3-7
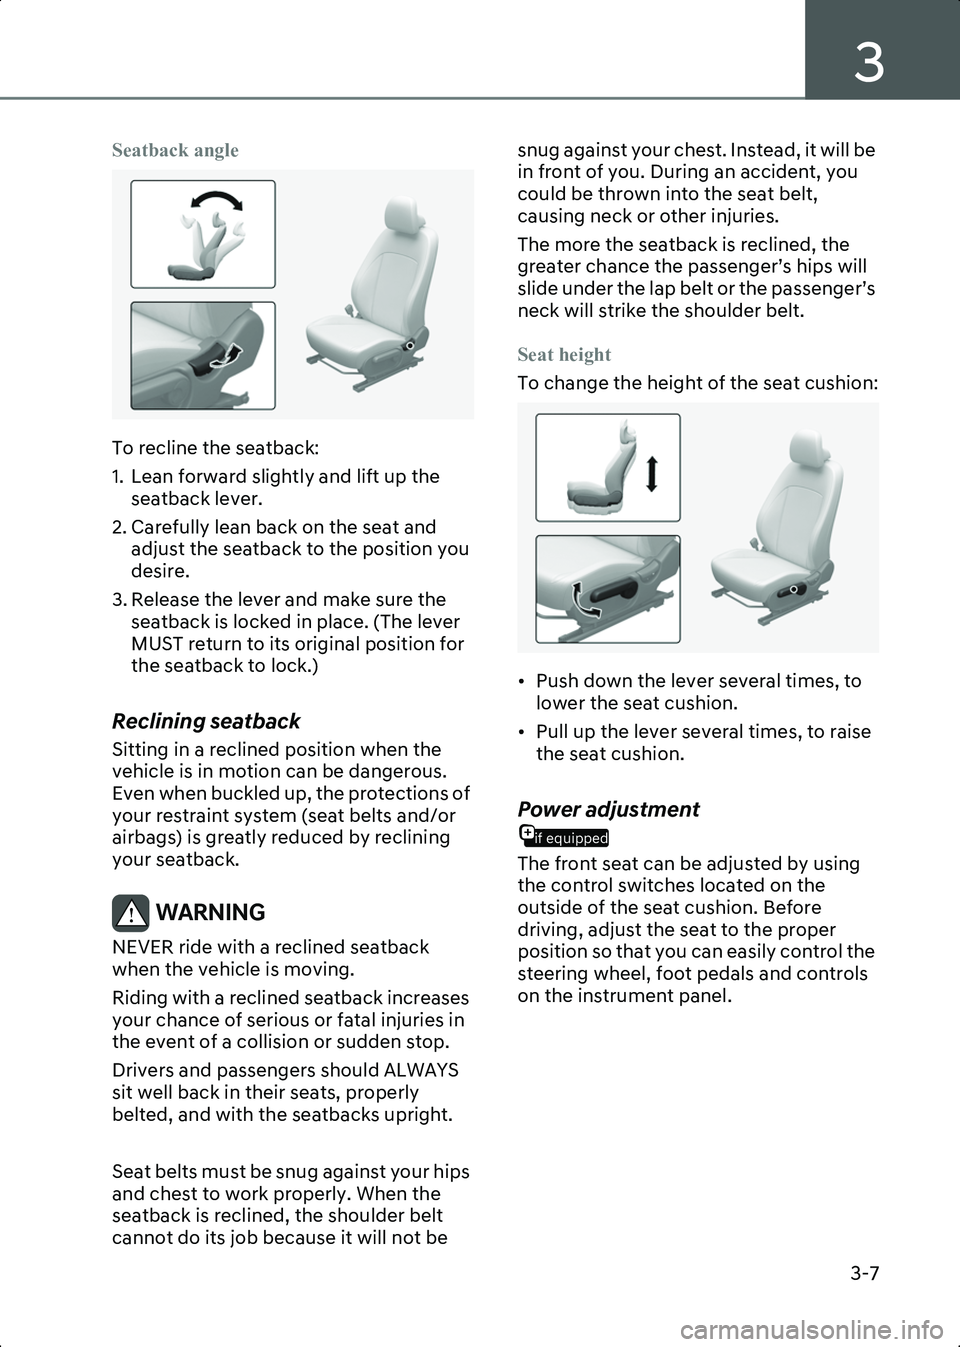
Seatback angle
B3000202
To recline the seatback:
1. Lean forward slightly and lift up the seatback lever.
2. Carefully lean back on the seat and adjust the seatback to the position you
desire.
3. Release the lever and make sure the seatback is locked in place. (The lever
MUST return to its original position for
the seatback to lock.)
Reclining seatback
Sitting in a reclined position when the
vehicle is in motion can be dangerous.
Even when buckled up, the protections of
your restraint system (seat belts and/or
airbags) is greatly reduced by reclining
your seatback.
WARNING NEVER ride with a reclined seatback
when the vehicle is moving.
Riding with a reclined seatback increases
your chance of serious or fatal injuries in
the event of a collision or sudden stop.
Drivers and passengers should ALWAYS
sit well back in their seats, properly
belted, and with the seatbacks upright.
Seat belts must be snug against your hips
and chest to work properly. When the
seatback is reclined, the shoulder belt
cannot do its job because it will not be snug against your chest. Instead, it will be
in front of you. During an accident, you
could be thrown into the seat belt,
causing neck or other injuries.
The more the seatback is reclined, the
greater chance the passenger’s hips will
slide under the lap belt or the passenger’s
neck will strike the shoulder belt.
Seat height
To change the height of the seat cushion:
B3000203
• Push down the lever several times, to
lower the seat cushion.
• Pull up the lever several times, to raise the seat cushion.
if equipped
Power adjustment
The front seat can be adjusted by using
the control switches located on the
outside of the seat cushion. Before
driving, adjust the seat to the proper
position so that you can easily control the
steering wheel, foot pedals and controls
on the instrument panel.
Hyundai_CE_en_US.book Page 7
Page 102 of 582
Seats & Safety System
3-8
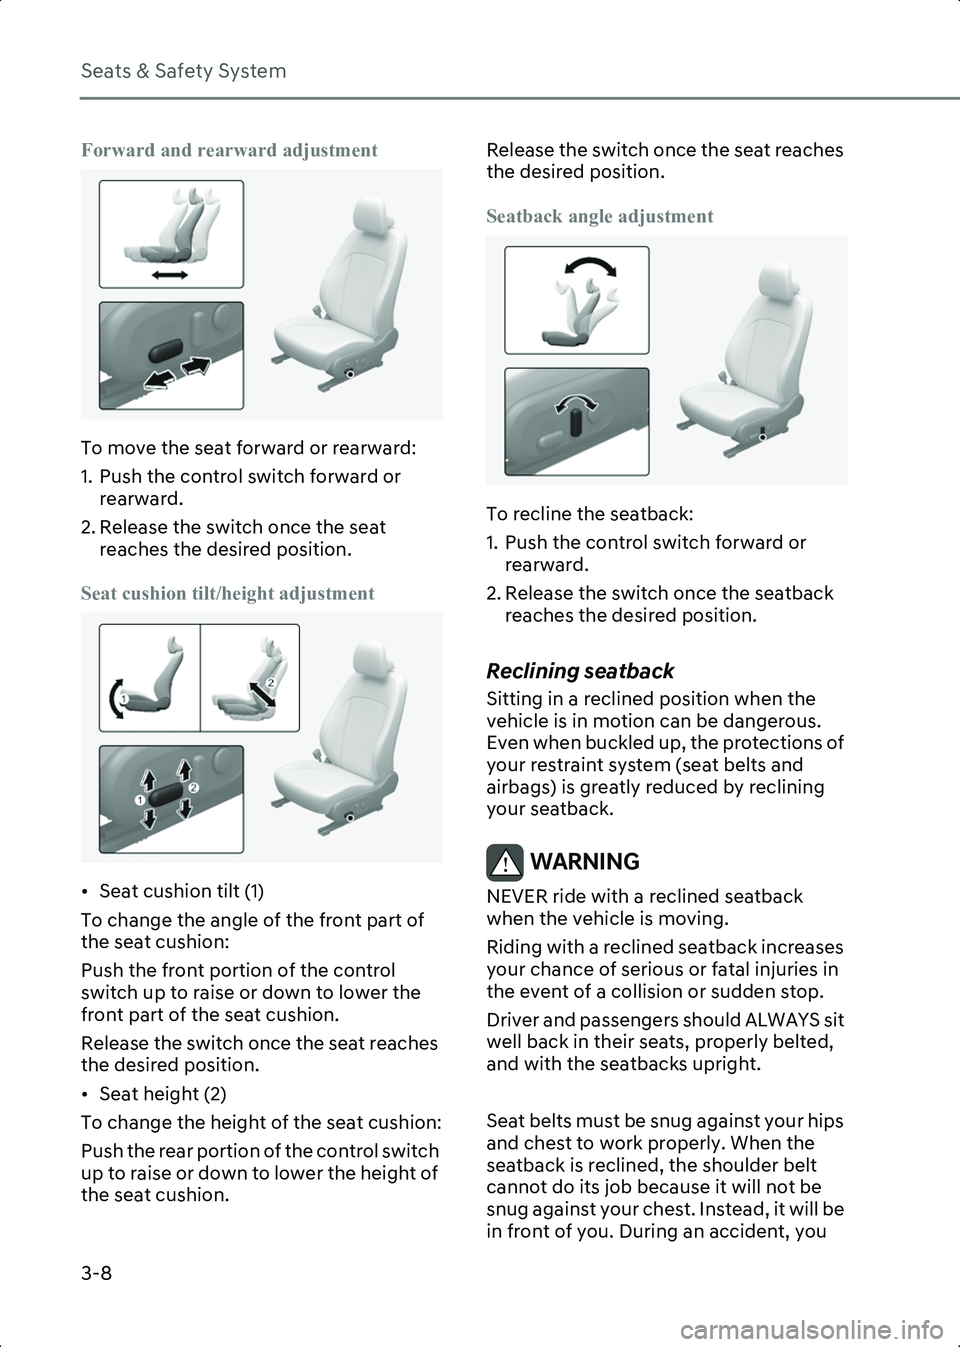
Forward and rearward adjustment
B3000204
To move the seat forward or rearward:
1. Push the control switch forward or rearward.
2. Release the switch once the seat reaches the desired position.
Seat cushion tilt/height adjustment
B3000206
• Seat cushion tilt (1)
To change the angle of the front part of
the seat cushion:
Push the front portion of the control
switch up to raise or down to lower the
front part of the seat cushion.
Release the switch once the seat reaches
the desired position.
• Seat height (2)
To change the height of the seat cushion:
Push the rear portion of the control switch
up to raise or down to lower the height of
the seat cushion. Release the switch once the seat reaches
the desired position.
Seatback angle adjustment
B3000205
To recline the seatback:
1. Push the control switch forward or
rearward.
2. Release the switch once the seatback reaches the desired position.
Reclining seatback
Sitting in a reclined position when the
vehicle is in motion can be dangerous.
Even when buckled up, the protections of
your restraint system (seat belts and
airbags) is greatly reduced by reclining
your seatback.
WARNING NEVER ride with a reclined seatback
when the vehicle is moving.
Riding with a reclined seatback increases
your chance of serious or fatal injuries in
the event of a collision or sudden stop.
Driver and passengers should ALWAYS sit
well back in their seats, properly belted,
and with the seatbacks upright.
Seat belts must be snug against your hips
and chest to work properly. When the
seatback is reclined, the shoulder belt
cannot do its job because it will not be
snug against your chest. Instead, it will be
in front of you. During an accident, you
Hyundai_CE_en_US.book Page 8