Hyundai Ioniq Electric 2018 Owner's Manual
Manufacturer: HYUNDAI, Model Year: 2018, Model line: Ioniq Electric, Model: Hyundai Ioniq Electric 2018Pages: 541, PDF Size: 19.83 MB
Page 131 of 541
3-46
Convenient features of your vehicle
Hood
Opening the hood
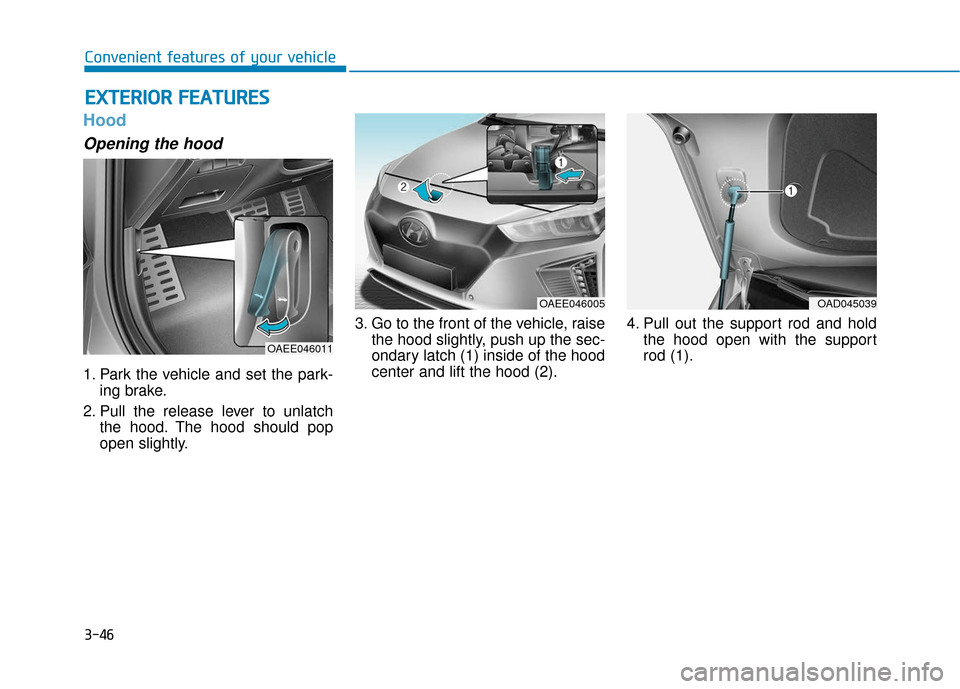
1. Park the vehicle and set the park-ing brake.
2. Pull the release lever to unlatch the hood. The hood should pop
open slightly. 3. Go to the front of the vehicle, raise
the hood slightly, push up the sec-
ondary latch (1) inside of the hood
center and lift the hood (2). 4. Pull out the support rod and hold
the hood open with the support
rod (1).
E EX
X T
TE
ER
R I
IO
O R
R
F
F E
E A
A T
TU
U R
RE
ES
S
OAEE046011
OAEE046005OAD045039
Page 132 of 541
3-47
Convenient features of your vehicle
3
Closing the hood
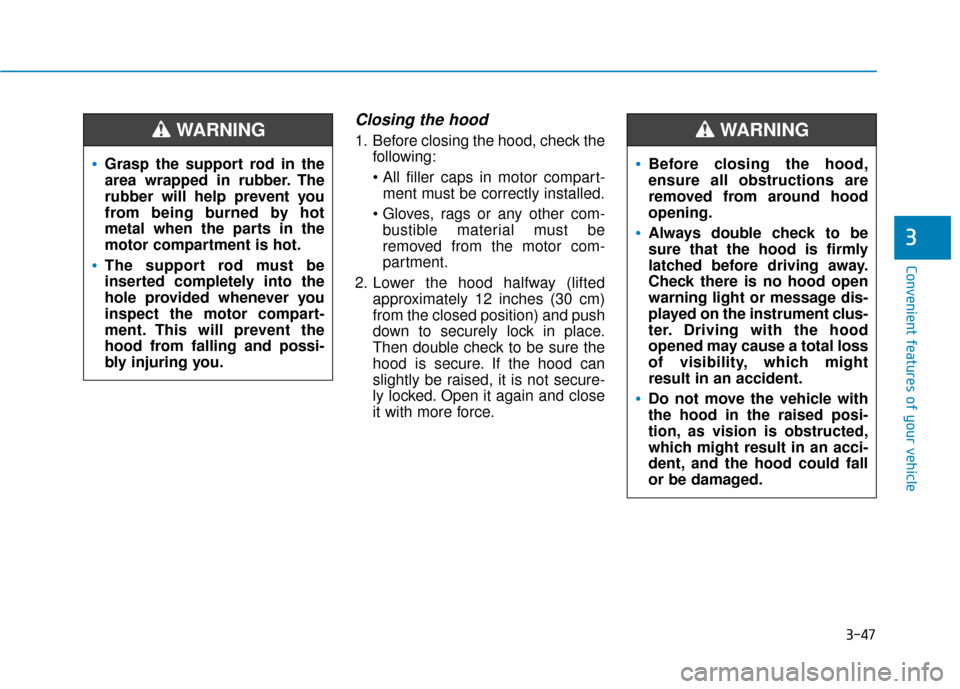
1. Before closing the hood, check thefollowing:
ment must be correctly installed.
bustible material must be
removed from the motor com-
partment.
2. Lower the hood halfway (lifted approximately 12 inches (30 cm)
from the closed position) and push
down to securely lock in place.
Then double check to be sure the
hood is secure. If the hood can
slightly be raised, it is not secure-
ly locked. Open it again and close
it with more force.
Before closing the hood,
ensure all obstructions are
removed from around hood
opening.
Always double check to be
sure that the hood is firmly
latched before driving away.
Check there is no hood open
warning light or message dis-
played on the instrument clus-
ter. Driving with the hood
opened may cause a total loss
of visibility, which might
result in an accident.
Do not move the vehicle with
the hood in the raised posi-
tion, as vision is obstructed,
which might result in an acci-
dent, and the hood could fall
or be damaged.
WARNING
Grasp the support rod in the
area wrapped in rubber. The
rubber will help prevent you
from being burned by hot
metal when the parts in the
motor compartment is hot.
The support rod must be
inserted completely into the
hole provided whenever you
inspect the motor compart-
ment. This will prevent the
hood from falling and possi-
bly injuring you.
WARNING
Page 133 of 541
3-48
Convenient features of your vehicle
Liftgate
Opening the liftgate
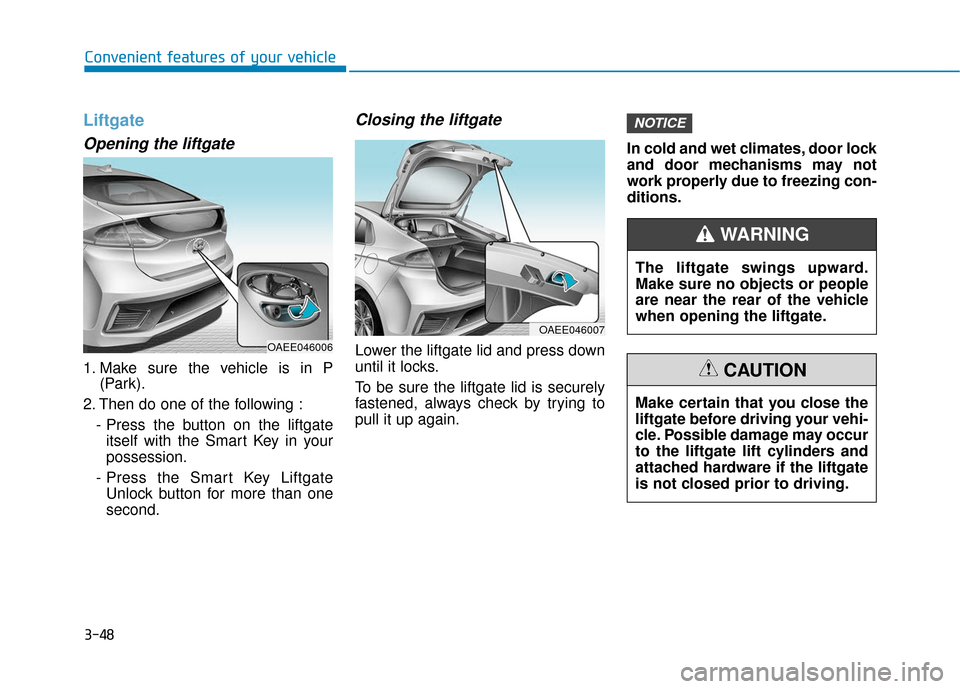
1. Make sure the vehicle is in P(Park).
2. Then do one of the following : - Press the button on the liftgateitself with the Smart Key in your
possession.
- Press the Smart Key Liftgate Unlock button for more than one
second.
Closing the liftgate
Lower the liftgate lid and press down
until it locks.
To be sure the liftgate lid is securely
fastened, always check by trying to
pull it up again. In cold and wet climates, door lock
and door mechanisms may not
work properly due to freezing con-
ditions.
NOTICE
OAEE046007
The liftgate swings upward.
Make sure no objects or people
are near the rear of the vehicle
when opening the liftgate.
WARNING
Make certain that you close the
liftgate before driving your vehi-
cle. Possible damage may occur
to the liftgate lift cylinders and
attached hardware if the liftgate
is not closed prior to driving.
CAUTION
OAEE046006
Page 134 of 541
3-49
Convenient features of your vehicle
3
Emergency liftgate safetyrelease
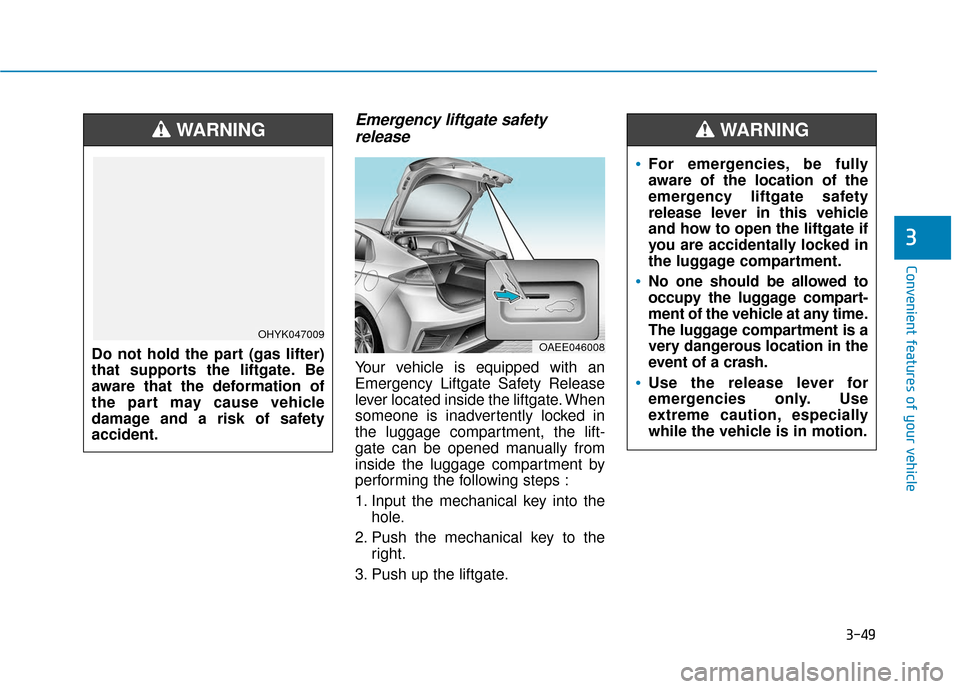
Your vehicle is equipped with an
Emergency Liftgate Safety Release
lever located inside the liftgate. When
someone is inadvertently locked in
the luggage compartment, the lift-
gate can be opened manually from
inside the luggage compartment by
performing the following steps :
1. Input the mechanical key into the
hole.
2. Push the mechanical key to the right.
3. Push up the liftgate.
OAEE046008
For emergencies, be fully
aware of the location of the
emergency liftgate safety
release lever in this vehicle
and how to open the liftgate if
you are accidentally locked in
the luggage compartment.
No one should be allowed to
occupy the luggage compart-
ment of the vehicle at any time.
The luggage compartment is a
very dangerous location in the
event of a crash.
Use the release lever for
emergencies only. Use
extreme caution, especially
while the vehicle is in motion.
WARNING
Do not hold the part (gas lifter)
that supports the liftgate. Be
aware that the deformation of
the part may cause vehicle
damage and a risk of safety
accident.
WARNING
OHYK047009
Page 135 of 541
3-50
Convenient features of your vehicle
Charging Door
Opening the charging door
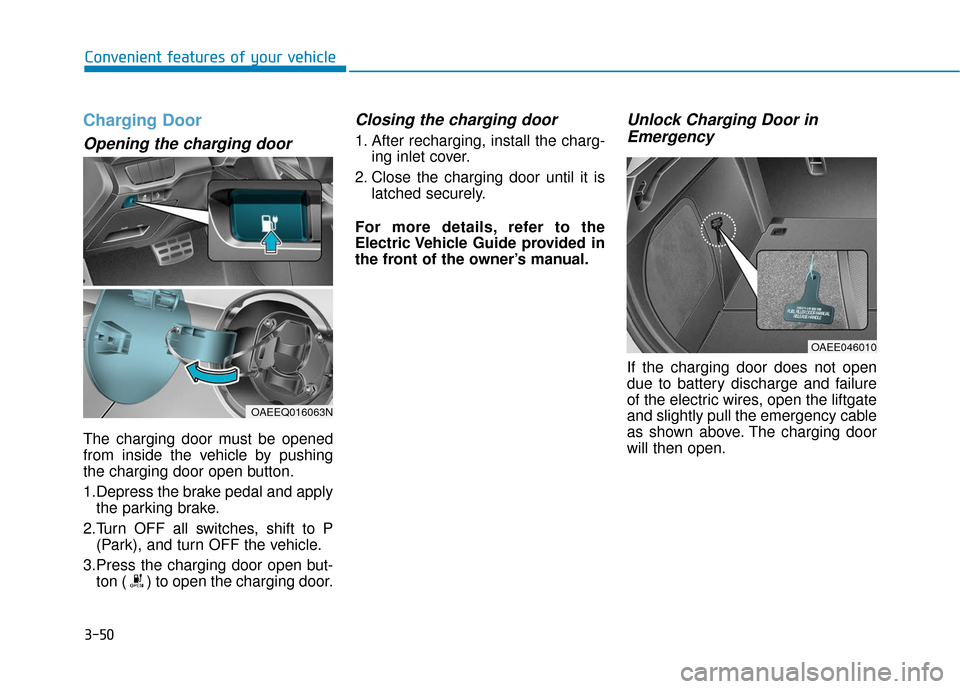
The charging door must be opened
from inside the vehicle by pushing
the charging door open button.
1.Depress the brake pedal and applythe parking brake.
2.Turn OFF all switches, shift to P (Park), and turn OFF the vehicle.
3.Press the charging door open but- ton ( ) to open the charging door.
Closing the charging door
1. After recharging, install the charg- ing inlet cover.
2. Close the charging door until it is latched securely.
For more details, refer to the
Electric Vehicle Guide provided in
the front of the owner’s manual.
Unlock Charging Door in Emergency
If the charging door does not open
due to battery discharge and failure
of the electric wires, open the liftgate
and slightly pull the emergency cable
as shown above. The charging door
will then open.
OAEE046010
OAEEQ016063N
Page 136 of 541
3-51
Convenient features of your vehicle
I
IN
N S
ST
T R
R U
U M
M E
EN
N T
T
C
C L
LU
U S
ST
T E
ER
R
3
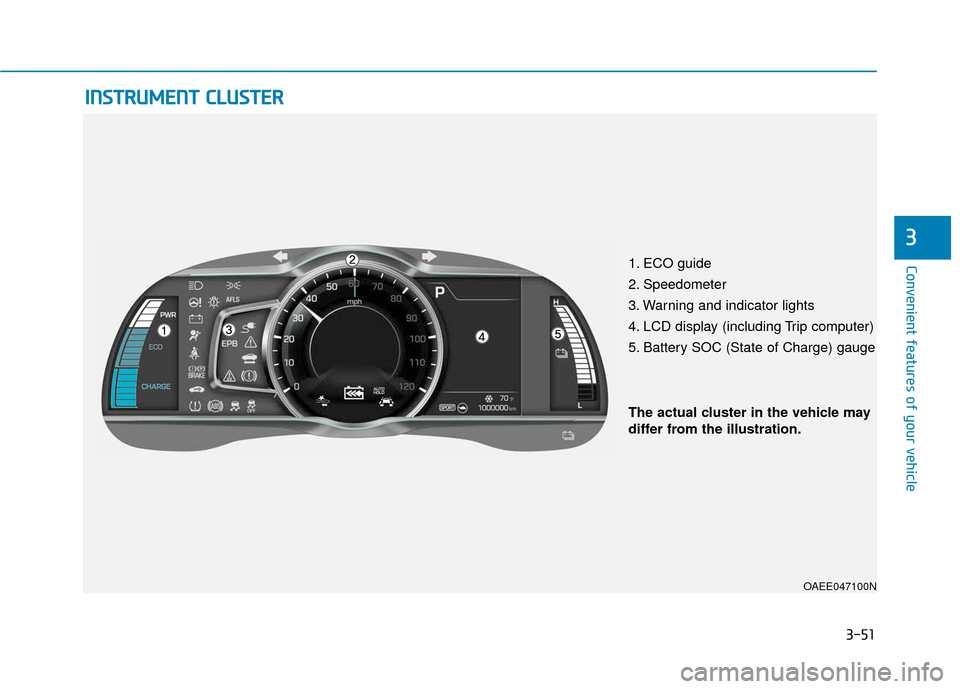
1. ECO guide
2. Speedometer
3. Warning and indicator lights
4. LCD display (including Trip computer)
5. Battery SOC (State of Charge) gauge
OAEE047100N
The actual cluster in the vehicle may
differ from the illustration.
Page 137 of 541
3-52
Convenient features of your vehicle
Instrument Cluster Control
Adjusting instrument clusterillumination
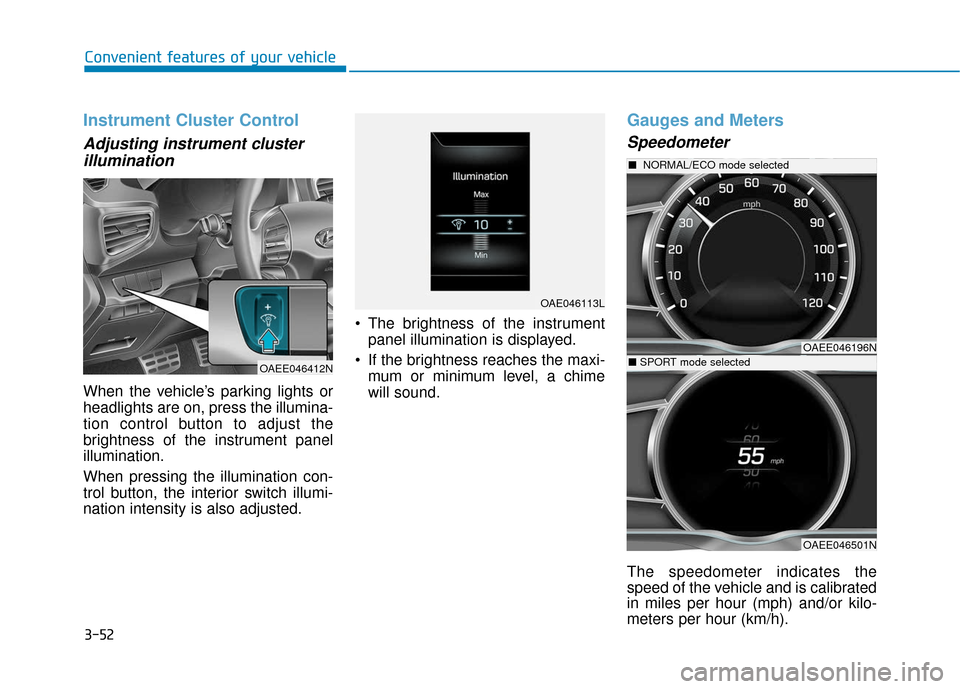
When the vehicle’s parking lights or
headlights are on, press the illumina-
tion control button to adjust the
brightness of the instrument panel
illumination.
When pressing the illumination con-
trol button, the interior switch illumi-
nation intensity is also adjusted. The brightness of the instrument
panel illumination is displayed.
If the brightness reaches the maxi- mum or minimum level, a chime
will sound.
Gauges and Meters
Speedometer
The speedometer indicates the
speed of the vehicle and is calibrated
in miles per hour (mph) and/or kilo-
meters per hour (km/h).
OAE046113L
OAEE046412N
OAEE046196N
■ NORMAL/ECO mode selected
OAEE046501N
■SPORT mode selected
Page 138 of 541
3-53
Convenient features of your vehicle
3
The speedometer is displayed differ-
ently according to the selected drive
mode in the Drive Mode Integrated
Control System.
For more information, refer to
“Drive Mode Integrated Control
System” in chapter 5.ECO guide
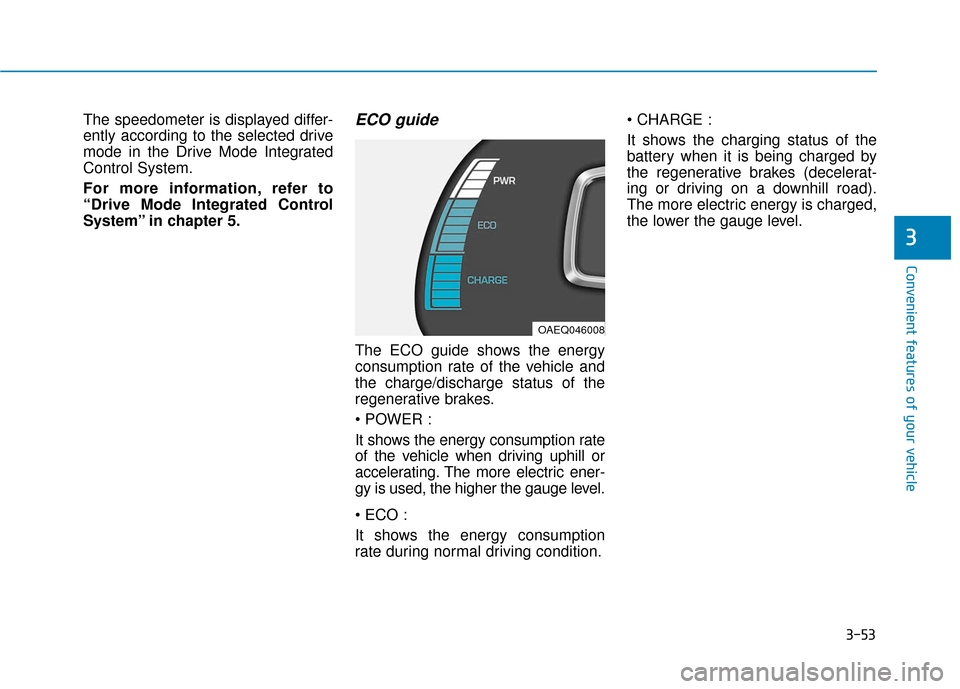
The ECO guide shows the energy
consumption rate of the vehicle and
the charge/discharge status of the
regenerative brakes.
It shows the energy consumption rate
of the vehicle when driving uphill or
accelerating. The more electric ener-
gy is used, the higher the gauge level.
It shows the energy consumption
rate during normal driving condition.
It shows the charging status of the
battery when it is being charged by
the regenerative brakes (decelerat-
ing or driving on a downhill road).
The more electric energy is charged,
the lower the gauge level.
OAEQ046008
Page 139 of 541
3-54
Convenient features of your vehicle
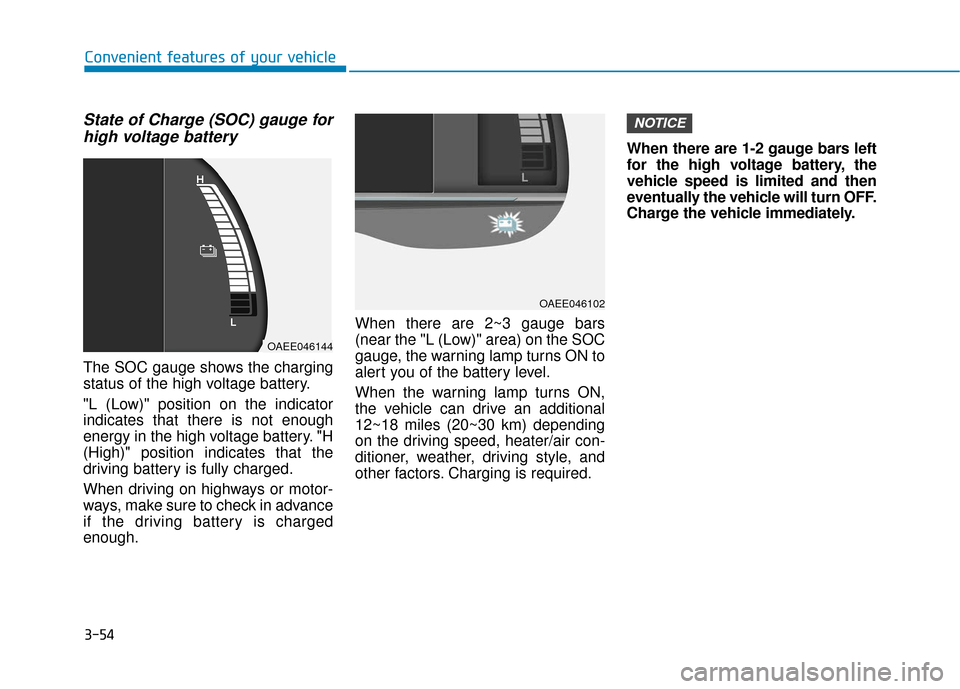
State of Charge (SOC) gauge forhigh voltage battery
The SOC gauge shows the charging
status of the high voltage battery.
"L (Low)" position on the indicator
indicates that there is not enough
energy in the high voltage battery. "H
(High)" position indicates that the
driving battery is fully charged.
When driving on highways or motor-
ways, make sure to check in advance
if the driving battery is charged
enough. When there are 2~3 gauge bars
(near the "L (Low)" area) on the SOC
gauge, the warning lamp turns ON to
alert you of the battery level.
When the warning lamp turns ON,
the vehicle can drive an additional
12~18 miles (20~30 km) depending
on the driving speed, heater/air con-
ditioner, weather, driving style, and
other factors. Charging is required.When there are 1-2 gauge bars left
for the high voltage battery, the
vehicle speed is limited and then
eventually the vehicle will turn OFF.
Charge the vehicle immediately.
NOTICE
OAEE046144
OAEE046102
Page 140 of 541
3-55
Convenient features of your vehicle
3
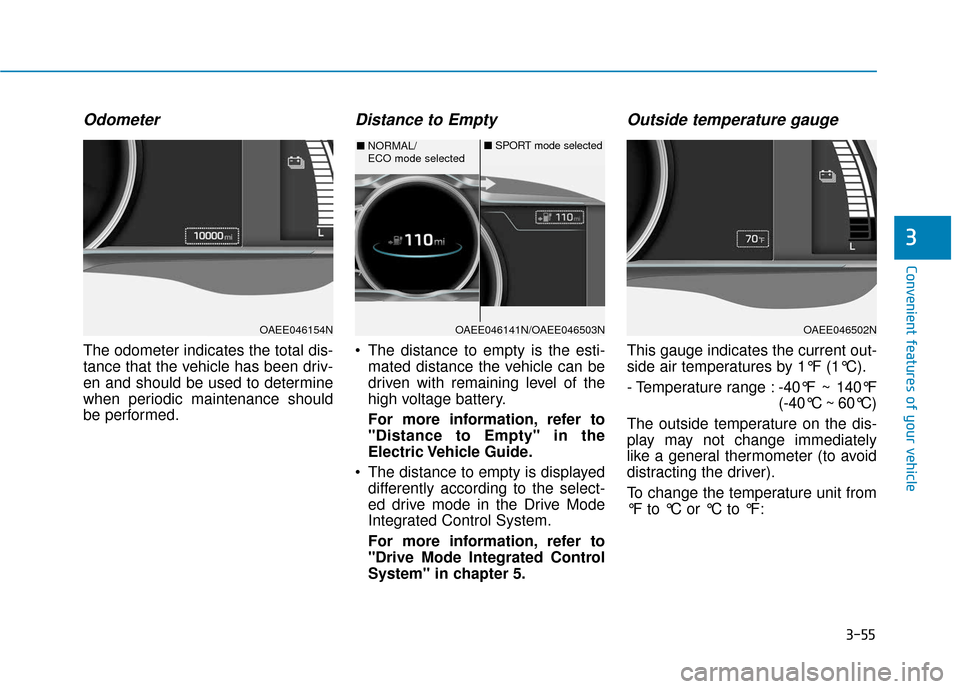
Odometer
The odometer indicates the total dis-
tance that the vehicle has been driv-
en and should be used to determine
when periodic maintenance should
be performed.
Distance to Empty
The distance to empty is the esti-mated distance the vehicle can be
driven with remaining level of the
high voltage battery.
For more information, refer to
"Distance to Empty" in the
Electric Vehicle Guide.
The distance to empty is displayed differently according to the select-
ed drive mode in the Drive Mode
Integrated Control System.
For more information, refer to
"Drive Mode Integrated Control
System" in chapter 5.
Outside temperature gauge
This gauge indicates the current out-
side air temperatures by 1°F (1°C).
- Temperature range : -40°F ~ 140°F
(-40°C ~ 60°C)
The outside temperature on the dis-
play may not change immediately
like a general thermometer (to avoid
distracting the driver).
To change the temperature unit from
°F to °C or °C to °F:
OAEE046154NOAEE046141N/OAEE046503N
■ NORMAL/
ECO mode selected ■
SPORT mode selected
OAEE046502N