ECO mode Hyundai Ioniq Electric 2018 User Guide
[x] Cancel search | Manufacturer: HYUNDAI, Model Year: 2018, Model line: Ioniq Electric, Model: Hyundai Ioniq Electric 2018Pages: 541, PDF Size: 19.83 MB
Page 115 of 541
3-30
Convenient features of your vehicle
Integrated HomeLink®Wireless
Control System
The HomeLink®Wireless Control
System can replace up to three hand-
held radio-frequency (RF) transmit-
ters with a single built-in device. This
innovative feature will learn the radio
frequency codes of most current
transmitters to operate devices such
as gate operators, garage door open-
ers, entry door locks, security sys-
tems, even home lighting. Both stan-
dard and rolling code-equipped trans-
mitters can be programmed by fol-
lowing the outlined procedures.
Additional HomeLink
®information
can be found at: www.homelink.com
or by calling 1-800-355-3515.
Retain the original transmitter of the
RF device you are programming for
use in other vehicles as well as for
future HomeLink
®programming. It is
also suggested that upon the sale of
the vehicle, the programmed
HomeLink
®buttons be erased for
security purposes.
Programming HomeLink®
Please note the following:
When programming a garage door opener, it is advised to park the
vehicle outside of the garage.
It is recommended that a new bat- tery be placed in the hand-held
transmitter of the device being pro-
grammed to HomeLink
®for quicker
training and accurate transmission
of the radio-frequency signal.
Some vehicles may require the POWER button to be placed in the
ACC (or "Accessories") position for
programming and/or operation of
HomeLink
®.
In the event that there are still pro- gramming difficulties or questions
after following the programming
steps listed below, contact
HomeLink
®at: www.homelink.com
or by calling 1-800-355-3515.
Before programming HomeLink
®
to a garage door opener or gate
operator, make sure people and
objects are out of the way of the
device to prevent potential harm
or damage. Do not use the
HomeLink
®with any garage door
opener that lacks the safety stop
and reverse features required by
U.S. federal safety standards (this
includes any garage door opener
model manufactured before April
1, 1982). A garage door that can-
not detect an object - signaling
the door to stop and reverse -
does not meet current U.S. feder-
al safety standards. Using a
garage door opener without
these features increases the risk
of serious injury or death.
WARNING
Page 118 of 541
3-33
Convenient features of your vehicle
3
Reprogramming a singleHomeLink®button
To program a new device to a previ-
ously trained HomeLink®button, fol-
low these steps:
1. Press and hold the desired HomeLink
®button. Do NOT
release until step 4 has been com-
pleted.
2. When the indicator light begins to flash slowly (after 20 seconds),
position the handheld transmitter 1
to 3 inches away from the
HomeLink
®surface.
3. Press and hold the handheld transmitter button. The HomeLink
®
indicator light will flash, first slowly
and then rapidly.
4. When the indicator light begins to flash rapidly, release both buttons.
5. Press and hold the just-trained HomeLink
®button and observe
the red Status Indicator LED. If the
indicator light stays on constantly,
programming is complete and
your new device should activate.
Erasing HomeLink®buttons
Individual buttons cannot be erased.
However, to erase all three pro-
grammed buttons:
1. Press and hold the two outer HomeLink
®buttons until the indi-
cator light begins to flash-after 20
seconds.
2. Release both buttons. Do not hold for longer than 30 seconds.
The Integrated HomeLink
®Wireless
Control System is now in the training
(learn) mode and can be pro-
grammed at any time following the
appropriate steps in the Programming
chapters above.
NVS
®is a registered trademark and
Z-Nav™ is a trademark of the Gentex
Corporation, Zeeland, Michigan.
HomeLink
®is a registered trademark
owned by Johnson Controls,
Incorporated, Milwaukee, Wisconsin.
FCC ID: NZLZTVHL3
IC: 4112A-ZTVHL3
Information
This device complies with Part 15 of
the FCC Rules.
Operation is subject to the following
three conditions:
1. This device may not cause harmful interference, and
2. This device must accept any interfer- ence received, including interference
that may cause undesired operation.
3. The transceiver has been tested and complies with FCC and Industry
Canada rules. Changes or modifica-
tions not expressly approved by the
party responsible for compliance
could void the user’s authority to
operate the device.
i
Page 130 of 541
3-45
Convenient features of your vehicle
3
Resetting the sunroof
Sunroof needs to be reset if the fol-
lowing occurs :
- Battery is discharged or discon-nected or the related fuse has been
replaced or disconnected
- The one-touch sliding function of the sunroof does not normally oper-
ate
Reset procedure :
1. Place the POWER button to the ON position or start the vehicle
( indicator ON). It is recom-
mended to reset the sunroof while
the vehicle is in the ready ( )
mode.
2. Push the control lever forward. The sunroof will close completely or tilt
depending on the condition of the
sunroof.
3. Release the control lever when the sunroof stops moving. 4. Push the control lever forward
about 10 seconds.
- When the sunroof is in the closed position :
The glass will tilt and slightly move up and down.
- When the sunroof is in the tilt position:
The glass will slightly move up and down.
Do not release the lever until the
operation is completed.
If you release the lever during opera-
tion, start the procedure again from
step 2.
5. Within 3 seconds, push and hold the control lever forward until the
sunroof operates as follows:
Tilt down → Slide Open → Slide
Close. Do not release the lever until the
operation is completed.
If you release the lever during opera-
tion, start the procedure again from
step 2.
6. Release the sunroof control lever
after all steps have completed. (The
sunroof system has been reset.)
Information
• If the sunroof is not reset when thevehicle battery is disconnected or
discharged, or the sunroof fuse is
blown, the sunroof may not operate
normally.
• For more detailed information, con- tact an authorized HYUNDAI deal-
er.
i
Page 137 of 541
3-52
Convenient features of your vehicle
Instrument Cluster Control
Adjusting instrument clusterillumination
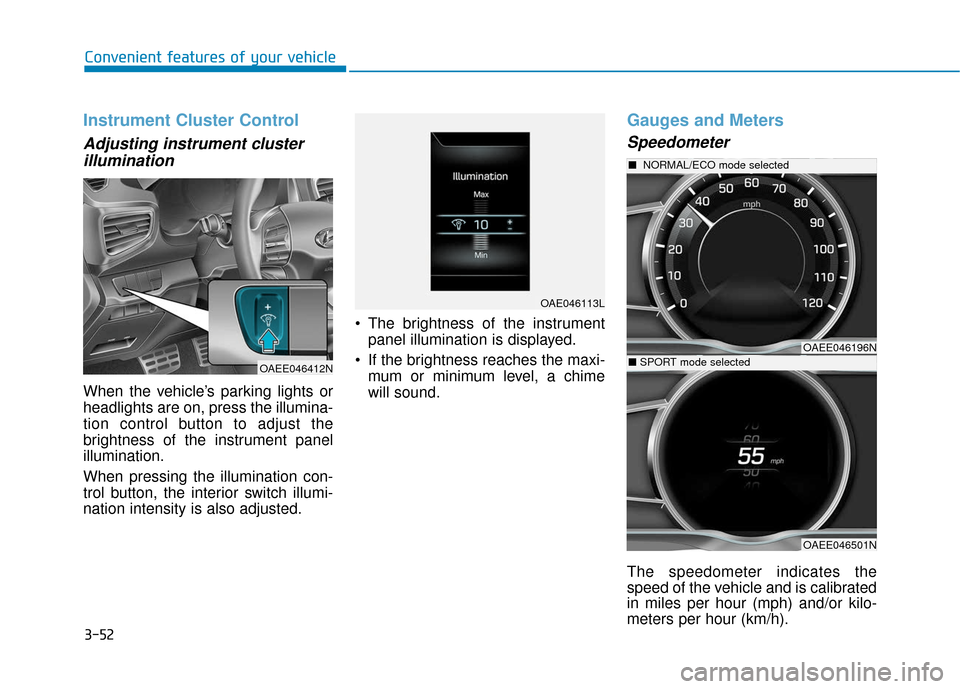
When the vehicle’s parking lights or
headlights are on, press the illumina-
tion control button to adjust the
brightness of the instrument panel
illumination.
When pressing the illumination con-
trol button, the interior switch illumi-
nation intensity is also adjusted. The brightness of the instrument
panel illumination is displayed.
If the brightness reaches the maxi- mum or minimum level, a chime
will sound.
Gauges and Meters
Speedometer
The speedometer indicates the
speed of the vehicle and is calibrated
in miles per hour (mph) and/or kilo-
meters per hour (km/h).
OAE046113L
OAEE046412N
OAEE046196N
■ NORMAL/ECO mode selected
OAEE046501N
■SPORT mode selected
Page 138 of 541
3-53
Convenient features of your vehicle
3
The speedometer is displayed differ-
ently according to the selected drive
mode in the Drive Mode Integrated
Control System.
For more information, refer to
“Drive Mode Integrated Control
System” in chapter 5.ECO guide
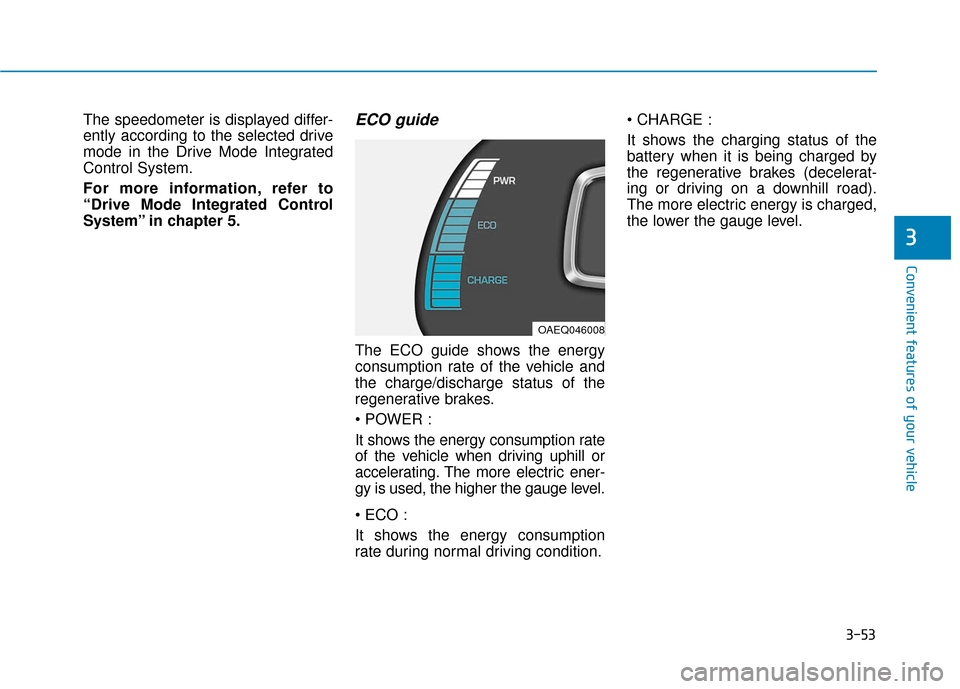
The ECO guide shows the energy
consumption rate of the vehicle and
the charge/discharge status of the
regenerative brakes.
It shows the energy consumption rate
of the vehicle when driving uphill or
accelerating. The more electric ener-
gy is used, the higher the gauge level.
It shows the energy consumption
rate during normal driving condition.
It shows the charging status of the
battery when it is being charged by
the regenerative brakes (decelerat-
ing or driving on a downhill road).
The more electric energy is charged,
the lower the gauge level.
OAEQ046008
Page 140 of 541
3-55
Convenient features of your vehicle
3
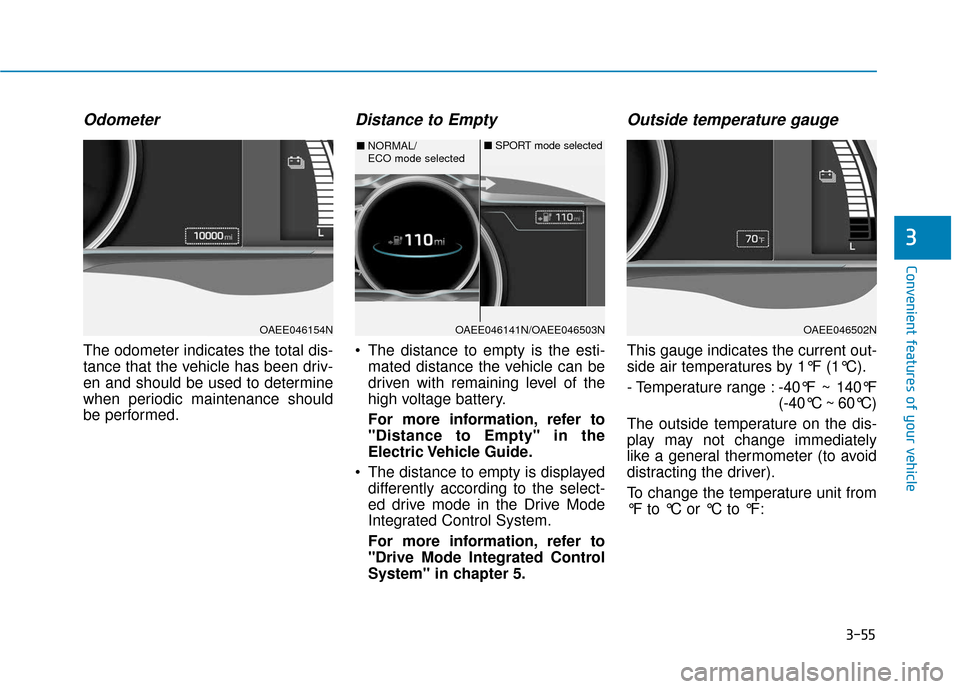
Odometer
The odometer indicates the total dis-
tance that the vehicle has been driv-
en and should be used to determine
when periodic maintenance should
be performed.
Distance to Empty
The distance to empty is the esti-mated distance the vehicle can be
driven with remaining level of the
high voltage battery.
For more information, refer to
"Distance to Empty" in the
Electric Vehicle Guide.
The distance to empty is displayed differently according to the select-
ed drive mode in the Drive Mode
Integrated Control System.
For more information, refer to
"Drive Mode Integrated Control
System" in chapter 5.
Outside temperature gauge
This gauge indicates the current out-
side air temperatures by 1°F (1°C).
- Temperature range : -40°F ~ 140°F
(-40°C ~ 60°C)
The outside temperature on the dis-
play may not change immediately
like a general thermometer (to avoid
distracting the driver).
To change the temperature unit from
°F to °C or °C to °F:
OAEE046154NOAEE046141N/OAEE046503N
■ NORMAL/
ECO mode selected ■
SPORT mode selected
OAEE046502N
Page 141 of 541
3-56
Convenient features of your vehicle
- Go to User Settings Mode ➝Other
Features ➝Temperature Unit.
- Press the AUTO button for 3 sec- onds while pressing the OFF button.
Both the temperature unit on the
cluster LCD display and climate con-
trol screen will change.
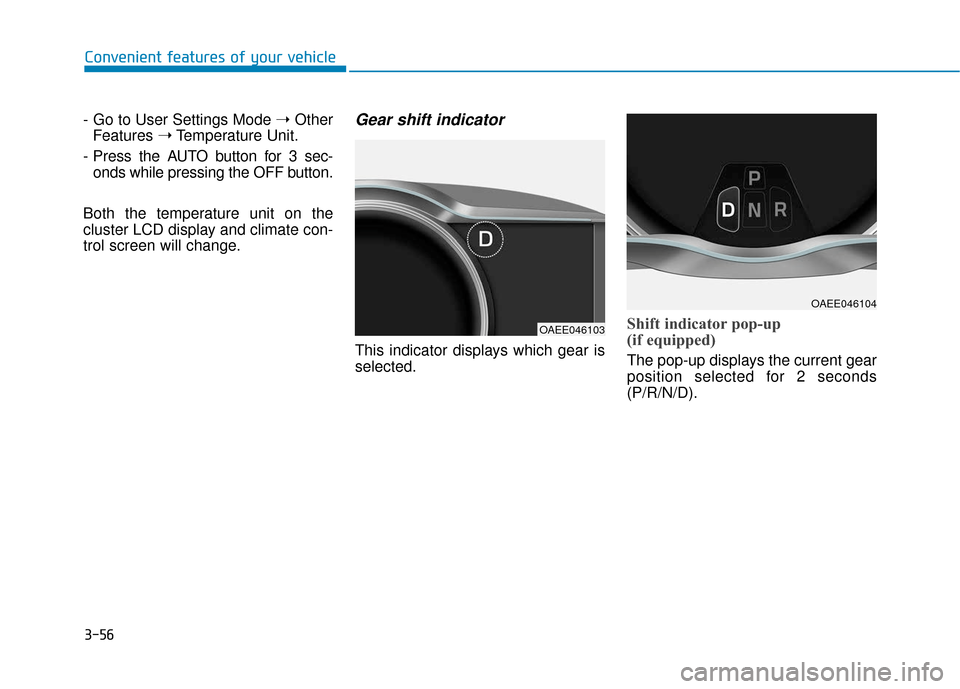
Gear shift indicator
This indicator displays which gear is
selected.
Shift indicator pop-up
(if equipped)
The pop-up displays the current gear
position selected for 2 seconds
(P/R/N/D).
OAEE046103
OAEE046104
Page 153 of 541
3-68
Convenient features of your vehicle
SPORT Mode IndicatorLight
This indicator light illuminates:
When you select "SPORT" mode as
drive mode.
For more information, refer to
"Drive Mode Integrated Control
System" in chapter 5.
ECO Mode IndicatorLight
This indicator light illuminates :
When you select "ECO" mode as
drive mode.
For more information, refer to
"Drive Mode Integrated Control
System" in this chapter.
LCD Display Messages
Shift to P
This warning message is displayed if
you try to turn off the vehicle with the
gear in the N (Neutral) position.
At this time, the POWER button
changes to the ACC position (If you
press the POWER button once more,
it will turn to the ON position).
Low Key Battery
This warning message is displayed if
the battery of the smart key is dis-
charged while changing the POWER
button to the OFF position.
Page 166 of 541
3-81
Convenient features of your vehicle
3
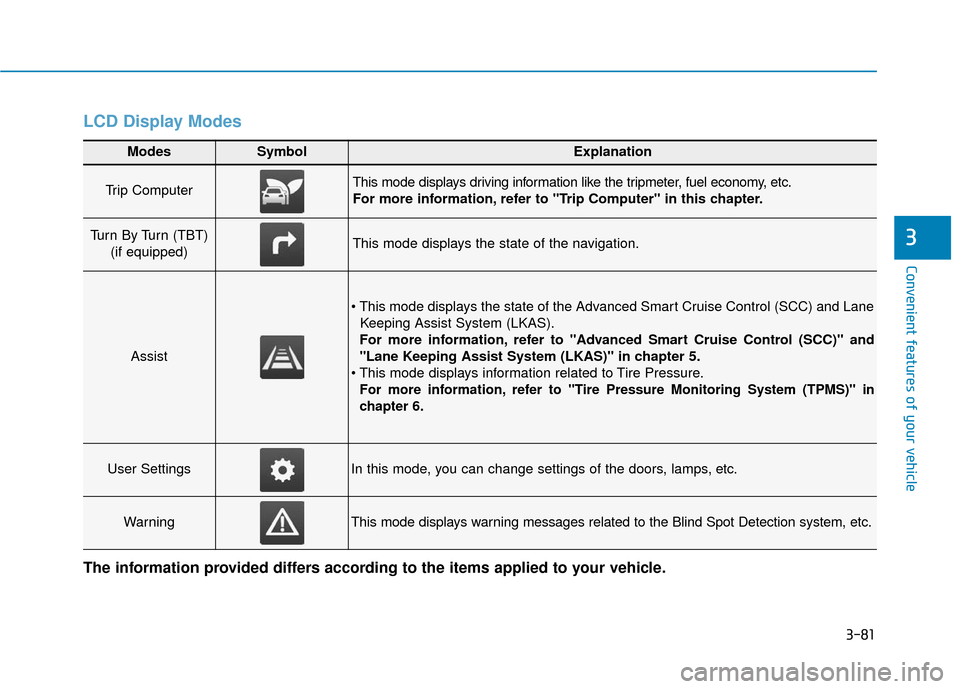
LCD Display Modes
Modes SymbolExplanation
Trip Computer This mode displays driving information like the tripmeter, fuel economy, etc.
For more information, refer to "Trip Computer" in this chapter.
Turn By Turn (TBT) (if equipped)This mode displays the state of the navigation.
Assist
Keeping Assist System (LKAS).
For more information, refer to "Advanced Smart Cruise Control (SCC)" and
"Lane Keeping Assist System (LKAS)" in chapter 5.
For more information, refer to "Tire Pressure Monitoring System (TPMS)"in
chapter 6.
User SettingsIn this mode, you can change settings of the doors, lamps, etc.
WarningThis mode displays warning messages related to the Blind Spot Detection system, etc.
The information provided differs according to the items applied to your vehicle.
Page 167 of 541
3-82
Convenient features of your vehicle
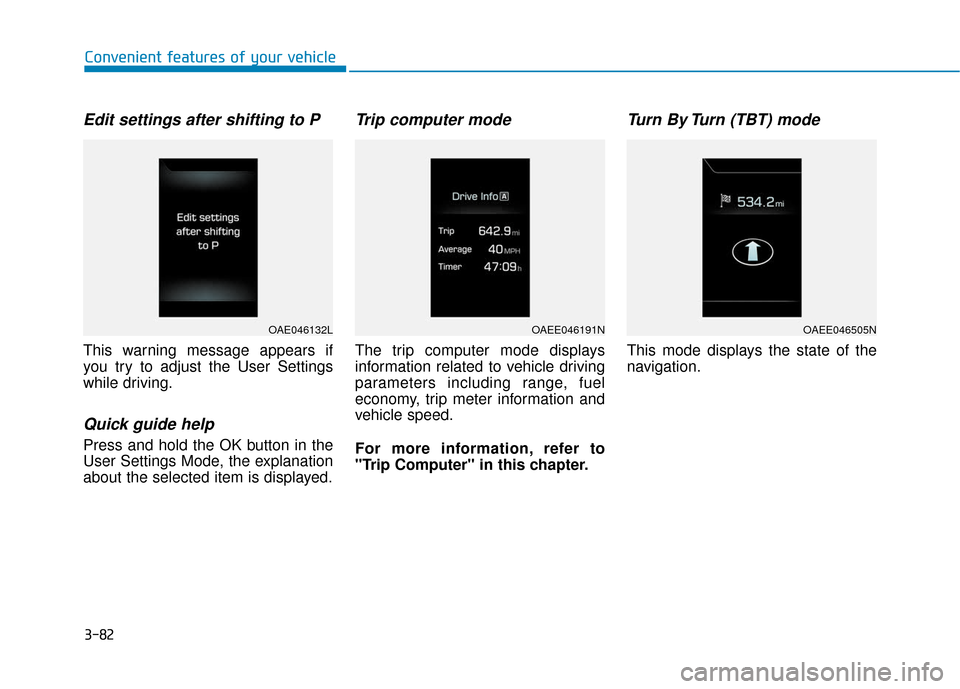
Edit settings after shifting to P
This warning message appears if
you try to adjust the User Settings
while driving.
Quick guide help
Press and hold the OK button in the
User Settings Mode, the explanation
about the selected item is displayed.
Trip computer mode
The trip computer mode displays
information related to vehicle driving
parameters including range, fuel
economy, trip meter information and
vehicle speed.
For more information, refer to
"Trip Computer" in this chapter.
Turn By Turn (TBT) mode
This mode displays the state of the
navigation.
OAE046132LOAEE046191NOAEE046505N