reset Hyundai Ioniq Electric 2019 Owner's Manual - RHD (UK, Australia)
[x] Cancel search | Manufacturer: HYUNDAI, Model Year: 2019, Model line: Ioniq Electric, Model: Hyundai Ioniq Electric 2019Pages: 526, PDF Size: 16.63 MB
Page 148 of 526
 Convenient features of your vehicle
Accessing your vehicle .........................................3-3
Smart key ........................................................................\
....3-3
Immo")
Convenient features of your vehicle
Accessing your vehicle .........................................3-3
Smart key ........................................................................\
....3-3
Immobiliser system............................................................3-7
Door locks ...............................................................3-8
Operating door locks from outside the vehicle.........3-8
Operating door locks from inside the vehicle ...........3-9
Deadlocks ........................................................................\
..3-11
Auto door lock/unlock features..................................3-11
Child-protector rear door locks ..................................3-12
Theft-alarm system.............................................3-13
Driver position memory system .........................3-14
Storing memory positions .............................................3-14
Easy access function .....................................................3-15
Steering wheel......................................................3-16
Electric power steering (EPS) ......................................3-16
Tilt steering / Telescope steering...............................3-17
Heated steering wheel ...................................................3-17
Horn ........................................................................\
............3-18
Mirrors ...................................................................3-18
Inside rearview mirror....................................................3-18
Outside rearview mirror ................................................3-20
Windows ................................................................3-23
Power windows................................................................3-23
Sunroof..................................................................3-28
Sunroof opening and closing .......................................3-29
Sliding the sunroof .........................................................3-29
Tilting the sunroof ..........................................................3-30
Sunshade ........................................................................\
...3-30
Resetting the sunroof ....................................................3-31
Exterior features .................................................3-32
Bonnet........................................................................\
........3-32
Tailgate.....................................................................\
..........3-33
Instrument cluster................................................3-35
Instrument cluster control ............................................3-36
Gauges and meters .........................................................3-37
Warning and indicator lights ........................................3-41
LCD display messages ..................................................3-52
LCD display ...........................................................3-65
LCD display control.........................................................3-65
LCD display modes ........................................................3-66
Trip computer .......................................................3-73
Light .......................................................................3\
-77
Exterior lights ..................................................................3-77
Welcome system..............................................................3-83
Interior lights ....................................................................3-84\
3
Page 160 of 526
3-13
Convenient features of your vehicle
3
This system helps to protect your
vehicle and valuables. The horn will
sound and the hazard warning lights
will blink continuously if any of the
following occurs:
- A door is opened without using thesmart key.
- The tailgate is opened without using the smart key.
- The bonnet is opened.
The alarm continues for 30 seconds,
then the system resets. To turn off
the alarm, unlock the doors with the
smart key.
The Theft Alarm System automati-
cally sets 30 seconds after you lock
the doors and the tailgate. For the
system to activate, you must lock the
doors and the tailgate from outside
the vehicle with the smart key or by
pressing the button on the outside of
the door handles with the smart key
in your possession.
The hazard warning lights will blink
and the chime will sound once to
indicate the system is armed. Once the security system is set, open-
ing any door, the tailgate, or the bon-
net without using the smart key will
cause the alarm to activate.
The Theft Alarm System will not set if
the bonnet, the tailgate, or any door
is not fully closed. If the system will
not set, check the bonnet, the tail-
gate, or the doors are fully closed.
Do not attempt to alter this system or
add other devices to it.
Information
• Do not lock the doors until all pas-
sengers have left the vehicle. If the
remaining passenger leaves the
vehicle when the system is armed,
the alarm will be activated.
• If the vehicle is not disarmed with the smart key, open the doors by
using the mechanical key, start the
vehicle and wait for 30 seconds.
• When the system is disarmed but a door or tailgate is not opened within
30 seconds, the system will be
rearmed.
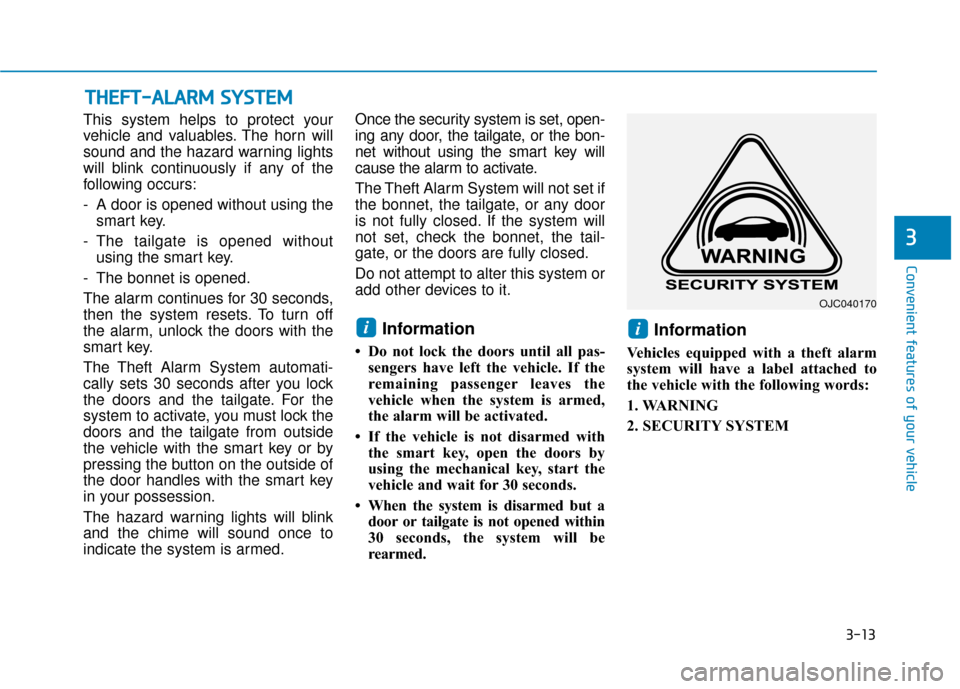
Information
Vehicles equipped with a theft alarm
system will have a label attached to
the vehicle with the following words:
1. WARNING
2. SECURITY SYSTEM
ii
T TH
H E
EF
FT
T -
-A
A L
LA
A R
RM
M
S
S Y
Y S
ST
T E
EM
M
OJC040170
Page 165 of 526
3-18
Convenient features of your vehicle
Information
The heated steering wheel will turn off
automatically approximately 30 min-
utes after the heated steering wheel is
turned on.
When the vehicle is turned off during
the heated steering wheel is on, the
timer function of heated steering
wheel will be reset.
To reuse heated steering wheel, press
button again.
Do not install any cover or acces-
sory on the steering wheel. This
cover or accessory could cause
damage to the heated steering
wheel system.
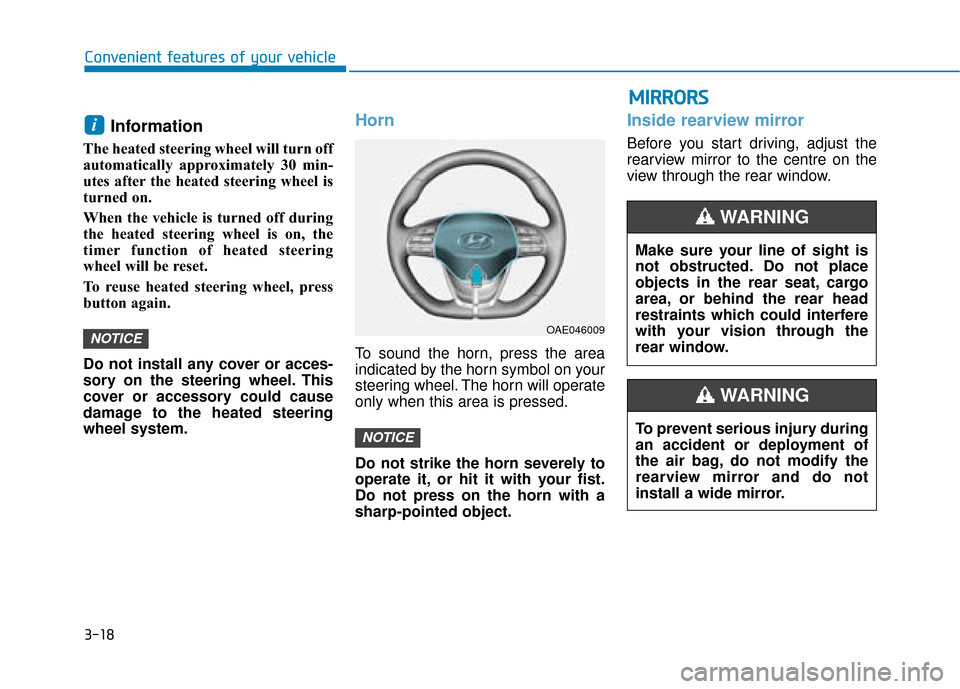
Horn
To sound the horn, press the area
indicated by the horn symbol on your
steering wheel. The horn will operate
only when this area is pressed.
Do not strike the horn severely to
operate it, or hit it with your fist.
Do not press on the horn with a
sharp-pointed object.
Inside rearview mirror
Before you start driving, adjust the
rearview mirror to the centre on the
view through the rear window.
NOTICE
NOTICE
i
OAE046009
M
MI
IR
R R
RO
O R
RS
S
Make sure your line of sight is
not obstructed. Do not place
objects in the rear seat, cargo
area, or behind the rear head
restraints which could interfere
with your vision through the
rear window.
WARNING
To prevent serious injury during
an accident or deployment of
the air bag, do not modify the
rearview mirror and do not
install a wide mirror.
WARNING
Page 172 of 526
3-25
Convenient features of your vehicle
3
Auto down window (if equipped)
Pressing the power window switch
momentarily to the second detent
position (6) completely lowers the
window even when the switch is
released. To stop the window at the
desired position whilst the window is
in operation, pull up or press down
and release the switch.
Auto up/down window (if equipped)
Pressing or pulling up the power win-
dow switch momentarily to the sec-
ond detent position (6) completely
lowers or lifts the window even when
the switch is released. To stop the
window at the desired position whilst
the window is in operation, pull up or
press down and release the switch.
To reset the power windows
If the power windows do not operate
normally, the automatic power win-
dow system must be reset as follows:
1. Place the POWER button to the
ON position.
2. Close the window and continue pulling up on the power window
switch for at least one second.
If the power windows do not operate
properly after resetting, it is recom-
mended that the system be checked
by a HYUNDAI authorised repairer.
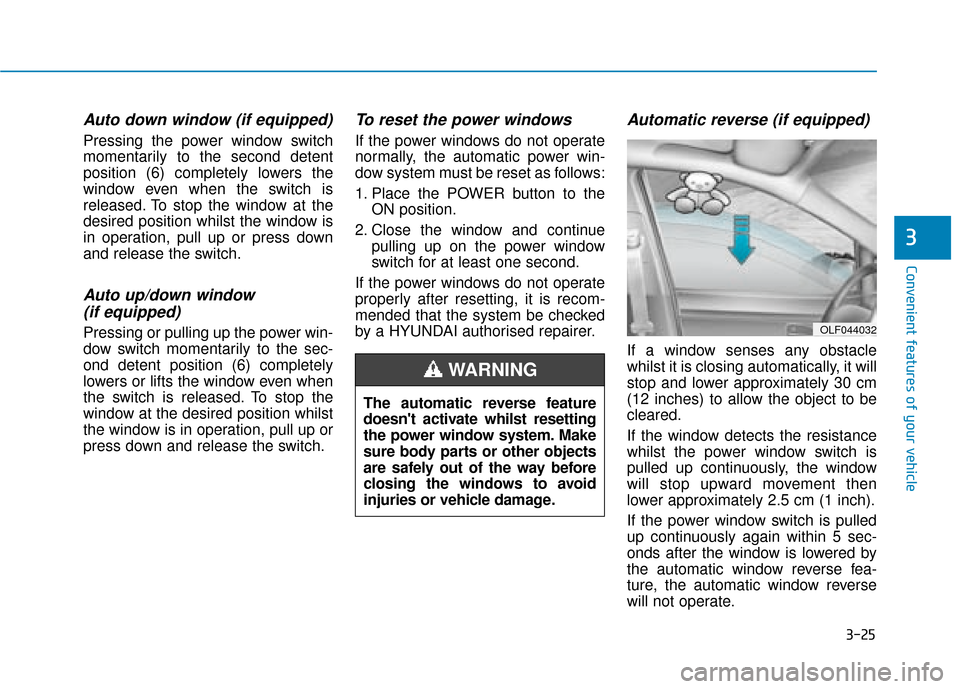
Automatic reverse (if equipped)
If a window senses any obstacle
whilst it is closing automatically, it will
stop and lower approximately 30 cm
(12 inches) to allow the object to be
cleared.
If the window detects the resistance
whilst the power window switch is
pulled up continuously, the window
will stop upward movement then
lower approximately 2.5 cm (1 inch).
If the power window switch is pulled
up continuously again within 5 sec-
onds after the window is lowered by
the automatic window reverse fea-
ture, the automatic window reverse
will not operate.
OLF044032
The automatic reverse feature
doesn't activate whilst resetting
the power window system. Make
sure body parts or other objects
are safely out of the way before
closing the windows to avoid
injuries or vehicle damage.
WARNING
Page 178 of 526
3-31
Convenient features of your vehicle
3
Resetting the sunroof
The sunroof may need to be reset if
the following conditions occur:
- Battery is discharged or disconnect-ed or the related fuse has been
replaced or disconnected
- The one-touch sliding function of the sunroof does not normally operate
To reset the sunroof, perform the fol-
lowing steps:
1. Place the POWER button to the ON position or when the vehicle is
in the ready ( ) mode. It is rec-
ommended to reset the sunroof
whilst the vehicle is in the ready
( ) mode.
2. Push the control lever forward. The sunroof will close completely or tilt
depending on the condition of the
sunroof.
3. Release the control lever until the sunroof does not move. 4. Push the control lever forward
about 10 seconds.
- When the sunroof is in the close position :
The glass will tilt and slightly move up and down.
- When the sunroof is in the tilt posi- tion:
The glass will slightly move up and down.
Do not release the lever until the
operation is completed.
If you release the lever during opera-
tion, try again from step 2.
5. Within 3 seconds, push the control lever forward until the sunroof
operates as follows:
Tilt down → Slide Open → Slide
Close.
Do not release the lever until the
operation is completed.
If you release the lever during opera-
tion, try again from step 2. 6. Release the sunroof control lever
after all operation has completed.
The sunroof system has been
reset.
Information
• If the sunroof does not reset whenthe vehicle battery is disconnected
or discharged, or related fuse is
blown, the sunroof may not operate
normally.
• For more detailed information, we recommend that you contact a
HYUNDAI authorised repairer.
i
Page 212 of 526
3-65
Convenient features of your vehicle
3
LCD display control
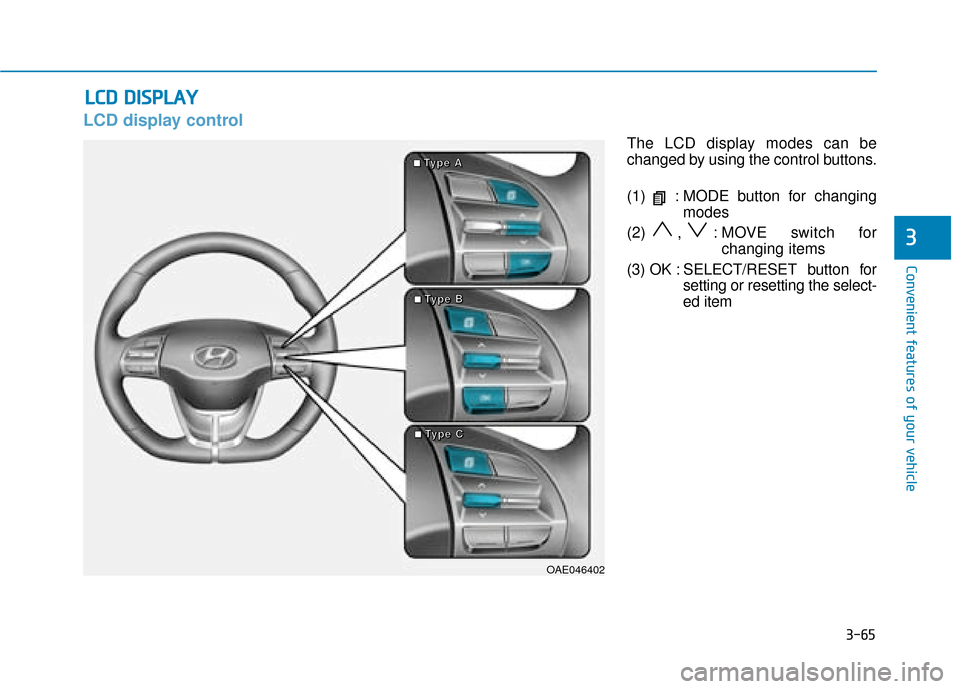
The LCD display modes can be
changed by using the control buttons.
(1) : MODE button for changingmodes
(2) , : MOVE switch for changing items
(3) OK : SELECT/ RESET button for
setting or resetting the select-
ed item
L
L C
C D
D
D
D I
IS
S P
P L
LA
A Y
Y
OAE046402
■
■
■
■T
T
T
T
y
y
y
y
p
p
p
p
e
e
e
e
A
A
A
A
■
■
■
■T
T
T
T
y
y
y
y
p
p
p
p
e
e
e
e
B
B
B
B
■
■
■
■T
T
T
T
y
y
y
y
p
p
p
p
e
e
e
e
C
C
C
C
Page 216 of 526
3-69
Convenient features of your vehicle
3
Warning mode
If one of followings occurs, warning
messages will be displayed on the
LCD display for several seconds.
- Lower washer fluid ((if equipped)
- Blind-Spot Collision Warning(BCW) system malfunction (if
equipped)
- Forward Collision-Avoidance Assist (FCA) system malfunction (if
equipped)
- Smart Cruise Control malfunction (if equipped)
- Tyre Pressure Monitoring System (TPMS) malfunction (if equipped)
User settings mode
In this mode, you can change the
settings of the instrument cluster,
doors, lamps, etc.
1. Driver assistance
2. Door
3. Lights
4. Sound
5. Convenience
6. Service Interval
7. Other Features
8. Reset
The information provided differs
according to the items applied to your
vehicle.
1. Driver assistance
- LDW (Lane Departure Warning)/Standard LKA (Lane Keep Assist)/
Active LKA (Lane Keep Assist)
To adjust the sensitivity of the Lane
Keeping Assist (LKA) system.
For more information, refer to the
"Lane Keeping Assist (LKA) sys-
tem" in chapter 5. DAW (Driver Attention Warning)
- High sensitivity/Normal sensitivi-ty/Off
To adjust the sensitivity of the Driver
Attention Warning (DAW).
For more information, refer to the
"Driver Attention Warning (DAW)
system " in chapter 5.
- Fast/Normal/Slow To adjust the sensitivity of the
Smart Cruise Control system.
For more information, refer to the
"Smart Cruise Control" in chapter
5.
Assist)
To activate or deactivate the Forward
Collision-Avoidance Assist (FCA).
For more information, refer to
"Forward Collision-Avoidance
Assist (FCA)" in chapter 5.
Page 219 of 526
3-72
Convenient features of your vehicle
If the service interval is activated and
the time and distance is adjusted,
messages are displayed in the fol-
lowing situations each time the vehi-
cle is turned on.
- Service in : Displayed to inform the driver theremaining mileage and days to
service.
- Service required : Displayed when the mileage anddays to service has been reached
or passed.
If any of the following conditions
occur, the mileage and number of days
to service may be incorrect.
- The battery cable is disconnected.
- The fuse switch is turned off.
- The battery is discharged. 7. Other Features
Battery Saver+
To activate or deactivate the Aux.
Battery Saver+ function.
When activated, the high voltage bat-
tery is used to keep the 12V battery
charged.
For more information, refer to
“Aux. Battery Saver+” in the
Electric Vehicle Guide.
- Off: The average fuel economy will
not reset automatically whenever
refuelling.
- After Ignition: The average fuel economy will reset automatically
whenever it has passed 4 hours
after turning OFF the vehicle.
- After Recharging : The average fuel economy will reset automatically
when recharging.
For more information, refer to
"Trip Computer" in this chapter.
To select the fuel economy unit.
(km/kWh, kWh/100km, mi/kWh)
To select the temperature unit.
(°C,°F)
To select the tyre pressure unit.
(psi, kPa, bar)
To select language.
8. Reset
You can reset the menus in the User
Settings Mode. All menus in the User
Settings Mode are initialized, except
language and service interval.
Page 220 of 526
3-73
Convenient features of your vehicle
3
T
TR
R I
IP
P
C
C O
O M
M P
PU
U T
TE
ER
R
The trip computer is a microcomput-
er-controlled driver information sys-
tem that displays information related
to driving.
Information
Some driving information stored in the
trip computer resets if the battery is
disconnected.
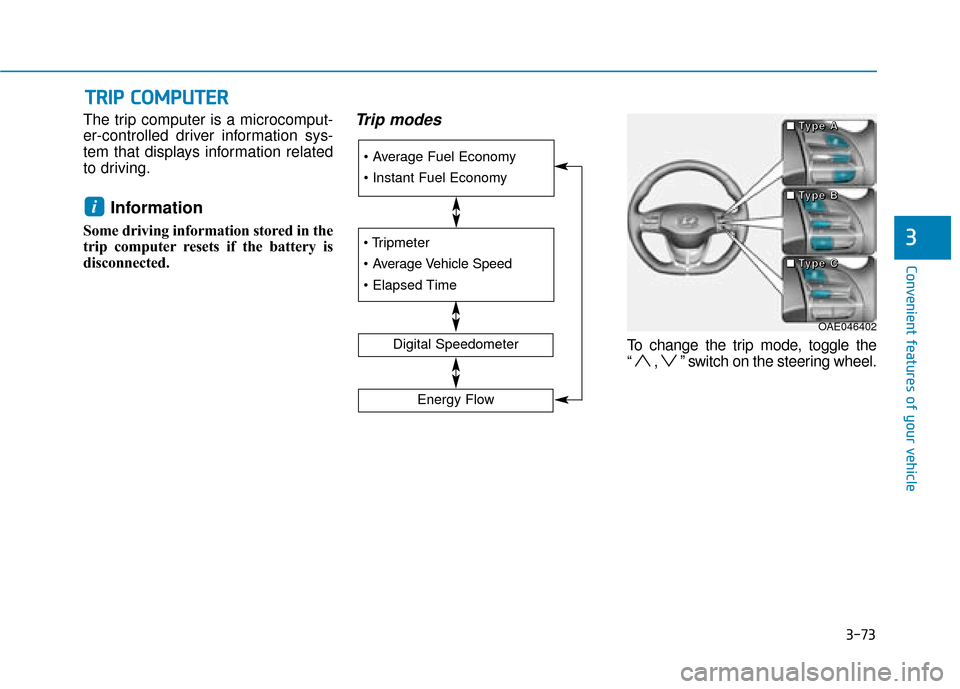
Trip modes
To change the trip mode, toggle the
“ , ” switch on the steering wheel.
i
Digital Speedometer
Energy Flow
OAE046402
■
■
■
■
T
T
T
T
y
y
y
y
p
p
p
p
e
e
e
e
A
A
A
A
■
■
■
■
T
T
T
T
y
y
y
y
p
p
p
p
e
e
e
e
B
B
B
B
■
■
■
■
T
T
T
T
y
y
y
y
p
p
p
p
e
e
e
e
C
C
C
C
Page 221 of 526
3-74
Convenient features of your vehicle
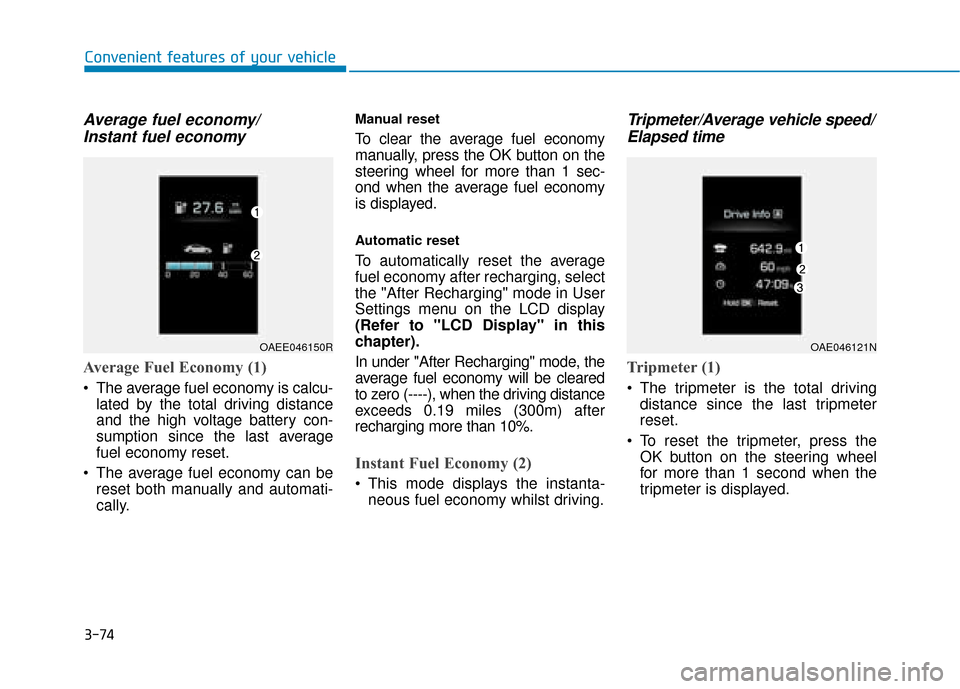
Average fuel economy/Instant fuel economy
Average Fuel Economy (1)
The average fuel economy is calcu-
lated by the total driving distance
and the high voltage battery con-
sumption since the last average
fuel economy reset.
The average fuel economy can be reset both manually and automati-
cally.
Manual reset
To clear the average fuel economy
manually, press the OK button on the
steering wheel for more than 1 sec-
ond when the average fuel economy
is displayed.
Automatic reset
To automatically reset the average
fuel economy after recharging, select
the "After Recharging" mode in User
Settings menu on the LCD display
(Refer to "LCD Display" in this
chapter).
In under "After Recharging" mode, the
average fuel economy will be cleared
to zero (----), when the driving distance
exceeds 0.19 miles (300m) after
recharging more than 10%.
Instant Fuel Economy (2)
This mode displays the instanta-neous fuel economy whilst driving.
Tripmeter/Average vehicle speed/Elapsed time
Tripmeter (1)
The tripmeter is the total driving
distance since the last tripmeter
reset.
To reset the tripmeter, press the OK button on the steering wheel
for more than 1 second when the
tripmeter is displayed.
OAEE046150ROAE046121N