fuel HYUNDAI IONIQ ELECTRIC 2022 Owners Manual
[x] Cancel search | Manufacturer: HYUNDAI, Model Year: 2022, Model line: IONIQ ELECTRIC, Model: HYUNDAI IONIQ ELECTRIC 2022Pages: 546, PDF Size: 34.82 MB
Page 2 of 546
F2Your HYUNDAI should not be modified in any way. Such modifications may adversely affect
the performance, safety or durability of your HYUNDAI and may, in addition, violate condi-
tions of the limited warranties covering the vehicle. Certain modifications may also be in vio-
lation of regulations established by the Department of Transportation and other government
agencies in your country.
Your vehicle is equipped with electronic fuel injection and other electronic components. It is
possible for an improperly installed/adjusted two-way radio or cellular telephone to adversely
affect electronic systems. For this reason, we recommend that you carefully follow the radio
manufacturer's instructions or consult your HYUNDAI dealer for precautionary measures or
special instructions if you choose to install one of these devices.
CAUTION: MODIFICATIONS TO YOUR HYUNDAI
TWO-WAY RADIO OR CELLULAR TELEPHONE INSTALLATION
Page 12 of 546
H3
Electric Vehicle
An electric vehicle is driven using a
battery and an electric motor. While
general vehicles use an internal
combustion engine and gasoline as
fuel, electric vehicles use electricalenergy that is charged inside the
high voltage battery. As a result,
electric vehicles are eco-friendly in
that they do not require fuel and do
not emit exhaust gases.
Characteristics of Electric
Vehicles
1. It is driven using the electricalenergy that is charged inside the
high voltage battery. This method
prevents air pollution since fuel,
like gasoline, is not required,
negating the emission of exhaust
gases.
2. A high performance motor is used in the vehicle as well. Compared
to standard, internal combustion
engine vehicles, engine noise and
vibrations are much more minimal
when driving.
3. When decelerating or driving downhill, regenerative braking is
utilized to charge the high voltage
battery. This minimizes energyloss and increases the distance to
empty.
4.When the battery charge is not suf- ficient, AC charge, DC charge and
trickle charge are available. (Refer
to “Charge Types for Electric
Vehicle” for details.) Information
What does regenerative braking do?
It uses the electric motor when decel-
erating or braking which transforms
vehicle motion (kinetic energy) to elec-
trical energy to charge the high volt-
age batteries. (Torque is applied in the
opposite direction when decelerating
to generate braking force and electric
energy.)
Battery Information
The vehicle is composed of a high voltage battery that drives the
motor and air-conditioner, and an
auxiliary battery (12 V) that drives
the lamps, wipers, and audio sys-tem.
The auxiliary battery is automati- cally charged when the vehicle is in
the ready ( ) mode or the high
voltage battery is being charged.
i
EELLEE CCTT RR IICC VV EEHH IICC LLEE
Page 308 of 546
5-18
The Smart Regeneration System
controls the regenerative brakingautomatically according to the road
gradient and driving condition of the
vehicle in front. The system mini-
mizes the unnecessary operation of
the brake and acceleration pedal,
improving the fuel efficiency and
assisting the driver.
System Setting
The Smart Regeneration System is
enabled when:
The gear is in P (Park) and select 'User settings
�Convenience �
Smart Regeneration' on the User
Settings mode. The setting is maintained when the
vehicle is restarted.
Activating the Smart
Regeneration System
With 'AUTO' for the regenerative
braking level displayed on the clus-
ter, the regenerative braking level is
controlled automatically when vehi-
cle speed is above 6 mph (10 km/h)
and one of the condition below ismet.
- The road gradient changes
- Distance from the vehicle ahead reduces or increases
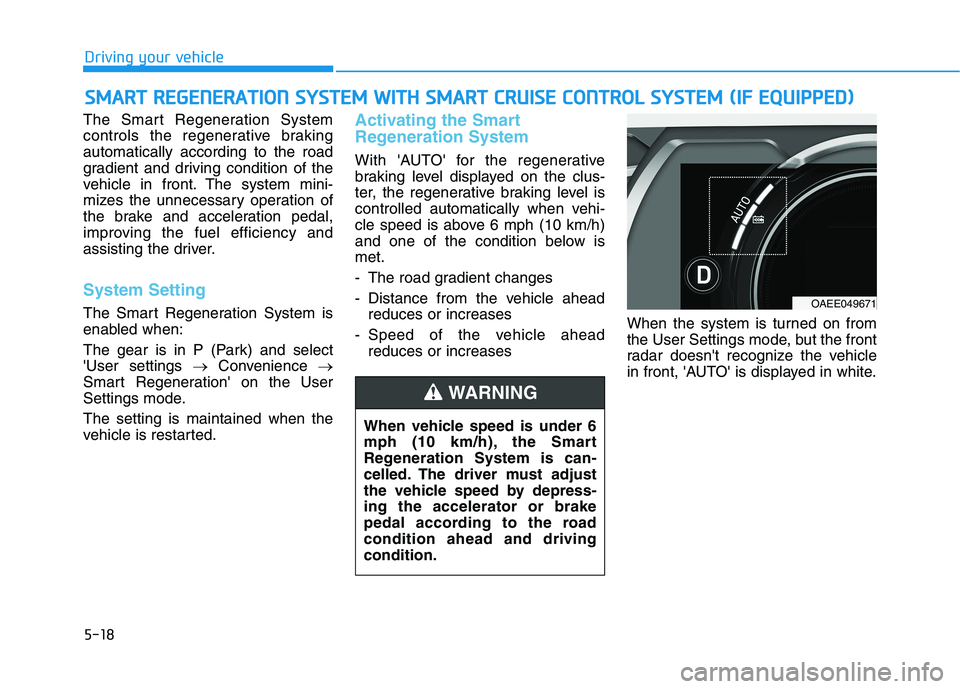
- Speed of the vehicle ahead reduces or increases When the system is turned on from
the User Settings mode, but the front
radar doesn't recognize the vehicle
in front, 'AUTO' is displayed in white.
SS
MM AARRTT RR EEGG EENN EERR AA TTIIOO NN SS YY SSTT EEMM WW IITT HH SS MM AARRTT CC RR UU IISS EE CC OO NNTTRR OO LL SS YY SSTT EEMM (( IIFF EE QQ UUIIPP PPEEDD ))
Driving your vehicle
When vehicle speed is under 6
mph (10 km/h), the Smart
Regeneration System is can-
celled. The driver must adjust
the vehicle speed by depress-ing the accelerator or brake
pedal according to the roadcondition ahead and drivingcondition.
WARNING
OAEE049671
Page 430 of 546
5-140
Driving your vehicle
Two labels on your driver's door sill
show how much weight your vehicle
was designed to carry: the Tire and
Loading Information Label and the
Certification Label.
Before loading your vehicle, familiar-
ize yourself with the following terms
for determining your vehicle’s weight
ratings, from the vehicle's specifica-
tions and the Certification Label:
Base Curb Weight
This is the weight of the vehicle including a full tank of fuel and all
standard equipment. It does not
include passengers, cargo, or option-al equipment.
Vehicle Curb Weight
This is the weight of your new vehicle
when you picked it up from your deal-
er plus any aftermarket equipment.Cargo Weight
This figure includes all weight added
to the Base Curb Weight, includingcargo and optional equipment.
GAW (Gross Axle Weight)
This is the total weight placed on each axle (front and rear) - including
vehicle curb weight and all payload.
GAWR (Gross Axle Weight Rating)
This is the maximum allowable
weight that can be carried by a single
axle (front or rear). These numbers
are shown on the Certification Label.
The total load on each axle must
never exceed its GAWR.
GVW (Gross Vehicle Weight)
This is the Base Curb Weight plus
actual Cargo Weight plus passen-
gers.
GVWR (Gross Vehicle Weight Rating)
This is the maximum allowable
weight of the fully loaded vehicle
(including all options, equipment,
passengers and cargo). The GVWR
is shown on the Certification Label
located on the driver’s door sill.
VV
EEHH IICC LLEE LL OO AADD LL IIMM IITT
Page 434 of 546
5-144
Driving your vehicle
Certification label
The certification label is located on
the driver’s door sill at the center pil-
lar and shows the maximum allow-
able weight of the fully loaded vehi-
cle. This is called the GVWR (Gross
Vehicle Weight Rating). The GVWR
includes the weight of the vehicle, all
occupants, fuel and cargo.
This label also tells you the maxi-
mum weight that can be supported
by the front and rear axles, called
Gross Axle Weight Rating (GAWR).
The total weight of the vehicle,
including all occupants, accessories,
cargo, and trailer tongue load must
not exceed the Gross Vehicle WeightRating (GVWR) or the Gross Axle
Weight Rating (GAWR). To find out
the actual loads on your front and
rear axles, you need to go to a weigh
station and weigh your vehicle. Be
sure to spread out your load equally
on both sides of the centerline.Overloading your vehicle may
cause damage. Repairs would not
be covered by your warranty. Do
not overload your vehicle.
NOTICE
Overloading
Never exceed the GVWR for
your vehicle, the GAWR for
either the front or rear axle
and vehicle capacity weight.Exceeding these ratings can
affect your vehicle's handling
and braking ability, and causean accident.
Do not overload your vehicle.
Overloading your vehicle can
cause heat buildup in your
vehicle's tires and possible
tire failure, increased stop-ping distances and poor vehi-
cle handling-all of which mayresult in a crash.
WARNING
Page 444 of 546
6-9
What to do in an emergency
6
Tire Pressure Monitoring System
Each tire, including the spare (if pro-
vided), should be checked monthlywhen cold and inflated to the inflation
pressure recommended by the vehi-
cle manufacturer on the vehicle plac-
ard or tire inflation pressure label. (If
your vehicle has tires of a different
size than the size indicated on the
vehicle placard or tire inflation pres-
sure label, you should determine the
proper tire inflation pressure for
those tires.)As an added safety feature, your
vehicle has been equipped with a tire
pressure monitoring system (TPMS)
that illuminates a low tire pressure
telltale when one or more of yourtires is significantly under-inflated.
Accordingly, when the low tire pres-
sure telltale illuminates, you should
stop and check your tires as soon as
possible, and inflate them to the
proper pressure. Driving on a signifi-cantly under-inflated tire causes the
tire to overheat and can lead to tire
failure. Under-inflation also reduces fuel effi-
ciency and tire tread life, and may
affect the vehicle’s handling and
stopping ability.
Please note that the TPMS is not a
substitute for proper tire mainte-
nance, and it is the driver’s responsi-bility to maintain correct tire pres-
sure, even if under-inflation has not
reached the level to trigger illumina-
tion of the TPMS low tire pressure
telltale.Your vehicle has also been equipped
with a TPMS malfunction indicator toindicate when the system is not
operating properly. The TPMS mal-function indicator is combined with
the low tire pressure telltale. Whenthe system detects a malfunction,
the telltale will flash for approximate-
ly one minute and then remain con-
tinuously illuminated. This sequence
will continue upon subsequent vehi-
cle start-ups as long as the malfunc-
tion exists. When the malfunction indicator is
illuminated, the system may not be
able to detect or signal low tire pres-
sure as intended. TPMS malfunc-
tions may occur for a variety of rea-
sons, including the installation of
replacement or alternate tires or
wheels on the vehicle that prevent
the TPMS from functioning properly.
Always check the TPMS malfunction telltale after replacing one or more
tires or wheels on your vehicle toensure that the replacement or alter-
nate tires and wheels allow the
TPMS to continue to function proper-
ly.
Over-inflation or under-inflation
can reduce tire life, adversely
affect vehicle handling, and
lead to sudden tire failure that
may cause loss of vehicle con-
trol resulting in an accident.
WARNING
Page 465 of 546
7-6
Maintenance
Owner Maintenance Schedule
When you stop for fuel:
• Check coolant level in the coolantreservoir.
Check the windshield washer fluid level.
Check for low or under-inflated tires.
While operating your vehicle:
Check for vibrations in the steeringwheel. Notice if there is any
increased steering effort or loose-
ness in the steering wheel, or
change in its straight-ahead posi-tion.
Notice if your vehicle constantly turns slightly or "pulls" to one side
when traveling on smooth, levelroad.
When stopping, listen and check for unusual sounds, pulling to one
side, increased brake pedal travel
or "hard-to-push" brake pedal.
If any slipping or changes in the operation of your reduction gear
occurs, check the reduction gear
fluid level.
Check the reduction gear P (Park) function.
Check the parking brake.
Check for fluid leaks under your vehicle (water dripping from the air
conditioning system during or after
use is normal).
At least monthly:
Check coolant level in the coolantreservoir.
Check the operation of all exterior lights, including the brake lights,
turn signals and hazard warning
flashers.
Check the inflation pressures of all tires including the spare for tires
that are worn, show uneven wear,or are damaged.
Check for loose wheel lug nuts.
Be careful when checking your
coolant level when the parts in
the motor compartment are hot.
This may result in coolant being
blown out of the opening and
cause serious burns and otherinjuries.
WARNING
Page 482 of 546
7-23
7
Maintenance
TTIIRR EESS AA NN DD WW HHEEEELLSS
Tire Care
For proper maintenance, safety, and
maximum fuel economy, you must
always maintain recommended tire
inflation pressures and stay within
the load limits and weight distribution
recommended for your vehicle.
(Continued)Replace tires that are worn,
show uneven wear, or are dam-
aged. Worn tires can cause
loss of braking effectiveness,
steering) control, or traction.
ALWAYS replace tires with the
same size as each tire that
was originally supplied with
this vehicle. Using tires andwheels other than the recom-
mended sizes could cause
unusual handling characteris-
tics, poor vehicle control, or
negatively affect your vehi-
cle’s Anti-Lock Brake System(ABS) resulting in a seriousaccident.
Tire failure may cause loss of
vehicle control resulting in an
accident. To reduce risk of
SERIOUS INJURY or DEATH,
take the following precautions:
Inspect your tires monthly for
proper inflation as well as
wear and damage.
The recommended cold tire
pressure for your vehicle can
be found in this manual and onthe tire label located on the dri-
ver’s side center pillar. Always
use a tire pressure gauge to
measure tire pressure. Tires
with too much or too little
pressure wear unevenly caus-ing poor handling.
Check the pressure of the
spare every time you checkthe pressure of the other tires
on your vehicle.
(Continued)
WARNING
Page 484 of 546
7-25
7
Maintenance
Check Tire Inflation Pressure
Check your tires, including the spare
tire, once a month or more.
How to check
Use a good quality tire pressure
gauge to check tire pressure. You
can not tell if your tires are properly
inflated simply by looking at them.
Radial tires may look properly inflat-
ed when they are under-inflated.
Remove the valve cap from the tire
valve stem. Press the tire gauge firm-
ly onto the valve to get a pressure
measurement. If the cold tire inflationpressure matches the recommendedpressure on the tire and loading
information label, no further adjust-
ment is necessary. If the pressure is
low, add air until you reach the rec-
ommended pressure. Make sure to
put the valve caps back on the valve
stems. Without the valve cap, dirt or
moisture could get into the valve
core and cause air leakage. If a valve
cap is missing, install a new one as
soon as possible.If you overfill the tire, release air bypushing on the metal stem in the
center of the tire valve. Recheck the
tire pressure with the tire gauge. Be
sure to put the valve caps back on
the valve stems. Without the valve
cap, dirt or moisture could get into
the valve core and cause air leakage.
If a valve cap is missing, install a new
one as soon as possible.
Under-inflation results in
excessive wear, poor handling
and reduced fuel economy.
Wheel deformation is also
possible. Keep your tire pres-
sures at the proper levels. If a
tire frequently needs refilling,
have it checked by an author-
ized HYUNDAI dealer.
Over-inflation produces a
harsh ride, excessive wear atthe center of the tire tread,and a greater possibility of
damage from road hazards.
CAUTION
Page 492 of 546
7-33
7
Maintenance
Bead
The tire bead contains steel wires
wrapped by steel cords that hold the
tire onto the rim.
Bias Ply Tire
A pneumatic tire in which the plies
are laid at alternate angles less than
90 degrees to the centerline of thetread.
Cold Tire Pressure
The amount of air pressure in a tire,measured in pounds per square inch
(psi) or kilopascals (kPa) before a tire
has built up heat from driving.
Curb Weight
This means the weight of a motor
vehicle with standard and optional
equipment including the maximum
capacity of fuel, oil and coolant, but
without passengers and cargo.
DOT Markings
The DOT code includes the TireIdentification Number (TIN), an
alphanumeric designator which can
also identify the tire manufacturer,
production plant, brand and date ofproduction.
GVWR
Gross Vehicle Weight Rating
GAWR FRT
Gross Axle Weight Rating for the
Front Axle.
GAWR RR
Gross Axle Weight Rating for the
Rear axle.
Intended Outboard Sidewall
The side of an asymmetrical tire, that
must always face outward when
mounted on a vehicle.
Kilopascal (kPa)
The metric unit for air pressure.
Light truck(LT) tire
A tire designated by its manufacturer
as primarily intended for use on light-
weight trucks or multipurpose pas-
senger vehicles.
Load ratings
The maximum load that a tire is rated
to carry for a given inflation pressure.
Load Index
An assigned number ranging from 1to 279 that corresponds to the load
carrying capacity of a tire.
Maximum Inflation Pressure
The maximum air pressure to which
a cold tire may be inflated. The max-
imum air pressure is molded onto the
sidewall.