navigation Hyundai Ioniq Plug-in Hybrid 2018 Owner's Manual
[x] Cancel search | Manufacturer: HYUNDAI, Model Year: 2018, Model line: Ioniq Plug-in Hybrid, Model: Hyundai Ioniq Plug-in Hybrid 2018Pages: 589, PDF Size: 21.53 MB
Page 111 of 589
3-19
Convenient features of your vehicle
3
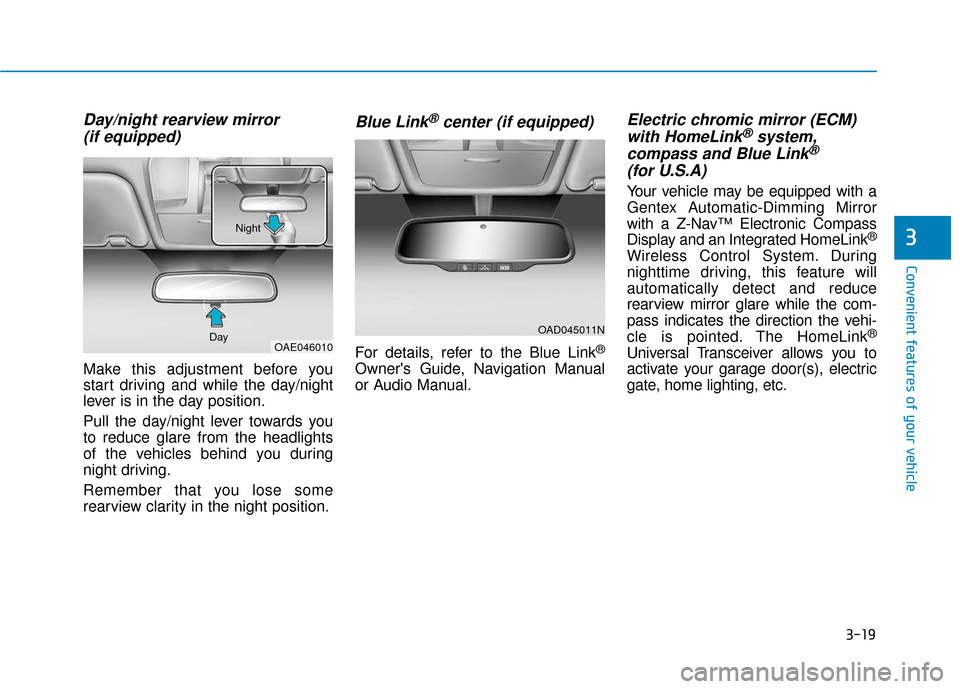
Day/night rearview mirror (if equipped)
Make this adjustment before you
start driving and while the day/night
lever is in the day position.
Pull the day/night lever towards you
to reduce glare from the headlights
of the vehicles behind you during
night driving.
Remember that you lose some
rearview clarity in the night position.
Blue Link®center (if equipped)
For details, refer to the Blue Link®
Owner's Guide, Navigation Manual
or Audio Manual.
Electric chromic mirror (ECM)with HomeLink®system,
compass and Blue Link®
(for U.S.A)
Your vehicle may be equipped with a
Gentex Automatic-Dimming Mirror
with a Z-Nav™ Electronic Compass
Display and an Integrated HomeLink
®
Wireless Control System. During
nighttime driving, this feature will
automatically detect and reduce
rearview mirror glare while the com-
pass indicates the direction the vehi-
cle is pointed. The HomeLink
®
Universal Transceiver allows you to
activate your garage door(s), electric
gate, home lighting, etc.
OAD045011N
OAE046010
Day Night
Page 181 of 589
3-89
Convenient features of your vehicle
3
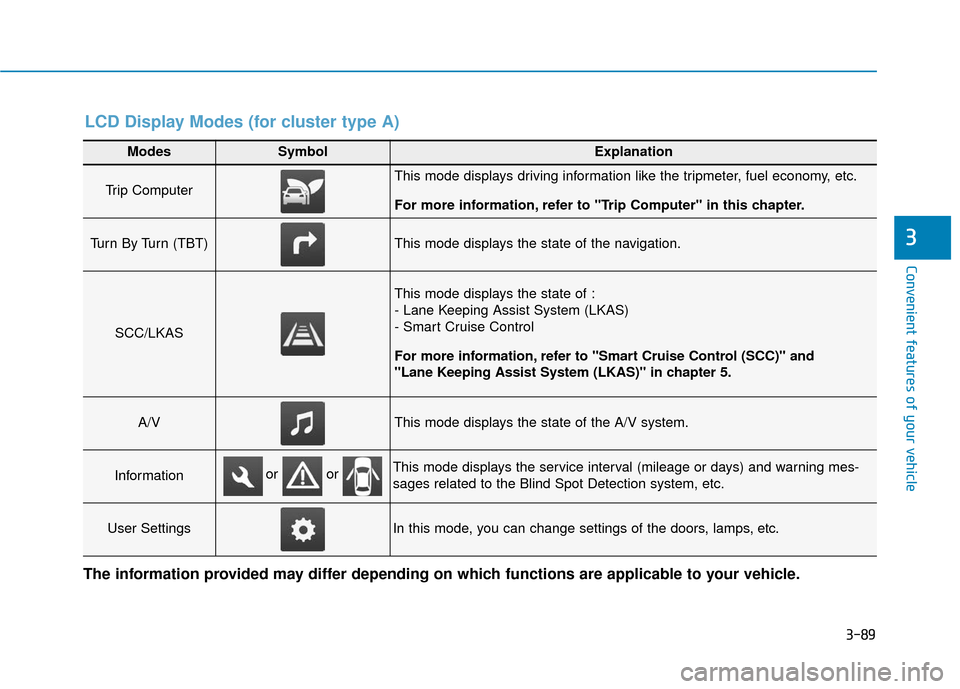
Modes SymbolExplanation
Trip Computer This mode displays driving information like the tripmeter, fuel economy, etc.
For more information, refer to "Trip Computer" in this chapter.
Turn By Turn (TBT)This mode displays the state of the navigation.
SCC/LKAS
This mode displays the state of :
- Lane Keeping Assist System (LKAS)
- Smart Cruise Control
For more information, refer to "Smart Cruise Control (SCC)" and
"Lane Keeping Assist System (LKAS)" in chapter 5.
A/VThis mode displays the state of the A/V system.
InformationThis mode displays the service interval (mileage or days) and warning mes-
sages related to the Blind Spot Detection system, etc.
User SettingsIn this mode, you can change settings of the doors, lamps, etc.
or or
LCD Display Modes (for cluster type A)
The information provided may differ depending on which functions are applicable to your vehicle.
Page 182 of 589
3-90
Convenient features of your vehicle
Edit settings after shifting to P/Shift to P to edit settings
Either message appears if you try to
adjust the User Settings while driv-
ing.
For your safety, change the User
Settings after parking the vehicle,
applying the parking brake and mov-
ing the shift lever to P (Park).
Quick guide (Help)
This mode provides quick guides for
the systems in the User Settings
mode.
Select an item, press and hold the
OK button.
For more information, about each
system, refer to this Owner's
Manual.
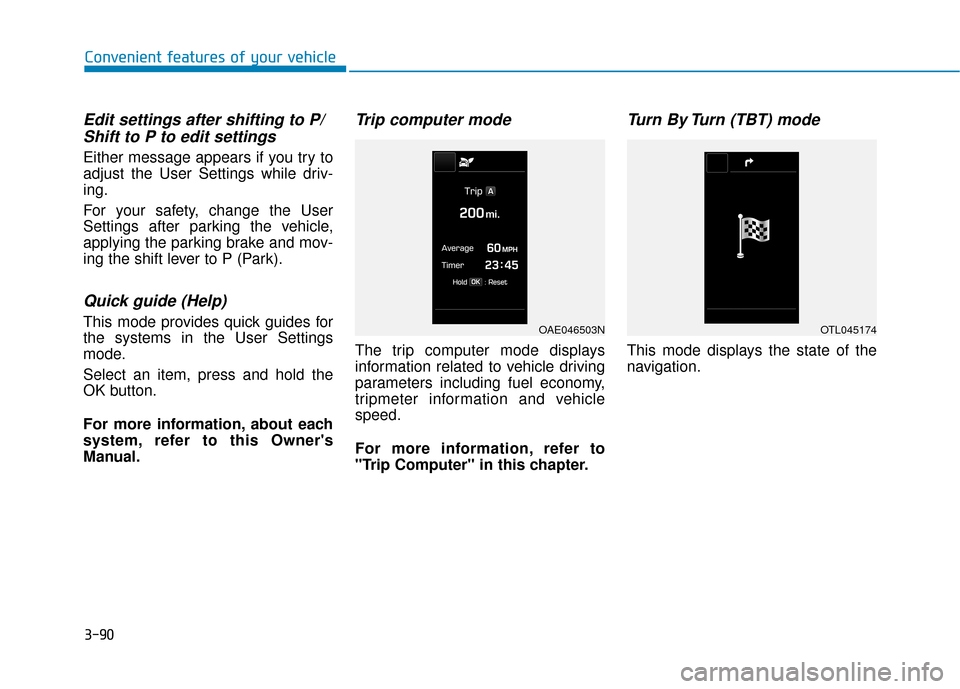
Trip computer mode
The trip computer mode displays
information related to vehicle driving
parameters including fuel economy,
tripmeter information and vehicle
speed.
For more information, refer to
"Trip Computer" in this chapter.
Turn By Turn (TBT) mode
This mode displays the state of the
navigation.
OAE046503NOTL045174
Page 189 of 589
3-97
Convenient features of your vehicle
3
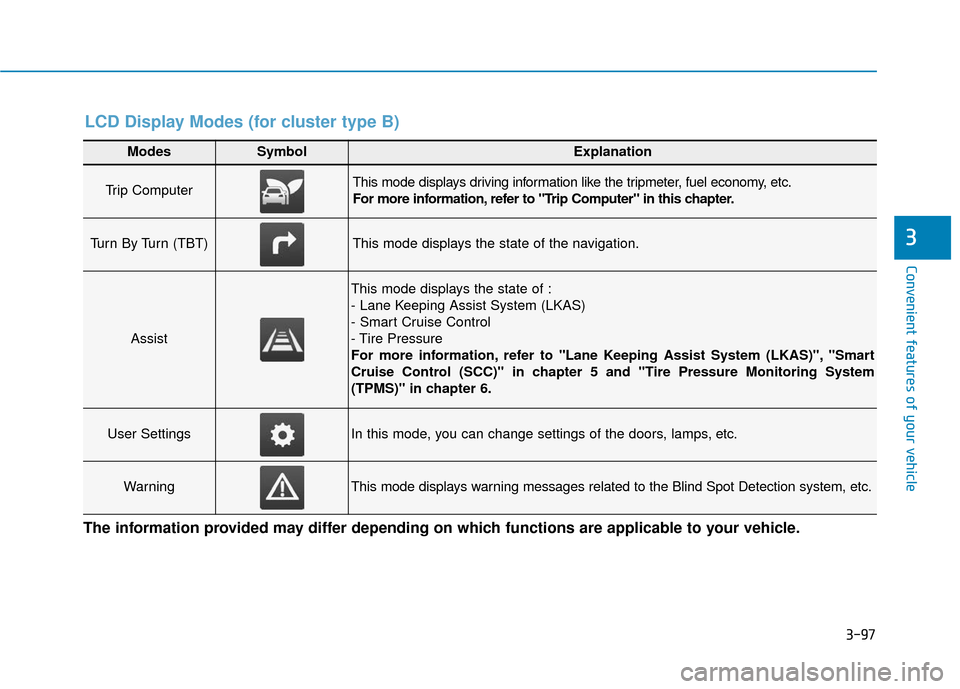
Modes SymbolExplanation
Trip Computer This mode displays driving information like the tripmeter, fuel economy, etc.
For more information, refer to "Trip Computer" in this chapter.
Turn By Turn (TBT)This mode displays the state of the navigation.
Assist
This mode displays the state of :
- Lane Keeping Assist System (LKAS)
- Smart Cruise Control
- Tire Pressure
For more information, refer to "Lane Keeping Assist System (LKAS)", "Smart
Cruise Control (SCC)" in chapter 5 and "Tire Pressure Monitoring System
(TPMS)" in chapter 6.
User SettingsIn this mode, you can change settings of the doors, lamps, etc.
WarningThis mode displays warning messages related to the Blind Spot Detection system, etc.
The information provided may differ depending on which functions are applicable to your vehicle.
LCD Display Modes (for cluster type B)
Page 191 of 589
3-99
Convenient features of your vehicle
3
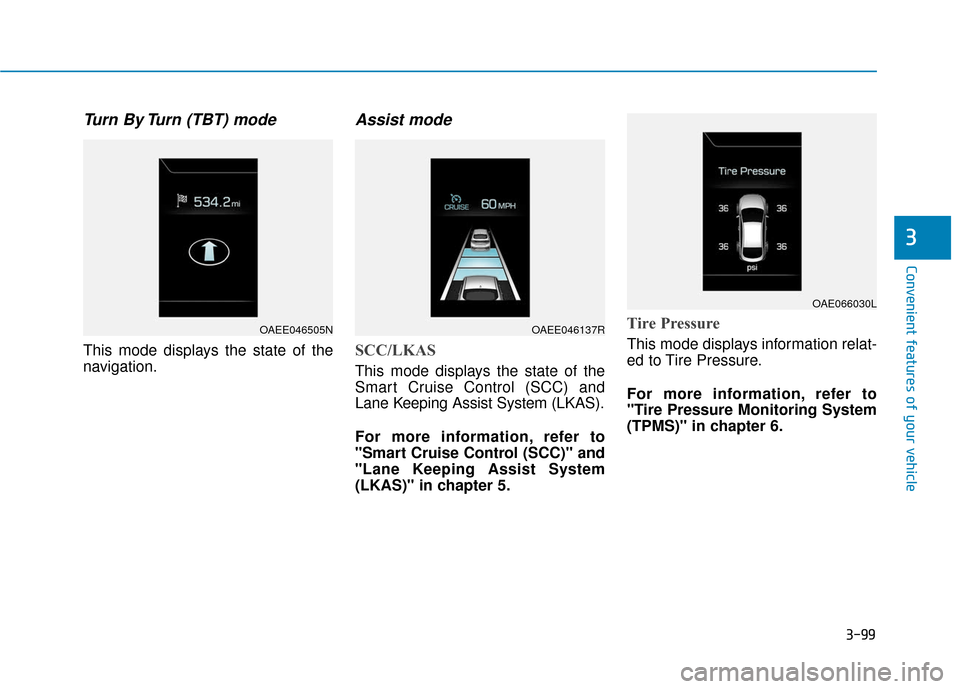
Turn By Turn (TBT) mode
This mode displays the state of the
navigation.
Assist mode
SCC/LKAS
This mode displays the state of the
Smart Cruise Control (SCC) and
Lane Keeping Assist System (LKAS).
For more information, refer to
"Smart Cruise Control (SCC)" and
"Lane Keeping Assist System
(LKAS)" in chapter 5.
Tire Pressure
This mode displays information relat-
ed to Tire Pressure.
For more information, refer to
"Tire Pressure Monitoring System
(TPMS)" in chapter 6.
OAEE046505NOAEE046137R
OAE066030L
Page 244 of 589
3-152
Convenient features of your vehicle
If your phone is not charging:
- Slightly change the position of the cellular phone on the charging pad.
- Make sure the indicator light is orange.
Depending on the cellular phone type,
the indicator light may not turn green
even though the charging is complete.
The indicator light will blink orange for
10 seconds if there is a malfunction in
the wireless charging system.
In this case, temporarily stop the
charging process, and re-attempt to
wirelessly charge your cellular phone
again.
The system warns you with a message
on the LCD display if the cellular phone
is still on the wireless charging unit
after the Engine Start/Stop button is in
the OFF position and the front door is
opened.
The wireless cellular phone charging system may not sup-
port certain cellular phones,
which are not verified for the Qi
specification ( ).
(Continued)(Continued)
Locate your cell phone well in
the middle of the wireless cellu-
lar phone charging system.
Even when your cell phone
locates slightly to one side, the
charging speed may decrease.
The wireless charging process may temporarily stop, when a
smart key function operates (i.e.
starting the vehicle, opening the
doors, closing the doors).
For certain cell phones, the indi- cator color may not change to
green, even when the wireless
charging process is properly
completed.
The wireless charging process may temporarily stop, when tem-
perature abnormally increases
inside the wireless cellular
phone charging system. The
wireless charging process
restarts, when temperature falls
to a certain level.
The wireless charging process may temporarily stop when
there is any metallic item, such
as a coin, between the wireless
cellular phone charging system
and a cellular phone.
Clock
Vehicles with Audio system
Select the [SETUP] button on the
audio system ➟ Select [Date/Time].
Set time: Set the time displayed on the audio screen.
Time format: Choose between 12- hour and 24-hour time formats.
Vehicles with Navigation system
Select the Settings menu on the
Navigation system ➟Select
[Date/Time].
GPS time: Displays time according to the received GNSS time.
24-hour: Switches to 12 hour or 24 hour.
NOTICE
Do not adjust the clock while
driving, you may lose your
steering control and cause an
accident that results in severe
personal injury or death.
WARNING
Page 248 of 589
Multimedia System
Multimedia System.................................................4-2
AUX, USB and iPod®port ...............................................4-2
Antenna ........................................................................\
.......4-2
Steering Wheel Audio Controls ......................................4-3
Bluetooth®Wireless Technology Hands-Free ...........4-4
Audio (Display Audio) / Video /
Navigation System (AVN).................................................4-5
How Vehicle Audio Works ...............................................4-5
Features of Your Vehicle.................................................4-7
Audio (with Touch Screen) .................................4-10
Feature of Your Audio ...................................................4-11
Radio........................................................................\
...........4-16
SiriusXM ........................................................................\
....4-18
Media........................................................................\
..........4-19
Phone ........................................................................\
.........4-32
Siri ........................................................................\
...............4-40
Setup ........................................................................\
..........4-41
Declaration of Conformity ..................................4-44
FCC ........................................................................\
..............4-44
4
Page 252 of 589
(3) Microphone
Detailed information for the
Bluetooth®
Wireless Technology hands-free is
described in the Car Multimedia
User's Manual.
Audio (Display Audio) / Video /
Navigation System (AVN)
(if equipped)
Detailed information for the AVN sys-
tem is described in the Car
Multimedia User's Manual.
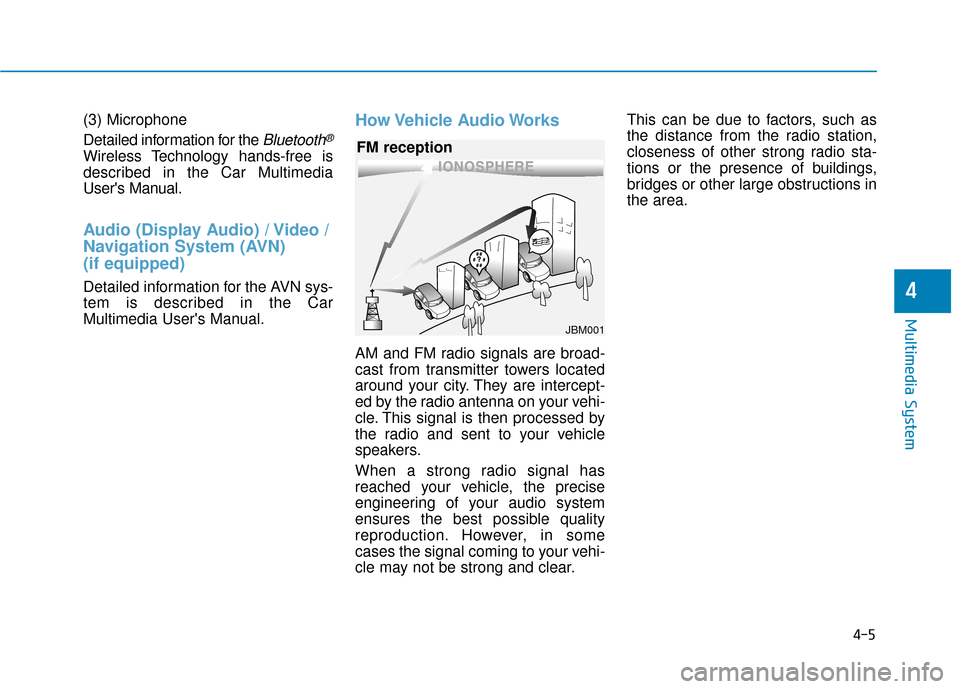
How Vehicle Audio Works
AM and FM radio signals are broad-
cast from transmitter towers located
around your city. They are intercept-
ed by the radio antenna on your vehi-
cle. This signal is then processed by
the radio and sent to your vehicle
speakers.
When a strong radio signal has
reached your vehicle, the precise
engineering of your audio system
ensures the best possible quality
reproduction. However, in some
cases the signal coming to your vehi-
cle may not be strong and clear.This can be due to factors, such as
the distance from the radio station,
closeness of other strong radio sta-
tions or the presence of buildings,
bridges or other large obstructions in
the area.
4-5
Multimedia System
4
JBM001
FM reception
Page 313 of 589
5-22
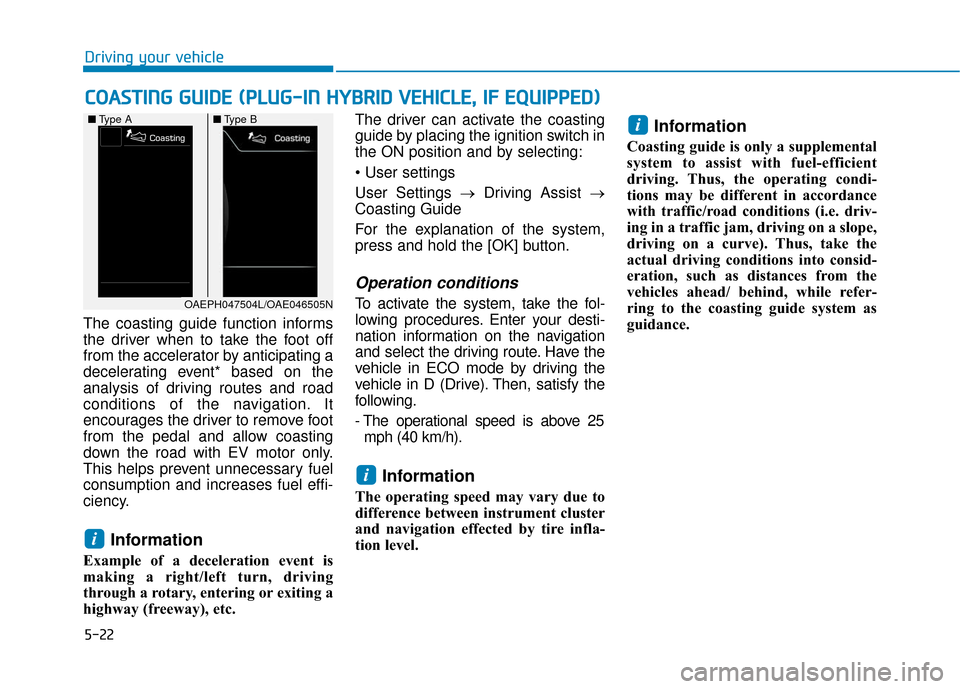
The coasting guide function informs
the driver when to take the foot off
from the accelerator by anticipating a
decelerating event* based on the
analysis of driving routes and road
conditions of the navigation. It
encourages the driver to remove foot
from the pedal and allow coasting
down the road with EV motor only.
This helps prevent unnecessary fuel
consumption and increases fuel effi-
ciency.
Information
Example of a deceleration event is
making a right/left turn, driving
through a rotary, entering or exiting a
highway (freeway), etc. The driver can activate the coasting
guide by placing the ignition switch in
the ON position and by selecting:
User Settings →
Driving Assist →
Coasting Guide
For the explanation of the system,
press and hold the [OK] button.
Operation conditions
To activate the system, take the fol-
lowing procedures. Enter your desti-
nation information on the navigation
and select the driving route. Have the
vehicle in ECO mode by driving the
vehicle in D (Drive). Then, satisfy the
following.
- The operational speed is above 25 mph (40 km/h).
Information
The operating speed may vary due to
difference between instrument cluster
and navigation effected by tire infla-
tion level.
Information
Coasting guide is only a supplemental
system to assist with fuel-efficient
driving. Thus, the operating condi-
tions may be different in accordance
with traffic/road conditions (i.e. driv-
ing in a traffic jam, driving on a slope,
driving on a curve). Thus, take the
actual driving conditions into consid-
eration, such as distances from the
vehicles ahead/ behind, while refer-
ring to the coasting guide system as
guidance.
i
i
i
C C O
O A
AS
ST
T I
IN
N G
G
G
G U
U I
ID
D E
E
(
( P
P L
LU
U G
G-
-I
IN
N
H
H Y
Y B
BR
RI
ID
D
V
V E
EH
H I
IC
C L
LE
E ,
,
I
IF
F
E
E Q
Q U
UI
IP
P P
PE
ED
D )
)
Driving your vehicle
OAEPH047504L/OAE046505N
■
Type A ■Type B
Page 407 of 589
6-18
What to do in an emergency
The TPMS Malfunction Indicator
may illuminate after blinking for
one minute if the vehicle is near
electric power supply cables or
radio transmitters such as police
stations, government and public
offices, broadcasting stations,
military installations, airports,
transmitting towers, etc.
Additionally, the TPMS Malfunction
Indicator may illuminate if snow
chains are used or electronic
devices such as computers, charg-
ers, remote starters, navigation,
etc. This may interfere with normal
operation of the TPMS.
Changing a Tire with TPMS
If you have a flat tire, the Low Tire
Pressure and LCD position indicator
will come on. Have the flat tire
repaired by an authorized HYUNDAI
dealer as soon as possible or
replace the flat tire with the spare
tire.
The spare tire does not come with a
tire pressure monitoring sensor.
When the low pressure tire or the flat
tire is replaced with the spare tire,
the Low Tire Pressure LCD position
indicator will remain on. Also, the
TPMS Malfunction Indicator will illu-
minate after blinking for one minute if
the vehicle is driven at speed above
15.5 mph (25 km/h) for approximate-
ly 20 minutes. Once the original tire equipped with
a tire pressure monitoring sensor is
reinflated to the recommended pres-
sure and reinstalled on the vehicle,
the Low Tire Pressure LCD position
indicator and TPMS Malfunction
Indicator will go off within a few min-
utes of driving.
If the indicators do not disappear
after a few minutes, please visit an
authorized HYUNDAI dealer.
Each wheel is equipped with a tire
pressure sensor mounted inside the
tire behind the valve stem (except for
the spare tire). You must use TPMS
specific wheels. It is recommended
that you always have your tires serv-
iced by an authorized HYUNDAI
dealer.
NOTICE
Never use a puncture-repairing
agent not approved by HYUNDAI
dealer to repair and/or inflate a
low pressure tire. Tire sealant
not approved by HYUNDAI deal-
er may damage the tire pressure
sensor.
CAUTION