remove seats Hyundai Ioniq Plug-in Hybrid 2019 Owner's Manual - RHD (UK, Australia)
[x] Cancel search | Manufacturer: HYUNDAI, Model Year: 2019, Model line: Ioniq Plug-in Hybrid, Model: Hyundai Ioniq Plug-in Hybrid 2019Pages: 599, PDF Size: 17.32 MB
Page 49 of 599
H49
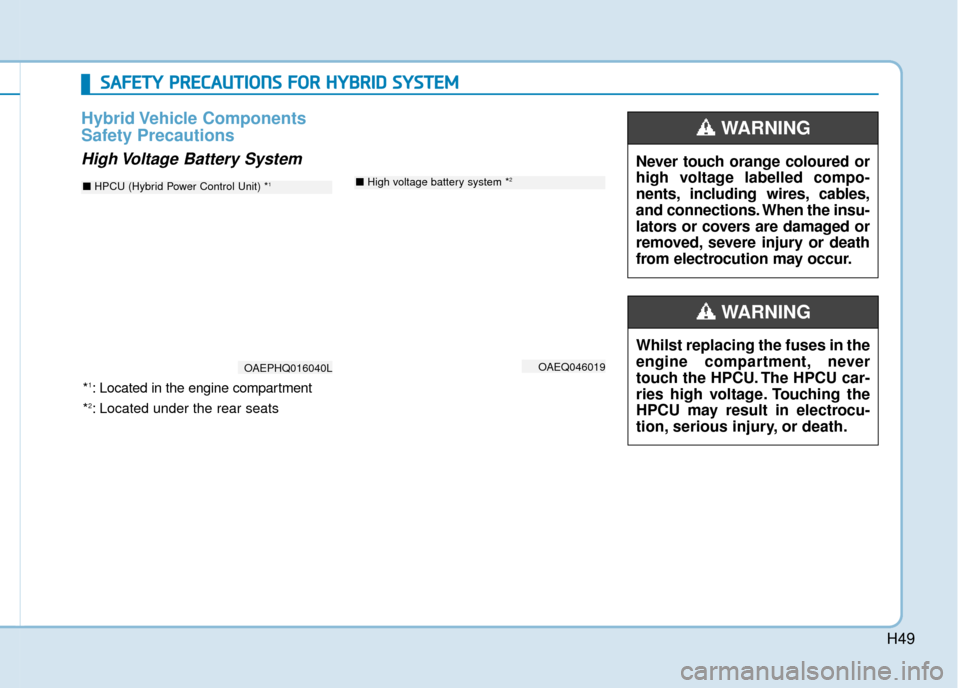
Hybrid Vehicle Components
Safety Precautions
High Voltage Battery SystemNever touch orange coloured or
high voltage labelled compo-
nents, including wires, cables,
and connections. When the insu-
lators or covers are damaged or
removed, severe injury or death
from electrocution may occur.
WARNING
Whilst replacing the fuses in the
engine compartment, never
touch the HPCU. The HPCU car-
ries high voltage. Touching the
HPCU may result in electrocu-
tion, serious injury, or death.
WARNING
S SA
A F
FE
E T
T Y
Y
P
P R
R E
EC
CA
A U
U T
TI
IO
O N
NS
S
F
F O
O R
R
H
H Y
Y B
BR
RI
ID
D
S
S Y
Y S
ST
T E
EM
M
OAEQ046019
■ High voltage battery system *2
*1: Located in the engine compartment
*
2: Located under the rear seats
OAEPHQ016040L
■ HPCU (Hybrid Power Control Unit) *1
Page 92 of 599
2-15
Safety system of your vehicle
2
Armrest
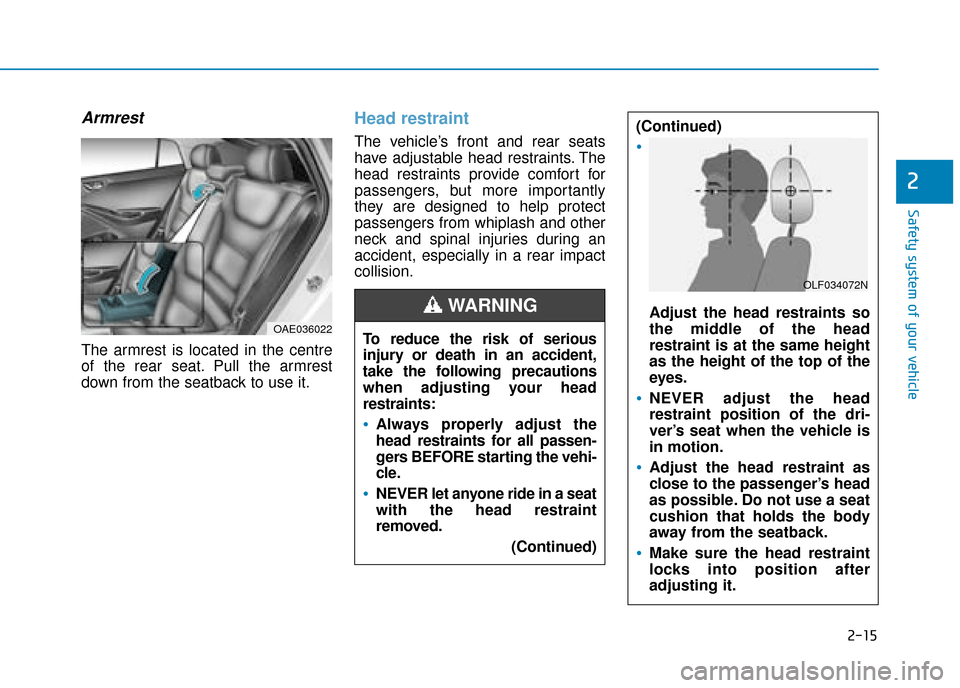
The armrest is located in the centre
of the rear seat. Pull the armrest
down from the seatback to use it.
Head restraint
The vehicle’s front and rear seats
have adjustable head restraints. The
head restraints provide comfort for
passengers, but more importantly
they are designed to help protect
passengers from whiplash and other
neck and spinal injuries during an
accident, especially in a rear impact
collision.
OAE036022To reduce the risk of serious
injury or death in an accident,
take the following precautions
when adjusting your head
restraints:
Always properly adjust the
head restraints for all passen-
gers BEFORE starting the vehi-
cle.
NEVER let anyone ride in a seat
with the head restraint
removed.(Continued)
(Continued)
Adjust the head restraints so
the middle of the head
restraint is at the same height
as the height of the top of the
eyes.
NEVER adjust the head
restraint position of the dri-
ver’s seat when the vehicle is
in motion.
Adjust the head restraint as
close to the passenger’s head
as possible. Do not use a seat
cushion that holds the body
away from the seatback.
Make sure the head restraint
locks into position after
adjusting it.
WARNING
OLF034072N
Page 96 of 599

2-19
Safety system of your vehicle
2
Rear seat head restraints
The rear seats are equipped with
head restraints in all the seating
positions for the passenger’s safety
and comfort.
Adjusting the height up and down
To raise the head restraint:
1. Pull it up to the desired position (1).
To lower the head restraint:
1. Push and hold the release button(2) on the head restraint support.
2. Lower the head restraint to the desired position (3). To remove the head restraint, raise it
as far as it can go then press the
release button (1) whilst pulling the
head restraint up (2).
To reinstall the head restraint, put the
head restraint poles (3) into the holes
whilst pressing the release button
(1). Then adjust it to the appropriate
height.
OPDE036069
Make sure the head restraint
locks in position after adjusting
it to properly protect the occu-
pants.
WARNING
OAE036017OAE036072L
Page 116 of 599
2-39
Safety system of your vehicle
2
Booster seats
A booster seat is a Child Restraint
System designed to improve the fit of
the vehicle’s seat belt system. A boost-
er seat positions the seat belt so that it
fits properly over the stronger parts of
your child’s body. Keep your children in
booster seats until they are big
enough to fit in a seat belt properly.
For a seat belt to fit properly, the lap
belt must lie comfortable across the
upper thighs, not the stomach. The
shoulder belt should lie comfortable
across the shoulder and chest and
not across the neck or face. Children
under age 13 must always be proper-
ly restrained to minimise the risk of
injury in an accident, sudden stop or
sudden manoeuvre.
Installing a Child Restraint
System (CRS)After selecting a proper Child Restraint
System for your child and checking
that the Child Restraint System fits
properly on the seating position, there
are three general steps for a proper
installation:
Properly secure the Child Restraint
System to the vehicle.
All Child
Restraint Systems must be secured
to the vehicle with the lap belt or lap
part of a lap/shoulder belt or with
the ISOFIX top-tether and/or ISOFIX
anchorage and/or with the support
leg.
Make sure the Child Restraint
System is firmly secured. After
installing a Child Restraint System
to the vehicle, push and pull the
seat forward and from side-to-side
to verify that it is securely attached
to the seat. A Child Restraint
System secured with a seat belt
should be installed as firmly as
possible. However, some side-to-
side movement can be expected.
Before installing your Child
Restraint System always:
Read and follow the instructions
provided by the manufacturer of
the Child Restraint System.
Failure to follow all warnings
and instructions could increase
the risk of the SERIOUS INJURY
or DEATH if an accident occurs.
WARNING
If the vehicle head restraint pre-
vents proper installation of a
Child Restraint System, the
head restraint of the respective
seating position shall be read-
justed or entirely removed.
WARNING
Page 583 of 599
7-75
7
Maintenance
Interior care
Interior general precautions
Prevent caustic solutions such as
perfume and cosmetic oil, from con-
tacting the interior parts because
they may cause damage or dis-
colouration. If they do contact the
interior parts, wipe them off immedi-
ately. See the instructions for the
proper way to clean vinyl.
Never allow water or other liq-uids to come in contact with
electrical/electronic compo-
nents inside the vehicle as this
may damage them.
When cleaning leather products (steering wheel, seats etc.), use
neutral detergents or low alco-
hol content solutions. If you use
high alcohol content solutions
or acid/ alkaline detergents, the
colour of the leather may fade or
the surface may get stripped off.
Cleaning the upholstery andinterior trim
Vinyl (if equipped)
Remove dust and loose dirt from
vinyl with a whisk broom or vacuum
cleaner. Clean vinyl surfaces with a
vinyl cleaner.
Fabric (if equipped)
Remove dust and loose dirt from fab-
ric with a whisk broom or vacuum
cleaner. Clean with a mild soap solu-
tion recommended for upholstery or
carpets. Remove fresh spots imme-
diately with a fabric spot cleaner. If
fresh spots do not receive immediate
attention, the fabric can be stained
and its colour can be affected. Also,
its fire-resistant properties can be
reduced if the material is not proper-
ly maintained.
Using anything but recommended
cleaners and procedures may
affect the fabric’s appearance and
fire-resistant properties.
Leather (if equipped)
Features of seat leather
- Leather is made from the outerskin of an animal, which goes
through a special process to be
available for us. Since it is a natu-
ral product, each part differs in
thickness or density. Wrinkles
may appear as a natural result of
stretching and shrinking depend-
ing on the temperature and
humidity.
- The seat is made of stretchable fabric to improve comfort.
- The parts contacting the body are curved and the side supporting
area is high which provides driv-
ing comfort and stability.
- Wrinkles may appear naturally from usage. It is not a fault of the
product.
NOTICE
NOTICE
Page 584 of 599
7-76
Maintenance
Wrinkles or abrasions which appear naturally from usage are
not covered by warranty.
Belts with metallic accessories, zippers or keys inside the back
pocket may damage the seat
fabric.
Make sure not to wet the seat. It may change the nature of natu-
ral leather.
Jeans or clothes which could bleach may contaminate the sur-
face of the seat covering fabric. Caring for the leather seats
- Vacuum the seat periodically toremove dust and sand on the
seat. It will prevent abrasion or
damage of the leather and main-
tain its quality.
- Wipe the natural leather seat cover often with dry or soft cloth.
- Use of a proper leather protector may prevent abrasion of the
cover and helps maintain the
colour. Be sure to read the
instructions and consult a spe-
cialist when using leather coating
or protective agents.
- Light coloured (beige, cream beige) leather is easily contami-
nated and the stain is noticeable.
Clean the seats frequently.
- Avoid wiping with wet cloth. It may cause the surface to crack. Cleaning the leather seats
- Remove all contaminationsinstantly. Refer to instructions
below for removal of each con-
taminant.
- Cosmetic products (sunscreen, foundation, etc.)
Apply cleansing cream on a cloth
and wipe the contaminated spot.
Wipe off the cream with a wet
cloth and remove water with a dry
cloth.
- Beverages(coffee, soft drink, etc.) Apply a small amount of neutral
detergent and wipe until contami-
nations do not smear.
- Oil Remove oil instantly with
absorbable cloth and wipe with
stain remover used only for natu-
ral leather.
- Chewing gum Harden the gum with ice and
remove gradually.
NOTICE