turn signal Hyundai Ioniq Plug-in Hybrid 2019 Owner's Manual - RHD (UK, Australia)
[x] Cancel search | Manufacturer: HYUNDAI, Model Year: 2019, Model line: Ioniq Plug-in Hybrid, Model: Hyundai Ioniq Plug-in Hybrid 2019Pages: 599, PDF Size: 17.32 MB
Page 71 of 599
1-5
Your vehicle at a glance
1
I
IN
N S
ST
T R
R U
U M
M E
EN
N T
T
P
P A
A N
N E
EL
L
O
O V
VE
ER
R V
V I
IE
E W
W
-
-
H
H Y
Y B
BR
RI
ID
D
V
V E
EH
H I
IC
C L
LE
E
OAEPH017005R
The actual shape may differ from the illustration.
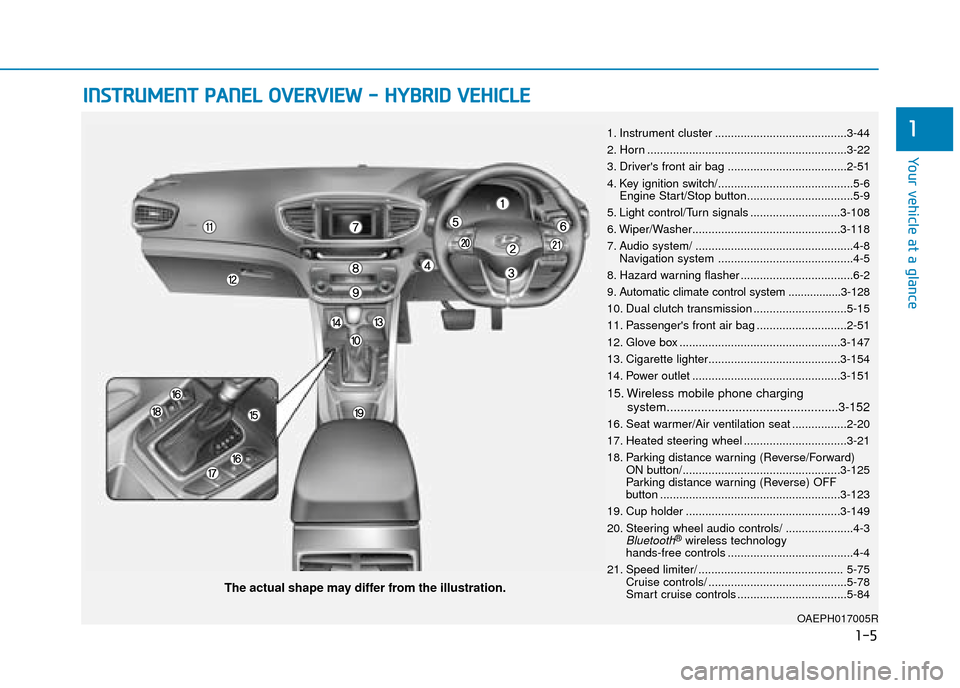
1. Instrument cluster .........................................3-44
2. Horn ..............................................................3-22
3. Driver's front air bag .....................................2-51
4. Key ignition switch/..........................................5-6
Engine Start/Stop button.................................5-9
5. Light control/Turn signals ............................3-108
6. Wiper/Washer..............................................3-118
7. Audio system/ .................................................4-8 Navigation system ..........................................4-5
8. Hazard warning flasher ...................................6-2
9. Automatic climate control system .................3-128
10. Dual clutch transmission .............................5-15
11. Passenger's front air bag ............................2-51
12. Glove box ..................................................3-147
13. Cigarette lighter.........................................3-154
14. Power outlet ..............................................3-151
15. Wireless mobile phone charging system..................................................3-152
16. Seat warmer/Air ventilation seat .................2-20
17. Heated steering wheel ................................3-21
18. Parking distance warning (Reverse/Forward) ON button/.................................................3-125
Parking distance warning (Reverse) OFF
button ........................................................3-123
19. Cup holder ................................................3-149
20. Steering wheel audio controls/ .....................4-3
Bluetooth®wireless technology
hands-free controls .......................................4-4
21. Speed limiter/ ............................................. 5-75 Cruise controls/ ...........................................5-78
Smart cruise controls ..................................5-84
Page 76 of 599
1-10
Your vehicle at a glance
I
IN
N S
ST
T R
R U
U M
M E
EN
N T
T
P
P A
A N
N E
EL
L
O
O V
VE
ER
R V
V I
IE
E W
W
-
-
P
P L
LU
U G
G-
-I
IN
N
H
H Y
Y B
BR
RI
ID
D
V
V E
EH
H I
IC
C L
LE
E
OAEPH017004R
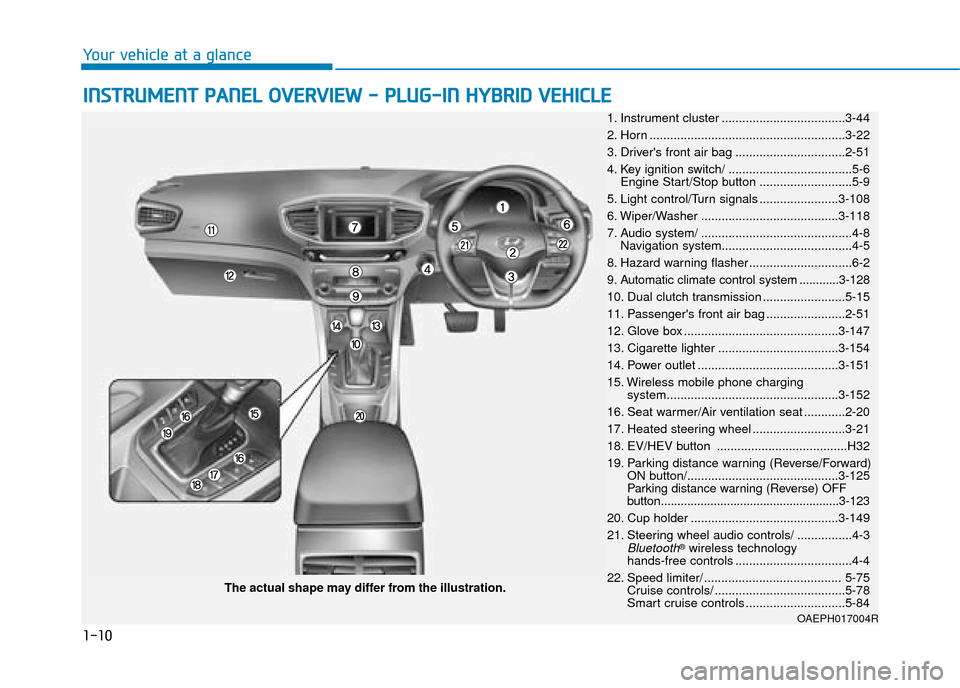
The actual shape may differ from the illustration. 1. Instrument cluster ....................................3-44
2. Horn .........................................................3-22
3. Driver's front air bag ................................2-51
4. Key ignition switch/ ....................................5-6 Engine Start/Stop button ...........................5-9
5. Light control/Turn signals .......................3-108
6. Wiper/Washer ........................................3-118
7. Audio system/ ............................................4-8 Navigation system......................................4-5
8. Hazard warning flasher ..............................6-2
9. Automatic climate control system ............3-128
10. Dual clutch transmission ........................5-15
11. Passenger's front air bag .......................2-51
12. Glove box .............................................3-147
13. Cigarette lighter ...................................3-154
14. Power outlet .........................................3-151
15. Wireless mobile phone charging system..................................................3-152
16. Seat warmer/Air ventilation seat ............2-20
17. Heated steering wheel ...........................3-21
18. EV/HEV button ......................................H32
19. Parking distance warning (Reverse/Forward) ON button/............................................3-125
Parking distance warning (Reverse) OFF
button......................................................3-123
20. Cup holder ...........................................3-149
21. Steering wheel audio controls/ ................4-3
Bluetooth®wireless technology
hands-free controls ..................................4-4
22. Speed limiter/ ........................................ 5-75 Cruise controls/ ......................................5-78
Smart cruise controls .............................5-84
Page 134 of 599
2-57
Safety system of your vehicle
2
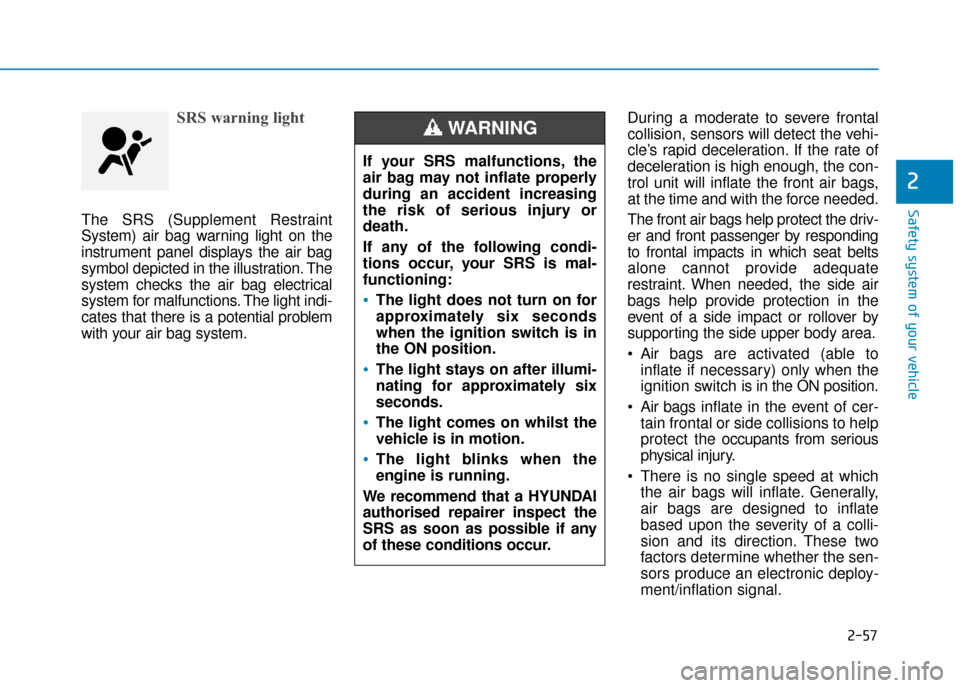
SRS warning light
The SRS (Supplement Restraint
System) air bag warning light on the
instrument panel displays the air bag
symbol depicted in the illustration. The
system checks the air bag electrical
system for malfunctions. The light indi-
cates that there is a potential problem
with your air bag system.During a moderate to severe frontal
collision, sensors will detect the vehi-
cle’s rapid deceleration. If the rate of
deceleration is high enough, the con-
trol unit will inflate the front air bags,
at the time and with the force needed.
The front air bags help protect the driv-
er and front passenger by responding
to frontal impacts in which seat belts
alone cannot provide adequate
restraint. When needed, the side air
bags help provide protection in the
event of a side impact or rollover by
supporting the side upper body area.
Air bags are activated (able to
inflate if necessary) only when the
ignition switch is in the ON position.
Air bags inflate in the event of cer-
tain frontal or side collisions to help
protect the occupants from serious
physical injury.
There is no single speed at which the air bags will inflate. Generally,
air bags are designed to inflate
based upon the severity of a colli-
sion and its direction. These two
factors determine whether the sen-
sors produce an electronic deploy-
ment/inflation signal.
If your SRS malfunctions, the
air bag may not inflate properly
during an accident increasing
the risk of serious injury or
death.
If any of the following condi-
tions occur, your SRS is mal-
functioning:
The light does not turn on for
approximately six seconds
when the ignition switch is in
the ON position.
The light stays on after illumi-
nating for approximately six
seconds.
The light comes on whilst the
vehicle is in motion.
The light blinks when the
engine is running.
We recommend that a HYUNDAI
authorised repairer inspect the
SRS as soon as possible if any
of these conditions occur.
WARNING
Page 208 of 599
3-62
Convenient features of your vehicle
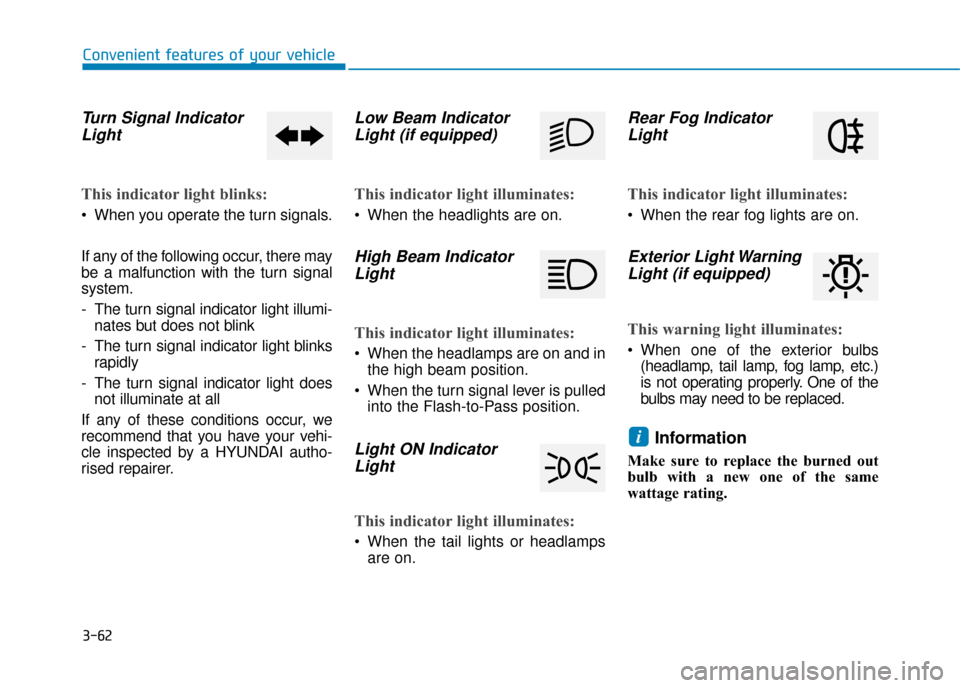
Turn Signal IndicatorLight
This indicator light blinks:
When you operate the turn signals.
If any of the following occur, there may
be a malfunction with the turn signal
system.
- The turn signal indicator light illumi-
nates but does not blink
- The turn signal indicator light blinks rapidly
- The turn signal indicator light does not illuminate at all
If any of these conditions occur, we
recommend that you have your vehi-
cle inspected by a HYUNDAI autho-
rised repairer.
Low Beam Indicator Light (if equipped)
This indicator light illuminates:
When the headlights are on.
High Beam IndicatorLight
This indicator light illuminates:
When the headlamps are on and in
the high beam position.
When the turn signal lever is pulled into the Flash-to-Pass position.
Light ON IndicatorLight
This indicator light illuminates:
When the tail lights or headlamps
are on.
Rear Fog IndicatorLight
This indicator light illuminates:
When the rear fog lights are on.
Exterior Light WarningLight (if equipped)
This warning light illuminates:
When one of the exterior bulbs
(headlamp, tail lamp, fog lamp, etc.)
is not operating properly. One of the
bulbs may need to be replaced.
Information
Make sure to replace the burned out
bulb with a new one of the same
wattage rating.
i
Page 233 of 599
3-87
Convenient features of your vehicle
3. Lights
- Off: The one touch turn signal func-tion will be deactivated.
- 3, 5, 7 Flashes: The turn signal indi- cator will blink 3, 5, or 7 times when
the turn signal lever is moved
slightly.
For more information, refer to
"Light" in this chapter.
To activate or deactivate the head-
lamp delay function.
For more information, refer to
"Light" in this chapter 4. Sound
Volume for PDW (Parking Distance
Warning)
- Level 1~3 To adjust the Park Assist System
volume.
5. Convenience
- None: The seat easy access func- tion is deactivated.
- Normal/Extended: When you turn off the engine, the driver's seat will
automatically move rearward short
(Normal) or long (Extended) for you
to enter or exit the vehicle more
comfortably.
For more information, refer to
"Driver Position Memory System"
in this chapter.
To activate or deactivate the wireless
charging system in the front seat.
For more information, refer to
"Wireless Charging System" in
this chapter.
To activate or deactivate the Wiper/
Light mode.
When activated, the LCD display
shows the selected Wiper/Light
mode whenever you change the
mode.
To activate or deactivate the gear
position pop-up.
When activated, the gear position
will be displayed on the LCD display.
3
Page 241 of 599
3-95
Convenient features of your vehicle
3
3. Lights
- Off: The one touch turn signal func-tion will be deactivated.
- 3, 5, 7 Flashes: The turn signal indi- cator will blink 3, 5, or 7 times when
the turn signal lever is moved slightly.
For more information, refer to
"Light" in this chapter.
To activate or deactivate the head-
lamp delay function.
For more information, refer to
"Light" in this chapter 4. Sound
Volume for PDW (Parking Distance
Warning)
- Level 1~3 To adjust the Park Assist System
volume.
5. Convenience
- None: The seat easy access func- tion is deactivated.
- Normal/Extended: When you turn off the engine, the driver's seat will
automatically move rearward short
(Normal) or long (Extended) for you
to enter or exit the vehicle more
comfortably.
For more information, refer to
"Driver Position Memory System"
in this chapter.
To activate or deactivate the wireless
charging system in the front seat.
For more information, refer to
"Wireless Charging System" in
this chapter.
To activate or deactivate the Wiper/
Light mode.
When activated, the LCD display
shows the selected Wiper/Light
mode whenever you changed the
mode.
To activate or deactivate the gear
position pop-up.
When activated, the gear position
will be displayed on the LCD display.
6. Service Interval
To activate or deactivate the service
interval function.
If the service interval menu is acti-
vated, you may adjust the time and
distance.
Information
To use the service interval menu, con-
sult a HYUNDAI authorised repairer.
i
Page 256 of 599
3-110
Convenient features of your vehicle
To turn off the high beam headlamp,
pull the lever towards you. The low
beams will turn on.
To flash the high beam headlamp,
pull the lever towards you, then
release the lever. The high beams
will remain ON as long as you hold
the lever towards you.
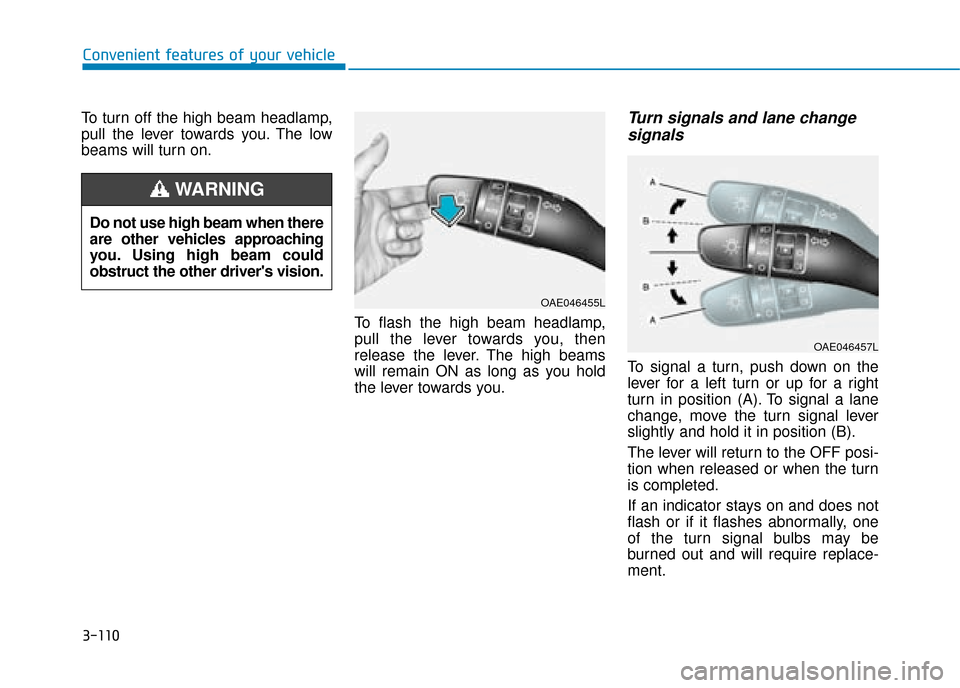
Turn signals and lane changesignals
To signal a turn, push down on the
lever for a left turn or up for a right
turn in position (A). To signal a lane
change, move the turn signal lever
slightly and hold it in position (B).
The lever will return to the OFF posi-
tion when released or when the turn
is completed.
If an indicator stays on and does not
flash or if it flashes abnormally, one
of the turn signal bulbs may be
burned out and will require replace-
ment.
Do not use high beam when there
are other vehicles approaching
you. Using high beam could
obstruct the other driver's vision.
WARNING
OAE046455L
OAE046457L
Page 257 of 599
3-111
Convenient features of your vehicle
3
One-touch turn signal function
To activate a one-touch turn signal
function, move the turn signal lever
slightly and then release it. The lane
change signals will blink 3, 5 or 7
times.
You can activate/deactivate the One
Touch Turn Signal function or choose
the number of blinks (3, 5, or 7) from
the User Settings Mode on the LCD
display.For more information, refer
to "LCD Display" in this chapter.
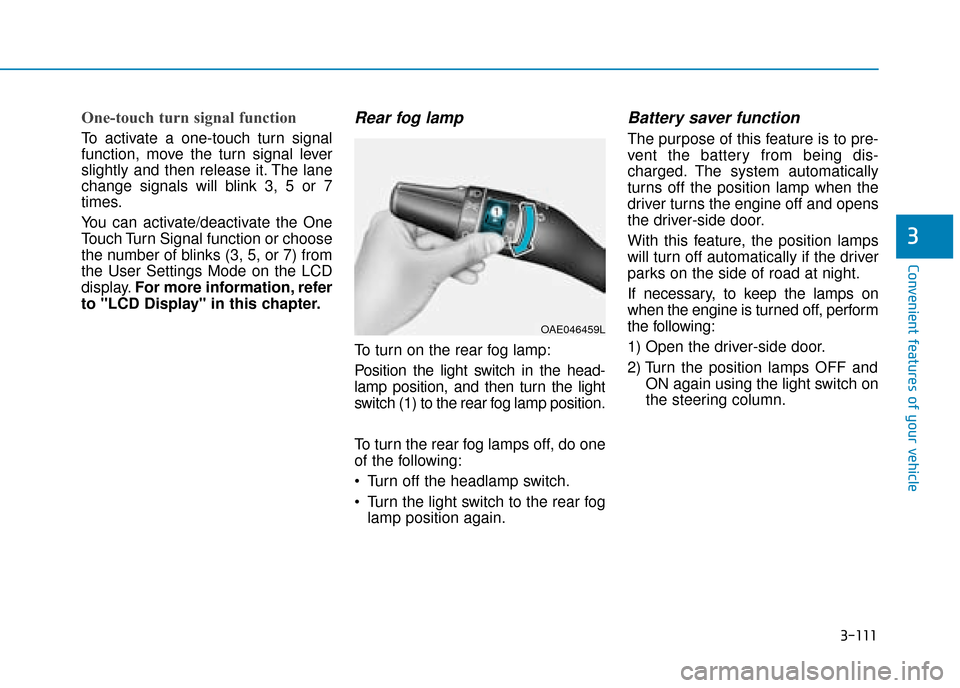
Rear fog lamp
To turn on the rear fog lamp:
Position the light switch in the head-
lamp position, and then turn the light
switch (1) to the rear fog lamp position.
To turn the rear fog lamps off, do one
of the following:
• Turn off the headlamp switch.
Turn the light switch to the rear fog lamp position again.
Battery saver function
The purpose of this feature is to pre-
vent the battery from being dis-
charged. The system automatically
turns off the position lamp when the
driver turns the engine off and opens
the driver-side door.
With this feature, the position lamps
will turn off automatically if the driver
parks on the side of road at night.
If necessary, to keep the lamps on
when the engine is turned off, perform
the following:
1) Open the driver-side door.
2) Turn the position lamps OFF and ON again using the light switch on
the steering column.
OAE046459L
Page 290 of 599
3-144
Convenient features of your vehicle
Auto defogging system
(if equipped)
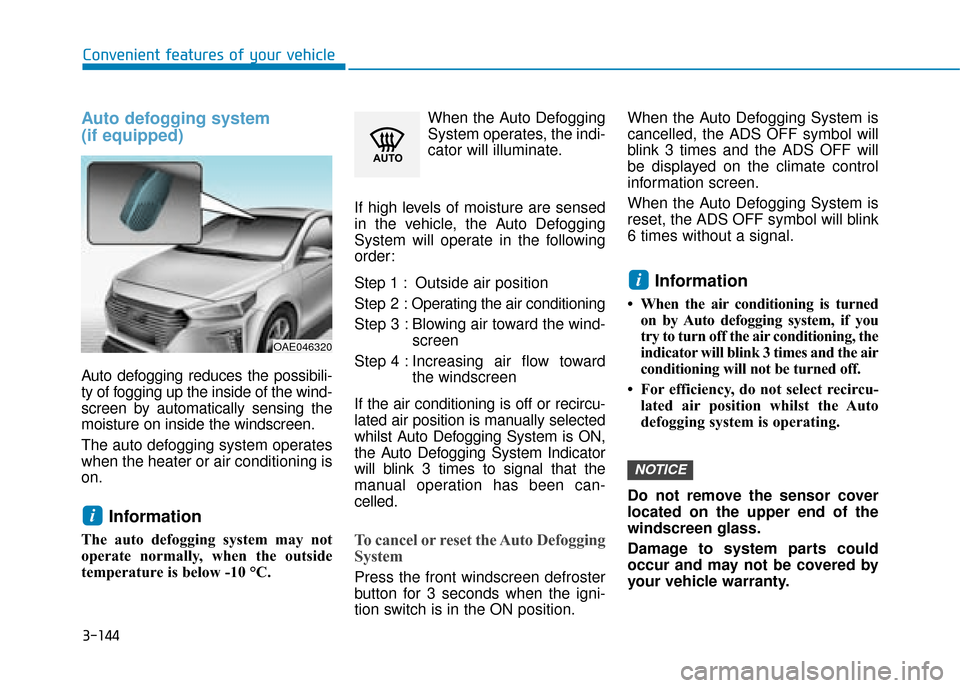
Auto defogging reduces the possibili-
ty of fogging up the inside of the wind-
screen by automatically sensing the
moisture on inside the windscreen.
The auto defogging system operates
when the heater or air conditioning is
on.
Information
The auto defogging system may not
operate normally, when the outside
temperature is below -10 °C.When the Auto Defogging
System operates, the indi-
cator will illuminate.
If high levels of moisture are sensed
in the vehicle, the Auto Defogging
System will operate in the following
order:
Step 1 : Outside air position
Step 2 : Operating the air conditioning
Step 3 : Blowing air toward the wind- screen
Step 4 : Increasing air flow toward the windscreen
If the air conditioning is off or recircu-
lated air position is manually selected
whilst Auto Defogging System is ON,
the Auto Defogging System Indicator
will blink 3 times to signal that the
manual operation has been can-
celled.To cancel or reset the Auto Defogging
System
Press the front windscreen defroster
button for 3 seconds when the igni-
tion switch is in the ON position. When the Auto Defogging System is
cancelled, the ADS OFF symbol will
blink 3 times and the ADS OFF will
be displayed on the climate control
information screen.
When the Auto Defogging System is
reset, the ADS OFF symbol will blink
6 times without a signal.
Information
• When the air conditioning is turned
on by Auto defogging system, if you
try to turn off the air conditioning, the
indicator will blink 3 times and the air
conditioning will not be turned off.
• For efficiency, do not select recircu- lated air position whilst the Auto
defogging system is operating.
Do not remove the sensor cover
located on the upper end of the
windscreen glass.
Damage to system parts could
occur and may not be covered by
your vehicle warranty.
NOTICE
i
i
OAE046320
Page 382 of 599
5-38
Driving your vehicle
Hill-Start Assist Control (HAC)
A vehicle has the tendency to slide
backwards on a steep slope, before
depressing the accelerator after a
stop. The HAC prevents the vehicle
from sliding backwards by automati-
cally operating the brake systems for
about 2 seconds. The brake systems
are automatically released, when the
accelerator pedal is depressed.
Information
• The HAC does not operate when theshift lever is in P (Park) or N (Neutral).
• The HAC activates even when the ESC (Electronic Stability Control) is
off. However, it does not activate,
when the ESC does not operate nor-
mally.
Emergency Stop Signal (ESS)
The Emergency Stop Signal system
alerts the driver behind by blinking
the stop lights, whilst sharply and
severely braking.
The system is activated when:
The vehicle suddenly stops. (Thedeceleration power exceeds 7 m/s
2,
and the driving speed exceeds 34
mph (55 km/h).)
The ABS is activated.
The hazard warning flasher automat-
ically turns ON after blinking the stop
lights:
When the driving speed is under 25 mph (40 km/h),
When the ABS is deactivated, and
When the sudden braking situation is over. The hazard warning flasher turns
OFF:
When the vehicle drives at a low
speed for a certain period of time.
The driver can manually turn OFF
the hazard warning flasher by
pressing the button.
Information
The Emergency Stop Signal (ESS) sys-
tem will not work if the hazard warn-
ing flashers are already on.
i
i
The HAC is activated only for
about 2 seconds, so always
depress the accelerator pedal
to begin driving upwards after a
stop.
WARNING