electric Hyundai Ioniq Plug-in Hybrid 2020 Service Manual
[x] Cancel search | Manufacturer: HYUNDAI, Model Year: 2020, Model line: Ioniq Plug-in Hybrid, Model: Hyundai Ioniq Plug-in Hybrid 2020Pages: 635, PDF Size: 52.13 MB
Page 553 of 635
7-73
7
Maintenance
Interior Care
Interior general precautions
Prevent caustic solutions such as
perfume and cosmetic oil, from con-
tacting the interior parts because
they may cause damage or discol-
oration. If they do contact the interior
parts, wipe them off immediately.
See the instructions for the proper
way to clean vinyl.
Never allow water or other liq-
uids to come in contact with
electrical/electronic compo-
nents inside the vehicle as this
may damage them.
When cleaning leather products
(steering wheel, seats etc.), use
neutral detergents or low alco-
hol content solutions. If you use
high alcohol content solutions
or acid/alkaline detergents, the
color of the leather may fade or
the surface may get stripped off.
Cleaning the upholstery and
interior trim
Vinyl (if equipped)
Remove dust and loose dirt from
vinyl with a whisk broom or vacuum
cleaner. Clean vinyl surfaces with a
vinyl cleaner.
Fabric (if equipped)
Remove dust and loose dirt from fab-
ric with a whisk broom or vacuum
cleaner. Clean with a mild soap solu-
tion recommended for upholstery or
carpets. Remove fresh spots imme-
diately with a fabric spot cleaner. If
fresh spots do not receive immediate
attention, the fabric can be stained
and its color can be affected. Also, its
fire-resistant properties can be
reduced if the material is not proper-
ly maintained.
Using anything but recommended
cleaners and procedures may
affect the fabric's appearance and
fire-resistant properties.
Leather (if equipped)
Features of seat leather
- Leather is made from the outer
skin of an animal, which goes
through a special process to be
available for use. Since it is a nat-
ural product, each part differs in
thickness or density.
Wrinkles may appear as a natural
result of stretching and shrinking
depending on the temperature
and humidity.
- The seat is made of stretchable
fabric to improve comfort.
- The parts contacting the body are
curved and the side supporting
area is high which provides driv-
ing comfort and stability.
- Wrinkles may appear naturally
from usage. It is not a fault of the
products.
NOTICE
NOTICE
Page 572 of 635
H Hy
yb
br
ri
id
d
S
Sy
ys
st
te
em
m
O
Ov
ve
er
rv
vi
ie
ew
w
HEV (Hybrid Electric Vehicle) System..................H2
Hybrid Vehicle ......................................................................H2
PHEV (Plug-In Electric Vehicle) System..............H3
Plug-in Hybrid Vehicle.......................................................H3
Charging the Plug-In Hybrid Vehicle....................H4
Charging Information .........................................................H4
Charging Types ....................................................................H4
Charging Time Information ...............................................H4
Charging Status ...................................................................H5
Charging Connector AUTO / LOCK Mode.....................H6
Scheduled Charging ............................................................H7
Charging Precautions .........................................................H8
AC Charge .............................................................................H9
Trickle Charge ....................................................................H15
Action to be taken when charging stops abruptly...H27
Driving the Hybrid/Plug-In Hybrid Vehicle .......H28
Starting the Vehicle ..........................................................H28
Special Features ................................................................H29
Hybrid System Gauge ......................................................H31
Plug-in Hybrid Mode (Plug-in hybrid vehicle)..........H32
Aux. Battery Saver+ (Plug-in hybrid vehicle) ...........H33
Warning and Indicator Lights ........................................H35
LCD Display Messages.....................................................H36
Energy flow ........................................................................H45
Safety Precautions For Hybrid System .............H49
High Voltage Battery System.........................................H49
Safety Plug .........................................................................H52
High Voltage Battery Cooling Duct ..............................H53
If an Accident Occurs ......................................................H54
When the Hybrid Vehicle Shuts Off ............................H55
Page 573 of 635
H2
Hybrid Vehicle H HE
EV
V
(
(H
HY
YB
BR
RI
ID
D
E
EL
LE
EC
CT
TR
RI
IC
C
V
VE
EH
HI
IC
CL
LE
E)
)
S
SY
YS
ST
TE
EM
M
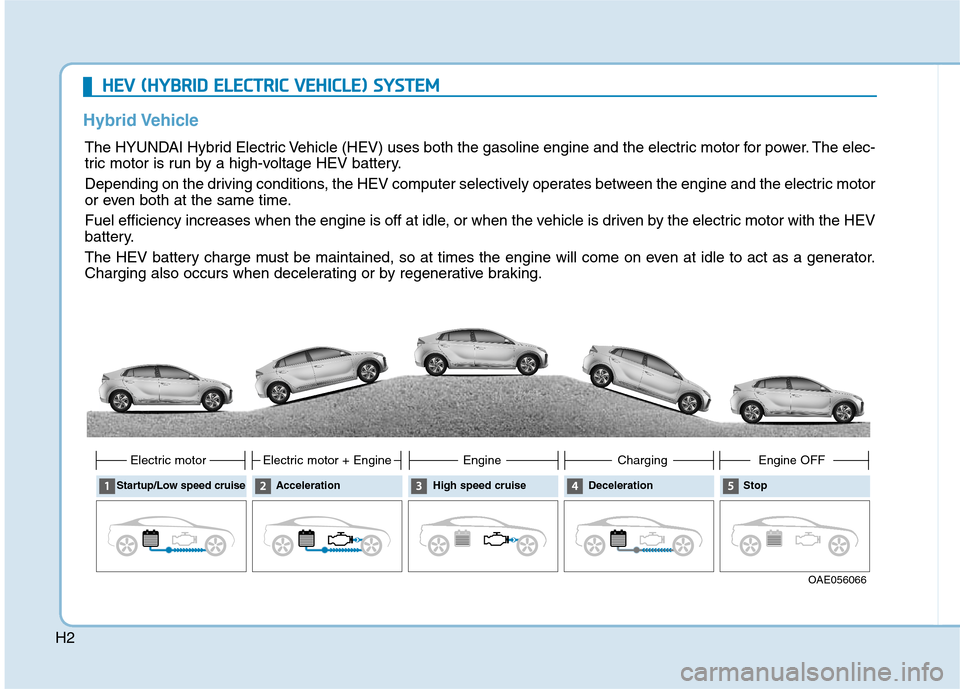
The HYUNDAI Hybrid Electric Vehicle (HEV) uses both the gasoline engine and the electric motor for power. The elec-
tric motor is run by a high-voltage HEV battery.
Depending on the driving conditions, the HEV computer selectively operates between the engine and the electric motor
or even both at the same time.
Fuel efficiency increases when the engine is off at idle, or when the vehicle is driven by the electric motor with the HEV
battery.
The HEV battery charge must be maintained, so at times the engine will come on even at idle to act as a generator.
Charging also occurs when decelerating or by regenerative braking.
OAE056066 Startup/Low speed cruise
Electric motor
Acceleration
Electric motor + Engine
High speed cruise
Engine
Deceleration
Charging
Stop
Engine OFF
Page 574 of 635
H3
P PH
HE
EV
V
(
(P
PL
LU
UG
G-
-I
IN
N
E
EL
LE
EC
CT
TR
RI
IC
C
V
VE
EH
HI
IC
CL
LE
E)
)
S
SY
YS
ST
TE
EM
M
Plug-in Hybrid Vehicle
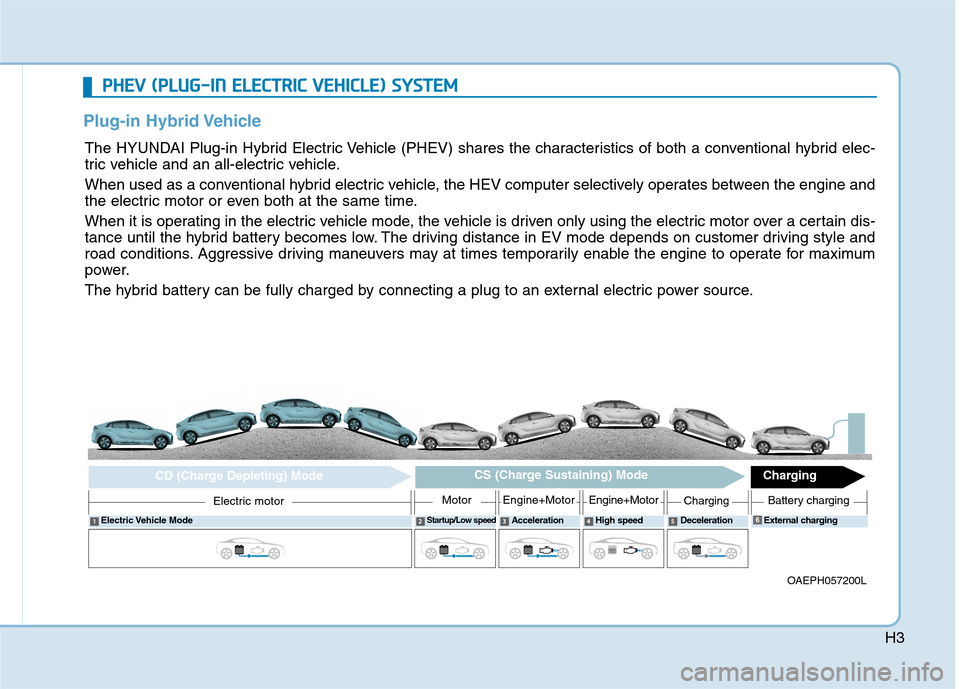
The HYUNDAI Plug-in Hybrid Electric Vehicle (PHEV) shares the characteristics of both a conventional hybrid elec-
tric vehicle and an all-electric vehicle.
When used as a conventional hybrid electric vehicle, the HEV computer selectively operates between the engine and
the electric motor or even both at the same time.
When it is operating in the electric vehicle mode, the vehicle is driven only using the electric motor over a certain dis-
tance until the hybrid battery becomes low. The driving distance in EV mode depends on customer driving style and
road conditions. Aggressive driving maneuvers may at times temporarily enable the engine to operate for maximum
power.
The hybrid battery can be fully charged by connecting a plug to an external electric power source.
OAEPH057200L
Electric Vehicle ModeStartup/Low speedAcceleration High speed Deceleration External charging
Electric motor
CD (Charge Depleting) ModeCS (Charge Sustaining) Mode
Charging
MotorEngine+MotorEngine+MotorChargingBattery charging
6
Page 575 of 635
H4
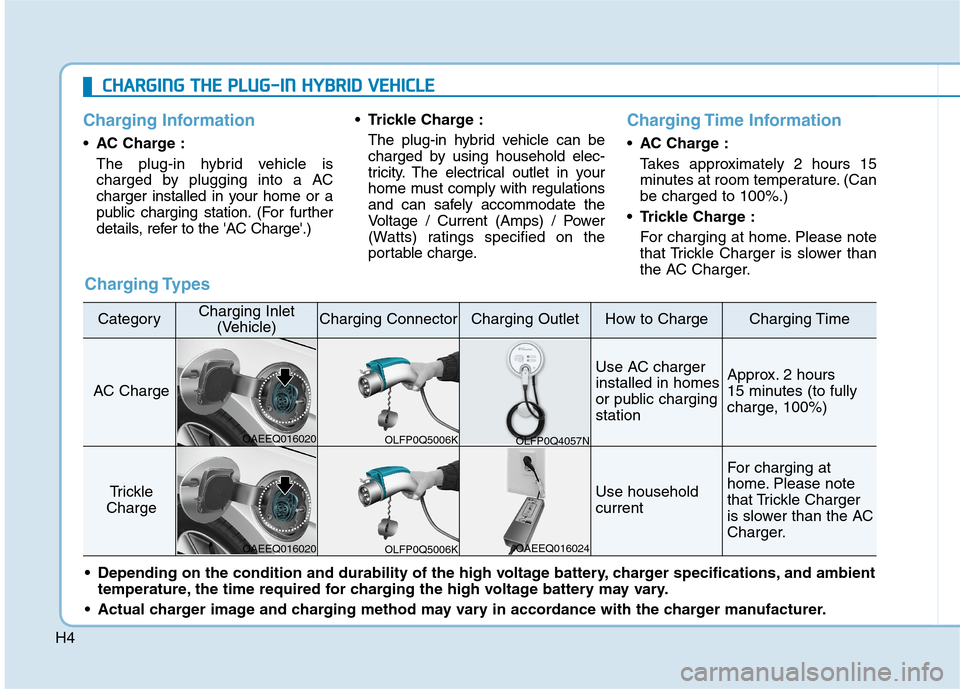
Charging Information
•AC Charge :
The plug-in hybrid vehicle is
charged by plugging into a AC
charger installed in your home or a
public charging station. (For further
details, refer to the 'AC Charge'.)Trickle Charge :
The plug-in hybrid vehicle can be
charged by using household elec-
tricity. The electrical outlet in your
home must comply with regulations
and can safely accommodate the
Voltage / Current (Amps) / Power
(Watts) ratings specified on the
portable charge.
Charging Time Information
AC Charge :
Takes approximately 2 hours 15
minutes at room temperature. (Can
be charged to 100%.)
• Trickle Charge :
For charging at home. Please note
that Trickle Charger is slower than
the AC Charger.
C CH
HA
AR
RG
GI
IN
NG
G
T
TH
HE
E
P
PL
LU
UG
G-
-I
IN
N
H
HY
YB
BR
RI
ID
D
V
VE
EH
HI
IC
CL
LE
E
Charging Types
CategoryCharging Inlet
(Vehicle)Charging ConnectorCharging OutletHow to ChargeCharging Time
AC Charge
Use AC charger
installed in homes
or public charging
stationApprox. 2 hours
15 minutes (to fully
charge, 100%)
Trickle
Charge Use household
current
For charging at
home. Please note
that Trickle Charger
is slower than the AC
Charger.
Depending on the condition and durability of the high voltage battery, charger specifications, and ambient
temperature, the time required for charging the high voltage battery may vary.
Actual charger image and charging method may vary in accordance with the charger manufacturer.
OLFP0Q5006K OAEEQ016020
OAEEQ016020OAEEQ016024 OLFP0Q4057N
OLFP0Q5006K
Page 579 of 635
H8
C CH
HA
AR
RG
GI
IN
NG
G
T
TH
HE
E
P
PL
LU
UG
G-
-I
IN
N
H
HY
YB
BR
RI
ID
D
V
VE
EH
HI
IC
CL
LE
E
(
(C
CO
ON
NT
T.
.)
)
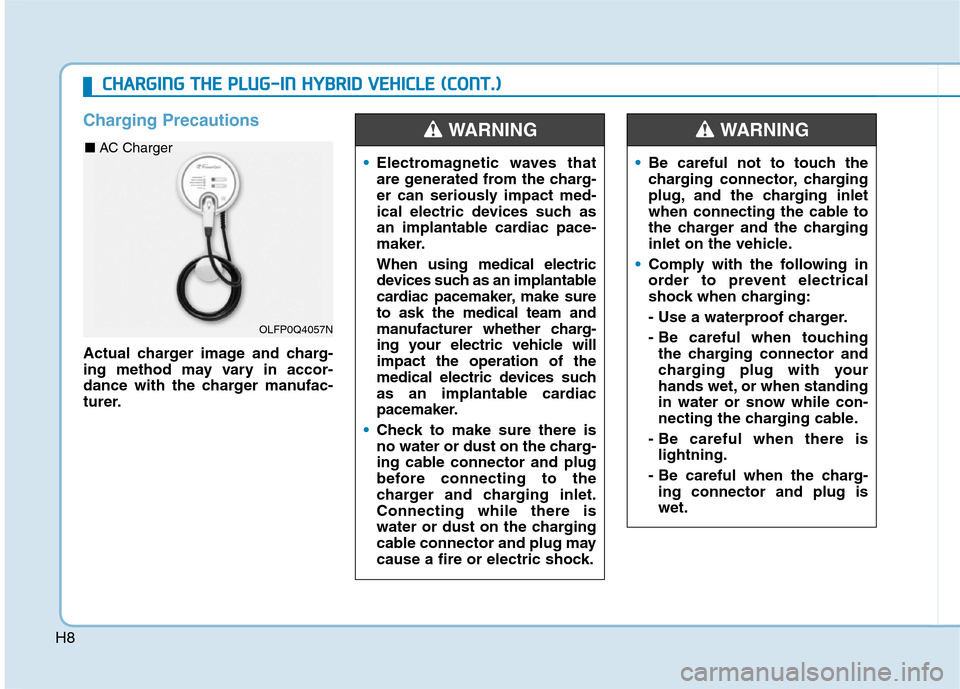
Charging Precautions
Actual charger image and charg-
ing method may vary in accor-
dance with the charger manufac-
turer.Electromagnetic waves that
are generated from the charg-
er can seriously impact med-
ical electric devices such as
an implantable cardiac pace-
maker.
When using medical electric
devices such as an implantable
cardiac pacemaker, make sure
to ask the medical team and
manufacturer whether charg-
ing your electric vehicle will
impact the operation of the
medical electric devices such
as an implantable cardiac
pacemaker.
Check to make sure there is
no water or dust on the charg-
ing cable connector and plug
before connecting to the
charger and charging inlet.
Connecting while there is
water or dust on the charging
cable connector and plug may
cause a fire or electric shock.
WARNING
Be careful not to touch the
charging connector, charging
plug, and the charging inlet
when connecting the cable to
the charger and the charging
inlet on the vehicle.
Comply with the following in
order to prevent electrical
shock when charging:
- Use a waterproof charger.
- Be careful when touching
the charging connector and
charging plug with your
hands wet, or when standing
in water or snow while con-
necting the charging cable.
- Be careful when there is
lightning.
- Be careful when the charg-
ing connector and plug is
wet.
WARNING
OLFP0Q4057N
■ AC Charger
Page 580 of 635
H9
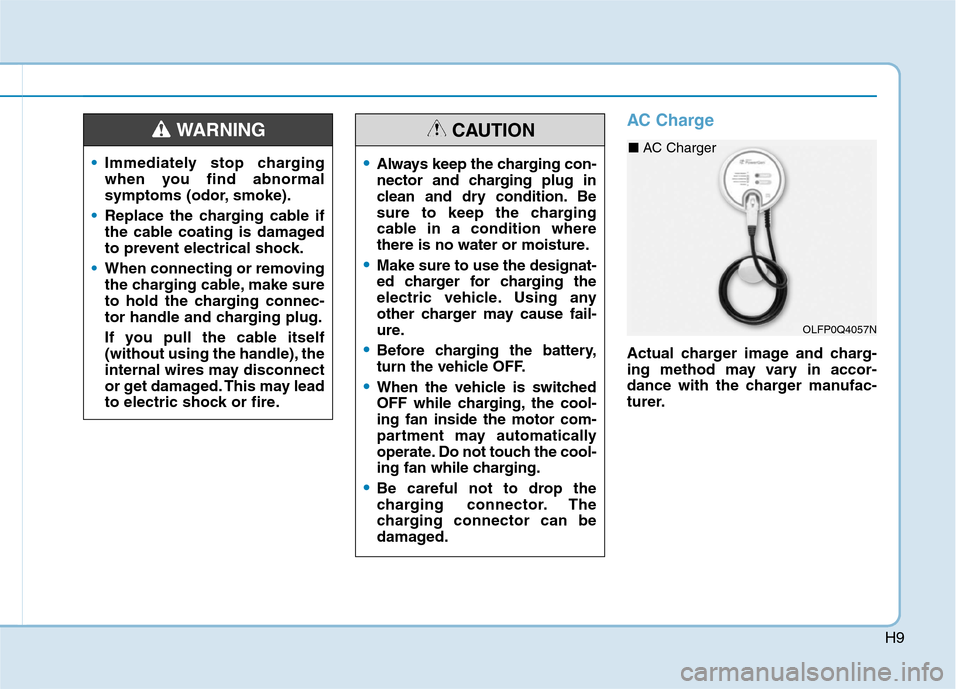
AC Charge
Actual charger image and charg-
ing method may vary in accor-
dance with the charger manufac-
turer.
Immediately stop charging
when you find abnormal
symptoms (odor, smoke).
Replace the charging cable if
the cable coating is damaged
to prevent electrical shock.
When connecting or removing
the charging cable, make sure
to hold the charging connec-
tor handle and charging plug.
If you pull the cable itself
(without using the handle), the
internal wires may disconnect
or get damaged. This may lead
to electric shock or fire.
WARNING
Always keep the charging con-
nector and charging plug in
clean and dry condition. Be
sure to keep the charging
cable in a condition where
there is no water or moisture.
Make sure to use the designat-
ed charger for charging the
electric vehicle. Using any
other charger may cause fail-
ure.
Before charging the battery,
turn the vehicle OFF.
When the vehicle is switched
OFF while charging, the cool-
ing fan inside the motor com-
partment may automatically
operate. Do not touch the cool-
ing fan while charging.
Be careful not to drop the
charging connector. The
charging connector can be
damaged.
CAUTION
OLFP0Q4057N
■ AC Charger
Page 582 of 635
H11
Information
Charging connector AUTO/LOCK
mode
The charging connector is locked in
the inlet at a different period accord-
ing to which mode is selected.
• LOCK mode : The connector locks
when the charging connector is
plugged into the charging inlet.
• AUTO mode : The connector locks
when charging starts.
For more details, refer to "Charging
Connector AUTO/LOCK Mode" in
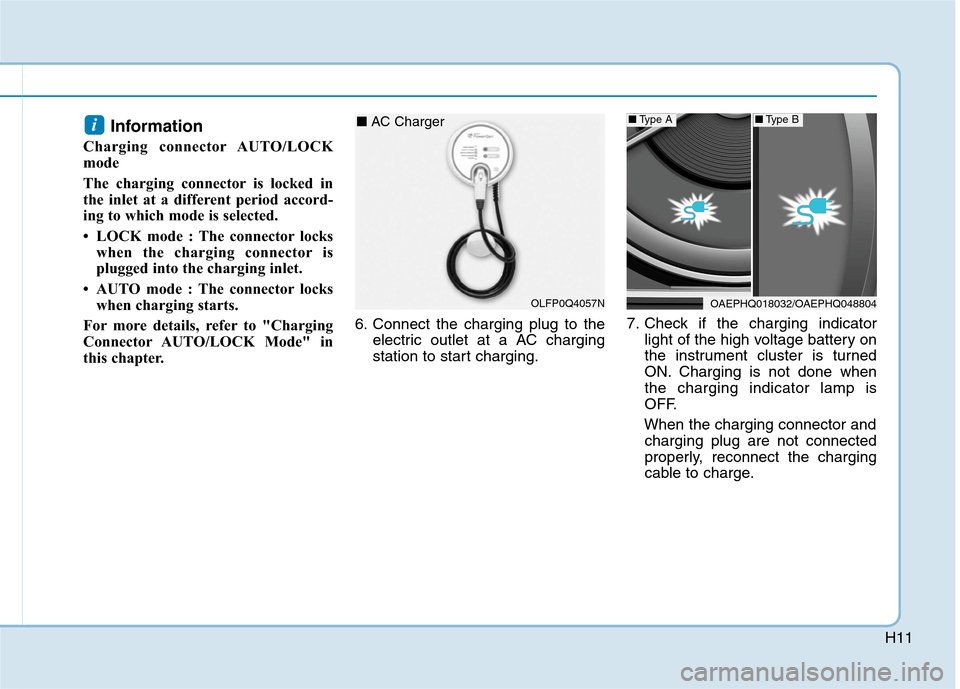
this chapter.6. Connect the charging plug to the
electric outlet at a AC charging
station to start charging.7. Check if the charging indicator
light of the high voltage battery on
the instrument cluster is turned
ON. Charging is not done when
the charging indicator lamp is
OFF.
When the charging connector and
charging plug are not connected
properly, reconnect the charging
cable to charge.
i
OLFP0Q4057N
■ AC Charger
OAEPHQ018032/OAEPHQ048804
■Type A■Type B
Page 583 of 635
H12
Information
• Even though charging is possible
with the Engine Start/Stop button in
the ON/START position, for your
safety, start charging when the
Engine Start/Stop button is in the
OFF position and the vehicle shifted
to P (Park). After charging has
started, you can use electrical com-
ponents such as the radio by press-
ing the Engine Start/Stop button to
the ACC or ON position.
• During AC charging, the radio
reception may be bad.
• Moving the shift lever from P (Park)
to R (Reverse)/N (Neutral)/D
(Drive) stops the charging process.
To restart the charging process,
move the shift lever to P (Park),
place the Engine Start/Stop button
to the OFF position, and disconnect
the charging cable. Then, connect
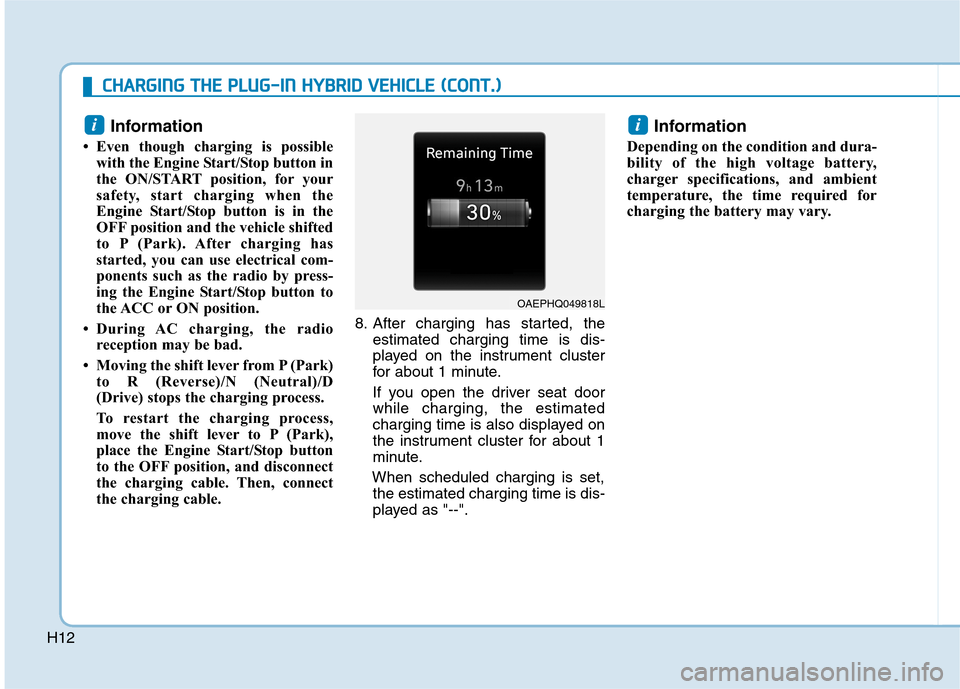
the charging cable.8. After charging has started, the
estimated charging time is dis-
played on the instrument cluster
for about 1 minute.
If you open the driver seat door
while charging, the estimated
charging time is also displayed on
the instrument cluster for about 1
minute.
When scheduled charging is set,
the estimated charging time is dis-
played as "--".
Information
Depending on the condition and dura-
bility of the high voltage battery,
charger specifications, and ambient
temperature, the time required for
charging the battery may vary.
ii
OAEPHQ049818L
C CH
HA
AR
RG
GI
IN
NG
G
T
TH
HE
E
P
PL
LU
UG
G-
-I
IN
N
H
HY
YB
BR
RI
ID
D
V
VE
EH
HI
IC
CL
LE
E
(
(C
CO
ON
NT
T.
.)
)
Page 585 of 635
H14
C CH
HA
AR
RG
GI
IN
NG
G
T
TH
HE
E
P
PL
LU
UG
G-
-I
IN
N
H
HY
YB
BR
RI
ID
D
V
VE
EH
HI
IC
CL
LE
E
(
(C
CO
ON
NT
T.
.)
)
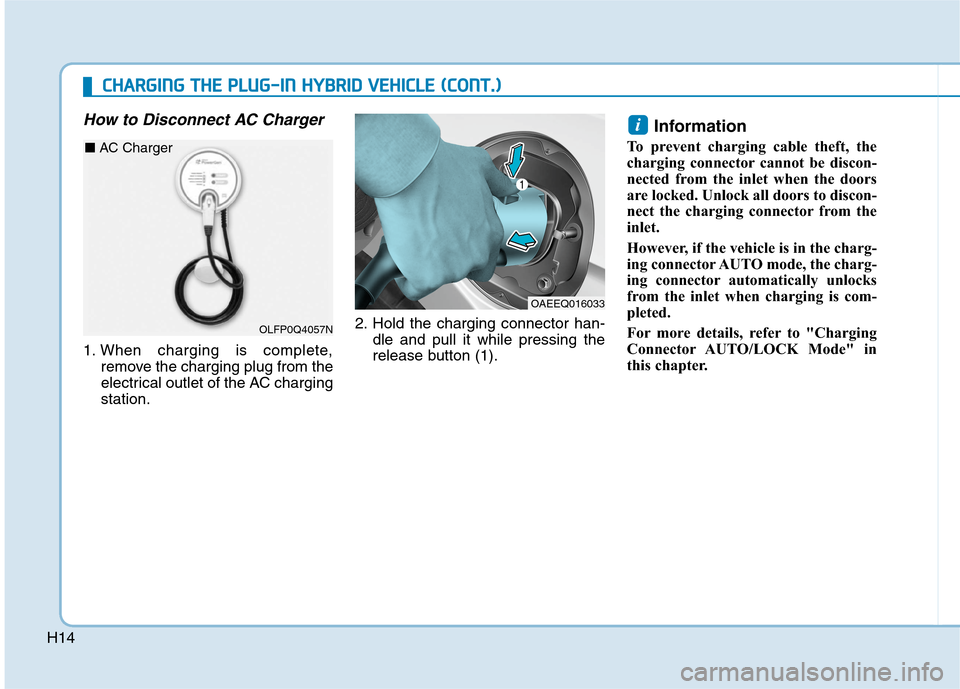
How to Disconnect AC Charger
1. When charging is complete,
remove the charging plug from the
electrical outlet of the AC charging
station.2. Hold the charging connector han-
dle and pull it while pressing the
release button (1).
Information
To prevent charging cable theft, the
charging connector cannot be discon-
nected from the inlet when the doors
are locked. Unlock all doors to discon-
nect the charging connector from the
inlet.
However, if the vehicle is in the charg-
ing connector AUTO mode, the charg-
ing connector automatically unlocks
from the inlet when charging is com-
pleted.
For more details, refer to "Charging
Connector AUTO/LOCK Mode" in
this chapter.
i
OAEEQ016033
OLFP0Q4057N
■ AC Charger