roof HYUNDAI IX20 2015 Owners Manual
[x] Cancel search | Manufacturer: HYUNDAI, Model Year: 2015, Model line: IX20, Model: HYUNDAI IX20 2015Pages: 385, PDF Size: 13.67 MB
Page 56 of 385
339
Safety features of your vehicle
Noise and smoke
When the air bags inflate, they make a
loud noise and they leave smoke and
powder in the air inside of the vehicle.
This is normal and is a result of the igni-
tion of the air bag inflator. After the air
bag inflates, you may feel substantial dis-
comfort in breathing due to the contact of
your chest with both the seat belt and the
air bag, as well as from breathing the
smoke and powder.Open your doors
and/or windows as soon as possible
after impact in order to reduce dis-
comfort and prevent prolonged expo-
sure to the smoke and powder.
Though smoke and powder are non-
toxic, it may cause irritation to the skin
(eyes, nose and throat, etc.). If this is the
case, wash and rinse with cold water
immediately and consult with the doctor if
the symptom persists.
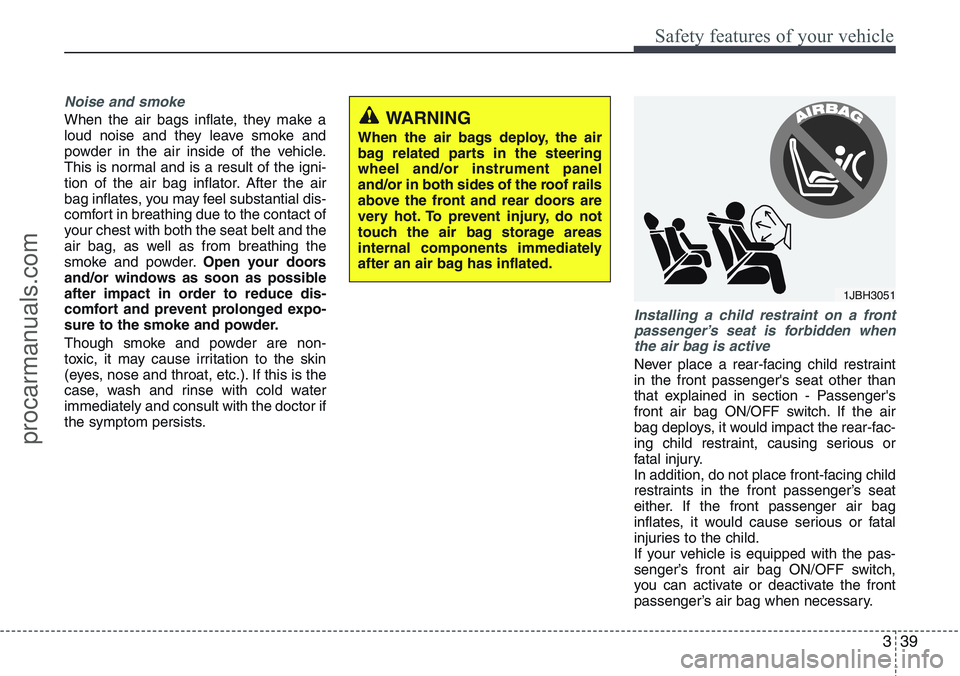
Installing a child restraint on a front
passenger’s seat is forbidden when
the air bag is active
Never place a rear-facing child restraint
in the front passenger's seat other than
that explained in section - Passenger's
front air bag ON/OFF switch. If the air
bag deploys, it would impact the rear-fac-
ing child restraint, causing serious or
fatal injury.
In addition, do not place front-facing child
restraints in the front passenger’s seat
either. If the front passenger air bag
inflates, it would cause serious or fatal
injuries to the child.
If your vehicle is equipped with the pas-
senger’s front air bag ON/OFF switch,
you can activate or deactivate the front
passenger’s air bag when necessary.
1JBH3051
WARNING
When the air bags deploy, the air
bag related parts in the steering
wheel and/or instrument panel
and/or in both sides of the roof rails
above the front and rear doors are
very hot. To prevent injury, do not
touch the air bag storage areas
internal components immediately
after an air bag has inflated.
procarmanuals.com
Page 68 of 385
351
Safety features of your vehicle
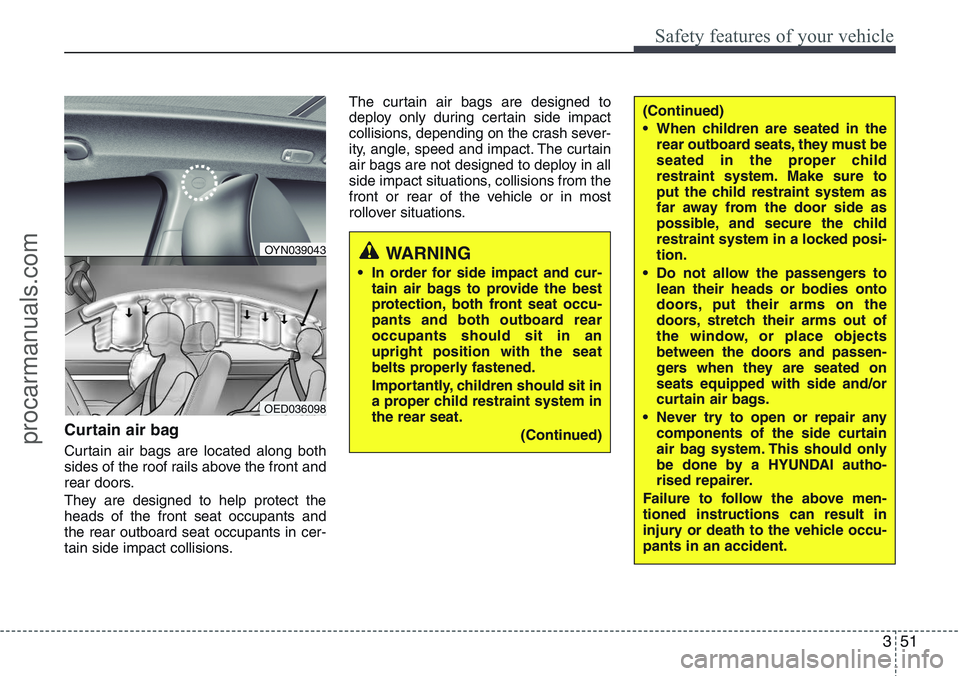
Curtain air bag
Curtain air bags are located along both
sides of the roof rails above the front and
rear doors.
They are designed to help protect the
heads of the front seat occupants and
the rear outboard seat occupants in cer-
tain side impact collisions.The curtain air bags are designed to
deploy only during certain side impact
collisions, depending on the crash sever-
ity, angle, speed and impact. The curtain
air bags are not designed to deploy in all
side impact situations, collisions from the
front or rear of the vehicle or in most
rollover situations.
WARNING
• In order for side impact and cur-
tain air bags to provide the best
protection, both front seat occu-
pants and both outboard rear
occupants should sit in an
upright position with the seat
belts properly fastened.
Importantly, children should sit in
a proper child restraint system in
the rear seat.
(Continued)
(Continued)
• When children are seated in the
rear outboard seats, they must be
seated in the proper child
restraint system. Make sure to
put the child restraint system as
far away from the door side as
possible, and secure the child
restraint system in a locked posi-
tion.
• Do not allow the passengers to
lean their heads or bodies onto
doors, put their arms on the
doors, stretch their arms out of
the window, or place objects
between the doors and passen-
gers when they are seated on
seats equipped with side and/or
curtain air bags.
• Never try to open or repair any
components of the side curtain
air bag system. This should only
be done by a HYUNDAI autho-
rised repairer.
Failure to follow the above men-
tioned instructions can result in
injury or death to the vehicle occu-
pants in an accident.
OED036098
OYN039043
procarmanuals.com
Page 74 of 385
357
Safety features of your vehicle
SRS Care
The SRS is virtually maintenance-free
and so there are no parts you can safely
service by yourself. If the SRS air bag
warning light does not illuminate, or con-
tinuously remains on, have your vehicle
immediately inspected by a HYUNDAI
authorised repairer.
Any work on the SRS system, such as
removing, installing, repairing, or any
work on the steering wheel, the front
passenger's panel, front seats and roof
rails must be performed by a HYUNDAI
authorised repairer. Improper handling of
the SRS system may result in serious
personal injury.WARNING
• Modification to SRS components
or wiring, including the addition
of any kind of badges to the pad
covers or modifications to the
body structure, can adversely
affect SRS performance and lead
to possible injury.
• For cleaning the air bag pad cov-
ers, use only a soft, dry cloth or
one which has been moistened
with plain water. Solvents or
cleaners could adversely affect
the air bag covers and proper
deployment of the system.
• No objects should be placed over
or near the air bag modules on
the steering wheel, instrument
panel, and the front passenger's
panel above the glove box,
because any such object could
cause harm if the vehicle is in a
crash severe enough to cause
the air bags to inflate.
(Continued)
(Continued)
• If the air bags inflate, they must
be replaced by a HYUNDAI autho-
rised repairer.
• Do not tamper with or disconnect
SRS wiring, or other components
of the SRS system. Doing so
could result in injury, due to acci-
dental inflation of the air bags or
by rendering the SRS inopera-
tive.
• If components of the air bag sys-
tem must be discarded, or if the
vehicle must be scrapped, certain
safety precautions must be
observed. A HYUNDAI authorised
repairer knows these precautions
and can give you the necessary
information. Failure to follow
these precautions and proce-
dures could increase the risk of
personal injury.
• If your car was flooded and has
soaked carpeting or water on the
floor, you shouldn't try to start
the engine; have the car towed to
a HYUNDAI authorised repairer.
procarmanuals.com
Page 77 of 385
4
Keys / 4-2
Remote keyless entry / 4-5
Smart key / 4-8
Theft-alarm system / 4-11
Door locks / 4-13
Tailgate / 4-17
Windows / 4-19
Bonnet / 4-24
Fuel filler lid / 4-26
Panorama sunroof / 4-29
Steering wheel / 4-33
Mirrors / 4-35
Instrument cluster / 4-40
Rear parking assist system / 4-63
Rearview camera / 4-67
Hazard warning flasher / 4-68
Lighting / 4-69
Wipers and washers / 4-75
Interior light / 4-79
Defroster / 4-80
Manual climate control system / 4-81
Automatic climate control system / 4-90
Windscreen defrosting and defogging / 4-98
Storage compartment / 4-100
Interior features / 4-103
Audio system / 4-111
Features of your vehicle
procarmanuals.com
Page 96 of 385
Features of your vehicle
20 4
Power windows
The ignition switch must be in the ON
position for power windows to operate.
Each door has a power window switch
that controls the door's window. The driv-
er has a master power window switch
that controls all the windows in the vehi-
cle. Also, a power window lock switch
which that can block the operation of rear
passenger windows. The power windows
can be operated for approximately 30
seconds after the ignition key is removed
or turned to the ACC or LOCK position.
However, if the front doors are opened,
the power windows cannot be operated
within the 30 seconds period.
✽NOTICE
Whilst driving with the rear windows
down or with the sunroof (if equipped)
opened (or partially opened), your vehi-
cle may demonstrate a wind buffeting or
pulsation noise. This noise is a normal
occurrence and can be reduced or elim-
inated by taking the following actions.
If the noise occurs with one or both of
the rear windows down, partially lower
both front windows approximately one
inch. If you experience the noise with
the sunroof open, slightly reduce the size
of the sunroof opening
Window opening and closing
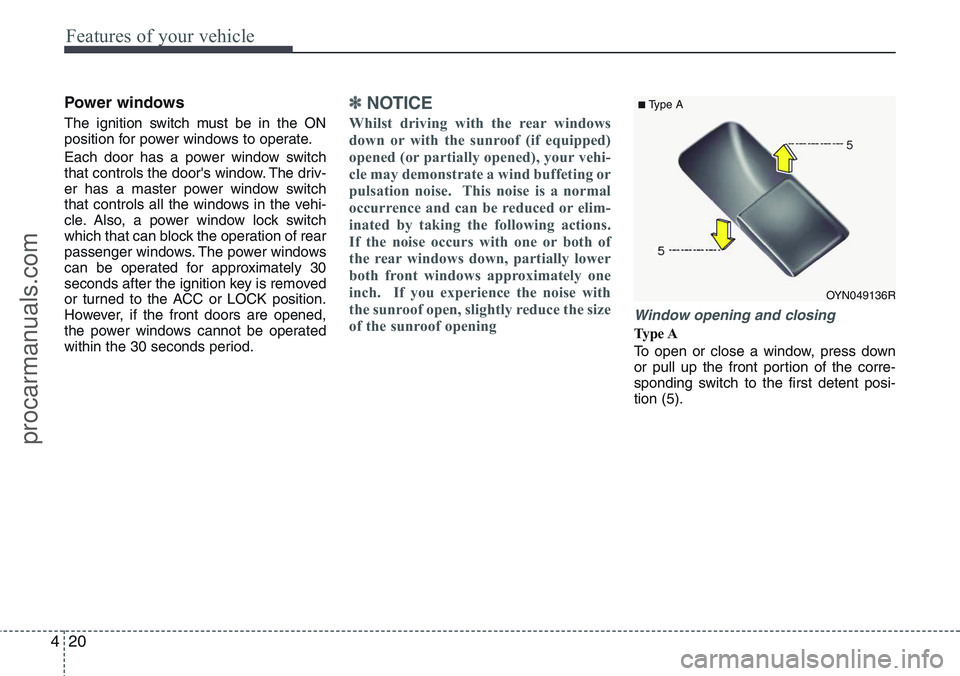
Ty p e A
To open or close a window, press down
or pull up the front portion of the corre-
sponding switch to the first detent posi-
tion (5).
OYN049136R
■Type A
procarmanuals.com
Page 105 of 385
429
Features of your vehicle
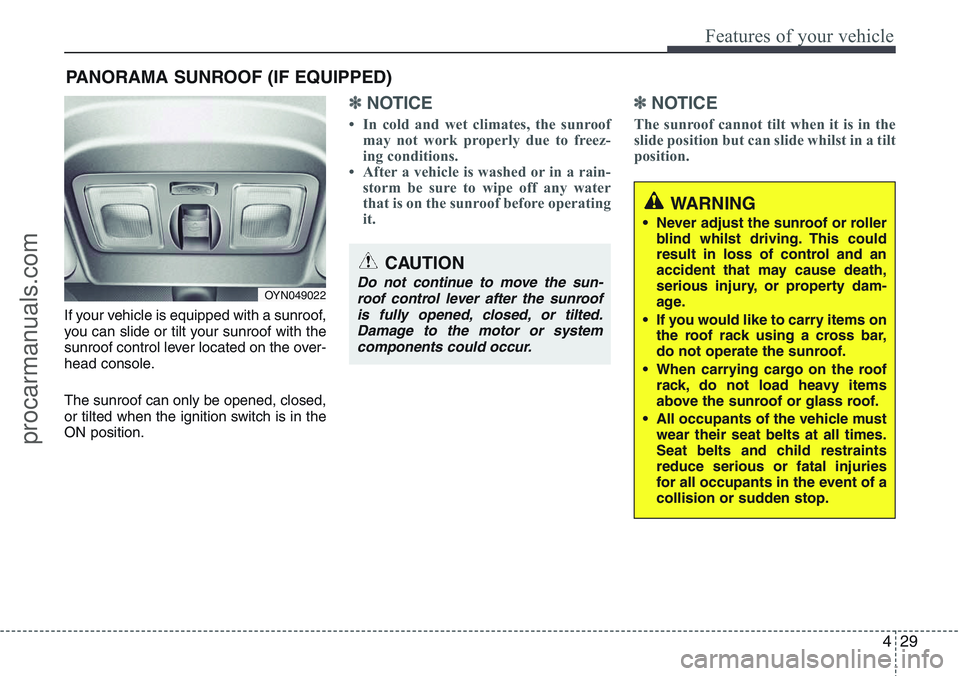
If your vehicle is equipped with a sunroof,
you can slide or tilt your sunroof with the
sunroof control lever located on the over-
head console.
The sunroof can only be opened, closed,
or tilted when the ignition switch is in the
ON position.
✽NOTICE
• In cold and wet climates, the sunroof
may not work properly due to freez-
ing conditions.
• After a vehicle is washed or in a rain-
storm be sure to wipe off any water
that is on the sunroof before operating
it.
✽NOTICE
The sunroof cannot tilt when it is in the
slide position but can slide whilst in a tilt
position.
PANORAMA SUNROOF (IF EQUIPPED)
OYN049022
CAUTION
Do not continue to move the sun-
roof control lever after the sunroof
is fully opened, closed, or tilted.
Damage to the motor or system
components could occur.
WARNING
• Never adjust the sunroof or roller
blind whilst driving. This could
result in loss of control and an
accident that may cause death,
serious injury, or property dam-
age.
• If you would like to carry items on
the roof rack using a cross bar,
do not operate the sunroof.
• When carrying cargo on the roof
rack, do not load heavy items
above the sunroof or glass roof.
• All occupants of the vehicle must
wear their seat belts at all times.
Seat belts and child restraints
reduce serious or fatal injuries
for all occupants in the event of a
collision or sudden stop.
procarmanuals.com
Page 106 of 385
Features of your vehicle
30 4
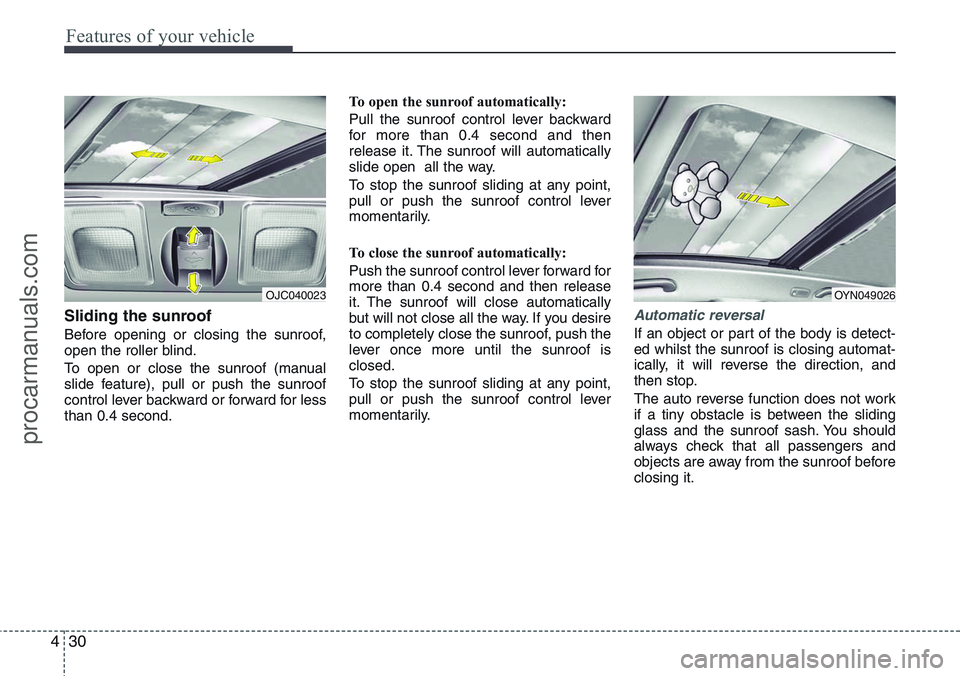
Sliding the sunroof
Before opening or closing the sunroof,
open the roller blind.
To open or close the sunroof (manual
slide feature), pull or push the sunroof
control lever backward or forward for less
than 0.4 second.To open the sunroof automatically:
Pull the sunroof control lever backward
for more than 0.4 second and then
release it. The sunroof will automatically
slide open all the way.
To stop the sunroof sliding at any point,
pull or push the sunroof control lever
momentarily.
To close the sunroof automatically:
Push the sunroof control lever forward for
more than 0.4 second and then release
it. The sunroof will close automatically
but will not close all the way. If you desire
to completely close the sunroof, push the
lever once more until the sunroof is
closed.
To stop the sunroof sliding at any point,
pull or push the sunroof control lever
momentarily.
Automatic reversal
If an object or part of the body is detect-
ed whilst the sunroof is closing automat-
ically, it will reverse the direction, and
then stop.
The auto reverse function does not work
if a tiny obstacle is between the sliding
glass and the sunroof sash. You should
always check that all passengers and
objects are away from the sunroof before
closing it.
OJC040023OYN049026
procarmanuals.com
Page 107 of 385
431
Features of your vehicle
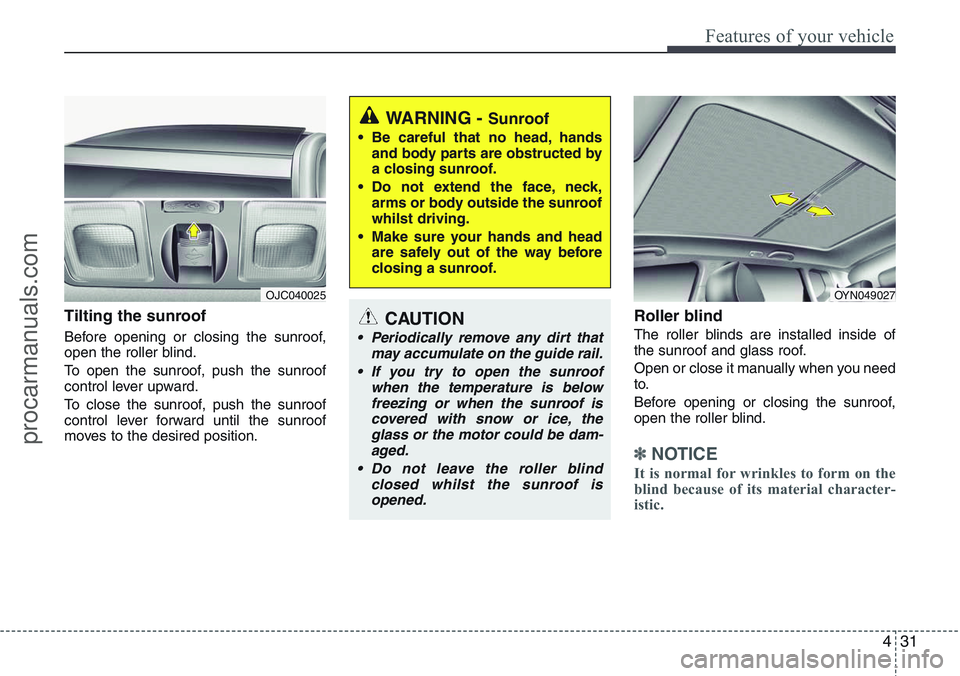
Tilting the sunroof
Before opening or closing the sunroof,
open the roller blind.
To open the sunroof, push the sunroof
control lever upward.
To close the sunroof, push the sunroof
control lever forward until the sunroof
moves to the desired position.
Roller blind
The roller blinds are installed inside of
the sunroof and glass roof.
Open or close it manually when you need
to.
Before opening or closing the sunroof,
open the roller blind.
✽NOTICE
It is normal for wrinkles to form on the
blind because of its material character-
istic.
WARNING - Sunroof
• Be careful that no head, hands
and body parts are obstructed by
a closing sunroof.
• Do not extend the face, neck,
arms or body outside the sunroof
whilst driving.
• Make sure your hands and head
are safely out of the way before
closing a sunroof.
CAUTION
• Periodically remove any dirt that
may accumulate on the guide rail.
• If you try to open the sunroof
when the temperature is below
freezing or when the sunroof is
covered with snow or ice, the
glass or the motor could be dam-
aged.
• Do not leave the roller blind
closed whilst the sunroof is
opened.
OYN049027OJC040025
procarmanuals.com
Page 108 of 385
Features of your vehicle
32 4
Resetting the sunroof
Whenever the vehicle battery is discon-
nected or discharged, you must reset
your sunroof system as follows:
1. Turn the ignition switch to the ON
position.
2. Open the roller blind.
3. Close the sunroof.
4. Release the sunroof control lever.
5. Push the sunroof control lever forward
in the direction of close (about 10 sec-
onds) until the sunroof moves a little.
Then, release the lever.
6. Push the sunroof control lever forward
in the direction of close until the sun-
roof operates as follows:
TILT OPEN →SLIDE OPEN →
SLIDE CLOSE
Then, release the lever.
When this is complete, the sunroof sys-
tem has been reset.
procarmanuals.com
Page 133 of 385
457
Features of your vehicle
AUTO STOP indicator
(if equipped)
This indicator will illuminate when the
engine enters the Idle Stop mode of the
ISG (Idle Stop and Go) system.
When the automatic starting occurs, the
"AUTO STOP" indicator on the cluster
will blink for 5 seconds.
For more details, refer to the “ISG (Idle
Stop and Go) system” in section 5.
✽NOTICE
When the engine automatically starts by
the ISG system, some warning
lights(ABS, ESP, ESP OFF, EPS or
Parking brake warning light) may turn
on for a few seconds.
This happens because of low battery
voltage. It does not mean the system has
malfunctioned.
Sunroof open warning chime
(if equipped)
If the driver removes the ignition key
(smart key: turns off the engine) and
opens the driver-side door when the sun-
roof is not fully closed, the warning chime
will sound for approximately 7 seconds.
Close the sunroof securely when leaving
your vehicle.
Glow indicator
(Diesel engine)
The indicator illuminates when the igni-
tion switch is in the ON position. The
engine can be started after the preheat
indicator light goes off. The illuminating
time varies with the water temperature,
air temperature and battery condition.
✽NOTICE
If the engine does not start within 10
seconds after the preheating is complet-
ed, turn the ignition key once more to
the LOCK position for 10 seconds, and
then to the ON position, in order to pre-
heat again.
CAUTION
If the preheat indicator continues to
illuminate or blink on and off after
the engine has warmed up or whilst
driving, have the system checked
by a HYUNDAI authorised repairer
as soon as possible.
procarmanuals.com