roof HYUNDAI IX35 2016 Owners Manual
[x] Cancel search | Manufacturer: HYUNDAI, Model Year: 2016, Model line: IX35, Model: HYUNDAI IX35 2016Pages: 550, PDF Size: 11.23 MB
Page 11 of 550
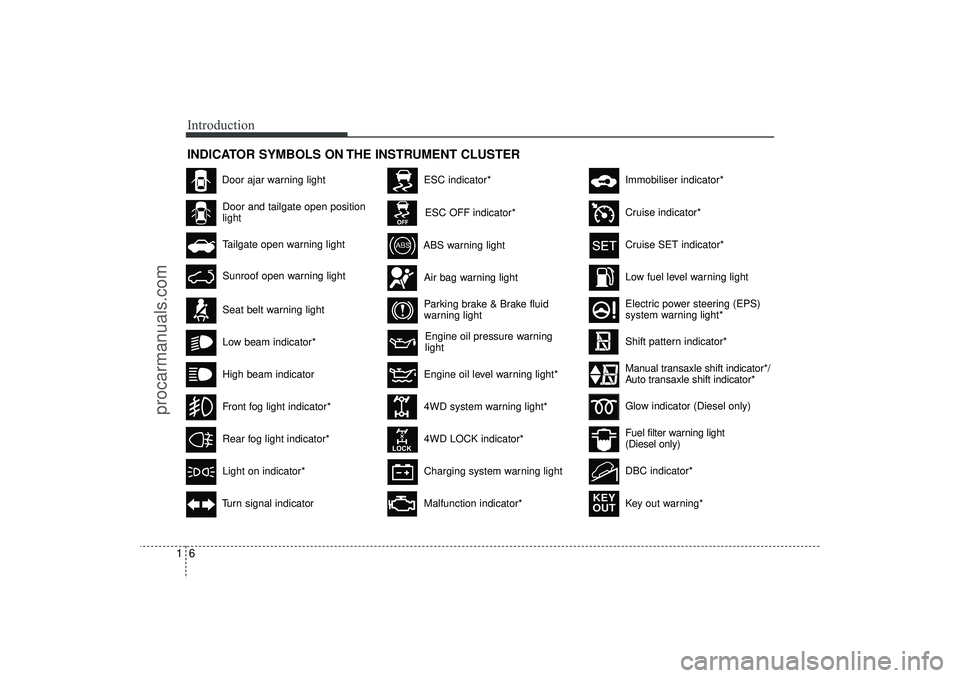
Introduction61INDICATOR SYMBOLS ON THE INSTRUMENT CLUSTER
Engine oil pressure warning
light
Seat belt warning lightDoor and tailgate open position
lightHigh beam indicatorLight on indicator*Turn signal indicator
ABS warning lightParking brake & Brake fluid
warning light4WD system warning light*
4WD LOCK indicator*Malfunction indicator*Air bag warning light
Cruise SET indicator*Low fuel level warning light
Charging system warning light
Door ajar warning light
Glow indicator (Diesel only)Fuel filter warning light
(Diesel only)
Cruise indicator*
ESC indicator*ESC OFF indicator*
Immobiliser indicator*Shift pattern indicator*
Front fog light indicator*Rear fog light indicator*Low beam indicator*
Electric power steering (EPS)
system warning light*
Key out warning*
KEY
OUT
DBC indicator*
Tailgate open warning lightSunroof open warning light
Engine oil level warning light*
Manual transaxle shift indicator*/
Auto transaxle shift indicator*
EL(FL) UK 1.QXP 12/16/2014 8:50 PM Page 6
procarmanuals.com
Page 64 of 550
345
Safety features of your vehicle
Noise and smokeWhen the air bags inflate, they make a
loud noise and they leave smoke and
powder in the air inside of the vehicle.
This is normal and is a result of the igni-
tion of the air bag inflator. After the air
bag inflates, you may feel substantial dis-
comfort in breathing due to the contact of
your chest with both the seat belt and the
air bag, as well as from breathing the
smoke and powder.Open your doors
and/or windows as soon as possible
after impact in order to reduce dis-
comfort and prevent prolonged expo-
sure to the smoke and powder.
Though smoke and powder are non-
toxic, it may cause irritation to the skin
(eyes, nose and throat, etc.). If this is the
case, wash and rinse with cold water
immediately and consult the doctor if the
symptom persists.
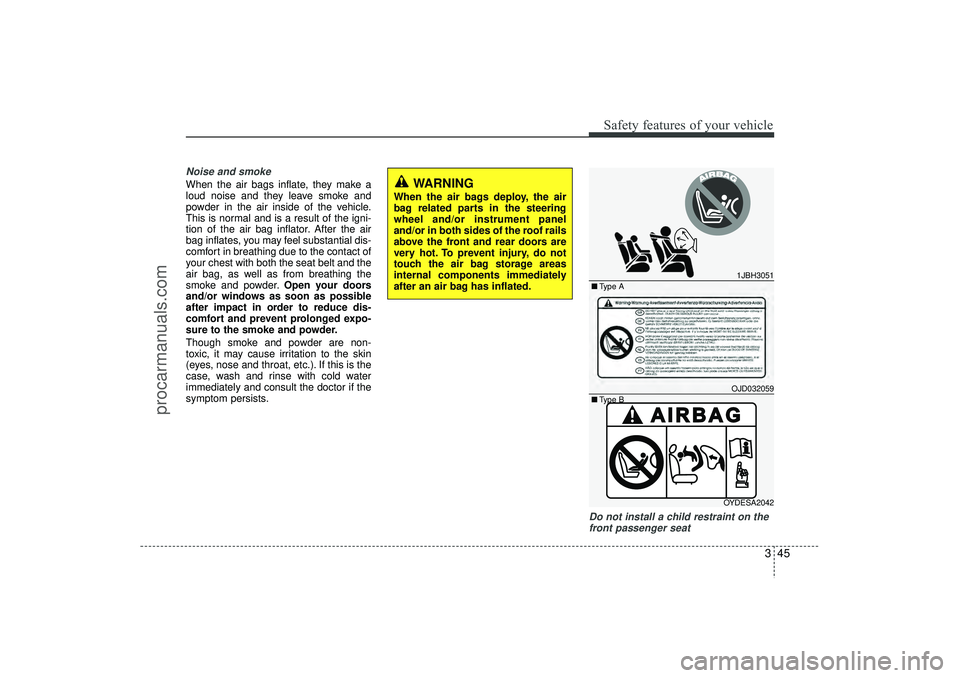
Do not install a child restraint on the front passenger seat
WARNING
When the air bags deploy, the air
bag related parts in the steering
wheel and/or instrument panel
and/or in both sides of the roof rails
above the front and rear doors are
very hot. To prevent injury, do not
touch the air bag storage areas
internal components immediately
after an air bag has inflated.
1JBH3051OJD032059OYDESA2042
■ Type A
■ Type B
EL(FL) UK 3.QXP 12/16/2014 8:56 PM Page 45
procarmanuals.com
Page 76 of 550
357
Safety features of your vehicle
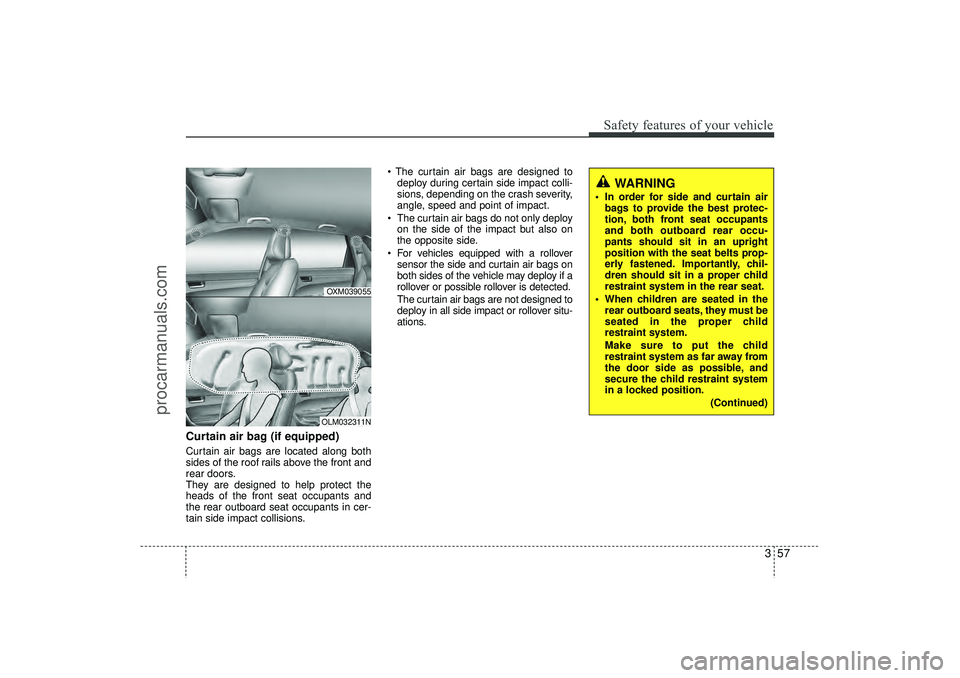
Curtain air bag (if equipped)Curtain air bags are located along both
sides of the roof rails above the front and
rear doors.
They are designed to help protect the
heads of the front seat occupants and
the rear outboard seat occupants in cer-
tain side impact collisions. The curtain air bags are designed to
deploy during certain side impact colli-
sions, depending on the crash severity,
angle, speed and point of impact.
The curtain air bags do not only deploy on the side of the impact but also on
the opposite side.
For vehicles equipped with a rollover sensor the side and curtain air bags on
both sides of the vehicle may deploy if a
rollover or possible rollover is detected.
The curtain air bags are not designed to
deploy in all side impact or rollover situ-
ations.
WARNING
In order for side and curtain airbags to provide the best protec-
tion, both front seat occupants
and both outboard rear occu-
pants should sit in an upright
position with the seat belts prop-
erly fastened. Importantly, chil-
dren should sit in a proper child
restraint system in the rear seat.
When children are seated in the rear outboard seats, they must be
seated in the proper child
restraint system.
Make sure to put the child
restraint system as far away from
the door side as possible, and
secure the child restraint system
in a locked position.
(Continued)
OXM039055OLM032311N
EL(FL) UK 3.QXP 12/16/2014 8:56 PM Page 57
procarmanuals.com
Page 86 of 550
Features of your vehicleKeys . . . . . . . . . . . . . . . . . . . . . . . . . . . . . . . . . . . . \
. . 4-4• Record your key number . . . . . . . . . . . . . . . . . . . . . . . 4-4
• Key operations . . . . . . . . . . . . . . . . . . . . . . . . . . . . . . . . 4-4
• Immobiliser system . . . . . . . . . . . . . . . . . . . . . . . . . . . . 4-5Remote keyless entry . . . . . . . . . . . . . . . . . . . . . . . 4-7• Remote keyless entry system operations . . . . . . . . . . . 4-7
• Transmitter precautions . . . . . . . . . . . . . . . . . . . . . . . . 4-8
• Battery replacement . . . . . . . . . . . . . . . . . . . . . . . . . . . 4-9Smart key . . . . . . . . . . . . . . . . . . . . . . . . . . . . . . . . 4-10• Smart key functions . . . . . . . . . . . . . . . . . . . . . . . . . . 4-10
• Smart key precautions . . . . . . . . . . . . . . . . . . . . . . . . 4-12
• Door lock/unlock in an emergency situation . . . . . . 4-12Theft-alarm system . . . . . . . . . . . . . . . . . . . . . . . . 4-13• Theft-alarm stage . . . . . . . . . . . . . . . . . . . . . . . . . . . . 4-14
• Disarmed stage. . . . . . . . . . . . . . . . . . . . . . . . . . . . . . . 4-14Door locks . . . . . . . . . . . . . . . . . . . . . . . . . . . . . . . 4-15• Operating door locks from outside the vehicle . . . . 4-15
• Operating door locks from inside the vehicle . . . . . . 4-16
• Deadlocks . . . . . . . . . . . . . . . . . . . . . . . . . . . . . . . . . . 4-17\
• Speed sensing door lock system . . . . . . . . . . . . . . . . 4-18
• Child-protector rear door lock. . . . . . . . . . . . . . . . . . 4-18Tailgate . . . . . . . . . . . . . . . . . . . . . . . . . . . . . . . . . . 4-19\
• Opening the tailgate . . . . . . . . . . . . . . . . . . . . . . . . . . 4-19
• Closing the tailgate . . . . . . . . . . . . . . . . . . . . . . . . . . . 4-19
Windows . . . . . . . . . . . . . . . . . . . . . . . . . . . . . . . . . 4-21• Power windows . . . . . . . . . . . . . . . . . . . . . . . . . . . . . . 4-22Bonnet . . . . . . . . . . . . . . . . . . . . . . . . . . . . . . . . . . . 4-\
25• Opening the bonnet . . . . . . . . . . . . . . . . . . . . . . . . . . 4-25
• Closing the bonnet . . . . . . . . . . . . . . . . . . . . . . . . . . . . 4-26Fuel filler lid . . . . . . . . . . . . . . . . . . . . . . . . . . . . . 4-27• Opening the fuel filler lid . . . . . . . . . . . . . . . . . . . . . . 4-27
• Closing the fuel filler lid . . . . . . . . . . . . . . . . . . . . . . . 4-27Panorama sunroof . . . . . . . . . . . . . . . . . . . . . . . . . 4-30• Sunroof open warning . . . . . . . . . . . . . . . . . . . . . . . . 4-30
• Tilting the sunroof . . . . . . . . . . . . . . . . . . . . . . . . . . . 4-32
• Resetting the sunroof . . . . . . . . . . . . . . . . . . . . . . . . . 4-33Steering wheel . . . . . . . . . . . . . . . . . . . . . . . . . . . . . 4-34• Electric power steering . . . . . . . . . . . . . . . . . . . . . . . 4-34
• Heated steering wheel . . . . . . . . . . . . . . . . . . . . . . . . 4-35
• Horn . . . . . . . . . . . . . . . . . . . . . . . . . . . . . . . . . . . . \
. . . 4-36
• Flex steering wheel . . . . . . . . . . . . . . . . . . . . . . . . . . . 4-37Mirrors . . . . . . . . . . . . . . . . . . . . . . . . . . . . . . . . . . 4-39\
• Inside rearview mirror . . . . . . . . . . . . . . . . . . . . . . . . 4-39
• Outside rearview mirror . . . . . . . . . . . . . . . . . . . . . . 4-43Instrument cluster . . . . . . . . . . . . . . . . . . . . . . . . . 4-46• Instrument panel illumination . . . . . . . . . . . . . . . . . 4-47
• LCD Display Control . . . . . . . . . . . . . . . . . . . . . . . . . 4-47
• Gauges . . . . . . . . . . . . . . . . . . . . . . . . . . . . . . . . . . . . \
. 4-48
• Transaxle Shift Indicator . . . . . . . . . . . . . . . . . . . . . . 4-52
4
EL(FL) UK 4A.QXP 2/9/2015 9:02 PM Page 1
procarmanuals.com
Page 88 of 550
Manual climate control system . . . . . . . . . . . . . 4-115• Heating and air conditioning . . . . . . . . . . . . . . . . . . 4-116
• System operation . . . . . . . . . . . . . . . . . . . . . . . . . . . . 4-120
• Climate control air filter . . . . . . . . . . . . . . . . . . . . . 4-122
• Checking the amount of air conditioner refrigerant and compressor lubricant . . . . . . . . . . . . . . . . . . . 4-123Automatic climate control system . . . . . . . . . . . 4-124• Automatic heating and air conditioning . . . . . . . . . 4-125
• Manual heating and air conditioning . . . . . . . . . . . 4-126Windscreen defrosting and defogging . . . . . . . 4-131• Manual climate control system . . . . . . . . . . . . . . . . 4-131
• Automatic climate control system . . . . . . . . . . . . . . 4-133Storage compartment . . . . . . . . . . . . . . . . . . . . . . 4-134• Centre console storage . . . . . . . . . . . . . . . . . . . . . . . 4-134
• Glove box . . . . . . . . . . . . . . . . . . . . . . . . . . . . . . . . . . 4-13\
4
• Cool box . . . . . . . . . . . . . . . . . . . . . . . . . . . . . . . . . . . 4-\
135
• Sunglass holder . . . . . . . . . . . . . . . . . . . . . . . . . . . . . 4-135Interior features . . . . . . . . . . . . . . . . . . . . . . . . . 4-137• Cigarette lighter . . . . . . . . . . . . . . . . . . . . . . . . . . . . 4-137
• Ashtray . . . . . . . . . . . . . . . . . . . . . . . . . . . . . . . . . . . 4-\
137
• Cup holder . . . . . . . . . . . . . . . . . . . . . . . . . . . . . . . . . 4-138
• Sunvisor . . . . . . . . . . . . . . . . . . . . . . . . . . . . . . . . . . . 4-\
138
• Power outlet . . . . . . . . . . . . . . . . . . . . . . . . . . . . . . . . 4-139
• Digital clock . . . . . . . . . . . . . . . . . . . . . . . . . . . . . . . 4-140
• Aux, USB and iPod
®. . . . . . . . . . . . . . . . . . . . . . . . . 4-140 • Floor mat anchor(s) . . . . . . . . . . . . . . . . . . . . . . . . . 4-141
• Luggage net (holder) . . . . . . . . . . . . . . . . . . . . . . . . 4-141
• Cargo security screen . . . . . . . . . . . . . . . . . . . . . . . 4-142
Exterior features . . . . . . . . . . . . . . . . . . . . . . . . . . 4-144• Roof rack . . . . . . . . . . . . . . . . . . . . . . . . . . . . . . . . . . 4-14\
4Audio system . . . . . . . . . . . . . . . . . . . . . . . . . . . . . 4-145
4
EL(FL) UK 4A.QXP 2/9/2015 9:02 PM Page 3
procarmanuals.com
Page 107 of 550
Features of your vehicle22
4Power windowsThe ignition switch must be in the ON
position for power windows to operate.
Each door has a power window switch
that controls the door’s window. The driv-
er has a power window lock switch which
can block the operation of rear (or front)
passenger windows.
The power windows can be operated for
approximately 30 seconds after the igni-
tion key is removed or turned to the ACC
or LOCK position. However, if the front
doors are opened, the power windows
cannot be operated even within the 30
seconds period. The driver’s door has a
master power window switch that con-
trols all the windows in the vehicle.✽ ✽
NOTICEWhilst driving with the rear windows
down or with the sunroof (if equipped)
in an open (or partially open position),
your vehicle may demonstrate a wind
buffeting or pulsation noise. This
noise is a normal occurrence and can be
reduced or eliminated by taking the fol-
lowing actions. If the noise occurs with
one or both of the rear windows down,
partially lower both front windows
approximately one inch. If you experi-
ence the noise with the sunroof open,
slightly reduce the size of the sunroof
opening.
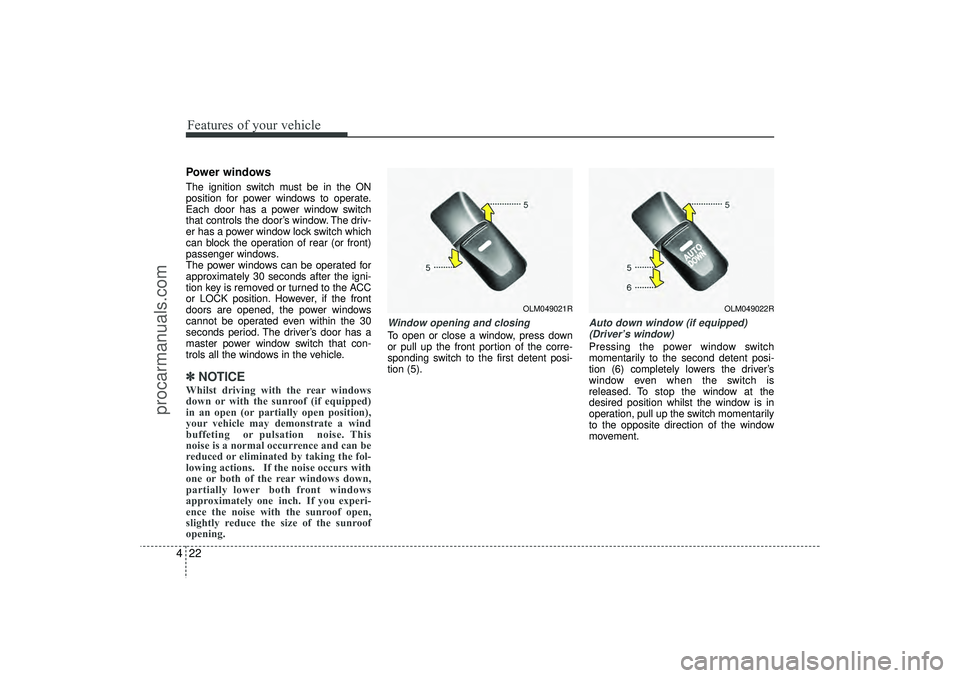
Window opening and closingTo open or close a window, press down
or pull up the front portion of the corre-
sponding switch to the first detent posi-
tion (5).
Auto down window (if equipped)
(Driver’s window)Pressing the power window switch
momentarily to the second detent posi-
tion (6) completely lowers the driver’s
window even when the switch is
released. To stop the window at the
desired position whilst the window is in
operation, pull up the switch momentarily
to the opposite direction of the window
movement.
OLM049021R
OLM049022R
EL(FL) UK 4A.QXP 2/9/2015 9:03 PM Page 22
procarmanuals.com
Page 115 of 550
Features of your vehicle30
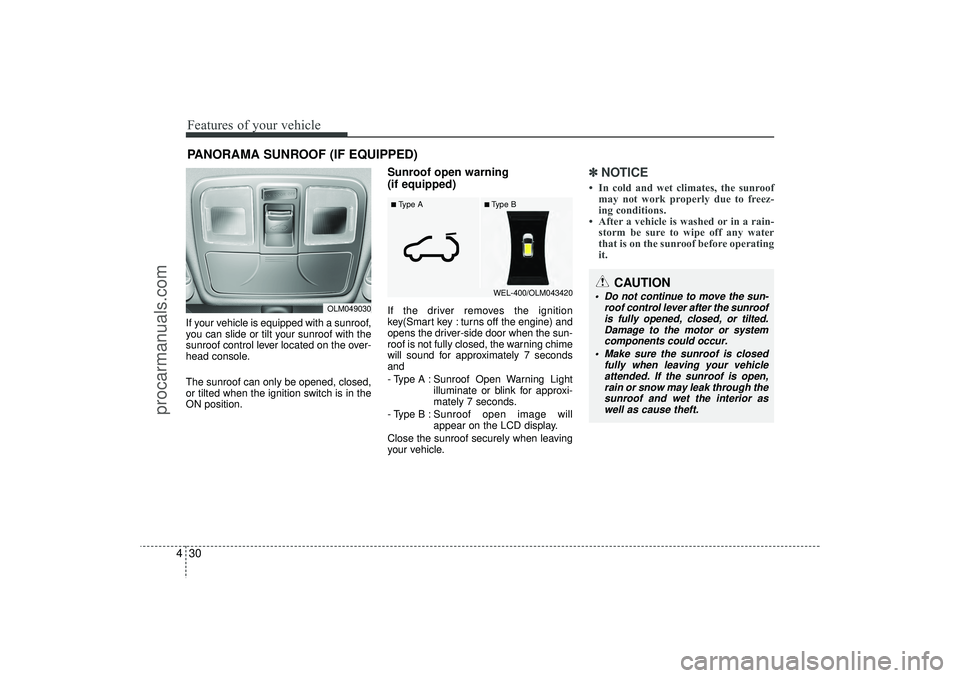
4If your vehicle is equipped with a sunroof,
you can slide or tilt your sunroof with the
sunroof control lever located on the over-
head console.
The sunroof can only be opened, closed,
or tilted when the ignition switch is in the
ON position.
Sunroof open warning
(if equipped)If the driver removes the ignition
key(Smart key : turns off the engine) and
opens the driver-side door when the sun-
roof is not fully closed, the warning chime
will sound for approximately 7 seconds
and
- Type A : Sunroof Open Warning Light
illuminate or blink for approxi-
mately 7 seconds.
- Type B : Sunroof open image will
appear on the LCD display.
Close the sunroof securely when leaving
your vehicle.
✽ ✽ NOTICE• In cold and wet climates, the sunroof
may not work properly due to freez-
ing conditions.
• After a vehicle is washed or in a rain- storm be sure to wipe off any water
that is on the sunroof before operating
it.
PANORAMA SUNROOF (IF EQUIPPED)
OLM049030
CAUTION
Do not continue to move the sun-
roof control lever after the sunroofis fully opened, closed, or tilted.Damage to the motor or system components could occur.
Make sure the sunroof is closed fully when leaving your vehicleattended. If the sunroof is open,rain or snow may leak through the sunroof and wet the interior aswell as cause theft.
■Type B
■Type A
WEL-400/OLM043420
EL(FL) UK 4A.QXP 2/9/2015 9:03 PM Page 30
procarmanuals.com
Page 116 of 550
431
Features of your vehicle
✽
✽NOTICEThe sunroof cannot tilt when it is in the
slide position but can be slid whilst in a
tilt position.
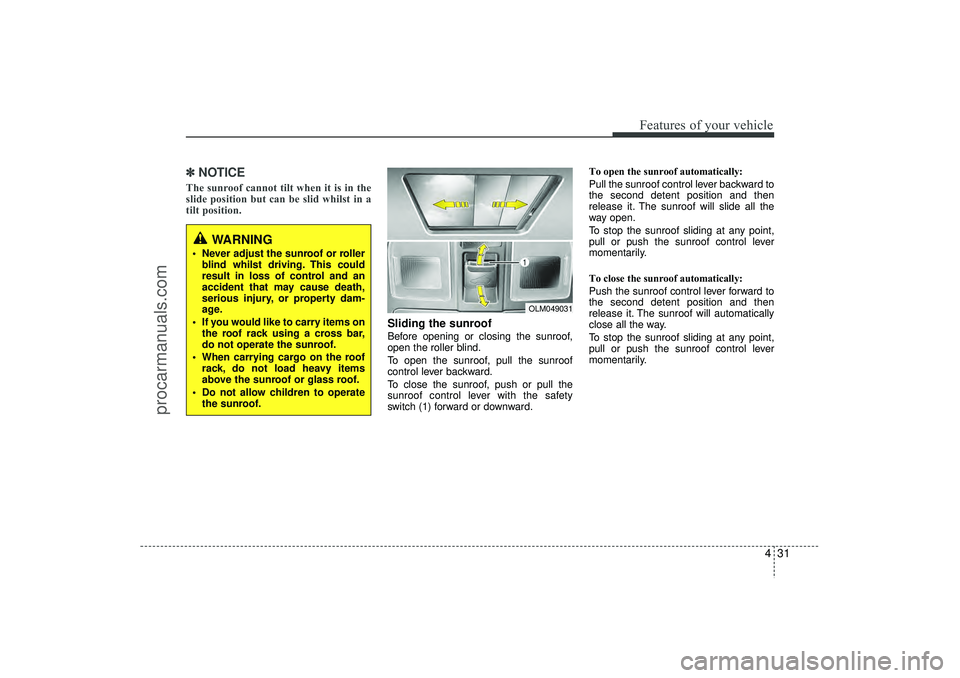
Sliding the sunroof Before opening or closing the sunroof,
open the roller blind.
To open the sunroof, pull the sunroof
control lever backward.
To close the sunroof, push or pull the
sunroof control lever with the safety
switch (1) forward or downward. To open the sunroof automatically:
Pull the sunroof control lever backward to
the second detent position and then
release it. The sunroof will slide all the
way open.
To stop the sunroof sliding at any point,
pull or push the sunroof control lever
momentarily.
To close the sunroof automatically:
Push the sunroof control lever forward to
the second detent position and then
release it. The sunroof will automatically
close all the way.
To stop the sunroof sliding at any point,
pull or push the sunroof control lever
momentarily.
OLM049031
WARNING
Never adjust the sunroof or roller
blind whilst driving. This could
result in loss of control and an
accident that may cause death,
serious injury, or property dam-
age.
If you would like to carry items on the roof rack using a cross bar,
do not operate the sunroof.
When carrying cargo on the roof rack, do not load heavy items
above the sunroof or glass roof.
Do not allow children to operate the sunroof.
EL(FL) UK 4A.QXP 2/9/2015 9:04 PM Page 31
procarmanuals.com
Page 117 of 550
Features of your vehicle32
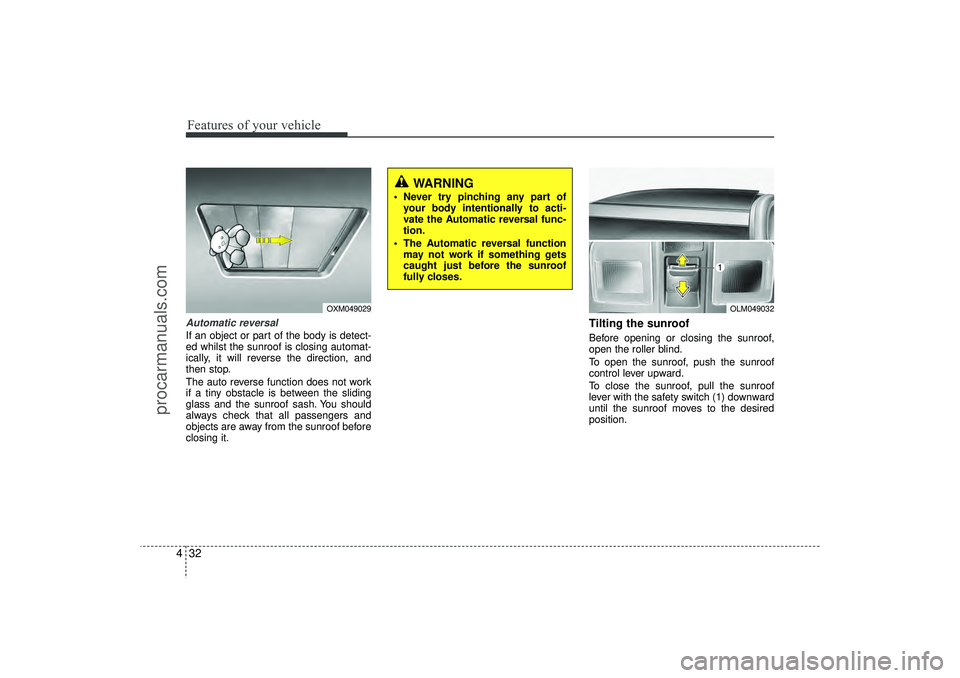
4Automatic reversalIf an object or part of the body is detect-
ed whilst the sunroof is closing automat-
ically, it will reverse the direction, and
then stop.
The auto reverse function does not work
if a tiny obstacle is between the sliding
glass and the sunroof sash. You should
always check that all passengers and
objects are away from the sunroof before
closing it.
Tilting the sunroof Before opening or closing the sunroof,
open the roller blind.
To open the sunroof, push the sunroof
control lever upward.
To close the sunroof, pull the sunroof
lever with the safety switch (1) downward
until the sunroof moves to the desired
position.
OLM049032
WARNING
Never try pinching any part of
your body intentionally to acti-
vate the Automatic reversal func-
tion.
The Automatic reversal function may not work if something gets
caught just before the sunroof
fully closes.
OXM049029
EL(FL) UK 4A.QXP 2/9/2015 9:04 PM Page 32
procarmanuals.com
Page 118 of 550
433
Features of your vehicle
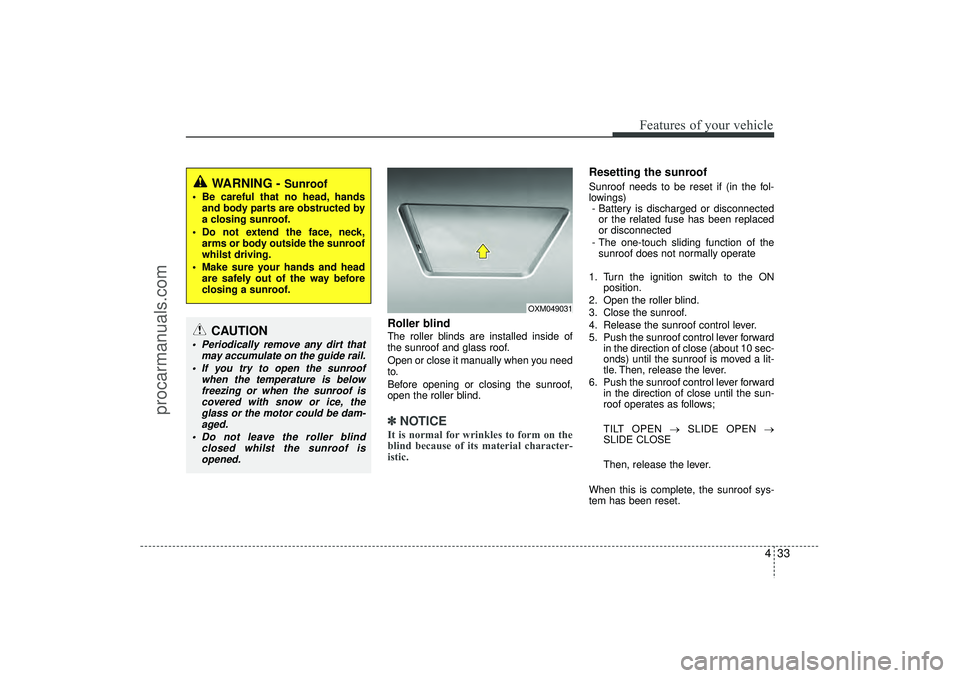
Roller blind The roller blinds are installed inside of
the sunroof and glass roof.
Open or close it manually when you need
to.
Before opening or closing the sunroof,
open the roller blind.✽ ✽NOTICEIt is normal for wrinkles to form on the
blind because of its material character-
istic.
Resetting the sunroofSunroof needs to be reset if (in the fol-
lowings)
- Battery is discharged or disconnected or the related fuse has been replaced
or disconnected
- The one-touch sliding function of the sunroof does not normally operate
1. Turn the ignition switch to the ON position.
2. Open the roller blind.
3. Close the sunroof.
4. Release the sunroof control lever.
5. Push the sunroof control lever forward in the direction of close (about 10 sec-
onds) until the sunroof is moved a lit-
tle. Then, release the lever.
6. Push the sunroof control lever forward in the direction of close until the sun-
roof operates as follows;
TILT OPEN → SLIDE OPEN →
SLIDE CLOSE
Then, release the lever.
When this is complete, the sunroof sys-
tem has been reset.
OXM049031
WARNING -
Sunroof
Be careful that no head, hands and body parts are obstructed by
a closing sunroof.
Do not extend the face, neck, arms or body outside the sunroof
whilst driving.
Make sure your hands and head are safely out of the way before
closing a sunroof.
CAUTION
Periodically remove any dirt that may accumulate on the guide rail.
If you try to open the sunroof when the temperature is belowfreezing or when the sunroof iscovered with snow or ice, the glass or the motor could be dam-aged.
Do not leave the roller blind closed whilst the sunroof isopened.
EL(FL) UK 4A.QXP 2/9/2015 9:04 PM Page 33
procarmanuals.com