fuse Hyundai Kona 2018 Owner's Manual - RHD (UK, Australia)
[x] Cancel search | Manufacturer: HYUNDAI, Model Year: 2018, Model line: Kona, Model: Hyundai Kona 2018Pages: 497, PDF Size: 11.7 MB
Page 16 of 497
1-6
Your vehicle at a glance
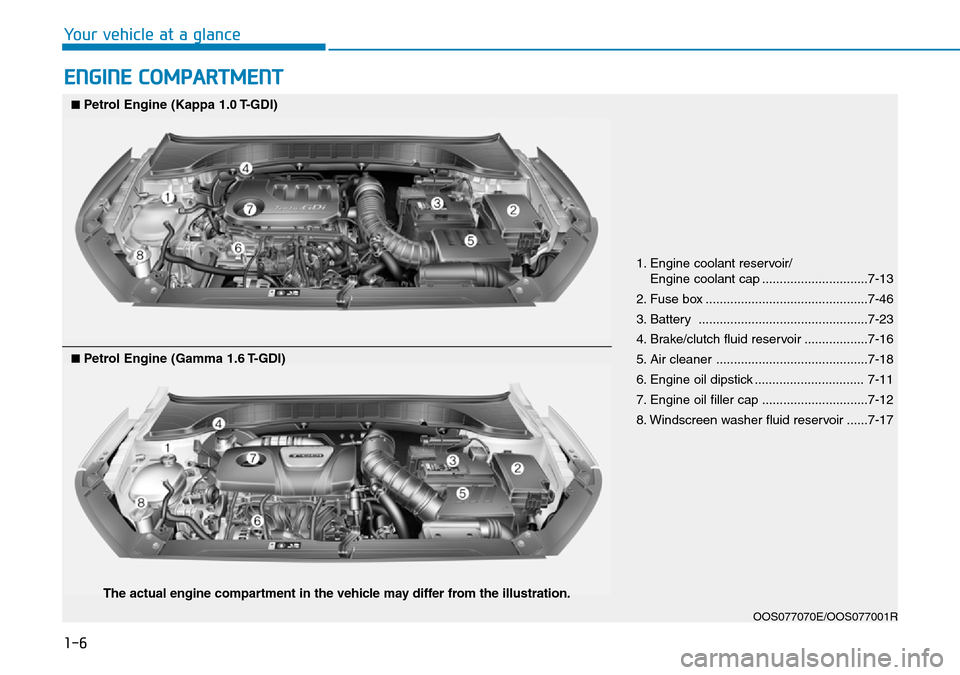
ENGINE COMPARTMENT
1. Engine coolant reservoir/Engine coolant cap ..............................7-13
2. Fuse box ..............................................7-46
3. Battery ................................................7-23
4. Brake/clutch fluid reservoir ..................7-16
5. Air cleaner ...........................................7-18
6. Engine oil dipstick ............................... 7-11
7. Engine oil filler cap ..............................7-12
8. Windscreen washer fluid reservoir ......7-17
OOS077070E/OOS077001R
■Petrol Engine (Kappa 1.0 T-GDI)
■Petrol Engine (Gamma 1.6 T-GDI)
The actual engine compartment in the vehicle may differ from the illustration.
Page 104 of 497
3-26
Convenient features of your vehicle
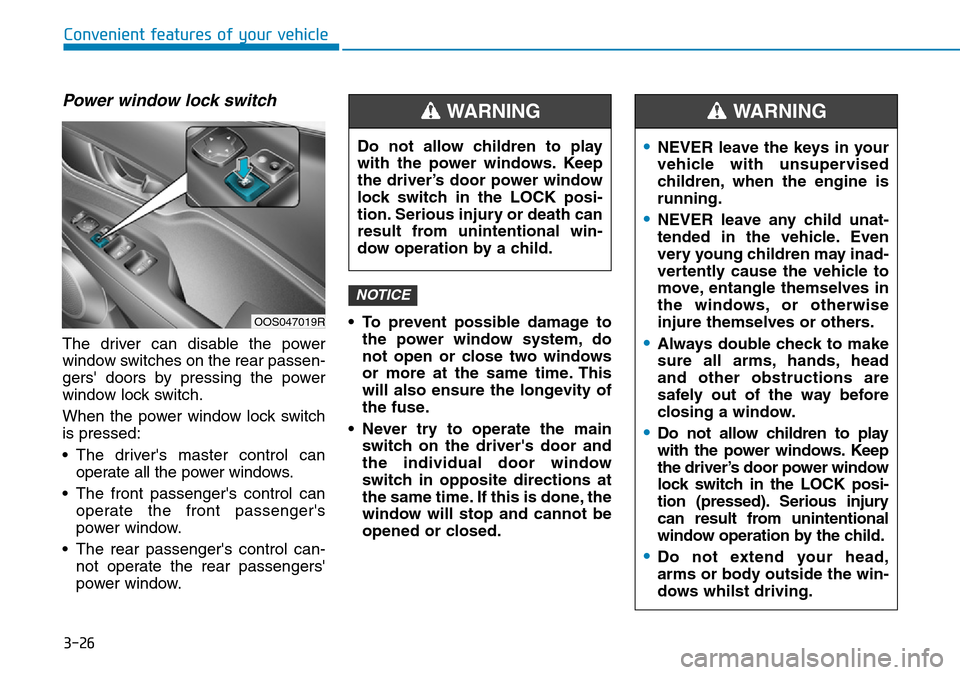
Power window lock switch
The driver can disable the power
window switches on the rear passen-
gers' doors by pressing the power
window lock switch.
When the power window lock switch
is pressed:
• The driver's master control canoperate all the power windows.
• The front passenger's control can operate the front passenger's
power window.
• The rear passenger's control can- not operate the rear passengers'
power window. • To prevent possible damage to
the power window system, do
not open or close two windows
or more at the same time. This
will also ensure the longevity of
the fuse.
• Never try to operate the main switch on the driver's door and
the individual door window
switch in opposite directions at
the same time. If this is done, the
window will stop and cannot be
opened or closed.
NOTICE
Do not allow children to play
with the power windows. Keep
the driver’s door power window
lock switch in the LOCK posi-
tion. Serious injury or death can
result from unintentional win-
dow operation by a child.
WARNING
OOS047019R
•NEVER leave the keys in your
vehicle with unsupervised
children, when the engine is
running.
•NEVER leave any child unat-
tended in the vehicle. Even
very young children may inad-
vertently cause the vehicle to
move, entangle themselves in
the windows, or otherwise
injure themselves or others.
•Always double check to make
sure all arms, hands, head
and other obstructions are
safely out of the way before
closing a window.
•Do not allow children to play
with the power windows. Keep
the driver’s door power window
lock switch in the LOCK posi-
tion (pressed). Serious injury
can result from unintentional
window operation by the child.
•Do not extend your head,
arms or body outside the win-
dows whilst driving.
WARNING
Page 108 of 497
3-30
Convenient features of your vehicle
Resetting the sunroof
The sunroof may need to be reset if
the following conditions occur:
- The battery is discharged or dis- connected or the sunroof fuse has
been replaced or disconnected
- The sunroof control lever is not operating correctly
To reset the sunroof, perform the fol-
lowing steps:
1. Place the ignition switch to the ON position or start the engine. It is
recommended to reset the sunroof
whilst the engine is running.
2. Push the control lever forward. The sunroof will close completely or tilt
depending on the condition of the
sunroof.
3. Release the control lever until the sunroof does not move.
4. Push the control lever forward about 10 seconds.
- When the sunroof is in the close position :
The glass will tilt and slightly move up and down. - When the sunroof is in the tilt
position:
The glass will slightly move up and down.
Do not release the lever until the
operation is completed.
If you release the lever during opera-
tion, try again from step 2.
5. Within 3 seconds, push the control lever forward until the sunroof
operates as follows:
Tilt down → Slide Open → Slide
Close.
Do not release the lever until the
operation is completed.
If you release the lever during opera-
tion, try again from step 2.
6. Release the sunroof control lever after all operation has completed.
(The sunroof system has been
reset.)
Information
• If the sunroof does not reset whenthe vehicle battery is disconnected
or discharged, or related fuse is
blown, the sunroof may not operate
normally.
• For more detailed information, we recommend that you contact a
HYUNDAI authorised repairer.
Sunroof open warning
(if equipped)
• If the driver turns off the enginewhen the sunroof is not fully
closed, the warning chime will
sound for approximately 3 seconds
and sunroof open warning will
appear on the LCD display.
• If the driver turns off the engine and opens the door when the sun-
roof is not fully closed, the open
sunroof warning will appear on the
LCD display until the door is closed
or the sunroof is fully closed.
Close the sunroof securely when
leaving your vehicle.
i
Page 137 of 497
3-59
Convenient features of your vehicle
3
Press clutch pedal to startengine (for smart key systemand manual transmission)
This warning message is displayed if
the Engine Start/Stop button is in the
ACC position twice by pressing the
button repeatedly without depressing
the clutch pedal.
Depress the clutch pedal to start the
engine.
Key not in vehicle(for smart key system)
This warning message is displayed if
the smart key is not in the vehicle
when you open or close door in the
ACC position or ON position. The
warning sound is heard when you
close door without a smart key in
vehicle.
When attempting to start the vehicle
always have the smart key with you.
Key not detected (for smart key system)
This warning message is displayed if
the smart key is not detected when you
press the Engine Start/Stop button.
Press START button with key(for smart key system)
This warning message is displayed if
you press the Engine Start/Stop but-
ton whilst the warning message “Key
not detected” is displayed.
At this time, the immobiliser indicator
light blinks.
Press START button again (for smart key system)
This message is displayed if you
were unable to start the vehicle when
the Engine Start/Stop button was
pressed.
If this occurs, attempt to start the
engine by pressing the Engine
Start/Stop button again.
If the warning message appears
each time you press the Engine
Start/Stop button, we recommend
that you have your vehicle inspected
by a HYUNDAI authorised repairer.
Check BRAKE SWITCH fuse (for smart key system and dualclutch transmission)
This warning message is displayed if
the brake switch fuse is disconnected.
You need to replace the fuse with a
new one. If that is not possible, you
can start the engine by pressing the
Engine Start/Stop button for 10 sec-
onds in the ACC position.
Shift to P or N to start engine (for smart key system and dualclutch transmission)
This warning message is displayed if
you try to start the engine with the
shift lever not in the P (Park) or N
(Neutral) position.
Information
You can start the engine with the shift
lever in the N (Neutral) position. But,
for your safety, we recommend that
you start the engine with the shift
lever in the P (Park) position.
i
Page 139 of 497
3-61
Convenient features of your vehicle
3
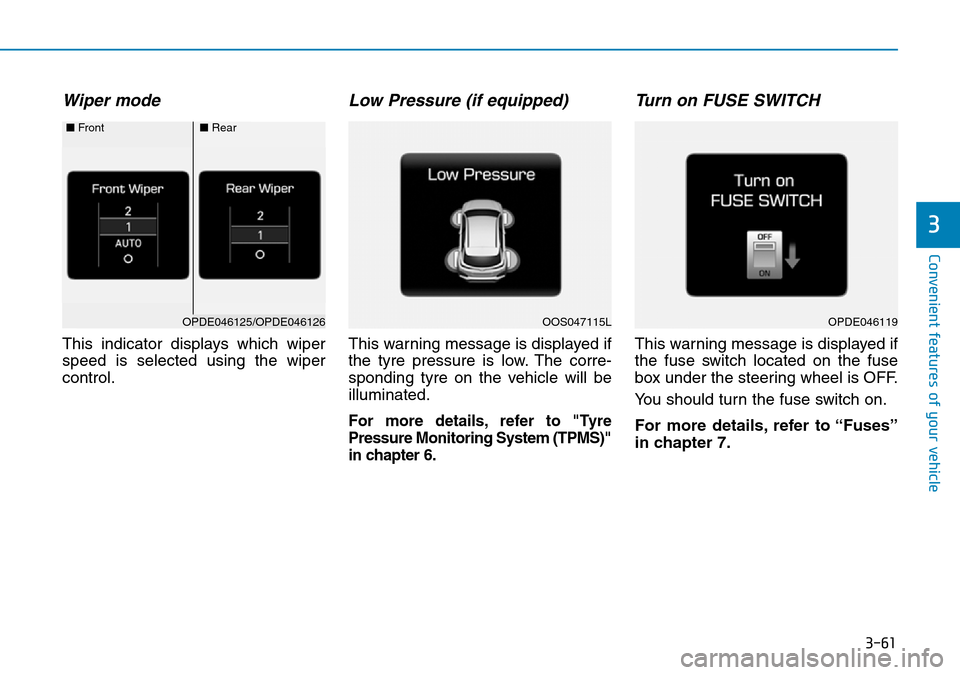
Wiper mode
This indicator displays which wiper
speed is selected using the wiper
control.
Low Pressure (if equipped)
This warning message is displayed if
the tyre pressure is low. The corre-
sponding tyre on the vehicle will be
illuminated.
For more details, refer to "Tyre
Pressure Monitoring System (TPMS)"
in chapter 6.
Turn on FUSE SWITCH
This warning message is displayed if
the fuse switch located on the fuse
box under the steering wheel is OFF.
You should turn the fuse switch on.
For more details, refer to “Fuses”
in chapter 7.
OPDE046119OOS047115LOPDE046125/OPDE046126
■Front■Rear
Page 149 of 497
3-71
Convenient features of your vehicle
3
7. Service interval
• Service interval
To activate or deactivate the service
interval function.
• Adjust interval
If the service interval menu is acti-
vated, you may adjust the time and
distance.
Information
To use the service interval menu, con-
sult a HYUNDAI authorised repairer.
If the service interval is activated and
the time and distance is adjusted,
messages are displayed in the fol-
lowing situations each time the vehi-
cle is turned on.
- Service in: Displayed to inform the driver theremaining mileage and days to
service.
- Service required : Displayed when the mileage anddays to service has been reached
or passed.
Information
If any of the following conditions
occur, the mileage and number of days
to service may be incorrect.
- The battery cable is disconnected.
- The fuse switch is turned off.
- The battery is discharged.
8. Other features
• Fuel economy auto reset
- Off: The average fuel economy will not reset automatically whenever
refuelling.
- After ignition: When the engine has been OFF for 4 hours or longer the
average fuel economy will reset
automatically.
- After refuelling: The average fuel economy will reset automatically
after adding 6 litres (1.3 lmp. gal.)
of fuel or more and after driving
speed exceeds 1 mph (1 km/h).
For more information, refer to
"Trip Computer" in this chapter. • Fuel economy unit
To select the fuel economy unit.
(UK gallon, US gallon)
• Temperature unit
To select the temperature unit.
(°C,°F)
• Tyre pressure unit
To select the tyre pressure unit.
(psi, kPa, bar)
9. Language
Choose the language.
10. Reset
You can reset the menus in the User
Settings Mode. All menus in the User
Settings Mode are initialised, except
language and service interval.
i
i
Page 211 of 497
3-133
Convenient features of your vehicle
3
• Some electronic devices cancause electronic interference
when plugged into a vehicle’s
power outlet. These devices may
cause excessive audio static
and malfunctions in other elec-
tronic systems or devices used
in your vehicle.
• Push the plug in as far as it will go. If good contact is not made,
the plug may overheat and the
fuse may open.
• Plug in battery equipped electrical/ electronic devices with reverse
current protection. The current
from the battery may flow into the
vehicle's electrical/electronic sys-
tem and cause system malfunc-
tion.Wireless mobile phone charg-
ing system (if equipped)
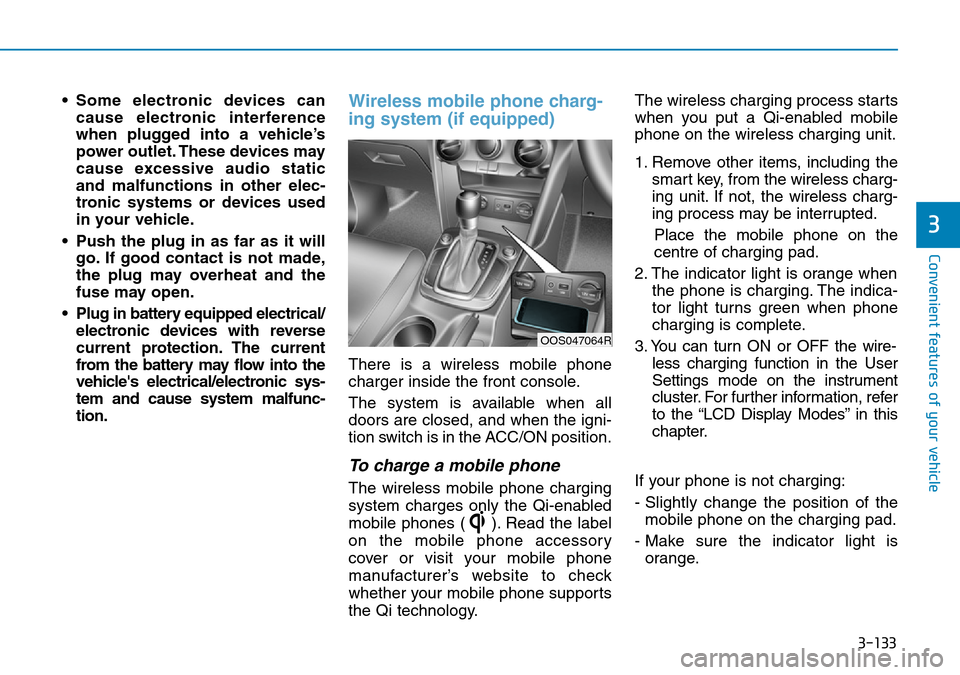
There is a wireless mobile phone
charger inside the front console.
The system is available when all
doors are closed, and when the igni-
tion switch is in the ACC/ON position.
To charge a mobile phone
The wireless mobile phone charging
system charges only the Qi-enabled
mobile phones ( ). Read the label
on the mobile phone accessory
cover or visit your mobile phone
manufacturer’s website to check
whether your mobile phone supports
the Qi technology. The wireless charging process starts
when you put a Qi-enabled mobile
phone on the wireless charging unit.
1. Remove other items, including the
smart key, from the wireless charg-
ing unit. If not, the wireless charg-
ing process may be interrupted.
Place the mobile phone on the
centre of charging pad.
2. The indicator light is orange when the phone is charging. The indica-
tor light turns green when phone
charging is complete.
3. You can turn ON or OFF the wire- less charging function in the User
Settings mode on the instrument
cluster. For further information, refer
to the “LCD Display Modes” in this
chapter.
If your phone is not charging:
- Slightly change the position of the mobile phone on the charging pad.
- Make sure the indicator light is orange.
OOS047064R
Page 264 of 497
5-15
Driving your vehicle
5
Information
• Do not wait for the engine to warmup whilst the vehicle remains sta-
tionary.
Start driving at moderate engine
speeds. Steep accelerating and
decelerating should be avoided.
• Always start the vehicle with your foot on the brake pedal. Do not
depress the accelerator whilst start-
ing the vehicle. Do not race the
engine whilst warming it up.
To prevent damage to the vehicle:
• If the engine stalls whilst you are in motion, do not attempt to
move the shift lever to the P
(Park) position.
If traffic and road conditions
permit, you may put the shift
lever in the N (Neutral) position
whilst the vehicle is still moving
and press the Engine Start/Stop
button in an attempt to restart
the engine.
• Do not push or tow your vehicle to start the engine. To prevent damage to the vehicle:
Do not press the Engine Start/
Stop button for more than 10 sec-
onds except when the stop lamp
fuse is blown.
When the stop lamp fuse is blown,
you can't start the engine normal-
ly. Replace the fuse with a new
one. If you are not able to replace
the fuse, you can start the engine
by pressing and holding the
Engine Start/Stop button for 10
seconds with the Engine Start/
Stop button in the ACC position.
For your safety always depress
the brake and/or clutch pedal
before starting the engine.
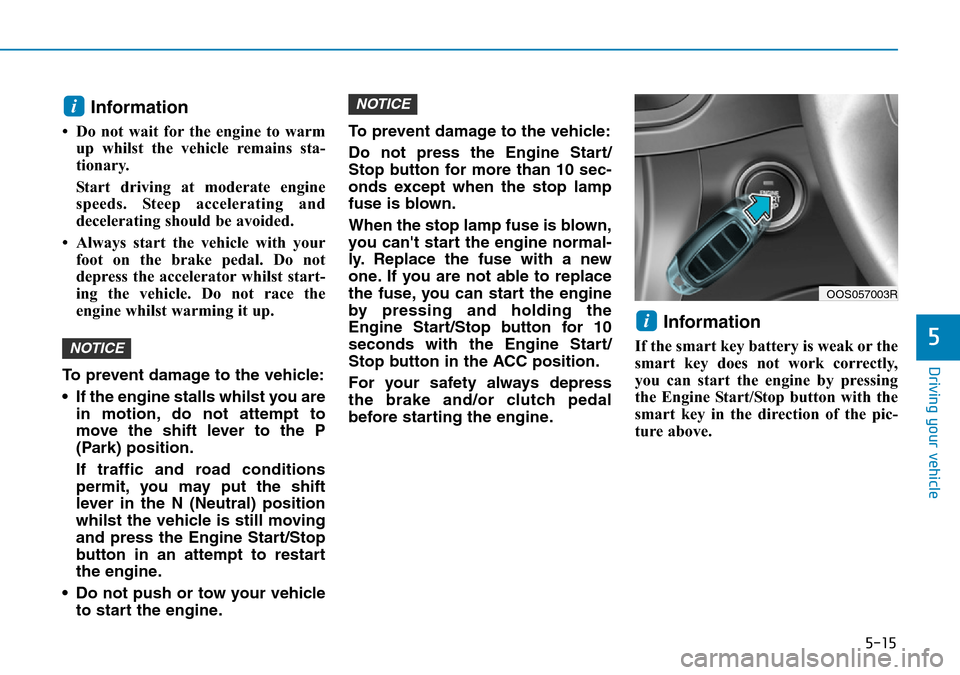
Information
If the smart key battery is weak or the
smart key does not work correctly,
you can start the engine by pressing
the Engine Start/Stop button with the
smart key in the direction of the pic-
ture above.
i
NOTICE
NOTICE
i
OOS057003R
Page 409 of 497
7
Fuses ......................................................................7-\
37
Instrument panel fuse replacement ...........................7-38
Engine compartment panel fuse replacement.........7-39
Fuse/Relay panel description ......................................7-41
Light bulbs.............................................................7-54
Headlamp, Low beam assist - Static,
position lamp, turn signal lamp and
daytime running light bulb replacement ...................7-55
Front fog lamp .................................................................7-59
Headlamp and front fog lamp aiming ........................7-59
Side repeater lamp replacement .................................7-64
Rear combination lamp bulb replacement ................7-64
High mounted stop lamp replacement .......................7-66
License plate light bulb replacement .........................7-66
Interior light bulb replacement ....................................7-67
Appearance care ..................................................7-68
Exterior care ....................................................................7-68\
Interior care......................................................................7-\
73
Emission control system .....................................7-75
Crankcase emission control system ...........................7-76
Evaporative emission control system.........................7-76
Exhaust emission control system ...............................7-76
Page 410 of 497
7-3
7
Maintenance
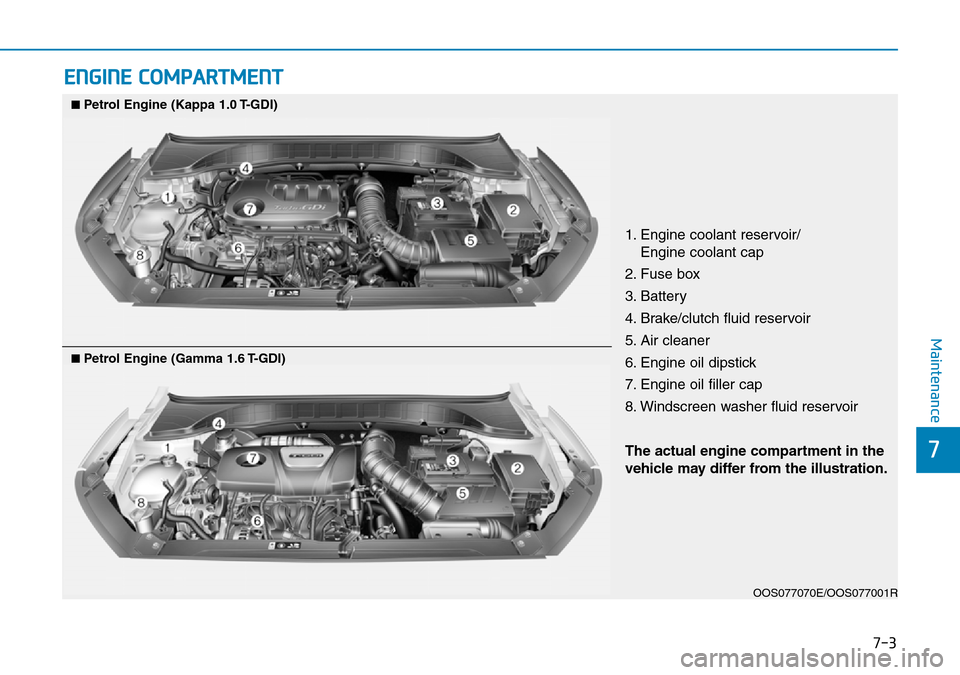
ENGINE COMPARTMENT
1. Engine coolant reservoir/Engine coolant cap
2. Fuse box
3. Battery
4. Brake/clutch fluid reservoir
5. Air cleaner
6. Engine oil dipstick
7. Engine oil filler cap
8. Windscreen washer fluid reservoir
The actual engine compartment in the
vehicle may differ from the illustration.
OOS077070E/OOS077001R
■Petrol Engine (Kappa 1.0 T-GDI)
■Petrol Engine (Gamma 1.6 T-GDI)