check oil Hyundai Kona 2019 - RHD (UK, Australia) User Guide
[x] Cancel search | Manufacturer: HYUNDAI, Model Year: 2019, Model line: Kona, Model: Hyundai Kona 2019Pages: 526, PDF Size: 15.68 MB
Page 426 of 526
7-9
7
Maintenance
E
EX
X P
PL
LA
A N
N A
AT
TI
IO
O N
N
O
O F
F
S
S C
C H
H E
ED
D U
U L
LE
E D
D
M
M A
AI
IN
N T
TE
EN
N A
AN
N C
CE
E
I
IT
T E
EM
M S
S
Engine oil and filter
The engine oil and filter should be
changed at the intervals specified in
the maintenance schedule. If the
vehicle is being driven in severe con-
ditions, more frequent oil and filter
changes are required.
Drive belts
Inspect all drive belts for evidence of
cuts, cracks, excessive wear or oil
saturation and replace if necessary.
Drive belts should be checked peri-
odically for proper tension and
adjusted as necessary.
Fuel filter (cartridge)
A clogged-up fuel filter may limit the
vehicle driving speed, damage the
emission system, and cause the
hard starting. When a considerable
amount of foreign substances are
accumulated in the fuel tank, the fuel
filter should be replaced.
Upon installing a new fuel filter, oper-
ate the diesel engine for several min-
utes, and check the connections for
any leakages. We recommend you to
have the fuel filter replaced by a
HYUNDAI authorised repairer.
Fuel lines, fuel hoses and con-
nections
Check the fuel lines, fuel hoses and
connections for leakage and dam-
age. We recommend that the fuel
lines, fuel hoses and connections be
replaced by a HYUNDAI authorised
repairer.
Fuel filter
This HYUNDAI petrol vehicle is
equipped with a lifetime fuel filter that
is integrated with the fuel tank.
Regular maintenance or replace-
ment is not needed but depends on
fuel quality. If there are some impor-
tant safety matters like fuel flow
restriction, surging, loss of power,
hard starting problem etc, fuel filter
inspection or replace is needed. We
recommend that the fuel filter be
Inspected or replaced by a
HYUNDAI authorised repairer.
Vapour hose and fuel filler cap
The vapour hose and fuel filler cap
should be inspected at those inter-
vals specified in the maintenance
schedule. Make sure that a new
vapour hose or fuel filler cap is cor-
rectly replaced.
When you are inspecting the belt,
place the ignition switch to the
LOCK/OFF or ACC position or
place the Engin Start/Stop button
to the OFF position.CAUTION
Page 429 of 526
7-12
Maintenance
E
EN
N G
GI
IN
N E
E
O
O I
IL
L
Checking the engine oil level
(Petrol engine)
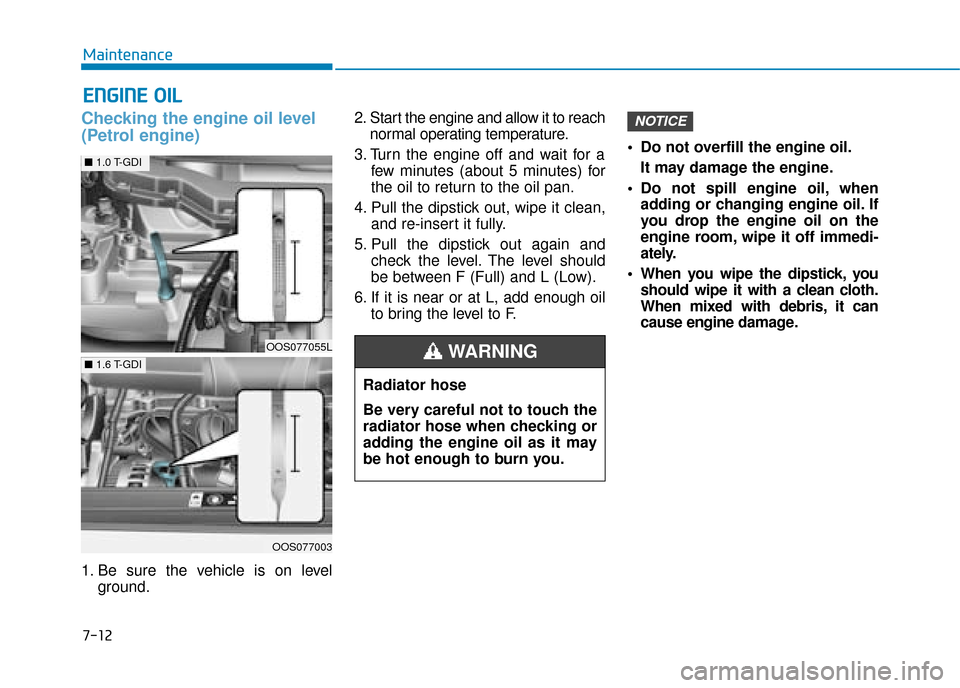
1. Be sure the vehicle is on level
ground. 2. Start the engine and allow it to reach
normal operating temperature.
3. Turn the engine off and wait for a few minutes (about 5 minutes) for
the oil to return to the oil pan.
4. Pull the dipstick out, wipe it clean, and re-insert it fully.
5. Pull the dipstick out again and check the level. The level should
be between F (Full) and L (Low).
6. If it is near or at L, add enough oil to bring the level to F. Do not overfill the engine oil.
It may damage the engine.
Do not spill engine oil, when adding or changing engine oil. If
you drop the engine oil on the
engine room, wipe it off immedi-
ately.
When you wipe the dipstick, you should wipe it with a clean cloth.
When mixed with debris, it can
cause engine damage.
NOTICE
Radiator hose
Be very careful not to touch the
radiator hose when checking or
adding the engine oil as it may
be hot enough to burn you.
WARNING OOS077055L
OOS077003
■ 1.6 T-GDI
■1.0 T-GDI
Page 430 of 526
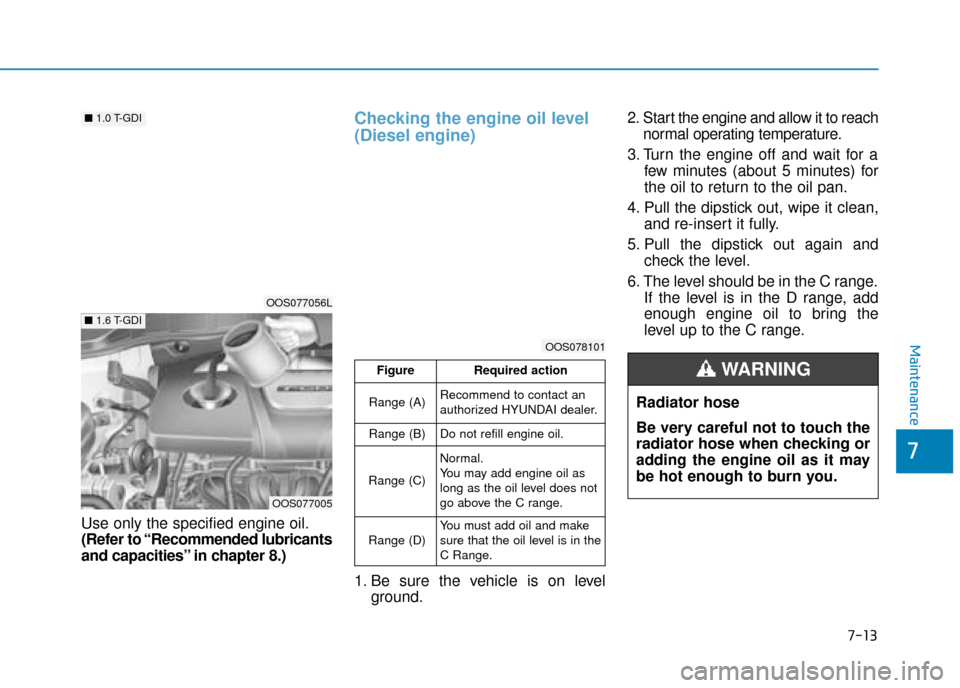
Use only the specified engine oil.
(Refer to “Recommended lubricants
and capacities” in chapter 8.)
Checking the engine oil level
(Diesel engine)
1. Be sure the vehicle is on levelground. 2. Start the engine and allow it to reach
normal operating temperature.
3. Turn the engine off and wait for a few minutes (about 5 minutes) for
the oil to return to the oil pan.
4. Pull the dipstick out, wipe it clean, and re-insert it fully.
5. Pull the dipstick out again and check the level.
6. The level should be in the C range. If the level is in the D range, add
enough engine oil to bring the
level up to the C range.
7-13
7
MaintenanceOOS078101
Radiator hose
Be very careful not to touch the
radiator hose when checking or
adding the engine oil as it may
be hot enough to burn you.
WARNING FigureRequired action
Range (A)Recommend to contact an
authorized HYUNDAI dealer.
Range (B)Do not refill engine oil.
Range (C)
Normal.
You may add engine oil as
long as the oil level does not
go above the C range.
Range (D)You must add oil and make
sure that the oil level is in the
C Range.
OOS077056L
OOS077005
■1.6 T-GDI
■1.0 T-GDI
Page 431 of 526
Do not spill engine oil, whenadding or changing engine oil. If
you drop the engine oil on the
engine room, wipe it off immedi-
ately.
When you wipe the oil level gauge, you should wipe it with a clean
cloth. When mixed with debris, it
can cause engine damage.
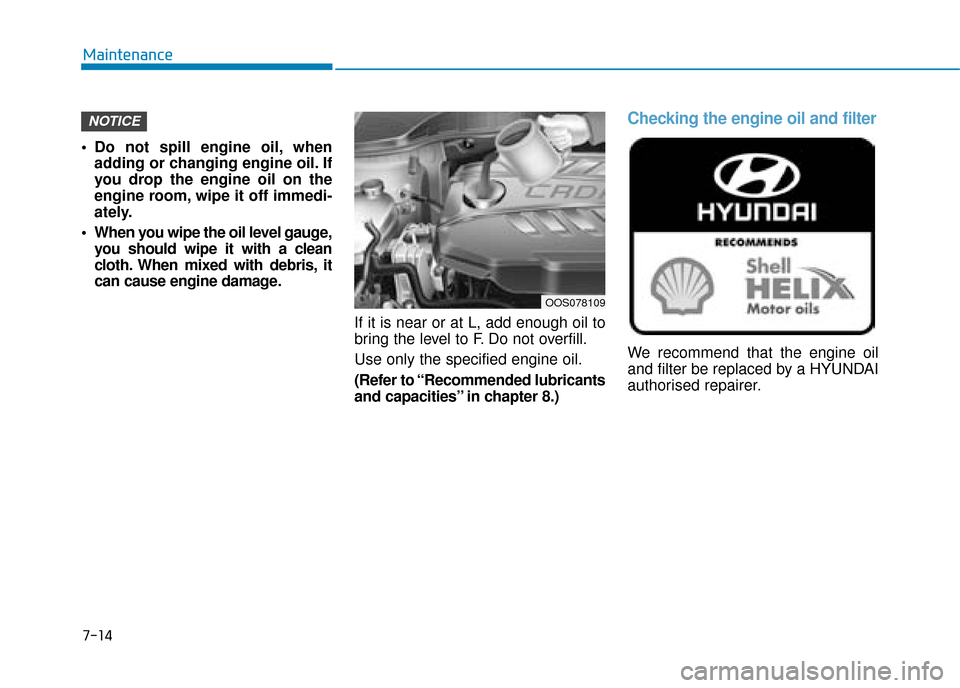
If it is near or at L, add enough oil to
bring the level to F. Do not overfill.
Use only the specified engine oil.
(Refer to “Recommended lubricants
and capacities” in chapter 8.)
Checking the engine oil and filter
We recommend that the engine oil
and filter be replaced by a HYUNDAI
authorised repairer.
NOTICE
7-14
Maintenance
OOS078109
Page 436 of 526
7-19
7
Maintenance
B
BR
RA
A K
KE
E/
/C
C L
LU
U T
TC
CH
H
F
F L
LU
U I
ID
D
(
( I
IF
F
E
E Q
Q U
UI
IP
P P
PE
ED
D )
)
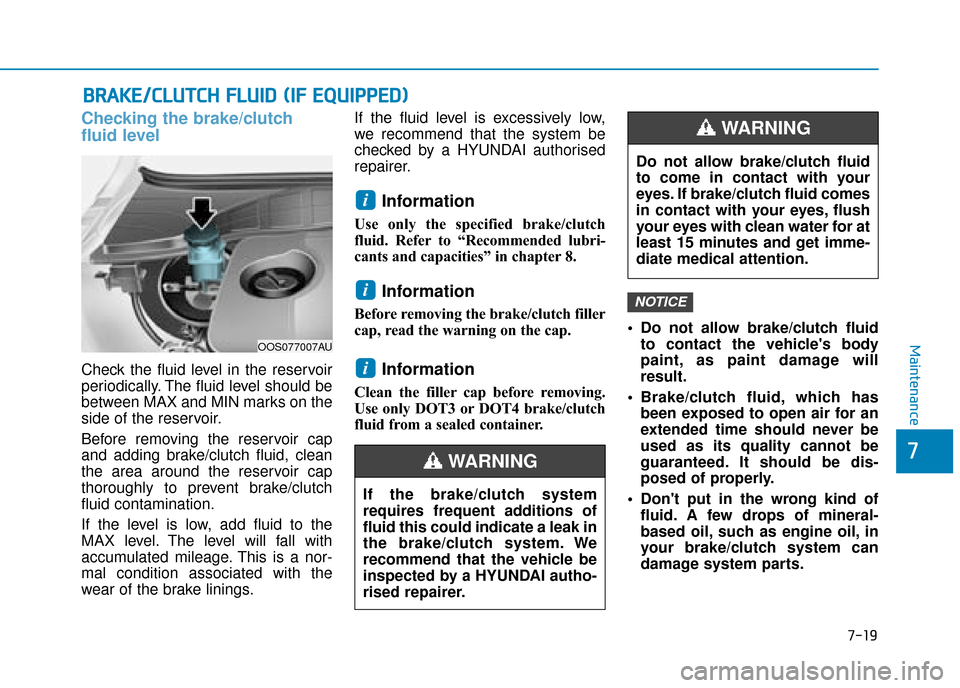
Checking the brake/clutch
fluid level
Check the fluid level in the reservoir
periodically. The fluid level should be
between MAX and MIN marks on the
side of the reservoir.
Before removing the reservoir cap
and adding brake/clutch fluid, clean
the area around the reservoir cap
thoroughly to prevent brake/clutch
fluid contamination.
If the level is low, add fluid to the
MAX level. The level will fall with
accumulated mileage. This is a nor-
mal condition associated with the
wear of the brake linings. If the fluid level is excessively low,
we recommend that the system be
checked by a HYUNDAI authorised
repairer.
Information
Use only the specified brake/clutch
fluid. Refer to “Recommended lubri-
cants and capacities” in chapter 8.
Information
Before removing the brake/clutch filler
cap, read the warning on the cap.
Information
Clean the filler cap before removing.
Use only DOT3 or DOT4 brake/clutch
fluid from a sealed container.
Do not allow brake/clutch fluid
to contact the vehicle's body
paint, as paint damage will
result.
Brake/clutch fluid, which has been exposed to open air for an
extended time should never be
used as its quality cannot be
guaranteed. It should be dis-
posed of properly.
Don't put in the wrong kind of fluid. A few drops of mineral-
based oil, such as engine oil, in
your brake/clutch system can
damage system parts.
NOTICE
i
i
i
OOS077007AU
If the brake/clutch system
requires frequent additions of
fluid this could indicate a leak in
the brake/clutch system. We
recommend that the vehicle be
inspected by a HYUNDAI autho-
rised repairer.
WARNING
Do not allow brake/clutch fluid
to come in contact with your
eyes. If brake/clutch fluid comes
in contact with your eyes, flush
your eyes with clean water for at
least 15 minutes and get imme-
diate medical attention.
WARNING
Page 438 of 526
7-21
7
Maintenance
F
FU
U E
EL
L
F
F I
IL
L T
T E
ER
R
(
( F
F O
O R
R
D
D I
IE
E S
SE
E L
L)
)
Draining water from fuel filter
The fuel filter in the diesel engine
operates the critical function of sepa-
rating water from the fuels and pre-
venting accumulating of water in the
base.
When enough water is accumulated
inside the fuel filter, the warning light
( ) illuminates with the ignition
switch in the ON position.
In this case, we recommend you to
have the system checked by a
HYUNDAI authorised repairer.
When the accumulated water is
not drained at the proper timing,
water may permeate in the fuel fil-
ter, damaging the major vehicle
components, such as the fuel sys-
tem.
Fuel filter cartridge replace-
ment
We recommend the fuel filter car-
tridge be replaced by a HYUNDAI
authorised repairer according to the
Maintenance Schedule at the begin-
ning of this chapter.
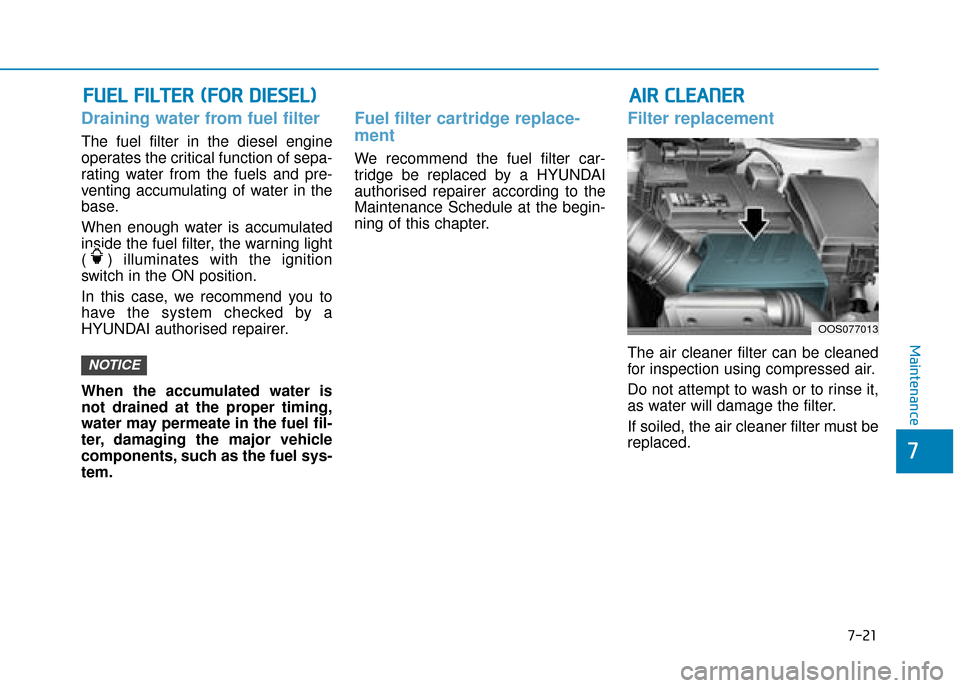
Filter replacement
The air cleaner filter can be cleaned
for inspection using compressed air.
Do not attempt to wash or to rinse it,
as water will damage the filter.
If soiled, the air cleaner filter must be
replaced.NOTICE
A
A I
IR
R
C
C L
LE
E A
A N
N E
ER
R
OOS077013
Page 447 of 526
7-30
MaintenanceAlways follow these instruc-
tions when recharging your
vehicle’s battery to avoid the
risk of SERIOUS INJURY or
DEATH from explosions or acid
burns:
Before performing mainte-
nance or recharging the bat-
tery, turn off all accessories
and place the Engine Start/
Stop button to the OFF posi-
tion.
Keep all flames, sparks, or
smoking materials away from
the battery.
Always work outdoors or in an
area with plenty of ventilation.
Wear eye protection when
checking the battery during
charging.
The battery must be removed
from the vehicle and placed in
a well ventilated area.
WARNING Watch the battery during
charging, and stop or reduce
the charging rate if the battery
cells begin boiling violently.
The negative battery cable
must be removed first and
installed last when the battery
is disconnected. Disconnect
the battery charger in the fol-
lowing order:
(1) Turn off the battery charg-
er main switch.
(2) Unhook the negative
clamp from the negative
battery terminal.
(3) Unhook the positive clamp from the positive battery
terminal.
Always use a genuine
HYUNDAI approved battery
when you replace the battery.
AGM battery (if equipped)
Absorbent Glass Matt (AGM)
batteries are maintenance-
free and we recommend that
the AGM battery be serviced
by a HYUNDAI authorised
repairer. For charging your
AGM battery, use only fully
automatic battery chargers
that are specially developed
for AGM batteries.
When replacing the AGM bat-
tery, we recommend that you
use parts for replacement
from a HYUNDAI authorised
repairer.
Do not open or remove the
cap on top of the battery. This
may cause leaks of internal
electrolyte that could result in
severe injury.
CAUTION
Page 459 of 526
7-42
Maintenance
F
FU
U S
SE
E S
S
A vehicle’s electrical system is pro-
tected from electrical overload dam-
age by fuses.
This vehicle has 2 (or 3) fuse panels,
one located in the driver’s side panel
bolster, the other in the engine com-
partment.
If any of your vehicle’s lights, acces-
sories, or controls do not work, check
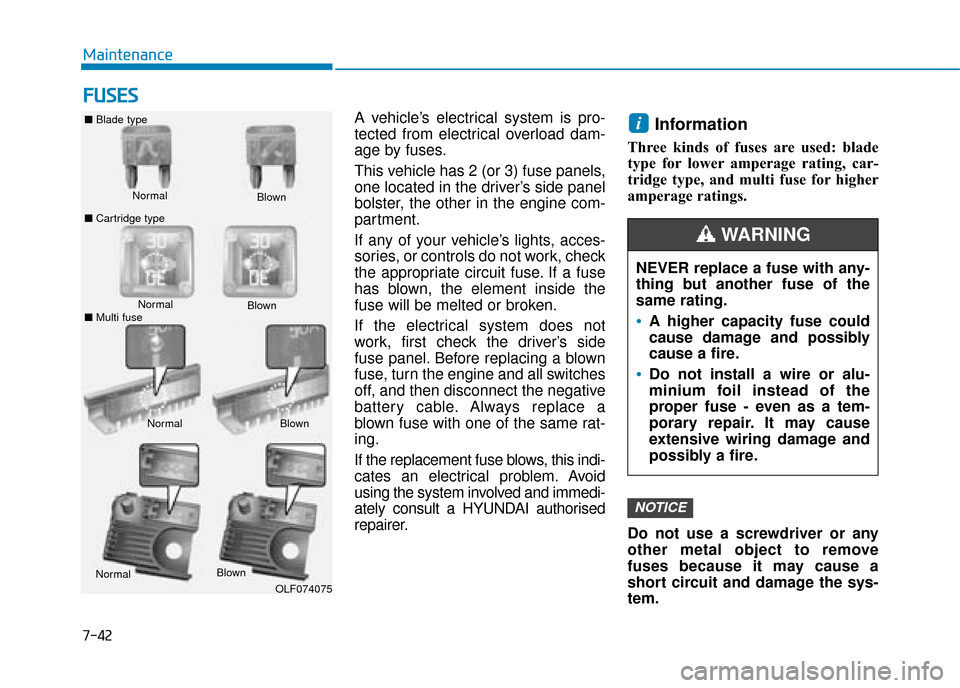
the appropriate circuit fuse. If a fuse
has blown, the element inside the
fuse will be melted or broken.
If the electrical system does not
work, first check the driver’s side
fuse panel. Before replacing a blown
fuse, turn the engine and all switches
off, and then disconnect the negative
battery cable. Always replace a
blown fuse with one of the same rat-
ing.
If the replacement fuse blows, this indi-
cates an electrical problem. Avoid
using the system involved and immedi-
ately consult a HYUNDAI authorised
repairer.Information
Three kinds of fuses are used: blade
type for lower amperage rating, car-
tridge type, and multi fuse for higher
amperage ratings.
Do not use a screwdriver or any
other metal object to remove
fuses because it may cause a
short circuit and damage the sys-
tem.
NOTICE
i
Normal
■
Blade type
■ Cartridge type Blown
Normal Blown
Normal Blown
OLF074075
NEVER replace a fuse with any-
thing but another fuse of the
same rating.
A higher capacity fuse could
cause damage and possibly
cause a fire.
Do not install a wire or alu-
minium foil instead of the
proper fuse - even as a tem-
porary repair. It may cause
extensive wiring damage and
possibly a fire.
WARNING
Normal Blown
■ Multi fuse
Page 472 of 526
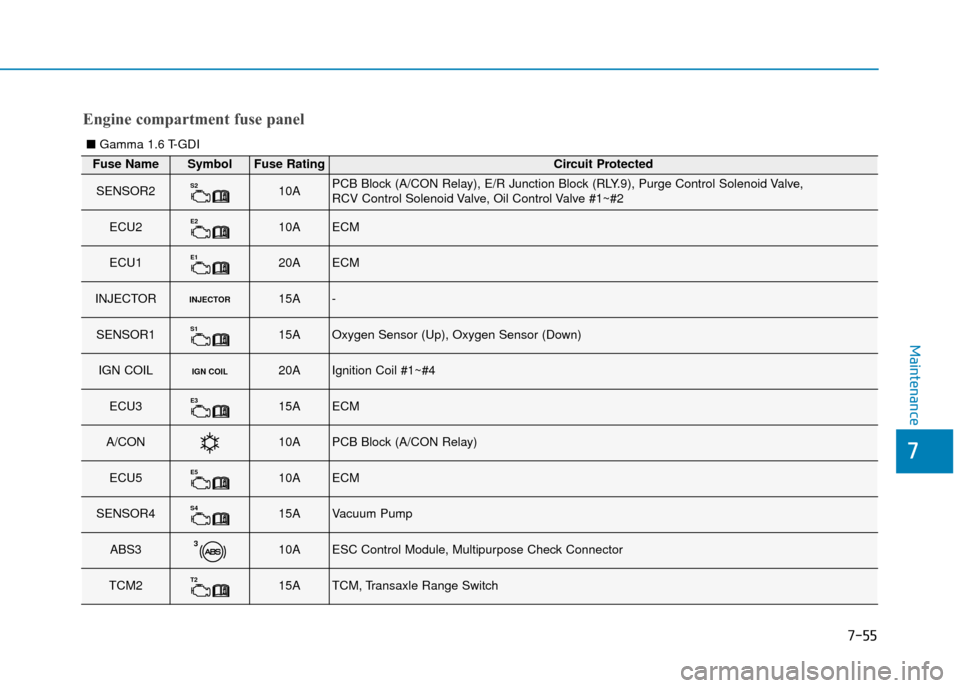
7-55
7
Maintenance
Fuse NameSymbolFuse RatingCircuit Protected
SENSOR2S210APCB Block (A/CON Relay), E/R Junction Block (RLY.9), Purge Control Solenoid Valve,
RCV Control Solenoid Valve, Oil Control Valve #1~#2
ECU2E210AECM
ECU1E120AECM
INJECTORINJECTOR15A-
SENSOR1S115AOxygen Sensor (Up), Oxygen Sensor (Down)
IGN COILIGN COIL20AIgnition Coil #1~#4
ECU3E315AECM
A/CON10APCB Block (A/CON Relay)
ECU5E510AECM
SENSOR4S415AVacuum Pump
ABS3310AESC Control Module, Multipurpose Check Connector
TCM2T215ATCM, Transaxle Range Switch
Engine compartment fuse panel
■ Gamma 1.6 T-GDI
Page 474 of 526
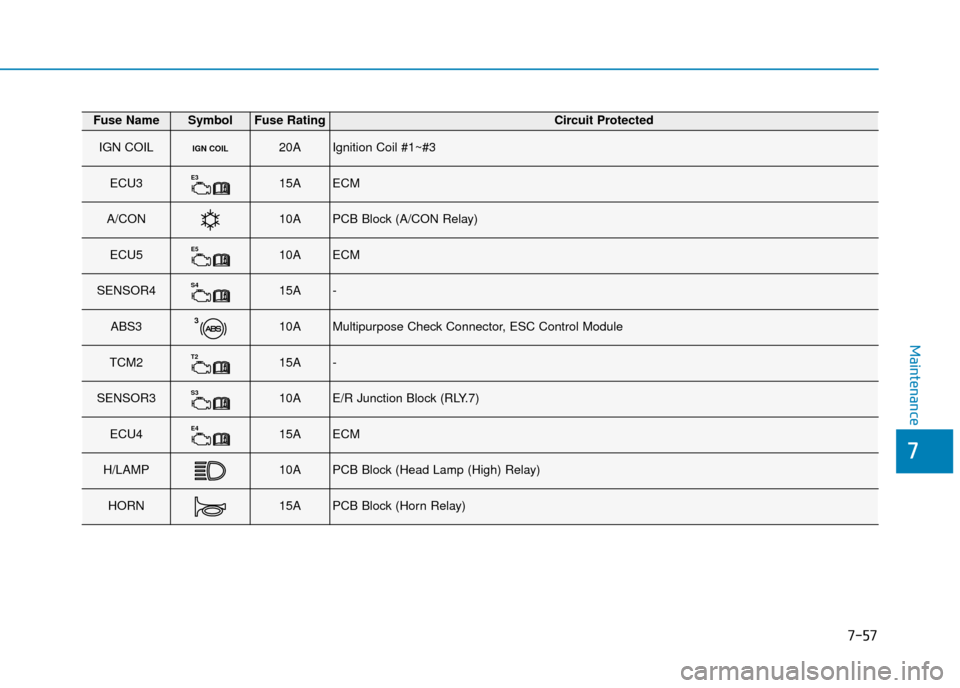
7-57
7
Maintenance
Fuse NameSymbolFuse RatingCircuit Protected
IGN COILIGN COIL20AIgnition Coil #1~#3
ECU3E315AECM
A/CON10APCB Block (A/CON Relay)
ECU5E510AECM
SENSOR4S415A-
ABS3310AMultipurpose Check Connector, ESC Control Module
TCM2T215A-
SENSOR3S310AE/R Junction Block (RLY.7)
ECU4E415AECM
H/LAMP10APCB Block (Head Lamp (High) Relay)
HORN15APCB Block (Horn Relay)