engine start Hyundai Kona 2020 Workshop Manual
[x] Cancel search | Manufacturer: HYUNDAI, Model Year: 2020, Model line: Kona, Model: Hyundai Kona 2020Pages: 505, PDF Size: 13.47 MB
Page 269 of 505
5-35
Driving your vehicle
5
ESC OFF condition
To cancel ESC operation :
State 1
Press the ESC OFF button briefly.
The ESC OFF indicator light and
message "Traction Control disabled"
will illuminate. In this state, the trac-
tion
control function of ESC (engine man-
agement) is disabled, but the brake
control function of ESC (braking
management) still operates.
Press and hold the ESC OFF button
continuously for more than 3 sec-
onds. The ESC OFF indicator light
and message "Traction and Stability
Control disabled" illuminates and a
warning chime sounds. In this state,
both the traction control function of
ESC (engine management) and the
brake control function of ESC (brak-
ing management) are disabled.
If the ignition switch is placed to the
LOCK/OFF position when ESC is off,
ESC remains off. Upon restarting the
engine, the ESC will automatically turn
on again.
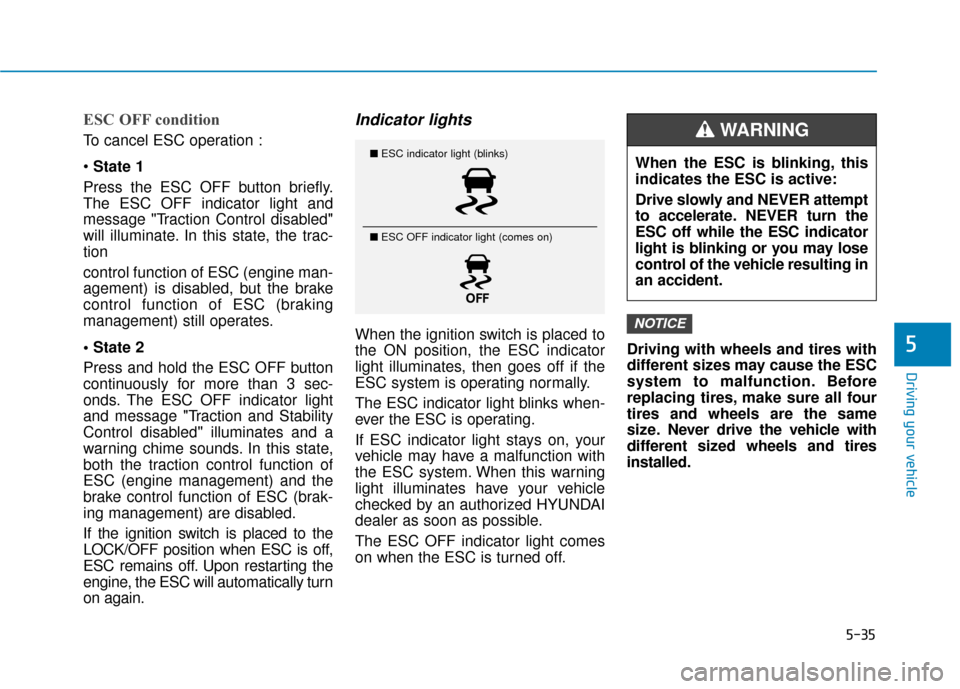
Indicator lights
When the ignition switch is placed to
the ON position, the ESC indicator
light illuminates, then goes off if the
ESC system is operating normally.
The ESC indicator light blinks when-
ever the ESC is operating.
If ESC indicator light stays on, your
vehicle may have a malfunction with
the ESC system. When this warning
light illuminates have your vehicle
checked by an authorized HYUNDAI
dealer as soon as possible.
The ESC OFF indicator light comes
on when the ESC is turned off. Driving with wheels and tires with
different sizes may cause the ESC
system to malfunction. Before
replacing tires, make sure all four
tires and wheels are the same
size. Never drive the vehicle with
different sized wheels and tires
installed.NOTICE
■
ESC indicator light (blinks)
■ ESC OFF indicator light (comes on)When the ESC is blinking, this
indicates the ESC is active:
Drive slowly and NEVER attempt
to accelerate. NEVER turn the
ESC off while the ESC indicator
light is blinking or you may lose
control of the vehicle resulting in
an accident.
WARNING
Page 276 of 505
5-42
Driving your vehicle
When the AWD LOCK mode is
deactivated, a sensation may be
felt as the driving power is deliv-
ered entirely to the front wheels.
For safe AWD operation
Before driving
Make sure all passengers are wearing seat belts.
Sit upright and closer to the steer- ing wheel than usual. Adjust the
steering wheel to a position com-
fortable for you to drive.
Driving on snow-covered or icy
roads
Start off slowly by applying theaccelerator pedal gently.
Use snow tires or tire chains.
Keep sufficient distance between your vehicle and the vehicle in front
of you.
Apply engine braking during decel- eration by switching the gear shift
lever to Manual Shift Mode and
manually selecting a lower gear.
Avoid speeding, rapid acceleration, sudden brake applications, and
sharp turns to prevent skids.
Driving in sand or mud
Maintain slow and constant speed.
Use tire chains driving in mud ifnecessary.
Keep sufficient distance between your vehicle and the vehicle in front
of you.
Reduce vehicle speed and always check the road condition.
Avoid speeding, rapid acceleration, sudden brake applications, and
sharp turns to prevent getting
stuck.
NOTICE
When driving on normal roads,
deactivate the AWD LOCK mode
by pushing the AWD LOCK but-
ton (AWD LOCK indicator light
goes off). Driving on normal
roads with the AWD LOCK
mode, especially, when corner-
ing may cause mechanical
noise or vibration. The noise
and vibration will disappear
when the AWD LOCK mode is
deactivated. Prolong driving
with the noise and vibration
may damage some parts of the
power train.
CAUTION
When the vehicle is stuck in
snow, sand or mud, place a non-
slip material under the drive
wheels to provide traction OR
Slowly spin the wheels in for-
ward and reverse directions
which causes a rocking motion
that may free the vehicle.
However, avoid running the
engine continuously at high
rpm, doing so may damage the
AWD system.
CAUTION
Page 277 of 505
5-43
Driving your vehicle
5
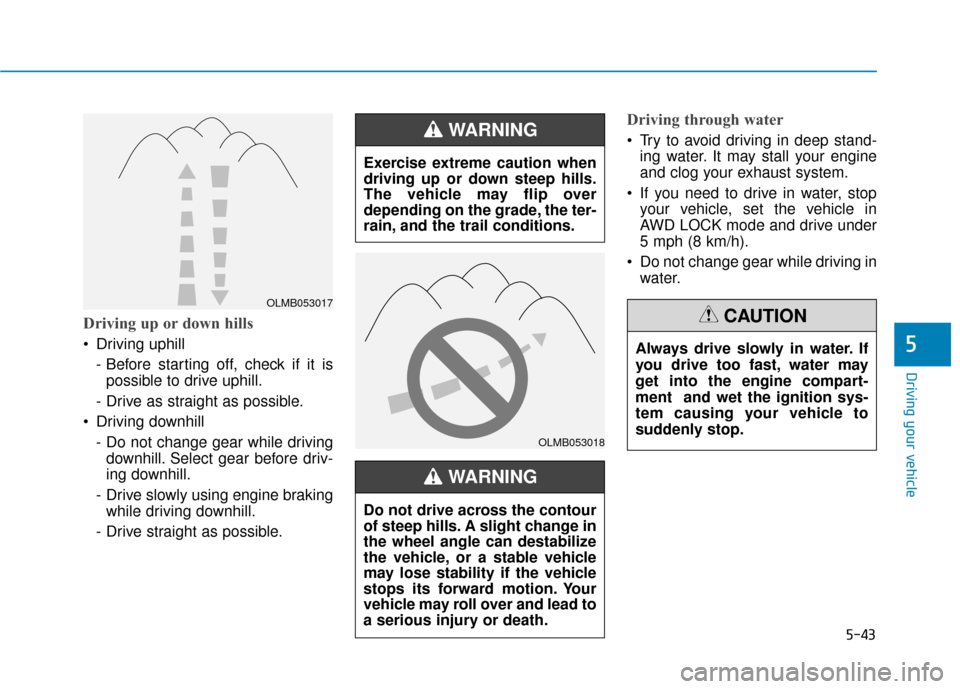
Driving up or down hills
Driving uphill - Before starting off, check if it ispossible to drive uphill.
- Drive as straight as possible.
Driving downhill - Do not change gear while drivingdownhill. Select gear before driv-
ing downhill.
- Drive slowly using engine braking while driving downhill.
- Drive straight as possible.
Driving through water
Try to avoid driving in deep stand- ing water. It may stall your engine
and clog your exhaust system.
If you need to drive in water, stop your vehicle, set the vehicle in
AWD LOCK mode and drive under
5 mph (8 km/h).
Do not change gear while driving in water.
OLMB053017
OLMB053018
Exercise extreme caution when
driving up or down steep hills.
The vehicle may flip over
depending on the grade, the ter-
rain, and the trail conditions.
WARNING
Do not drive across the contour
of steep hills. A slight change in
the wheel angle can destabilize
the vehicle, or a stable vehicle
may lose stability if the vehicle
stops its forward motion. Your
vehicle may roll over and lead to
a serious injury or death.
WARNING
Always drive slowly in water. If
you drive too fast, water may
get into the engine compart-
ment and wet the ignition sys-
tem causing your vehicle to
suddenly stop.
CAUTION
Page 278 of 505
5-44
Driving your vehicle
Additional driving conditions
Become familiar with the off-roadconditions before driving.
Always pay attention when driving off-road and avoid dangerous
areas.
Drive slowly when driving in heavy wind.
Reduce vehicle speed when cor- nering. The center of gravity of
AWD vehicles is higher than con-
ventional 2WD vehicles, making
them more likely to roll over when
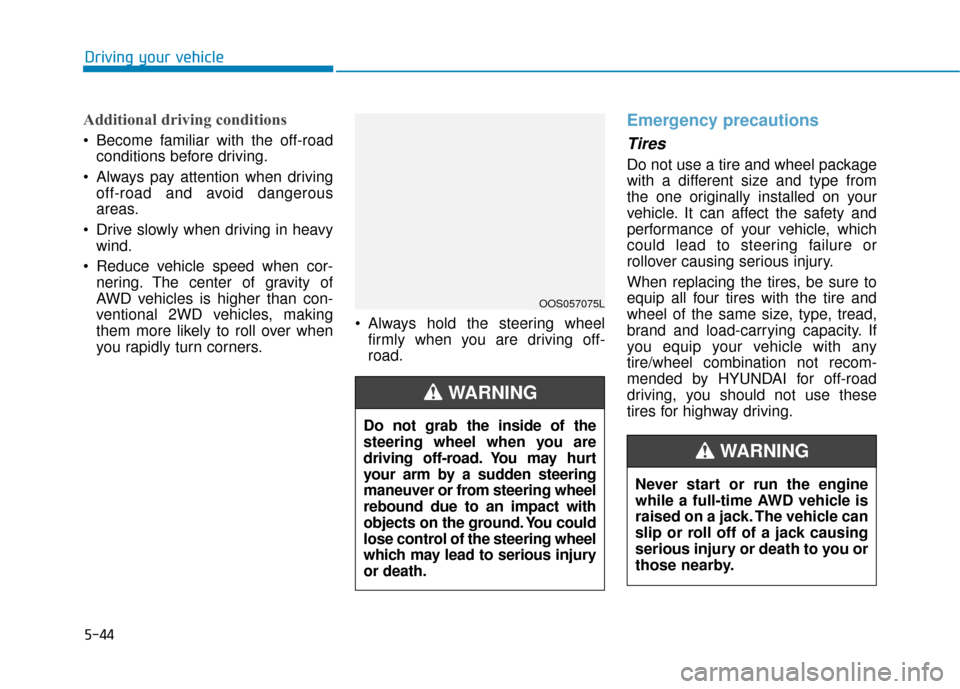
you rapidly turn corners. Always hold the steering wheel
firmly when you are driving off-
road.
Emergency precautions
Tires
Do not use a tire and wheel package
with a different size and type from
the one originally installed on your
vehicle. It can affect the safety and
performance of your vehicle, which
could lead to steering failure or
rollover causing serious injury.
When replacing the tires, be sure to
equip all four tires with the tire and
wheel of the same size, type, tread,
brand and load-carrying capacity. If
you equip your vehicle with any
tire/wheel combination not recom-
mended by HYUNDAI for off-road
driving, you should not use these
tires for highway driving.
OOS057075L
Do not grab the inside of the
steering wheel when you are
driving off-road. You may hurt
your arm by a sudden steering
maneuver or from steering wheel
rebound due to an impact with
objects on the ground. You could
lose control of the steering wheel
which may lead to serious injury
or death.
WARNING
Never start or run the engine
while a full-time AWD vehicle is
raised on a jack. The vehicle can
slip or roll off of a jack causing
serious injury or death to you or
those nearby.
WARNING
Page 280 of 505
5-46
Driving your vehicle
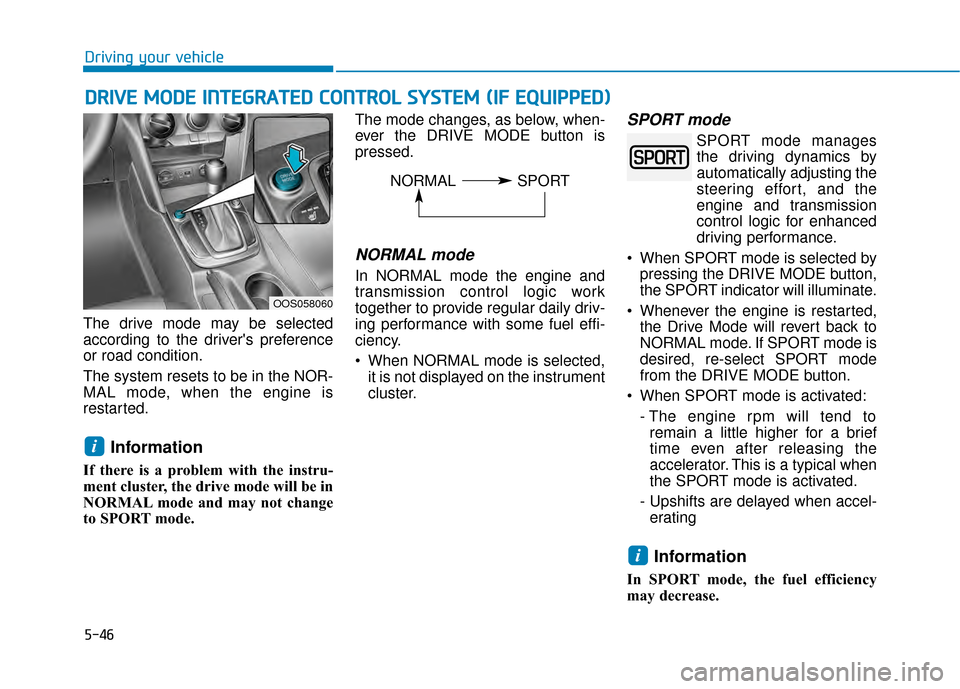
The drive mode may be selected
according to the driver's preference
or road condition.
The system resets to be in the NOR-
MAL mode, when the engine is
restarted.
Information
If there is a problem with the instru-
ment cluster, the drive mode will be in
NORMAL mode and may not change
to SPORT mode. The mode changes, as below, when-
ever the DRIVE MODE button is
pressed.
NORMAL mode
In NORMAL mode the engine and
transmission control logic work
together to provide regular daily driv-
ing performance with some fuel effi-
ciency.
When NORMAL mode is selected,
it is not displayed on the instrument
cluster.
SPORT mode
SPORT mode managesthe driving dynamics by
automatically adjusting the
steering effort, and the
engine and transmission
control logic for enhanced
driving performance.
When SPORT mode is selected by pressing the DRIVE MODE button,
the SPORT indicator will illuminate.
Whenever the engine is restarted, the Drive Mode will revert back to
NORMAL mode. If SPORT mode is
desired, re-select SPORT mode
from the DRIVE MODE button.
When SPORT mode is activated: - The engine rpm will tend toremain a little higher for a brief
time even after releasing the
accelerator. This is a typical when
the SPORT mode is activated.
- Upshifts are delayed when accel- erating
Information
In SPORT mode, the fuel efficiency
may decrease.
i
i
D D R
RI
IV
V E
E
M
M O
OD
DE
E
I
IN
N T
TE
EG
G R
RA
A T
TE
ED
D
C
C O
O N
NT
TR
R O
O L
L
S
S Y
Y S
ST
T E
EM
M
(
( I
IF
F
E
E Q
Q U
UI
IP
P P
PE
ED
D )
)
OOS058060
NORMAL SPORT
Page 322 of 505
5-88
Driving your vehicle
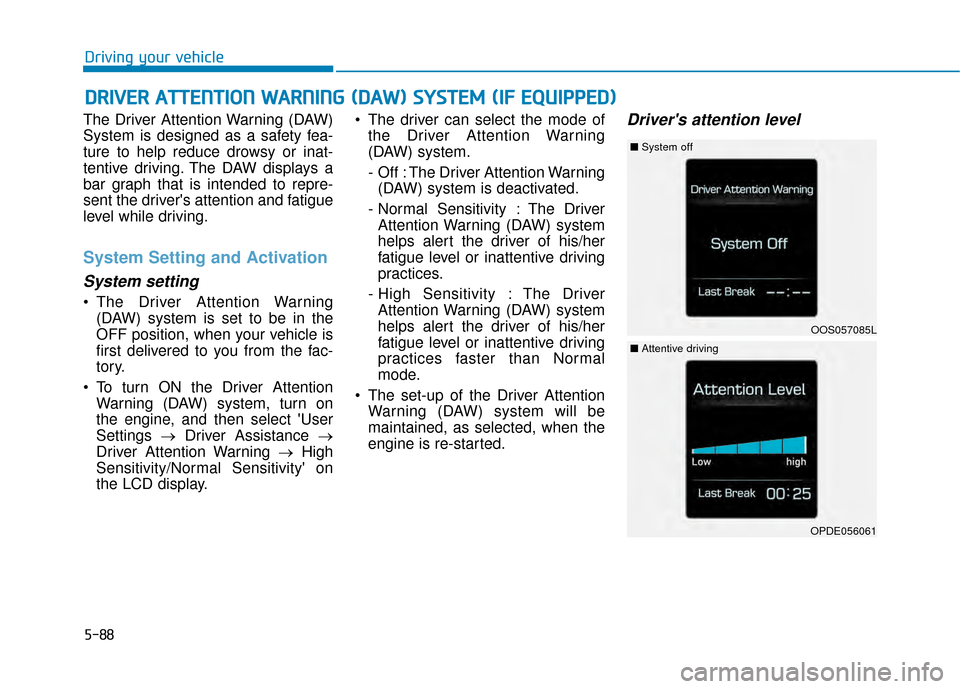
The Driver Attention Warning (DAW)
System is designed as a safety fea-
ture to help reduce drowsy or inat-
tentive driving. The DAW displays a
bar graph that is intended to repre-
sent the driver's attention and fatigue
level while driving.
System Setting and Activation
System setting
The Driver Attention Warning (DAW) system is set to be in the
OFF position, when your vehicle is
first delivered to you from the fac-
tory.
To turn ON the Driver Attention Warning (DAW) system, turn on
the engine, and then select 'User
Settings →Driver Assistance →
Driver Attention Warning →High
Sensitivity/Normal Sensitivity' on
the LCD display. The driver can select the mode of
the Driver Attention Warning
(DAW) system.
- Off : The Driver Attention Warning(DAW) system is deactivated.
- Normal Sensitivity : The Driver Attention Warning (DAW) system
helps alert the driver of his/her
fatigue level or inattentive driving
practices.
- High Sensitivity : The Driver Attention Warning (DAW) system
helps alert the driver of his/her
fatigue level or inattentive driving
practices faster than Normal
mode.
The set-up of the Driver Attention Warning (DAW) system will be
maintained, as selected, when the
engine is re-started.
Driver's attention level
D DR
RI
IV
V E
ER
R
A
A T
TT
TE
EN
N T
TI
IO
O N
N
W
W A
AR
RN
N I
IN
N G
G
(
( D
D A
A W
W )
)
S
S Y
Y S
ST
T E
EM
M
(
( I
IF
F
E
E Q
Q U
UI
IP
P P
PE
ED
D )
)
OOS057085L
■ System off
OPDE056061
■Attentive driving
Page 323 of 505
5-89
Driving your vehicle
5
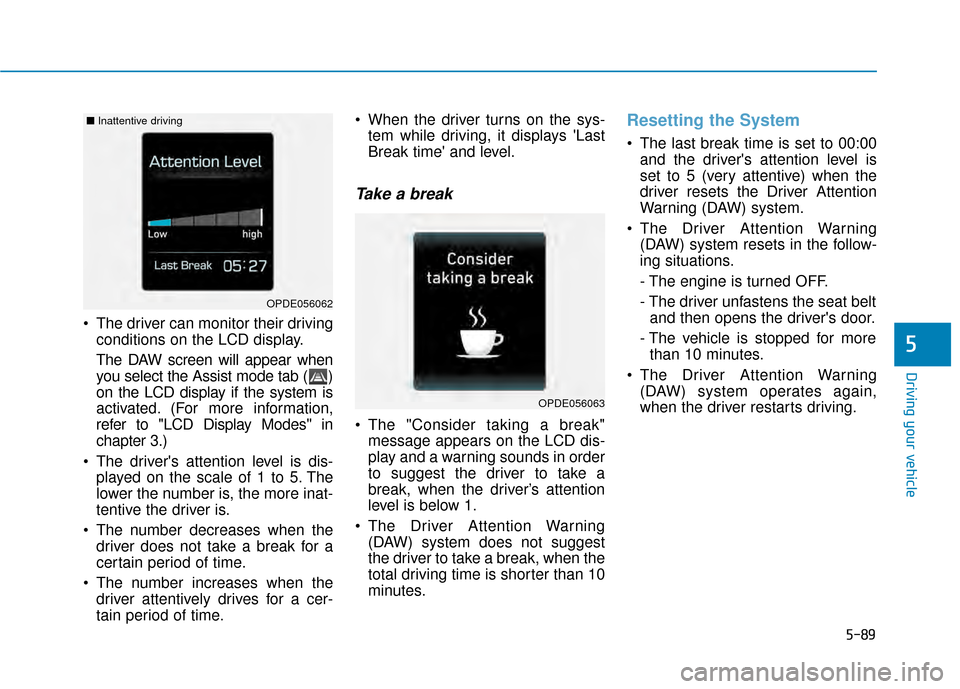
The driver can monitor their drivingconditions on the LCD display.
The DAW screen will appear when
you select the Assist mode tab ( )
on the LCD display if the system is
activated. (For more information,
refer to "LCD Display Modes" in
chapter 3.)
The driver's attention level is dis- played on the scale of 1 to 5. The
lower the number is, the more inat-
tentive the driver is.
The number decreases when the driver does not take a break for a
certain period of time.
The number increases when the driver attentively drives for a cer-
tain period of time. When the driver turns on the sys-
tem while driving, it displays 'Last
Break time' and level.
Take a break
The "Consider taking a break"message appears on the LCD dis-
play and a warning sounds in order
to suggest the driver to take a
break, when the driver’s attention
level is below 1.
The Driver Attention Warning (DAW) system does not suggest
the driver to take a break, when the
total driving time is shorter than 10
minutes.
Resetting the System
The last break time is set to 00:00and the driver's attention level is
set to 5 (very attentive) when the
driver resets the Driver Attention
Warning (DAW) system.
The Driver Attention Warning (DAW) system resets in the follow-
ing situations.
- The engine is turned OFF.
- The driver unfastens the seat beltand then opens the driver's door.
- The vehicle is stopped for more than 10 minutes.
The Driver Attention Warning (DAW) system operates again,
when the driver restarts driving.
OPDE056063
OPDE056062
■ Inattentive driving
Page 327 of 505
5-93
Driving your vehicle
5
Information
• During normal cruise control opera-tion, when the SET switch is activat-
ed or reactivated after applying the
brakes, the cruise control will ener-
gize after approximately 3 seconds.
This delay is normal.
• Before activating the cruise control function, the system will check to
verify that the brake switch is oper-
ating normally. Depress the brake
pedal at least once after turning ON
the ignition or starting the engine.
To set Cruise Control speed
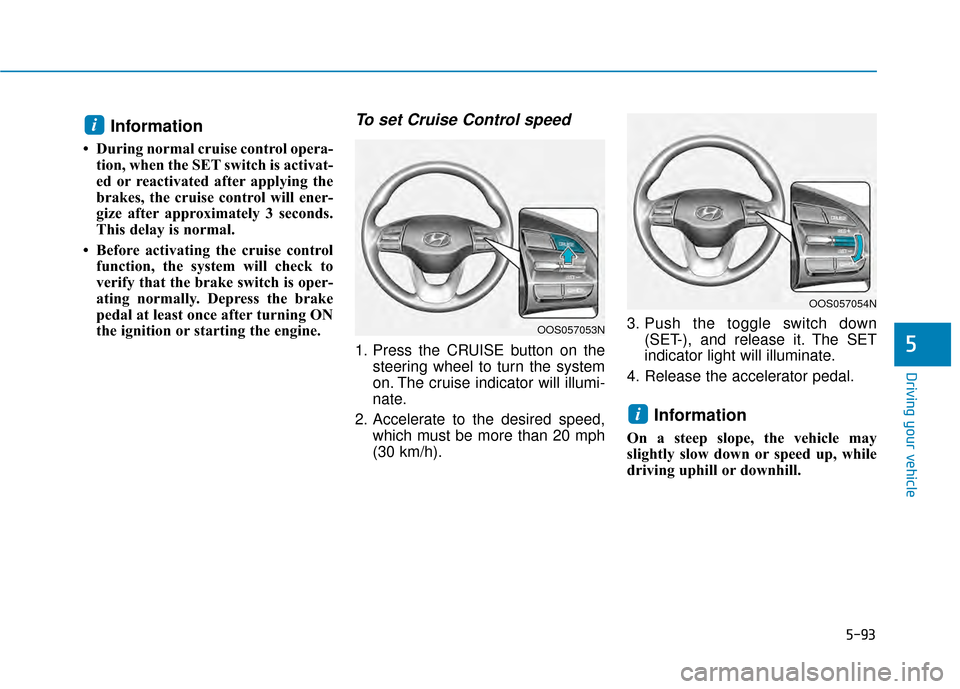
1. Press the CRUISE button on the steering wheel to turn the system
on. The cruise indicator will illumi-
nate.
2. Accelerate to the desired speed, which must be more than 20 mph
(30 km/h). 3. Push the toggle switch down
(SET-), and release it. The SET
indicator light will illuminate.
4. Release the accelerator pedal.
Information
On a steep slope, the vehicle may
slightly slow down or speed up, while
driving uphill or downhill.
i
i
OOS057054N
OOS057053N
Page 336 of 505
5-102
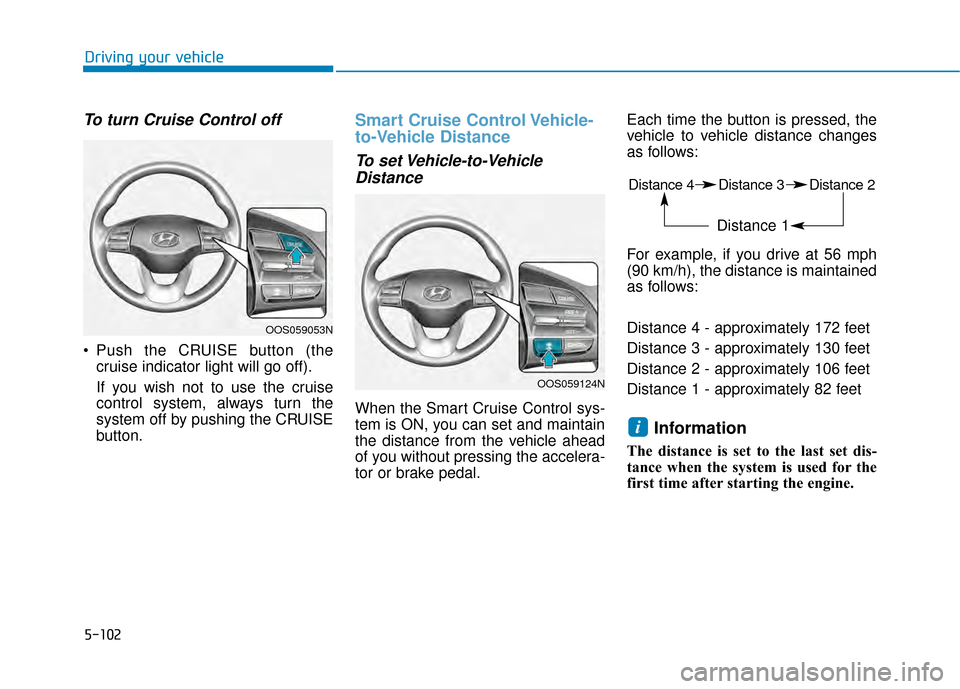
To turn Cruise Control off
Push the CRUISE button (thecruise indicator light will go off).
If you wish not to use the cruise
control system, always turn the
system off by pushing the CRUISE
button.
Smart Cruise Control Vehicle-
to-Vehicle Distance
To set Vehicle-to-VehicleDistance
When the Smart Cruise Control sys-
tem is ON, you can set and maintain
the distance from the vehicle ahead
of you without pressing the accelera-
tor or brake pedal. Each time the button is pressed, the
vehicle to vehicle distance changes
as follows:
For example, if you drive at 56 mph
(90 km/h), the distance is maintained
as follows:
Distance 4 - approximately 172 feet
Distance 3 - approximately 130 feet
Distance 2 - approximately 106 feet
Distance 1 - approximately 82 feet
Information
The distance is set to the last set dis-
tance when the system is used for the
first time after starting the engine.
i
Driving your vehicle
OOS059053N
OOS059124N
Distance 4 Distance 3 Distance 2
Distance 1
Page 362 of 505
What to do in an emergency
6
Hazard warning flasher ........................................6-2
In case of an emergency while driving ..............6-2
If the Engine Stalls While Driving .................................6-2
If the Engine Stalls at a Crossroad or Crossing ........6-2
If you Have a Flat Tire While Driving ..........................6-3
If the engine will not start ...................................6-3
If the Engine Doesn't Turn Over or
Turns Over Slowly .............................................................6-3
If the Engine Turns Over Normally but
Doesn't Start ......................................................................6-\
3
Jump starting ..........................................................6-4
If the engine overheats ........................................6-6
Tire Pressure Monitoring System (TPMS).........6-8
Check Tire Pressure .........................................................6-8
Tire Pressure Monitoring System .................................6-9
Low Tire Pressure Telltale ............................................6-10
Low Tire Pressure LCD Display with
Position Indicator ............................................................6-10
TPMS Malfunction Indicator ........................................6-11
Changing a Tire with TPMS..........................................6-12
If you have a flat tire (With spare tire) ...........6-14
Jack and Tools .................................................................6-14
Changing Tires .................................................................6-15
If you have a flat tire (with tire mobility kit)..6-20
Introduction ......................................................................6-\
20
Notes on the safe use of the Tire Mobility Kit.......6-21
Components of the Tire Mobility Kit .........................6-22
Using the Tire Mobility Kit............................................6-23
Distributing the sealant .................................................6-24
Checking the tire inflation pressure ..........................6-25
Towing ...................................................................6-27
Towing Service .................................................................6-27
Removable Towing Hook ...............................................6-28
Emergency Towing..........................................................6-29
Tie-down Hook ................................................................6-30