service HYUNDAI KONA 2021 User Guide
[x] Cancel search | Manufacturer: HYUNDAI, Model Year: 2021, Model line: KONA, Model: HYUNDAI KONA 2021Pages: 506, PDF Size: 34.9 MB
Page 209 of 506
3-125
Convenient features of your vehicle
3
To help reduce moisture inside of
the windows on rainy or humid
days, decrease the humidity inside
the vehicle by operating the air
conditioning system with the win-
dows and sunroof closed.
Use the air conditioning system
every month only for a few minutes
to ensure maximum system per-
formance.
If you operate air conditioner
excessively, the difference between
the temperature of the outside air
and that of the windshield could
cause the outer surface of the
windshield to fog up, causing loss
of visibility. In this case, set the
mode selection knob or button to
the position and fan speed
control to the lower speed.System Maintenance
Cabin air filter
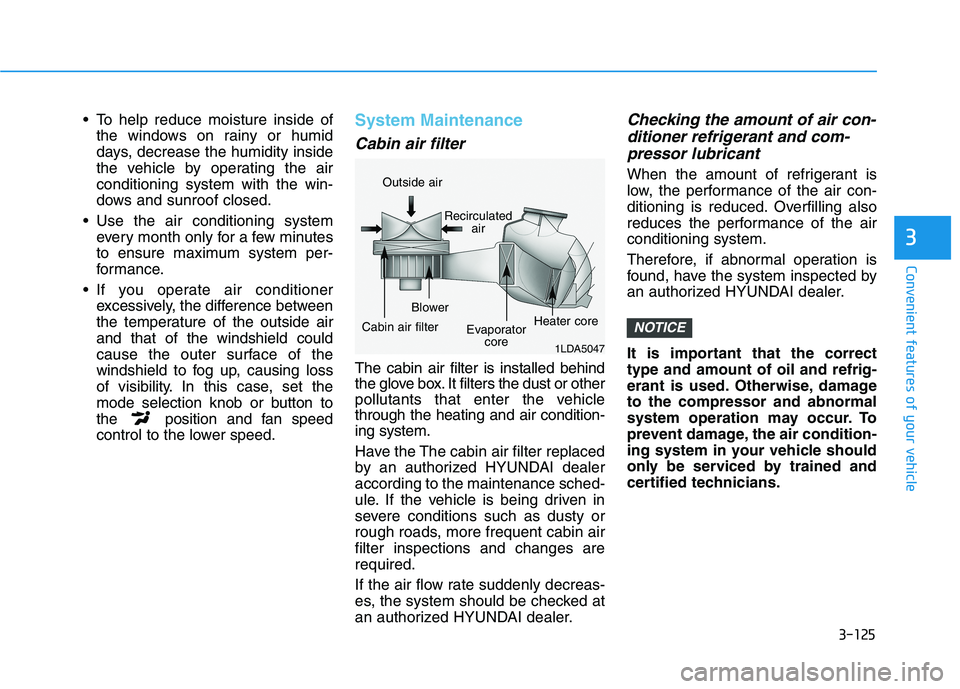
The cabin air filter is installed behind
the glove box. It filters the dust or other
pollutants that enter the vehicle
through the heating and air condition-
ing system.
Have the The cabin air filter replaced
by an authorized HYUNDAI dealer
according to the maintenance sched-
ule. If the vehicle is being driven in
severe conditions such as dusty or
rough roads, more frequent cabin air
filter inspections and changes are
required.
If the air flow rate suddenly decreas-
es, the system should be checked at
an authorized HYUNDAI dealer.
Checking the amount of air con-
ditioner refrigerant and com-
pressor lubricant
When the amount of refrigerant is
low, the performance of the air con-
ditioning is reduced. Overfilling also
reduces the performance of the air
conditioning system.
Therefore, if abnormal operation is
found, have the system inspected by
an authorized HYUNDAI dealer.
It is important that the correct
type and amount of oil and refrig-
erant is used. Otherwise, damage
to the compressor and abnormal
system operation may occur. To
prevent damage, the air condition-
ing system in your vehicle should
only be serviced by trained and
certified technicians.
NOTICE
1LDA5047
Outside air
Recirculated
air
Cabin air filterBlower
Evaporator
coreHeater core
Page 210 of 506
3-126
Convenient features of your vehicle
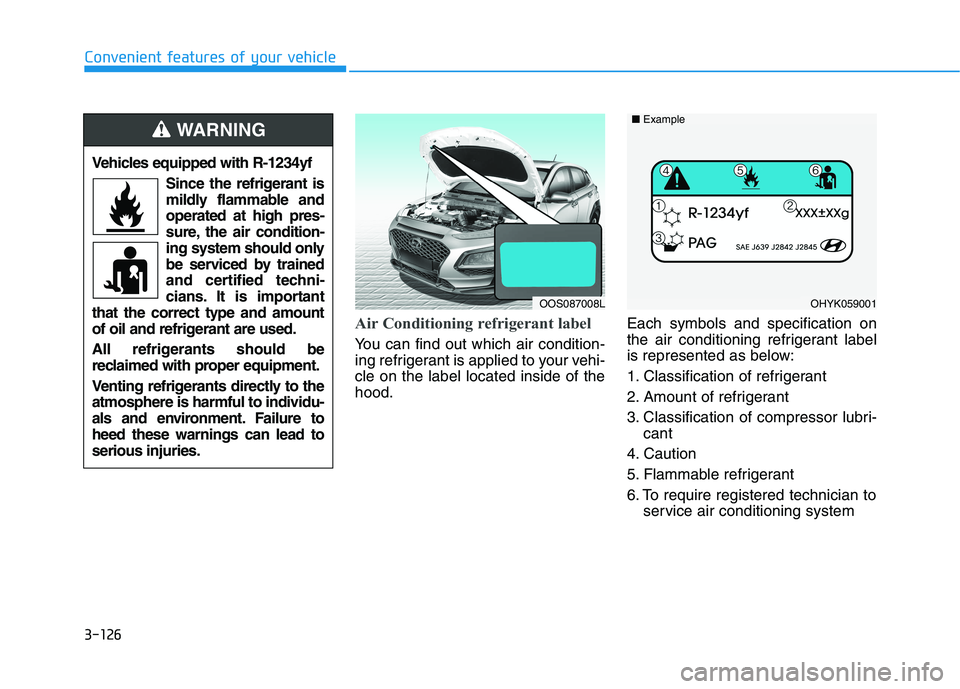
Air Conditioning refrigerant label
You can find out which air condition-
ing refrigerant is applied to your vehi-
cle on the label located inside of the
hood.Each symbols and specification on
the air conditioning refrigerant label
is represented as below:
1. Classification of refrigerant
2. Amount of refrigerant
3. Classification of compressor lubri-
cant
4. Caution
5. Flammable refrigerant
6. To require registered technician to
service air conditioning system
OHYK059001 ■Example
Vehicles equipped with R-1234yf
Since the refrigerant is
mildly flammable and
operated at high pres-
sure, the air condition-
ing system should only
be serviced by trained
and certified techni-
cians. It is important
that the correct type and amount
of oil and refrigerant are used.
All refrigerants should be
reclaimed with proper equipment.
Venting refrigerants directly to the
atmosphere is harmful to individu-
als and environment. Failure to
heed these warnings can lead to
serious injuries.
WARNING
OOS087008L
Page 355 of 506
5-121
Driving your vehicle
5
- When using tire chains:
Wrong size chains or improperly
installed chains can damage
your vehicle's brake lines, sus-
pension, body and wheels.
Use SAE "S" class or wire
chains.
If you hear noise caused by
chains contacting the body,
retighten the chain to prevent
contact with the vehicle body.
To prevent body damage,
retighten the chains after driving
0.3~0.6 miles (0.5~1.0 km).
Do not use tire chains on vehi-
cles equipped with aluminum
wheels. If unavoidable, use a
wire type chain.
Use wire chains less than 0.47
inch (12 mm) wide to prevent
damage to the chain’s connec-
tion.
Winter Precautions
Use high quality ethylene glycol
coolant
Your vehicle is delivered with high
quality ethylene glycol coolant in the
cooling system. It is the only type of
coolant that should be used because
it helps prevent corrosion in the cool-
ing system, lubricates the water
pump and prevents freezing. Be sure
to replace or replenish your coolant
in accordance with the maintenance
schedule in chapter 7. Before winter,
have your coolant tested to assure
that its freezing point is sufficient for
the temperatures anticipated during
the winter.
Change to "winter weight" oil if
necessary
In some climates it is recommended
that a lower viscosity "winter weight"
oil be used during cold weather. See
chapter 8 for recommendations. If
you aren't sure what weight oil you
should use, consult an authorized
HYUNDAI dealer.
Check battery and cables
Winter puts additional burdens on
the battery system. Visually inspect
the battery and cables as described
in chapter 7. The level of charge in
your battery can be checked by an
authorized HYUNDAI dealer or a
service station.
NOTICE
Page 363 of 506
What to do in an emergency
6
Hazard warning flasher ........................................6-2
In case of an emergency while driving ..............6-2
If the Engine Stalls While Driving .................................6-2
If the Engine Stalls at a Crossroad or Crossing ........6-2
If you Have a Flat Tire While Driving ..........................6-3
If the engine will not start ...................................6-3
If the Engine Doesn't Turn Over or
Turns Over Slowly .............................................................6-3
If the Engine Turns Over Normally but
Doesn't Start ......................................................................6-3
Jump starting ..........................................................6-4
If the engine overheats ........................................6-6
Tire Pressure Monitoring System (TPMS).........6-8
Check Tire Pressure .........................................................6-8
Tire Pressure Monitoring System .................................6-9
Low Tire Pressure Telltale ............................................6-10
Low Tire Pressure LCD Display with
Position Indicator ............................................................6-10
TPMS Malfunction Indicator ........................................6-11
Changing a Tire with TPMS..........................................6-12
If you have a flat tire (With spare tire) ...........6-14
Jack and Tools .................................................................6-14
Changing Tires .................................................................6-15
If you have a flat tire (with tire mobility kit)..6-20
Introduction ......................................................................6-20
Notes on the safe use of the Tire Mobility Kit.......6-21
Components of the Tire Mobility Kit .........................6-22
Using the Tire Mobility Kit............................................6-23
Distributing the sealant .................................................6-24
Checking the tire inflation pressure ..........................6-25
Towing ...................................................................6-27
Towing Service .................................................................6-27
Removable Towing Hook ...............................................6-28
Emergency Towing..........................................................6-29
Tie-down Hook ................................................................6-30
Page 366 of 506
6-4
What to do in an emergency
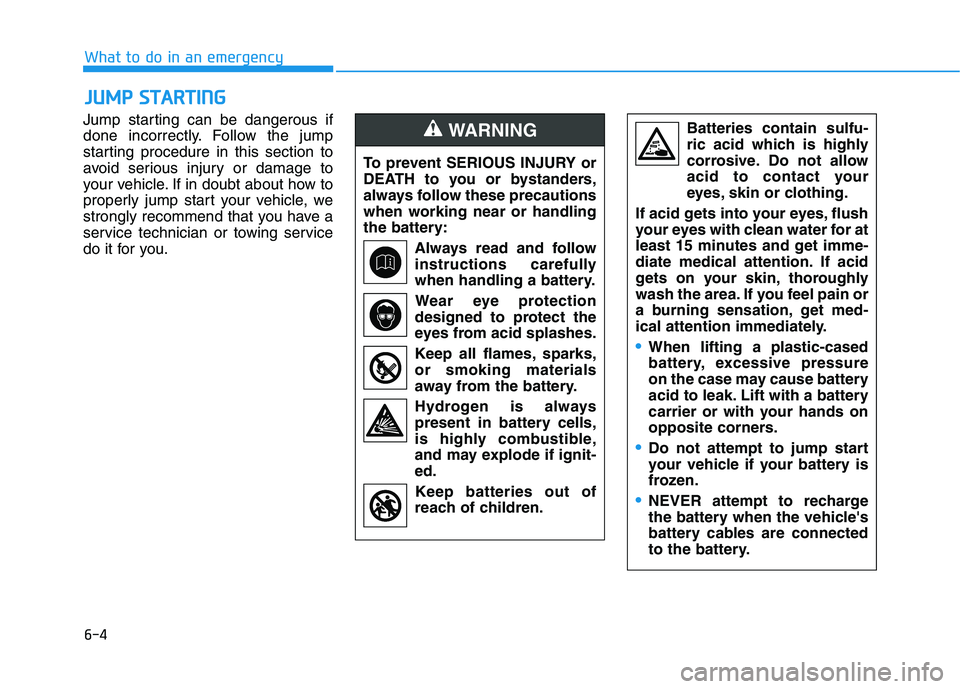
Jump starting can be dangerous if
done incorrectly. Follow the jump
starting procedure in this section to
avoid serious injury or damage to
your vehicle. If in doubt about how to
properly jump start your vehicle, we
strongly recommend that you have a
service technician or towing service
do it for you.
J JU
UM
MP
P
S
ST
TA
AR
RT
TI
IN
NG
G
To prevent SERIOUS INJURY or
DEATH to you or bystanders,
always follow these precautions
when working near or handling
the battery:
Always read and follow
instructions carefully
when handling a battery.
Wear eye protection
designed to protect the
eyes from acid splashes.
Keep all flames, sparks,
or smoking materials
away from the battery.
Hydrogen is always
present in battery cells,
is highly combustible,
and may explode if ignit-
ed.
Keep batteries out of
reach of children.
WARNING Batteries contain sulfu-
ric acid which is highly
corrosive. Do not allow
acid to contact your
eyes, skin or clothing.
If acid gets into your eyes, flush
your eyes with clean water for at
least 15 minutes and get imme-
diate medical attention. If acid
gets on your skin, thoroughly
wash the area. If you feel pain or
a burning sensation, get med-
ical attention immediately.
•When lifting a plastic-cased
battery, excessive pressure
on the case may cause battery
acid to leak. Lift with a battery
carrier or with your hands on
opposite corners.
Do not attempt to jump start
your vehicle if your battery is
frozen.
NEVER attempt to recharge
the battery when the vehicle's
battery cables are connected
to the battery.
Page 372 of 506
6-10
What to do in an emergency
If any of the below happens, have
the system checked by an author-
ized HYUNDAI dealer.
1. The Low Tire Pressure TPMS
Malfunction Indicator does not
illuminate for 3 seconds when
the ignition switch is placed to
the ON position or engine is
running.
2. The TPMS Malfunction Indicator
remains illuminated after blink-
ing for approximately 1 minute.
3. The Low Tire Pressure LCD dis-
play remains illuminated
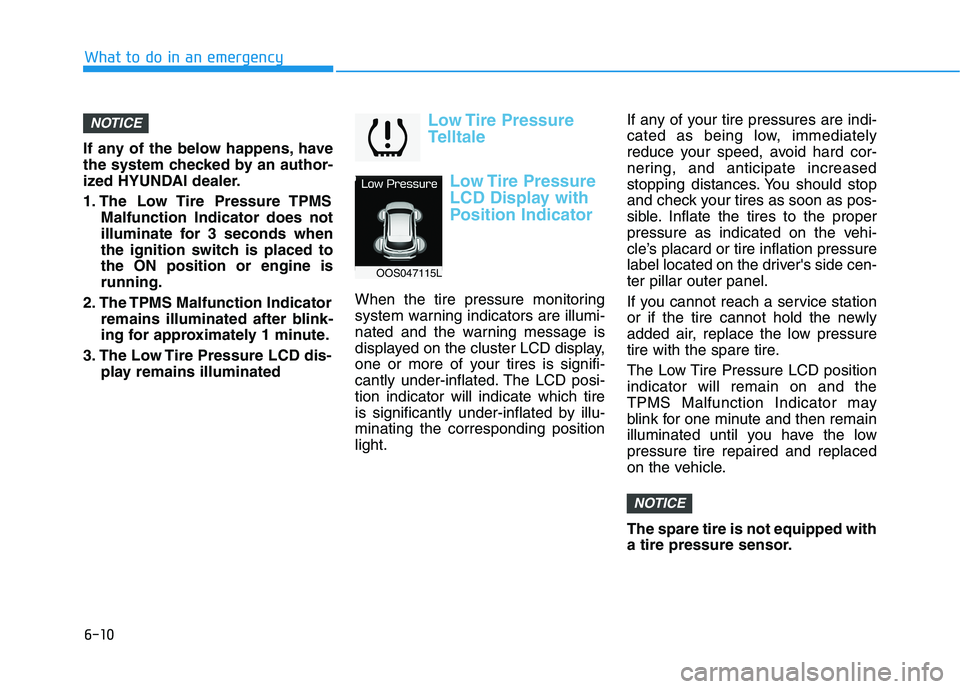
Low Tire Pressure
Telltale
Low Tire Pressure
LCD Display with
Position Indicator
When the tire pressure monitoring
system warning indicators are illumi-
nated and the warning message is
displayed on the cluster LCD display,
one or more of your tires is signifi-
cantly under-inflated. The LCD posi-
tion indicator will indicate which tire
is significantly under-inflated by illu-
minating the corresponding position
light.If any of your tire pressures are indi-
cated as being low, immediately
reduce your speed, avoid hard cor-
nering, and anticipate increased
stopping distances. You should stop
and check your tires as soon as pos-
sible. Inflate the tires to the proper
pressure as indicated on the vehi-
cle’s placard or tire inflation pressure
label located on the driver's side cen-
ter pillar outer panel.
If you cannot reach a service station
or if the tire cannot hold the newly
added air, replace the low pressure
tire with the spare tire.
The Low Tire Pressure LCD position
indicator will remain on and the
TPMS Malfunction Indicator may
blink for one minute and then remain
illuminated until you have the low
pressure tire repaired and replaced
on the vehicle.
The spare tire is not equipped with
a tire pressure sensor.
NOTICE
NOTICE
OOS047115L
Page 377 of 506
6-15
What to do in an emergency
6
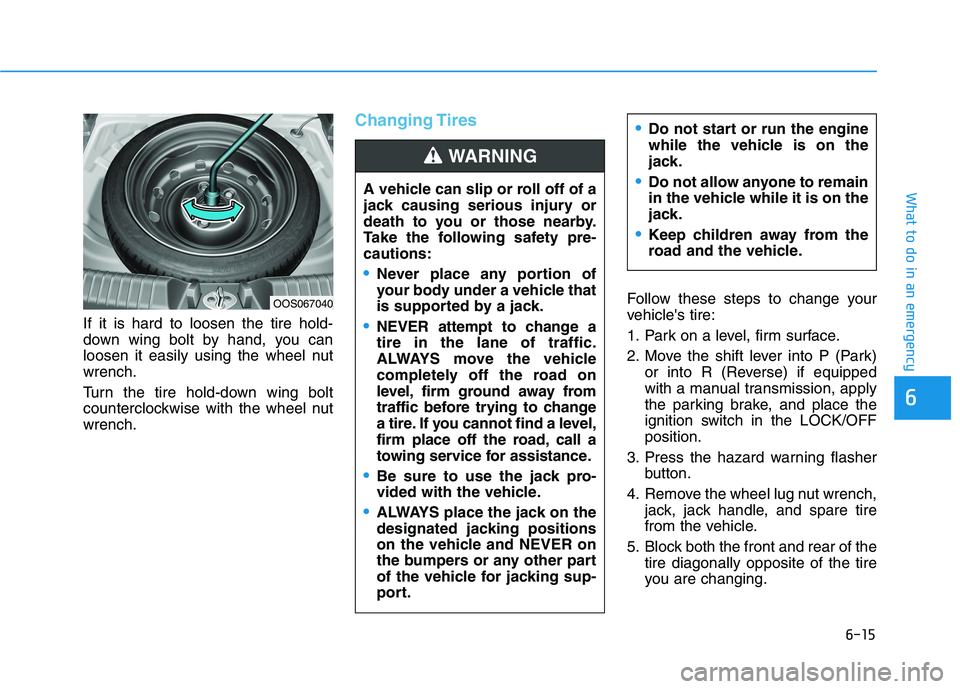
If it is hard to loosen the tire hold-
down wing bolt by hand, you can
loosen it easily using the wheel nut
wrench.
Turn the tire hold-down wing bolt
counterclockwise with the wheel nut
wrench.
Changing Tires
Follow these steps to change your
vehicle's tire:
1. Park on a level, firm surface.
2. Move the shift lever into P (Park)
or into R (Reverse) if equipped
with a manual transmission, apply
the parking brake, and place the
ignition switch in the LOCK/OFF
position.
3. Press the hazard warning flasher
button.
4. Remove the wheel lug nut wrench,
jack, jack handle, and spare tire
from the vehicle.
5. Block both the front and rear of the
tire diagonally opposite of the tire
you are changing. A vehicle can slip or roll off of a
jack causing serious injury or
death to you or those nearby.
Take the following safety pre-
cautions:
Never place any portion of
your body under a vehicle that
is supported by a jack.
NEVER attempt to change a
tire in the lane of traffic.
ALWAYS move the vehicle
completely off the road on
level, firm ground away from
traffic before trying to change
a tire. If you cannot find a level,
firm place off the road, call a
towing service for assistance.
Be sure to use the jack pro-
vided with the vehicle.
ALWAYS place the jack on the
designated jacking positions
on the vehicle and NEVER on
the bumpers or any other part
of the vehicle for jacking sup-
port.
Do not start or run the engine
while the vehicle is on the
jack.
Do not allow anyone to remain
in the vehicle while it is on the
jack.
Keep children away from the
road and the vehicle.
WARNING
OOS067040
Page 379 of 506
6-17
What to do in an emergency
6
9. Loosen the lug nuts with the wheel
lug nut wrench and remove them
with your fingers. Remove the
wheel from the studs and lay it flat
on the ground out of the way.
Remove any dirt or debris from
the studs, mounting surfaces, and
wheel.
10. Install the spare tire onto the
studs of the hub.
11. Tighten the lug nuts with your fin-
gers onto the studs with the
smaller end of the lug nuts clos-
est to the wheel.
12. Lower the vehicle to the ground
by turning the jack handle coun-
terclockwise.
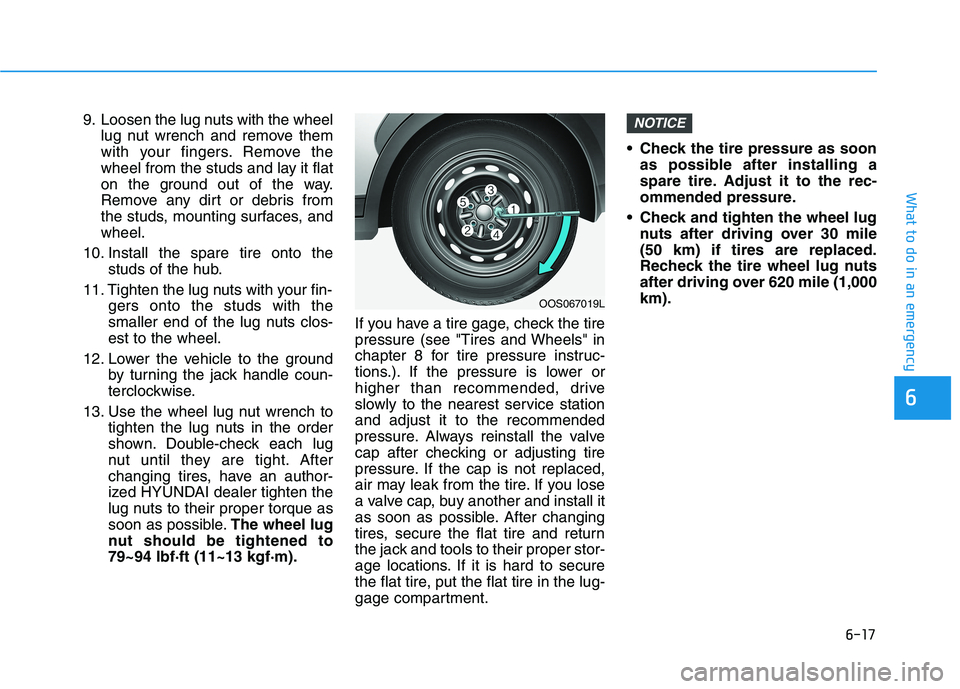
13. Use the wheel lug nut wrench to
tighten the lug nuts in the order
shown. Double-check each lug
nut until they are tight. After
changing tires, have an author-
ized HYUNDAI dealer tighten the
lug nuts to their proper torque as
soon as possible.The wheel lug
nut should be tightened to
79~94 lbf·ft (11~13 kgf·m).If you have a tire gage, check the tire
pressure (see "Tires and Wheels" in
chapter 8 for tire pressure instruc-
tions.). If the pressure is lower or
higher than recommended, drive
slowly to the nearest service station
and adjust it to the recommended
pressure. Always reinstall the valve
cap after checking or adjusting tire
pressure. If the cap is not replaced,
air may leak from the tire. If you lose
a valve cap, buy another and install it
as soon as possible. After changing
tires, secure the flat tire and return
the jack and tools to their proper stor-
age locations. If it is hard to secure
the flat tire, put the flat tire in the lug-
gage compartment. Check the tire pressure as soon
as possible after installing a
spare tire. Adjust it to the rec-
ommended pressure.
Check and tighten the wheel lug
nuts after driving over 30 mile
(50 km) if tires are replaced.
Recheck the tire wheel lug nuts
after driving over 620 mile (1,000
km).NOTICE
OOS067019L
Page 382 of 506
6-20
For safe operation, carefully read
and follow the instructions in this
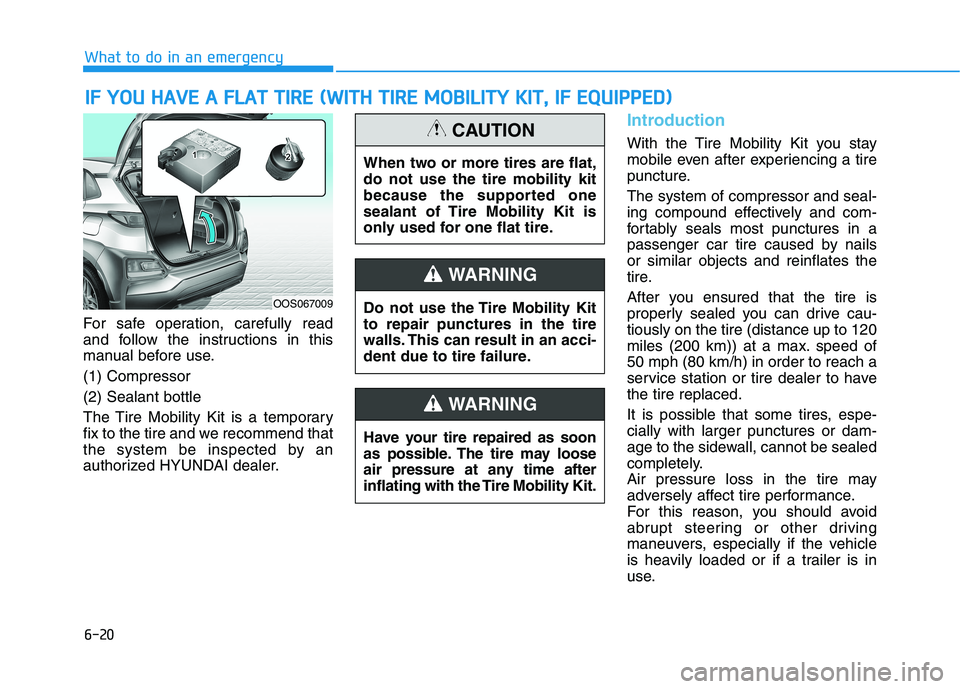
manual before use.
(1) Compressor
(2) Sealant bottle
The Tire Mobility Kit is a temporary
fix to the tire and we recommend that
the system be inspected by an
authorized HYUNDAI dealer.
Introduction
With the Tire Mobility Kit you stay
mobile even after experiencing a tire
puncture.
The system of compressor and seal-
ing compound effectively and com-
fortably seals most punctures in a
passenger car tire caused by nails
or similar objects and reinflates the
tire.
After you ensured that the tire is
properly sealed you can drive cau-
tiously on the tire (distance up to 120
miles (200 km)) at a max. speed of
50 mph (80 km/h) in order to reach a
service station or tire dealer to have
the tire replaced.
It is possible that some tires, espe-
cially with larger punctures or dam-
age to the sidewall, cannot be sealed
completely.
Air pressure loss in the tire may
adversely affect tire performance.
For this reason, you should avoid
abrupt steering or other driving
maneuvers, especially if the vehicle
is heavily loaded or if a trailer is in
use.
I IF
F
Y
YO
OU
U
H
HA
AV
VE
E
A
A
F
FL
LA
AT
T
T
TI
IR
RE
E
(
(W
WI
IT
TH
H
T
TI
IR
RE
E
M
MO
OB
BI
IL
LI
IT
TY
Y
K
KI
IT
T,
,
I
IF
F
E
EQ
QU
UI
IP
PP
PE
ED
D)
)
What to do in an emergency
Do not use the Tire Mobility Kit
to repair punctures in the tire
walls. This can result in an acci-
dent due to tire failure.
WARNING
Have your tire repaired as soon
as possible. The tire may loose
air pressure at any time after
inflating with the Tire Mobility Kit.
WARNING
When two or more tires are flat,
do not use the tire mobility kit
because the supported one
sealant of Tire Mobility Kit is
only used for one flat tire.
CAUTION
OOS067009
Page 386 of 506
6-24
5. Plug the compressor power cord
(4) into the vehicle power outlet.
Only use the front passenger side
power outlet when connecting the
power cord.
6. With the ignition switch in the ON
position, switch on the compres-
sor and let it run for approximately
5~7 minutes to fill the sealant up
to proper pressure. (refer to the
Tire and Wheels, chapter 8). The
inflation pressure of the tire after
filling is unimportant and will be
checked/corrected later.Be careful not to overinflate the
tire and stay away from the tire
when filling it.
7. Switch off the compressor.
8. Detach the hoses from the sealant
bottle connector and from the tire
valve.
Return the Tire Mobility Kit to its stor-
age location in the vehicle.
Distributing the sealant
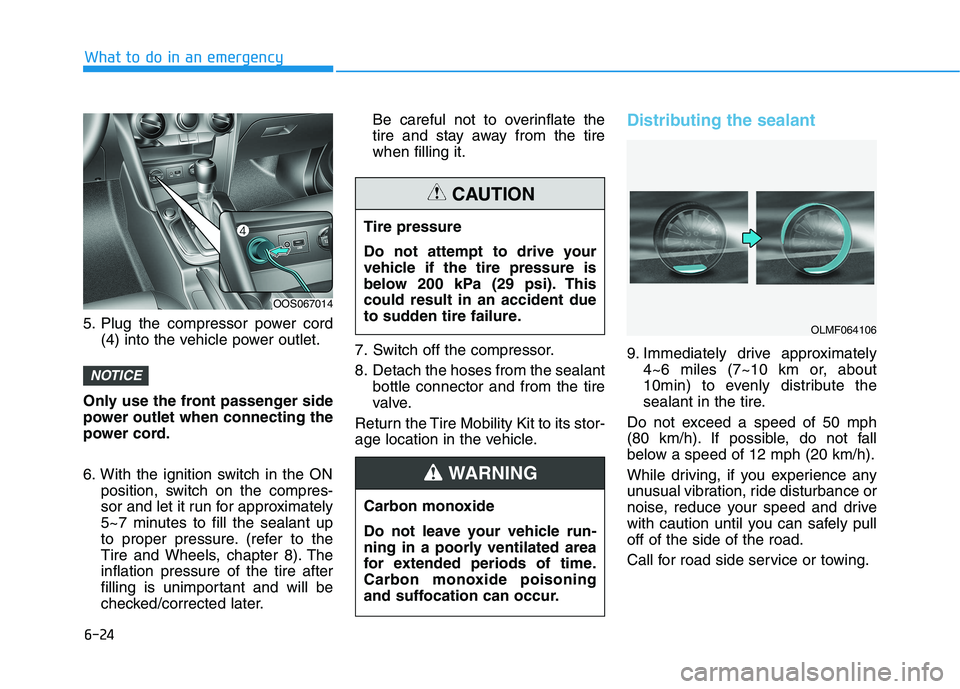
9. Immediately drive approximately
4~6 miles (7~10 km or, about
10min) to evenly distribute the
sealant in the tire.
Do not exceed a speed of 50 mph
(80 km/h). If possible, do not fall
below a speed of 12 mph (20 km/h).
While driving, if you experience any
unusual vibration, ride disturbance or
noise, reduce your speed and drive
with caution until you can safely pull
off of the side of the road.
Call for road side service or towing.
NOTICE
What to do in an emergency
OOS067014
Tire pressure
Do not attempt to drive your
vehicle if the tire pressure is
below 200 kPa (29 psi). This
could result in an accident due
to sudden tire failure.
CAUTION
Carbon monoxide
Do not leave your vehicle run-
ning in a poorly ventilated area
for extended periods of time.
Carbon monoxide poisoning
and suffocation can occur.
WARNING
OLMF064106