set clock Hyundai Matrix 2004 Owner's Manual
[x] Cancel search | Manufacturer: HYUNDAI, Model Year: 2004, Model line: Matrix, Model: Hyundai Matrix 2004Pages: 317, PDF Size: 5.12 MB
Page 51 of 317
FEATURES OF YOUR HYUNDAI 1- 43
There are three control buttons for the digital clock. Their functions are: HOUR - Push "H" to advance the hour indicat-
ed. MIN - Push "M" to advance the minute indicat-
ed.RESET - Push "R" to reset minutes to ":00" to
facilitate resetting the clock to the correct time.When this is done: Pressing "R" between 10 : 30 and 11 : 29 changes the readout to 11 : 00.Pressing "R" between 11 : 30 and 12 : 29changes the readout to 12 : 00. B430A01FC-GAT FRONT ASHTRAY
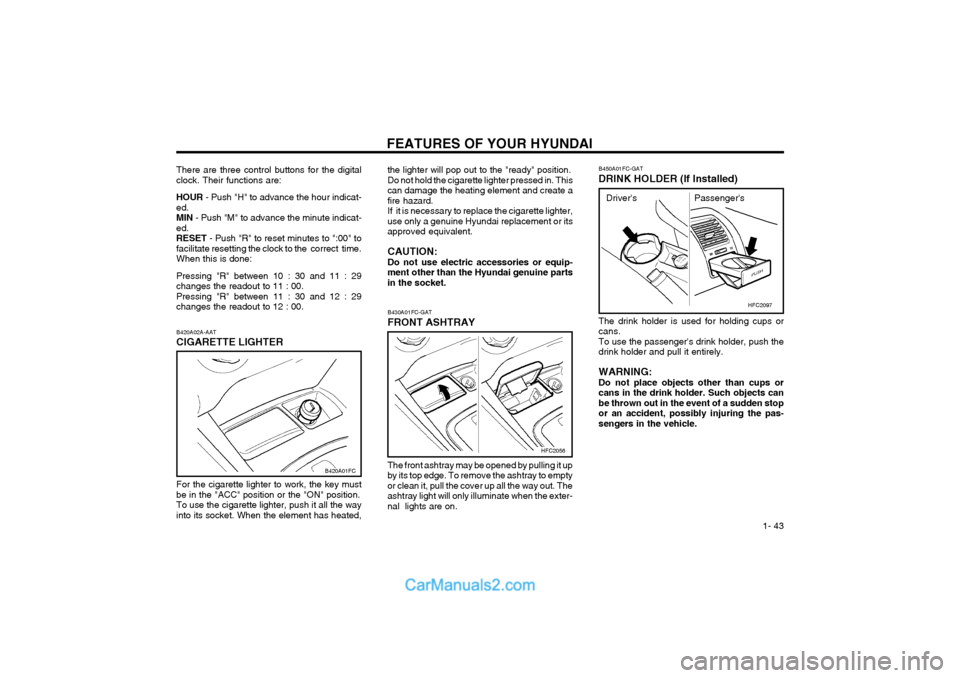
HFC2056
The front ashtray may be opened by pulling it up by its top edge. To remove the ashtray to emptyor clean it, pull the cover up all the way out. Theashtray light will only illuminate when the exter-nal lights are on.
B420A02A-AAT CIGARETTE LIGHTER For the cigarette lighter to work, the key must be in the "ACC" position or the "ON" position.To use the cigarette lighter, push it all the wayinto its socket. When the element has heated,
B420A01FC the lighter will pop out to the "ready" position. Do not hold the cigarette lighter pressed in. Thiscan damage the heating element and create afire hazard.If it is necessary to replace the cigarette lighter,use only a genuine Hyundai replacement or itsapproved equivalent. CAUTION: Do not use electric accessories or equip-ment other than the Hyundai genuine partsin the socket.
B450A01FC-GAT DRINK HOLDER (If Installed)
HFC2097
The drink holder is used for holding cups or cans.To use the passenger's drink holder, push thedrink holder and pull it entirely. WARNING: Do not place objects other than cups orcans in the drink holder. Such objects canbe thrown out in the event of a sudden stopor an accident, possibly injuring the pas-sengers in the vehicle.
Driver's Passenger's
Page 74 of 317
FEATURES OF YOUR HYUNDAI
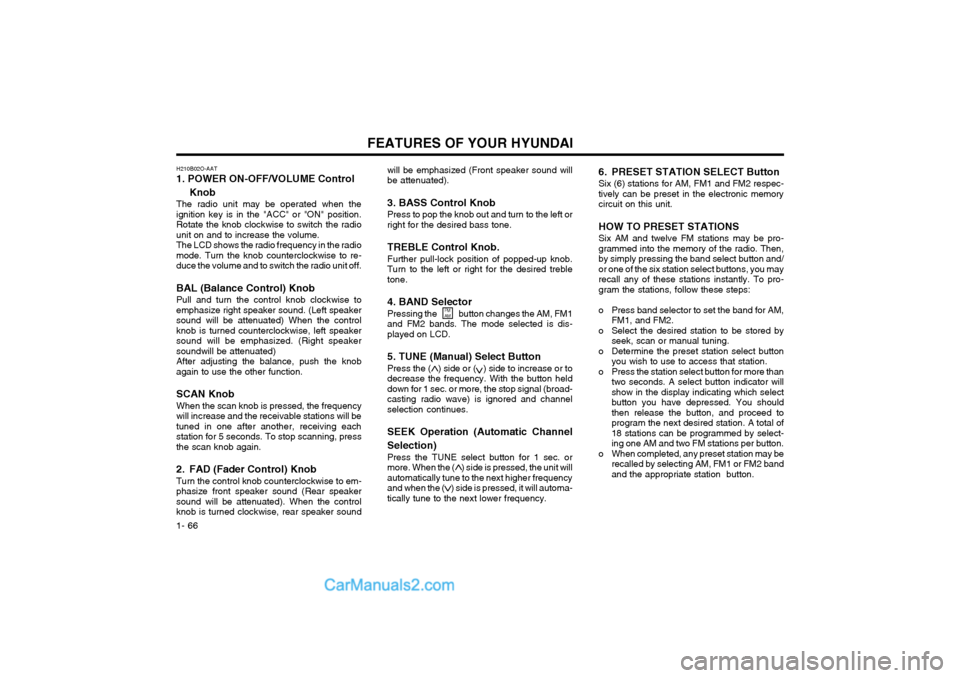
1- 66 will be emphasized (Front speaker sound will be attenuated). 3. BASS Control Knob Press to pop the knob out and turn to the left or right for the desired bass tone. TREBLE Control Knob. Further pull-lock position of popped-up knob. Turn to the left or right for the desired trebletone. 4. BAND Selector Pressing the button changes the AM, FM1 and FM2 bands. The mode selected is dis-played on LCD.
5. TUNE (Manual) Select Button Press the ( ) side or ( ) side to increase or to decrease the frequency. With the button helddown for 1 sec. or more, the stop signal (broad-casting radio wave) is ignored and channelselection continues. SEEK Operation (Automatic Channel Selection) Press the TUNE select button for 1 sec. or more. When the ( ) side is pressed, the unit willautomatically tune to the next higher frequencyand when the ( ) side is pressed, it will automa-tically tune to the next lower frequency.
6. PRESET STATION SELECT Button Six (6) stations for AM, FM1 and FM2 respec- tively can be preset in the electronic memorycircuit on this unit. HOW TO PRESET STATIONS Six AM and twelve FM stations may be pro- grammed into the memory of the radio. Then,by simply pressing the band select button and/or one of the six station select buttons, you mayrecall any of these stations instantly. To pro-gram the stations, follow these steps:
o Press band selector to set the band for AM,
FM1, and FM2.
o Select the desired station to be stored by seek, scan or manual tuning.
o Determine the preset station select button you wish to use to access that station.
o Press the station select button for more than two seconds. A select button indicator will show in the display indicating which selectbutton you have depressed. You shouldthen release the button, and proceed toprogram the next desired station. A total of18 stations can be programmed by select-ing one AM and two FM stations per button.
o When completed, any preset station may be recalled by selecting AM, FM1 or FM2 bandand the appropriate station button.
FM AM
H210B02O-AAT 1. POWER ON-OFF/VOLUME Control
Knob
The radio unit may be operated when the ignition key is in the "ACC" or "ON" position.Rotate the knob clockwise to switch the radiounit on and to increase the volume.The LCD shows the radio frequency in the radiomode. Turn the knob counterclockwise to re-duce the volume and to switch the radio unit off. BAL (Balance Control) Knob Pull and turn the control knob clockwise to emphasize right speaker sound. (Left speakersound will be attenuated) When the controlknob is turned counterclockwise, left speakersound will be emphasized. (Right speakersoundwill be attenuated)After adjusting the balance, push the knobagain to use the other function. SCAN Knob When the scan knob is pressed, the frequency will increase and the receivable stations will betuned in one after another, receiving eachstation for 5 seconds. To stop scanning, pressthe scan knob again.
2. FAD (Fader Control) Knob Turn the control knob counterclockwise to em- phasize front speaker sound (Rear speakersound will be attenuated). When the controlknob is turned clockwise, rear speaker sound
Page 76 of 317
FEATURES OF YOUR HYUNDAI
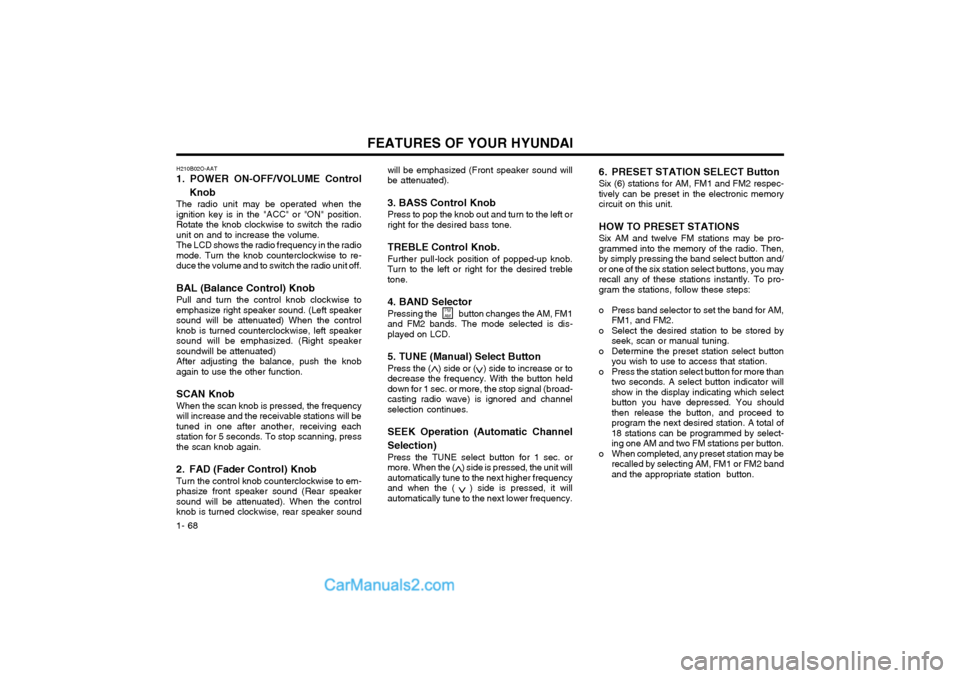
1- 68 will be emphasized (Front speaker sound will be attenuated). 3. BASS Control Knob Press to pop the knob out and turn to the left or right for the desired bass tone. TREBLE Control Knob. Further pull-lock position of popped-up knob. Turn to the left or right for the desired trebletone. 4. BAND Selector Pressing the button changes the AM, FM1 and FM2 bands. The mode selected is dis-played on LCD.
5. TUNE (Manual) Select Button Press the ( ) side or ( ) side to increase or to decrease the frequency. With the button helddown for 1 sec. or more, the stop signal (broad-casting radio wave) is ignored and channelselection continues. SEEK Operation (Automatic Channel Selection) Press the TUNE select button for 1 sec. or more. When the ( ) side is pressed, the unit willautomatically tune to the next higher frequencyand when the ( ) side is pressed, it willautomatically tune to the next lower frequency.
6. PRESET STATION SELECT Button Six (6) stations for AM, FM1 and FM2 respec- tively can be preset in the electronic memorycircuit on this unit. HOW TO PRESET STATIONS Six AM and twelve FM stations may be pro- grammed into the memory of the radio. Then,by simply pressing the band select button and/or one of the six station select buttons, you mayrecall any of these stations instantly. To pro-gram the stations, follow these steps:
o Press band selector to set the band for AM,
FM1, and FM2.
o Select the desired station to be stored by seek, scan or manual tuning.
o Determine the preset station select button you wish to use to access that station.
o Press the station select button for more than two seconds. A select button indicator will show in the display indicating which selectbutton you have depressed. You shouldthen release the button, and proceed toprogram the next desired station. A total of18 stations can be programmed by select-ing one AM and two FM stations per button.
o When completed, any preset station may be recalled by selecting AM, FM1 or FM2 bandand the appropriate station button.
FM
AM
H210B02O-AAT 1. POWER ON-OFF/VOLUME Control
Knob
The radio unit may be operated when the ignition key is in the "ACC" or "ON" position.Rotate the knob clockwise to switch the radiounit on and to increase the volume.The LCD shows the radio frequency in the radiomode. Turn the knob counterclockwise to re-duce the volume and to switch the radio unit off. BAL (Balance Control) Knob Pull and turn the control knob clockwise to emphasize right speaker sound. (Left speakersound will be attenuated) When the controlknob is turned counterclockwise, left speakersound will be emphasized. (Right speakersoundwill be attenuated)After adjusting the balance, push the knobagain to use the other function. SCAN Knob When the scan knob is pressed, the frequency will increase and the receivable stations will betuned in one after another, receiving eachstation for 5 seconds. To stop scanning, pressthe scan knob again.
2. FAD (Fader Control) Knob Turn the control knob counterclockwise to em- phasize front speaker sound (Rear speakersound will be attenuated). When the controlknob is turned clockwise, rear speaker sound
Page 80 of 317
FEATURES OF YOUR HYUNDAI
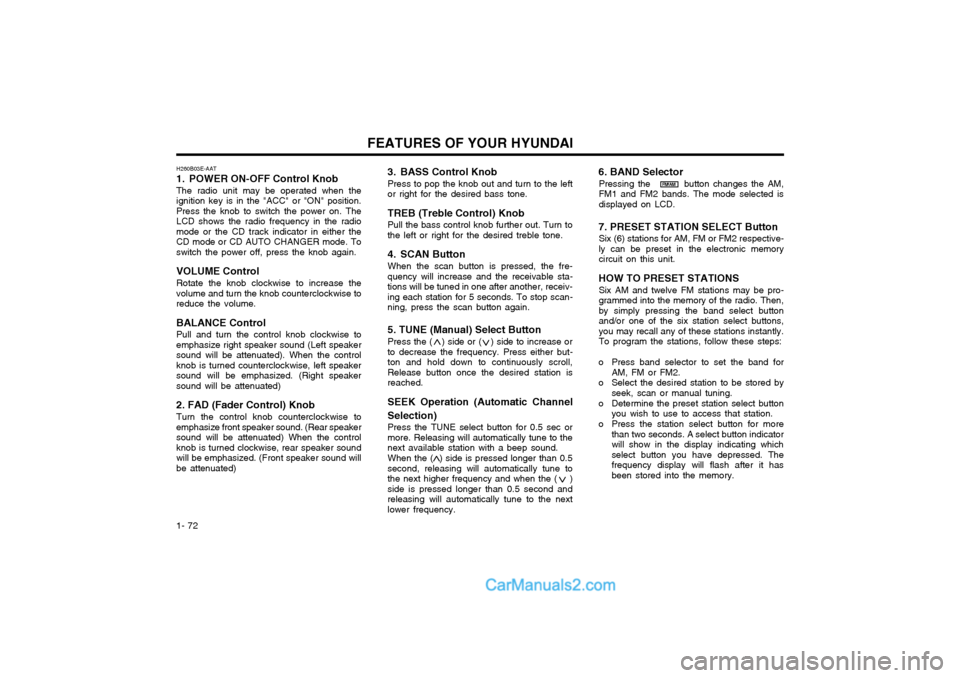
1- 72 3. BASS Control Knob Press to pop the knob out and turn to the left or right for the desired bass tone. TREB (Treble Control) Knob Pull the bass control knob further out. Turn to the left or right for the desired treble tone.
4. SCAN Button When the scan button is pressed, the fre- quency will increase and the receivable sta-tions will be tuned in one after another, receiv-ing each station for 5 seconds. To stop scan-ning, press the scan button again. 5. TUNE (Manual) Select Button Press the ( ) side or ( ) side to increase or to decrease the frequency. Press either but-ton and hold down to continuously scroll,Release button once the desired station isreached. SEEK Operation (Automatic Channel Selection) Press the TUNE select button for 0.5 sec or more. Releasing will automatically tune to thenext available station with a beep sound. When the ( ) side is pressed longer than 0.5 second, releasing will automatically tune tothe next higher frequency and when the ( )side is pressed longer than 0.5 second andreleasing will automatically tune to the nextlower frequency.
6. BAND Selector
Pressing the button changes the AM,FM1 and FM2 bands. The mode selected isdisplayed on LCD.
7. PRESET STATION SELECT Button Six (6) stations for AM, FM or FM2 respective-ly can be preset in the electronic memorycircuit on this unit.
HOW TO PRESET STATIONS Six AM and twelve FM stations may be pro-grammed into the memory of the radio. Then,by simply pressing the band select buttonand/or one of the six station select buttons,you may recall any of these stations instantly.To program the stations, follow these steps:
o Press band selector to set the band for AM, FM or FM2.
o Select the desired station to be stored by seek, scan or manual tuning.
o Determine the preset station select button you wish to use to access that station.
o Press the station select button for more than two seconds. A select button indicatorwill show in the display indicating whichselect button you have depressed. Thefrequency display will flash after it hasbeen stored into the memory.
H260B03E-AAT
1. POWER ON-OFF Control Knob The radio unit may be operated when the ignition key is in the "ACC" or "ON" position.Press the knob to switch the power on. TheLCD shows the radio frequency in the radiomode or the CD track indicator in either theCD mode or CD AUTO CHANGER mode. Toswitch the power off, press the knob again. VOLUME Control Rotate the knob clockwise to increase the volume and turn the knob counterclockwise toreduce the volume. BALANCE Control Pull and turn the control knob clockwise to emphasize right speaker sound (Left speakersound will be attenuated). When the controlknob is turned counterclockwise, left speakersound will be emphasized. (Right speakersound will be attenuated) 2. FAD (Fader Control) Knob Turn the control knob counterclockwise to emphasize front speaker sound. (Rear speakersound will be attenuated) When the controlknob is turned clockwise, rear speaker soundwill be emphasized. (Front speaker sound willbe attenuated)
FM/AM
Page 87 of 317
FEATURES OF YOUR HYUNDAI 1- 79
H290B03E-GAT
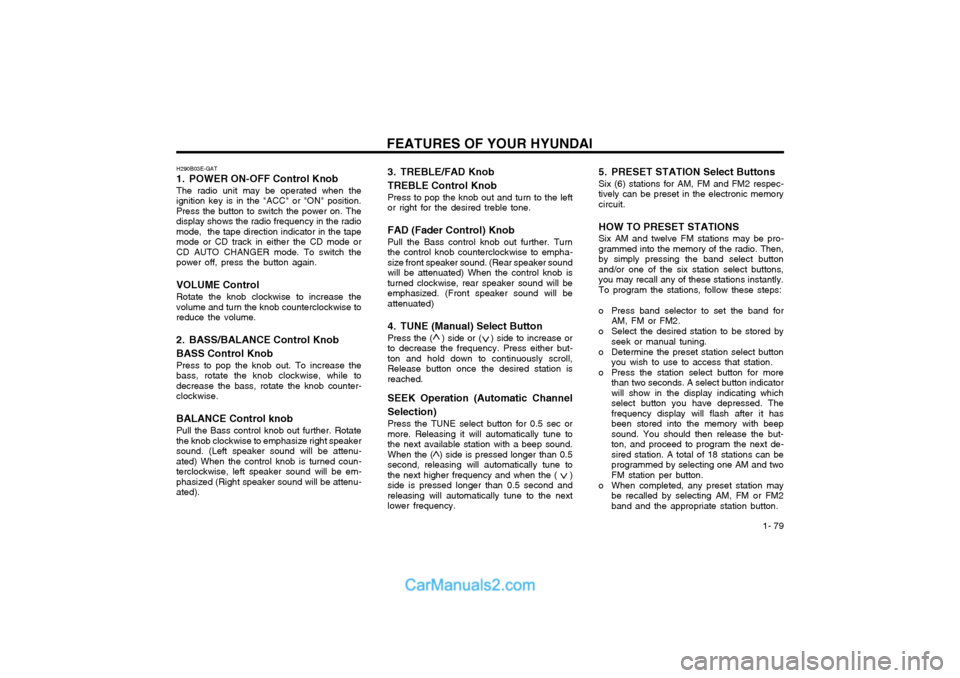
1. POWER ON-OFF Control Knob
The radio unit may be operated when the ignition key is in the "ACC" or "ON" position.Press the button to switch the power on. Thedisplay shows the radio frequency in the radiomode, the tape direction indicator in the tapemode or CD track in either the CD mode orCD AUTO CHANGER mode. To switch thepower off, press the button again.
VOLUME Control Rotate the knob clockwise to increase thevolume and turn the knob counterclockwise toreduce the volume.
2. BASS/BALANCE Control Knob BASS Control Knob Press to pop the knob out. To increase the bass, rotate the knob clockwise, while todecrease the bass, rotate the knob counter-clockwise.
BALANCE Control knob Pull the Bass control knob out further. Rotatethe knob clockwise to emphasize right speakersound. (Left speaker sound will be attenu-ated) When the control knob is turned coun-terclockwise, left speaker sound will be em-phasized (Right speaker sound will be attenu-ated). 3. TREBLE/FAD Knob TREBLE Control Knob
Press to pop the knob out and turn to the left or right for the desired treble tone.
FAD (Fader Control) Knob Pull the Bass control knob out further. Turnthe control knob counterclockwise to empha-size front speaker sound. (Rear speaker soundwill be attenuated) When the control knob isturned clockwise, rear speaker sound will beemphasized. (Front speaker sound will beattenuated)
4. TUNE (Manual) Select Button Press the ( ) side or ( ) side to increase orto decrease the frequency. Press either but-ton and hold down to continuously scroll,Release button once the desired station isreached.
SEEK Operation (Automatic Channel Selection) Press the TUNE select button for 0.5 sec or more. Releasing it will automatically tune tothe next available station with a beep sound.When the ( ) side is pressed longer than 0.5second, releasing will automatically tune tothe next higher frequency and when the ( )side is pressed longer than 0.5 second andreleasing will automatically tune to the nextlower frequency. 5. PRESET STATION Select Buttons Six (6) stations for AM, FM and FM2 respec- tively can be preset in the electronic memorycircuit. HOW TO PRESET STATIONS Six AM and twelve FM stations may be pro- grammed into the memory of the radio. Then,by simply pressing the band select buttonand/or one of the six station select buttons,you may recall any of these stations instantly.To program the stations, follow these steps:
o Press band selector to set the band for
AM, FM or FM2.
o Select the desired station to be stored by seek or manual tuning.
o Determine the preset station select button you wish to use to access that station.
o Press the station select button for more than two seconds. A select button indicator will show in the display indicating whichselect button you have depressed. Thefrequency display will flash after it hasbeen stored into the memory with beepsound. You should then release the but-ton, and proceed to program the next de-sired station. A total of 18 stations can beprogrammed by selecting one AM and twoFM station per button.
o When completed, any preset station may be recalled by selecting AM, FM or FM2band and the appropriate station button.
Page 140 of 317
DO-IT-YOURSELF MAINTENANCE
6-6 If the oil level is close to or below the "L" mark,
add oil until it reaches the "F" mark. To add oil:
1. Remove the oil filler cap by turning it counter- clockwise.
2. Add oil, then check the level again. Do not overfill.
3. Replace the cap by turning it clockwise.
The distance between the "F" and "L" marks is
equal to about 1 liter(Gasoline Engine)/1.2 liter(Diesel Engine) of oil.
G350A01A-GAT
ENGINE OIL CONSUMPTION Function of Engine Oil
Engine oil has the primary function of lubricat-
ing and cooling the inside of the engine.
Engine oil consumption It is normal that an engine should consume
some engine oil while normal driving. The cause of oil consumption in a normal engine are asfollows;
o Engine oil is used to lubricate pistons, piston rings and cylinders. A thin film of oil is left on the cylinder wall when a piston moves downwards in thecylinder. High negative pressure generated
during engine operation sucks some of theoil into the combustion chamber. This oil with some oil of the cylinder wall is burned by the high temperature combustion gases during the combustion process.
o The engine oil consumption is strongly ef- fected by the viscosity and quality of oil,engine rpm and driving condition etc. Theengine oil is more consumed under severedriving conditions such as high speeds and
frequent acceleration and deceleration thannormal driving condition.
G040A03FC-GAT
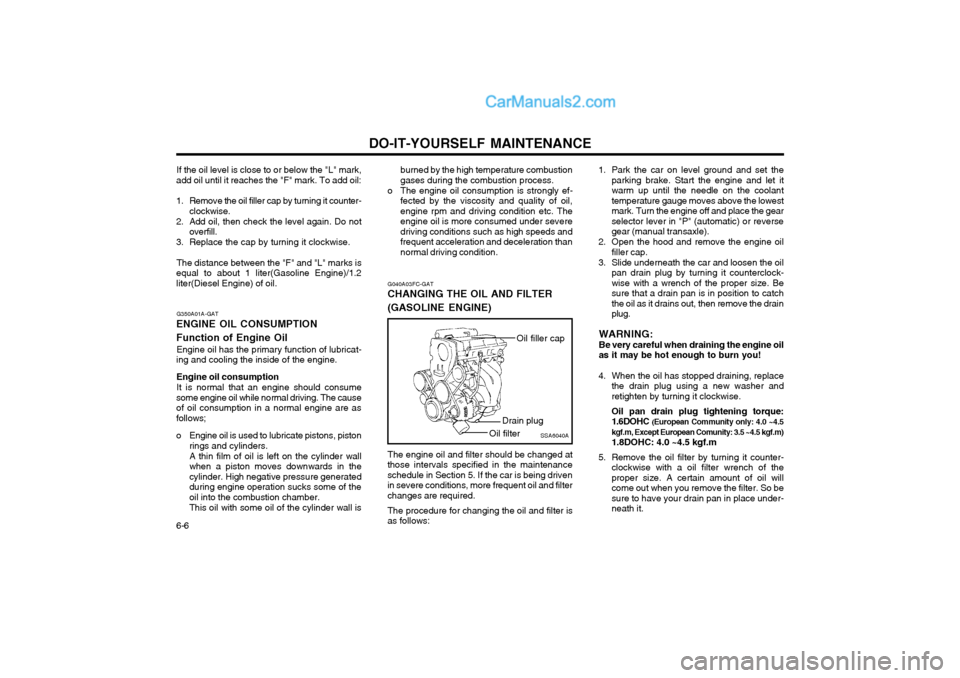
CHANGING THE OIL AND FILTER (GASOLINE ENGINE)
The engine oil and filter should be changed at
those intervals specified in the maintenance schedule in Section 5. If the car is being drivenin severe conditions, more frequent oil and filterchanges are required.
The procedure for changing the oil and filter is
as follows: 1. Park the car on level ground and set the
parking brake. Start the engine and let itwarm up until the needle on the coolanttemperature gauge moves above the lowestmark. Turn the engine off and place the gearselector lever in "P" (automatic) or reversegear (manual transaxle).
2. Open the hood and remove the engine oil filler cap.
3. Slide underneath the car and loosen the oil pan drain plug by turning it counterclock-wise with a wrench of the proper size. Besure that a drain pan is in position to catchthe oil as it drains out, then remove the drainplug.
WARNING:Be very careful when draining the engine oilas it may be hot enough to burn you!
4. When the oil has stopped draining, replace the drain plug using a new washer andretighten by turning it clockwise. Oil pan drain plug tightening torque: 1.6DOHC (European Community only: 4.0 ~4.5
kgf.m, Except European Comunity: 3.5 ~4.5 kgf.m) 1.8DOHC: 4.0 ~4.5 kgf.m
5. Remove the oil filter by turning it counter- clockwise with a oil filter wrench of the proper size. A certain amount of oil willcome out when you remove the filter. So besure to have your drain pan in place under-neath it.
SSA6040A
Oil filler cap
Drain plug
Oil filter
Page 141 of 317
DO-IT-YOURSELF MAINTENANCE 6-7
G040C01FCEngine oil drain plug
Oil filter
G040B03FC-GAT
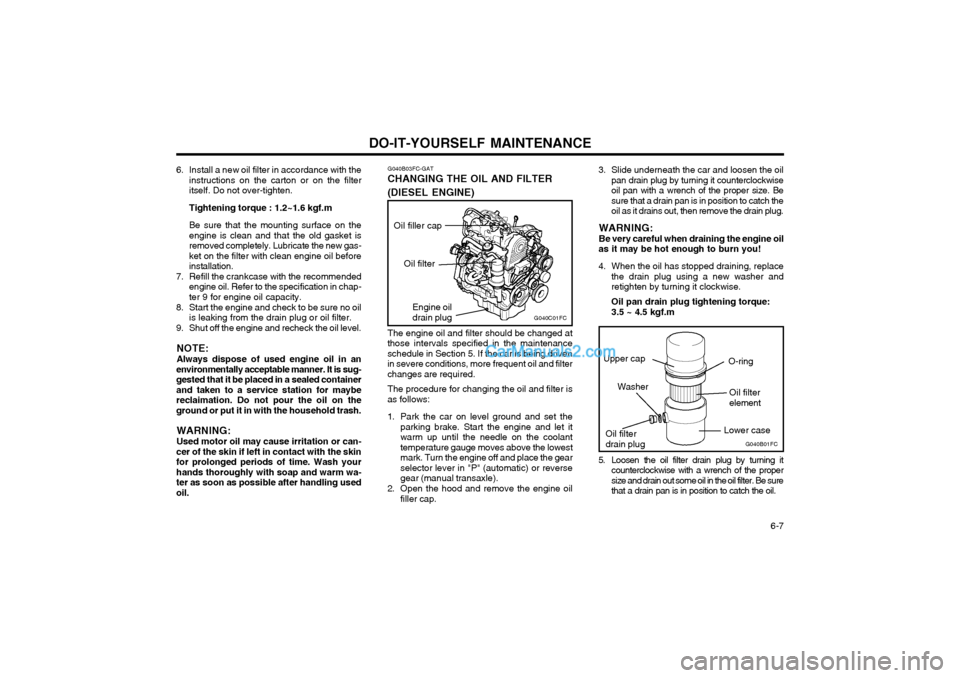
CHANGING THE OIL AND FILTER (DIESEL ENGINE)
The engine oil and filter should be changed at
those intervals specified in the maintenance schedule in Section 5. If the car is being drivenin severe conditions, more frequent oil and filterchanges are required.
The procedure for changing the oil and filter is
as follows:
1. Park the car on level ground and set the parking brake. Start the engine and let it warm up until the needle on the coolanttemperature gauge moves above the lowestmark. Turn the engine off and place the gearselector lever in "P" (automatic) or reversegear (manual transaxle).
2. Open the hood and remove the engine oil filler cap. 3. Slide underneath the car and loosen the oil
pan drain plug by turning it counterclockwiseoil pan with a wrench of the proper size. Besure that a drain pan is in position to catch theoil as it drains out, then remove the drain plug.
WARNING: Be very careful when draining the engine oil
as it may be hot enough to burn you!
4. When the oil has stopped draining, replace the drain plug using a new washer and retighten by turning it clockwise. Oil pan drain plug tightening torque: 3.5 ~ 4.5 kgf.m
6. Install a new oil filter in accordance with the
instructions on the carton or on the filter itself. Do not over-tighten. Tightening torque : 1.2~1.6 kgf.mBe sure that the mounting surface on the engine is clean and that the old gasket isremoved completely. Lubricate the new gas-ket on the filter with clean engine oil beforeinstallation.
7. Refill the crankcase with the recommended engine oil. Refer to the specification in chap-ter 9 for engine oil capacity.
8. Start the engine and check to be sure no oil is leaking from the drain plug or oil filter.
9. Shut off the engine and recheck the oil level.
NOTE: Always dispose of used engine oil in an
environmentally acceptable manner. It is sug- gested that it be placed in a sealed containerand taken to a service station for maybereclaimation. Do not pour the oil on theground or put it in with the household trash.
WARNING: Used motor oil may cause irritation or can-
cer of the skin if left in contact with the skin for prolonged periods of time. Wash yourhands thoroughly with soap and warm wa-ter as soon as possible after handling usedoil. 5. Loosen the oil filter drain plug by turning it
counterclockwise with a wrench of the propersize and drain out some oil in the oil filter. Be surethat a drain pan is in position to catch the oil.
G040B01FCOil filter drain plug O-ring
Oil filterelement
Washer
Upper cap
Lower case
Oil filler cap
Page 171 of 317
INDEX10-1
Cargo Area
Cover ............................................................................. 1-53
Cassette Tape Player Operation (H220, H280).1-69 ~ 1-70, 1-81 ~ 1-82 Catalytic Converter .................................................................... 7-1 ~ 7-2
CD Auto Changer ............................................................................. 1-53
CD Auto Changer (H260, H280) ...................... 1-76 ~ 1-77, 1-85 ~ 1-86
Child-Protector Rear Door Lock ......................................................... 1-5
Child Restraint System .......................................................... 1-18 ~ 1-23
Cigarette Lighter ................................................................................ 1-43
Clock ................................................................................................ 1-43Clutch Checking fluid ............................................................................... 6-16
Pedal free play ............................................................................. 6-18
Combination Light Headlight flasher ........................................................................... 1-40
Headlight switch ............................................................................ 1-39
High-beam switch .......................................................................... 1-40
Lane change signal ....................................................................... 1-39
Turn signal operation .................................................................... 1-39
Compact Disc Player Operation (H260, H280) .1-72 ~ 1-75, 1-83 ~ 1-84Cooling Fans ..................................................................................... 6-21
Corrosion Protection
Cleaning the interior ........................................................................ 4-3
Protecting your Hyundai from corrosion ................ ......................... 4-1
Washing and waxing ....................................................................... 4-2
DDefrosting/Defogging ......................................................................... 1-60
Door Central door lock ............................................................................. 1-6
Door locks ....................................................................................... 1-4Locking and unlocking front doors with a key ....................... 1-4 ~ 1-5
Drink Holder ........................................................................... 1-43 ~ 1-44
Drive Belts ........................................................................................ 6-19
ZK000A1-G 10. INDEX
A Accessory Tray ................................................................................. 1-51
Air Bag ................................................................................... 1-25 ~ 1-29
Air Cleaner Filter ............................................................................... 6-12
Air Conditioning Care .............................................................................................. 6-16
Operation ....................................................................................... 6-17
Switch ............................................................................................ 1-61
Air Filter ............................................................................................ 1-62
Antenna ............................................................................................. 1-90
Ashtray .............................................................................................. 1-43
Auto Fuel Cut Switch ........................................................................ 1-54
BBattery ...................................................................................... 2-11, 6-20
Brake Anti-lock system ..................................................................... 2-8 ~ 2-9
Checking the brakes ..................................................................... 6-15
Fluid ............................................................................................... 6-15
Pedal clearance ............................................................................ 6-18
Pedal free play .............................................................................. 6-18
Practices ................................................................................ 2-7 ~ 2-8
Brake Pad Wear Warning Sound ..................................................... 1-35
Brake Traction Control System .......................................................... 2-9
Breaking-In your new Hyundai ........................................................... 1-2
Bulbs Wattage ................................................................................... 6-25
C Care of Cassette Tapes ........................................................ 1-88 ~ 1-89
Care of Disc ...................................................................................... 1-88
10
Page 222 of 317
CONTROLS AND EQUIPMENT
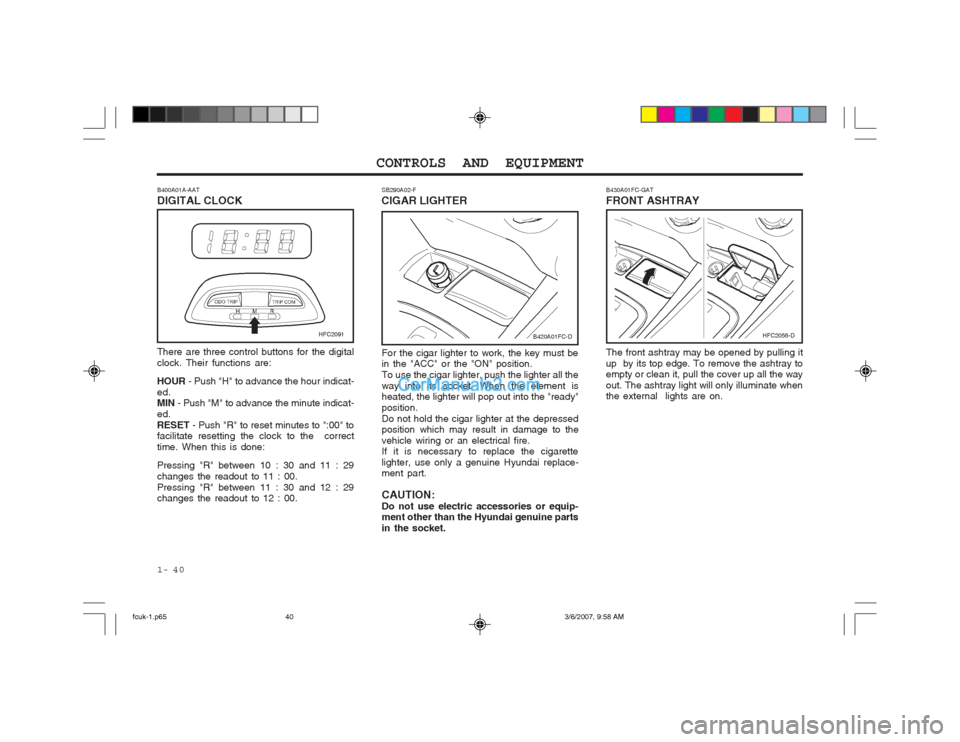
1- 40 SB290A02-F
CIGAR LIGHTER
For the cigar lighter to work, the key must be in the "ACC" or the "ON" position. To use the cigar lighter, push the lighter all theway into its socket. When the element is heated, the lighter will pop out into the "ready" position.Do not hold the cigar lighter at the depressed position which may result in damage to the vehicle wiring or an electrical fire. If it is necessary to replace the cigarette lighter, use only a genuine Hyundai replace- ment part. CAUTION: Do not use electric accessories or equip- ment other than the Hyundai genuine parts in the socket. The front ashtray may be opened by pulling itup by its top edge. To remove the ashtray to empty or clean it, pull the cover up all the way out. The ashtray light will only illuminate when the external lights are on.
B430A01FC-GAT FRONT ASHTRAY
There are three control buttons for the digital clock. Their functions are: HOUR - Push "H" to advance the hour indicat-
ed. MIN - Push "M" to advance the minute indicat-
ed. RESET - Push "R" to reset minutes to ":00" to
facilitate resetting the clock to the correcttime. When this is done: Pressing "R" between 10 : 30 and 11 : 29 changes the readout to 11 : 00.Pressing "R" between 11 : 30 and 12 : 29 changes the readout to 12 : 00.
B400A01A-AAT DIGITAL CLOCK
B420A01FC-DHFC2091HFC2056-D
fcuk-1.p65
3/6/2007, 9:58 AM
40
Page 263 of 317
IN CASE OF EMERGENCY
3-4
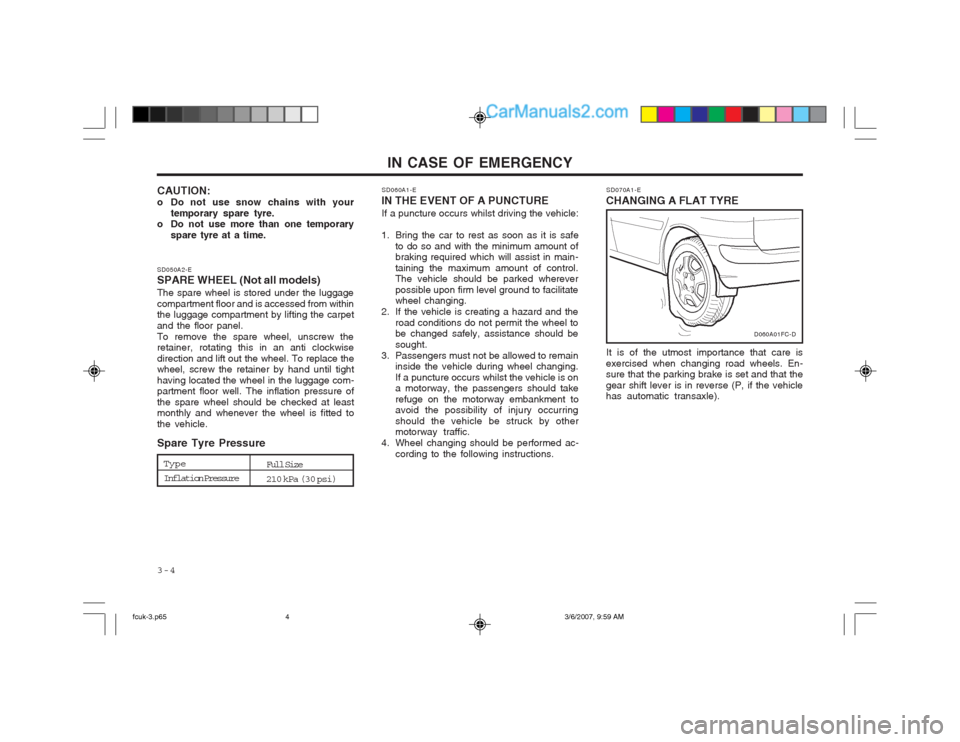
SD070A1-E
CHANGING A FLAT TYRE
It is of the utmost importance that care is
exercised when changing road wheels. En- sure that the parking brake is set and that the gear shift lever is in reverse (P, if the vehicle has automatic transaxle).
D060A01FC-D
SD050A2-E SPARE WHEEL (Not all models) The spare wheel is stored under the luggage compartment floor and is accessed from within the luggage compartment by lifting the carpet and the floor panel.To remove the spare wheel, unscrew the retainer, rotating this in an anti clockwise direction and lift out the wheel. To replace the wheel, screw the retainer by hand until tight having located the wheel in the luggage com- partment floor well. The inflation pressure of the spare wheel should be checked at least monthly and whenever the wheel is fitted to the vehicle. Spare Tyre Pressure
CAUTION:
o Do not use snow chains with your
temporary spare tyre.
o Do not use more than one temporary
spare tyre at a time. SD060A1-E
IN THE EVENT OF A PUNCTURE If a puncture occurs whilst driving the vehicle:
1. Bring the car to rest as soon as it is safe to do so and with the minimum amount of braking required which will assist in main- taining the maximum amount of control. The vehicle should be parked wherever possible upon firm level ground to facilitate wheel changing.
2. If the vehicle is creating a hazard and the road conditions do not permit the wheel tobe changed safely, assistance should be sought.
3. Passengers must not be allowed to remain inside the vehicle during wheel changing.If a puncture occurs whilst the vehicle is on a motorway, the passengers should take refuge on the motorway embankment to avoid the possibility of injury occurring should the vehicle be struck by other motorway traffic.
4. Wheel changing should be performed ac- cording to the following instructions.
Type
Inflation Pressure Full Size
210 kPa (30 psi)
fcuk-3.p65
3/6/2007, 9:59 AM
4