reset HYUNDAI NEXO 2022 User Guide
[x] Cancel search | Manufacturer: HYUNDAI, Model Year: 2022, Model line: NEXO, Model: HYUNDAI NEXO 2022Pages: 561, PDF Size: 48.42 MB
Page 239 of 561
3-152
Convenient features of your vehicle
Adjusting the driver and passenger
side temperature equally
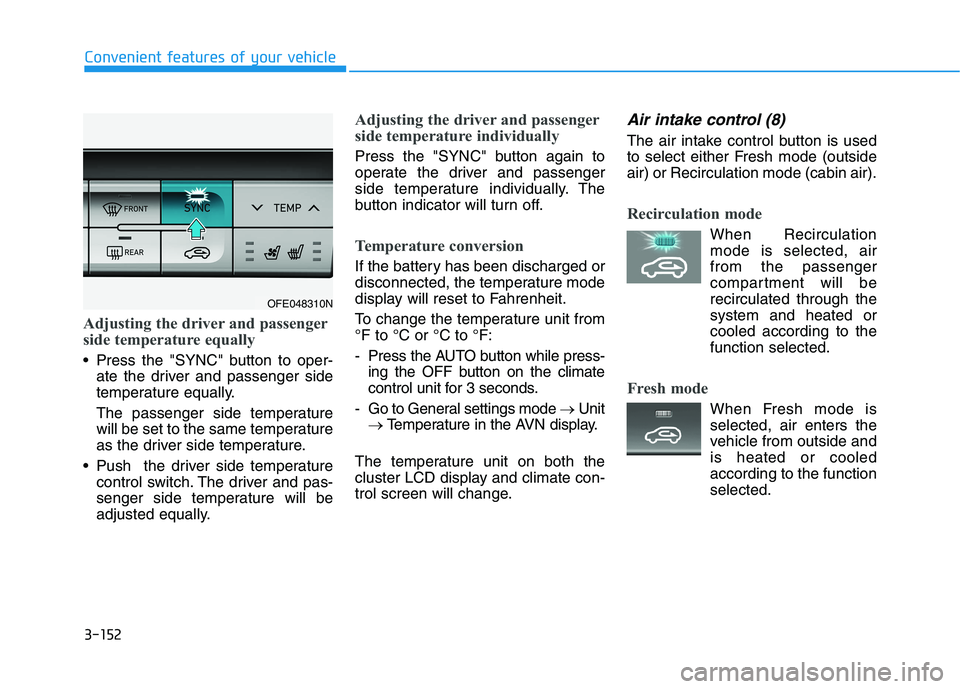
Press the "SYNC" button to oper-
ate the driver and passenger side
temperature equally.
The passenger side temperature
will be set to the same temperature
as the driver side temperature.
Push the driver side temperature
control switch. The driver and pas-
senger side temperature will be
adjusted equally.
Adjusting the driver and passenger
side temperature individually
Press the "SYNC" button again to
operate the driver and passenger
side temperature individually. The
button indicator will turn off.
Temperature conversion
If the battery has been discharged or
disconnected, the temperature mode
display will reset to Fahrenheit.
To change the temperature unit from
°F to °C or °C to °F:
- Press the AUTO button while press-
ing the OFF button on the climate
control unit for 3 seconds.
- Go to General settings mode →Unit
→Temperature in the AVN display.
The temperature unit on both the
cluster LCD display and climate con-
trol screen will change.
Air intake control (8)
The air intake control button is used
to select either Fresh mode (outside
air) or Recirculation mode (cabin air).
Recirculation mode
When Recirculation
mode is selected, air
from the passenger
compartment will be
recirculated through the
system and heated or
cooled according to the
function selected.
Fresh mode
When Fresh mode is
selected, air enters the
vehicle from outside and
is heated or cooled
according to the function
selected.
OFE048310N
Page 246 of 561
3-159
Convenient features of your vehicle
3
To defrost outside windshield
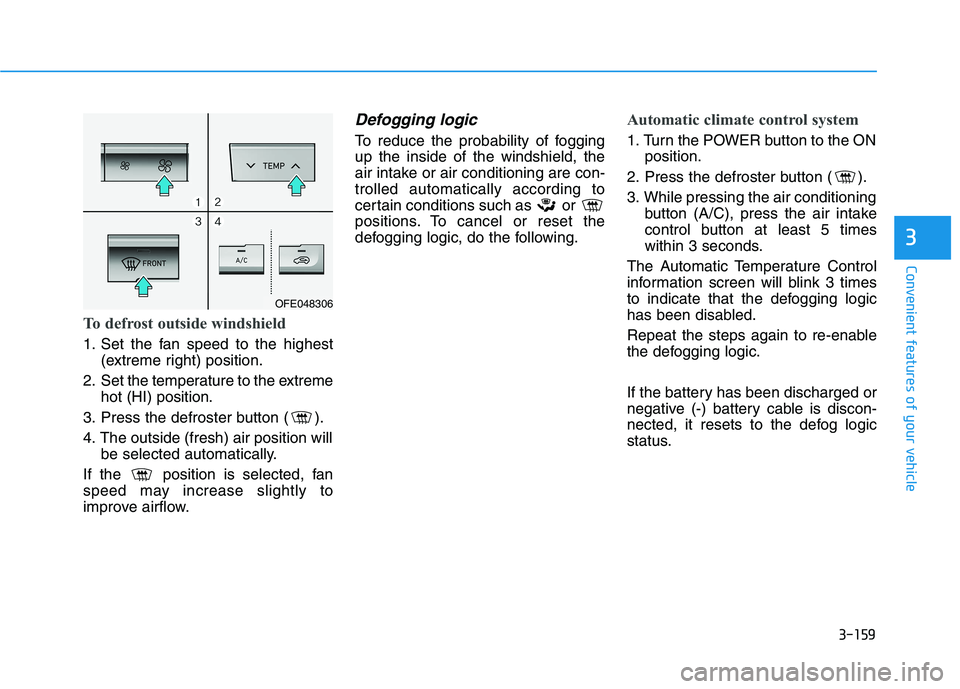
1. Set the fan speed to the highest
(extreme right) position.
2. Set the temperature to the extreme
hot (HI) position.
3. Press the defroster button ( ).
4. The outside (fresh) air position will
be selected automatically.
If the position is selected, fan
speed may increase slightly to
improve airflow.
Defogging logic
To reduce the probability of fogging
up the inside of the windshield, the
air intake or air conditioning are con-
trolled automatically according to
certain conditions such as or
positions. To cancel or reset the
defogging logic, do the following.
Automatic climate control system
1. Turn the POWER button to the ON
position.
2. Press the defroster button ( ).
3. While pressing the air conditioning
button (A/C), press the air intake
control button at least 5 times
within 3 seconds.
The Automatic Temperature Control
information screen will blink 3 times
to indicate that the defogging logic
has been disabled.
Repeat the steps again to re-enable
the defogging logic.
If the battery has been discharged or
negative (-) battery cable is discon-
nected, it resets to the defog logic
status.
OFE048306
Page 247 of 561
3-160
Convenient features of your vehicle
Auto Defogging System
(Additional Feature with
Automatic Temperature
Control System) (if equipped)
Auto defogging helps reduce the pos-
sibility of fogging up the inside of the
windshield by automatically sensing
the moisture on inside the windshield.
The auto defogging system operates
when the heater or air conditioning is
on.
Information
The auto defogging system may not
operate normally, when the outside
temperature is below 14 °F (-10 °C).When the Auto Defogging
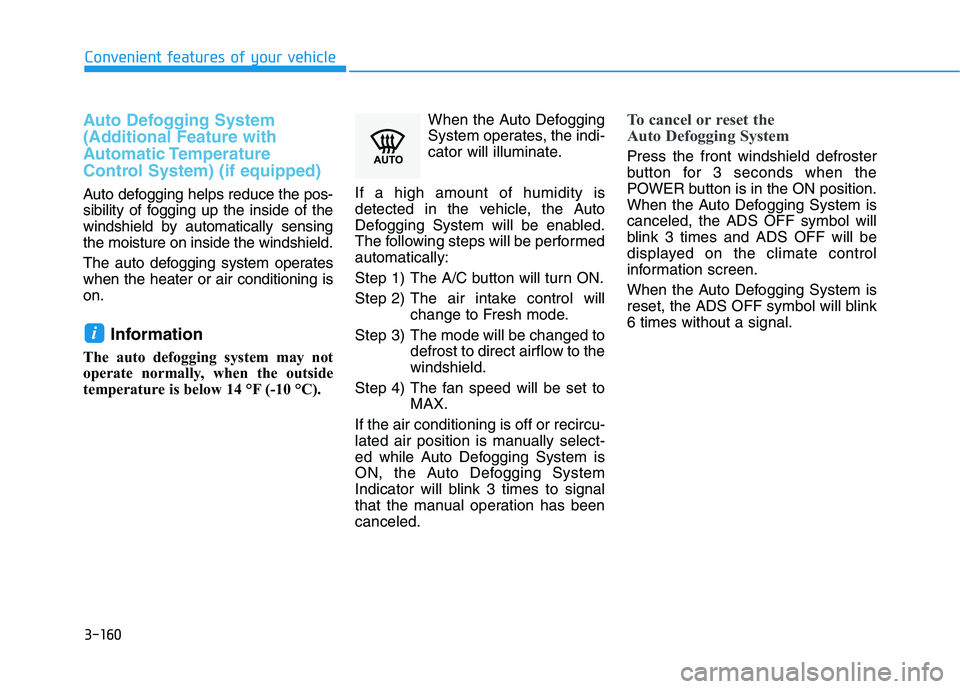
System operates, the indi-
cator will illuminate.
If a high amount of humidity is
detected in the vehicle, the Auto
Defogging System will be enabled.
The following steps will be performed
automatically:
Step 1) The A/C button will turn ON.
Step 2) The air intake control will
change to Fresh mode.
Step 3) The mode will be changed to
defrost to direct airflow to the
windshield.
Step 4) The fan speed will be set to
MAX.
If the air conditioning is off or recircu-
lated air position is manually select-
ed while Auto Defogging System is
ON, the Auto Defogging System
Indicator will blink 3 times to signal
that the manual operation has been
canceled.
To cancel or reset the
Auto Defogging System
Press the front windshield defroster
button for 3 seconds when the
POWER button is in the ON position.
When the Auto Defogging System is
canceled, the ADS OFF symbol will
blink 3 times and ADS OFF will be
displayed on the climate control
information screen.
When the Auto Defogging System is
reset, the ADS OFF symbol will blink
6 times without a signal.
i
Page 249 of 561
3-162
Convenient features of your vehicle
Automatic Ventilation
(if equipped)
When the POWER button is in the
ON position or when the vehicle is in
the ready ( ) mode and tempera-
ture is below 59°F (15°C) with the
recirculated air position selected
more than five minutes, the air intake
position will automatically change to
the outside (fresh) air position.
To cancel or reset the Automatic
Ventilation
When the air conditioning system is
on, select Face Level mode and
press the recirculation mode button
five times within three seconds while
pressing A/C button.
When the Automatic Ventilation fea-
ture is enabled, the recirculation but-
ton LED indicator will blink 6 times.
When the Automatic Ventilation fea-
ture is disabled, the recirculation but-
ton LED indicator will blink 3 times.
Sunroof Inside Air
Recirculation (if equipped)
When the heater or air conditioning
system is on with the sunroof
opened, the fresh mode will be auto-
matically selected. If you press the
recirculation mode button with the
sunroof open, recirculation mode
activate but will only remain enabled
for 3 minutes. After 3 minutes the air
intake control will revert back to
Fresh mode.
When the sunroof is closed, the air
intake position will return to the orig-
inal position that was selected.
C CL
LI
IM
MA
AT
TE
E
C
CO
ON
NT
TR
RO
OL
L
A
AD
DD
DI
IT
TI
IO
ON
NA
AL
L
F
FE
EA
AT
TU
UR
RE
ES
S
Page 266 of 561
4-3
Multimedia System
4
Steering Wheel Audio Control
Do not operate multiple audio
remote control buttons simultane-
ously.
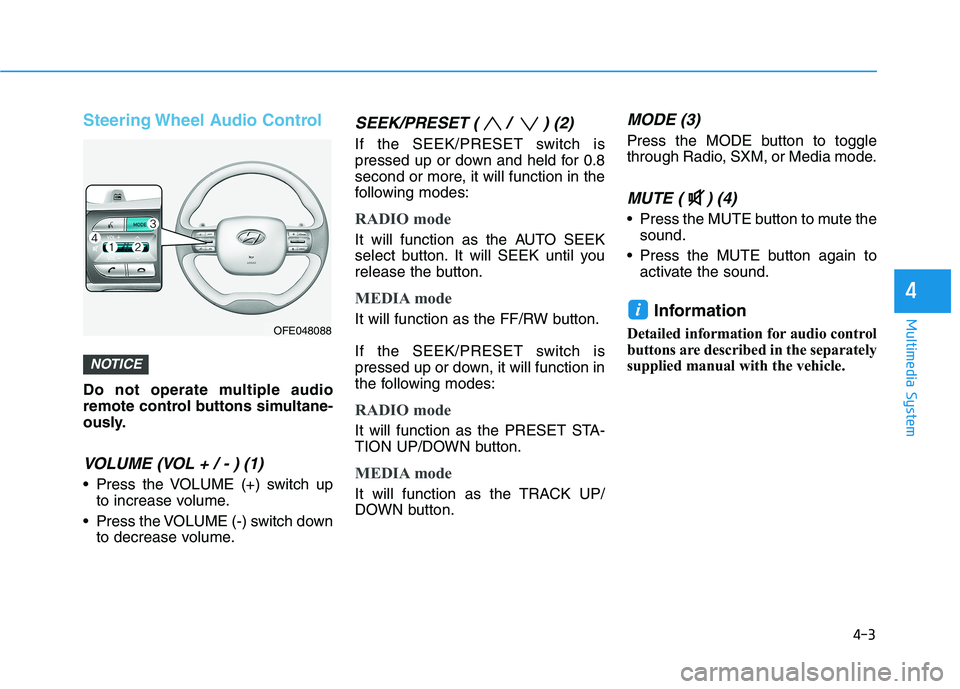
VOLUME (VOL + / - ) (1)
Press the VOLUME (+) switch up
to increase volume.
Press the VOLUME (-) switch down
to decrease volume.
SEEK/PRESET ( / ) (2)
If the SEEK/PRESET switch is
pressed up or down and held for 0.8
second or more, it will function in the
following modes:
RADIO mode
It will function as the AUTO SEEK
select button. It will SEEK until you
release the button.
MEDIA mode
It will function as the FF/RW button.
If the SEEK/PRESET switch is
pressed up or down, it will function in
the following modes:
RADIO mode
It will function as the PRESET STA-
TION UP/DOWN button.
MEDIA mode
It will function as the TRACK UP/
DOWN button.
MODE (3)
Press the MODE button to toggle
through Radio, SXM, or Media mode.
MUTE ( ) (4)
Press the MUTE button to mute the
sound.
Press the MUTE button again to
activate the sound.
Information
Detailed information for audio control
buttons are described in the separately
supplied manual with the vehicle.
i
NOTICE
OFE048088
Page 269 of 561
5
Blind-Spot View Monitor System ......................5-77
Operating conditions ......................................................5-77
Blind-Spot View Monitor system warning ...............5-78
Lane Keeping Assist (LKA) System ...................5-79
LKA System Operation...................................................5-80
Warning Light and Message.........................................5-83
Limitations of the System .............................................5-85
LKA System Function Change......................................5-86
Lane Following Assist (LFA) System.................5-87
LFA operation...................................................................5-88
Warning message ............................................................5-90
Limitations of the system .............................................5-92
Driver Attention Warning (DAW) System .........5-94
System Setting and Activation.....................................5-94
Resetting the System .....................................................5-95
System Standby ...............................................................5-96
System Malfunction .......................................................5-96
Smart Cruise Control With Stop &
Go System .............................................................5-98
Smart Cruise Control Switch ........................................5-99
To Adjust the Sensitivity of
Smart Cruise Control ....................................................5-100
To Convert to Cruise Control Mode .........................5-100
Smart Cruise Control Speed .......................................5-101Smart Cruise Control Vehicle-to-Vehicle
Distance ...........................................................................5-105
Sensor to Detect Distance to the Vehicle Ahead .5-108
Limitations of the System...........................................5-110
Leading Vehicle Departure Alert .....................5-116
System Setting and Activation ..................................5-116
Special Driving Conditions ................................5-118
Hazardous Driving Conditions....................................5-118
Rocking the Vehicle ......................................................5-118
Smooth Cornering .........................................................5-119
Driving at Night .............................................................5-119
Driving in the Rain ........................................................5-119
Driving in Flooded Areas.............................................5-120
Highway Driving ............................................................5-120
Reducing the Risk of a Rollover ...............................5-121
Winter Driving ....................................................5-122
Snow or Icy Conditions................................................5-122
Winter Precautions .......................................................5-124
Vehicle Load Limit..............................................5-126
Tire Loading Information Label .................................5-126
Trailer Towing .....................................................5-131
Page 304 of 561
5-37
Driving your vehicle
The drive mode may be selected
according to the driver's preference
or road condition.
The system resets to be in the NOR-
MAL mode (except if it is in ECO
mode), when the vehicle is restarted.
Information
If there is a problem with the instru-
ment cluster, the drive mode will be in
NORMAL mode and may not change
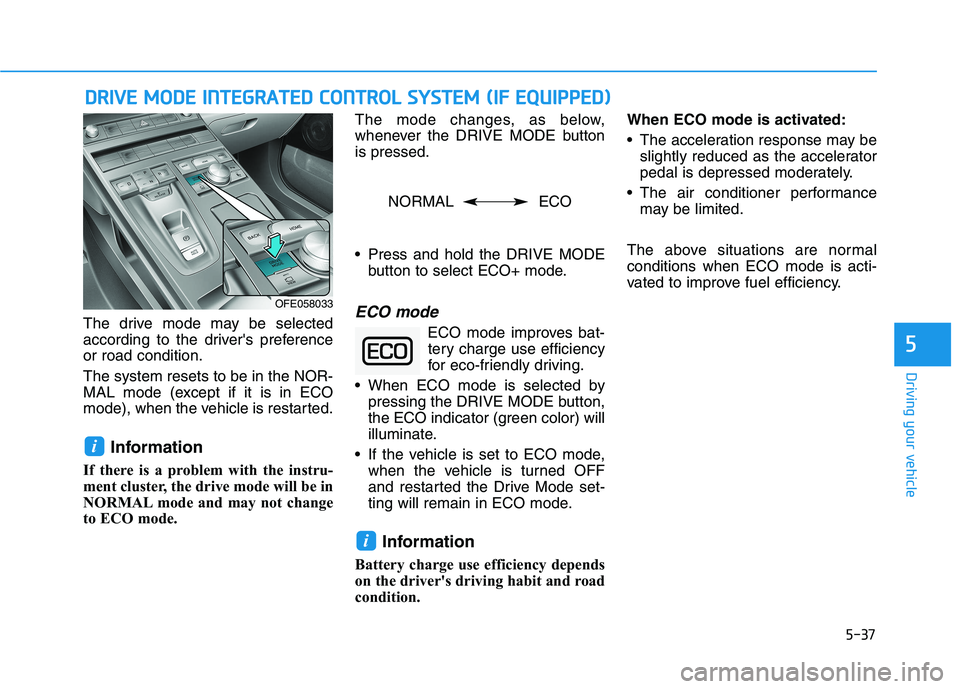
to ECO mode. The mode changes, as below,
whenever the DRIVE MODE button
is pressed.
Press and hold the DRIVE MODE
button to select ECO+ mode.
ECO mode
ECO mode improves bat-
tery charge use efficiency
for eco-friendly driving.
When ECO mode is selected by
pressing the DRIVE MODE button,
the ECO indicator (green color) will
illuminate.
If the vehicle is set to ECO mode,
when the vehicle is turned OFF
and restarted the Drive Mode set-
ting will remain in ECO mode.
Information
Battery charge use efficiency depends
on the driver's driving habit and road
condition.When ECO mode is activated:
The acceleration response may be
slightly reduced as the accelerator
pedal is depressed moderately.
The air conditioner performance
may be limited.
The above situations are normal
conditions when ECO mode is acti-
vated to improve fuel efficiency.
i
i
D DR
RI
IV
VE
E
M
MO
OD
DE
E
I
IN
NT
TE
EG
GR
RA
AT
TE
ED
D
C
CO
ON
NT
TR
RO
OL
L
S
SY
YS
ST
TE
EM
M
(
(I
IF
F
E
EQ
QU
UI
IP
PP
PE
ED
D)
)
5
OFE058033
NORMAL ECO
Page 362 of 561
5-95
Driving your vehicle
5
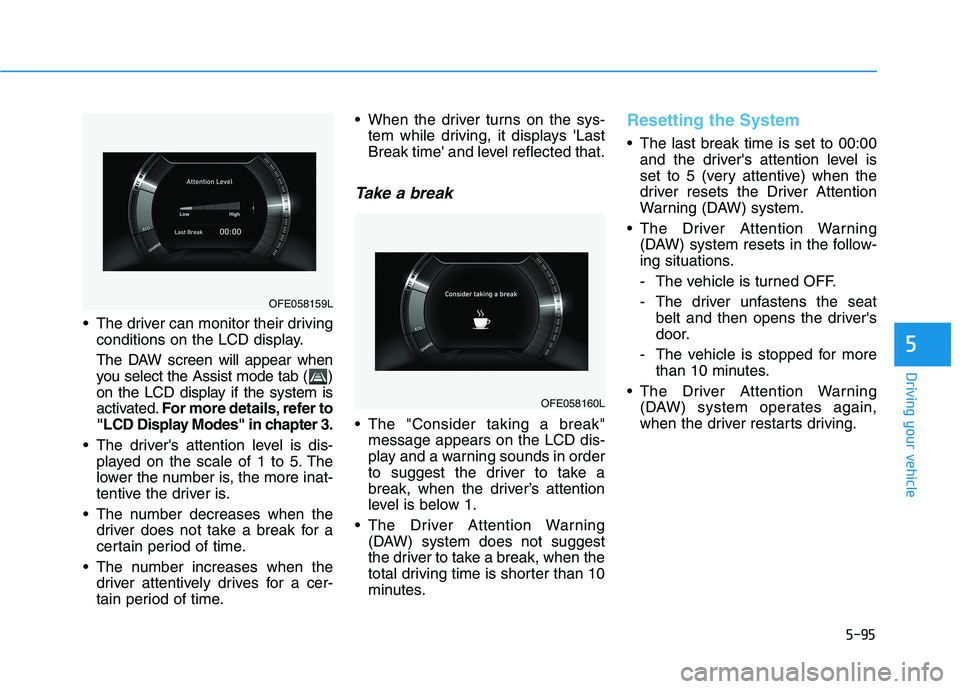
The driver can monitor their driving
conditions on the LCD display.
The DAW screen will appear when
you select the Assist mode tab ( )
on the LCD display if the system is
activated.For more details, refer to
"LCD Display Modes" in chapter 3.
The driver's attention level is dis-
played on the scale of 1 to 5. The
lower the number is, the more inat-
tentive the driver is.
The number decreases when the
driver does not take a break for a
certain period of time.
The number increases when the
driver attentively drives for a cer-
tain period of time. When the driver turns on the sys-
tem while driving, it displays 'Last
Break time' and level reflected that.
Take a break
The "Consider taking a break"
message appears on the LCD dis-
play and a warning sounds in order
to suggest the driver to take a
break, when the driver’s attention
level is below 1.
The Driver Attention Warning
(DAW) system does not suggest
the driver to take a break, when the
total driving time is shorter than 10
minutes.
Resetting the System
The last break time is set to 00:00
and the driver's attention level is
set to 5 (very attentive) when the
driver resets the Driver Attention
Warning (DAW) system.
The Driver Attention Warning
(DAW) system resets in the follow-
ing situations.
- The vehicle is turned OFF.
- The driver unfastens the seat
belt and then opens the driver's
door.
- The vehicle is stopped for more
than 10 minutes.
The Driver Attention Warning
(DAW) system operates again,
when the driver restarts driving.
OFE058160L
OFE058159L
Page 402 of 561
6-4
If you have a flat tire while
driving
If a tire goes flat while you are driv-
ing:
1. Take your foot off the accelerator
pedal and let the vehicle slow
down while driving straight ahead.
Do not apply the brakes immedi-
ately or attempt to pull off the road
as this may cause a loss of con-
trol. When the vehicle has slowed
to such a speed that it is safe to do
so, brake carefully and pull off the
road. Drive off the road as far as
possible and park on firm, level
ground. If you are on a divided
highway, do not park in the medi-
an area between the two traffic
lanes.
2. When the vehicle is stopped, turn
on your emergency hazard flash-
ers, set the parking brake and shift
gear to the P(Park) position.
3. Have all passengers get out of the
vehicle. Be sure they all get out on
the side of the vehicle that is away
from traffic.
If the vehicle stalls while driv-
ing
1. Reduce your speed gradually,
keeping a straight line. Move cau-
tiously off the road to a safe place.
2. Turn on your emergency flashers.
3. Try to start the vehicle again. If
your vehicle will not start, contact
an authorized HYUNDAI dealer. Be sure the shift lever is in P
(Park). The vehicle starts only
when the shift lever is in P (Park).
This vehicle does not have a regu-
lar 12V battery that needs periodic
replacement. It is lithium ion poly-
mer type integrated into the high
voltage battery. The vehicle has a
12V battery protection system that
cuts 12V battery from vehicle draw
to prevent full discharge. If vehicle
will not start, first try pressing the
12V Battery Reset switch (left side
of the steering wheel near the fuel
door open switch) to reconnect the
12V battery, but you must start
vehicle within 15 seconds of press-
ing the 12V Battery Reset switch.
After starting vehicle, operate the
vehicle safely outdoors in ready
mode stopped and/or drive it for 30
minutes total to charge the 12V
battery fully.
Check the fuel level and add fuel if
necessary.
Do not push or pull the vehicle to
start it.
If the vehicle still does not start, call
an authorized HYUNDAI dealer for
assistance.
What to do in an emergency
I IF
F
T
TH
HE
E
V
VE
EH
HI
IC
CL
LE
E
W
WI
IL
LL
L
N
NO
OT
T
S ST
TA
AR
RT
T
Page 403 of 561
6-5
What to do in an emergency
6
Before Jump Starting
This vehicle does not have a regular
12V battery that needs periodic
replacement. It is lithium ion polymer
type integrated into the high voltage
battery. The vehicle has a 12V bat-
tery protection system that cuts 12V
battery from vehicle draw to prevent
full discharge.
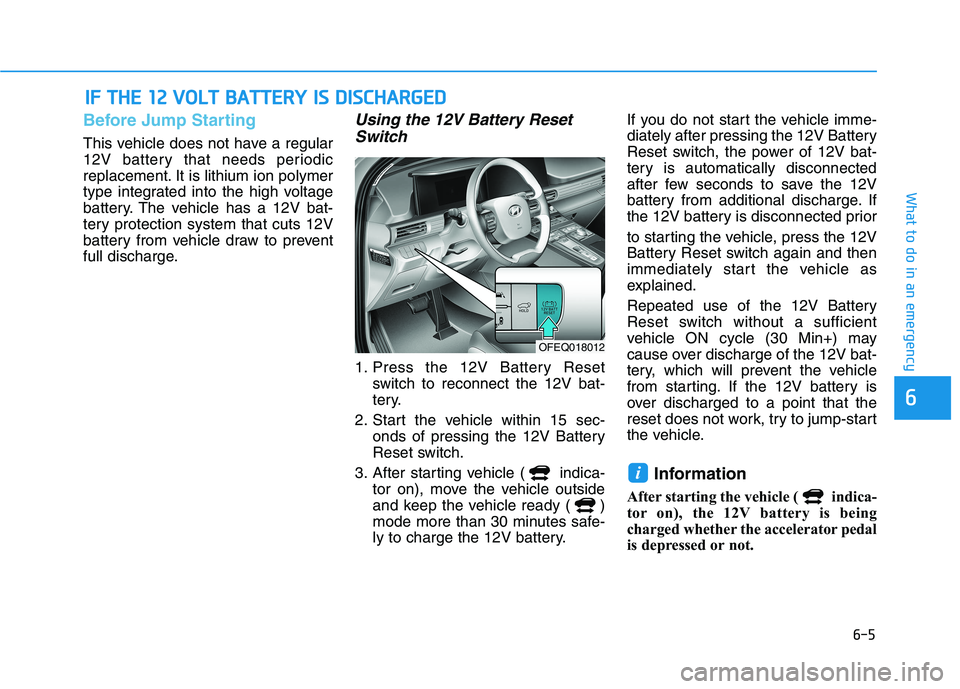
Using the 12V Battery Reset
Switch
1. Press the 12V Battery Reset
switch to reconnect the 12V bat-
tery.
2. Start the vehicle within 15 sec-
onds of pressing the 12V Battery
Reset switch.
3. After starting vehicle ( indica-
tor on), move the vehicle outside
and keep the vehicle ready ( )
mode more than 30 minutes safe-
ly to charge the 12V battery.If you do not start the vehicle imme-
diately after pressing the 12V Battery
Reset switch, the power of 12V bat-
tery is automatically disconnected
after few seconds to save the 12V
battery from additional discharge. If
the 12V battery is disconnected prior
to starting the vehicle, press the 12V
Battery Reset switch again and then
immediately start the vehicle as
explained.
Repeated use of the 12V Battery
Reset switch without a sufficient
vehicle ON cycle (30 Min+) may
cause over discharge of the 12V bat-
tery, which will prevent the vehicle
from starting. If the 12V battery is
over discharged to a point that the
reset does not work, try to jump-start
the vehicle.
Information
After starting the vehicle ( indica-
tor on), the 12V battery is being
charged whether the accelerator pedal
is depressed or not.
i
I IF
F
T
TH
HE
E
1
12
2
V
VO
OL
LT
T
B
BA
AT
TT
TE
ER
RY
Y
I
IS
S
D
DI
IS
SC
CH
HA
AR
RG
GE
ED
D
OFEQ018012